Introduction
Welcome to the guide on how to wire a swamp cooler smart thermostat. Upgrading your swamp cooler thermostat to a smart thermostat not only allows for remote temperature control but also helps you save on energy costs by optimizing cooling efficiency. By following the steps outlined in this article, you’ll be able to wire your smart thermostat and enjoy the convenience and energy efficiency it provides.
Before we dive into the process, it’s important to gather the necessary tools and materials to ensure a smooth installation. Make sure you have a screwdriver set, wire cutters, wire strippers, electrical tape, and of course, a compatible smart thermostat designed for swamp coolers. It’s important to check the compatibility of the smart thermostat with your specific swamp cooler make and model. Once you have everything ready, let’s move on to the step-by-step process.
We will start by turning off the power to ensure your safety during installation. Then we will locate the existing thermostat wiring and disconnect it. After that, we will connect the new thermostat wires according to the manufacturer’s instructions. We will mount the smart thermostat in a suitable location and connect it to the power source. Finally, we will test the connection to ensure proper functionality.
By the end of this guide, you’ll have the confidence and knowledge to successfully wire your smart thermostat for your swamp cooler. So, let’s get started with step one – turning off the power.
Tools and Materials Needed
Before you begin wiring your swamp cooler smart thermostat, ensure you have the following tools and materials:
- Screwdriver set: A set of screwdrivers will be needed to loosen and tighten screws during the installation process.
- Wire cutters: Wire cutters are essential for trimming any excess wires or cutting them to the appropriate length.
- Wire strippers: You’ll need wire strippers to remove the insulation from the ends of the wires, allowing for proper connection.
- Electrical tape: Electrical tape is used to secure and insulate the connected wires, adding an extra layer of protection.
- Smart thermostat: Make sure you have a compatible smart thermostat designed explicitly for swamp coolers. Check the manufacturer’s specifications and compatibility before purchasing.
These tools and materials are essential for successfully wiring your swamp cooler smart thermostat. It’s crucial to have them on hand to avoid any unnecessary delays or interruptions during the installation process.
Step 1: Turn off Power
The first step in wiring your swamp cooler smart thermostat is to turn off the power to the swamp cooler. This step is crucial for your safety during the installation process.
Locate your home’s electrical panel and find the circuit breaker or fuse that controls the power supply to the swamp cooler. The circuit breaker or fuse should be labeled accordingly, but if not, refer to the instruction manual or contact a professional electrician for guidance.
Once you have identified the correct circuit breaker or fuse, switch it off to cut off the power supply. This ensures that there is no electricity running through the wires while you work on the thermostat wiring.
It is advisable to double-check that the power is indeed turned off by testing the swamp cooler to ensure it does not turn on. Also, use a voltage tester to confirm that there is no electrical current in the thermostat wiring area.
Taking these precautionary measures will significantly reduce the risk of electrical shock or accidents while handling the thermostat wiring.
Now that the power is safely turned off, you can proceed to the next step of locating the thermostat wiring for your smart thermostat installation.
Step 2: Locate the Thermostat Wiring
Now that the power to your swamp cooler is turned off, the next step is to locate the thermostat wiring. The thermostat wiring is typically found near the control panel or the swamp cooler unit itself.
Begin by visually inspecting the area around your swamp cooler for any visible wiring. Look for a bundle of wires that are connected to the existing thermostat. These wires are responsible for transmitting the control signals between the thermostat and the swamp cooler.
If you are unable to locate the thermostat wiring visually, refer to the swamp cooler’s instruction manual for specific guidance on the placement of the wiring. The manual will provide detailed information on the location and color-coding of the thermostat wires.
Once you have located the thermostat wiring, identify each wire’s color and label them accordingly. Common wire colors used in thermostat wiring include red (R), white (W), green (G), and yellow (Y).
This step is essential in ensuring that you correctly connect the new smart thermostat wires to the existing wiring during the installation process. Each wire color corresponds to a specific function, and correctly identifying them will help you make the proper connections without any confusion.
After successfully locating and identifying the thermostat wiring, you are ready to move on to the next step and disconnect the existing thermostat wires.
Step 3: Disconnect Existing Thermostat Wires
With the thermostat wiring located and identified, it’s time to disconnect the existing thermostat wires from the swamp cooler. This step will prepare the wiring for the installation of the new smart thermostat.
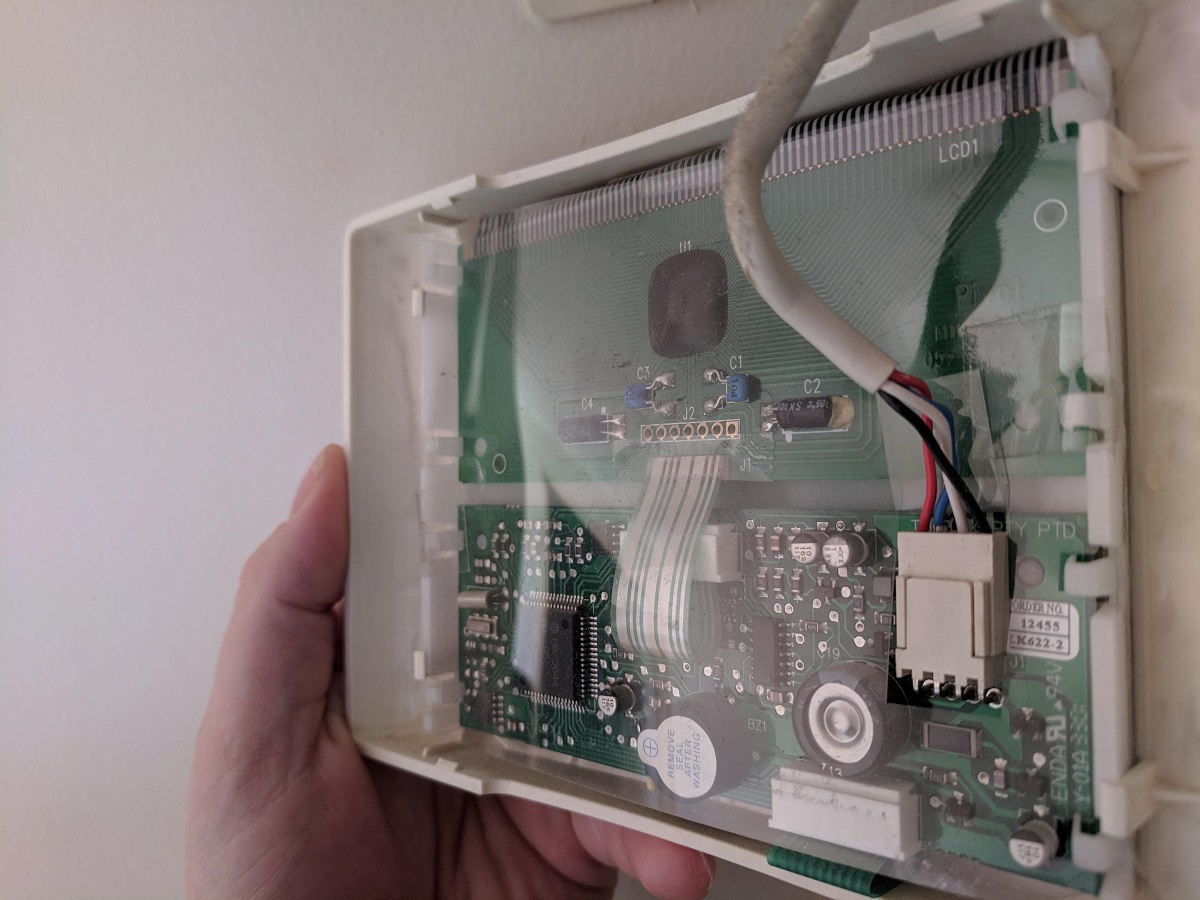
Start by carefully removing the thermostat cover to expose the wiring terminals. The thermostat cover may be held in place by screws or clips, so refer to the manufacturer’s instructions for the specific removal method.
Once the cover is removed, you will see the wiring terminals where the existing thermostat wires are connected. Each wire is typically secured by a screw or inserted into a designated terminal slot.
Using a screwdriver, loosen the screws or release the wire from the terminal slots to disconnect the existing wires. Be gentle and avoid pulling on the wires excessively, as this can damage the wires or the terminal connections.
As you disconnect each wire, it is recommended to take note of the wire color and its corresponding terminal label. This will ensure that you correctly reconnect the wires when installing the new smart thermostat.
After disconnecting all the existing thermostat wires, carefully coil them together and use a zip tie or electrical tape to secure them. This will prevent the wires from accidentally falling into the wall or getting entangled during the installation process.
By disconnecting the existing thermostat wires, you have successfully prepared the wiring for the installation of the new smart thermostat. Now, in the next step, we will proceed to connect the new thermostat wires.
Step 4: Connect New Thermostat Wires
After disconnecting the existing thermostat wires, it’s time to connect the new thermostat wires for your smart thermostat. Follow these steps to ensure a successful and secure connection:
- Prepare the new wires: If the new thermostat wires are not pre-stripped, use wire strippers to remove approximately 1/2 inch of insulation from the ends of each wire. This will expose the bare copper wire for proper connection.
- Identify the terminal labels: Consult the smart thermostat’s instruction manual to identify the appropriate terminal labels for each wire color. Commonly used labels for swamp cooler thermostats include R (power), C (common), Y (cooling), and G (fan).
- Connect the wires: Match each new thermostat wire to its corresponding terminal label and insert the stripped end of the wire into the designated terminal slot. Ensure that the connection is secure by tightening any terminal screws if necessary.
- Secure the connections: Once all the wires are connected, use electrical tape or wire connectors to secure and insulate the connections. This will help prevent any accidental disconnections or short circuits.
It’s important to note that the specific instructions for connecting the new thermostat wires may vary depending on the smart thermostat model you are using. Always consult the manufacturer’s instructions and follow them carefully to ensure proper installation and functionality.
Once you have successfully connected the new thermostat wires, you are ready to mount your smart thermostat. In the next step, we will guide you through the process of mounting the thermostat.
Step 5: Mount the Smart Thermostat
After connecting the new thermostat wires, it’s time to mount the smart thermostat onto the wall. Follow these steps to ensure a secure and proper installation:
- Select a suitable location: Choose a location on the wall near your swamp cooler that allows for easy access and optimal temperature sensing. Avoid mounting the thermostat in direct sunlight or near any heat sources that may affect its performance.
- Mark the mounting holes: Hold the smart thermostat against the wall in the desired location and use a pencil to mark the position of the mounting holes. Ensure that the thermostat is level to maintain accuracy in temperature readings.
- Drill pilot holes: With the marked holes as a guide, use an appropriate size drill bit to drill pilot holes into the wall. Take care to avoid damaging any electrical wiring or plumbing behind the wall.
- Mount the thermostat: Line up the mounting holes on the smart thermostat with the pilot holes on the wall. Secure the thermostat to the wall using screws or other mounting hardware provided by the manufacturer.
- Attach the thermostat cover: Once the thermostat is securely mounted, attach the thermostat cover by aligning it with the housing and gently snapping it into place. Be sure to follow any specific instructions provided by the manufacturer for attaching the cover.
It’s important to note that the mounting process may vary depending on the smart thermostat model you are using. Always refer to the manufacturer’s instructions for the specific mounting guidelines and any additional considerations.
Once the smart thermostat is properly mounted, you are ready to move on to the next step and connect it to the power source for operation. We will guide you through this process in the upcoming step.
Step 6: Connect the Smart Thermostat to the Power Source
With the smart thermostat mounted on the wall, the next step is to connect it to the power source. Follow these steps to ensure a proper and safe connection:
- Refer to the manufacturer’s instructions: Consult the instruction manual provided by the smart thermostat manufacturer for specific guidance on how to connect the thermostat to the power source. Different models may have different wiring configurations.
- Turn the power back on: Return to the electrical panel that controls the power supply to the swamp cooler. Locate the circuit breaker or fuse that you previously switched off and turn it back on to restore the power.
- Locate the power source: Identify the power source terminals or wires near the swamp cooler unit. These terminals or wires are responsible for supplying power to the thermostat.
- Make the connections: Using wire connectors or the specified method described in the manufacturer’s instructions, connect the corresponding thermostat wires to the power source terminals or wires. Ensure that the connections are secure and tight.
- Check the voltage: Use a multimeter or voltage tester to confirm that the power is reaching the smart thermostat. Follow the manufacturer’s instructions to properly perform the voltage check.
It’s crucial to carefully follow the manufacturer’s instructions to ensure a successful connection to the power source. Incorrect wiring can damage the smart thermostat or result in malfunctioning.
Once the smart thermostat is properly connected to the power source, you are ready to proceed to the final step of testing the connection and ensuring proper functionality.
Step 7: Test the Connection
After connecting the smart thermostat to the power source, it’s important to test the connection and ensure that everything is working as expected. Follow these steps to test the connection:
- Power on the thermostat: Turn on the power to the smart thermostat by following the manufacturer’s instructions. This will activate the thermostat and allow you to access its settings and controls.
- Set the desired temperature: Use the thermostat’s interface to set your desired temperature. Make sure to select a temperature that will trigger the swamp cooler to turn on and begin cooling the room.
- Observe the thermostat’s display: Look for the temperature reading on the thermostat’s display screen. It should accurately reflect the current room temperature or the temperature that you have set.
- Listen for the swamp cooler: Listen for any signs that the swamp cooler has turned on, such as the sound of the fan or the movement of air. This indicates that the smart thermostat is properly controlling the swamp cooler’s operation.
- Check the functionality: Test the various functions and features of the smart thermostat, such as adjusting the temperature, setting a schedule, or accessing remote controls via a mobile app. Ensure that all the functions are responding correctly and as intended.
If you encounter any issues during the testing phase, consult the smart thermostat’s instruction manual or reach out to the manufacturer’s customer support for assistance. They can provide troubleshooting tips or guide you through any necessary adjustments.
By testing the connection, you can confirm that the smart thermostat is properly wired and working as intended. You can now enjoy the convenience, energy savings, and control that a smart thermostat provides for your swamp cooler.
Conclusion
Congratulations! You have successfully wired your swamp cooler with a smart thermostat. By following the step-by-step instructions in this guide, you have transformed your swamp cooler into a more efficient and convenient cooling system.
Throughout this process, you learned how to turn off the power to ensure safety, locate and disconnect the existing thermostat wires, connect the new thermostat wires, mount the smart thermostat on the wall, connect it to the power source, and test the connection to ensure proper functionality.
With your new smart thermostat, you can now enjoy the benefits of remote temperature control, energy savings, and the ability to create cooling schedules that align with your lifestyle. You can set your swamp cooler to automatically turn on and off, maintaining a comfortable environment without wasting energy.
Remember to refer to the manufacturer’s instructions for specific details about your smart thermostat model, as different models may have variations in the wiring process or additional features to explore.
If you encounter any difficulties during the installation or have questions about your smart thermostat’s functionality, it is always recommended to consult the manufacturer’s customer support or seek assistance from a professional electrician.
Enjoy your newly upgraded swamp cooler with the added convenience and efficiency brought by the smart thermostat. Stay cool and save energy!


