Introduction
Are you considering switching to a new mobile device, only to realize that your current SIM card doesn't fit the new device's tray? This common dilemma can be easily resolved by trimming your SIM card to fit the smaller size required. While the thought of altering a SIM card might seem daunting, with the right tools and careful execution, it can be a straightforward process. This step-by-step guide will walk you through the process of trimming your SIM card, ensuring that it fits perfectly into your new device.
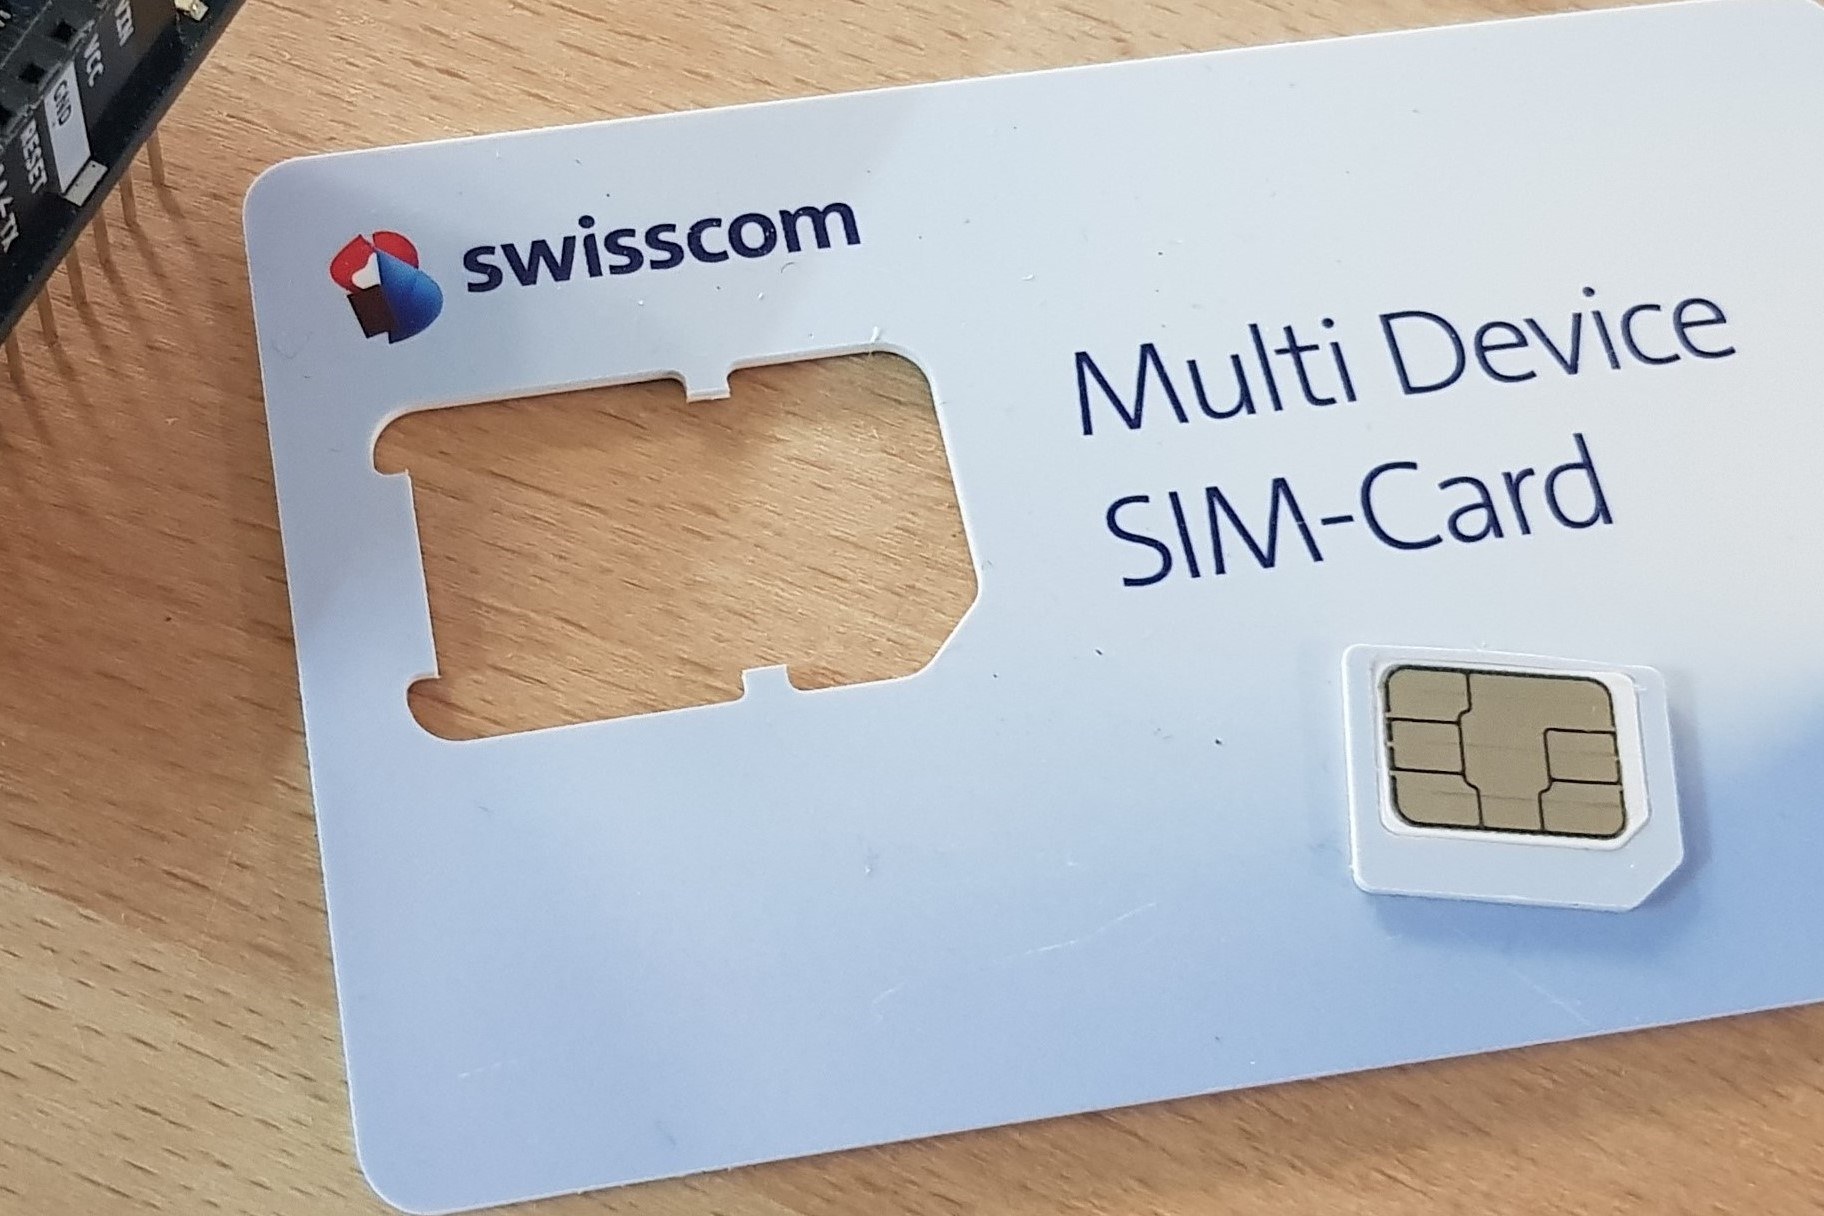
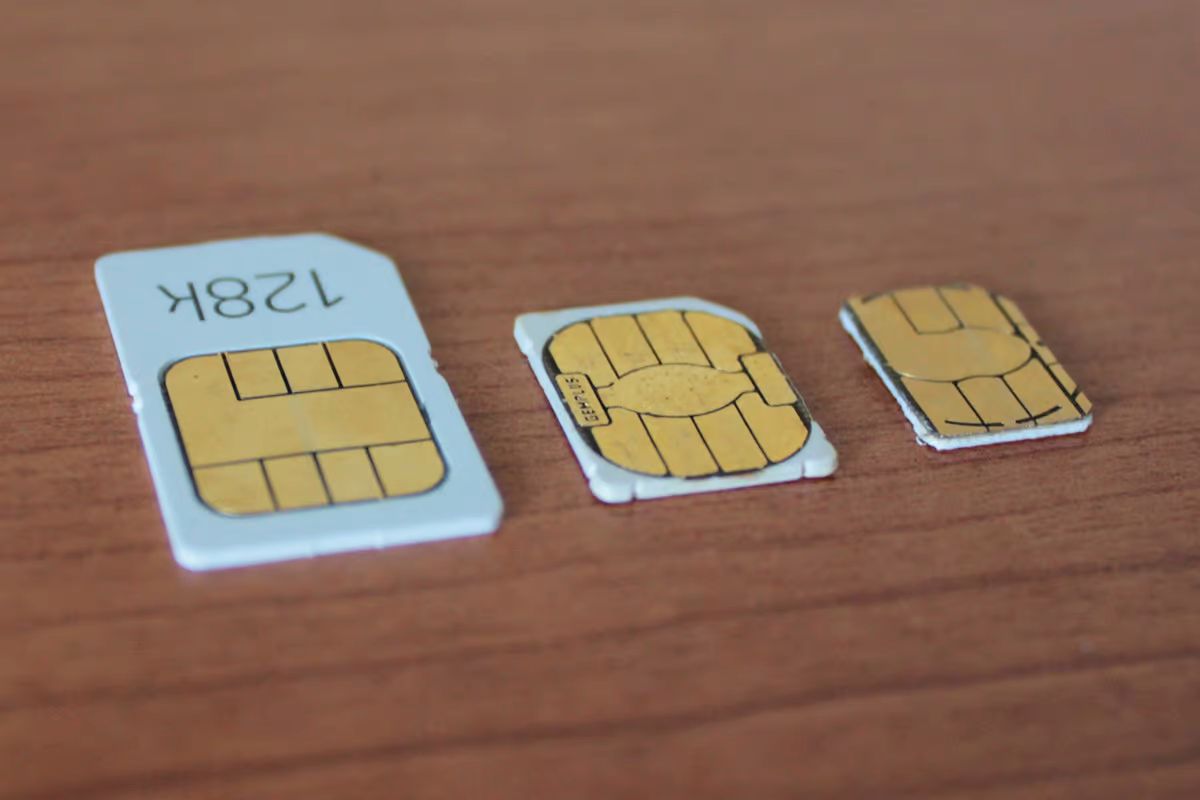
Trimming a SIM card involves reducing its size to fit into a smaller SIM card slot. This is often necessary when transitioning from a device that uses a standard SIM card to one that requires a micro or nano SIM. While some mobile network providers offer to replace your SIM card with a smaller one, this may not always be convenient or timely. By learning how to trim your SIM card, you can take matters into your own hands and adapt your existing card to fit your new device.
Before embarking on this endeavor, it's essential to gather the necessary tools and understand the precise measurements required for the target SIM card size. With the right tools and a steady hand, you can effectively trim your SIM card to fit the new device's tray, enabling a seamless transition to your new mobile device.
In the following steps, we'll guide you through the process of trimming your SIM card, from measuring and marking the card to carefully trimming it to size and ensuring a smooth finish. By the end of this guide, you'll have the confidence and know-how to successfully trim your SIM card, allowing you to make the most of your new mobile device without any compatibility issues. Let's get started with the first step: gathering the necessary tools.
Step 1: Gather the necessary tools
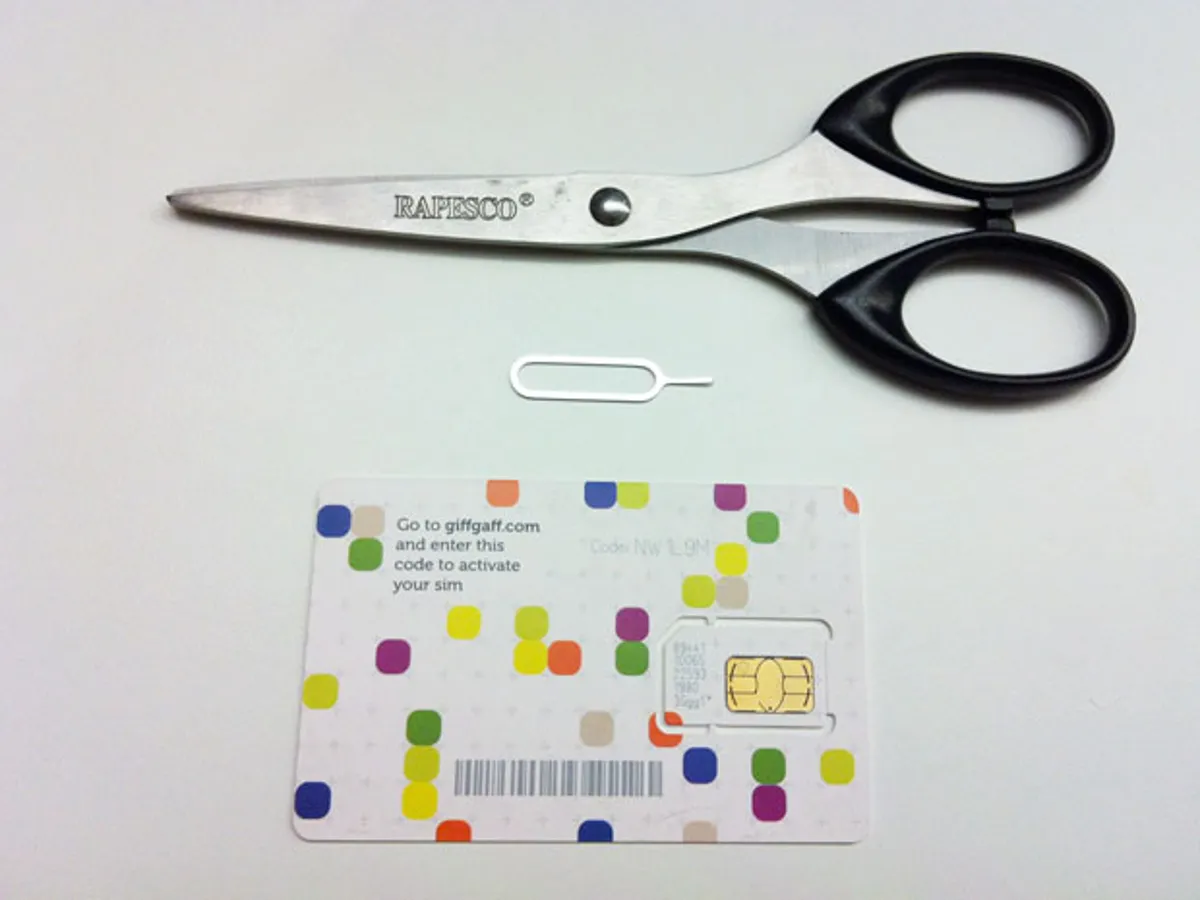
Before embarking on the process of trimming your SIM card, it's crucial to gather the essential tools that will facilitate a precise and safe transformation. Here's a comprehensive list of the tools you'll need:
-
SIM Card Adapter Kit: This kit includes a SIM card punch and adapters for converting the SIM card to different sizes. It ensures a smooth transition from a standard SIM card to a micro or nano SIM.
-
Marker Pen: A fine-tip marker pen is essential for accurately marking the cutting lines on the SIM card. Opt for a waterproof pen to prevent smudging during the cutting process.
-
Ruler: A precise ruler, preferably a metal one, is indispensable for measuring the exact dimensions required for the target SIM card size. This will ensure that the trimming process is carried out with utmost accuracy.
-
Fine Sandpaper or Emery Board: After trimming the SIM card, a fine sandpaper or emery board will be needed to smooth the edges, ensuring a perfect fit in the new device's SIM card tray.
-
Adhesive Tape: High-quality adhesive tape will be used to secure the SIM card in place while marking and cutting it, preventing any accidental movement that could lead to imprecise cuts.
-
Cleaning Cloth: A soft, lint-free cleaning cloth will be required to wipe the SIM card and remove any debris or adhesive residue after the trimming process.
-
Magnifying Glass: While not mandatory, a magnifying glass can be beneficial for inspecting the SIM card's edges and ensuring that they are perfectly smooth and free of imperfections after trimming.
By ensuring that you have these essential tools at your disposal, you'll be well-prepared to embark on the process of trimming your SIM card with confidence and precision. With the right tools in hand, you can proceed to the next step of measuring and marking the SIM card for the trimming process.
Step 2: Measure and mark the SIM card
Once you have gathered the necessary tools, the next crucial step in trimming your SIM card is to accurately measure and mark it for the impending cutting process. Precision is paramount at this stage, as any inaccuracies in measurement or marking could result in an ill-fitting SIM card, potentially causing damage to your device's SIM card tray. Here's a detailed walkthrough of how to measure and mark your SIM card effectively:
-
Select the Target Size: Before proceeding, determine the specific size to which you need to trim your SIM card. Whether it's a micro SIM or a nano SIM, refer to the precise measurements provided by the manufacturer of your new device. These measurements are typically standardized, ensuring that your trimmed SIM card will fit seamlessly into the new device's SIM card tray.
-
Use a Ruler: With the target size in mind, carefully place your SIM card on a flat, stable surface. Using a precise ruler, measure and mark the exact dimensions required for the new SIM card size. It's essential to exercise caution and double-check the measurements to avoid any errors.
-
Marking the Cutting Lines: Utilize a fine-tip marker pen to mark the cutting lines on the SIM card. Ensure that the lines are clear and accurately aligned with the measured dimensions. It's advisable to use a waterproof marker to prevent smudging during the subsequent cutting process.
-
Secure the SIM Card: To prevent any movement during the marking process, use high-quality adhesive tape to secure the SIM card in place. This will ensure that the cutting lines are marked precisely and that the SIM card remains stationary throughout the marking process.
-
Double-Check the Markings: After marking the cutting lines, carefully inspect the markings to verify their accuracy. Any discrepancies at this stage can be rectified before proceeding to the actual cutting of the SIM card.
By meticulously measuring and marking the SIM card according to the target size, you lay the groundwork for a successful trimming process. This meticulous approach minimizes the margin for error, ensuring that the subsequent cutting and smoothing stages proceed smoothly and yield a perfectly fitting SIM card for your new device. With the SIM card accurately marked, you are now ready to progress to the next step: trimming the SIM card to size.
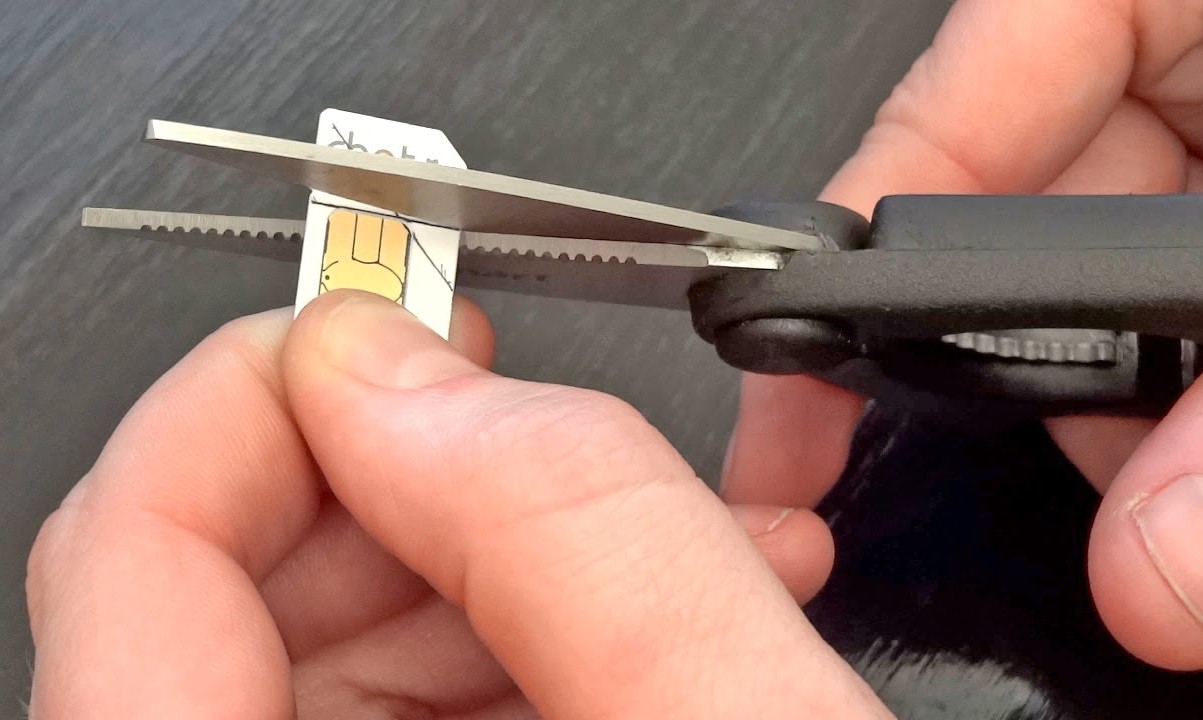
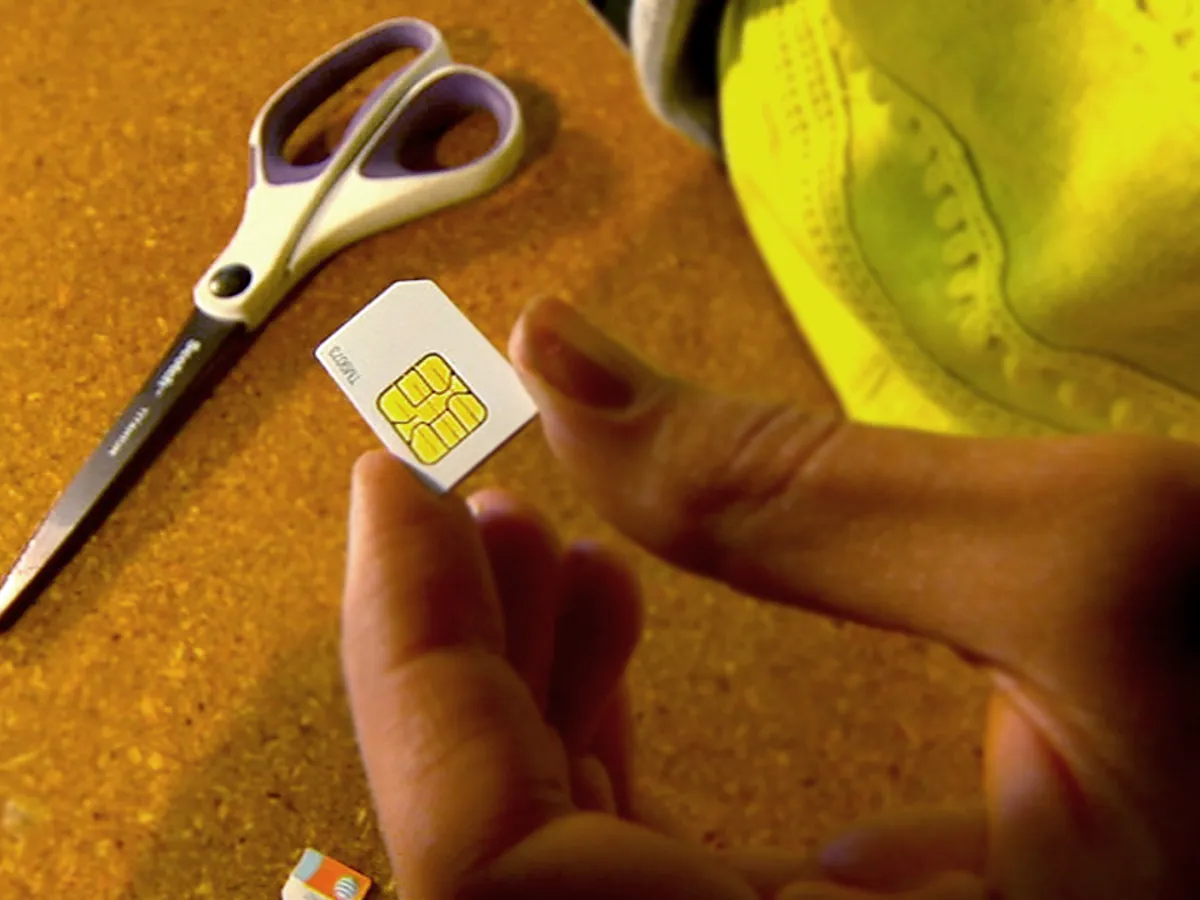
Step 3: Trim the SIM card
With the SIM card accurately marked for the target size, it's time to proceed with the precise trimming process. This step requires careful attention and a steady hand to ensure that the SIM card is trimmed to the exact dimensions required for compatibility with your new device. Here's a detailed guide on how to effectively trim your SIM card:
-
Use the SIM Card Punch: If you have a SIM card punch included in your adapter kit, it's the ideal tool for trimming the SIM card. Align the marked cutting lines with the cutting slot on the punch, ensuring that the lines are perfectly positioned within the slot's boundaries.
-
Cutting the SIM Card: With the SIM card securely positioned in the punch, firmly press down on the punch's handle to execute the cut. It's crucial to exert even pressure to ensure a clean and precise cut along the marked lines. If you don't have a SIM card punch, a sharp pair of scissors or a craft knife can be used to carefully trim the SIM card along the marked lines. Exercise caution and proceed with steady, deliberate movements to achieve accurate cuts.
-
Inspecting the Trimmed SIM Card: After trimming the SIM card, carefully inspect the edges to ensure that the cuts are clean and aligned with the marked lines. Any irregularities or jagged edges should be smoothed out using fine sandpaper or an emery board. It's essential to maintain the SIM card's structural integrity while achieving the desired size.
-
Finalizing the Trimming Process: Once the trimming and edge-smoothing stages are completed, use a soft, lint-free cleaning cloth to wipe the SIM card and remove any debris or adhesive residue. This final step ensures that the trimmed SIM card is clean and ready for testing in your new device.
By following these meticulous steps, you can effectively trim your SIM card to fit the smaller SIM card slot required by your new device. The precision and care exercised during the trimming process are instrumental in ensuring that the trimmed SIM card seamlessly integrates with your new mobile device, allowing for uninterrupted connectivity and functionality.
With the SIM card successfully trimmed, the next crucial step is to test its compatibility with your new device. This will validate the effectiveness of the trimming process and provide the assurance that your SIM card is ready for seamless integration. Let's proceed to the next step: testing the trimmed SIM card in your new device.
Step 4: Smooth the edges
After trimming the SIM card to fit the smaller SIM card slot, it's essential to focus on smoothing the edges to ensure a perfect fit and prevent any potential damage to your device's SIM card tray. This step is crucial in maintaining the structural integrity of the SIM card while ensuring a seamless insertion into the new device. Here's a detailed guide on how to effectively smooth the edges of the trimmed SIM card:
-
Inspecting the Trimmed Edges: Begin by carefully examining the edges of the trimmed SIM card. Look for any irregularities, rough spots, or jagged edges resulting from the cutting process. It's essential to ensure that the edges are smooth and free from imperfections that could hinder the SIM card's insertion into the device's SIM card tray.
-
Using Fine Sandpaper or Emery Board: To smooth the edges of the trimmed SIM card, gently rub the edges with fine sandpaper or an emery board. This process should be approached with caution, as the goal is to refine the edges without compromising the structural integrity of the SIM card. By using light, even strokes, you can gradually smooth out any rough areas, ensuring a uniform and polished finish.
-
Maintaining Uniformity: As you smooth the edges, pay close attention to maintaining uniformity across all edges of the SIM card. Consistency in the smoothness of the edges is essential for facilitating a seamless insertion into the device's SIM card tray. By meticulously refining the edges, you can ensure that the trimmed SIM card aligns perfectly with the dimensions of the SIM card slot in your new device.
-
Inspecting for Imperfections: After smoothing the edges, thoroughly inspect the trimmed SIM card to identify any remaining imperfections. This meticulous inspection allows you to address any lingering rough spots or irregularities, further refining the edges to achieve a flawless finish.
-
Cleaning the Trimmed SIM Card: Once the edges are uniformly smooth, use a soft, lint-free cleaning cloth to wipe the entire surface of the trimmed SIM card. This final step removes any residual debris from the smoothing process, leaving the SIM card clean and ready for testing in your new device.
By meticulously smoothing the edges of the trimmed SIM card, you ensure that it is impeccably prepared for insertion into your new device. This attention to detail not only enhances the functionality of the SIM card but also minimizes the risk of any complications when integrating it into the new device's SIM card tray. With the edges smoothly refined, the trimmed SIM card is now primed for testing in your new mobile device.
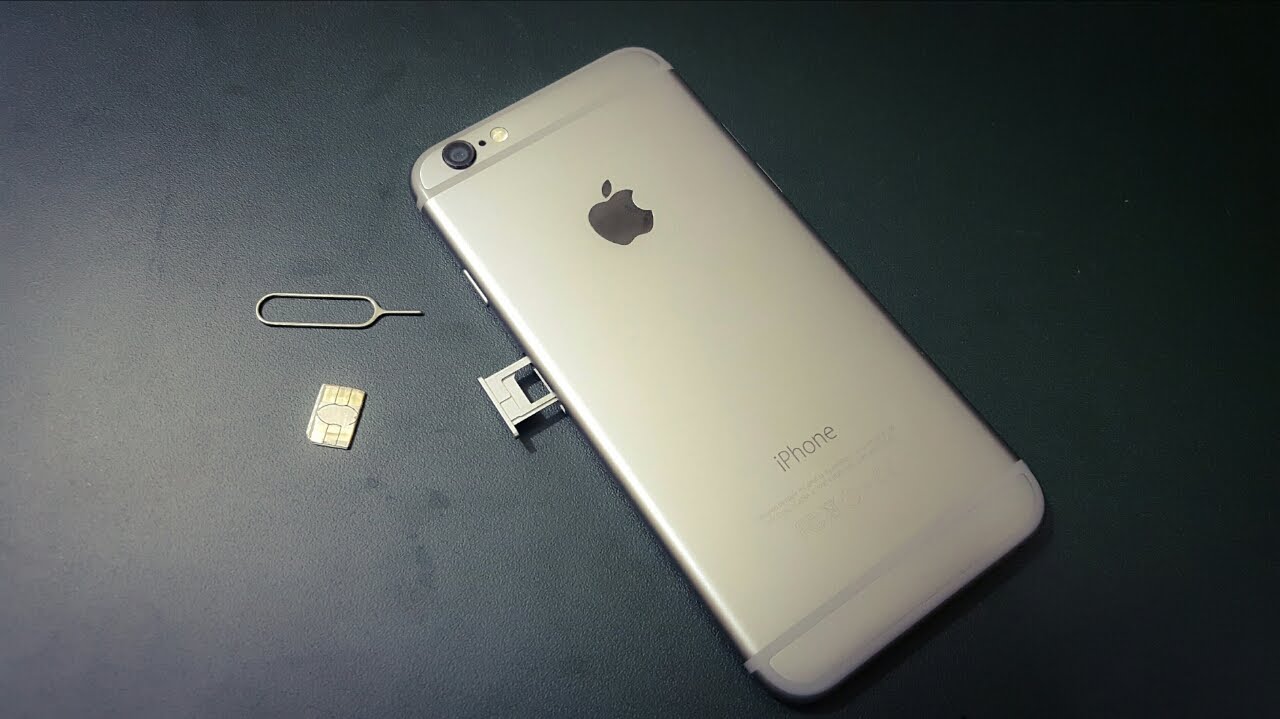
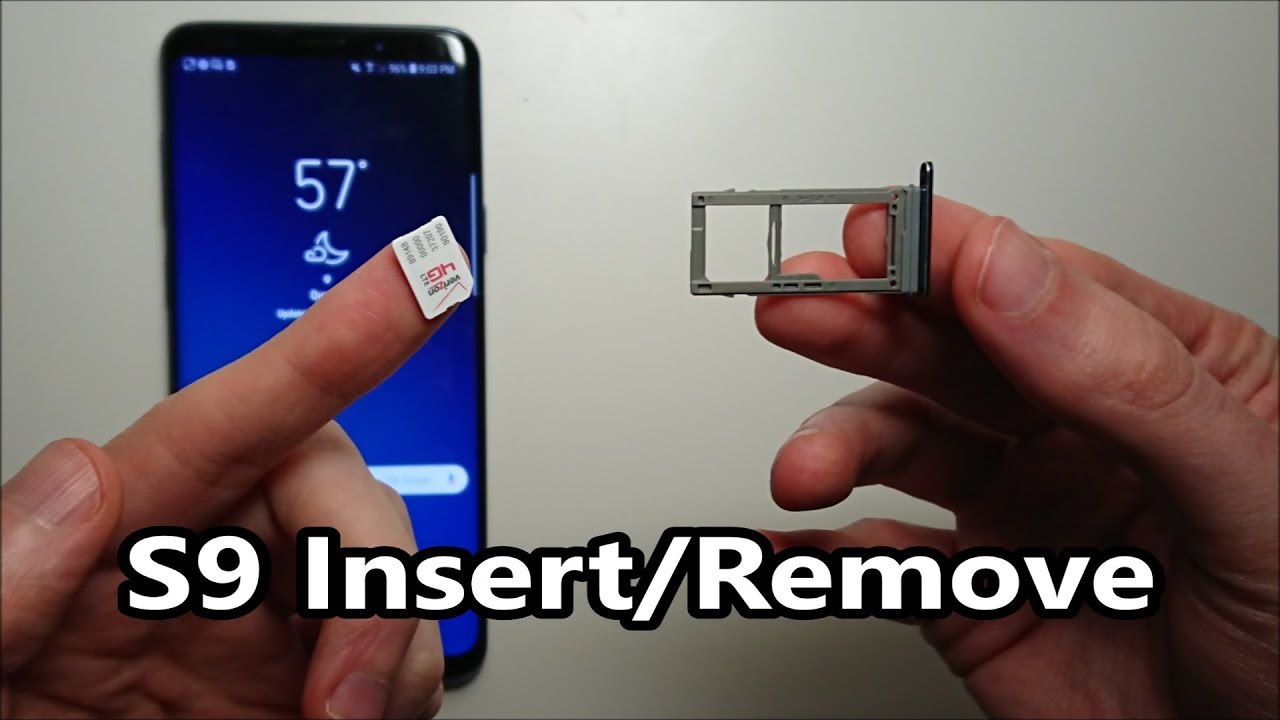
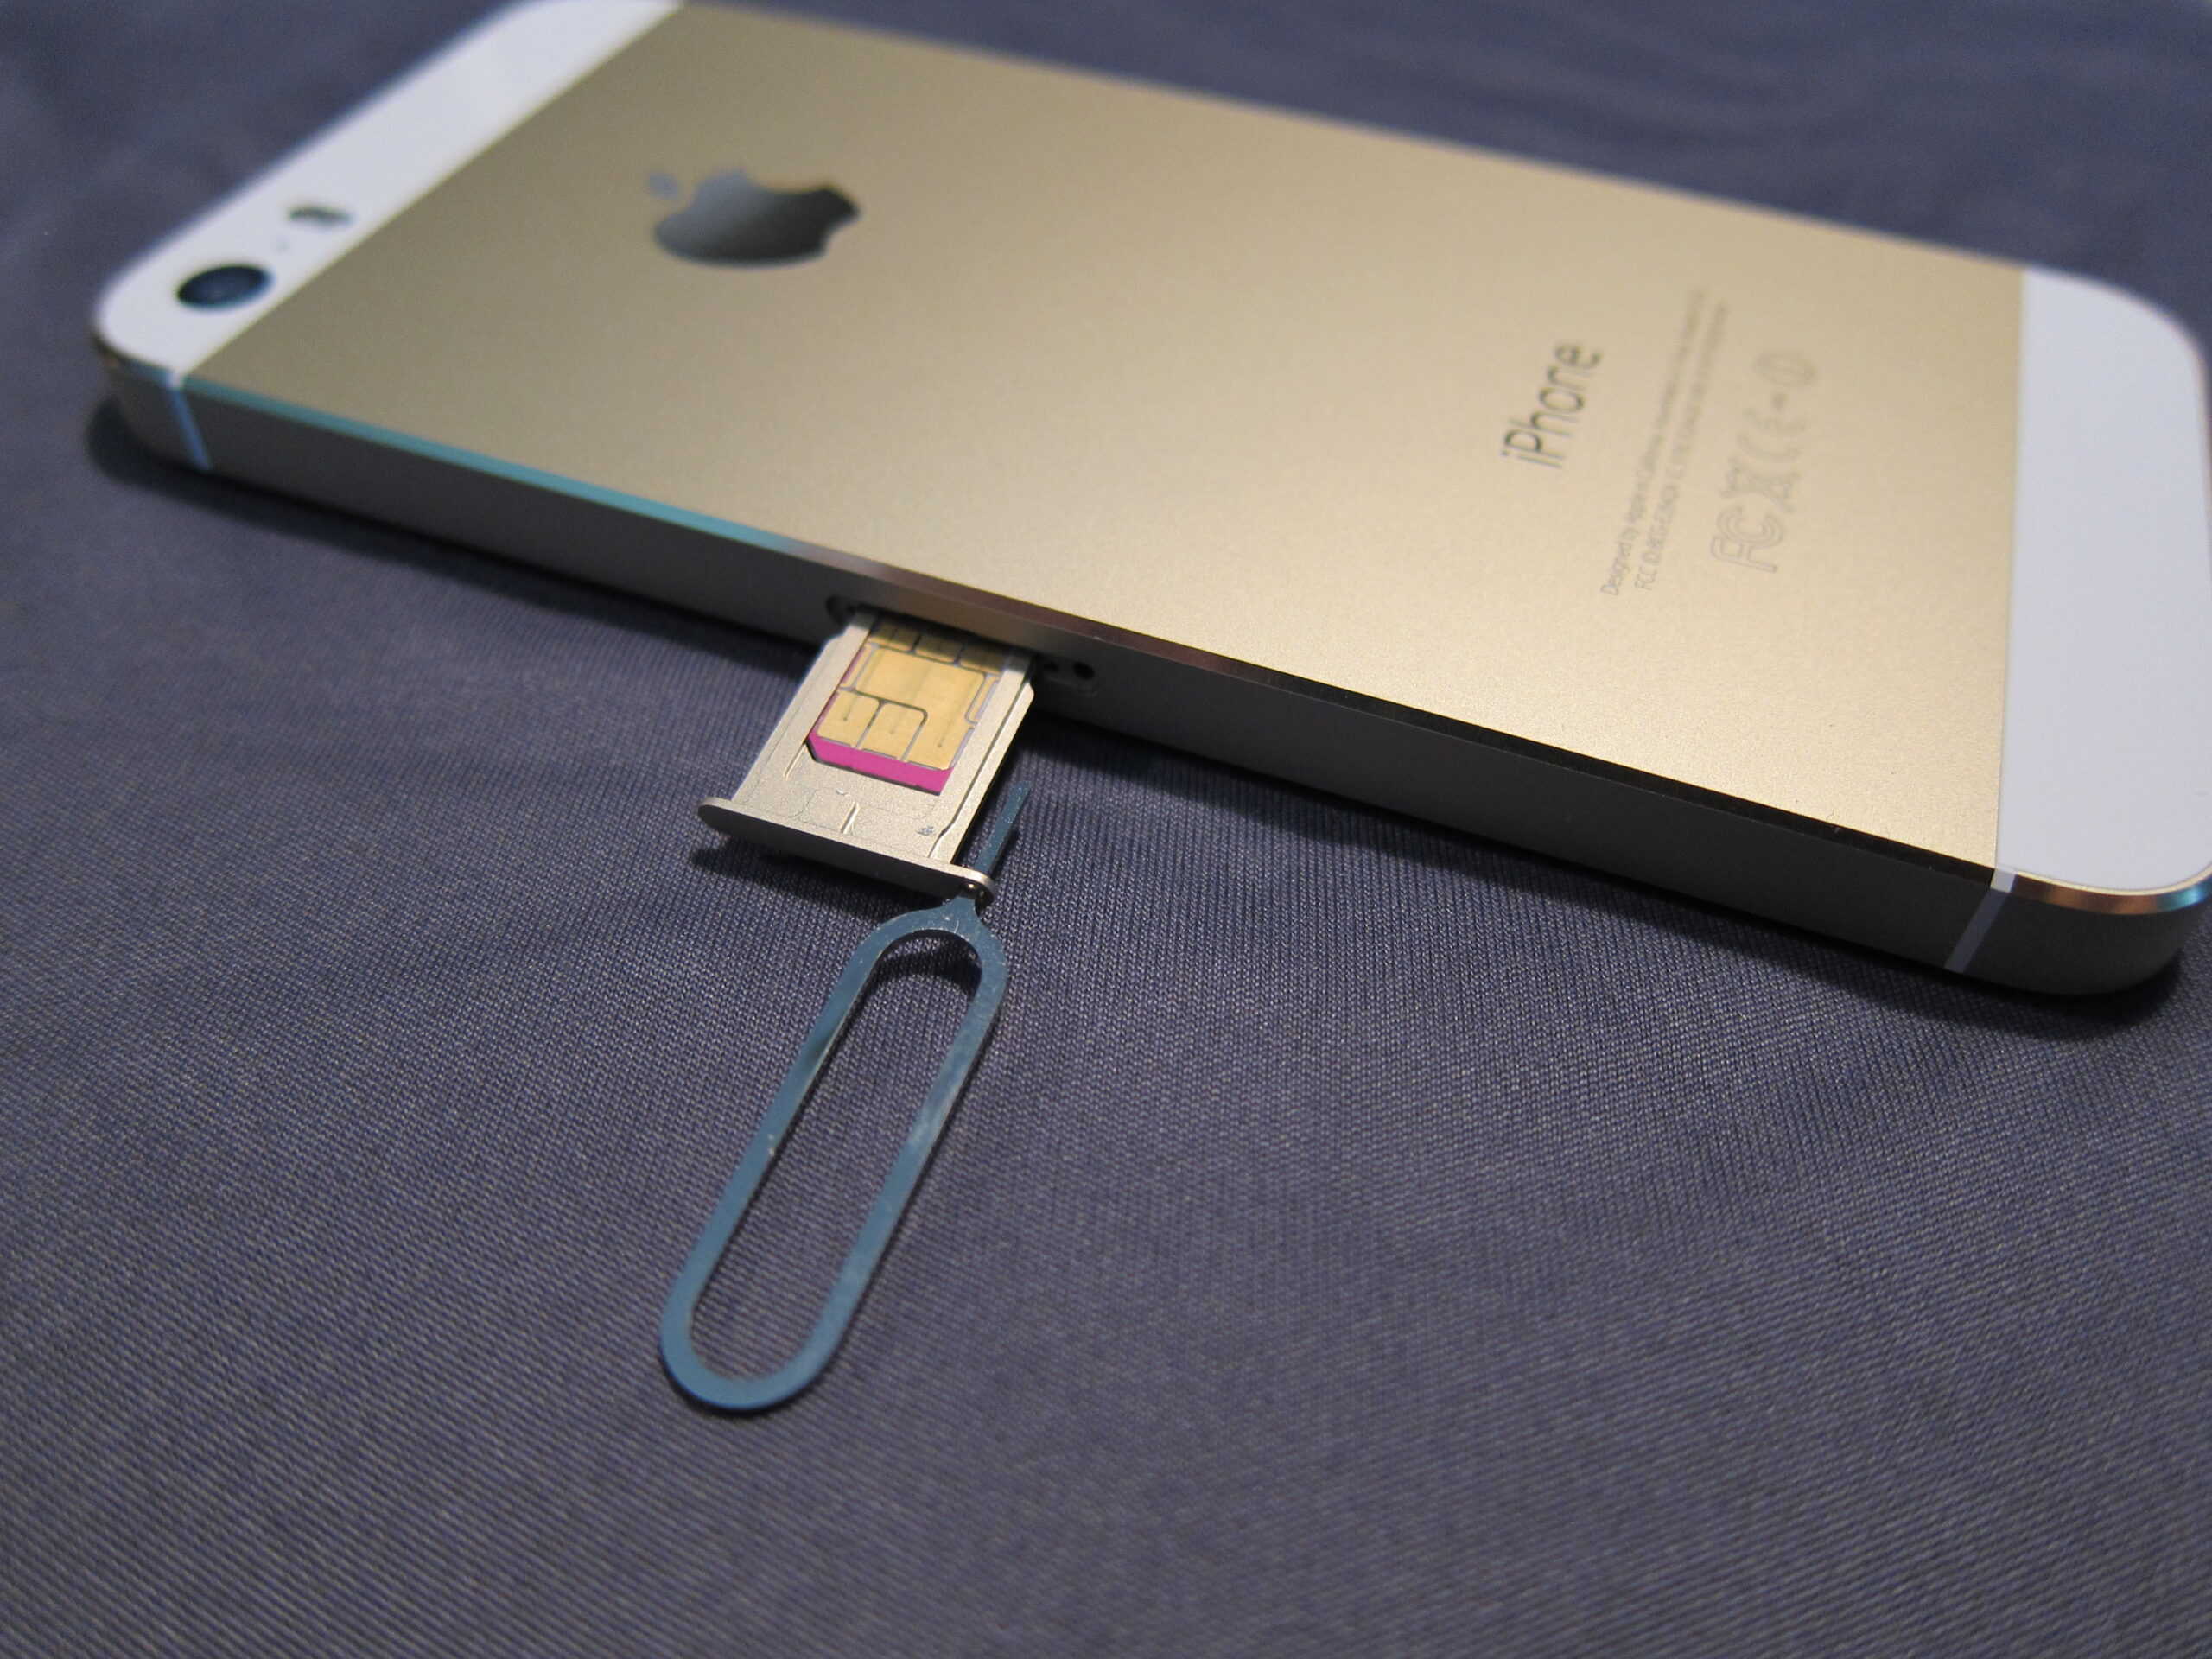
Step 5: Test the trimmed SIM card
With the SIM card trimmed and its edges smoothed to precision, the final step involves testing its compatibility and functionality in your new device. This critical stage ensures that the trimming process has been executed accurately, allowing for a seamless integration of the SIM card into the device's SIM card tray. Here's a detailed walkthrough of how to effectively test the trimmed SIM card:
-
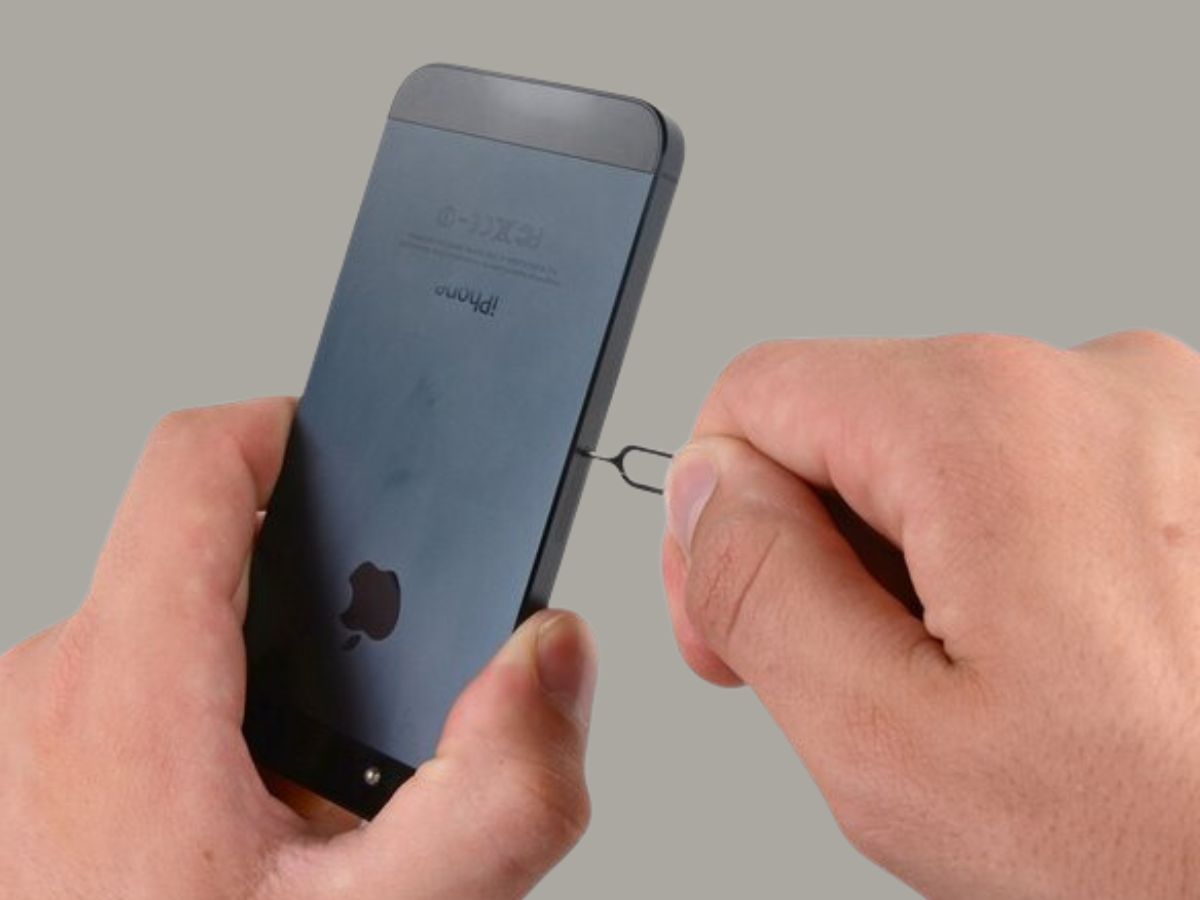
Inserting the SIM Card: Carefully insert the trimmed SIM card into the designated SIM card tray of your new mobile device. Ensure that the card fits smoothly and securely within the tray, aligning with the contours of the slot without any resistance.
-
Powering On the Device: Once the trimmed SIM card is inserted, power on your device and allow it to initialize. As the device boots up, it will detect the presence of the SIM card and attempt to establish network connectivity.
-
Checking Network Connectivity: Navigate to the device's network settings and verify that the trimmed SIM card is recognized and successfully connected to the mobile network. Ensure that the device displays the network signal and identifies the mobile carrier associated with the SIM card.
-
Making Test Calls and Sending Messages: To validate the functionality of the trimmed SIM card, make test calls and send text messages to ensure that the device can send and receive communication over the mobile network. This comprehensive test confirms that the trimmed SIM card is fully operational in the new device.
-
Testing Data Connectivity: If your mobile plan includes data services, test the data connectivity by accessing the internet and using mobile data-dependent applications. Confirm that the device can establish a stable data connection, enabling seamless browsing and app usage.
-
Verifying SIM Card Recognition: Access the device's settings or SIM card management interface to verify that the trimmed SIM card is recognized by the device, displaying its details and network connectivity status.
By meticulously conducting these tests, you can ascertain the effectiveness of the trimming process and ensure that the trimmed SIM card seamlessly integrates with your new device. The successful completion of these tests provides the assurance that the SIM card is fully compatible and functional, allowing you to make the most of your new mobile device without any compatibility issues.
Conclusion
Congratulations on successfully trimming your SIM card to fit the smaller SIM card slot required by your new mobile device. By following the step-by-step guide and meticulously executing each stage of the trimming process, you have demonstrated resourcefulness and adaptability in ensuring a seamless transition to your new device.
Trimming a SIM card may initially seem like a daunting task, but with the right tools, careful measurements, and precise execution, you have effectively adapted your existing SIM card to meet the requirements of your new device. This proactive approach not only saves time and effort but also allows you to maintain continuity in using your mobile number and existing mobile plan without the need for a new SIM card.
The meticulous attention to detail, from measuring and marking the SIM card to trimming and smoothing its edges, has culminated in a perfectly tailored SIM card that seamlessly integrates with your new device. The thorough testing of the trimmed SIM card ensures that it not only fits the SIM card tray but also functions flawlessly, providing network connectivity, call and messaging capabilities, and data services without any impediments.
By mastering the art of trimming a SIM card, you have empowered yourself with the ability to adapt to evolving mobile technologies and device requirements. This newfound skill not only enhances your confidence in managing mobile devices but also serves as a testament to your resourcefulness and willingness to explore practical solutions to common challenges.
As you enjoy the seamless functionality of your trimmed SIM card in your new device, remember that this process exemplifies the adaptability and versatility inherent in modern mobile technology. Embracing such challenges and finding practical solutions underscores the dynamic nature of mobile device compatibility and the versatility of SIM card technology.
With your trimmed SIM card seamlessly integrated into your new device, you can confidently embark on your mobile journey, leveraging the full potential of your device without any compatibility constraints. Your proactive approach to adapting your SIM card exemplifies your readiness to embrace technological advancements and ensure a smooth transition to new devices.
In conclusion, the successful trimming of your SIM card reflects your resourcefulness, adaptability, and commitment to seamless mobile device integration. As you continue to explore the capabilities of your new device, this experience serves as a testament to your ability to overcome challenges and optimize your mobile experience through practical solutions and proactive measures.