Introduction
Removing the battery from your Sony Xperia Mini is a straightforward process that can be necessary for various reasons, such as replacing a worn-out battery or troubleshooting issues with the device. While it may seem like a simple task, it's important to follow the correct steps to ensure the safety of both the device and the individual performing the removal.
In this guide, we will walk you through the step-by-step process of safely removing the battery from your Sony Xperia Mini. By following these instructions, you can confidently carry out this task without causing any damage to the device or risking personal injury. Whether you're a tech enthusiast looking to upgrade your device or a Sony Xperia Mini user facing battery-related concerns, this guide will equip you with the knowledge needed to complete the battery removal process with ease and precision.
The Sony Xperia Mini is a compact and stylish smartphone that has garnered a loyal following due to its impressive features and user-friendly design. As with any electronic device, proper maintenance and care are essential to ensure optimal performance and longevity. By learning how to safely remove the battery, you can take proactive steps to maintain your Sony Xperia Mini and address any battery-related issues effectively.
Now, let's delve into the specific steps required to safely remove the battery from your Sony Xperia Mini, empowering you to navigate this process confidently and with a clear understanding of each essential step.
Step 1: Power off the Sony Xperia Mini
Before initiating the battery removal process, it is crucial to power off your Sony Xperia Mini to prevent any potential electrical hazards and ensure a safe environment for handling the device. Follow these steps to power off your Sony Xperia Mini:
-
Unlock the Screen: If your device's screen is locked, unlock it by pressing the power button or using the designated unlock method, such as a PIN, pattern, or fingerprint recognition.
-
Press and Hold the Power Button: Locate the power button on your Sony Xperia Mini, typically situated on the side or top of the device. Press and hold the power button until the power-off menu appears on the screen.
-
Select "Power Off": Once the power-off menu is displayed, tap on the "Power Off" option. This action will prompt the device to begin the shutdown process.
-
Confirm the Power-Off Process: If prompted, confirm the power-off action by tapping "OK" or a similar confirmation option. This step ensures that the device is fully powered down and ready for the battery removal process.
-
Wait for Shutdown: Allow the Sony Xperia Mini to complete the shutdown process. You may notice the screen turning off, indicating that the device is powered down and safe to proceed with the battery removal.
By following these steps to power off your Sony Xperia Mini, you create a secure environment for handling the device and accessing the battery compartment. This precautionary measure minimizes the risk of electrical mishaps and ensures a smooth and safe battery removal process. With the device powered off, you are now ready to proceed to the next step of removing the back cover to access the battery compartment.
Taking the time to power off your Sony Xperia Mini demonstrates a responsible approach to device maintenance and safety, setting the stage for a successful battery removal process. This foundational step lays the groundwork for the subsequent actions involved in safely removing the battery from your Sony Xperia Mini.
Step 2: Remove the back cover
The next crucial step in safely removing the battery from your Sony Xperia Mini involves accessing the battery compartment by removing the back cover. This process allows you to gain direct access to the battery, enabling its safe removal and potential replacement. Follow these detailed steps to effectively remove the back cover of your Sony Xperia Mini:
-
Locate the Notch: Examine the edges of the Sony Xperia Mini to identify the presence of a small notch or indentation along the perimeter of the device. This notch serves as the entry point for initiating the back cover removal process.
-
Use Fingertips or a Pry Tool: With the notch identified, gently insert your fingertips or a non-abrasive pry tool into the notch. Apply light pressure to begin loosening the back cover from the main body of the device. Exercise caution to avoid using excessive force, as this may cause damage to the back cover or the device itself.
-
Gradually Separate the Back Cover: Once the initial separation is achieved, carefully work your way around the edges of the device, gradually separating the back cover from the Sony Xperia Mini. Take your time and proceed methodically to ensure a smooth and controlled removal process.
-
Mindful of Connectors and Buttons: As you continue to detach the back cover, be mindful of any connectors or buttons that may be integrated into the cover. These components, such as the power button or volume controls, should be handled with care to prevent damage during the removal process.
-
Set Aside the Back Cover: Once the back cover is fully detached, set it aside in a safe and secure location. This precautionary measure prevents accidental damage to the cover and ensures that it remains free from any potential hazards during the subsequent battery removal steps.
By meticulously following these steps, you can successfully remove the back cover of your Sony Xperia Mini, gaining access to the battery compartment in preparation for the next phase of the battery removal process. This careful and deliberate approach sets the stage for a seamless transition to the subsequent steps, allowing you to proceed with confidence and precision as you work towards safely removing the battery from your Sony Xperia Mini.
Step 3: Locate the battery
With the back cover successfully removed, you are now poised to locate the battery within your Sony Xperia Mini. The battery serves as a vital component of the device, providing the necessary power to support its functionality. By identifying the precise location of the battery, you can proceed with the subsequent steps of safely removing it from the device. Follow these detailed instructions to effectively locate the battery within your Sony Xperia Mini:
-
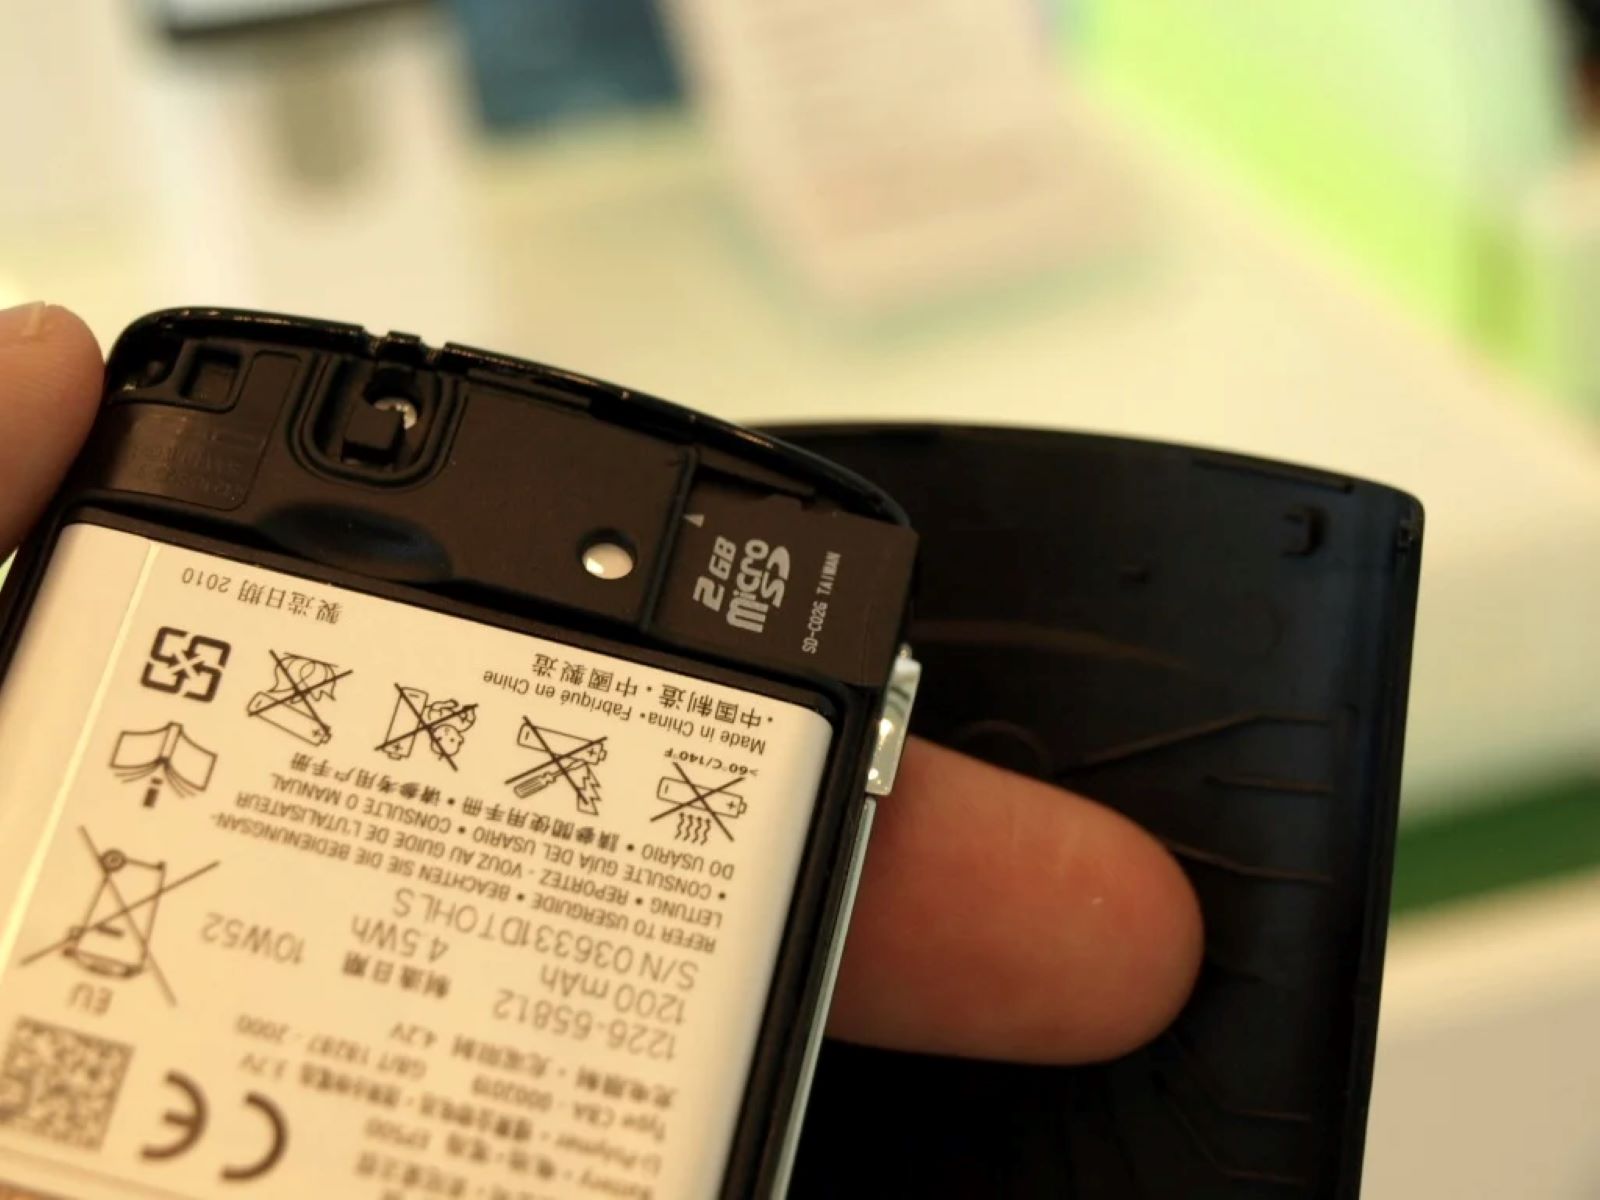
Visual Inspection: Upon removing the back cover, take a moment to visually inspect the interior of the device. The battery is typically situated near the center or towards the bottom of the device, secured within a designated compartment. Look for a rectangular or square-shaped component with connecting wires or terminals, indicating the presence of the battery.
-
Identify Labeling or Markings: In some cases, the battery may feature labeling or markings that distinguish it from other internal components. Look for indicators such as "Battery," model numbers, or manufacturer branding to confirm the location of the battery within the Sony Xperia Mini. These visual cues can help you pinpoint the precise area where the battery is housed.
-
Observe Connector Points: As you visually scan the interior of the device, pay attention to any connector points or terminals associated with the battery. These connector points serve as the interface between the battery and the device, facilitating the transfer of power. By identifying these connector points, you can further confirm the location of the battery and prepare for its safe removal.
-
Refer to Device Documentation: If needed, consult the official device documentation or user manual for your Sony Xperia Mini. The user manual often contains detailed illustrations and descriptions of the internal components, including the battery. Refer to the manual to gain additional insights into the specific location and characteristics of the battery within your device.
By diligently following these steps, you can effectively locate the battery within your Sony Xperia Mini, setting the stage for the subsequent phase of safely removing the battery from the device. This meticulous approach ensures that you have a clear understanding of the battery's location and characteristics, empowering you to proceed with confidence and precision as you navigate the battery removal process.
Step 4: Remove the battery
Having successfully located the battery within your Sony Xperia Mini, the next critical step involves the careful removal of the battery from its designated compartment. This process requires precision and attention to detail to ensure the safe extraction of the battery without causing any damage to the device or the battery itself. Follow these comprehensive instructions to effectively remove the battery from your Sony Xperia Mini:
-
Identify Battery Fastening Mechanisms: Before proceeding with the removal, take note of any fastening mechanisms or securing clips that may be holding the battery in place. These mechanisms are designed to keep the battery stable within the compartment and may require specific actions for disengagement.
-
Disconnect Battery Terminals: If your Sony Xperia Mini features accessible battery terminals, carefully disconnect any attached wires or connectors. Exercise caution and use gentle, deliberate movements to detach the terminals, ensuring that no undue force is applied that could lead to damage or disconnection issues.
-
Utilize Non-Conductive Tools (If Necessary): In cases where the battery is firmly secured within the compartment, consider using non-conductive tools, such as plastic pry tools or non-metallic spudgers, to assist in gently loosening the battery. These tools help minimize the risk of accidental damage to the battery or surrounding components during the removal process.
-
Lift the Battery with Even Pressure: With the fastening mechanisms disengaged and any connectors detached, carefully lift the battery from its compartment using even pressure. Avoid bending or twisting the battery, and ensure that your movements are steady and controlled to prevent any sudden jolts that could impact the device or the battery.
-
Inspect for Adhesive or Additional Fastenings: In some instances, the battery may be secured in place with adhesive or additional fastenings. If you encounter resistance during the removal process, inspect the battery compartment for any signs of adhesive or hidden fastening points. Exercise patience and diligence in addressing these potential obstacles.
-
Secure the Removed Battery: Once the battery is successfully removed from the Sony Xperia Mini, place it in a secure location away from any potential sources of damage or interference. This precautionary measure ensures that the battery remains protected and ready for safe disposal or potential replacement.
By meticulously following these steps, you can effectively remove the battery from your Sony Xperia Mini, completing a crucial phase in the battery removal process. This careful and methodical approach underscores the importance of precision and attention to detail when handling the device's internal components, ultimately contributing to a successful and safe battery removal experience.
Step 5: Safely dispose of the battery
Safely disposing of the battery from your Sony Xperia Mini is a critical step that requires careful consideration of environmental impact and adherence to proper disposal practices. As electronic devices contain components that can be harmful to the environment if not handled correctly, it is essential to approach the disposal of the battery with responsibility and awareness. Follow these detailed guidelines to ensure the safe and environmentally conscious disposal of the battery from your Sony Xperia Mini:
-
Research Local Disposal Regulations: Begin by researching the local regulations and guidelines for the disposal of electronic waste, including batteries. Many municipalities have specific protocols for the disposal of batteries to minimize environmental impact and ensure compliance with waste management standards. Contact local recycling centers or government agencies to obtain information on the proper disposal procedures for electronic batteries.
-
Utilize Battery Recycling Programs: Explore the availability of battery recycling programs in your area. Many communities offer designated drop-off locations or collection events for electronic waste, including batteries. These programs facilitate the proper recycling and disposal of batteries, allowing for the extraction of valuable materials while preventing harmful substances from entering the environment.
-
Secure Battery Packaging: When preparing the battery for disposal, ensure that it is securely packaged to prevent any potential leaks or damage during transportation. Place the battery in a sealable plastic bag or container to contain any electrolytes or other hazardous materials. This packaging helps safeguard against environmental contamination and protects individuals involved in the disposal process.
-
Label the Battery: Clearly label the packaged battery as "Electronic Waste" or "Battery for Recycling" to provide clear identification of its contents. This labeling serves as a visual indicator for recycling facility personnel and waste management professionals, ensuring that the battery is handled according to the appropriate disposal protocols.
-
Deliver to Authorized Recycling Centers: Once the battery is securely packaged and labeled, deliver it to authorized recycling centers or designated drop-off locations. These facilities are equipped to handle electronic waste, including batteries, in a manner that aligns with environmental regulations and sustainability practices. By entrusting the battery to these specialized facilities, you contribute to the responsible management of electronic waste and the promotion of eco-friendly disposal methods.
-
Educate Others on Proper Disposal: Share your knowledge of proper battery disposal practices with friends, family, and community members. By raising awareness of the importance of responsible electronic waste disposal, you contribute to a collective effort to minimize environmental impact and promote sustainable waste management practices.
By conscientiously following these guidelines, you can safely dispose of the battery from your Sony Xperia Mini, contributing to environmental preservation and responsible electronic waste management. This proactive approach reflects a commitment to sustainable practices and environmental stewardship, ensuring that the battery is handled in a manner that aligns with ethical and ecological considerations.
Conclusion
In conclusion, the process of safely removing the battery from your Sony Xperia Mini encompasses a series of deliberate and essential steps, each contributing to the overall safety and success of the battery removal process. By adhering to the outlined guidelines and exercising care and precision, you can navigate this task with confidence and responsibility, ensuring the well-being of both the device and the environment.
The initial step of powering off the Sony Xperia Mini sets the stage for a secure environment, mitigating potential electrical hazards and creating a safe space for the subsequent actions. This foundational measure underscores the importance of proactive safety practices and responsible device handling, reflecting a conscientious approach to electronic maintenance.
The meticulous removal of the back cover serves as a pivotal phase in accessing the battery compartment, requiring patience and attention to detail. By following the prescribed steps for back cover removal, you establish a controlled and methodical approach, laying the groundwork for the subsequent battery removal process.
Locating the battery within the Sony Xperia Mini involves careful observation and consideration of the device's internal components, emphasizing the significance of understanding the device's anatomy and functionality. This phase fosters a deeper awareness of the device's internal structure, empowering individuals to engage with their devices in a knowledgeable and informed manner.
The critical step of removing the battery demands precision and delicacy, highlighting the importance of gentle handling and adherence to best practices for electronic component extraction. By following the detailed instructions for battery removal, individuals can effectively navigate this process, safeguarding the integrity of both the device and the battery.
Safely disposing of the battery represents a commitment to environmental stewardship and ethical waste management, underscoring the responsibility of individuals in contributing to sustainable practices. By following the recommended guidelines for battery disposal, individuals actively participate in the preservation of the environment and the promotion of eco-conscious behaviors.
In essence, the comprehensive process of safely removing the battery from the Sony Xperia Mini embodies a holistic approach to device maintenance, safety, and environmental consciousness. By embracing these principles and integrating them into the handling of electronic devices, individuals can cultivate a culture of responsible technology usage and environmental mindfulness, ultimately contributing to a more sustainable and harmonious relationship with the devices we rely on daily.