Introduction
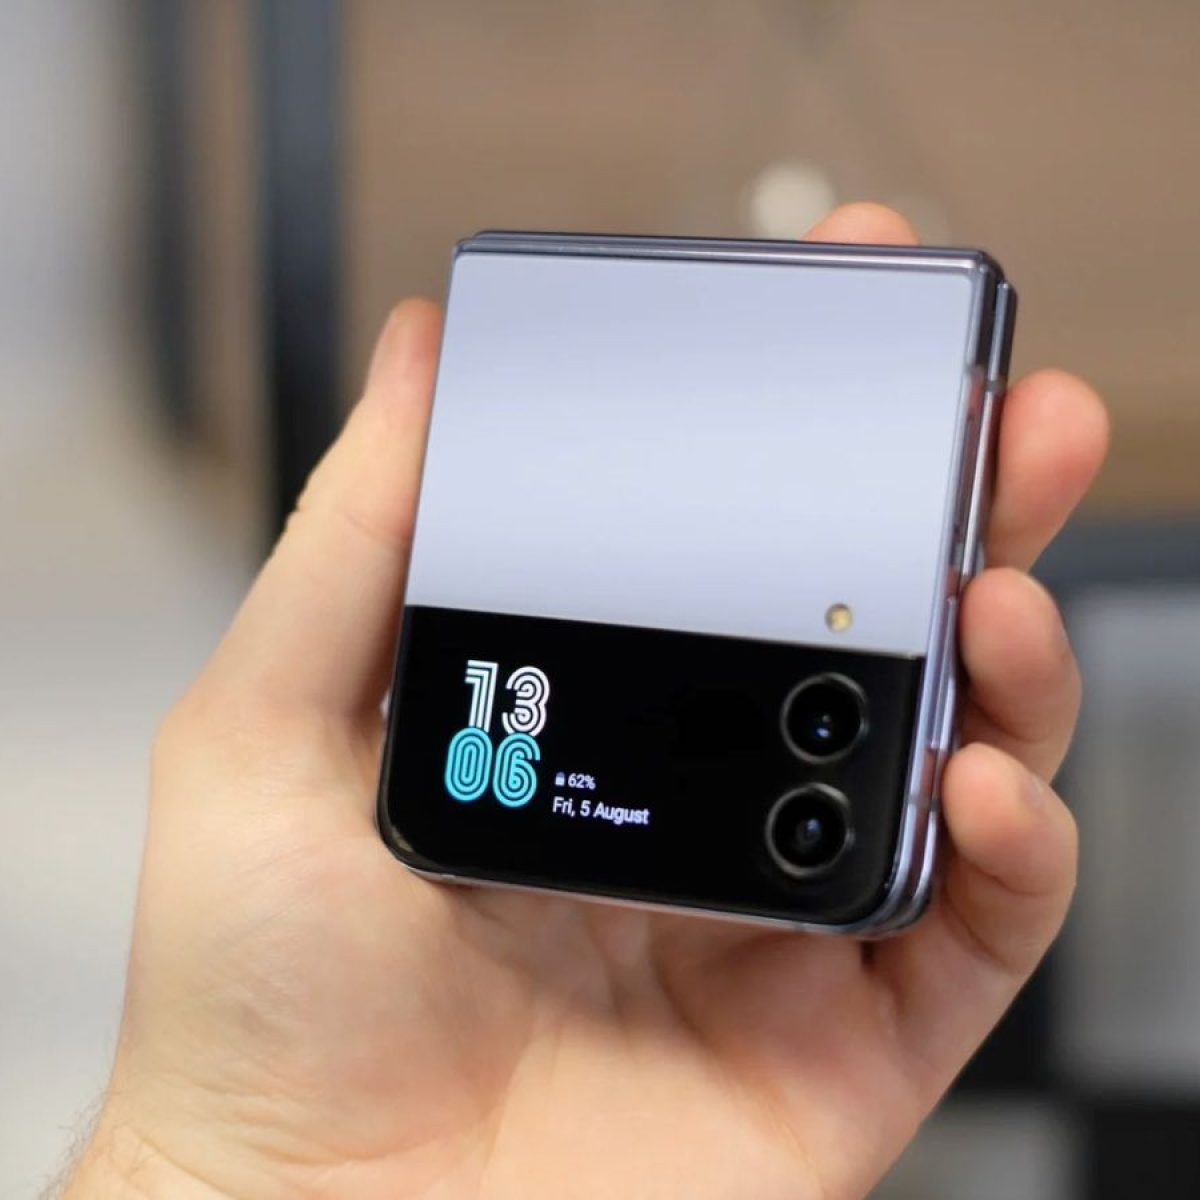
The Samsung Galaxy Z Flip 3 is a remarkable device that seamlessly integrates cutting-edge technology with a sleek, compact design. One of the essential components of this innovative smartphone is the SIM card, which enables users to connect with their network and access various mobile services. Whether you're upgrading to a new SIM card or troubleshooting network connectivity issues, knowing how to safely extract the SIM card from your Z Flip 3 is crucial.
In this comprehensive guide, we will walk you through the step-by-step process of safely removing the SIM card from your Z Flip 3. By following these instructions, you can ensure that the delicate components of your device remain unharmed while successfully accessing the SIM card tray.
Understanding the intricacies of handling the SIM card in your Z Flip 3 is vital for maintaining the device's functionality and preventing any potential damage. With the proper guidance and attention to detail, you can confidently navigate the process of extracting and reinserting the SIM card, empowering you to manage your mobile connectivity with ease.
Now, let's delve into the step-by-step instructions for safely extracting the SIM card from your Samsung Galaxy Z Flip 3. By following these guidelines, you'll be equipped with the knowledge and confidence to manage your SIM card effectively, ensuring a seamless and uninterrupted mobile experience.
Step 1: Gather Necessary Tools
Before embarking on the process of extracting the SIM card from your Samsung Galaxy Z Flip 3, it's essential to gather the necessary tools to ensure a smooth and hassle-free experience. Here's what you'll need:
-
SIM Ejector Tool: This small, pin-like tool is specifically designed for ejecting the SIM card tray from your Z Flip 3. It's typically included in the original packaging of your device. If you can't locate the SIM ejector tool, a paperclip can serve as an alternative, provided it's straightened out to mimic the shape and size of the original tool.
-
Stable Work Surface: Find a flat and stable surface to work on, such as a table or desk, to prevent any accidental drops or damage to your device during the SIM card extraction process.
-
Ample Lighting: Adequate lighting is crucial for clearly identifying the SIM card tray and ensuring that the extraction process is carried out with precision. Position yourself in a well-lit area or utilize a desk lamp to illuminate the work surface effectively.
By ensuring that you have the SIM ejector tool, a stable work surface, and ample lighting at your disposal, you'll be well-prepared to proceed with the subsequent steps of safely extracting the SIM card from your Samsung Galaxy Z Flip 3. These tools will facilitate a seamless and efficient process, allowing you to handle the delicate components of your device with care and precision.
Step 2: Power Off the Z Flip 3
Before initiating the process of extracting the SIM card from your Samsung Galaxy Z Flip 3, it's crucial to power off the device to prevent any potential damage and ensure a safe handling procedure. Powering off the Z Flip 3 will minimize the risk of disrupting the device's internal components and safeguard against accidental errors during the SIM card extraction process.
To power off your Z Flip 3, begin by locating the power button, which is typically situated on the right side of the device. The power button is designed to enable users to turn the device on or off with a simple press. Once you've identified the power button, press and hold it until the power off menu appears on the screen.
Upon accessing the power off menu, you'll be presented with options to either power off, restart, or enable emergency mode. To power off the Z Flip 3, tap on the "Power Off" option, which will prompt the device to initiate the shutdown process. It's important to allow the device to power off completely before proceeding to the next step of extracting the SIM card.
By powering off your Z Flip 3, you're taking a proactive step to ensure the safety and integrity of the device during the SIM card extraction process. This deliberate action minimizes the risk of potential electrical interference and safeguards the internal components of the device, ultimately contributing to a smooth and secure SIM card removal experience.
With the Z Flip 3 powered off, you're now ready to proceed to the next step of locating the SIM card tray and initiating the extraction process. By adhering to these systematic guidelines, you can confidently navigate the process of safely handling your Z Flip 3 and successfully managing the extraction of the SIM card, ensuring a seamless and uninterrupted mobile experience.
Step 3: Locate the SIM Card Tray
Locating the SIM card tray is a crucial step in the process of safely extracting the SIM card from your Samsung Galaxy Z Flip 3. The SIM card tray houses the SIM card and is designed to facilitate easy insertion and removal, ensuring seamless connectivity and accessibility. To proceed with this step, follow the detailed instructions below:
-
Identify the SIM Card Tray Slot: The SIM card tray slot is typically located on the right side of the Z Flip 3, adjacent to the power button. It is essential to familiarize yourself with the physical layout of the device to pinpoint the precise location of the SIM card tray slot.
-
Inspect the Device Casing: Gently examine the exterior casing of the Z Flip 3 to identify the small indentation or slot that indicates the presence of the SIM card tray. This subtle feature is designed to facilitate easy access to the tray and streamline the process of removing and reinserting the SIM card.
-
Utilize Adequate Lighting: To ensure a clear and accurate identification of the SIM card tray slot, it is advisable to position yourself in a well-lit environment or utilize a desk lamp to illuminate the area effectively. Adequate lighting is instrumental in facilitating a precise and seamless extraction process.
-
Exercise Caution: As you locate the SIM card tray slot, exercise caution to avoid applying excessive pressure or force to the device. The delicate nature of the Z Flip 3 necessitates a gentle and deliberate approach to prevent any inadvertent damage or mishandling during the SIM card extraction process.
By following these detailed instructions and exercising diligence, you can successfully locate the SIM card tray on your Samsung Galaxy Z Flip 3, setting the stage for the subsequent steps of safely ejecting and removing the SIM card. This meticulous approach ensures that you handle the device with care and precision, ultimately contributing to a seamless and secure SIM card extraction experience.
Step 4: Eject the SIM Card Tray
Ejecting the SIM card tray from your Samsung Galaxy Z Flip 3 is a pivotal step in the process of safely extracting the SIM card. This step requires precision and attention to detail to ensure that the delicate components of the device remain unharmed throughout the procedure. Follow the comprehensive guidelines below to execute this step effectively:
-
Retrieve the SIM Ejector Tool: Begin by retrieving the SIM ejector tool, which is a small, pin-like instrument designed specifically for ejecting the SIM card tray. If the original SIM ejector tool is unavailable, a straightened paperclip can serve as an alternative. Ensure that the tool is readily accessible before proceeding with the ejection process.
-
Insert the SIM Ejector Tool: With the Z Flip 3 positioned on a stable surface, locate the SIM card tray slot on the right side of the device. Gently insert the SIM ejector tool into the small pinhole located adjacent to the SIM card tray slot. Apply light pressure to engage the internal mechanism and initiate the ejection of the SIM card tray.
-
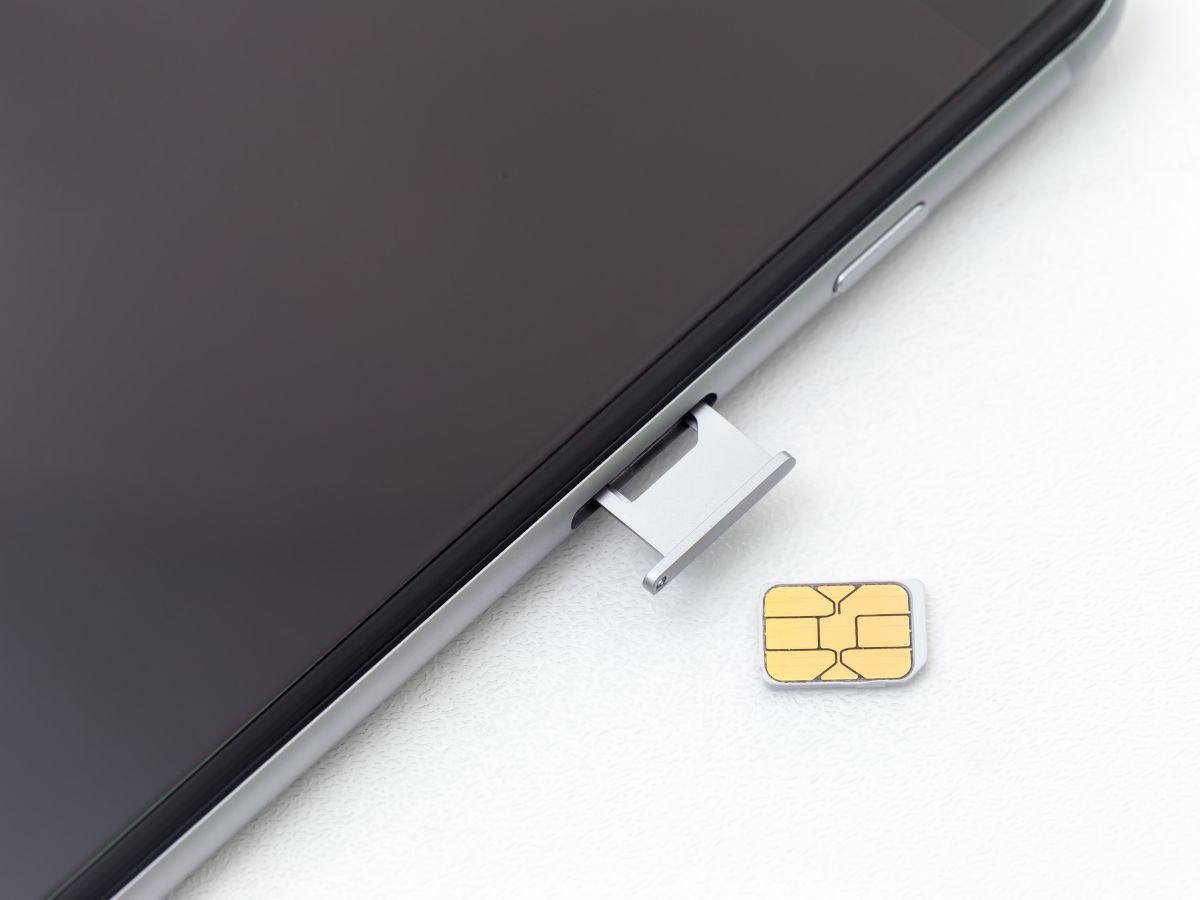
Eject the SIM Card Tray: Upon inserting the SIM ejector tool, you will feel a slight resistance as the internal mechanism releases the SIM card tray. Carefully continue to apply gentle pressure until the tray partially protrudes from the device. Exercise caution to prevent any abrupt or forceful movements that may compromise the integrity of the SIM card tray or the device itself.
-
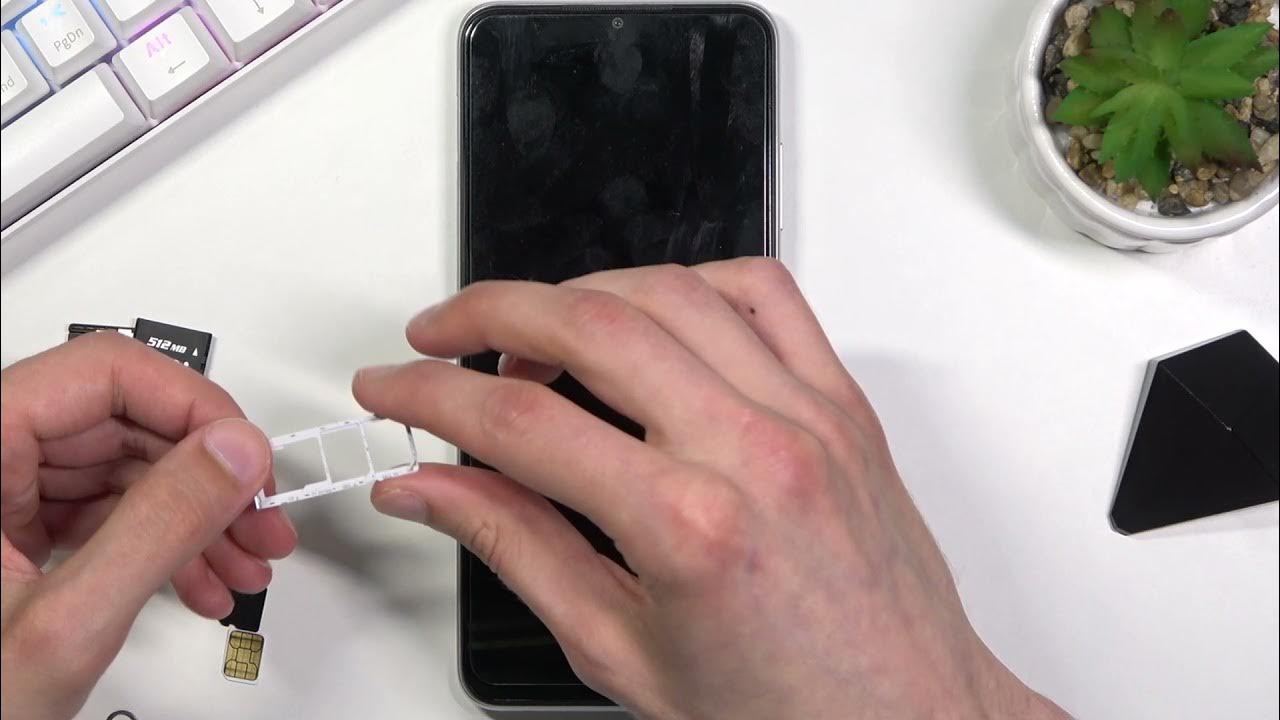
Remove the SIM Card Tray: Once the SIM card tray is partially ejected, delicately grasp the exposed edge of the tray and carefully slide it out from the device. Exercise care to avoid applying excessive force or causing any unnecessary strain on the tray or the device. The SIM card tray should slide out smoothly, allowing you to access the SIM card housed within it.
By meticulously following these steps and exercising precision throughout the ejection process, you can effectively remove the SIM card tray from your Z Flip 3 without compromising the integrity of the device or the SIM card. This deliberate approach ensures that the ejection process is carried out seamlessly, setting the stage for the subsequent step of safely removing the SIM card from the tray.
Step 5: Remove the SIM Card
With the SIM card tray successfully ejected from your Samsung Galaxy Z Flip 3, the next crucial step is to delicately remove the SIM card from the tray. This process requires precision and care to ensure that the SIM card is handled with utmost delicacy, safeguarding against any potential damage or misalignment. Follow the comprehensive guidelines below to execute this step effectively:
-
Inspect the SIM Card Tray: Upon removing the SIM card tray from the Z Flip 3, carefully examine the interior of the tray to locate the SIM card. The SIM card is typically positioned within a designated slot, secured in place to prevent dislodgment during normal usage. Take a moment to visually identify the SIM card and familiarize yourself with its placement within the tray.
-
Gently Dislodge the SIM Card: Using your fingertips, delicately maneuver the SIM card within the tray to dislodge it from its secured position. Exercise caution to avoid applying excessive force or bending the SIM card, as it is a delicate component that requires gentle handling. With a careful and deliberate approach, you can effectively release the SIM card from its slot within the tray.
-
Retrieve the SIM Card: Once the SIM card is dislodged from its slot, carefully lift it from the tray using your fingertips. Ensure that you maintain a firm yet gentle grip on the SIM card to prevent any accidental drops or mishandling. The SIM card should be handled with care and precision to prevent any potential damage to its surface or internal components.
-
Inspect the SIM Card: After removing the SIM card from the tray, take a moment to inspect its surface for any signs of damage or wear. Ensure that the metallic contacts and the overall structure of the SIM card remain intact and free from any visible defects. This visual inspection serves as a precautionary measure to verify the condition of the SIM card before reinserting it into the device.
By meticulously following these steps and exercising precision throughout the process of removing the SIM card from the tray, you can effectively handle this delicate component with care and precision. This deliberate approach ensures that the SIM card is extracted seamlessly, setting the stage for the subsequent step of reinserting the SIM card tray into your Samsung Galaxy Z Flip 3.
Step 6: Reinsert the SIM Card Tray
After safely removing the SIM card from your Samsung Galaxy Z Flip 3, the next crucial step is to reinsert the SIM card tray back into the device. This process is essential for ensuring that the SIM card is securely placed within the device, facilitating seamless connectivity and uninterrupted mobile services. Follow the comprehensive guidelines below to execute this step effectively:
-
Position the SIM Card Tray: With the SIM card in hand, carefully align the SIM card tray with the designated slot on the Z Flip 3. Ensure that the tray is positioned correctly, aligning it with the corresponding indentation on the device to guarantee a secure fit.
-
Insert the SIM Card Tray: Delicately slide the SIM card tray back into the device, applying gentle pressure to facilitate a smooth insertion. Exercise caution to avoid any abrupt or forceful movements that may compromise the integrity of the tray or the device.
-
Verify Secure Placement: Once the SIM card tray is fully inserted, verify that it is securely positioned within the device. Gently press down on the tray to ensure that it sits flush with the exterior casing, indicating a secure and stable placement.
-
Power On the Z Flip 3: With the SIM card tray reinserted, power on your Z Flip 3 by pressing and holding the power button. Allow the device to boot up and initialize the network connectivity, enabling you to seamlessly access mobile services and communication features.
By meticulously following these steps and exercising precision throughout the process of reinserting the SIM card tray, you can effectively ensure that the SIM card is securely placed within your Samsung Galaxy Z Flip 3, facilitating uninterrupted connectivity and optimal functionality.
With the SIM card tray successfully reinserted into the device, you have effectively completed the process of safely managing the SIM card in your Z Flip 3. By adhering to these systematic guidelines, you can confidently navigate the process of handling your device with care and precision, ultimately contributing to a seamless and secure SIM card reinsertion experience.
Conclusion
Successfully extracting and reinserting the SIM card in your Samsung Galaxy Z Flip 3 is a fundamental aspect of managing your device's connectivity and ensuring a seamless mobile experience. By following the comprehensive guide outlined above, you've gained valuable insights into the precise steps required to handle the SIM card with care and precision.
Throughout this process, you've learned the importance of gathering the necessary tools, powering off the device, locating the SIM card tray, ejecting the tray, removing the SIM card, and reinserting the tray. Each step was meticulously detailed to empower you with the knowledge and confidence needed to navigate the SIM card management process effectively.
By meticulously following these guidelines, you've demonstrated a proactive approach to safeguarding the delicate components of your Z Flip 3, ultimately contributing to a secure and uninterrupted mobile experience. The deliberate actions taken to power off the device, locate the SIM card tray, and handle the SIM card with care exemplify your commitment to maintaining the integrity of your device.
As you power on your Z Flip 3 and seamlessly access mobile services, you can take pride in the meticulous attention to detail applied throughout the SIM card extraction and reinsertion process. Your conscientious approach to device maintenance and management reflects a deep understanding of the intricacies involved in handling the SIM card within your Z Flip 3.
Moving forward, the knowledge and expertise gained from this comprehensive guide will serve as a valuable resource, empowering you to confidently manage the SIM card in your Samsung Galaxy Z Flip 3. Whether you're upgrading to a new SIM card, troubleshooting network connectivity issues, or simply ensuring the optimal functionality of your device, the skills acquired from this guide will continue to support your seamless mobile experience.
With the SIM card securely in place and your Z Flip 3 ready to deliver unparalleled performance, you can embark on your mobile journey with confidence, knowing that you possess the necessary expertise to handle the essential components of your device with precision and care.


