Introduction
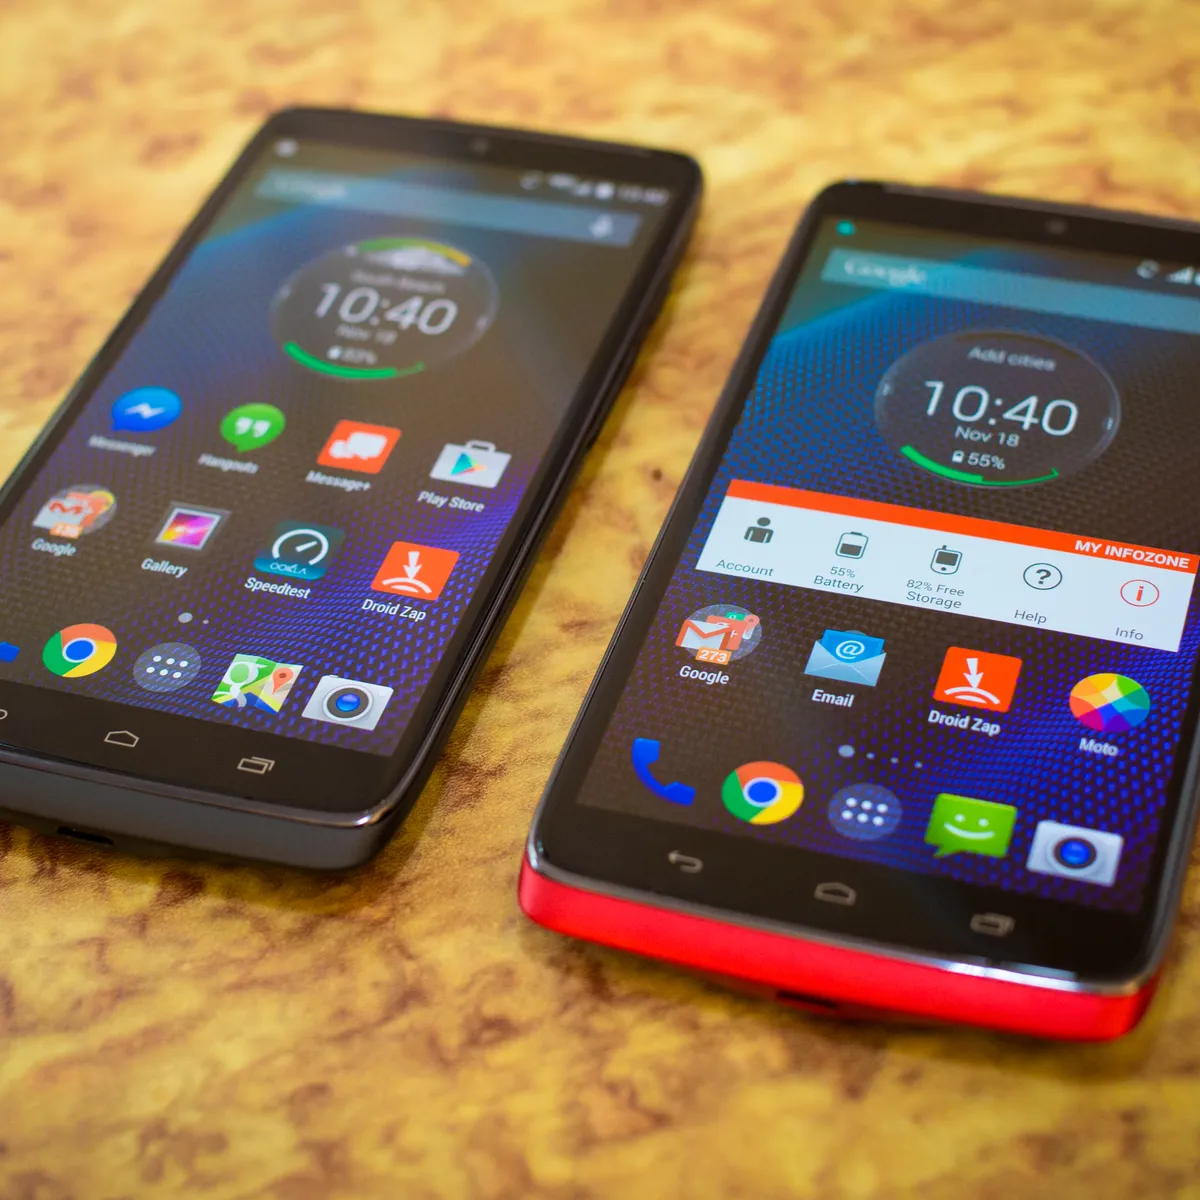
The Droid Turbo, a powerful and versatile mobile device, offers users the flexibility to switch carriers or upgrade their SIM card. Whether you're seeking improved network coverage, better data plans, or enhanced mobile services, replacing the SIM card in your Droid Turbo can unlock a world of possibilities. This comprehensive guide will walk you through the process, ensuring a seamless transition to your new SIM card.
By following this step-by-step tutorial, you'll gain the confidence to handle the SIM card replacement with ease. Whether you're a tech-savvy individual or someone who's new to mobile device maintenance, this guide is designed to empower you with the knowledge and skills necessary to complete the task successfully. With clear instructions and helpful tips, you'll be able to navigate the process smoothly, eliminating any uncertainties or concerns along the way.
The ability to replace the SIM card in your Droid Turbo grants you the freedom to adapt to your evolving mobile needs. Whether you're traveling internationally, switching carriers, or simply upgrading to a new SIM card, this process allows you to stay connected without limitations. With the right tools and guidance, you can easily complete this task and enjoy a seamless transition to your new SIM card.
As you embark on this journey of replacing your Droid Turbo's SIM card, remember that you're not alone. This guide is here to support you every step of the way, ensuring that you can confidently and successfully complete the process. So, without further ado, let's gather the necessary tools and begin the journey toward a seamlessly replaced SIM card in your Droid Turbo.
Step 1: Gather Necessary Tools
Before embarking on the journey of replacing the SIM card in your Droid Turbo, it's essential to gather the necessary tools to ensure a smooth and efficient process. Here's a comprehensive list of tools you'll need:
-
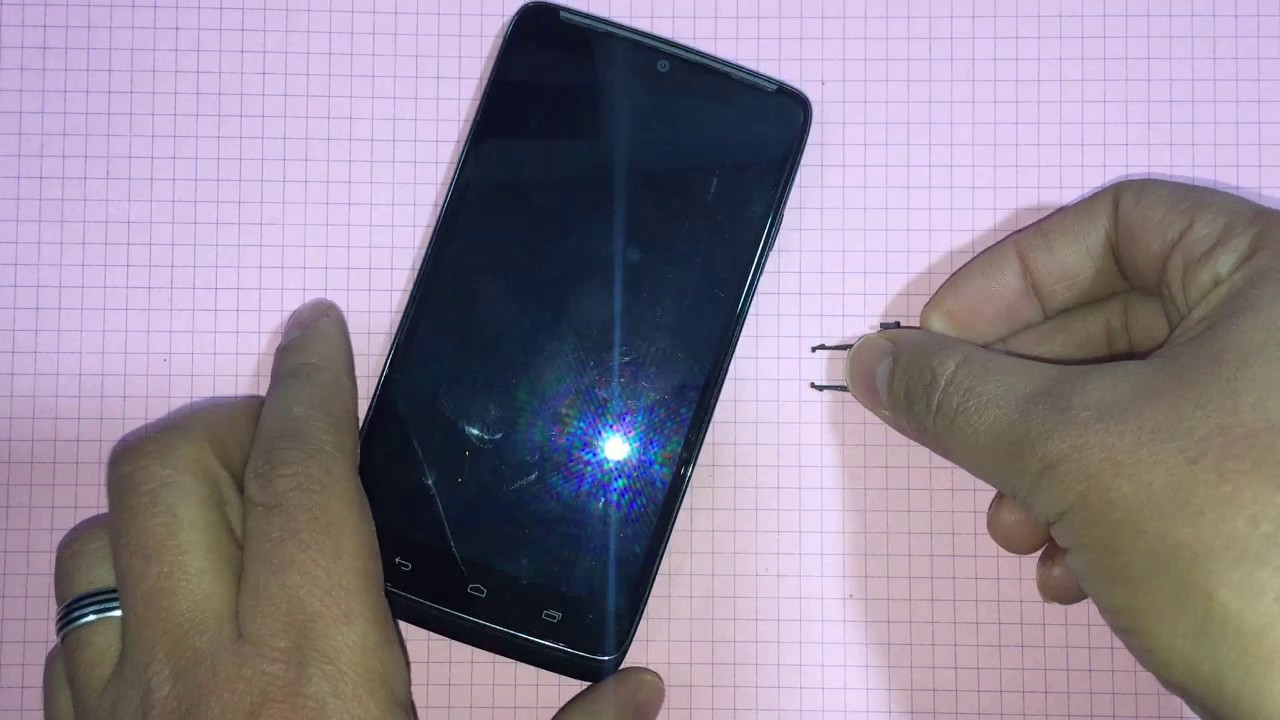
SIM Card Eject Tool: This small, pointed tool is essential for ejecting the SIM card tray from your Droid Turbo. It's typically included with the device or can be obtained from a mobile device repair kit.
-
New SIM Card: Whether you're upgrading your SIM card or switching carriers, ensure that you have the new SIM card ready for installation. Be sure to obtain the correct type of SIM card compatible with your Droid Turbo.
-
Microfiber Cloth: Keeping a microfiber cloth handy is beneficial for wiping the Droid Turbo and the SIM card tray, ensuring a clean and dust-free environment for the new SIM card.
-
Stable Work Surface: Find a stable and well-lit work surface to perform the SIM card replacement. A clean and clutter-free area will help prevent any small components from getting misplaced during the process.
-
Patience and Care: While not physical tools, patience and care are essential for this task. Taking your time and handling the components with care will minimize the risk of damaging the device or the SIM card.
By ensuring that you have all these tools at your disposal, you'll be well-prepared to proceed with confidence and peace of mind. With the necessary tools gathered, you're ready to power off your Droid Turbo and move on to the next step of the SIM card replacement process.
Step 2: Power Off the Droid Turbo
Before beginning the process of replacing the SIM card in your Droid Turbo, it's crucial to power off the device to ensure safety and prevent any potential damage. Follow these simple steps to power off your Droid Turbo:
-
Access the Power Button: Locate the power button on your Droid Turbo. It is typically situated on the right-hand side of the device, either near the top or along the midsection. The power button may have a textured or raised surface for easy identification.
-
Press and Hold the Power Button: Firmly press and hold the power button until the power off menu appears on the screen. This menu typically includes options such as "Power Off," "Restart," or "Emergency Mode."
-
Select "Power Off": Once the power off menu is displayed, tap on the "Power Off" option to initiate the shutdown process. Confirm the action if prompted to power off the device completely.
-
Wait for the Device to Power Down: Allow the Droid Turbo to complete the power off sequence. You may notice the screen turning off, and the device's indicator lights dimming as it shuts down.
-
Verify the Device is Powered Off: After a few moments, ensure that the Droid Turbo is completely powered off. You can do this by pressing the power button briefly to check if the screen remains inactive.
By following these steps, you have successfully powered off your Droid Turbo, preparing it for the next phase of the SIM card replacement process. With the device safely powered down, you can proceed with confidence to the next step, which involves locating the SIM card tray within the Droid Turbo.
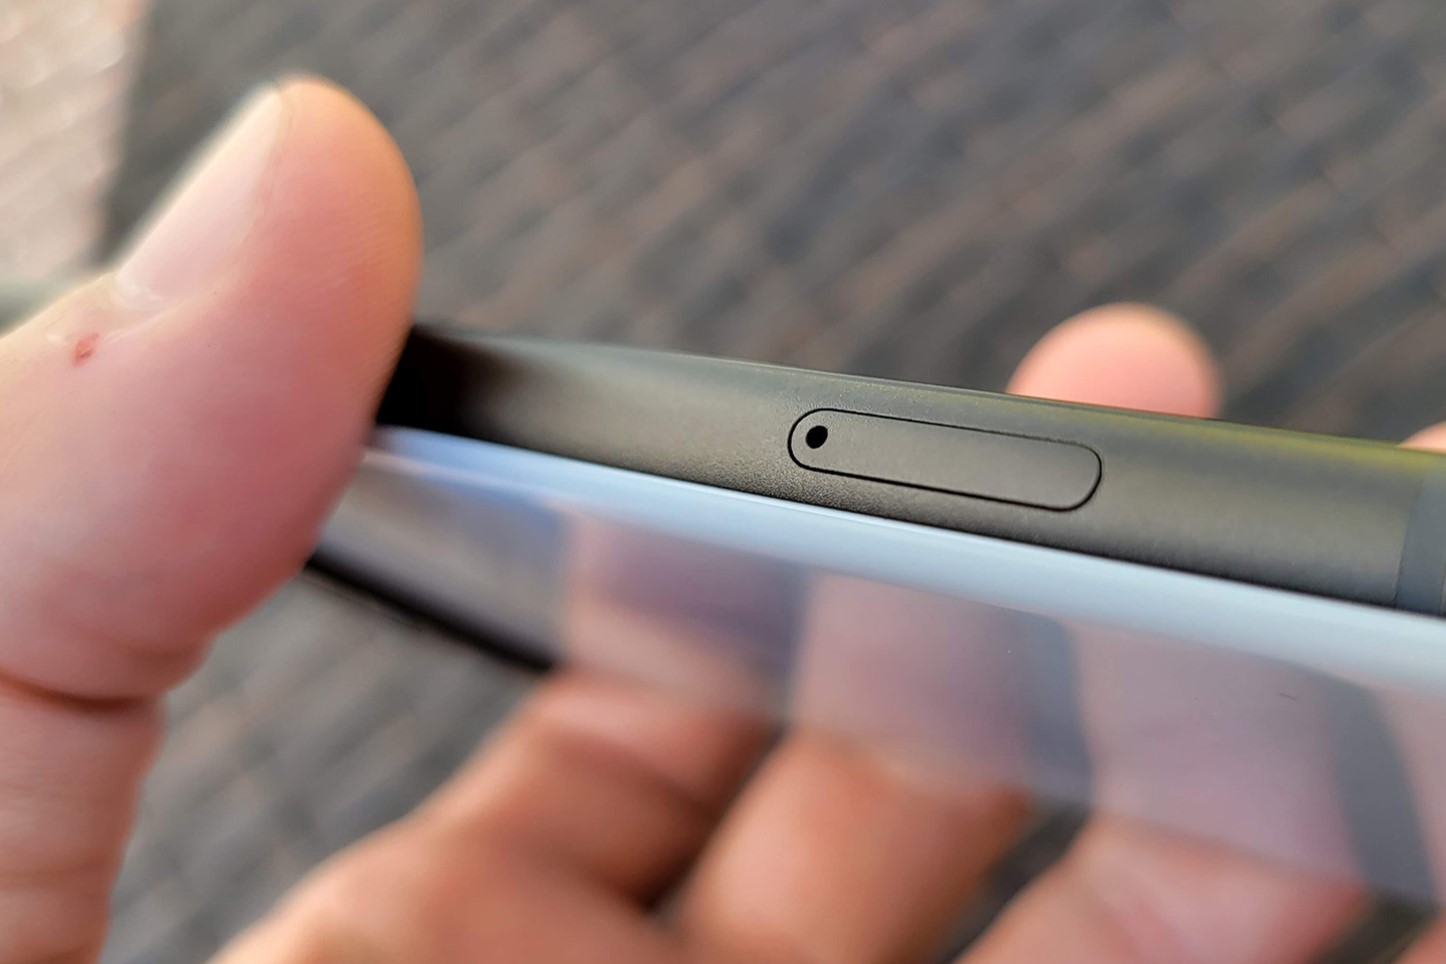
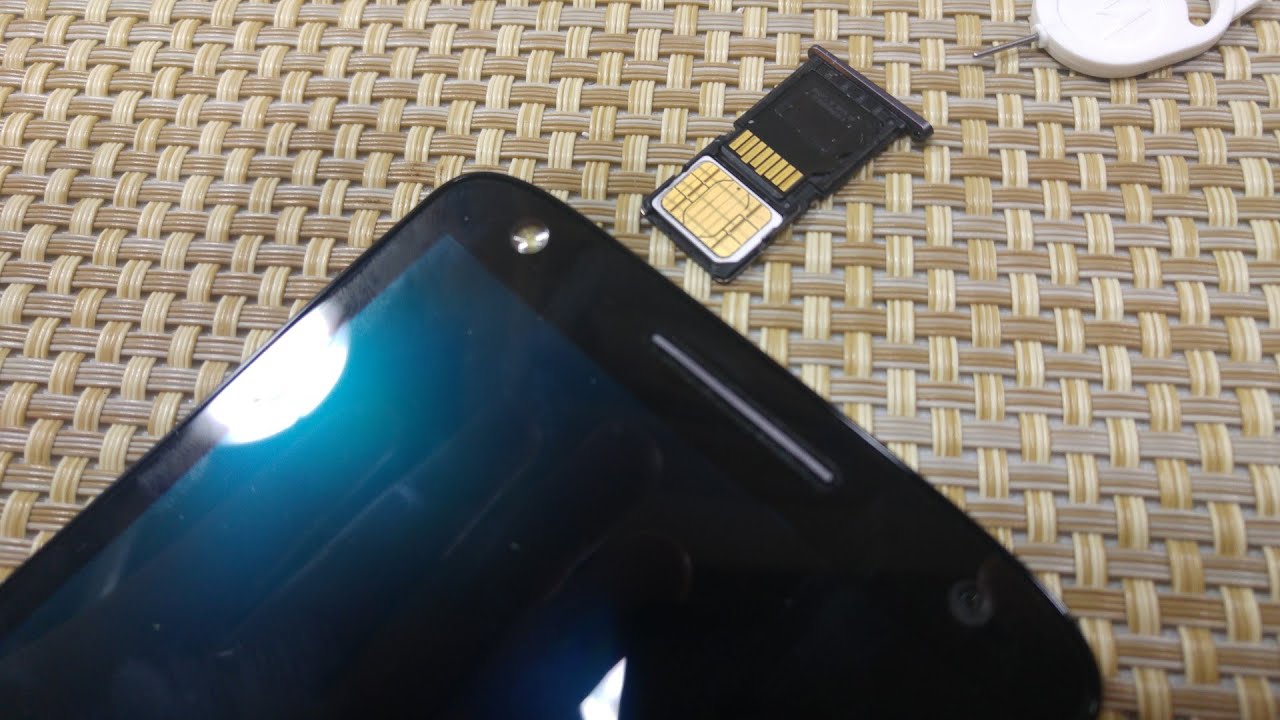
Step 3: Locate the SIM Card Tray
Locating the SIM card tray is a crucial step in the process of replacing the SIM card in your Droid Turbo. The SIM card tray houses the SIM card and ensures its secure placement within the device. To locate the SIM card tray, follow these steps:
-
Identify the SIM Card Tray Slot: The SIM card tray slot is typically situated on the side of the Droid Turbo. It may be located on the upper or lower edge, depending on the device's model. Look for a small pinhole or a tray with a tiny indentation, indicating the presence of the SIM card tray.
-
Use the SIM Card Eject Tool: Once you've identified the SIM card tray slot, take the SIM card eject tool from the gathered tools. This small, pointed tool is designed to fit into the pinhole on the SIM card tray, allowing for the tray's ejection from the device.
-
Insert the SIM Card Eject Tool: Gently insert the SIM card eject tool into the pinhole on the SIM card tray slot. Apply slight pressure to engage the internal mechanism, which will release the SIM card tray from its position within the Droid Turbo.
-
Carefully Remove the SIM Card Tray: Once the internal mechanism is activated, carefully pull the SIM card tray out of the Droid Turbo. The tray will slide out smoothly, revealing the compartment where the SIM card is housed.
By successfully locating the SIM card tray using these steps, you have completed a fundamental stage in the SIM card replacement process. The next steps will guide you through the removal of the old SIM card and the insertion of the new SIM card, allowing you to seamlessly transition to your updated mobile connectivity.
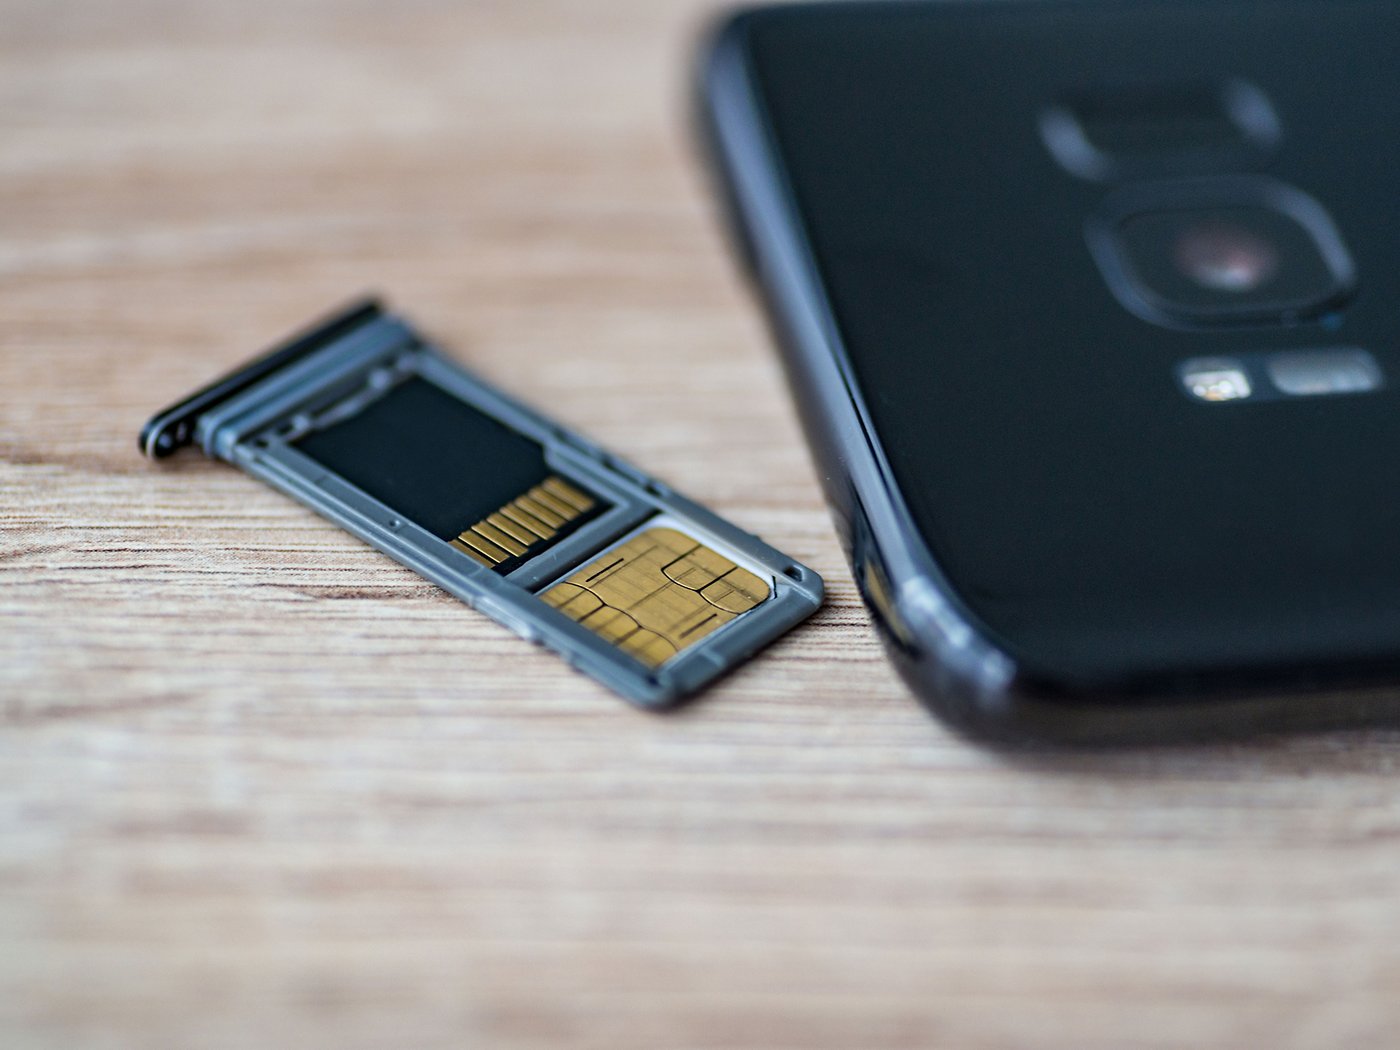
Step 4: Remove the SIM Card Tray
With the SIM card tray successfully located, the next crucial step is to carefully remove the SIM card tray from your Droid Turbo. This process requires precision and attention to detail to ensure the safe extraction of the tray without causing any damage to the device or the SIM card.
To remove the SIM card tray, follow these detailed steps:
-
Handle the Device Securely: Hold the Droid Turbo securely with one hand, ensuring a firm grip to maintain stability during the SIM card tray removal process. This will prevent any accidental slips or movements that could disrupt the procedure.
-
Gently Pull Out the SIM Card Tray: Using the SIM card eject tool or your fingers, gently pull the SIM card tray out of the device. Apply even pressure to ensure a smooth and controlled extraction, avoiding any abrupt movements that could potentially dislodge the SIM card or damage the tray.
-
Inspect the SIM Card Tray: As the tray is removed, take a moment to inspect it for any signs of damage or debris. Ensure that the tray is clean and free from any obstructions that could hinder the insertion of the new SIM card.
-
Set the Tray Aside: Once the SIM card tray is removed, place it on a clean and stable surface, ensuring that it is positioned securely to prevent any accidental displacement or damage.
By following these detailed steps, you have successfully removed the SIM card tray from your Droid Turbo, laying the groundwork for the subsequent stages of the SIM card replacement process. With the tray safely extracted, you are now ready to proceed to the next step, which involves removing the old SIM card from the tray in preparation for the insertion of the new SIM card.
Step 5: Remove the Old SIM Card
With the SIM card tray successfully removed from your Droid Turbo, the next critical step is to delicately remove the old SIM card from the tray. This process necessitates precision and care to ensure the safe extraction of the old SIM card without causing any damage to the card or the tray.
Follow these detailed steps to remove the old SIM card from the tray:
-
Inspect the Old SIM Card: Before proceeding with the removal, take a moment to inspect the old SIM card. Ensure that it is free from any visible damage, such as scratches, bends, or signs of wear. Additionally, check for any dirt or debris that may have accumulated on the surface of the SIM card.
-
Gently Eject the Old SIM Card: Using your fingers or a gentle, non-abrasive tool, such as the edge of a microfiber cloth, carefully push the old SIM card out from its slot within the SIM card tray. Apply light pressure and ensure that the movement is smooth and controlled to prevent any damage to the card.
-
Handle with Care: As the old SIM card is ejected, handle it with utmost care to avoid bending or scratching its delicate components. Hold the SIM card by its edges, avoiding contact with the metal contacts or the exposed circuitry.
-
Inspect the SIM Card Slot: After removing the old SIM card, take a moment to inspect the SIM card slot within the tray. Ensure that it is clean and free from any debris or foreign particles that may have accumulated during the card removal process.
-
Place the Old SIM Card Securely: Once the old SIM card has been removed, place it in a secure location, such as a SIM card holder or a protective case. This will prevent any accidental damage to the SIM card and ensure that it is readily available if needed in the future.
By meticulously following these steps, you have successfully removed the old SIM card from the tray of your Droid Turbo, preparing the tray for the insertion of the new SIM card. With the old SIM card safely removed, you are now ready to proceed to the next step, which involves the seamless insertion of the new SIM card into the SIM card tray.
Step 6: Insert the New SIM Card
With the old SIM card safely removed from the tray of your Droid Turbo, it's time to embark on the pivotal step of inserting the new SIM card. This process requires precision and attention to detail to ensure the seamless integration of the new SIM card into the device. Follow these detailed steps to insert the new SIM card into the SIM card tray:
-
Prepare the New SIM Card: Before inserting the new SIM card, carefully inspect it to ensure that it is free from any visible damage or deformities. Verify that the new SIM card is compatible with your Droid Turbo and aligns with the specific requirements of your chosen mobile carrier.
-
Position the New SIM Card: Orient the new SIM card so that it aligns with the shape and size of the designated slot within the SIM card tray. The SIM card will typically feature a notched corner or an icon indicating the correct orientation for insertion.
-
Gently Place the New SIM Card: With the correct orientation identified, carefully place the new SIM card into the designated slot within the SIM card tray. Apply light and even pressure to ensure that the SIM card fits snugly and securely within the tray.
-
Verify the Secure Placement: After inserting the new SIM card, visually inspect the tray to ensure that the card is properly seated and aligned within the slot. Confirm that the SIM card sits flush with the tray's surface, indicating a secure and accurate placement.
-
Handle with Care: Throughout the insertion process, handle the new SIM card with utmost care to prevent any damage to its delicate components. Avoid touching the metal contacts or the exposed circuitry, focusing on holding the card by its edges.
By meticulously following these steps, you have successfully inserted the new SIM card into the SIM card tray of your Droid Turbo. The secure placement of the new SIM card sets the stage for the seamless reinsertion of the SIM card tray into the device, marking a significant milestone in the overall process of replacing the SIM card. With the new SIM card securely in place, you are now prepared to proceed to the subsequent step, which involves reinserting the SIM card tray into your Droid Turbo.
Step 7: Reinsert the SIM Card Tray
With the new SIM card securely placed in the SIM card tray of your Droid Turbo, the next crucial step is to reinsert the tray into the device. This process requires precision and care to ensure the seamless integration of the tray, allowing the new SIM card to function effectively within the device. Follow these detailed steps to reinsert the SIM card tray into your Droid Turbo:
-
Position the SIM Card Tray: Hold the Droid Turbo securely and locate the slot where the SIM card tray will be reinserted. Ensure that the tray is oriented correctly, aligning it with the designated slot to facilitate a smooth insertion.
-
Align the Tray Correctly: Verify that the SIM card tray is aligned properly with the slot, ensuring that it sits flush with the device's exterior. Proper alignment is essential for the tray to slide in smoothly without any resistance.
-
Gently Slide In the Tray: With the SIM card tray correctly aligned, gently slide it back into the device. Apply even pressure to ensure a controlled and seamless insertion, avoiding any abrupt movements that could disrupt the placement of the tray.
-
Verify the Secure Fit: Once the tray is reinserted, visually inspect the device to ensure that the SIM card tray sits securely within the slot. Confirm that the tray is flush with the device's exterior, indicating a successful and secure fit.
-
Power On the Droid Turbo: After reinserting the SIM card tray, power on your Droid Turbo to initiate the device's startup sequence. Allow the device to fully power on, verifying that the new SIM card is recognized and activated within the system.
By meticulously following these steps, you have successfully reinserted the SIM card tray into your Droid Turbo, completing the crucial stage of the SIM card replacement process. The secure placement of the tray ensures the effective integration of the new SIM card, allowing you to harness the full potential of your updated mobile connectivity. With the tray securely in place and the device powered on, you have seamlessly transitioned to your new SIM card, unlocking a world of possibilities for enhanced network coverage and mobile services.
Now that the SIM card replacement process is complete, you can confidently enjoy the benefits of your updated SIM card within your Droid Turbo. Whether you've switched carriers, upgraded your mobile plan, or simply embraced a new SIM card, this comprehensive guide has empowered you to navigate the process with ease, ensuring a seamless transition to your updated mobile connectivity.
Step 8: Power On the Droid Turbo
With the SIM card tray successfully reinserted into your Droid Turbo, the final and pivotal step in the SIM card replacement process is to power on the device. This step initiates the device's startup sequence and allows it to recognize and activate the new SIM card, ensuring seamless integration and functionality. Follow these detailed steps to power on your Droid Turbo and complete the SIM card replacement process:
-
Press the Power Button: Locate the power button on your Droid Turbo, typically situated on the right-hand side of the device. Firmly press and hold the power button to initiate the device's startup sequence.
-
Observe the Startup Screen: As the device powers on, observe the startup screen for any indicators of the device recognizing the new SIM card. You may notice network connectivity symbols or carrier information appearing on the screen, signaling the successful activation of the new SIM card.
-
Wait for the Device to Initialize: Allow the Droid Turbo to complete its startup sequence, initializing the new SIM card within the system. During this process, the device establishes connectivity with the network and ensures that the new SIM card is fully functional.
-
Unlock the Device: Once the device has completed its startup sequence, unlock the Droid Turbo using your preferred security method, such as a PIN, pattern, or fingerprint scan. This will grant you access to the device's home screen and mobile functionalities.
-
Verify Network Connectivity: After unlocking the device, verify that the new SIM card has been successfully activated by checking for network connectivity. Ensure that the device recognizes the new SIM card and displays the appropriate network signal strength and mobile data indicators.
By meticulously following these steps, you have successfully powered on your Droid Turbo, completing the final stage of the SIM card replacement process. The device's recognition and activation of the new SIM card signify the successful integration of the updated mobile connectivity, allowing you to enjoy enhanced network coverage and seamless mobile services.
With the Droid Turbo powered on and the new SIM card fully functional, you have seamlessly transitioned to your updated mobile connectivity, unlocking a world of possibilities for improved network performance and enhanced mobile experiences. Congratulations on successfully completing the SIM card replacement process for your Droid Turbo, empowering yourself with the flexibility to adapt to your evolving mobile needs.
Conclusion
In conclusion, the process of replacing the SIM card in your Droid Turbo is a pivotal endeavor that empowers you to adapt to evolving mobile needs, whether it involves upgrading to a new SIM card, switching carriers, or seeking improved network coverage. By following this comprehensive step-by-step guide, you have gained the knowledge and confidence to navigate the SIM card replacement process with ease and precision.
Throughout this journey, you have gathered the necessary tools, powered off the Droid Turbo, located and removed the SIM card tray, delicately handled the old SIM card, seamlessly inserted the new SIM card, reinserted the SIM card tray, and powered on the device to activate the new SIM card. Each step was meticulously outlined to ensure a seamless transition to your updated mobile connectivity.
The ability to replace the SIM card in your Droid Turbo grants you the freedom to explore new mobile opportunities, embrace enhanced data plans, and adapt to changing network requirements. This process empowers you to stay connected without limitations, allowing you to leverage the full potential of your mobile device.
By embracing this guide, you have demonstrated your commitment to maintaining and optimizing the performance of your Droid Turbo. The meticulous care and attention to detail applied throughout the SIM card replacement process underscore your dedication to ensuring a seamless and successful transition to the new SIM card.
As you power on your Droid Turbo and witness the recognition and activation of the new SIM card, take a moment to appreciate the achievement and the newfound possibilities that await. Your proactive approach to managing your mobile connectivity exemplifies your readiness to embrace change and leverage the latest advancements in mobile technology.
With the SIM card replacement process now complete, you can confidently enjoy the benefits of your updated SIM card within your Droid Turbo. Whether you've switched carriers, upgraded your mobile plan, or simply embraced a new SIM card, this comprehensive guide has empowered you to navigate the process with ease, ensuring a seamless transition to your updated mobile connectivity.
As you embark on this next phase of your mobile journey, remember that you hold the key to unlocking a world of possibilities with your Droid Turbo. Embrace the flexibility and adaptability that come with replacing the SIM card, and continue to explore the myriad opportunities that await in the ever-evolving landscape of mobile connectivity.