Introduction
Removing the SIM card from your Moto X is a simple yet essential task that may be required when switching to a new device, changing carriers, or troubleshooting connectivity issues. The Subscriber Identity Module (SIM) card serves as the key to accessing your mobile network, storing crucial information such as contacts, text messages, and network preferences. Therefore, knowing how to safely remove and handle the SIM card is fundamental for every Moto X user.
In this comprehensive guide, we will walk you through the step-by-step process of removing the SIM card from your Moto X. Whether you are a seasoned mobile device enthusiast or a novice user, this guide is designed to provide clear and concise instructions to ensure a seamless SIM card removal experience. By following these steps, you can safeguard your SIM card from damage and successfully complete the removal process without any hiccups.
So, without further ado, let's delve into the world of Moto X and uncover the simple yet crucial steps to remove the SIM card from this iconic device. Whether you're preparing for an upgrade, troubleshooting network issues, or simply exploring the inner workings of your device, this guide is here to equip you with the knowledge and confidence to tackle the task at hand. Let's get started!
Step 1: Locate the SIM card tray
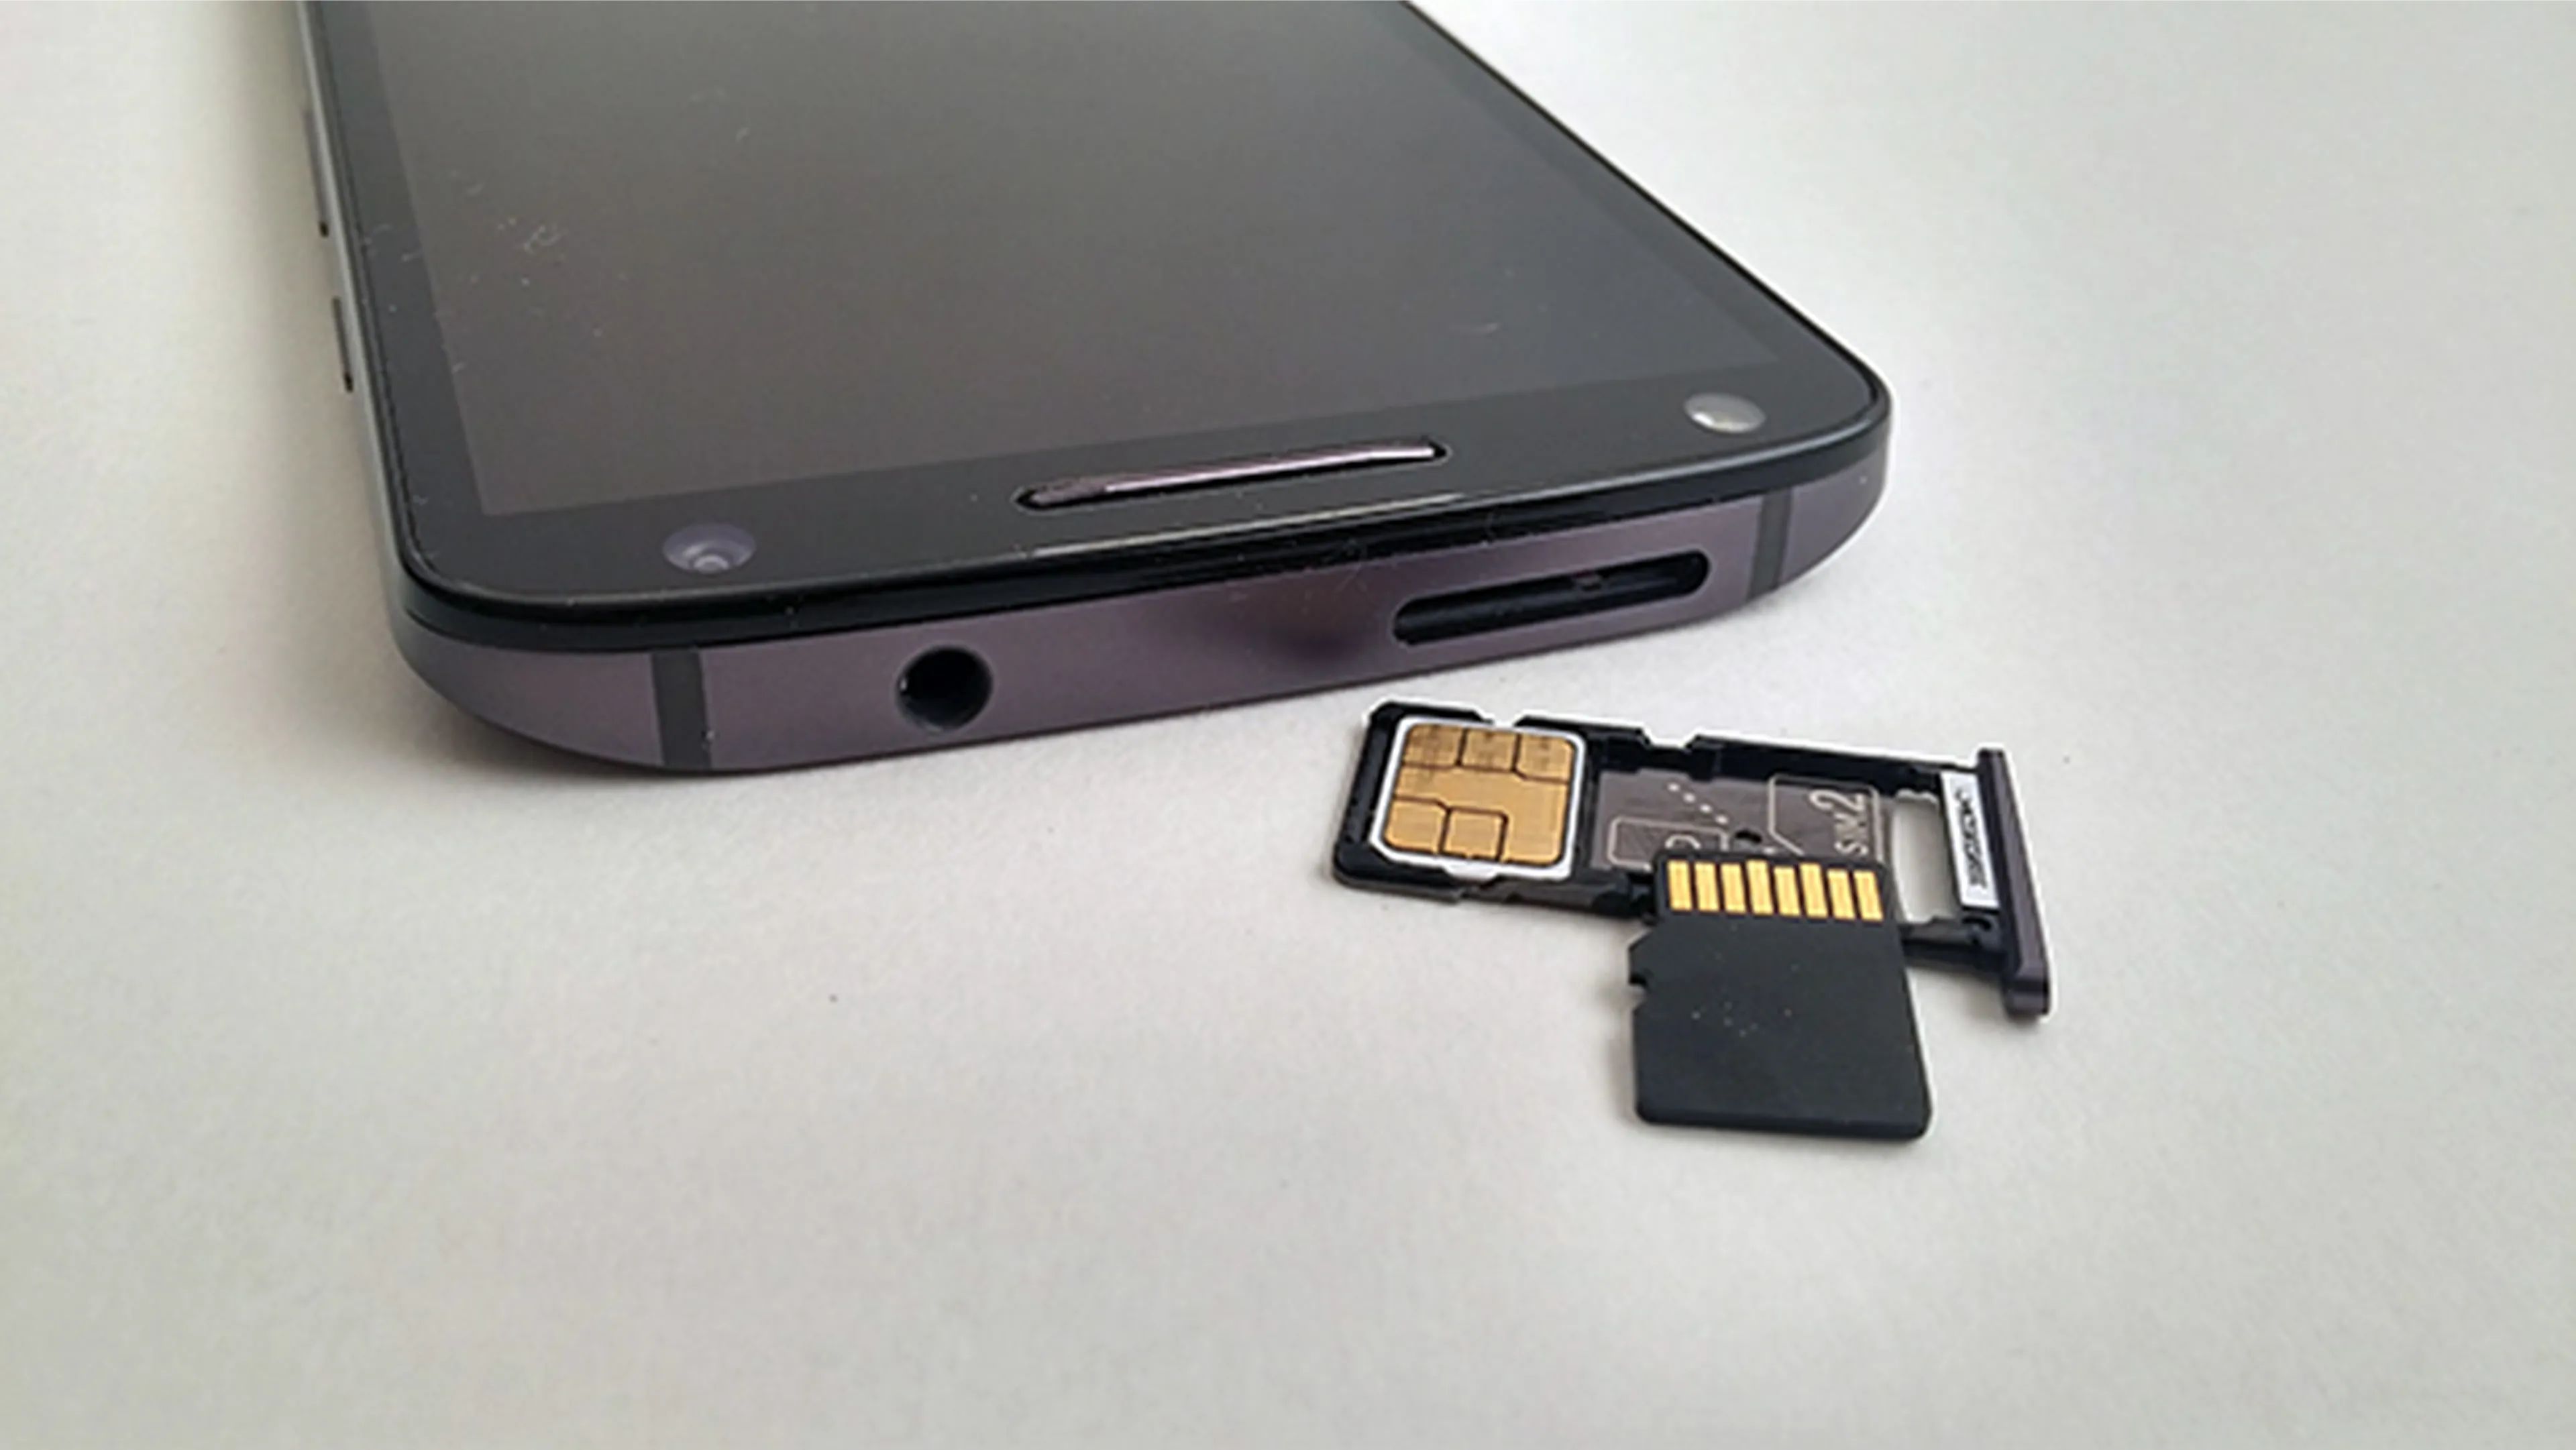
The first step in removing the SIM card from your Moto X is to locate the SIM card tray. The SIM card tray is a small, discreet component of the device that houses the SIM card and facilitates its insertion and removal. To begin the process, you will need to identify the precise location of the SIM card tray on your Moto X.
-
Identify the SIM Card Tray Slot: Depending on the model of your Moto X, the SIM card tray may be located on the side or the top of the device. Take a close look at the edges of your phone, and you should be able to spot a small pinhole or a narrow slot. This is where the SIM card tray is nestled, awaiting your attention.
-
Use the SIM Ejection Tool: Most Moto X devices come with a specialized SIM ejection tool, a small pin-like instrument that is designed for precisely this purpose. It is often included in the original packaging of the device. If you have the SIM ejection tool at hand, you are ready to proceed with the next step. If not, fret not; a paperclip or a similarly slender and sturdy object can serve as an alternative.
-
Exercise Caution: Before proceeding, it's important to handle your device with care. Ensure that your Moto X is powered off to prevent any potential damage to the device or the SIM card. Additionally, take a moment to familiarize yourself with the location of the volume and power buttons, as they may be situated near the SIM card tray and should be avoided during the removal process.
By following these steps, you can successfully locate the SIM card tray on your Moto X, setting the stage for the subsequent steps in the SIM card removal process. With the SIM card tray in sight, you are now poised to move on to the next crucial step: ejecting the SIM card tray to access the SIM card within.
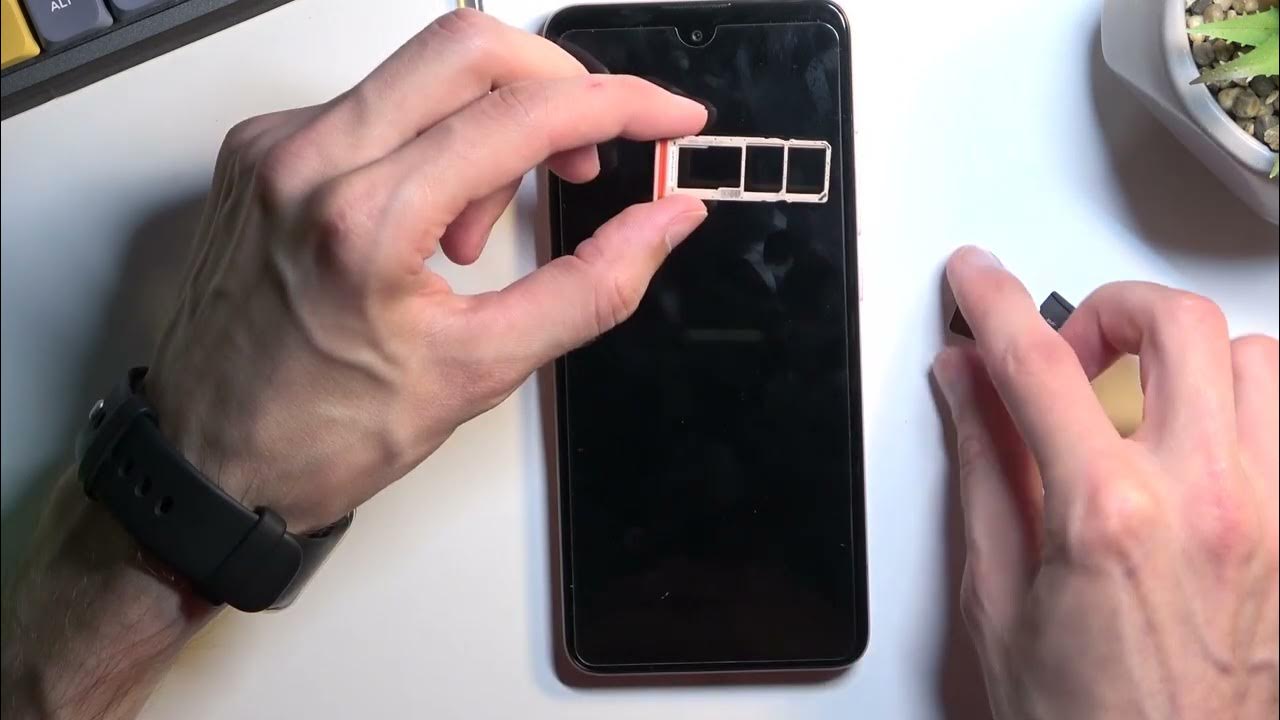
Step 2: Eject the SIM card tray
Ejecting the SIM card tray is a pivotal step in the process of removing the SIM card from your Moto X. This step requires precision and a gentle touch to ensure that the SIM card tray is safely released without causing any damage to the device or the SIM card itself.
To begin, locate the SIM ejection tool that was included with your Moto X or prepare an alternative such as a paperclip. Once you have the ejection tool in hand, carefully insert the tool into the small pinhole or slot adjacent to the SIM card tray. Apply gentle pressure while maintaining a steady hand, and you should feel a subtle resistance as the tool engages with the internal mechanism of the SIM card tray.
Upon encountering this resistance, exert a slight but steady force to initiate the ejection process. As you do so, you will notice the SIM card tray gradually protruding from the device. It is crucial to exercise patience and avoid applying excessive force, as this could potentially damage the SIM card tray or the internal components of your Moto X.
Once the SIM card tray is partially ejected, delicately pull it out from the device, taking care not to dislodge or jostle the SIM card housed within. The SIM card tray should slide out smoothly, revealing the SIM card nestled within its designated slot.
It's important to note that the SIM card tray may vary in design and orientation based on the specific model of your Moto X. Therefore, it is advisable to handle the tray with care and avoid any unnecessary twisting or bending motions that could compromise its integrity.
By following these precise steps, you can successfully eject the SIM card tray from your Moto X, gaining access to the SIM card and paving the way for the final step: removing the SIM card from the tray itself. With the SIM card tray in hand, you are now ready to proceed to the next phase of the SIM card removal process, ensuring a seamless and hassle-free experience.
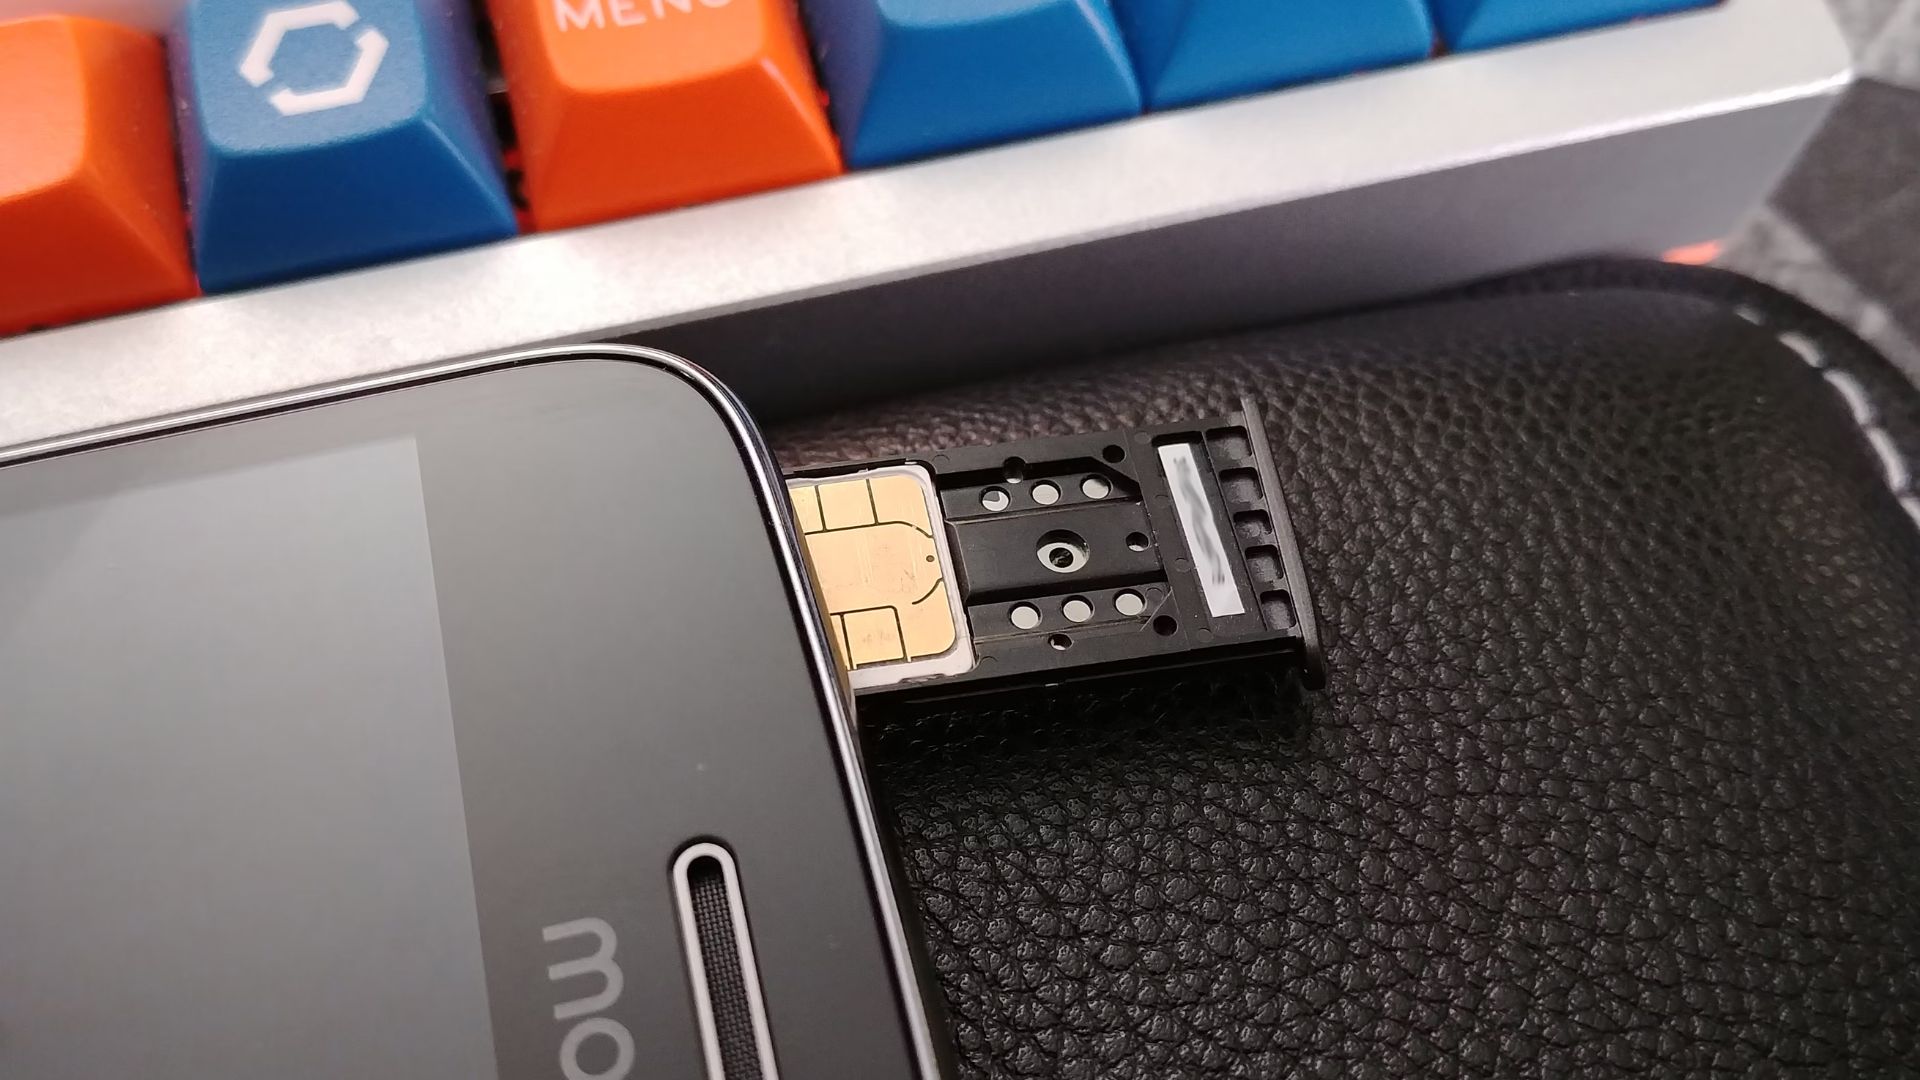
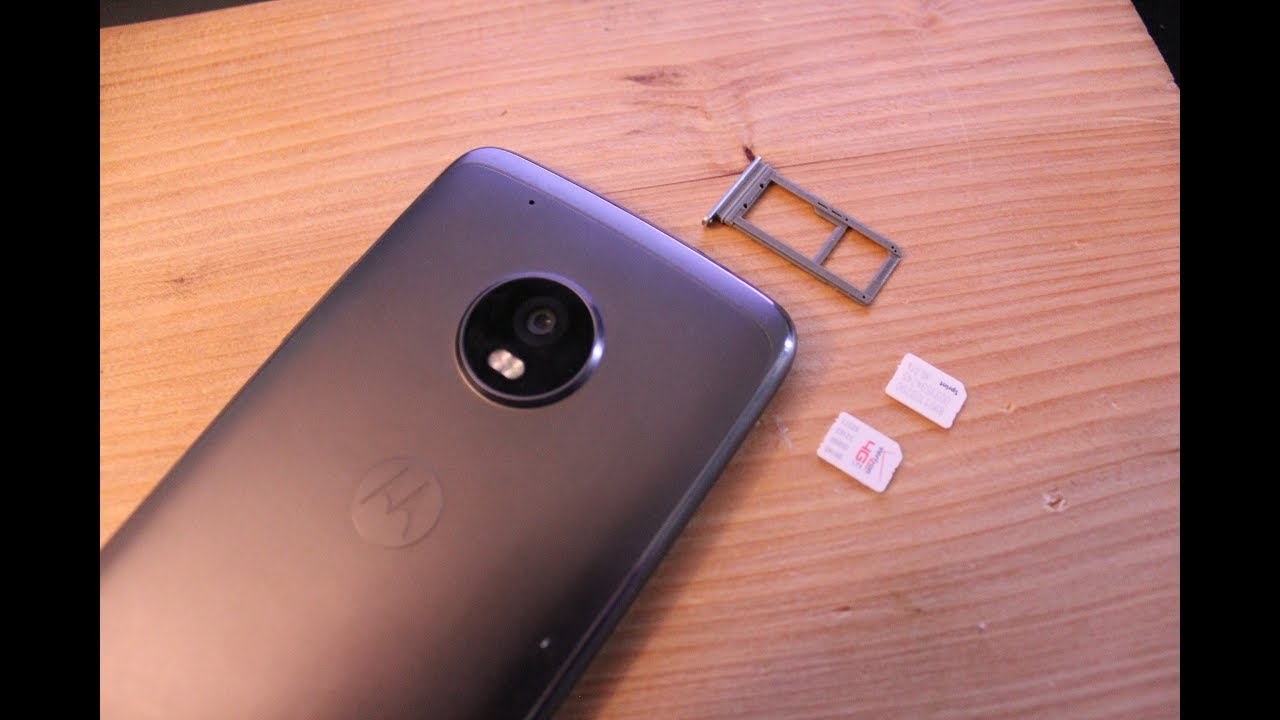
Step 3: Remove the SIM card
With the SIM card tray in hand, the next critical step is to carefully remove the SIM card from its designated slot within the tray. This task demands precision and gentle handling to ensure the safe extraction of the SIM card without causing any damage or compromising its functionality.
Upon inspecting the SIM card tray, you will notice a small recess or cavity that securely houses the SIM card. Gently maneuver the tray to orient it in a well-lit environment, allowing you to clearly observe the position of the SIM card within its slot. It's essential to exercise caution and avoid any abrupt movements that could dislodge or damage the SIM card during the removal process.
Using your fingertips or a non-abrasive tool, delicately grasp the SIM card and gently slide it out from the tray's slot. It's crucial to maintain a steady and controlled grip, ensuring that the SIM card is smoothly released without encountering any resistance or undue force. By employing a gentle yet firm touch, you can effectively detach the SIM card from the tray, preparing it for safekeeping or subsequent use in another device.
As you remove the SIM card, take a moment to inspect its surface for any signs of damage or debris. Ensure that the metallic contacts on the SIM card are clean and free from any foreign particles that could impede its functionality. If necessary, use a soft, dry cloth to gently wipe the SIM card, removing any accumulated dust or smudges that may affect its performance.
Once the SIM card has been successfully removed from the tray, it's advisable to store it in a secure location, such as a SIM card holder or the original packaging, to prevent loss or damage. Whether you intend to transfer the SIM card to a new device or store it as a backup, safeguarding it from physical harm and environmental factors is essential to preserving its integrity and usability.
By following these meticulous steps, you can confidently remove the SIM card from your Moto X, completing the essential process of SIM card removal with precision and care. With the SIM card safely in your possession, you are well-equipped to proceed with your mobile device endeavors, whether it involves transitioning to a new device, changing carriers, or simply ensuring the proper maintenance of your SIM card.
Conclusion
Congratulations! You've successfully navigated the intricate process of removing the SIM card from your Moto X with precision and care. By following the step-by-step guide outlined in this comprehensive tutorial, you've gained valuable insights into the essential task of SIM card removal, empowering you to handle this process with confidence and expertise.
As you reflect on the journey of SIM card removal from your Moto X, it's important to acknowledge the significance of this endeavor. The SIM card serves as the gateway to your mobile network, housing a wealth of vital information and personal data. By mastering the art of SIM card removal, you've demonstrated a keen understanding of your device's inner workings and the meticulous attention required to safeguard the integrity of the SIM card.
Furthermore, through the careful execution of each step, from locating the SIM card tray to delicately removing the SIM card, you've exemplified the virtues of patience and precision. These attributes are invaluable in the realm of mobile device maintenance and serve as a testament to your dedication to preserving the functionality and longevity of your Moto X.
As you prepare to embark on the next phase of your mobile device journey, whether it involves upgrading to a new device, transferring your SIM card to another compatible handset, or embarking on a new mobile network experience, the knowledge and expertise gained from this SIM card removal guide will undoubtedly serve you well. Armed with the ability to confidently handle the intricacies of SIM card removal, you are well-prepared to tackle a myriad of mobile device-related endeavors with poise and assurance.
In closing, the successful removal of the SIM card from your Moto X signifies a milestone in your journey as a discerning mobile device user. The skills acquired through this process not only enhance your technical proficiency but also instill a sense of empowerment and self-reliance in managing your device's essential components.
With this newfound expertise, you are poised to navigate the dynamic landscape of mobile devices with confidence, knowing that you possess the knowledge and capability to handle pivotal tasks with finesse. As you continue to explore the boundless possibilities offered by your Moto X and other mobile devices, may the skills honed through this SIM card removal guide serve as a beacon of proficiency and assurance in your mobile device endeavors.