Introduction
Properly inserting a SIM card into your Samsung Galaxy S5 is a crucial step in setting up your device for communication and connectivity. The SIM card, short for Subscriber Identity Module, is a small chip that securely stores your mobile subscriber information. This information includes your unique mobile identity, network authentication, and personal data, allowing you to make calls, send text messages, and access mobile data on your device.
Ensuring that the SIM card is correctly inserted into your Samsung Galaxy S5 is essential for seamless network connectivity and communication. A properly inserted SIM card enables your device to recognize and authenticate with your mobile network, granting you access to voice, messaging, and data services. Moreover, a secure and stable connection between the SIM card and the device's SIM card slot is vital for maintaining uninterrupted mobile communication and data access.
In this guide, we will walk you through the step-by-step process of properly inserting a SIM card into your Samsung Galaxy S5. Whether you are setting up your device for the first time or replacing an existing SIM card, following these instructions will ensure that your Samsung Galaxy S5 is ready to connect to your mobile network and provide you with a seamless communication experience. Let's dive into the details of locating the SIM card slot and correctly inserting the SIM card into your Samsung Galaxy S5.
Step 1: Locate the SIM card slot
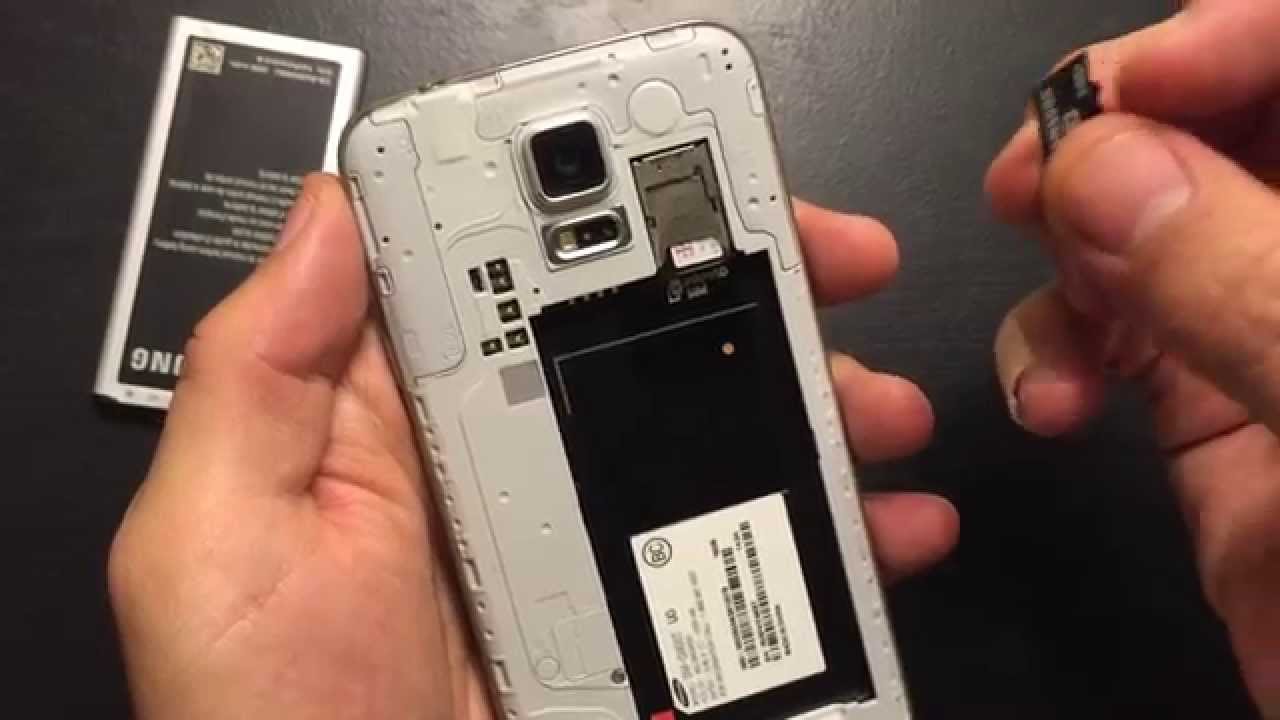
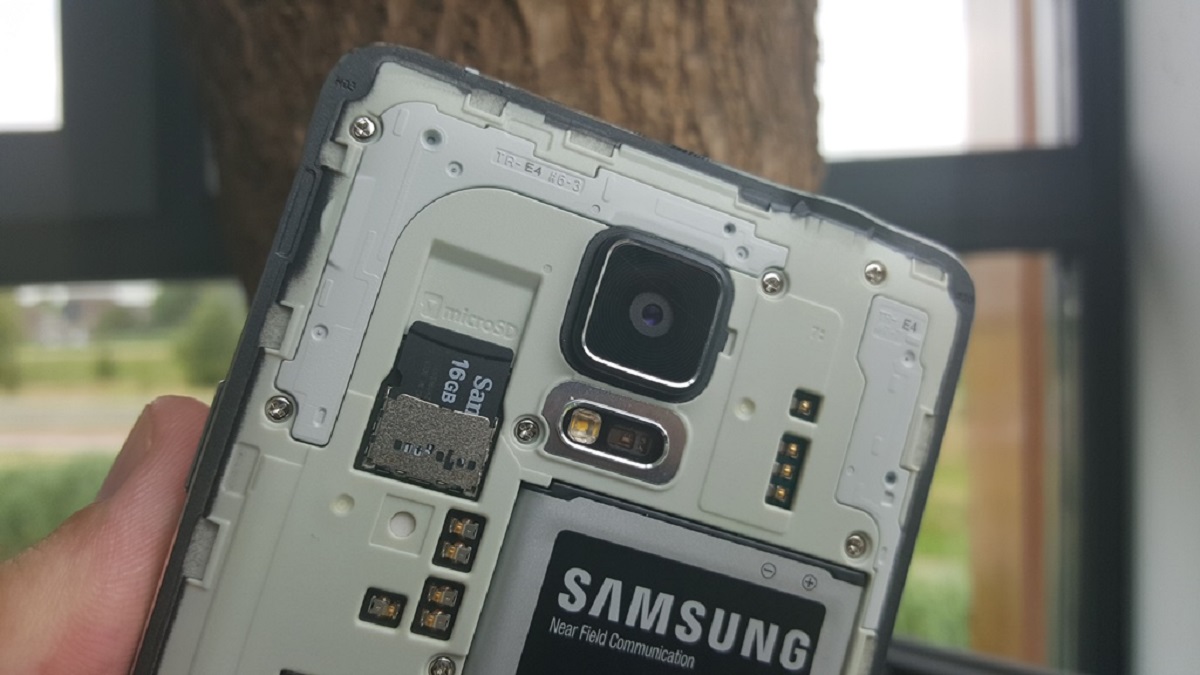
Before you can insert a SIM card into your Samsung Galaxy S5, you need to locate the SIM card slot. The SIM card slot on the Galaxy S5 is typically located on the side of the device. To find it, you will need to look for a small tray or slot along the edge of the phone. It's important to handle the device with care while locating the SIM card slot to avoid accidental damage.
To start, hold your Samsung Galaxy S5 securely in your hand, ensuring that the screen is facing you. Next, examine the sides of the device, paying close attention to the edges. You should be on the lookout for a small, rectangular slot or tray with a pinhole or a small notch adjacent to it. This slot is designed to accommodate the SIM card tray and is where you will insert the SIM card.
Once you have located the SIM card slot, take a moment to familiarize yourself with its position and orientation in relation to the rest of the device. The SIM card slot is often positioned near the top or bottom edge of the phone, depending on the specific model and design of the Samsung Galaxy S5.
It's important to note that the SIM card slot may be accompanied by other slots or buttons, such as the volume controls or the power button. Take care to identify the SIM card slot accurately to avoid confusion with other openings or features on the device.
By locating the SIM card slot, you have taken the first step towards preparing your Samsung Galaxy S5 for SIM card insertion. With the position of the slot identified, you are now ready to proceed with the subsequent steps of the SIM card insertion process, ensuring that your device is properly set up for network connectivity and communication.
Now that you have successfully located the SIM card slot on your Samsung Galaxy S5, you are ready to power off the device in preparation for the next step of inserting the SIM card.
Step 2: Power off the device
Before proceeding with the insertion of the SIM card into your Samsung Galaxy S5, it is essential to power off the device. Powering off the device ensures that you can safely handle the phone and perform the necessary steps to insert the SIM card without any risk of disruption or damage.
To power off your Samsung Galaxy S5, begin by pressing and holding the power button located on the side or top of the device. Depending on the specific model and configuration of your Galaxy S5, the power button may be situated on the right or left side of the phone, or at the top edge. Once you have located the power button, press and hold it until the power options menu appears on the screen.
On the power options menu, you will typically see the "Power off" or "Turn off" option displayed. Tap on this option to initiate the device shutdown process. As the device powers off, the screen will display a shutting down animation, indicating that the phone is in the process of turning off. It is important to wait for the device to completely power down before proceeding to the next step of inserting the SIM card.
Ensuring that your Samsung Galaxy S5 is powered off before inserting the SIM card is crucial for several reasons. Firstly, powering off the device prevents any potential interference or disruption during the SIM card insertion process, allowing you to focus on the task at hand without any distractions. Additionally, turning off the device reduces the risk of accidental errors or damage that may occur if the phone is powered on while handling the SIM card and the SIM card tray.
By powering off your Samsung Galaxy S5, you are taking a proactive step to create a safe and stable environment for the SIM card insertion process. This simple yet essential precaution sets the stage for the subsequent steps, ensuring that you can confidently and securely proceed with inserting the SIM card into your device.
With the Samsung Galaxy S5 powered off, you are now ready to move on to the next step of the SIM card insertion process, which involves using the SIM eject tool to access the SIM card tray. This pivotal step will bring you closer to successfully integrating the SIM card with your device, setting the stage for seamless network connectivity and communication capabilities.
Step 3: Insert the SIM eject tool
With your Samsung Galaxy S5 powered off, the next crucial step in the process of inserting a SIM card involves using the SIM eject tool to access the SIM card tray. The SIM eject tool, a small and pointed instrument provided by the device manufacturer, is specifically designed to facilitate the removal of the SIM card tray from the SIM card slot.
To begin, locate the SIM eject tool that was included in the original packaging of your Samsung Galaxy S5. The SIM eject tool is typically a compact, metallic pin with a narrow, pointed end. It may be enclosed in a small holder or packaging within the device box. Once you have retrieved the SIM eject tool, hold it securely between your fingers, ensuring that you have a firm grip on the tool's handle and that the pointed end is easily accessible for use.
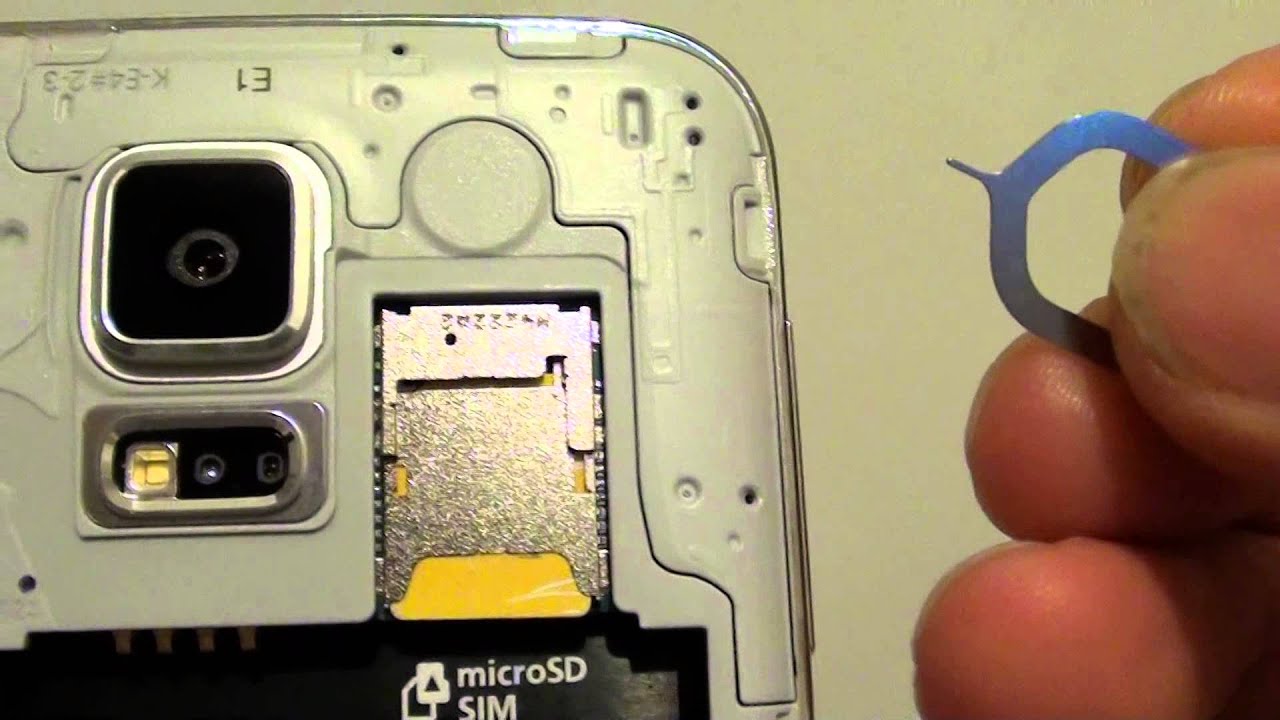
Next, examine the SIM card slot on your Samsung Galaxy S5 to identify the small pinhole or notch adjacent to the slot. This pinhole or notch is where you will insert the SIM eject tool to initiate the removal of the SIM card tray. Carefully position the pointed end of the SIM eject tool into the pinhole, ensuring that it fits snugly and securely into the opening.
With the SIM eject tool inserted into the pinhole, apply gentle pressure to push the tool further into the opening. As you do so, you will feel a slight resistance, indicating that the tool's tip has engaged with the internal mechanism of the SIM card tray. Continue to exert gentle pressure, maintaining a steady and controlled approach to avoid any excessive force that may cause damage to the device.
As the SIM eject tool interacts with the internal mechanism, you will notice that the SIM card tray begins to disengage from the SIM card slot. Slowly and carefully withdraw the SIM eject tool from the pinhole, ensuring that the tray remains partially ejected from the device. Once the SIM card tray is partially released, you can proceed to remove it completely from the device, preparing it for the insertion of the SIM card.
By successfully using the SIM eject tool to access the SIM card tray, you have completed a critical step in the process of inserting a SIM card into your Samsung Galaxy S5. The careful and precise use of the SIM eject tool sets the stage for the subsequent steps, allowing you to seamlessly integrate the SIM card with your device and prepare it for network connectivity and communication capabilities.
Step 4: Remove the SIM card tray
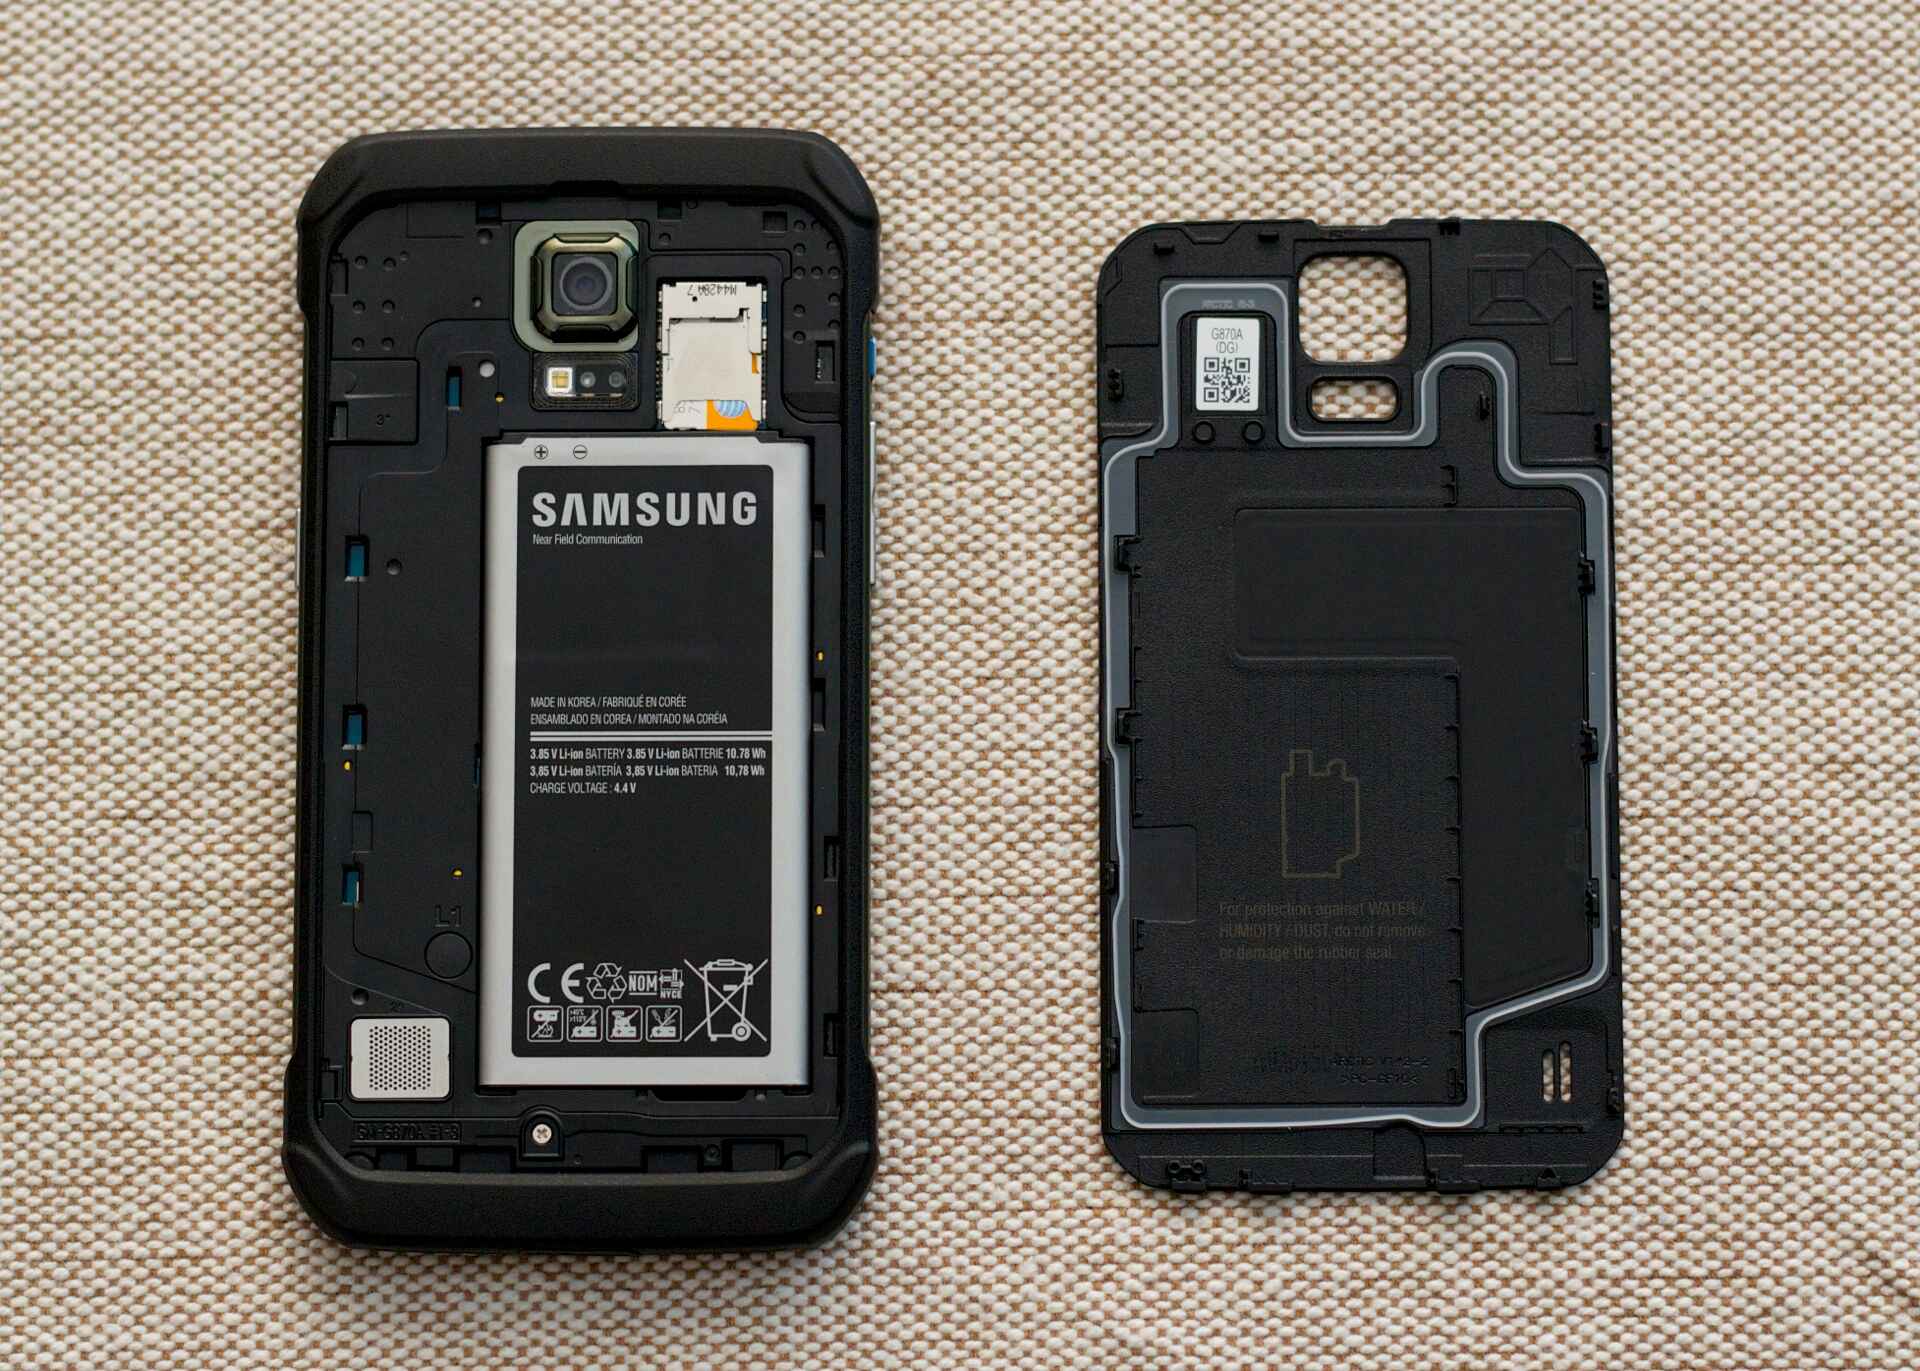
With the SIM card tray partially ejected from the SIM card slot, you are now ready to carefully remove it from your Samsung Galaxy S5. The SIM card tray is a small, rectangular component that securely holds the SIM card and facilitates its integration with the device. Removing the SIM card tray is a crucial step in the process of inserting a SIM card, as it provides access to the designated slot where the SIM card will be placed.
To remove the SIM card tray, gently grasp the exposed edge of the tray that protrudes from the SIM card slot. Exercise caution and ensure a firm yet gentle grip to avoid applying excessive force or causing damage to the tray. Once you have securely held the edge of the tray, carefully pull it out of the device, maintaining a steady and controlled motion.
As you withdraw the SIM card tray, pay close attention to any resistance or obstacles that may impede its movement. It is important to proceed with care and precision, ensuring that the tray is smoothly and evenly removed from the SIM card slot. Avoid any sudden or jerky movements that may disrupt the tray's alignment or cause unintended damage to the device.
Upon successfully removing the SIM card tray, take a moment to inspect it for any signs of damage or irregularities. Verify that the tray is in good condition, free from any physical defects or obstructions that may hinder the insertion of the SIM card. Additionally, examine the interior of the SIM card slot to ensure that it is clean and free from debris that could interfere with the proper placement of the SIM card.
By carefully removing the SIM card tray, you have completed a pivotal step in the process of preparing your Samsung Galaxy S5 for the insertion of a SIM card. The successful removal of the tray sets the stage for the subsequent step of inserting the SIM card into the designated slot, aligning it correctly for seamless integration with the device.
With the SIM card tray removed, you are now ready to proceed to the next step, which involves the precise insertion of the SIM card into the designated slot within your Samsung Galaxy S5. This essential step will bring you closer to establishing a secure and reliable connection between the SIM card and your device, paving the way for seamless network connectivity and communication capabilities.
Step 5: Insert the SIM card
With the SIM card tray removed from your Samsung Galaxy S5, you are now ready to proceed with the pivotal step of inserting the SIM card into the designated slot. The SIM card, a small and rectangular chip that securely stores your mobile subscriber information, is a crucial component that enables your device to connect to your mobile network and access communication services.
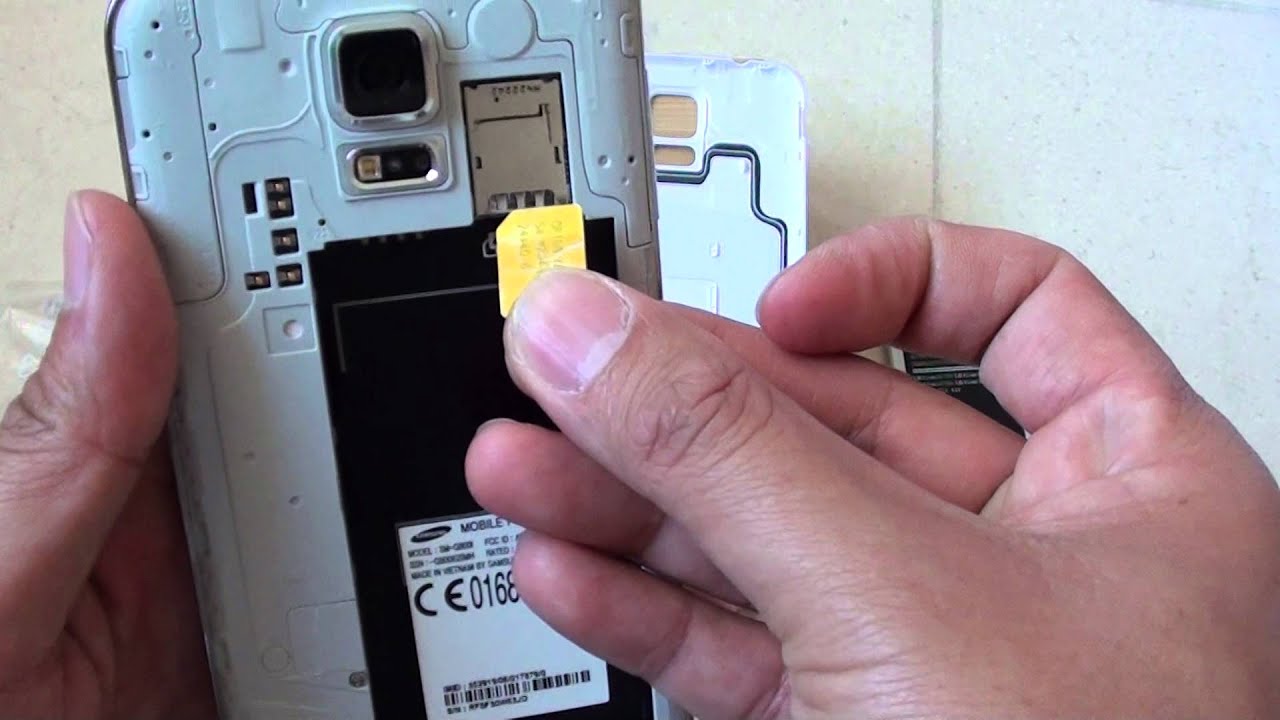
To begin the process of inserting the SIM card, carefully retrieve the SIM card from its packaging or the previous SIM card tray. The SIM card is a small, flat chip with beveled edges and a metallic contact surface. It is essential to handle the SIM card with care, ensuring that you do not bend or damage it during the insertion process.
Next, orient the SIM card in the correct position for insertion. Take note of the notched corner or the shape of the SIM card, as this will guide you in aligning it properly within the SIM card slot. Position the SIM card so that the notched corner or the designated orientation matches the corresponding layout within the SIM card slot, ensuring a secure and accurate fit.
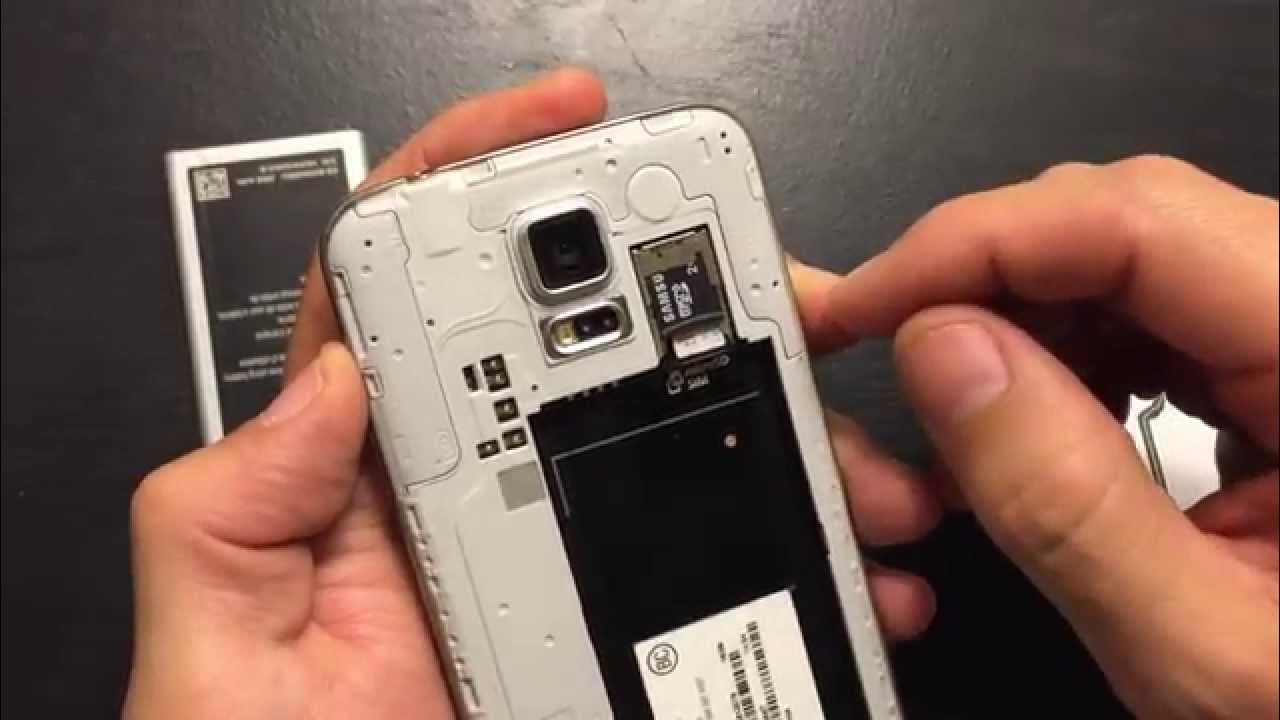
With the SIM card correctly oriented, carefully place it onto the designated area within the SIM card tray. Ensure that the SIM card rests flat and level within the tray, aligning it precisely with the contours of the designated slot. Exercise caution to avoid applying excessive force or causing any damage to the SIM card during the placement process.
As you position the SIM card within the tray, take a moment to verify that it is securely seated and aligned within the designated slot. The SIM card should fit snugly and evenly within the tray, with the metallic contact surface facing downward and the notched corner or designated orientation positioned correctly.
By successfully inserting the SIM card into the designated slot within your Samsung Galaxy S5, you have completed a critical step in the process of preparing your device for network connectivity and communication services. The secure and accurate placement of the SIM card sets the stage for the subsequent step of reinserting the SIM card tray into the device, bringing you closer to establishing a seamless and reliable connection between the SIM card and your Samsung Galaxy S5.
With the SIM card securely inserted, you are now ready to proceed to the next step, which involves reinserting the SIM card tray into the SIM card slot and preparing your Samsung Galaxy S5 for the final stages of the SIM card insertion process. This essential step will bring you closer to seamlessly integrating the SIM card with your device, setting the stage for uninterrupted network connectivity and communication capabilities.
Step 6: Reinsert the SIM card tray
With the SIM card securely inserted into the designated slot of your Samsung Galaxy S5, the next crucial step is to reinsert the SIM card tray back into the device. The SIM card tray, a small and rectangular component that securely holds the SIM card, plays a pivotal role in maintaining the proper positioning and alignment of the SIM card within the device. By carefully reinserting the tray, you will ensure that the SIM card is securely integrated with your Samsung Galaxy S5, setting the stage for seamless network connectivity and communication capabilities.
To begin the process of reinserting the SIM card tray, carefully align the tray with the corresponding slot on the device. Take note of the orientation and positioning of the tray, ensuring that it aligns accurately with the SIM card slot. The tray should fit smoothly and evenly into the slot, with the edges and contours aligning seamlessly with the surrounding components of the device.
Once the SIM card tray is correctly aligned, gently and steadily slide it back into the SIM card slot. Exercise caution and precision to ensure that the tray smoothly reenters the device without any resistance or obstruction. Avoid applying excessive force or hurried movements, as these may disrupt the alignment of the tray or cause unintended damage to the device.
As you carefully reinsert the SIM card tray, take a moment to verify that it is securely positioned within the SIM card slot. The tray should fit snugly and evenly, with its edges flush against the device's frame. Ensure that the tray sits securely within the slot, maintaining the proper alignment and positioning to support the integrated SIM card.
By successfully reinserting the SIM card tray into your Samsung Galaxy S5, you have completed a critical step in the process of finalizing the SIM card insertion. The secure and accurate placement of the tray ensures that the SIM card is firmly integrated with the device, setting the stage for uninterrupted network connectivity and communication capabilities.
With the SIM card tray securely reinserted, you have successfully completed the essential steps of properly inserting a SIM card into your Samsung Galaxy S5. The careful and precise execution of each step has prepared your device for seamless network connectivity and communication services, ensuring that you can confidently utilize the full range of capabilities offered by your Samsung Galaxy S5.
Step 7: Power on the device
With the SIM card securely inserted and the SIM card tray repositioned within the Samsung Galaxy S5, the final step in the process of properly inserting a SIM card involves powering on the device. Powering on the device initiates the boot-up sequence, allowing the Samsung Galaxy S5 to recognize the integrated SIM card and establish a connection with the mobile network. This critical step sets the stage for seamless network connectivity and communication capabilities, enabling you to leverage the full functionality of your device.
To power on your Samsung Galaxy S5, locate the power button on the side or top of the device, depending on the specific model and configuration. With a firm yet gentle press, activate the power button to initiate the device startup process. As the device powers on, you will notice the screen illuminating and displaying the Samsung logo, indicating that the boot-up sequence has commenced.
During the startup process, the Samsung Galaxy S5 will perform a series of internal checks and configurations to prepare the device for operation. It will recognize the presence of the inserted SIM card and establish a secure connection with the mobile network, enabling you to access voice, messaging, and data services seamlessly.
As the device completes the startup process, you will be prompted to enter any necessary credentials, such as a PIN or unlock pattern, to access the device's functionalities. Once you have successfully authenticated and unlocked the device, you will have full access to the range of features and capabilities offered by the Samsung Galaxy S5.
Powering on the device after inserting the SIM card marks the culmination of the SIM card insertion process, affirming that your Samsung Galaxy S5 is ready to deliver reliable and uninterrupted network connectivity and communication services. By following the step-by-step instructions for properly inserting a SIM card, you have ensured that your device is fully equipped to support your mobile communication needs, allowing you to stay connected and engaged with ease.
With the Samsung Galaxy S5 powered on and fully operational, you can now enjoy the seamless connectivity and communication capabilities facilitated by the integrated SIM card. Whether making calls, sending text messages, or accessing mobile data, your Samsung Galaxy S5 is primed to deliver a smooth and efficient communication experience, ensuring that you can leverage its full potential for both personal and professional use.
Conclusion
In conclusion, properly inserting a SIM card into your Samsung Galaxy S5 is a fundamental aspect of setting up your device for seamless network connectivity and communication. By following the step-by-step process outlined in this guide, you have successfully prepared your Samsung Galaxy S5 to recognize and authenticate with your mobile network, granting you access to essential voice, messaging, and data services.
The process began with locating the SIM card slot, a critical step that familiarized you with the physical positioning of the slot on your device. This initial step set the stage for the subsequent actions, ensuring that you could confidently proceed with the SIM card insertion process.
Powering off the device was the next essential step, creating a safe and stable environment for handling the SIM card and the SIM card tray. By powering off your Samsung Galaxy S5, you mitigated the risk of potential disruption or damage during the insertion process, setting the foundation for a smooth and uninterrupted experience.
Using the SIM eject tool to access the SIM card tray was a pivotal step that allowed you to safely remove the tray from the device, providing access to the designated slot for the SIM card. This precise and controlled action ensured that the SIM card insertion process could proceed seamlessly, setting the stage for the integration of the SIM card with your Samsung Galaxy S5.
Removing the SIM card tray and subsequently inserting the SIM card into the designated slot were critical steps that required careful handling and accurate positioning. By successfully completing these actions, you ensured that the SIM card was securely integrated with your device, laying the groundwork for stable network connectivity and communication capabilities.
Reinserting the SIM card tray and powering on the device marked the final stages of the SIM card insertion process. These concluding steps affirmed that your Samsung Galaxy S5 was fully equipped to deliver reliable and uninterrupted network connectivity and communication services, allowing you to leverage its full potential for both personal and professional use.
In summary, the proper insertion of a SIM card into your Samsung Galaxy S5 is an essential prerequisite for unlocking the device's full range of communication capabilities. By following the detailed instructions provided in this guide, you have taken a proactive step towards ensuring that your Samsung Galaxy S5 is ready to serve as a reliable and efficient communication tool, empowering you to stay connected and engaged with ease.