Introduction
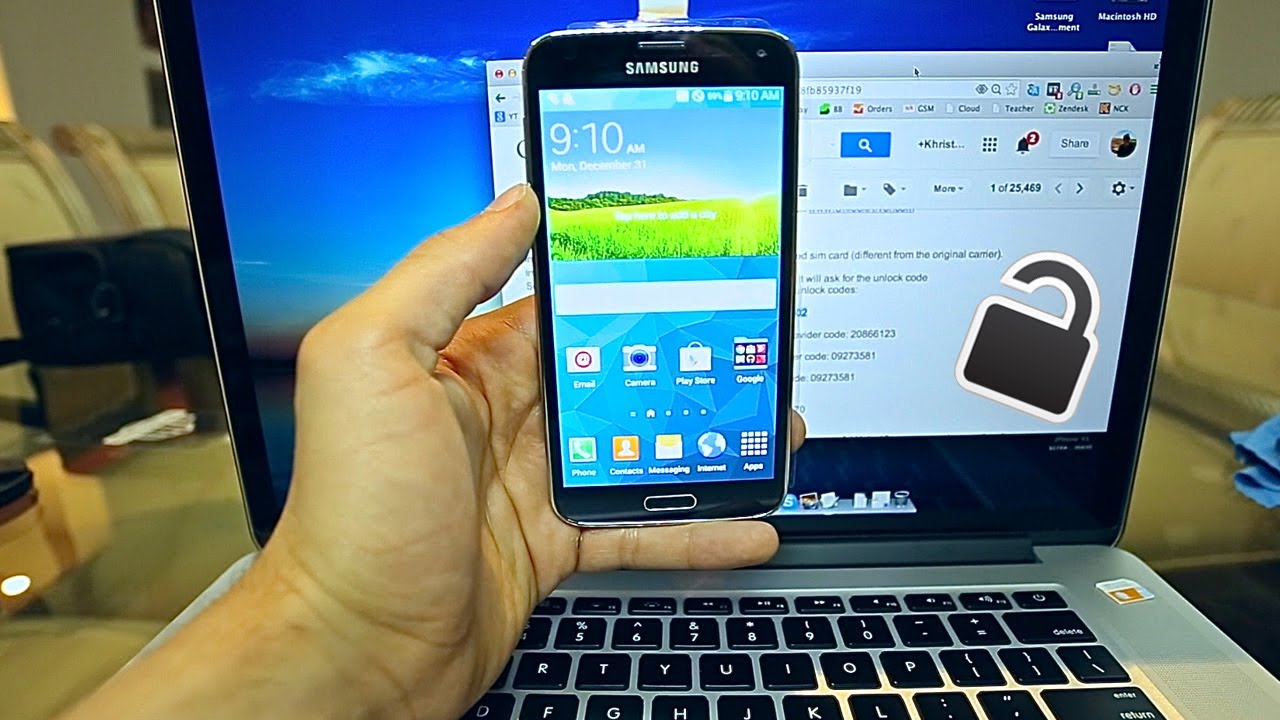
Inserting a SIM card into your Samsung Galaxy S5 is a fundamental step in setting up your device for communication and connectivity. The SIM card, which stands for Subscriber Identity Module, is a small, portable memory chip that stores the key information needed to identify a mobile subscriber. It enables the device to connect to a mobile network, allowing users to make calls, send text messages, and access mobile data services.
The process of inserting a SIM card into your Samsung Galaxy S5 is relatively straightforward, yet it is crucial to ensure it is done correctly to avoid any potential issues with network connectivity. Whether you are setting up your device for the first time or replacing an existing SIM card, this comprehensive guide will walk you through the step-by-step process, ensuring that you can seamlessly integrate the SIM card into your Samsung Galaxy S5.
By following the instructions outlined in this guide, you will gain the knowledge and confidence to successfully insert a SIM card into your Samsung Galaxy S5, empowering you to harness the full potential of your mobile device. Let's dive into the detailed steps to seamlessly integrate your SIM card into the Samsung Galaxy S5.
Step 1: Locate the SIM card slot
The first step in inserting a SIM card into your Samsung Galaxy S5 is to locate the SIM card slot on the device. The SIM card slot is typically situated on the side of the phone. To begin, hold your Samsung Galaxy S5 securely and examine the edges of the device. You should look for a small slot or compartment that can accommodate the SIM card.
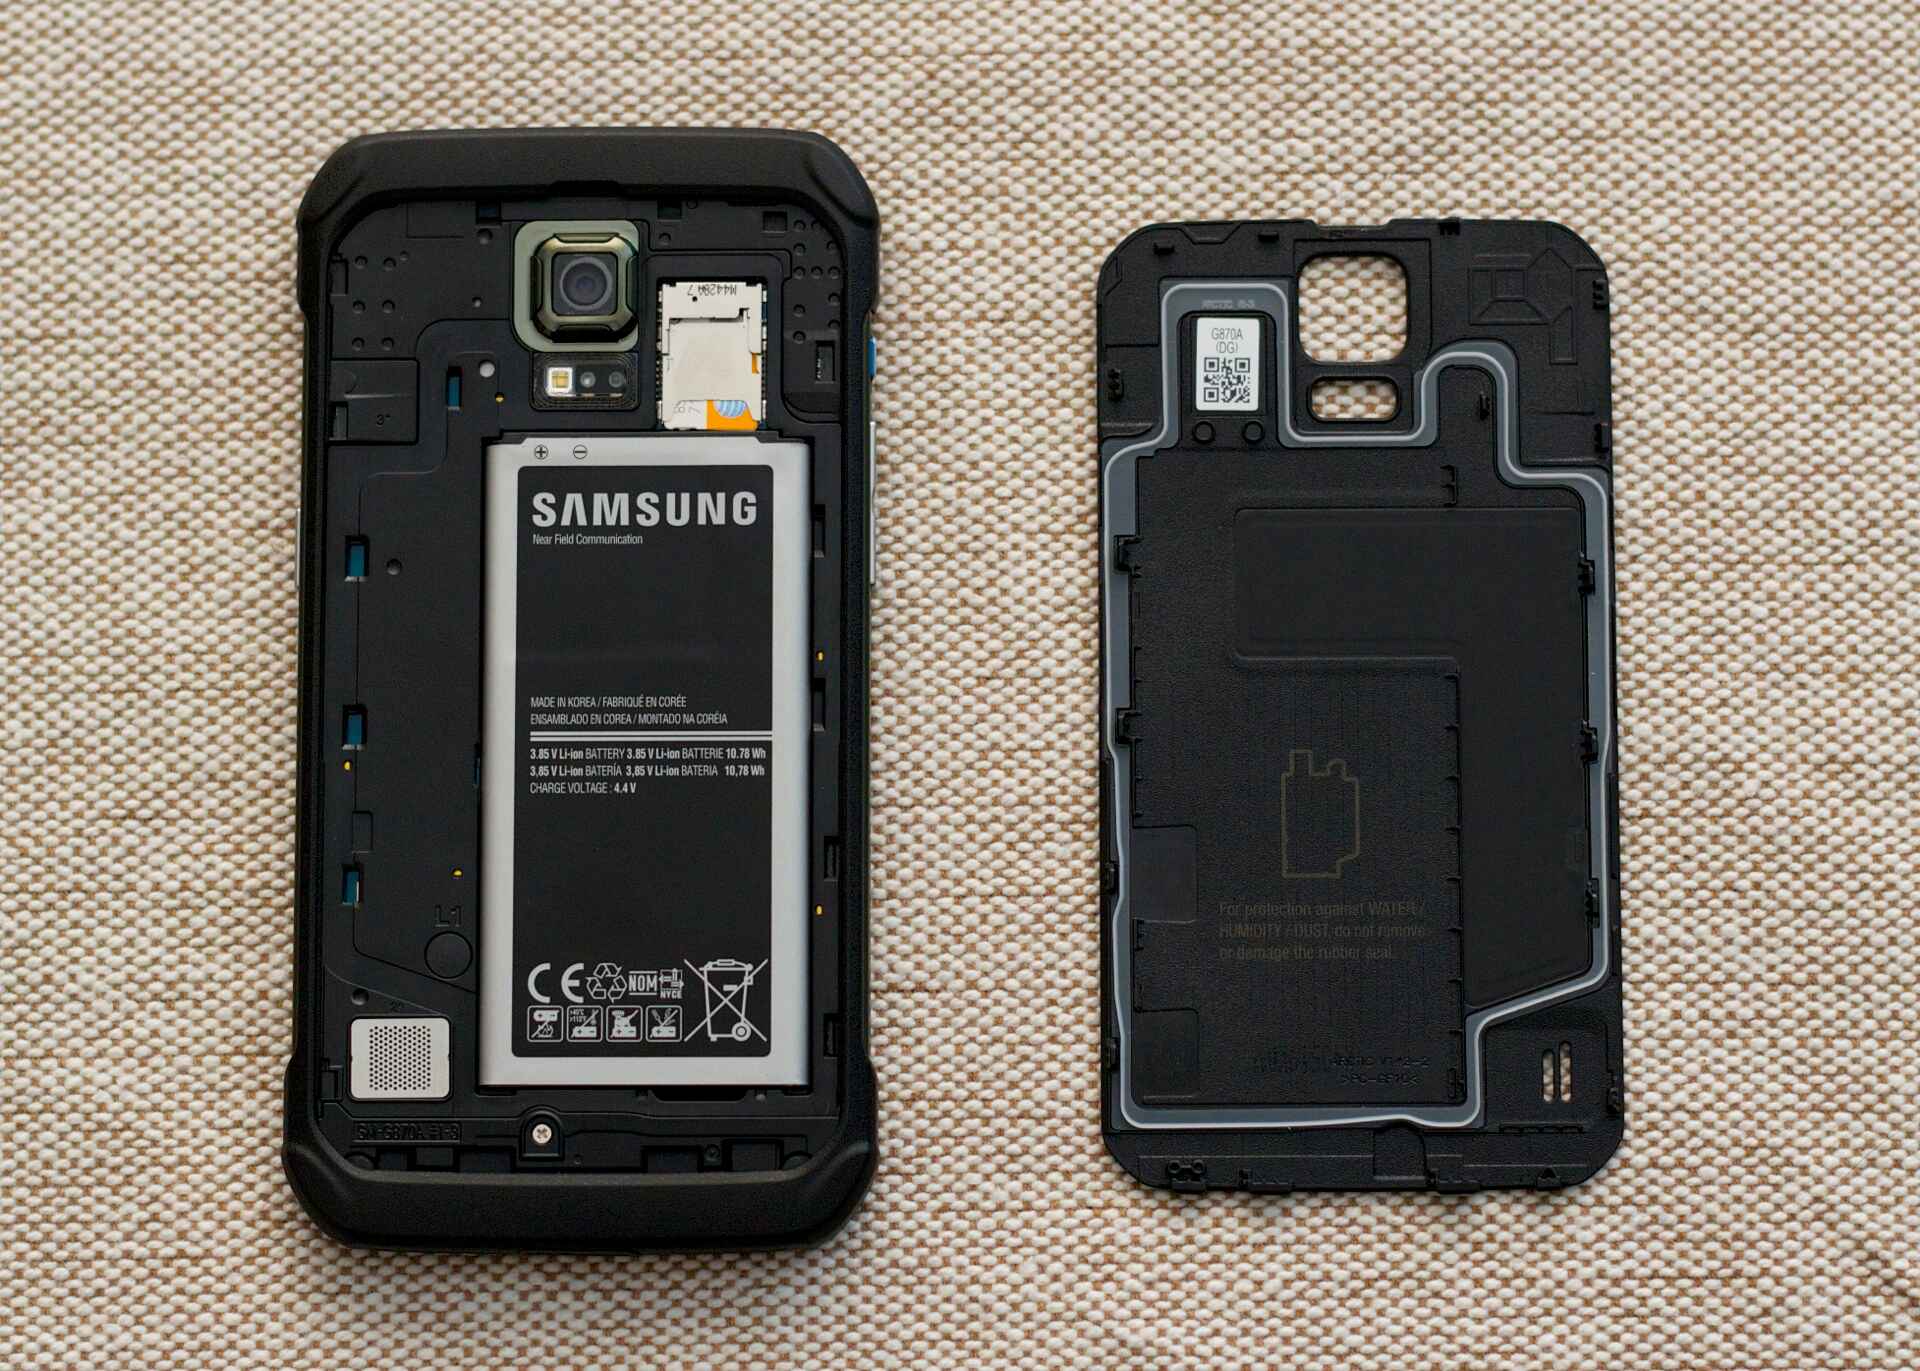
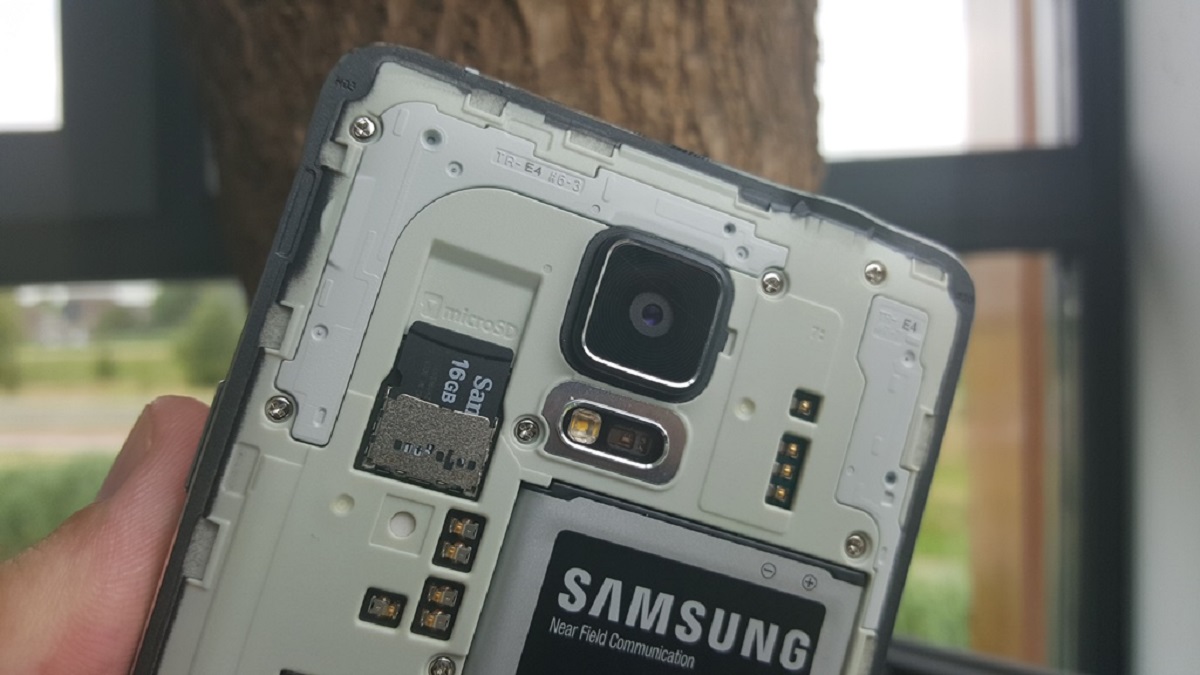
Upon close inspection, you will find a small pinhole or a tiny groove near the top or side of the device. This is the location of the SIM card slot. The Samsung Galaxy S5 features a removable back cover, allowing access to the battery and the SIM card slot. To access the slot, you will need to remove the back cover of the device. Once the back cover is removed, you will notice the SIM card slot adjacent to the battery compartment.
It is essential to handle the back cover with care as it is designed to protect the internal components of the device. Gently apply pressure to the designated area on the back cover and slide it downwards or to the side, following the specific instructions outlined in the user manual. As the back cover is removed, the SIM card slot will be revealed, usually positioned above the battery compartment.
Upon locating the SIM card slot, take a moment to familiarize yourself with its size and shape. The slot will be designed to accommodate a SIM card, which is a small, rectangular chip. Before proceeding to the next step, ensure that the SIM card slot is free from any debris or obstructions that may hinder the insertion process.
Once you have successfully located the SIM card slot and familiarized yourself with its positioning and size, you are ready to proceed to the next step in the process of inserting a SIM card into your Samsung Galaxy S5.
Step 2: Eject the SIM card tray
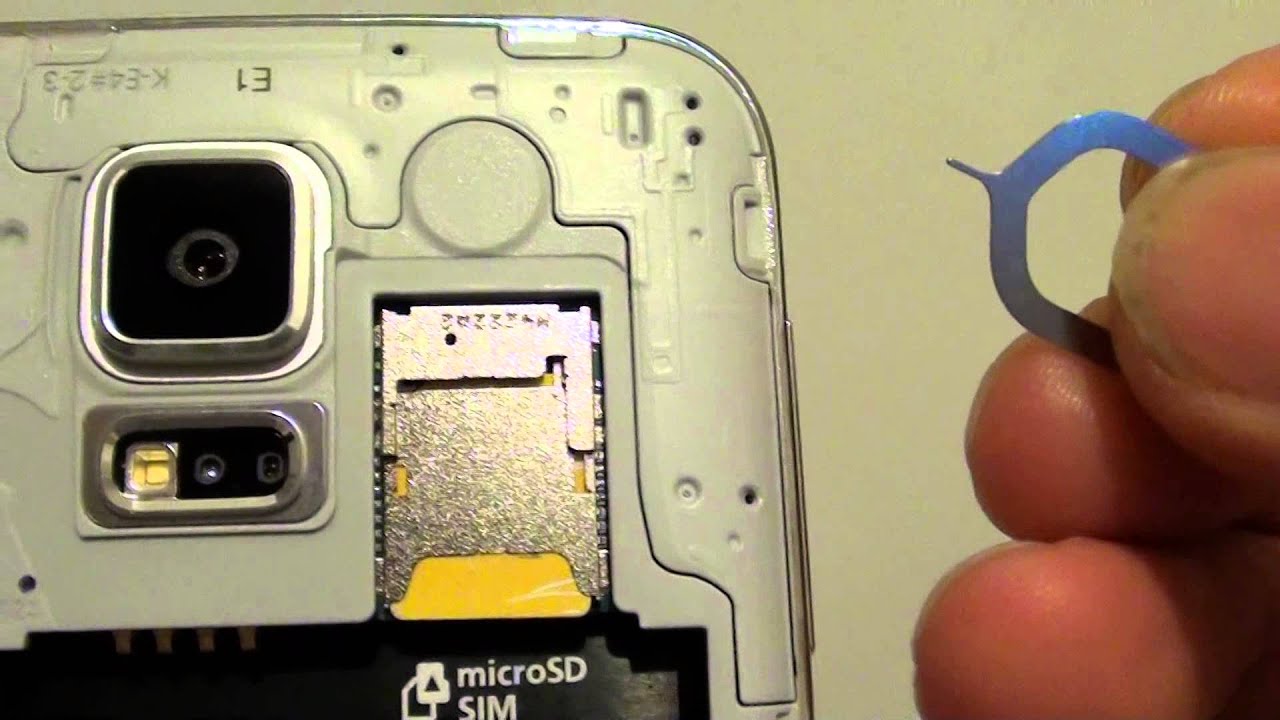
Ejecting the SIM card tray is a crucial step in the process of inserting a SIM card into your Samsung Galaxy S5. The SIM card tray is designed to securely hold the SIM card in place within the device, and ejecting it allows for the seamless insertion of the SIM card. To begin this step, you will need the SIM card ejection tool, which is typically provided by the manufacturer and can also be obtained from third-party retailers if it is not available.
The SIM card ejection tool is a small, pointed instrument that is specifically designed for ejecting the SIM card tray from the Samsung Galaxy S5. It is essential to use this tool rather than attempting to use a substitute, as using the incorrect tool may cause damage to the device or the SIM card tray.
Once you have the SIM card ejection tool in hand, locate the small pinhole adjacent to the SIM card slot on your Samsung Galaxy S5. This pinhole is designed to accommodate the SIM card ejection tool and facilitate the ejection of the SIM card tray. Gently insert the pointed end of the SIM card ejection tool into the pinhole, ensuring that it fits snugly into the opening.
Apply gentle pressure to the tool, exerting a slight amount of force to activate the mechanism that releases the SIM card tray. As you do so, you will feel a subtle resistance, indicating that the SIM card tray is being ejected from the device. Continue to apply steady pressure until the SIM card tray is partially ejected from the slot.
Once the SIM card tray is partially ejected, carefully remove it from the device using your fingers. Take care to handle the SIM card tray and the SIM card itself with caution, as they are delicate components that must be handled gently to avoid any damage.
With the SIM card tray successfully removed from the Samsung Galaxy S5, you have completed the essential step of ejecting the tray in preparation for inserting the SIM card. This paves the way for the subsequent step of seamlessly inserting the SIM card into your device, enabling you to fully utilize the communication and connectivity features of your Samsung Galaxy S5.
Step 3: Insert the SIM card
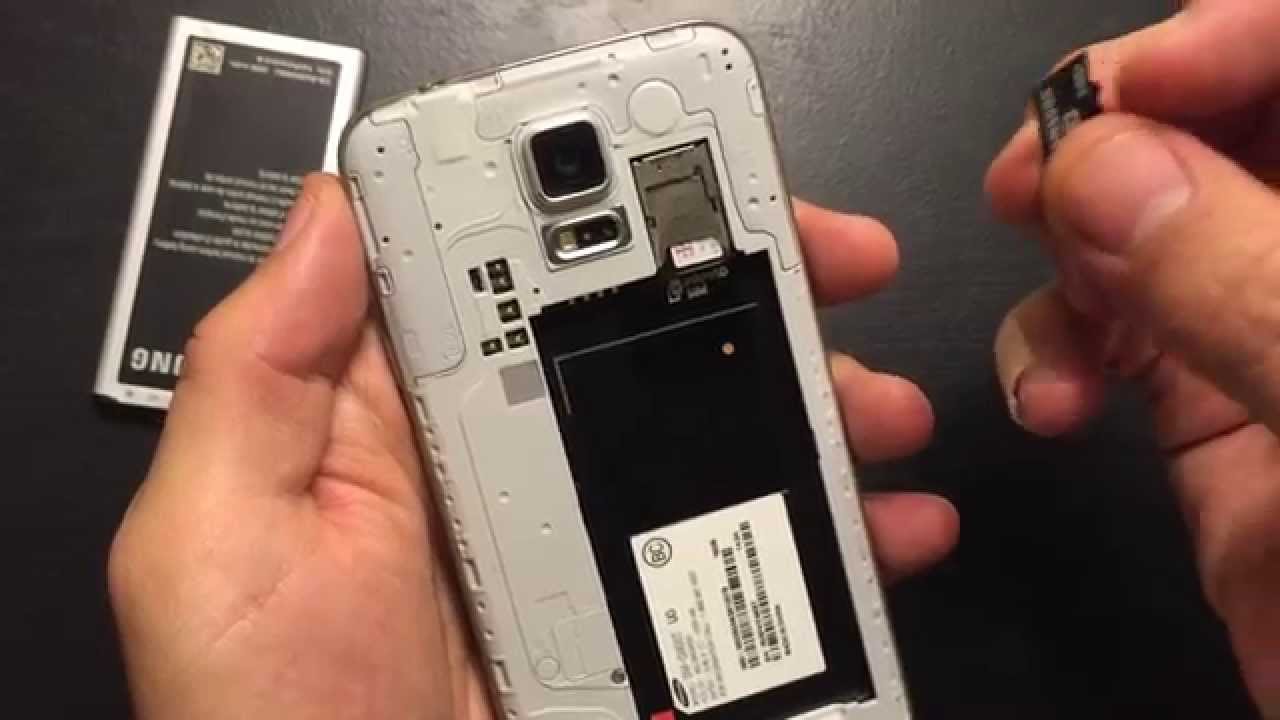
With the SIM card tray successfully ejected from your Samsung Galaxy S5, the next pivotal step is to insert the SIM card into the designated slot within the tray. Before proceeding, take a moment to inspect the SIM card and the tray to ensure that they are free from any dust, debris, or damage that could impede the insertion process.
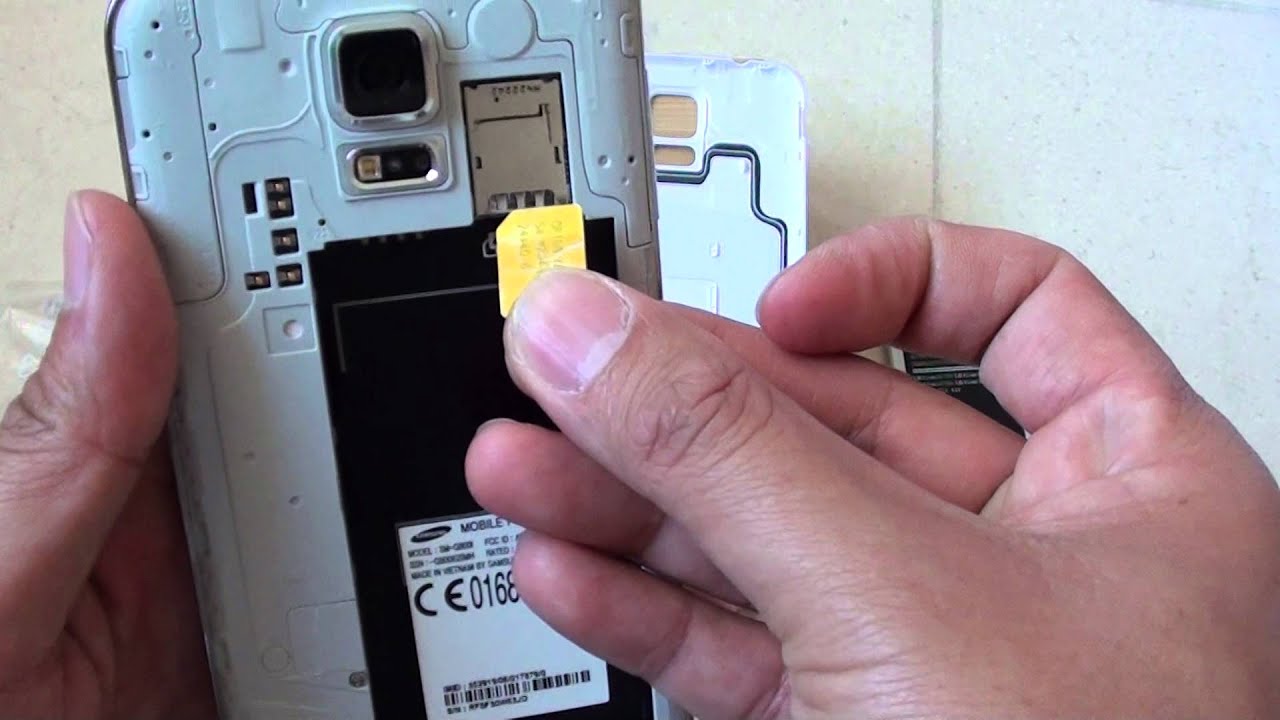
The SIM card is a small, rectangular chip that contains vital information related to your mobile subscription. It is crucial to handle the SIM card with care, holding it by the edges to avoid touching the metallic contacts or the chip itself. This minimizes the risk of static electricity or fingerprints interfering with the functionality of the SIM card.
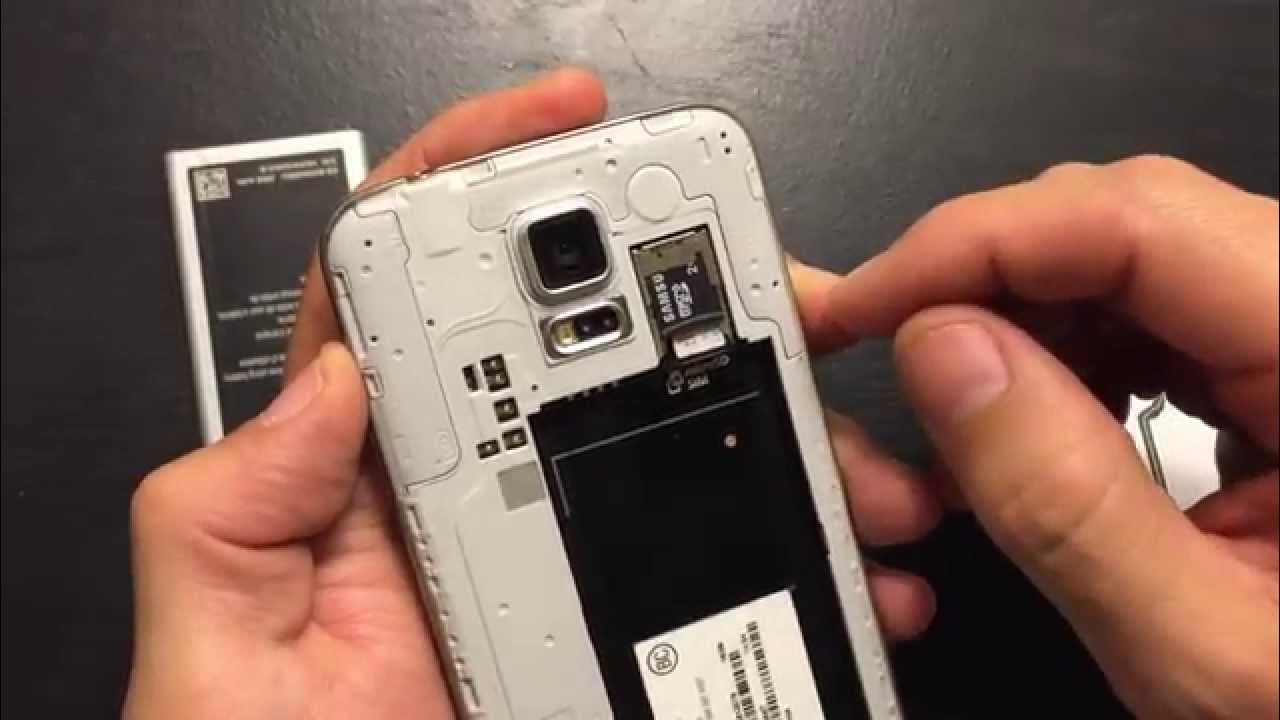
Position the SIM card with the metallic contacts facing downward, aligning it with the cutout on the SIM card tray that corresponds to the size of the SIM card. The tray is designed to securely hold the SIM card in place, ensuring that it remains firmly positioned within the device.
Gently place the SIM card into the designated area on the SIM card tray, ensuring that it fits snugly and aligns with the contours of the tray. Take care to avoid applying excessive force when inserting the SIM card, as this could potentially damage the delicate components.
Once the SIM card is securely in place within the tray, carefully slide the tray back into the SIM card slot on your Samsung Galaxy S5. Ensure that the tray is inserted in the correct orientation, aligning it with the slot to facilitate a smooth and seamless insertion.
As you gently push the tray back into the device, you may feel a subtle click, indicating that the tray is securely reinserted. Take a moment to verify that the tray is flush with the device, with no protrusions or misalignments that could affect the performance of your Samsung Galaxy S5.
With the SIM card successfully inserted into your Samsung Galaxy S5, you have completed the pivotal step of integrating the SIM card into your device. This sets the stage for harnessing the full range of communication and connectivity features offered by your Samsung Galaxy S5, empowering you to stay connected and engaged in the digital world.
Step 4: Reinsert the SIM card tray
After successfully inserting the SIM card into the designated slot within the tray and securely placing it back into your Samsung Galaxy S5, the final step is to ensure that the SIM card tray is reinserted into the device, finalizing the integration of the SIM card and enabling seamless connectivity. This step is crucial to ensure that the SIM card remains securely in place within the device, allowing you to make calls, send messages, and access mobile data without any interruptions.
To begin, carefully position the SIM card tray, ensuring that it aligns with the slot on your Samsung Galaxy S5. The tray is designed to fit snugly within the slot, and it is essential to verify that it is oriented correctly to facilitate a smooth reinsertion process. Take care to align the tray with the slot, ensuring that it is positioned correctly to avoid any potential issues with connectivity.
Once the SIM card tray is aligned with the slot, gently slide it back into the device, applying light pressure to ensure that it fits seamlessly and securely. As you push the tray back into the slot, you may feel a subtle resistance, indicating that the tray is being securely reinserted into your Samsung Galaxy S5. Continue to push the tray until it is fully inserted, ensuring that it sits flush with the device and does not protrude or feel loose.
Upon completing the reinsertion of the SIM card tray, take a moment to verify that it is securely in place within your Samsung Galaxy S5. Check for any misalignments or protrusions that could affect the performance of the device. It is essential to ensure that the tray is flush with the device, indicating that the SIM card is securely integrated and ready for use.
With the SIM card tray successfully reinserted into your Samsung Galaxy S5, you have finalized the process of inserting a SIM card into your device. This marks the completion of the essential steps required to seamlessly integrate the SIM card, empowering you to harness the full potential of your Samsung Galaxy S5 and stay connected with ease.
By following these detailed steps, you have gained the knowledge and confidence to effectively insert a SIM card into your Samsung Galaxy S5, ensuring that you can make the most of the communication and connectivity features offered by your device. With the SIM card securely in place, you are now ready to embark on a seamless mobile experience, staying connected and engaged in the digital world.
Conclusion
Successfully inserting a SIM card into your Samsung Galaxy S5 is a pivotal step in optimizing the functionality of your device and ensuring seamless connectivity. By following the comprehensive guide outlined in this article, you have gained valuable insights into the step-by-step process of integrating a SIM card into your Samsung Galaxy S5, empowering you to harness the full potential of your mobile device.
The process begins with locating the SIM card slot on your Samsung Galaxy S5, typically situated on the side of the device. By carefully removing the back cover and accessing the SIM card slot, you set the stage for seamlessly integrating the SIM card into your device. Ejecting the SIM card tray using the designated tool is a crucial step, allowing for the smooth insertion of the SIM card.
Inserting the SIM card into the tray, ensuring that it is securely positioned and aligns with the contours of the tray, is a pivotal part of the process. The delicate nature of the SIM card necessitates gentle handling, minimizing the risk of damage and ensuring optimal functionality.
Reinserting the SIM card tray into your Samsung Galaxy S5 finalizes the integration of the SIM card, ensuring that it is securely in place within the device. This step is essential to guarantee seamless connectivity, allowing you to make calls, send messages, and access mobile data without any interruptions.
By successfully completing these steps, you have equipped yourself with the knowledge and confidence to effectively insert a SIM card into your Samsung Galaxy S5, setting the stage for a seamless mobile experience. The integration of the SIM card enables you to stay connected and engaged in the digital world, leveraging the communication and connectivity features offered by your device.
As you embark on your mobile journey with the SIM card securely in place within your Samsung Galaxy S5, you are poised to embrace a world of connectivity, communication, and digital engagement. The successful integration of the SIM card paves the way for a seamless mobile experience, allowing you to make the most of the features and capabilities offered by your Samsung Galaxy S5.
With the SIM card seamlessly integrated into your device, you are now ready to explore a world of possibilities, staying connected, and leveraging the full range of communication and connectivity features offered by your Samsung Galaxy S5. Embrace the power of seamless connectivity and communication, empowered by the successful insertion of the SIM card into your device.