Introduction
Inserting a SIM card into an iPhone 4S is a fundamental step in setting up your device for cellular connectivity. The SIM card, or Subscriber Identity Module, plays a crucial role in enabling your iPhone 4S to connect to a mobile network, allowing you to make calls, send text messages, and access mobile data services. This guide will walk you through the simple process of inserting a SIM card into your iPhone 4S, ensuring that you can seamlessly integrate your device with your chosen mobile carrier.
The iPhone 4S, known for its sleek design and innovative features, remains a beloved choice for many users. Whether you're setting up a new device or switching to a different SIM card, understanding how to properly insert the SIM card is essential for a smooth and hassle-free experience. By following the step-by-step instructions provided in this guide, you'll gain the confidence to effortlessly manage your iPhone 4S's connectivity and enjoy uninterrupted access to mobile services.
Now, let's delve into the process of locating the SIM card slot and carefully inserting the SIM card into your iPhone 4S. This guide aims to simplify the task, ensuring that you can complete the process with ease and without any unnecessary complications. Get ready to embark on a journey to seamlessly integrate your iPhone 4S with a SIM card, empowering your device to connect to the mobile network of your choice.
Step 1: Locate the SIM card slot
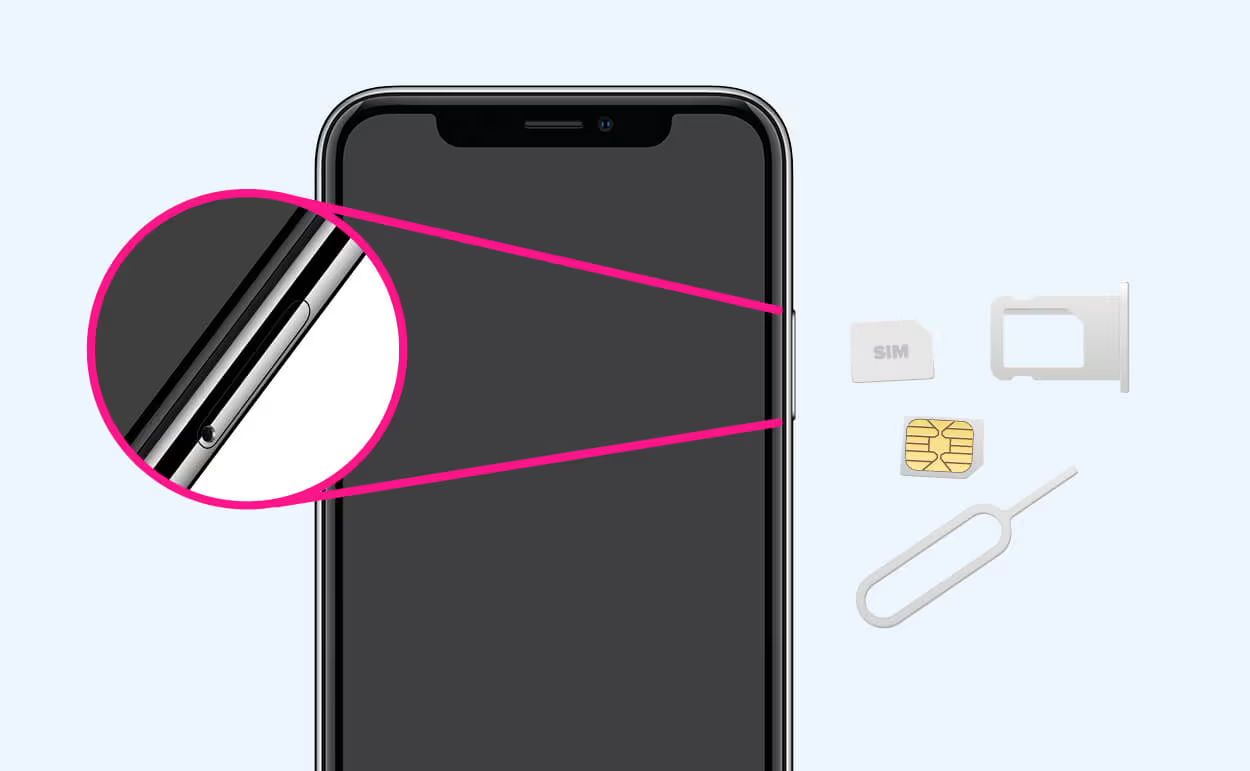
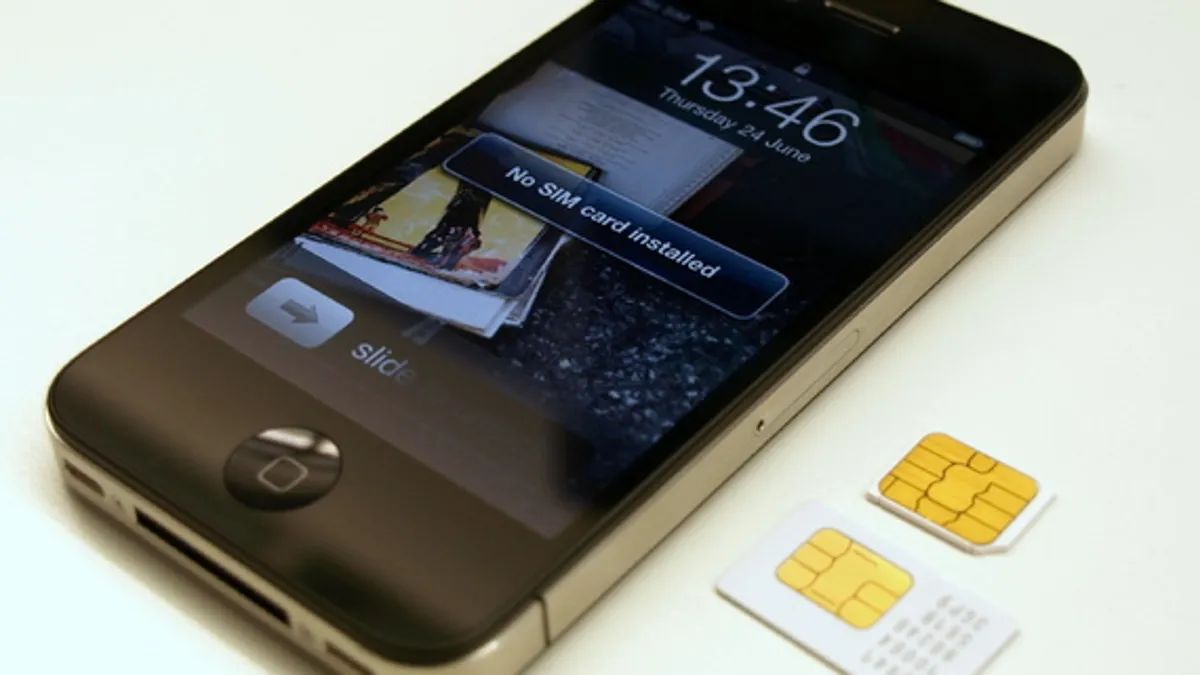
The first step in inserting a SIM card into your iPhone 4S is to locate the SIM card slot. The iPhone 4S features a micro-SIM card slot, which is designed to securely house the SIM card and facilitate seamless connectivity to your chosen mobile network. To begin, you'll need to identify the precise location of the SIM card slot on your device.
The SIM card slot on the iPhone 4S is typically situated on the right-hand side of the device, near the top edge. It is important to note that the exact placement may vary slightly depending on the specific model of the iPhone 4S. However, the general location remains consistent across most variations of the device.
Upon locating the SIM card slot, you will notice a small pinhole adjacent to the slot. This pinhole is designed to accommodate the SIM card ejection tool, which is essential for safely removing and inserting the SIM card. The presence of this pinhole serves as a convenient indicator, allowing you to easily identify the precise location of the SIM card slot without any guesswork.
Once you have successfully located the SIM card slot, you are now prepared to proceed to the next step of the process, which involves ejecting the SIM card tray. By effectively pinpointing the SIM card slot, you have taken the initial stride toward seamlessly integrating your iPhone 4S with a SIM card, setting the stage for the subsequent steps in the process.
With the SIM card slot now identified, you are ready to move forward and embark on the next phase of the process, which entails ejecting the SIM card tray. This pivotal step will pave the way for the subsequent insertion of the SIM card, ultimately enabling your iPhone 4S to establish a secure and reliable connection to your mobile network.
By successfully locating the SIM card slot, you have overcome the first hurdle in the process of inserting a SIM card into your iPhone 4S. This achievement marks a significant milestone on your journey toward seamlessly integrating your device with a SIM card, laying the groundwork for the subsequent steps that will culminate in a fully operational and connected iPhone 4S.
Now that the SIM card slot has been identified, it's time to proceed to the next step and embark on the process of ejecting the SIM card tray, bringing you one step closer to completing the integration of your iPhone 4S with a SIM card.
Step 2: Eject the SIM card tray
Ejecting the SIM card tray is a pivotal step in the process of inserting a SIM card into your iPhone 4S. This step requires precision and care to ensure that the SIM card tray is safely removed, allowing for the seamless insertion of the SIM card. The SIM card tray houses the SIM card and is designed to securely integrate with the iPhone 4S, facilitating the device's connectivity to a mobile network.
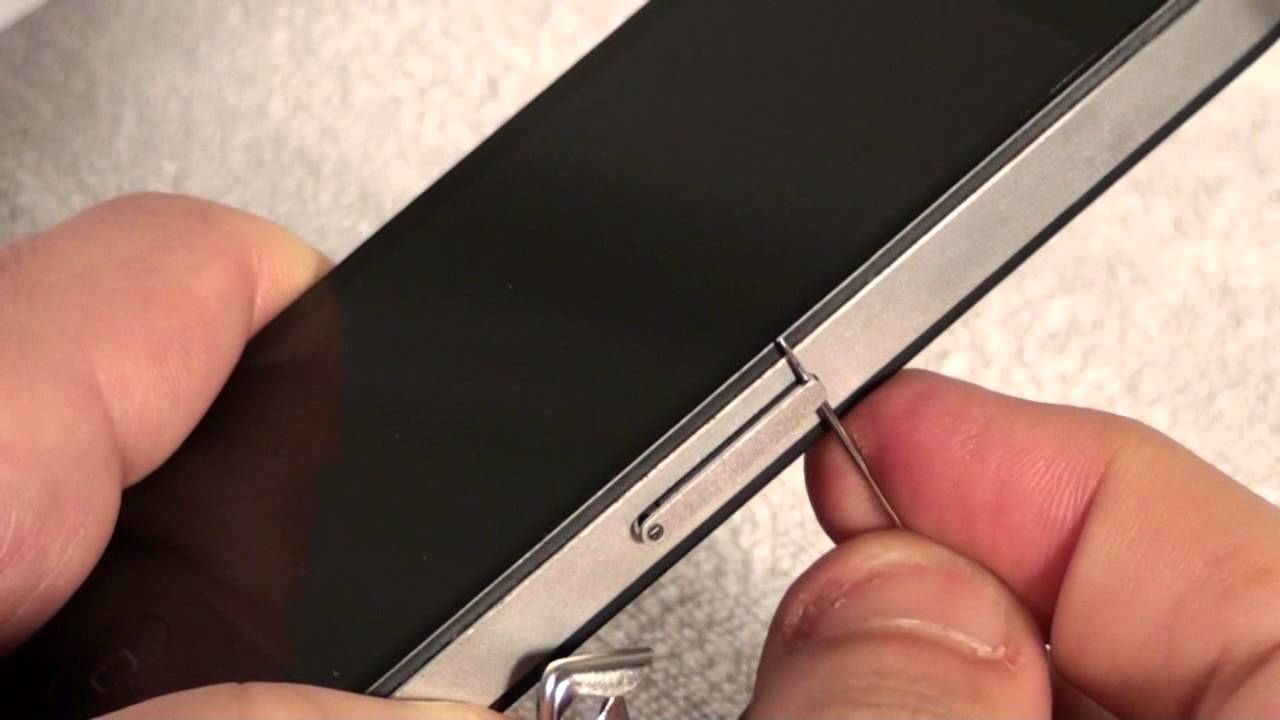
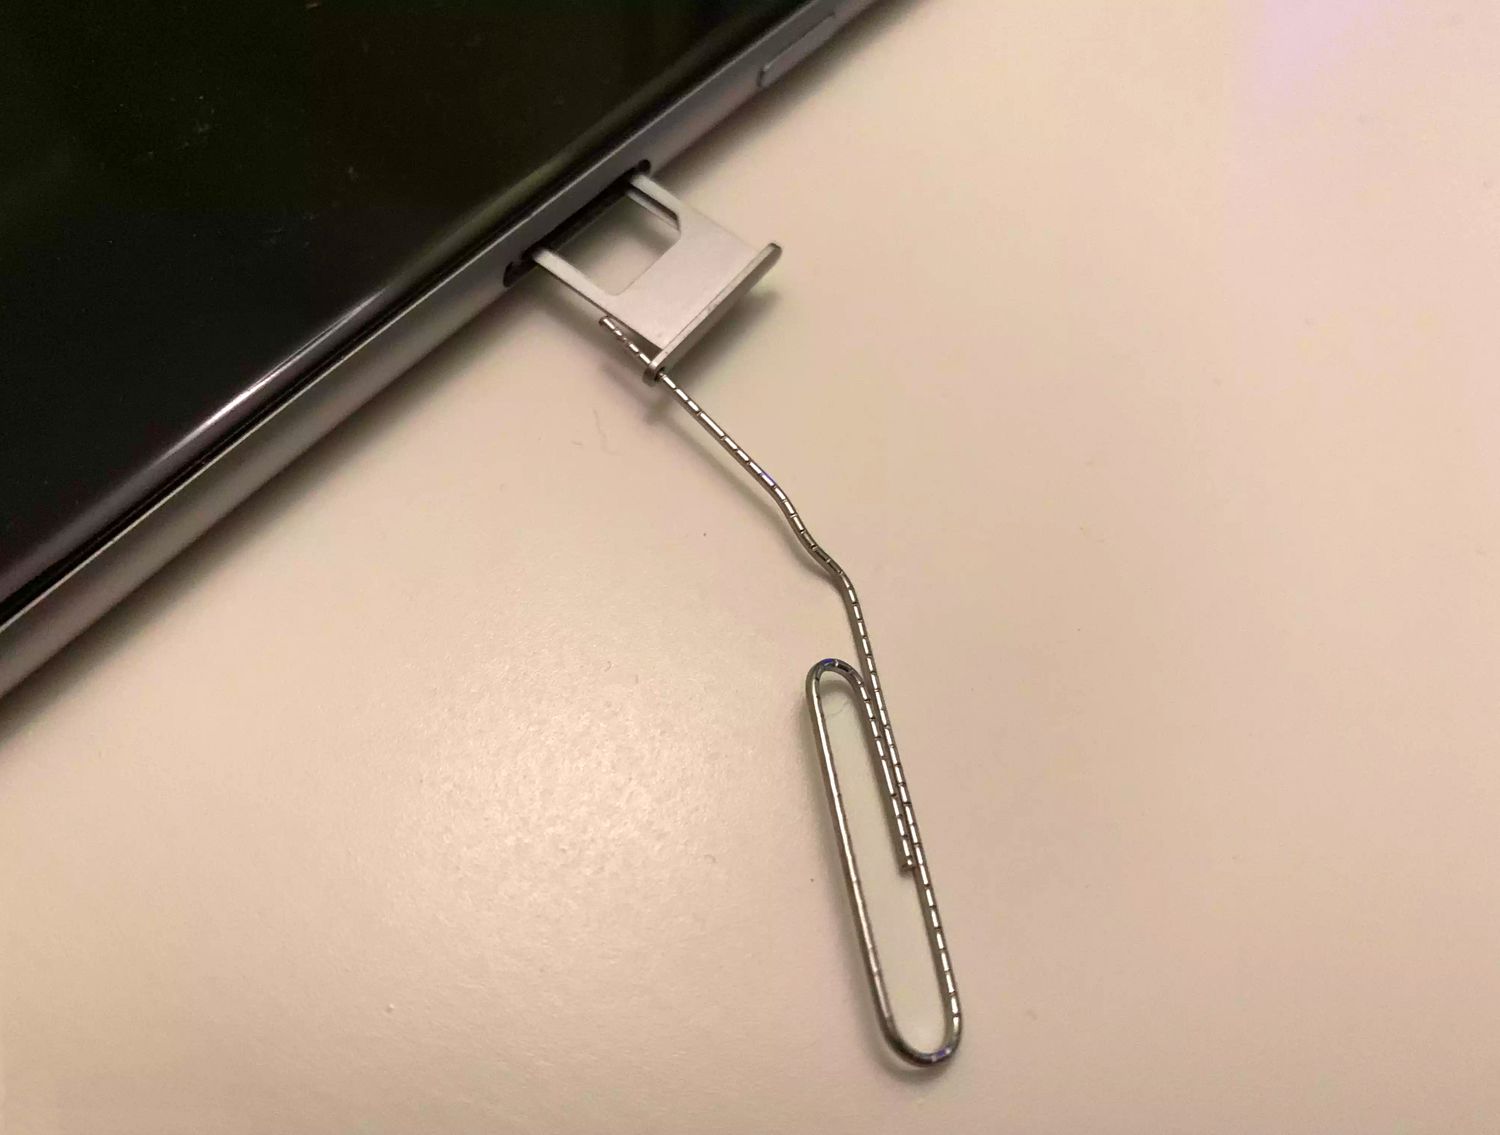
To begin the process of ejecting the SIM card tray, you will need to locate the SIM card ejection tool, which is typically included with your iPhone 4S. The ejection tool is a small, pointed instrument designed specifically for ejecting the SIM card tray from the device. If the ejection tool is not readily available, a paperclip can be used as an alternative, provided that it is straightened to effectively fit into the pinhole adjacent to the SIM card slot.
Once you have obtained the SIM card ejection tool, carefully insert the pointed end into the pinhole located next to the SIM card slot. Apply gentle pressure to the tool, exerting a slight amount of force to engage the internal mechanism responsible for releasing the SIM card tray. As you press the ejection tool into the pinhole, you will feel a subtle resistance, indicating that the mechanism has been activated.
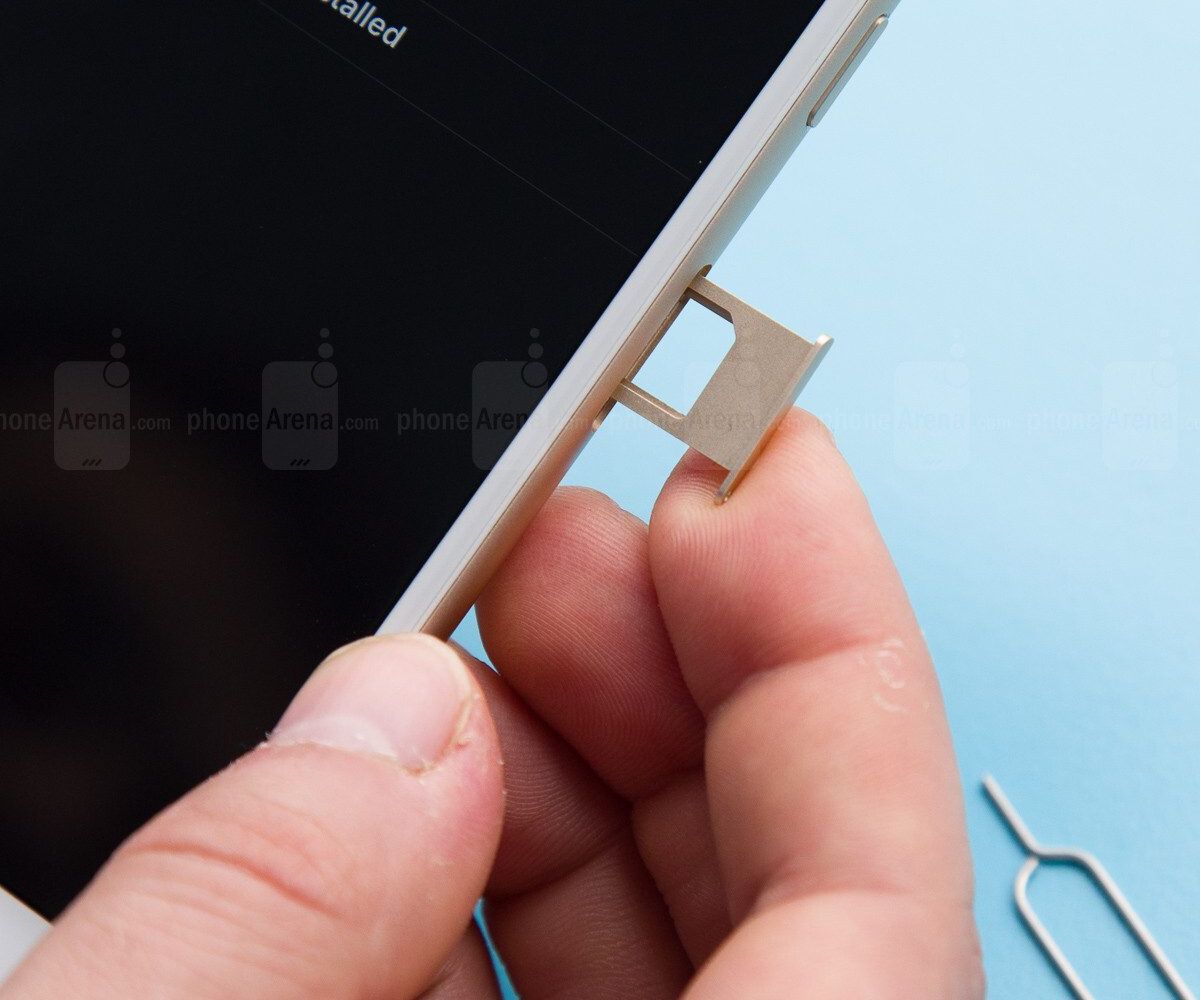
Continuing to apply steady pressure, the SIM card tray will gradually protrude from the device, facilitated by the internal ejection mechanism. Once the SIM card tray is partially ejected, carefully remove it from the device, ensuring that the SIM card remains securely housed within the tray. Exercise caution to prevent any damage to the SIM card or the tray during this process, maintaining a steady and controlled approach to ensure the safe removal of the tray.
With the SIM card tray successfully ejected, the stage is now set for the next phase of the process, which involves inserting the SIM card into the tray. The successful ejection of the SIM card tray represents a crucial milestone in the overall process of integrating your iPhone 4S with a SIM card, bringing you one step closer to establishing a seamless connection to your chosen mobile network.
By effectively ejecting the SIM card tray, you have navigated through a pivotal phase of the SIM card insertion process, demonstrating precision and care in preparing your iPhone 4S for seamless connectivity. With the SIM card tray in hand, you are now ready to proceed to the subsequent step, which entails the careful insertion of the SIM card into the tray, culminating in the successful integration of your device with a SIM card.
Step 3: Insert the SIM card
With the SIM card tray in hand, the next critical step in the process of integrating your iPhone 4S with a SIM card is to carefully insert the SIM card into the tray. The SIM card serves as the gateway to seamless connectivity, enabling your device to establish a secure and reliable connection to your chosen mobile network. By following the step-by-step instructions outlined below, you will navigate through this pivotal phase of the process with precision and confidence.
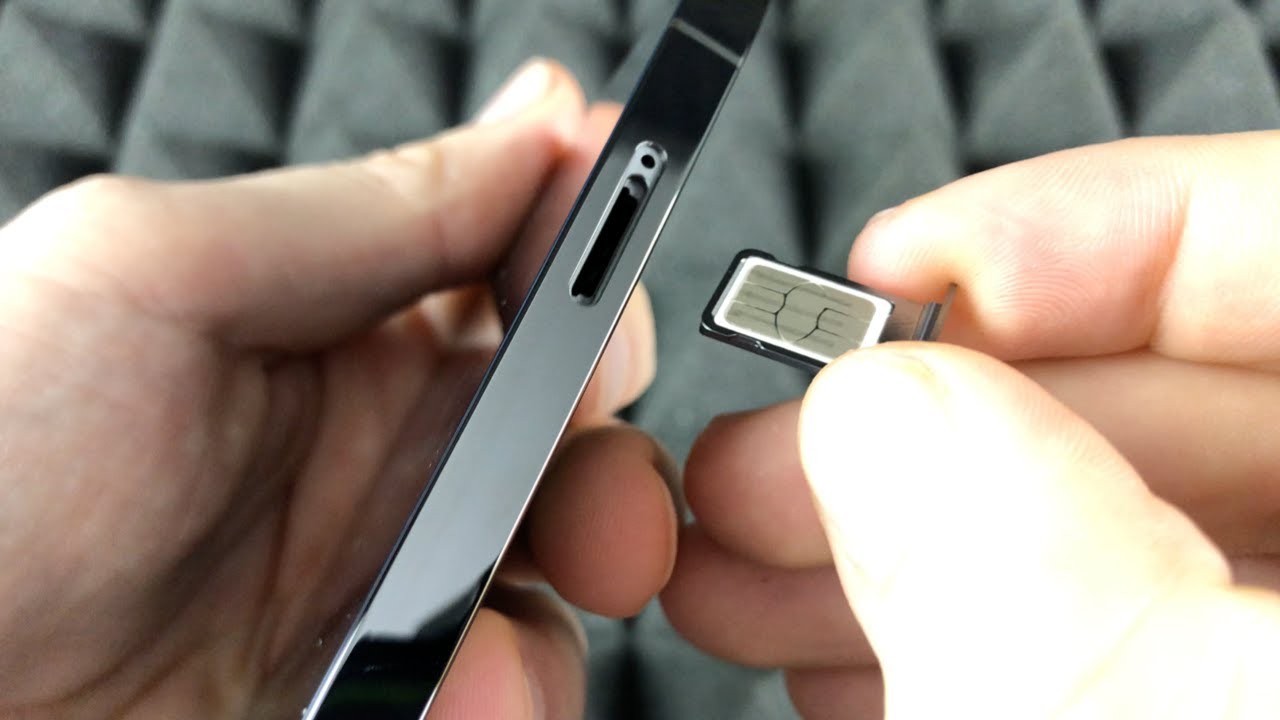
Before proceeding with the insertion of the SIM card, take a moment to examine the card itself. The SIM card features a distinctive shape with one corner angled or notched, aligning with the corresponding orientation within the SIM card tray. This design ensures that the SIM card can only be inserted in a single orientation, preventing any potential errors during the insertion process.
To begin, carefully position the SIM card within the designated area on the SIM card tray, ensuring that the notched corner of the card aligns with the corresponding notch within the tray. This alignment is crucial for seamlessly integrating the SIM card with the tray and, subsequently, the iPhone 4S. Exercise caution to avoid applying excessive force during this step, maintaining a gentle and controlled approach to prevent any damage to the SIM card or the tray.
Once the SIM card is correctly positioned within the tray, gently press down to secure it in place. The SIM card should fit snugly within the tray, ensuring a secure and stable connection. Take care to verify that the card is firmly seated within the tray, minimizing any potential movement or instability that could affect its functionality within the device.
With the SIM card now securely inserted into the tray, you are one step closer to completing the integration process. The successful insertion of the SIM card represents a pivotal milestone, setting the stage for the final phase of the process, which involves reinserting the SIM card tray into your iPhone 4S.
By meticulously following these steps, you have demonstrated the precision and care required to seamlessly integrate your iPhone 4S with a SIM card. With the SIM card securely in place, your device is poised to establish a robust connection to your chosen mobile network, enabling you to harness the full capabilities of your iPhone 4S.
Step 4: Reinsert the SIM card tray
With the SIM card securely inserted into the tray, the final step in the process of integrating your iPhone 4S with a SIM card involves reinserting the SIM card tray into the device. This critical step is essential for ensuring that the SIM card and tray are seamlessly integrated with the iPhone 4S, culminating in the establishment of a secure and reliable connection to your chosen mobile network.
To begin, carefully align the SIM card tray with the corresponding slot on the side of your iPhone 4S. The tray should effortlessly slide into the slot, guided by its precise fit and alignment with the device. Exercise caution to avoid applying excessive force during this step, maintaining a steady and controlled approach to ensure that the tray smoothly integrates with the iPhone 4S.
As the SIM card tray is gently inserted into the device, you will feel a subtle resistance, indicating that the tray is securely positioned within the slot. Ensure that the tray is flush with the device's exterior, maintaining a seamless and uniform profile. This alignment is crucial for guaranteeing that the SIM card and tray are effectively integrated with the iPhone 4S, setting the stage for the device to establish a robust connection to the mobile network.
Once the SIM card tray is securely reinserted into the iPhone 4S, take a moment to verify that it is firmly seated within the slot. Ensure that the tray is stable and does not protrude from the device, minimizing any potential disruptions to its connectivity. By confirming the secure integration of the tray, you can rest assured that your iPhone 4S is poised to leverage the capabilities of the SIM card, enabling seamless communication and connectivity.
With the SIM card tray successfully reinserted into your iPhone 4S, you have navigated through the final phase of the process, demonstrating precision and care in seamlessly integrating your device with a SIM card. The successful reinsertion of the tray marks the culmination of a comprehensive and meticulous process, ensuring that your iPhone 4S is fully equipped to establish a secure and reliable connection to your chosen mobile network.
By meticulously following these steps, you have empowered your iPhone 4S to harness the full potential of seamless connectivity, enabling you to make calls, send text messages, and access mobile data services with ease. The successful integration of your device with a SIM card represents a significant achievement, laying the foundation for a seamless and uninterrupted mobile experience.
Now that the SIM card tray has been securely reinserted into your iPhone 4S, your device is fully prepared to establish a robust connection to your chosen mobile network, empowering you to leverage the full range of capabilities offered by your iPhone 4S.
Conclusion
Congratulations! By diligently following the step-by-step guide outlined in this comprehensive tutorial, you have successfully navigated through the process of inserting a SIM card into your iPhone 4S. This pivotal undertaking has empowered you to seamlessly integrate your device with a SIM card, setting the stage for a robust and reliable connection to your chosen mobile network.
Throughout this journey, you have demonstrated precision and care, ensuring that each phase of the process was meticulously executed to guarantee a seamless integration. From locating the SIM card slot to securely reinserting the SIM card tray, you have exhibited a commendable commitment to mastering the intricacies of managing your iPhone 4S's connectivity.
By adhering to the detailed instructions provided in this guide, you have not only gained the technical expertise required to insert a SIM card into your iPhone 4S but also acquired a deeper understanding of the fundamental mechanisms that underpin the device's connectivity. This newfound knowledge will serve as a valuable asset as you continue to explore and optimize the capabilities of your iPhone 4S.
As you reflect on your accomplishment, take pride in the fact that you have equipped your iPhone 4S to leverage the full spectrum of mobile services, including making calls, sending text messages, and accessing mobile data with unparalleled ease. The successful integration of your device with a SIM card represents a significant milestone, marking the commencement of a seamless and uninterrupted mobile experience.
Moving forward, you can embark on your mobile journey with confidence, knowing that your iPhone 4S is primed to deliver a seamless and reliable connection to your chosen mobile network. Whether you are exploring new horizons or simply staying connected with loved ones, your device is now fully equipped to meet your communication needs with unparalleled efficiency and convenience.
As you embrace the possibilities that await, remember the meticulous attention to detail and care that you invested in seamlessly integrating your iPhone 4S with a SIM card. Your dedication has not only unlocked the full potential of your device but has also laid the groundwork for a seamless and uninterrupted mobile experience that aligns with your lifestyle and communication preferences.
With your iPhone 4S now seamlessly integrated with a SIM card, you are poised to embark on a journey filled with seamless connectivity, empowering you to harness the full capabilities of your device with unparalleled ease and confidence. As you embark on this new chapter, may your mobile experience be defined by seamless communication, effortless connectivity, and unparalleled convenience, all made possible by the successful integration of your iPhone 4S with a SIM card.


