Introduction
Welcome to the world of Venmo, where sending and receiving money has become easier than ever. With its user-friendly interface and seamless functionality, Venmo has quickly become a go-to platform for making social payments. One important feature of Venmo is the ability to send and receive payment requests, allowing you to easily split bills, pay back friends, or request money from others.
In this article, we will guide you through the process of seeing Venmo requests and how to effectively respond to them. Whether you are new to Venmo or just need a refresher, you’ll find all the information you need right here.
Understanding how to access and manage Venmo requests is essential for making sure you stay on top of your finances and keep track of the payments owed to you. We will explore different methods for accessing your Venmo requests, both through the mobile app and the Venmo website. Additionally, we will cover the different ways you can respond to a Venmo request and effectively manage your requests.
But what happens when you encounter issues or have trouble with Venmo requests? Don’t worry, we will also provide troubleshooting tips to help you overcome any challenges you may face.
So, if you’re ready to take control of your Venmo requests and streamline your money transfers, let’s dive in and explore the world of Venmo payments. Whether you’re a frequent Venmo user or just getting started, this guide will help you navigate the request system and make your financial transactions even smoother.
Understanding Venmo Requests
Before we delve into the process of accessing and managing Venmo requests, let’s first understand what exactly Venmo requests are and how they work. Venmo requests are payment notifications that you receive when someone wants to ask for money from you. These requests can be for a variety of reasons, such as splitting a dinner bill, reimbursing a friend for concert tickets, or even receiving payment for goods or services.
Venmo requests are typically accompanied by a brief description or note, explaining why the request is being made. This allows you to have a clear understanding of why someone is requesting money from you and helps you keep track of your expenses. When you receive a Venmo request, it appears in your Venmo account as a pending notification until you take action.
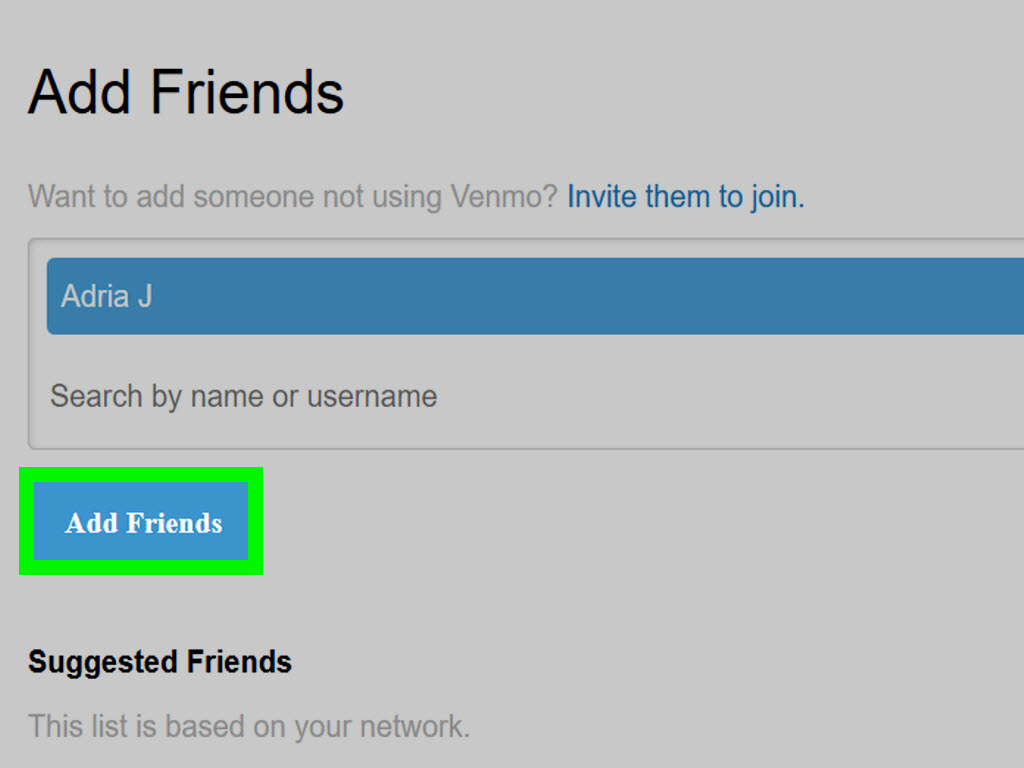
It’s important to note that Venmo requests can only be sent between users who are connected on the Venmo platform. If someone tries to send you a request but you are not connected on Venmo, you won’t receive the request until you establish a connection.
Additionally, Venmo requests can be made for specific amounts or for a “split” amount, which allows you to evenly divide a bill or payment among multiple people. If a request is for a specific amount, you need to pay the exact amount requested. If it is a split request, you have the option to adjust your payment amount based on the portion you are responsible for.
Understanding Venmo requests is crucial for managing your finances effectively and ensuring that you respond to requests in a timely manner. By staying informed about the purpose behind each request and properly addressing them, you can maintain healthy financial relationships with your friends, family, and peers.
Now that we have a clear understanding of what Venmo requests are, let’s explore how to access them using both the Venmo mobile app and the Venmo website.
Accessing Venmo Requests
To effectively manage your Venmo requests, you need to know how to access them. Venmo offers two primary methods for accessing your requests: through the Venmo mobile app and the Venmo website. Let’s take a look at how to access your Venmo requests using both options:
Method 1: Using the Venmo Mobile App
If you prefer to manage your Venmo requests on the go, the Venmo mobile app is the most convenient option. Here’s how you can access your Venmo requests using the app:
- Open the Venmo app on your mobile device and log in to your account.
- Tap on the “Notifications” icon at the bottom of the screen. It looks like a bell.
- In the Notifications tab, you’ll find all the requests and other important notifications related to your Venmo account. Scroll through the list to find the specific request you want to view.
- Tap on the request to open the details and view additional information about it, such as the amount, the sender’s username, and any accompanying notes.
Using the Venmo mobile app gives you quick and easy access to your Venmo requests, allowing you to stay on top of your money transfers wherever you are. Now let’s explore the second method for accessing your Venmo requests:
Method 2: Using the Venmo Website
If you prefer to manage your Venmo requests from your computer, the Venmo website provides a convenient platform. Here’s how you can access your Venmo requests through the website:
- Open your preferred web browser and visit the Venmo website (www.venmo.com).
- Sign in to your Venmo account using your username and password.
- Once you’re logged in, you’ll be taken to your Venmo account dashboard. On the left-hand side of the screen, you’ll see a navigation menu. Click on the “Requests” option.
- In the Requests section, you’ll find a list of all the pending requests made to you. Click on a specific request to view its details and additional information.
By accessing your Venmo requests through the website, you have a larger screen and more functionality to manage and interact with your requests. Whether you’re on your mobile device or computer, Venmo provides convenient options to access and respond to your requests effectively.
Now that we’ve covered how to access your Venmo requests, it’s time to learn how to respond to them.
Method 1: Using the Venmo Mobile App
If you prefer to manage your Venmo requests on the go, the Venmo mobile app is the most convenient option. Here’s how you can use the app to respond to Venmo requests:
- Open the Venmo app on your mobile device and log in to your account using your username and password.
- Tap on the “Notifications” icon at the bottom of the screen, represented by a bell.
- In the Notifications tab, you will find a list of all your Venmo requests and other important notifications related to your account.
- Scroll through the list and locate the specific request you want to respond to.
- Tap on the request to open its details. Here, you will find information such as the amount, the sender’s username, and any accompanying notes.
- Once you have reviewed the request details, you have two options: accept or decline the request.
- If you choose to accept the request, tap on the “Pay” button. You can also adjust the payment amount if it is a split request.
- If you prefer to decline the request, tap on the “Decline” button. You can also choose to provide a reason for declining the request by selecting the appropriate option.
- After accepting or declining the request, you will have the option to add a note or message to the transaction. This can be useful for providing additional context or information to the sender.
- Finally, tap on the “Pay” or “Decline” button to complete your response to the Venmo request.
The Venmo mobile app provides a user-friendly and intuitive interface for managing your Venmo requests on your smartphone. Whether you’re quickly splitting a bill or taking care of a payment request, using the mobile app ensures you can handle your transactions on the go.
Now that we’ve covered how to respond to Venmo requests using the mobile app, let’s explore another method using the Venmo website.
Method 2: Using the Venmo Website
If you prefer to manage your Venmo requests from your computer, the Venmo website provides a convenient platform. Here’s how you can use the website to respond to Venmo requests:
- Open your preferred web browser and visit the Venmo website (www.venmo.com).
- Sign in to your Venmo account using your username and password.
- Once you’re logged in, you will be taken to your Venmo account dashboard. On the left-hand side of the screen, you will see a navigation menu. Click on the “Requests” option.
- In the Requests section, you will find a list of all the pending requests made to you. Locate the specific request you want to respond to.
- Click on the request to open its details. Here, you will find information such as the amount, the sender’s username, and any accompanying notes.
- After reviewing the request details, you have two options: accept or decline the request.
- If you choose to accept the request, click on the “Pay” button. You can also adjust the payment amount if it is a split request.
- If you prefer to decline the request, click on the “Decline” button. You can also choose to provide a reason for declining the request by selecting the appropriate option.
- After accepting or declining the request, you will have the option to add a note or message to the transaction. This can be useful for providing additional context or information to the sender.
- Finally, click on the “Pay” or “Decline” button to complete your response to the Venmo request.
The Venmo website offers a more comprehensive interface for managing your Venmo requests, allowing you to view all the details and make informed decisions from your computer. This can be particularly helpful if you prefer a larger screen or need to access additional features while responding to requests.
Now that we’ve covered how to respond to Venmo requests using the Venmo website, let’s move on to the next section and explore how to manage your Venmo requests effectively.
Responding to Venmo Requests
When someone sends you a Venmo request, it’s important to respond in a timely manner to ensure a smooth and efficient payment process. Whether you need to accept or decline the request, Venmo provides easy ways to respond. Let’s explore the two methods for responding to Venmo requests:
Method 1: Accepting a Venmo Request
If you’re ready to pay the requested amount, follow these steps to accept a Venmo request:
- Open the Venmo app on your mobile device or access the Venmo website on your computer.
- Locate the specific request you want to accept.
- Review the request details, including the amount, the sender’s username, and any accompanying notes.
- If you are using the mobile app, tap on “Pay.” If you are using the website, click on the “Pay” button.
- If it’s a split request, you can adjust your payment amount based on the portion you are responsible for.
- After confirming the payment details, you may have the option to add a note or message to the transaction to provide additional context or information.
- Complete your response by tapping on “Pay” in the app or clicking on the “Pay” button on the website.
By accepting a Venmo request, you acknowledge the payment and initiate the transfer of funds to the sender. This is the recommended approach when you are ready to fulfill the requested payment.
Method 2: Declining a Venmo Request
If you are unable to fulfill a Venmo request or simply choose not to, you can decline the request by following these steps:
- Open the Venmo app on your mobile device or access the Venmo website on your computer.
- Locate the specific request you want to decline.
- Review the request details, including the amount and the sender’s username.
- If you are using the mobile app, tap on “Decline.” If you are using the website, click on the “Decline” button.
- If desired, you can provide a reason for declining the request by selecting an appropriate option.
- Optionally, you may add a note or message to provide additional information to the sender.
- Complete your response by tapping on “Decline” in the app or clicking on the “Decline” button on the website.
By declining a Venmo request, you inform the sender that you are unable or unwilling to fulfill their payment request. It is important to communicate any potential issues or reasons for declining the request to maintain transparency and avoid misunderstandings.
Now that you know how to effectively respond to Venmo requests, let’s move on to the next section and explore how to manage your Venmo requests once they have been accepted or declined.
Method 1: Accepting a Venmo Request
When you receive a Venmo request and are ready to fulfill the payment, you can easily accept the request by following these steps:
- Open the Venmo app on your mobile device or access the Venmo website on your computer.
- Locate the specific Venmo request that you want to accept.
- Review the request details, including the amount, the sender’s username, and any accompanying notes.
- If you are using the mobile app, tap on the “Pay” button. If you are using the website, click on the “Pay” button.
- If the request is a split payment, you can adjust your payment amount based on the portion you are responsible for.
- After confirming the payment details, you may have the option to add a note or message to the transaction to provide additional context or information.
- Finalize your response by tapping on “Pay” in the app or clicking on the “Pay” button on the website.
By accepting a Venmo request, you acknowledge the payment and initiate the transfer of funds to the sender. This method is ideal when you are ready and willing to fulfill the requested payment.
Accepting a Venmo request is a seamless process that ensures a smooth transaction between you and the sender. It allows for easy and convenient management of your financial obligations and enables quick and efficient money transfers.
Now that you know how to accept a Venmo request, let’s move on to the next section and explore the process of declining a Venmo request.
Method 2: Declining a Venmo Request
If you are unable or choose not to fulfill a Venmo request, you can easily decline it by following these steps:
- Open the Venmo app on your mobile device or access the Venmo website on your computer.
- Locate the specific Venmo request that you want to decline.
- Review the request details, including the amount and the sender’s username.
- If you are using the mobile app, tap on the “Decline” button. If you are using the website, click on the “Decline” button.
- If desired, you can provide a reason for declining the request by selecting an appropriate option.
- Optionally, you may add a note or message to provide additional information to the sender.
- Complete your response by tapping on “Decline” in the app or clicking on the “Decline” button on the website.
Declining a Venmo request notifies the sender that you are unable or choose not to fulfill their payment request. It is essential to communicate any potential issues or reasons for declining the request to maintain transparency and avoid misunderstandings.
By declining a Venmo request, you maintain control over your financial obligations and ensure that you only make payments that align with your circumstances or preferences.
It is important to note that declining a Venmo request should be done respectfully and responsibly. If there are any uncertainties or conflicts regarding the request, it is advisable to communicate directly with the sender to resolve the issue amicably.
Now that you know how to decline a Venmo request, let’s move on to the next section and explore how to effectively manage your Venmo requests once they have been accepted or declined.
Managing Venmo Requests
After accepting or declining a Venmo request, it’s important to effectively manage your requests to keep your financial transactions organized. Here are two methods for managing your Venmo requests:
Method 1: Marking a Venmo Request as Paid
Once you have fulfilled a Venmo request by making the payment, you can mark it as paid to indicate that the transaction has been completed. Follow these steps to mark a Venmo request as paid:
- Open the Venmo app on your mobile device or access the Venmo website on your computer.
- Locate the request that you have fulfilled and want to mark as paid.
- If you are using the mobile app, swipe the request to the right. If you are using the website, click on the checkmark or menu icon next to the request.
- Confirm your action when prompted to mark the request as paid.
Marking a Venmo request as paid helps you keep track of your completed payments and ensures that you have a clear record of your financial transactions.
Method 2: Archiving a Venmo Request
If you no longer need to refer to a Venmo request or want to declutter your request list, you can archive the request. Archiving a Venmo request removes it from your main request list but keeps it accessible for future reference if needed. Here’s how you can archive a Venmo request:
- Open the Venmo app on your mobile device or access the Venmo website on your computer.
- Locate the request that you want to archive.
- If you are using the mobile app, swipe the request to the left. If you are using the website, click on the archive button or option next to the request.
- Confirm your action when prompted to archive the request.
Archiving Venmo requests is a useful way to organize your transaction history and keep your request list clean and manageable.
By effectively managing your Venmo requests through marking them as paid or archiving them, you can stay organized and easily track your financial transactions. It also helps you maintain clarity in your payment history and simplifies future reference of requests.
Now that you know how to manage your Venmo requests, let’s move on to the next section and explore troubleshooting tips for any issues you may encounter.
Method 1: Marking a Venmo Request as Paid
Once you have made a payment to fulfill a Venmo request, it’s important to mark it as paid to keep your records accurate and organized. Here’s how you can mark a Venmo request as paid:
- Open the Venmo app on your mobile device or access the Venmo website on your computer.
- Locate the Venmo request that you have fulfilled and want to mark as paid.
- If you are using the mobile app, swipe the request to the right. If you are using the website, click on the checkmark or menu icon next to the request.
- Confirm your action when prompted to mark the request as paid.
Marking a Venmo request as paid is a simple yet crucial step in managing your financial transactions. By doing so, you indicate that the payment has been completed successfully.
Marked requests are typically moved to a separate section labeled “Paid” or “Completed” in your Venmo account, ensuring that your list of pending requests remains up-to-date. This allows for better organization and easy reference to see which payments have been fulfilled.
This feature is particularly useful when you have multiple pending requests or when you want to keep track of your payment history. By marking a Venmo request as paid, you can have a clear overview of all completed transactions and ensure that no request is overlooked or left without proper acknowledgement.
Remember, marking a request as paid is not the same as confirming the completion of the payment itself. It simply serves as a visual indicator within the Venmo platform to reflect the status of the transaction.
Now that you understand how to mark a Venmo request as paid, let’s move on to the next section and explore the process of archiving a Venmo request.
Method 2: Archiving a Venmo Request
As you continue to use Venmo and receive various requests, you may find it helpful to archive certain requests to keep your request list organized. Archiving allows you to remove a request from your main list without permanently deleting it. Here’s how you can archive a Venmo request:
- Open the Venmo app on your mobile device or access the Venmo website on your computer.
- Locate the Venmo request that you want to archive.
- If you are using the mobile app, swipe the request to the left. If you are using the website, click on the archive button or option next to the request.
- Confirm your action when prompted to archive the request.
Archiving a Venmo request helps you declutter your main request list while still keeping the request accessible for future reference if needed. It provides a way to organize your transaction history and focus on the active requests that require your attention.
Archived requests are typically moved to a separate section designated as “Archived” or something similar within your Venmo account. This separation allows you to distinguish between requests that are still pending and those that have been archived.
Archiving is especially useful when the request is no longer relevant or when you want to prioritize your active requests. By archiving requests, you can maintain a clean and streamlined request list, making it easier to manage and track your financial transactions.
It’s important to note that archiving a request does not affect the completion or status of the payment itself. It only changes the visibility and organization within your Venmo account.
Now that you know how to archive a Venmo request, you have a valuable tool to keep your request list organized and focus on the requests that require your attention. In the next section, we’ll explore troubleshooting tips for any problems you may encounter with Venmo requests.
Troubleshooting Venmo Requests
While Venmo strives to provide a smooth and user-friendly experience, there may be times when you encounter issues or have difficulties with Venmo requests. Here are some common troubleshooting tips to help you navigate and resolve any problems you may face:
1. Check your connectivity
If you are experiencing issues with accessing or viewing Venmo requests, ensure that you have a stable internet connection. Poor or intermittent connectivity can cause delays or errors in loading requests. Try switching to a different network or restarting your device for a fresh connection.
2. Confirm your notification settings
Ensure that you have enabled notifications for Venmo on your mobile device. If you are not receiving notifications for incoming requests, check your device’s notification settings and make sure Venmo is allowed to send notifications. Additionally, confirm that your email notifications are enabled if you prefer to receive request notifications via email.
3. Verify your connection with the sender
If you are not receiving a Venmo request from a specific sender, double-check that you are connected with them on the Venmo platform. Requesting and receiving payments can only occur between connected users, so it’s essential to establish the connection before expecting any requests.
4. Reach out to Venmo support
If you encounter persistent issues or experience technical difficulties with Venmo requests, it’s advisable to reach out to Venmo’s customer support. They have dedicated teams available to assist you and resolve any problems you may be facing. Visit the Venmo website or consult the app for contact information or access to FAQs and other support resources.
5. Keep your Venmo app and devices updated
Ensure that you are using the latest version of the Venmo app and that your mobile device or computer’s operating system is up to date. Developers frequently release updates to address bugs, improve performance, and introduce new features. Updating your app and devices can help resolve any compatibility issues and ensure smoother functionality.
By following these troubleshooting tips, you can overcome common challenges related to Venmo requests and continue to use the platform with ease. Remember, it’s important to regularly review your requests, address them promptly, and communicate with senders when necessary to maintain healthy financial relationships.
Now that we’ve covered troubleshooting tips, let’s wrap up this guide on Venmo requests.
Conclusion
Congratulations! You’ve now acquired a comprehensive understanding of Venmo requests and how to effectively manage them. We explored the process of accessing Venmo requests through the mobile app and website, responding to requests by accepting or declining them, and managing requests through marking them as paid or archiving them. Additionally, we provided troubleshooting tips to help you overcome any issues you may encounter.
Venmo requests offer a convenient and seamless way to request and send payments among friends, family, and peers. Whether you’re splitting a bill, reimbursing a friend, or receiving payment for goods or services, Venmo simplifies the payment process with its user-friendly interface and intuitive features.
By understanding how to access and respond to Venmo requests, you can stay on top of your financial obligations and maintain healthy financial relationships. Remember to communicate openly and promptly with senders, provide additional information or context when necessary, and keep your payment records organized by marking requests as paid or archiving them
If you encounter any challenges or issues, refer back to the troubleshooting tips we provided or reach out to Venmo’s customer support for assistance. They are dedicated to helping you resolve any problems and ensuring that your Venmo experience is smooth and enjoyable.
Now, armed with this knowledge and understanding, you can confidently navigate the world of Venmo requests, making your financial transactions even more convenient and hassle-free. So go ahead, make those payments, split those bills, and enjoy the simplicity of Venmo.