Introduction
Welcome to this guide on how to set up Venmo, the popular digital payment platform that makes it easy to send and receive money from your friends, family, and even businesses. Venmo has gained immense popularity due to its convenience, simplicity, and social aspect, allowing users to share payments and transactions with their contacts.
Whether you’re new to Venmo or just getting started, this step-by-step tutorial will walk you through the process of setting up your Venmo account and familiarize you with its key features. From creating an account to making payments and managing your settings, we’ll cover it all.
Before we delve into the details, it’s important to note that Venmo is available for both iOS and Android devices. You can download the app from your respective app store or access it through the Venmo website on your computer.
If you’re ready to join the millions of users who already enjoy the convenience of Venmo, let’s get started on setting up your account!
Creating an Account
The first step to using Venmo is to create an account. Start by downloading the Venmo app on your mobile device or accessing the Venmo website through your computer’s browser.
Once you have the app or website open, you’ll be prompted to sign up. You have two options: you can sign up using your Facebook account or your email address. If you choose to sign up with Facebook, Venmo will automatically pull in your basic information such as your name and profile picture. If you prefer to sign up with your email address, you’ll need to enter your full name, email, phone number, and create a password.
After you’ve entered your information, Venmo will send a verification code to the phone number you provided. Enter the code to complete the verification process. This ensures the security of your account and helps prevent unauthorized access.
Next, you’ll have the option to choose a username. Your username will be unique to your Venmo account and will be used for others to find and identify you on the platform. You can either choose a username suggested by Venmo or create your own.
Once your account is set up, it’s time to start personalizing it. Add a profile picture and a brief bio to make your account more recognizable to your contacts. This also creates a sense of trust and familiarity when sending or receiving payments.
Finally, you have the option to connect your phone’s contacts to Venmo. This allows you to easily find and add your friends and family who are already on Venmo. It also helps streamline the payment process, as you can quickly select contacts when making transactions.
Creating a Venmo account is quick and straightforward, and once you’re done, you’re ready to start making and receiving payments. In the next section, we’ll explore how to link your bank account or card to your Venmo account.
Linking Your Bank Account or Card
After creating your Venmo account, the next step is to link either your bank account or card to enable seamless transactions.
To start, open the Venmo app on your mobile device or access the Venmo website through your computer’s browser. Once logged in, navigate to the “Settings” section. Here, you’ll find the option to link a bank account or a card.
If you choose to link a bank account, you’ll need to provide your bank’s name, your account number, and the routing number. Venmo will securely store this information for future transactions. Keep in mind that linking a bank account may take a few business days to complete the verification process. Once linked, you’ll be able to transfer funds between your bank account and your Venmo balance.
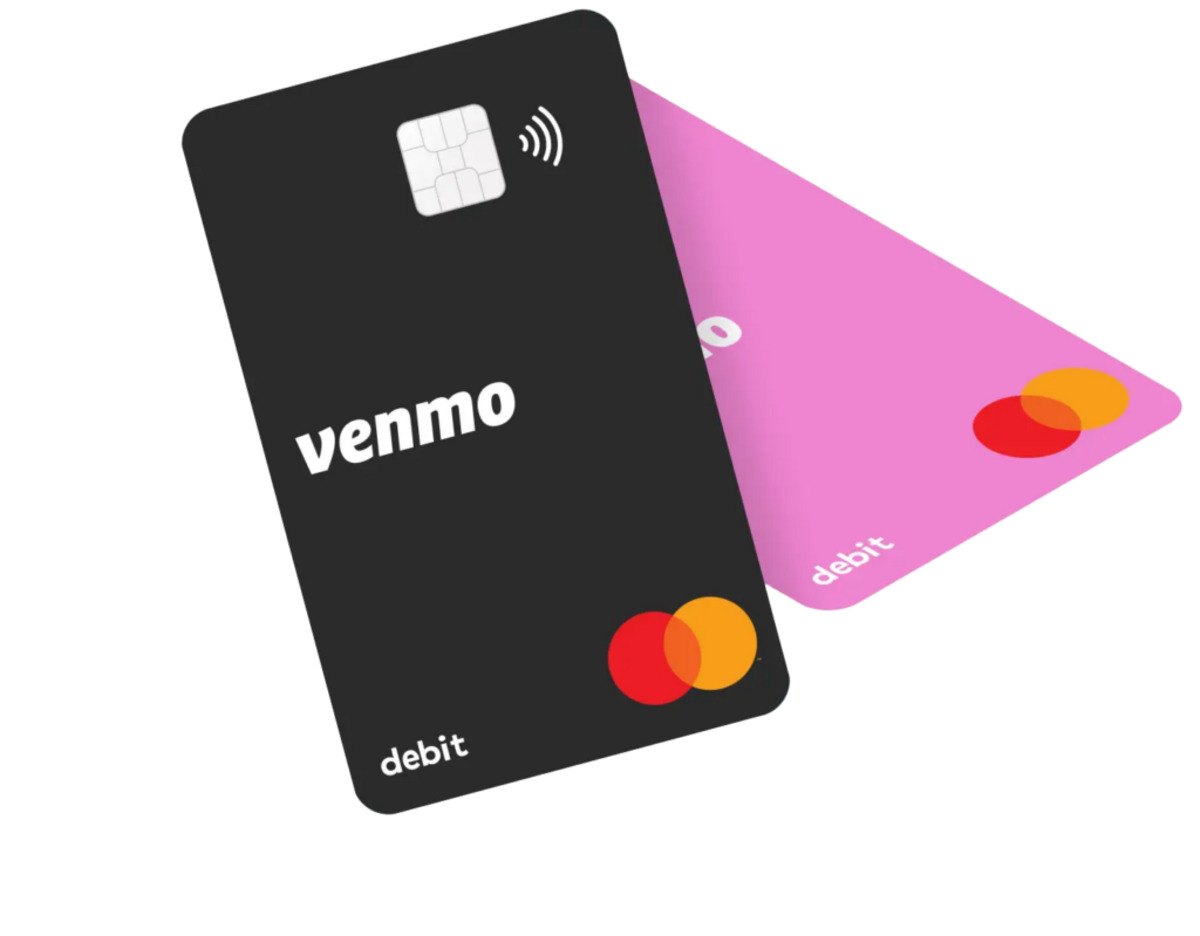
If you prefer to link a card, whether it’s a credit card or a debit card, you’ll need to enter the card details such as the card number, expiration date, and security code. Similarly, Venmo will securely store your card information for future transactions. Linking a card allows for instant transfers and convenient payments.
It’s important to note that Venmo utilizes advanced encryption and security measures to protect your financial information. Additionally, Venmo will never share your financial data with other users on the platform.
Once you have successfully linked your preferred payment method, you’ll have the flexibility to choose whether to use your bank account or card for each transaction. Venmo makes it easy to switch between payment methods based on your preference and needs.
With your bank account or card linked, you’re now ready to start sending and receiving payments through Venmo. In the following sections, we’ll explore additional features and functionalities that enhance your Venmo experience.
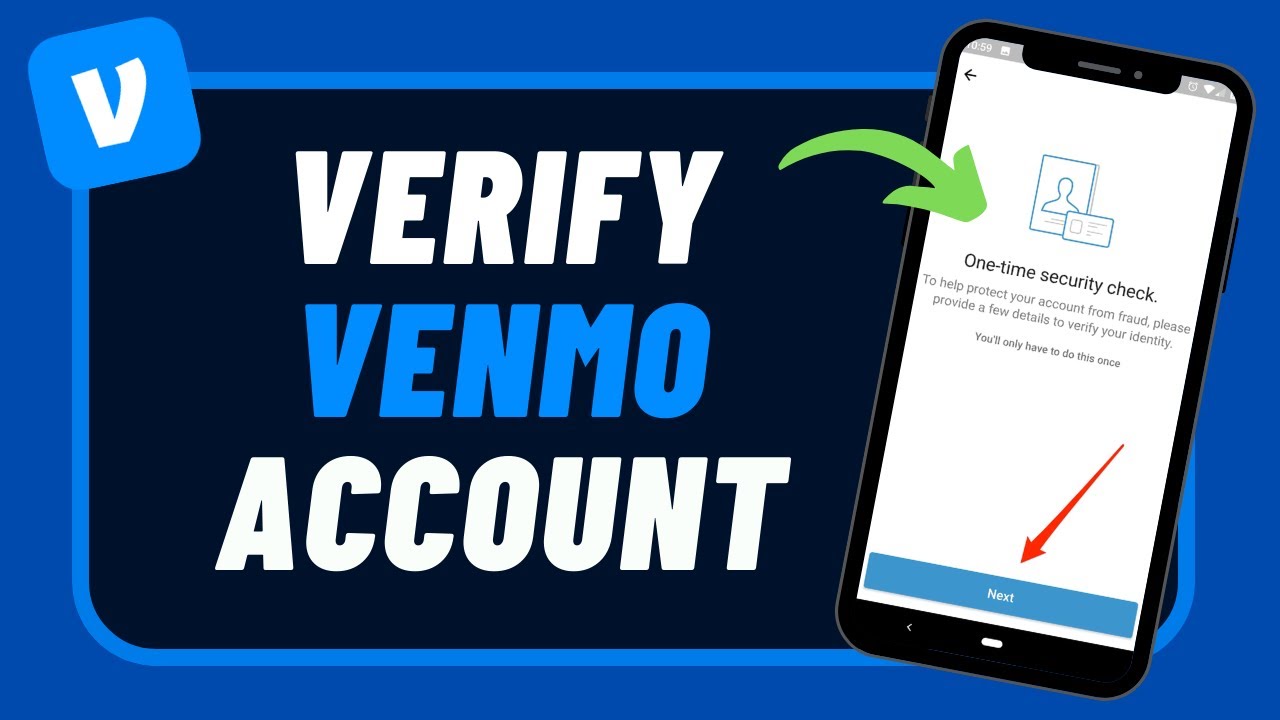
Verifying Your Identity
Verifying your identity on Venmo is an important step that provides an added layer of security and ensures compliance with financial regulations. To verify your identity, follow these simple steps.
First, open the Venmo app on your mobile device or access the Venmo website on your computer. From the main menu, navigate to the “Settings” section. Here, you’ll find an option to verify your identity.
Venmo uses a third-party service called “Green Dot” to verify user identities. Green Dot requires certain personal information to complete the verification process. You’ll need to enter details such as your full legal name, date of birth, Social Security number, and address.
It’s important to note that providing your Social Security number is required to comply with regulatory requirements and prevent fraudulent activity. Venmo takes extensive measures to protect your personal information and uses it solely for the purpose of verifying your identity.
Once you’ve submitted your information, Green Dot will conduct a verification process. In some cases, further documentation may be requested, such as a copy of your driver’s license or passport, to confirm your identity. This step helps ensure that the account is being used by the rightful owner.
The verification process typically takes a few days to complete. You may receive notifications or emails from Venmo or Green Dot regarding the status of your verification.
Once your identity is verified, you’ll have access to additional features and higher transaction limits on Venmo. It’s important to keep your verified information up to date, as it may be periodically reviewed to maintain the security and integrity of the platform.
Verifying your identity on Venmo is a straightforward process that helps protect both you and other users from fraudulent activities. Once completed, you can use Venmo with peace of mind, knowing that your account is secure and compliant with industry regulations.
In the next section, we’ll explore how to add contacts to your Venmo account, making payments and transactions even more convenient.
Adding Contacts
One of the key features of Venmo is the ability to easily add and manage contacts within the app. This makes it convenient to send and receive payments from your friends, family, and trusted contacts. Here’s how you can add contacts to your Venmo account:
When you first set up your Venmo account, you’ll have the option to connect your phone’s contacts. If you choose to do so, Venmo will automatically sync your contacts with the app. This allows you to quickly find and add your existing contacts who are already on Venmo.
To manually add contacts, open the Venmo app and navigate to the “Settings” section. Look for the “Contacts” option and select it. From there, you’ll have the option to search for specific names or phone numbers to add as contacts.
If you’re unable to find a specific contact on Venmo, you can invite them to join. Venmo has a built-in feature that allows you to send an invitation to your contacts who aren’t currently using the app. Simply select the “Invite Friends” option and choose the contacts you’d like to invite.
It’s worth noting that even if your contacts aren’t on Venmo, you can still send money to them by manually entering their email or phone number. Venmo will send them a notification and guide them through the process of creating an account and claiming the payment.
When sending or requesting a payment, you can choose your contacts from your list, making the process quicker and more efficient. Venmo also provides social features, allowing you to add notes or emojis to your transactions to add a personal touch.
Managing your contacts on Venmo is just as easy. You can edit or delete contacts as needed. This ensures that your contact list remains up to date with your trusted connections.
By adding and managing contacts on Venmo, you can streamline the payment process and stay connected with your friends and family. In the next section, we’ll explore how to make payments and transactions using Venmo.
Making Payments
Making payments on Venmo is simple and convenient, allowing you to easily send money to your contacts for various purposes. Follow these steps to make a payment using Venmo:
Open the Venmo app on your mobile device or access the Venmo website on your computer. From the main screen, you’ll see an option to “Pay or Request” at the top. Select “Pay” to initiate a payment.
Next, enter the username, email, or phone number of the contact you wish to send money to. If the contact is already on Venmo, their name will appear as you type for easy selection. Alternatively, you can type the amount you want to send first and then enter the contact’s details.
After selecting the desired contact, you’ll be prompted to enter the amount you wish to send. You can also include a note to specify the purpose of the payment. For example, you might add a note like “Dinner bill” or “Birthday gift.”
Lastly, choose the payment method you want to use for the transaction – either your Venmo balance, linked bank account, or linked card. Review the details and confirm the payment.
Once the payment is sent, the recipient will receive a notification and the funds will be instantly available in their Venmo account. They can choose to keep the money in their Venmo balance or transfer it to their linked bank account.
It’s important to note that Venmo also offers a social aspect where you can choose to make your payments public or private. Public payments can be seen by your contacts, adding a social element to the transaction. However, if you prefer privacy, you can easily set your payments to private in the settings.
In addition to making regular payments to contacts, Venmo also offers the option to split payments. This is especially useful when sharing expenses with friends or colleagues. You can divide the bill by entering the individual amounts for each person involved, making it a seamless and hassle-free process.
Making payments with Venmo is quick, efficient, and secure. By utilizing the multiple payment options and personalizing transactions with notes, Venmo enhances the overall payment experience. In the next section, we’ll explore how to request payments from your contacts.
Requesting Payments
Venmo not only enables you to send payments but also allows you to easily request money from your contacts. Whether you’re splitting a bill, collecting funds for a group gift, or seeking reimbursement, Venmo’s “Request” feature simplifies the process. Here’s how to request payments using Venmo:
Open the Venmo app on your mobile device or access the Venmo website on your computer. From the main screen, select the “Pay or Request” option at the top. This will open a menu where you can choose to request a payment.
Enter the username, email, or phone number of the contact you want to request money from. As you type, the contact’s name should appear for easy selection. Alternatively, you can type the amount you want to request first and then enter the contact’s details.
After selecting the desired contact, you’ll be prompted to enter the amount you need to be paid. Similar to making payments, you can also add a note to provide context or specify the reason for the request.
Review the details and confirm the request. An invoice will be sent to the contact, notifying them of the amount requested and the reason behind the request. The contact will receive a notification and be able to pay the requested amount directly from their Venmo account.
Once the payment is made, you’ll receive a notification, and the funds will be instantly added to your Venmo balance. From there, you can choose to keep the money in your Venmo account, transfer it to your linked bank account, or use it for future payments.
It’s important to note that requesting payments on Venmo is simple and hassle-free. It eliminates the need for awkward money-related conversations and allows for transparent and efficient transactions among your contacts.
In addition to requesting payments from individual contacts, Venmo also offers the option to create a “Group Request.” This feature is useful when collecting money from multiple contacts for a shared expense or event. Venmo automatically divides the requested amount equally among the selected contacts, making it easy for everyone to contribute their portion.
With Venmo’s intuitive interface and seamless payment processes, requesting payments has never been easier. In the next section, we’ll discuss how to set up a Venmo balance and utilize it for payments.
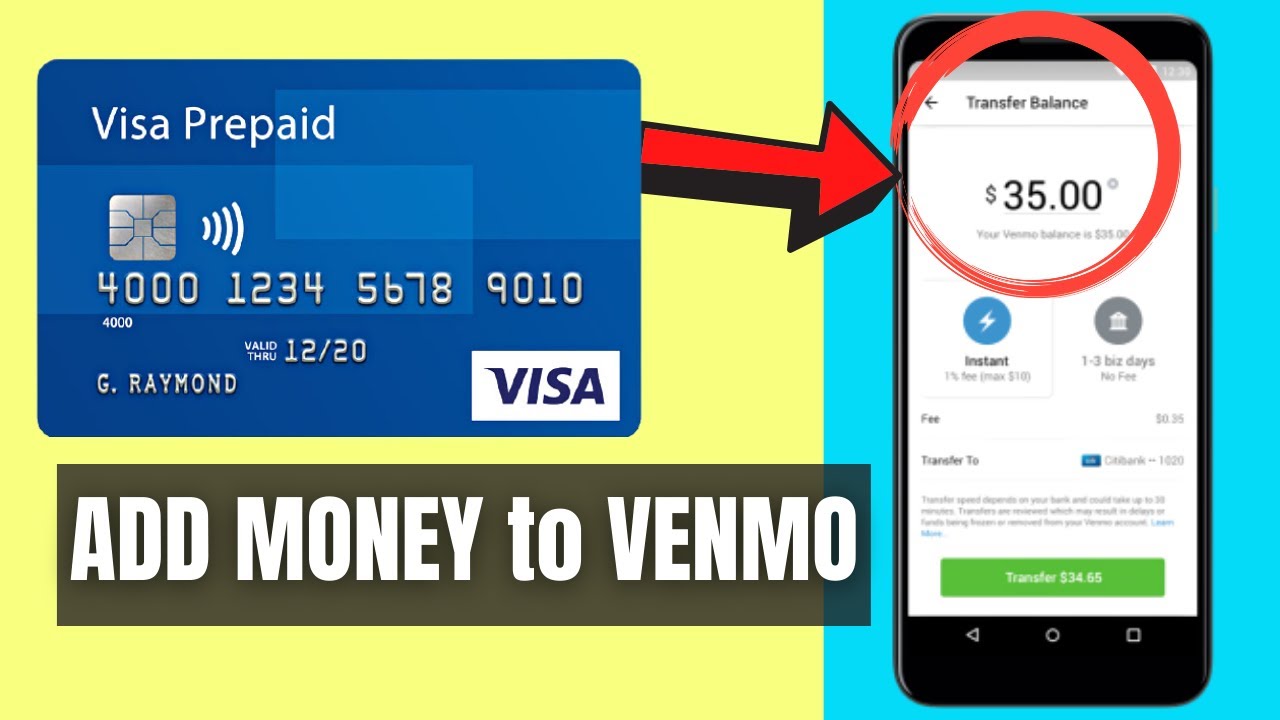
Setting Up Venmo Balance
Venmo offers an additional feature called Venmo Balance, which allows you to hold funds within your Venmo account. This balance acts as a digital wallet and provides added convenience and flexibility when making payments or transfers. Here’s how to set up and manage your Venmo Balance:
To start, open the Venmo app on your mobile device or access the Venmo website on your computer. From the main screen, navigate to the “Settings” section and select “Payment Methods.”
Under the Payment Methods section, you’ll find the option to enable Venmo Balance. Tap on it to activate this feature. Venmo may require certain information, such as your date of birth and social security number, to complete the identity verification process.
Once your Venmo Balance is set up, you can choose to keep funds in this digital wallet or transfer them to your linked bank account at any time. Having funds in your Venmo Balance provides the convenience of using them for immediate payments without the need to transfer funds from your bank account each time.
When making a payment or request, you’ll have the option to select your preferred payment method – Venmo Balance, linked bank account, or linked card. Venmo Balance will be the default payment method if sufficient funds are available.
When funds are received through Venmo, they are automatically added to your Venmo Balance. You can view your balance at any time within the Venmo app or website. Additionally, you have the option to add funds to your Venmo Balance manually using the “Add Money” feature.
It’s worth noting that while your Venmo Balance is convenient for everyday transactions, it is not intended to replace a traditional bank account. If you prefer to store larger amounts of money or require advanced banking services, it is recommended to keep the majority of your funds in your linked bank account.
Managing and utilizing your Venmo Balance is easy and convenient. By keeping funds in your Venmo account, you have quick access to make payments or withdraw money to your bank account when needed. In the following section, we’ll explore how to manage your payment settings on Venmo.
Managing Payment Settings
Venmo provides various payment settings that allow you to customize your experience and ensure that transactions align with your preferences. Here’s how you can manage your payment settings on Venmo:
To access your payment settings, open the Venmo app on your mobile device or access the Venmo website on your computer. From the main screen, navigate to the “Settings” section and select “Payment Methods.”
Within the Payment Methods section, you’ll find a variety of options to customize your payment settings. These options include:
- Default Payment Method: You can choose your preferred payment method, whether it’s your Venmo Balance, linked bank account, or linked card. This will be the default option for transactions, but you can always select a different method for each individual payment.
- Automatic Bank Transfer: Venmo provides the option to automatically transfer any received funds to your linked bank account. You can enable or disable this feature based on your preference.
- Transaction Notifications: Venmo allows you to customize the notifications you receive for various transaction activities. You can choose to be notified when funds are added to your Venmo Balance, when payments are made or received, and when requests for payments are received.
- Privacy Settings: Venmo offers privacy settings that allow you to control who can see your transactions. You can choose to keep your payments private, visible only to the sender and recipient, or make them public for your contacts to see by default.
- Merchant Payments: Venmo also provides the option to enable or disable payments to businesses or merchants within the app. This setting is useful if you prefer to limit your transactions to personal use only.
By managing and customizing your payment settings, you can tailor your Venmo experience to suit your preferences and ensure seamless and secure transactions.
In addition to the payment settings, it’s important to regularly review and update your account’s security settings. Enable features such as two-factor authentication and set a strong, unique password to enhance the security of your Venmo account.
With an array of customizable payment settings and security features, Venmo empowers you to have control over your transactions and create a payment experience that aligns with your needs and preferences. In the next section, we’ll discuss how to review your transaction history on Venmo.
Reviewing Transaction History
One of the valuable features of Venmo is the ability to review your transaction history, allowing you to keep track of payments, requests, and other financial activities. Here’s how you can easily access and review your transaction history on Venmo:
To access your transaction history, open the Venmo app on your mobile device or log in to your Venmo account on the website. From the main screen, navigate to the “Transactions” or “Activity” tab. Here, you’ll find a comprehensive list of all your past transactions.
The transaction history will display essential information for each transaction, including the date and time, the contact involved, the amount, and any accompanying notes or emojis. You can scroll through the history or use the search option to find specific transactions.
In addition to viewing your own transaction history, Venmo allows you to explore and interact with the transaction history of your contacts. You can see and like public transactions of your friends, creating a social element within the app.
Moreover, Venmo provides the option to download your transaction history for your personal records or for tax purposes. This feature is particularly useful for tracking expenses, managing budgets, or reconciling payments.
When reviewing your transaction history, it’s important to pay attention to the details and ensure that all transactions are accurate. In case of any discrepancies or unauthorized transactions, reach out to Venmo’s customer support for assistance.
By regularly reviewing your transaction history, you can stay organized, maintain transparency, and track your financial activities. This knowledge and record of your transactions provide a sense of control and help you better manage your finances.
Now that you know how to review your transaction history on Venmo, you have a comprehensive overview of your financial activities within the app. Let’s wrap up this guide by summarizing the essential steps and features discussed.
Conclusion
Congratulations! You have now learned how to set up and navigate the world of Venmo. From creating an account and linking your bank account or card to verifying your identity and adding contacts, you are equipped with the knowledge to make seamless payments and transactions.
Venmo’s user-friendly interface, secure payment methods, and social features make it a popular choice for individuals, businesses, and organizations alike. Whether you’re splitting bills, requesting payments, or reviewing your transaction history, Venmo offers a convenient and efficient way to manage your financial activities.
Remember to customize your payment settings, including your default payment method and privacy preferences, to ensure that Venmo aligns with your individual needs. Additionally, regularly reviewing your transaction history helps you stay organized and track your financial activities.
As with any financial service, it’s essential to prioritize security. Enable features like two-factor authentication and keep your account information confidential. If you ever encounter any issues or have questions, Venmo’s customer support is readily available to assist you.
Now, armed with the knowledge gained from this guide, you are ready to confidently navigate Venmo’s features and enhance your digital payment experience. Whether you’re splitting expenses with friends, paying merchants, or contributing to group gifts, Venmo makes it simple and convenient.
So, go ahead and explore the possibilities with Venmo. Embrace the convenience, security, and social aspects of the app as you make payments, request funds, and effortlessly manage your financial transactions. Happy Venmo-ing!