Introduction
Venmo has become one of the most popular and convenient ways to send and receive money digitally. Originally launched as a peer-to-peer payment platform, Venmo has expanded its capabilities to include the option to pay for goods and services. This means that you can now use Venmo to make purchases at online and physical stores, making it a versatile payment method for everyday transactions.
Whether you’re looking to buy a new gadget, pay for a meal at a restaurant, or even split the cost of rent with your roommates, Venmo Goods and Services offers a seamless and efficient way to make payments. In this guide, we’ll walk you through everything you need to know about using Venmo to pay for goods and services.
We’ll start by explaining what Venmo is and how it works. Next, we’ll delve into the specifics of Venmo Goods and Services, including how to set up your Venmo account, add funds, and link your bank account or credit/debit card. We’ll also guide you through the process of verifying your identity to ensure a smooth payment experience.
Once all the basics are covered, we’ll show you how to find merchants that accept Venmo and complete a transaction using the platform. Finally, we’ll address common issues that users may encounter and provide troubleshooting tips to help you navigate any challenges along the way.
By the end of this guide, you’ll have all the knowledge you need to confidently use Venmo to pay for goods and services. So let’s get started and discover the convenience and ease of using Venmo for your everyday purchases!
What is Venmo?
Venmo is a popular digital payment platform that allows users to send and receive money from their friends, family, and even businesses. It was created with the mission of making transactions simple, social, and convenient. Initially launched as a peer-to-peer payment app, Venmo quickly gained traction and became a go-to platform for millennials and Gen Z users.
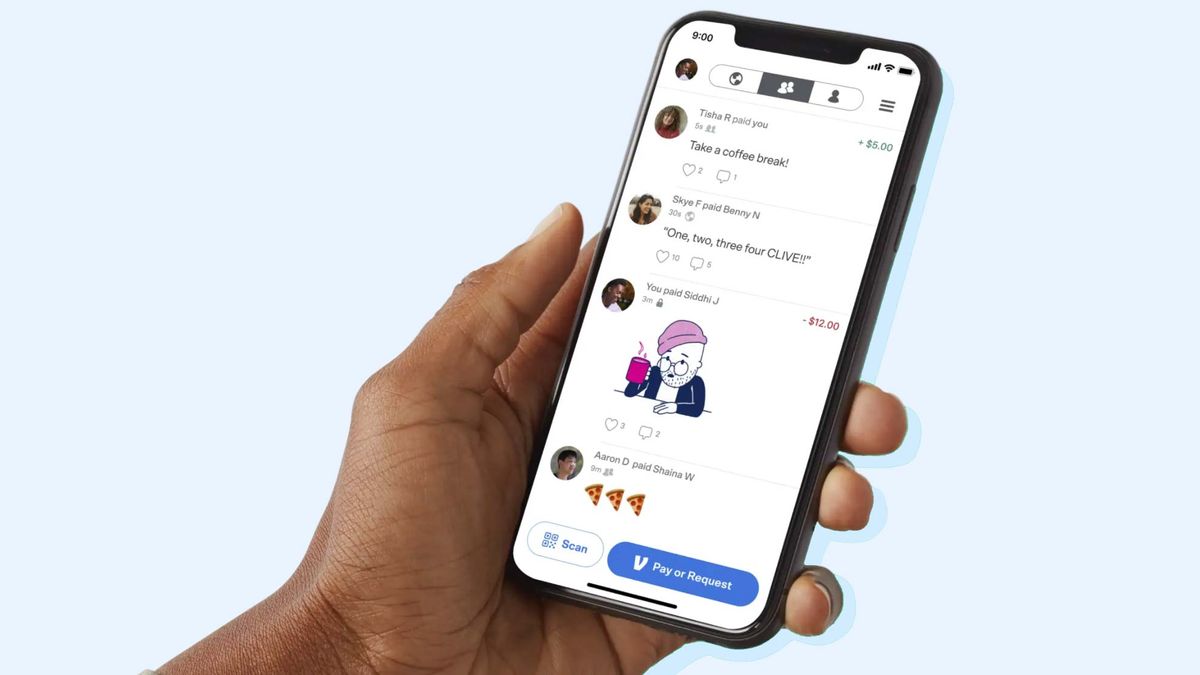
One of the key features that sets Venmo apart is its social component. Users can connect with their friends on the app, view and like each other’s payment activity, and even leave comments on transactions. This creates a unique and engaging experience that helps foster a sense of community and makes payments feel more personal.
When it comes to using Venmo for goods and services, the platform offers a secure and efficient way to make purchases. With Venmo Goods and Services, you can pay for a wide range of products and services, both online and in person. From clothing and electronics to dining out and paying bills, Venmo has made it easier than ever to handle your financial transactions.
Another standout feature of Venmo is its user-friendly interface. The app is designed with a clean and intuitive layout, making it easy for users to navigate, send payments, and view their transaction history. Additionally, Venmo offers real-time notifications, so you can stay up to date with your transactions and know exactly when money is being sent or received.
Security is a top priority for Venmo. The platform utilizes encryption and data protection measures to safeguard user information and ensure that payment details are kept secure. Venmo also provides users with the option to enable additional security features such as multi-factor authentication and biometric authentication for added peace of mind.
Overall, Venmo has revolutionized the way people handle their financial transactions. With its seamless interface, social aspects, and expanded capabilities for making payments for goods and services, Venmo has transformed the way we handle our day-to-day finances.
Now that we have covered the basics of Venmo, let’s dive deeper into using Venmo for goods and services and explore how to maximize its benefits for your everyday transactions.
Understanding Venmo Goods and Services
Venmo Goods and Services is a feature that extends the usability of Venmo beyond person-to-person payments. It allows users to make purchases and pay for products and services directly through the app. This feature has made Venmo a more versatile payment option, catering to the needs of both individuals and businesses.
With Venmo Goods and Services, you have the convenience of paying for a wide range of goods and services from various merchants. Whether you’re shopping online or visiting a physical store, you can use Venmo to complete your transactions quickly and securely.
When you pay for goods and services using Venmo, your transaction is protected by Venmo’s Purchase Protection program. This provides added security and ensures that you are covered in case of any issues with your purchase, such as receiving a damaged or faulty product.
One of the advantages of using Venmo Goods and Services is the seamless integration with social features. You can share your purchases with your friends, allowing them to see what you’ve bought and providing recommendations to others in your network. This social aspect adds an interactive and engaging element to your shopping experience.
Another benefit of using Venmo for goods and services is the ability to split payments with your friends. If you’re out with a group and need to split the bill, Venmo makes it easy to divide the total amount among multiple users. This eliminates the hassle of collecting cash or dealing with complicated math.
Furthermore, when you make a purchase using Venmo, your transaction details are neatly organized within the app. You can easily view your purchase history, track your spending, and stay on top of your finances. This helps you to manage your budget and be more mindful of your spending habits.
However, it is important to note that Venmo Goods and Services is not available for all merchants. While many online retailers now accept Venmo as a form of payment, it’s essential to check if a specific merchant accepts Venmo before making a purchase. You can easily find merchants that accept Venmo by searching within the app or visiting the Venmo website.
Now that we’ve established the basics of Venmo Goods and Services, let’s dive into the process of setting up your Venmo account and adding funds to get started with making purchases.
Setting Up Your Venmo Account
To get started with Venmo Goods and Services, you’ll first need to set up a Venmo account. The process is quick and straightforward, and you can be up and running in no time. Here’s a step-by-step guide to help you set up your Venmo account:
- Download the Venmo app: Venmo is available for both iOS and Android devices. Simply search for “Venmo” in the App Store or Google Play Store, and download the app to your smartphone or tablet.
- Create your Venmo account: Open the Venmo app and tap on “Sign Up”. You have the option to sign up using your email address or by linking your Facebook account. Choose the method that is most convenient for you.
- Verify your email address or phone number: Venmo will send you a verification code to verify your email address or phone number. Enter the code in the app to complete the verification process.
- Choose a username and password: Select a unique username that will be associated with your Venmo account. This is how other users will find and interact with you on the app. Be sure to choose a strong password to protect your account.
- Add your profile picture: Personalize your Venmo account by adding a profile picture. This helps your friends and contacts recognize you on the app.
- Set up account security: It’s important to ensure the security of your Venmo account. You can enable features such as PIN code or fingerprint authentication to add an extra layer of protection.
Once you have set up your Venmo account, you’re ready to start using Venmo Goods and Services. However, before you can make purchases, you’ll need to add funds to your Venmo account. We’ll explore how to do this in the next section.
Keep in mind that Venmo may require additional information during the account setup process to verify your identity and comply with applicable regulations. This may include providing your full name, date of birth, and social security number. Rest assured that Venmo takes privacy and security seriously, and your information is protected.
Now that your Venmo account is set up, let’s proceed to the next step and learn how to add funds to your account.
Adding Funds to Your Venmo Account
Before you can start using Venmo Goods and Services to make purchases, you’ll need to ensure that your Venmo account has sufficient funds. Adding funds to your Venmo account is a simple process that can be done in a few easy steps:
- Open the Venmo app: Launch the Venmo app on your smartphone or tablet and log in to your account using your username and password.
- Access the “Add Money” feature: Once you’re logged in, tap on the “☰” icon (located in the upper-left corner of the app) to open the side menu. From there, select “Manage Balance” and then tap on “Add Money”.
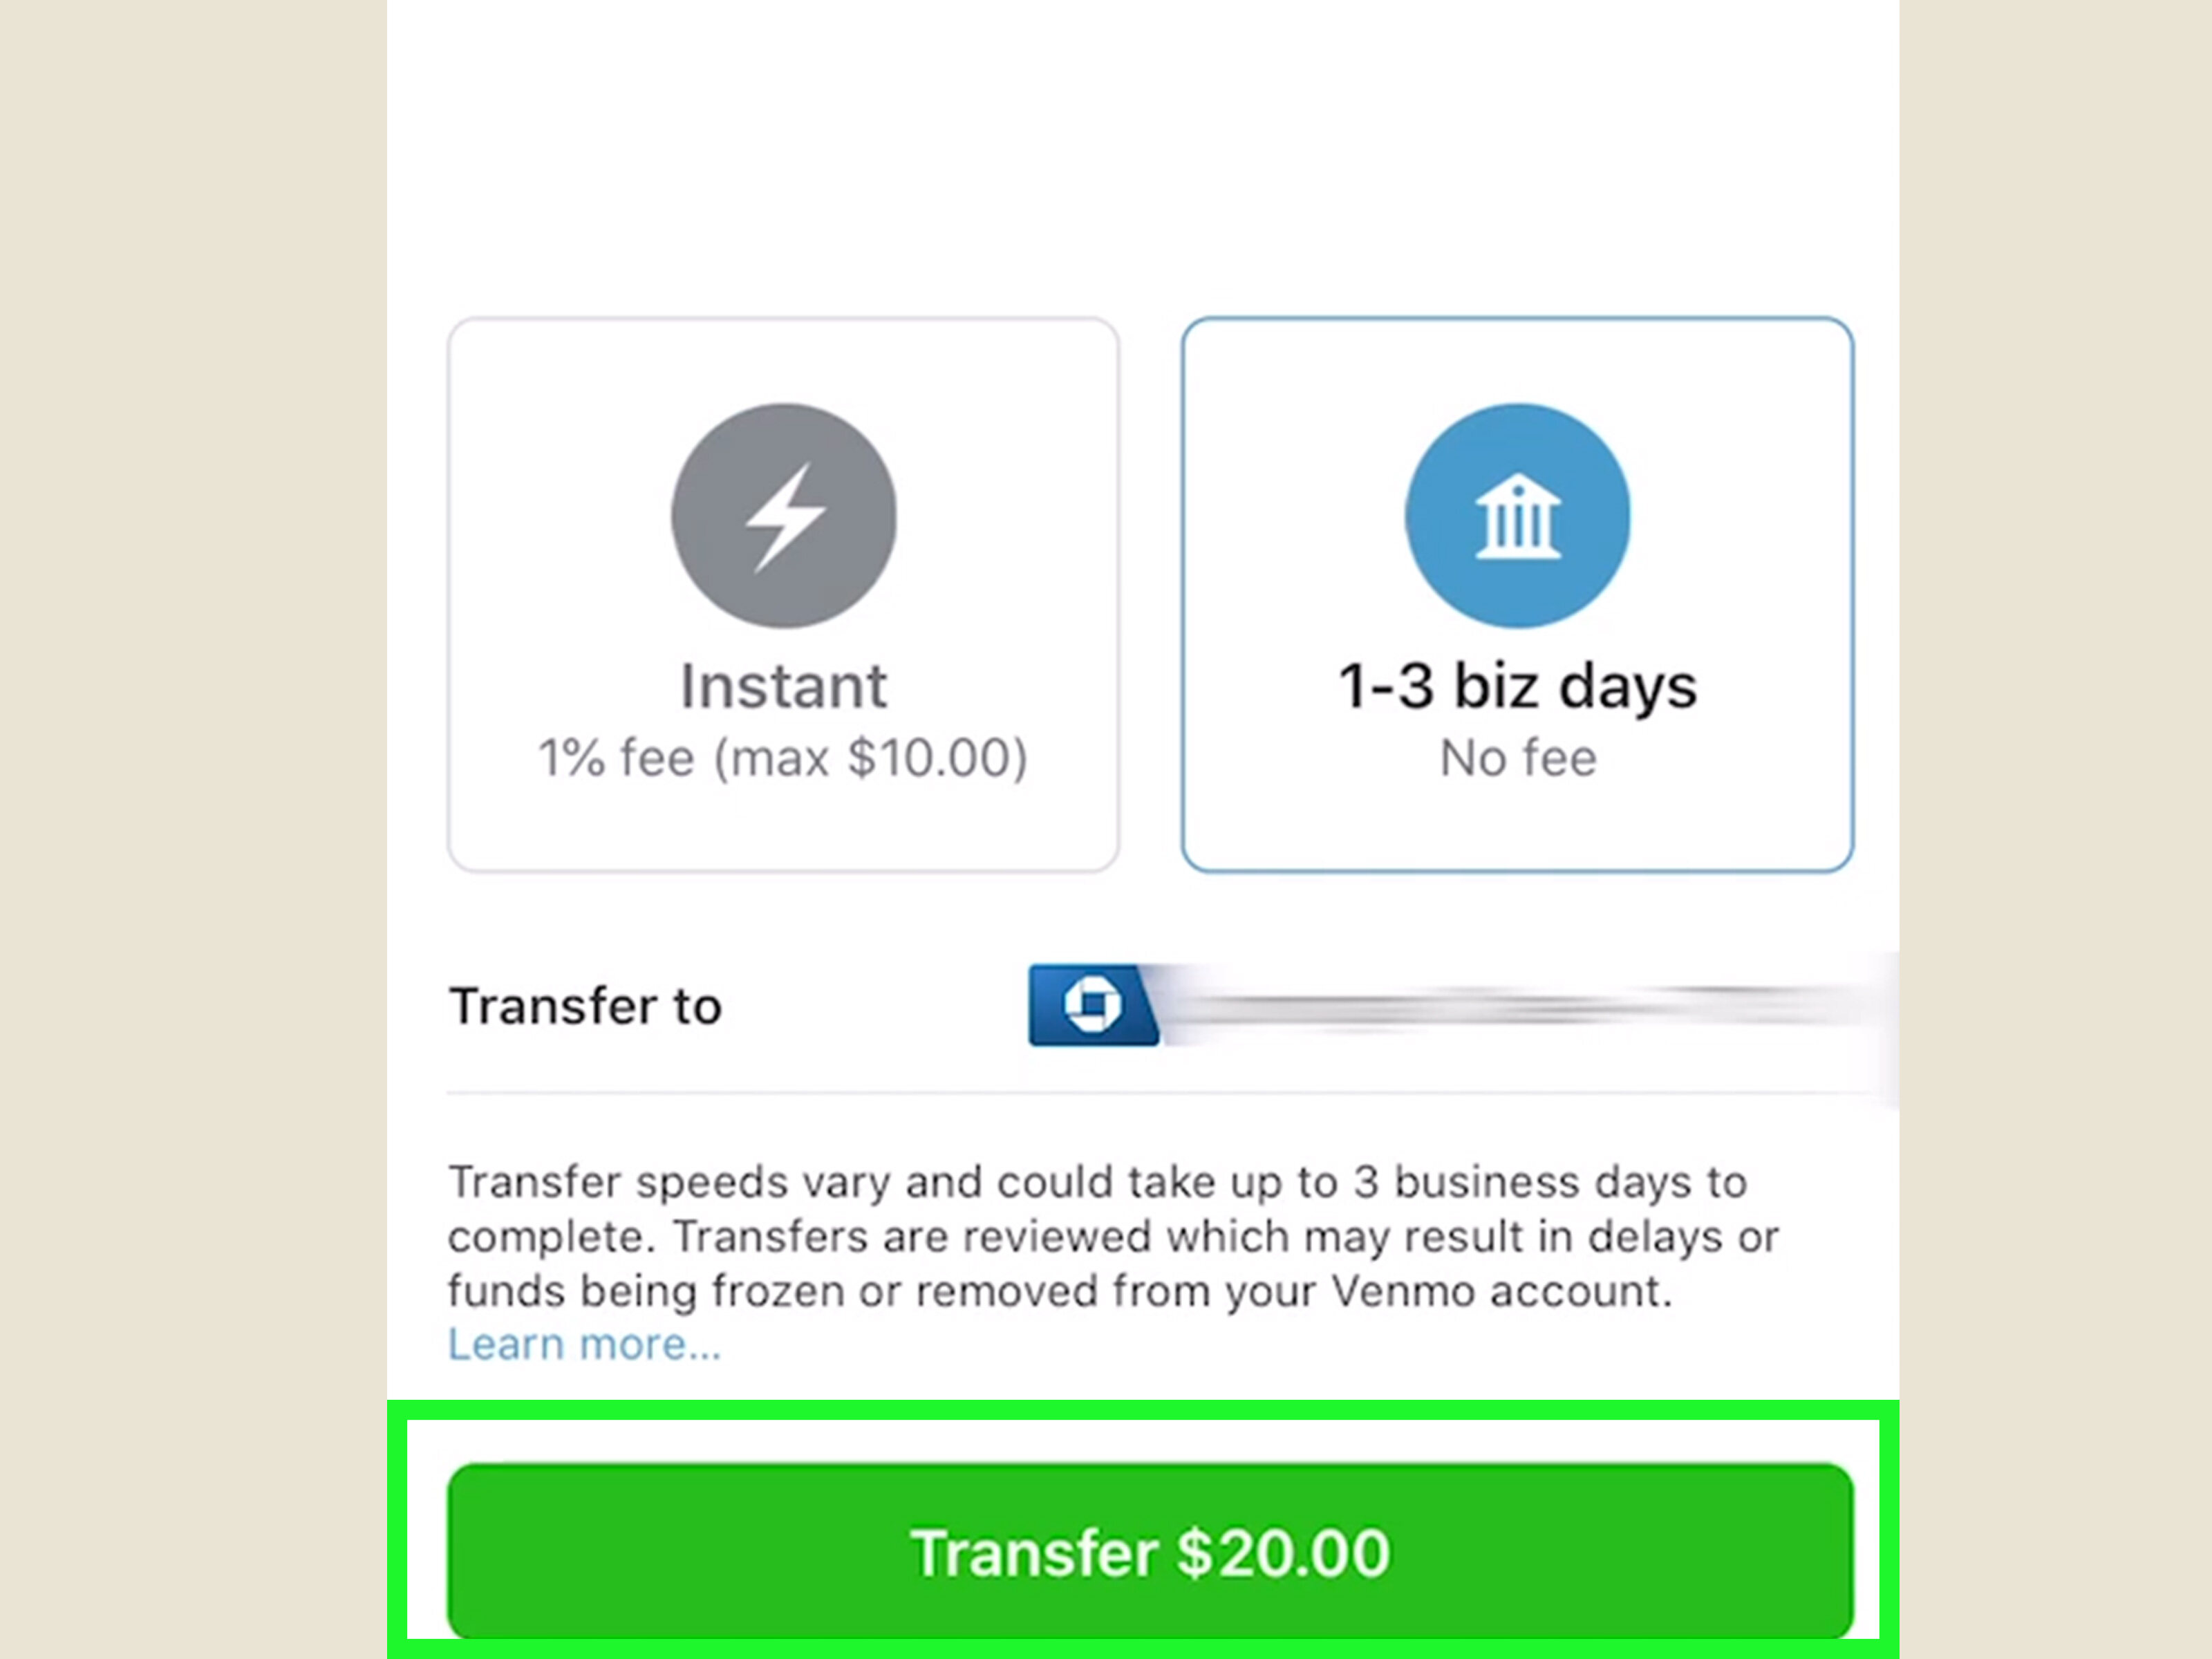
- Choose the amount to add: Enter the amount of money you wish to add to your Venmo account. Venmo allows you to add funds from your linked bank account or credit/debit card. Choose the option that suits you best.
- Select the funding source: If you opt to add funds from your linked bank account, select the desired account from the list of available options. If you choose to use a credit/debit card, enter the card details as prompted.
- Confirm the transaction: Review the details of your transaction, including the amount to be added and the funding source. Once you’re satisfied, tap on the “Add” or “Confirm” button to proceed with the transaction.
- Wait for the funds to be added: The funds you added will be processed and credited to your Venmo account. This usually takes a few minutes, but it may take longer in certain circumstances.
Once the funds have been successfully added to your Venmo account, you can use them to make purchases through Venmo Goods and Services. It’s important to note that Venmo may charge a fee for certain types of transactions, such as instant transfers or transfers from a credit card. Make sure to review the fee schedule provided by Venmo to understand any charges that may apply.
By adding funds to your Venmo account, you have the flexibility to make purchases without worrying about directly linking your payment methods for each transaction. This adds an extra layer of security and convenience, making your shopping experience smooth and hassle-free.
Now that your Venmo account is funded, let’s move on to the next step and learn how to link your bank account or credit/debit card for seamless payments.
Linking a Bank Account or Credit/Debit Card
In order to use Venmo Goods and Services to make purchases, you’ll need to link a bank account or credit/debit card to your Venmo account. This allows you to easily add funds and make payments for your purchases. Here’s how you can link a bank account or credit/debit card to your Venmo account:
- Open the Venmo app: Launch the Venmo app on your smartphone or tablet and log in to your account using your username and password.
- Access your profile settings: Tap on the “☰” icon (located in the upper-left corner of the app) to open the side menu. From there, select “Settings” and then tap on “Payment Methods”.
- Add a bank account or credit/debit card: Tap on the option to add a new bank account or card. Follow the prompts to enter the required information, such as your account/card number, expiration date, and security code.
- Verify your account or card: Venmo may require you to verify your bank account or card to ensure its authenticity. This may involve authorizing a small test deposit or confirming a verification code sent via SMS or email.
- Confirm the linking process: Once you’ve entered the necessary information and completed the verification process, review and confirm the linking of your bank account or card to your Venmo account.
It’s important to note that Venmo allows you to link multiple bank accounts and credit/debit cards to your account. This gives you the flexibility to choose which payment method to use for each transaction.
When linking a bank account to Venmo, it may take a couple of business days to verify and complete the process. However, once your bank account is confirmed, you’ll be able to initiate transfers between your bank account and Venmo account easily.
For credit/debit cards, Venmo may charge a fee for certain types of transactions, such as making payments using a credit card. Review the fee schedule provided by Venmo to understand any charges that may apply.
Linking a bank account or credit/debit card to your Venmo account ensures a seamless and secure payment experience. By having your payment methods linked, you can easily add funds, make purchases, and track your transactions all within the app.
Now that you’ve successfully linked your bank account or card to your Venmo account, let’s move on to the next step and learn how to verify your identity to unlock additional features.
Verifying your Identity
Verifying your identity is an important step when using Venmo Goods and Services, as it helps ensure the security and integrity of the platform. Venmo may require users to verify their identity in order to comply with regulatory requirements and protect against fraud. Here’s an overview of the process for verifying your identity on Venmo:
- Access your profile settings: Open the Venmo app on your smartphone or tablet and log in to your account. Tap on the “☰” icon to open the side menu, select “Settings,” and then choose “Identity Verification.”
- Provide your full legal name and date of birth: Venmo will ask you to provide your full legal name and date of birth to verify your identity. Make sure to enter accurate and up-to-date information.
- Confirm your personal details: Venmo may require you to confirm some personal details, such as your address or the last four digits of your Social Security number, to further validate your identity.
- Submit additional documentation: In some cases, Venmo may ask you to provide additional documentation to verify your identity. This can include uploading a photo of a government-issued ID, such as a driver’s license or passport, and potentially providing proof of address.
- Wait for verification: Once you’ve submitted your information and any required documentation, Venmo will review your details. The verification process usually takes a few business days, and you’ll receive a notification once your account is verified.
Verifying your identity not only unlocks additional features on Venmo but also helps provide a safer environment for all users. It adds an extra layer of security to protect your account and helps prevent unauthorized access.
It’s important to note that Venmo treats user privacy and security with utmost importance. Any personal information or documentation you provide during the identity verification process is encrypted and securely stored.
By verifying your identity on Venmo, you gain access to increased limits for transactions, such as sending and receiving money. This allows you to use Venmo Goods and Services with ease, making purchases and paying for services more efficiently.
Now that you’ve successfully verified your identity on Venmo, you’re ready to start using the platform’s full range of features and enjoy the convenience of secure payments.
Paying for Goods and Services with Venmo
When it comes to using Venmo Goods and Services to pay for purchases, the process is simple and straightforward. Whether you’re shopping online or making a payment in person, Venmo offers a seamless payment experience. Here’s a step-by-step guide on how to pay for goods and services with Venmo:
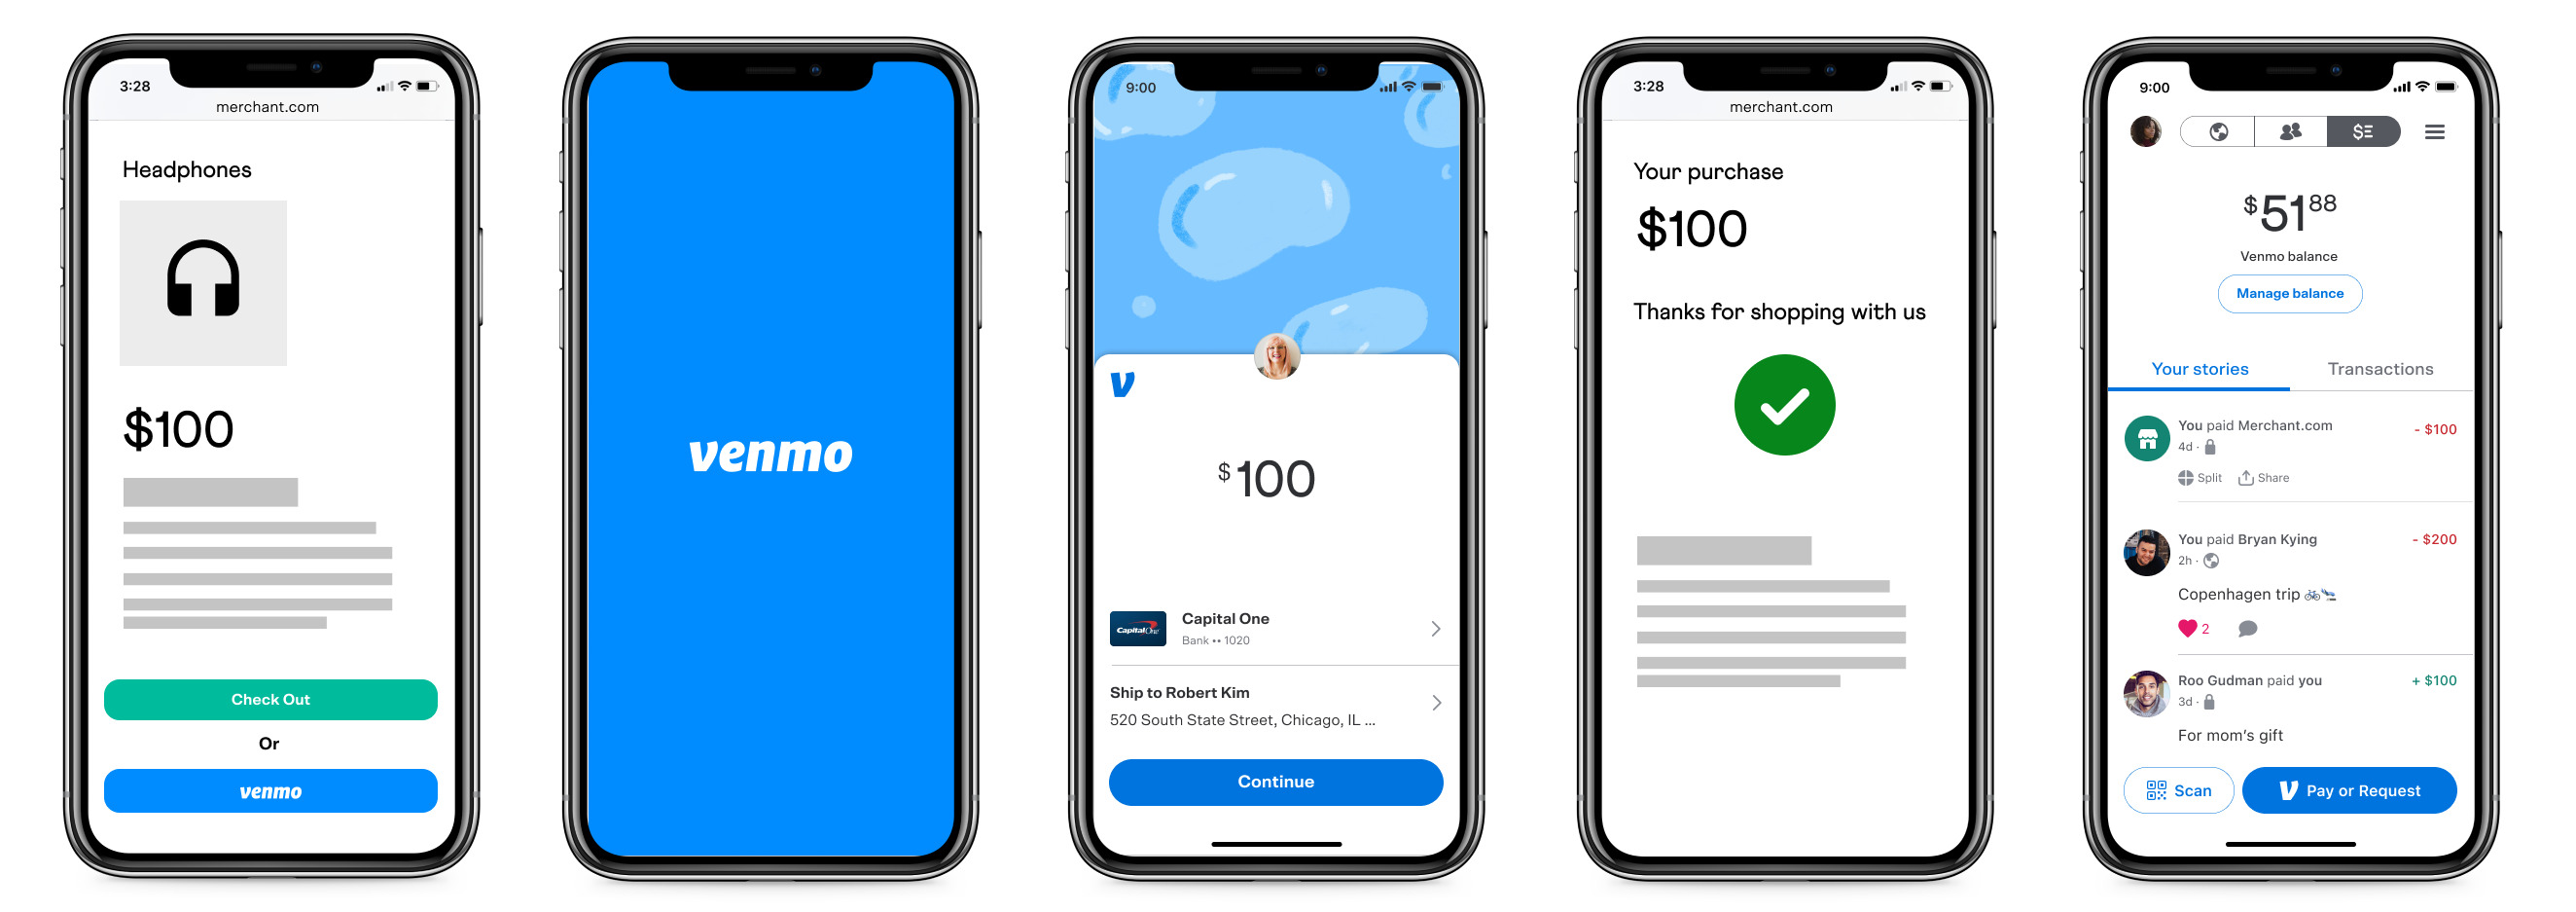
- Find a merchant that accepts Venmo: Before making a purchase, make sure the merchant accepts Venmo as a payment option. You can easily check this by looking for the Venmo logo or exploring the “Pay with Venmo” option on their website or app.
- Select Venmo as your payment method: When you’re ready to make a payment, proceed to the merchant’s checkout page. Look for the option to select a payment method and choose Venmo from the available options.
- Log in to your Venmo account: If you’re not already logged in, you’ll be prompted to log in to your Venmo account using your registered username and password. Make sure to enter the correct details to access your account.
- Authorize the payment: Once you’re logged in, review the details of your purchase, including the amount to be paid. Confirm the payment by authorizing it with your Venmo PIN or any additional verification method you have set up.
- Complete the transaction: After authorizing the payment, the transaction will be processed. You’ll receive a confirmation screen or email with the details of your purchase. The payment will be deducted from your Venmo balance or charged to your linked payment method, depending on the available funds.
- Keep a record of your transaction: Venmo automatically stores a record of your purchase within the app. You can view your transaction history, including the merchant’s name, date, and amount spent. This helps you stay organized and track your spending.
Paying for goods and services with Venmo offers a convenient and secure way to handle your transactions. It eliminates the need for carrying cash or physically presenting your payment method, making the process more efficient and streamlined.
When using Venmo Goods and Services, it’s essential to ensure that you have sufficient funds in your Venmo account or linked payment method. This helps avoid any potential payment delays or issues.
Furthermore, it’s always a good practice to review your purchases carefully and ensure that the transaction details are accurate before authorizing the payment. This helps minimize the risk of any discrepancies or potential disputes down the line.
Now that you know how to use Venmo to pay for goods and services, let’s explore how to find merchants that accept Venmo for added convenience.
Finding Merchants that Accept Venmo
With the popularity of Venmo continuing to rise, more and more merchants are accepting Venmo as a payment option. Finding merchants that accept Venmo for your purchases is relatively easy. Here are a few ways to discover merchants that accept Venmo:
1. Venmo App: Open the Venmo app on your smartphone or tablet and navigate to the “Pay or Request” tab. Scroll down, and you will find a section called “Merchants.” Explore this section to discover featured merchants that accept Venmo or use the search bar to find specific businesses or categories.
2. Venmo Website: Visit the Venmo website (venmo.com) and click on the “Merchants” tab at the top of the page. Here, you will find a directory of many online stores and businesses that accept Venmo as a payment method. You can browse through the list or search for particular merchants.
3. In-Store Transactions: When shopping or dining at a physical store, keep an eye out for the Venmo logo or any signs indicating that Venmo is accepted. Look for contactless payment options, as many merchants now offer the ability to pay with Venmo using QR codes or Near Field Communication (NFC) technology.
4. Online Shopping: When browsing online stores, look for the Venmo logo or check the payment options provided during checkout. Many online retailers now display the Venmo payment option alongside other popular payment methods like credit cards and PayPal.
5. Social Media: Follow Venmo on social media platforms like Instagram, Twitter, and Facebook. Venmo often partners with various brands and runs promotions or collaborations that involve exclusive discounts or special offers for Venmo users. Keep an eye out for these opportunities to discover new merchants.
6. Word of Mouth: Don’t hesitate to ask friends, family, or colleagues if they know of any great merchants that accept Venmo. Personal recommendations can be an excellent way to discover unique stores or local businesses that you might not come across otherwise.
Remember, while Venmo is widely accepted, it’s always a good idea to double-check with the merchant before making a purchase to ensure they accept Venmo as a payment option. Merchant acceptance may vary, and it’s best to confirm prior to completing a transaction.
By exploring these sources and keeping an eye out for the Venmo logo, you’ll be able to find merchants that accept Venmo, giving you the flexibility to make purchases easily and securely.
Now that you know how to find Venmo-accepting merchants, let’s move on to the next step and learn how to complete a Venmo transaction for goods and services.
Completing a Venmo Transaction for Goods and Services
Completing a Venmo transaction for goods and services is a seamless process that allows you to make purchases conveniently. Whether you’re shopping online or at a physical store, here’s a step-by-step guide on how to complete a Venmo transaction:
- Choose the items or services: Browse through the products or services offered by the merchant and select the ones you wish to purchase.
- Proceed to checkout: Once you’ve added the desired items to your cart, proceed to the checkout page on the merchant’s website or app.
- Select Venmo as your payment option: Look for the payment options available during checkout and choose Venmo as your preferred payment method. If you’re shopping in-store, inform the cashier that you would like to pay with Venmo.
- Enter the payment details: If you’re shopping online, you may need to provide your Venmo username or email address associated with your Venmo account. If you’re making an in-store purchase, follow the instructions provided by the merchant for scanning a QR code or using NFC technology.
- Authorize the payment: Once you’ve entered the necessary payment details, review the transaction details and authorize the payment. This may involve confirming the payment on your smartphone or entering your Venmo PIN.
- Receive confirmation: After authorizing the payment, you’ll receive a confirmation of the transaction. This may be in the form of an email, a notification in the Venmo app, or a receipt from the merchant.
- Track your purchases: Venmo automatically stores a record of your transaction history within the app. You can view your purchases, track your spending, and monitor your transaction activity to stay organized.
It’s important to remember that Venmo transactions are typically processed immediately. However, some transactions may take a brief moment to complete, depending on factors such as internet connectivity or merchant verification.
When completing a Venmo transaction, always ensure that the transaction details, including the total amount and items/services purchased, are accurate before authorizing the payment. Double-checking the information can help prevent any potential issues or discrepancies down the line.
If you encounter any issues during the transaction process, such as a declined payment or technical difficulties, reach out to the merchant’s customer support or contact Venmo customer service for assistance. They will be able to provide guidance and help resolve any concerns you may have.
By following these steps and being mindful of the transaction details, you can easily and securely complete Venmo transactions for goods and services, making your shopping experience effortless and convenient.
Now that you know how to complete a Venmo transaction, let’s explore some troubleshooting tips for common issues that may arise during the payment process.
Troubleshooting Common Issues
While Venmo strives to provide a seamless payment experience, you may encounter some common issues during the transaction process. Here are a few troubleshooting tips to help you navigate these challenges:
1. Insufficient funds: If you receive an error indicating insufficient funds, make sure you have enough balance in your Venmo account or sufficient funds in your linked bank account or credit/debit card. You may need to add funds to your Venmo account or choose an alternative payment method.
2. Declined payment: If your payment is declined, double-check that the payment details you entered are correct, including the amount, recipient, and payment method. If the issue persists, ensure that your Venmo account or linked payment method is in good standing, and contact Venmo or your bank for further assistance.
3. Payment not appearing: If a payment does not appear in your transaction history or the recipient claims they didn’t receive it, verify that you entered the correct recipient information and check your confirmation email or receipt for any discrepancies. If the payment is still not showing, reach out to Venmo customer service for investigation.
4. Merchant not accepting Venmo: If you encounter a merchant that does not accept Venmo, you may need to choose an alternative payment method or inquire with the merchant if they can accommodate Venmo payment or consider using a different store that accepts Venmo.
5. Slow processing time: Occasionally, transactions may take longer to process than usual. This can be due to various factors, such as network connectivity or merchant verification. If your transaction is taking longer than expected, be patient and wait for the process to complete. If significant delays occur, contact Venmo customer service for assistance.
6. Security concerns: If you have any security concerns about your Venmo account or a suspicious transaction, immediately change your account password and reach out to Venmo customer support. They can help investigate the issue and take appropriate action to secure your account.
Remember, it’s always recommended to review your transaction details carefully, keep track of your receipts or confirmation emails, and contact customer support when facing any problems. They are best equipped to provide specific guidance and assist in resolving any issues you may encounter.
By being proactive and following these troubleshooting tips, you can overcome common issues and ensure a smooth payment experience with Venmo Goods and Services.
Now that you’re armed with these troubleshooting tips, you’re well-prepared to navigate any challenges that may arise during your Venmo transactions.
Conclusion
Using Venmo Goods and Services provides a convenient and secure way to make purchases for a wide range of goods and services. From shopping online to making payments at physical stores, Venmo offers a seamless payment experience that simplifies your financial transactions.
In this guide, we explored the basics of Venmo Goods and Services, including setting up your Venmo account, adding funds, and linking your bank account or credit/debit card. We also discussed the importance of verifying your identity to unlock additional features and enhance security.
We discussed how to find merchants that accept Venmo, enabling you to easily locate businesses where you can make purchases using the platform. Additionally, we walked through the process of completing a Venmo transaction for goods and services, ensuring a smooth payment process.
Should you encounter any issues while using Venmo, we provided troubleshooting tips to help you resolve common problems, such as insufficient funds, declined payments, or slow processing times.
By following the steps outlined in this guide and being aware of these helpful tips, you can confidently use Venmo Goods and Services to simplify your payments and enhance your shopping experience.
Remember, it’s always crucial to review your transactions, stay vigilant of security concerns, and reach out to merchant support or Venmo customer service for assistance when needed.
Now that you have a comprehensive understanding of Venmo Goods and Services and how to make the most of this versatile payment option, you’re well-equipped to handle your financial transactions with ease and convenience.