Introduction
Welcome to our guide on how to accept money on Facebook Pay. In today’s digital world, online payments have become an important aspect of our daily lives. With the growing popularity of social media platforms, it comes as no surprise that Facebook has introduced its own payment system – Facebook Pay. This convenient feature allows users to send and receive money directly within the Facebook app or website, making it easier than ever to handle transactions with friends, family, and even customers.
Whether you’re looking to split the bill with a friend, receive payments for products or services, or even accept donations for a charitable cause, Facebook Pay offers a seamless and secure way to handle these transactions within the Facebook ecosystem. In this guide, we will walk you through the process of setting up Facebook Pay, linking a payment method, adding a payment button, and accepting money from friends. We will also cover how to request payments from friends, accept donations, and manage payments and transactions.
But before we delve into the specifics, it’s important to note that Facebook Pay is available to eligible users and in select countries. You should also ensure that you have a valid payment method linked to your Facebook account to facilitate sending and receiving money. With that in mind, let’s embark on this step-by-step journey to learn how to accept money on Facebook Pay.
Setting Up Facebook Pay
Before you can start accepting money on Facebook Pay, you need to set up this feature on your account. Follow these simple steps to get started:
- Open the Facebook app on your mobile device or go to the Facebook website on your computer.
- Tap on the menu button (three horizontal lines) on the bottom right corner of the screen or in the top right corner, depending on your device.
- Scroll down and select “Settings & Privacy” and then choose “Settings”.
- Under the “Your Facebook Information” section, tap on “Facebook Pay”.
- Click on “Add New Payment Method” to link a debit card, credit card, or PayPal account to your Facebook Pay.
- Enter the required details for your chosen payment method and follow the prompts to verify your account.
- Once your payment method is linked, tap on “Continue” to set up a security PIN or enable biometric authentication for additional protection.
It’s worth noting that Facebook Pay allows you to add multiple payment methods, making it convenient to choose how you want to pay or receive money. This flexibility ensures you have different options at your disposal to cater to various payment preferences and situations. Additionally, you can also set a primary payment method that Facebook will use as a default option for transactions unless you specify otherwise.
Now that you’ve successfully set up Facebook Pay and linked a payment method, you’re ready to receive money directly on the platform. In the next sections, we will explore how to add a payment button, accept payments from friends, request payments, and even accept donations on Facebook Pay.
Linking a Payment Method
Linking a payment method to your Facebook Pay account is essential to facilitate seamless transactions. Facebook Pay supports various payment methods, including debit cards, credit cards, and PayPal. Here’s how you can link a payment method:
- Open the Facebook app on your mobile device or go to the Facebook website on your computer.
- Tap on the menu button (three horizontal lines) on the bottom right corner of the screen or in the top right corner, depending on your device.
- Scroll down and select “Settings & Privacy” and then choose “Settings”.
- Under the “Your Facebook Information” section, tap on “Facebook Pay”.
- Click on “Add New Payment Method”.
- Select the desired payment method option: debit card, credit card, or PayPal.
- Enter the required information for the selected payment method, such as card details or PayPal credentials.
- Follow the prompts to verify your payment method, which may include providing additional security information or confirming your identity.
Once you have successfully linked a payment method, it will now be available for use on Facebook Pay. You can link multiple payment methods to give yourself flexibility when sending and receiving money.
In addition to linking a payment method, it’s important to ensure that your payment information is kept secure. Facebook Pay leverages advanced security measures to protect your financial details. However, it’s always a good practice to regularly monitor your transactions and report any suspicious activity to Facebook immediately.
Now that you have your payment method linked, let’s move on to the next section to learn how to add a payment button to your Facebook profile or page.
Adding a Payment Button
Adding a payment button to your Facebook profile or page makes it easy for others to send you money directly. Whether you’re a small business owner offering products or services or simply looking to receive payments from friends, the payment button streamlines the process. Follow these steps to add a payment button:
- Open the Facebook app on your mobile device or go to the Facebook website on your computer.
- Go to your Facebook profile or navigate to the Facebook page where you want to add the payment button.
- In the “About” section, click on “Edit Profile” or “Edit Page Info”.
- Scroll down to find the “Contact Info” or “Contact and Basic Info” section.
- Click on the “Add a Button” or “Add a Payment Button” option.
- Choose the “Make a Purchase or Donation” option.
- Select “Get bookings” if you offer services or “Donate to Charity” if you are raising funds for a cause.
- Enter the necessary details, such as your PayPal.me link or payment instructions.
- Save the changes, and the payment button will now be visible on your profile or page.
By adding a payment button, you provide a simple and direct way for others to send you money. For example, if you run a small business, customers can easily purchase your products or services by clicking on the payment button. Similarly, if you’re collecting donations for a charitable cause, supporters can contribute funds with just a few clicks.
Remember to regularly update your payment instructions or PayPal.me link if they change. This way, you ensure that the payment button directs users to the correct payment method without any disruptions. Now that you have added a payment button, let’s move on to the next section to explore how to accept money from friends on Facebook.
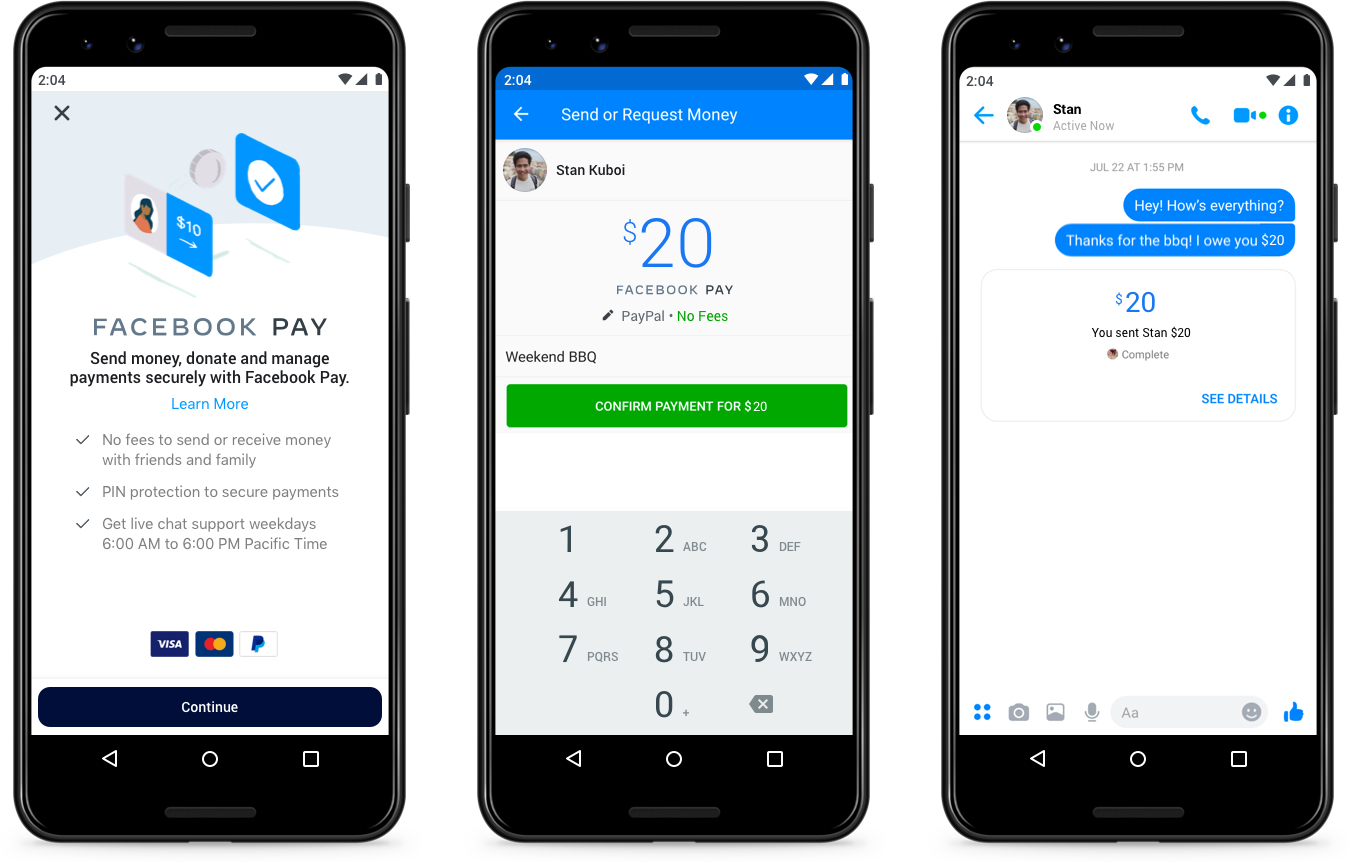
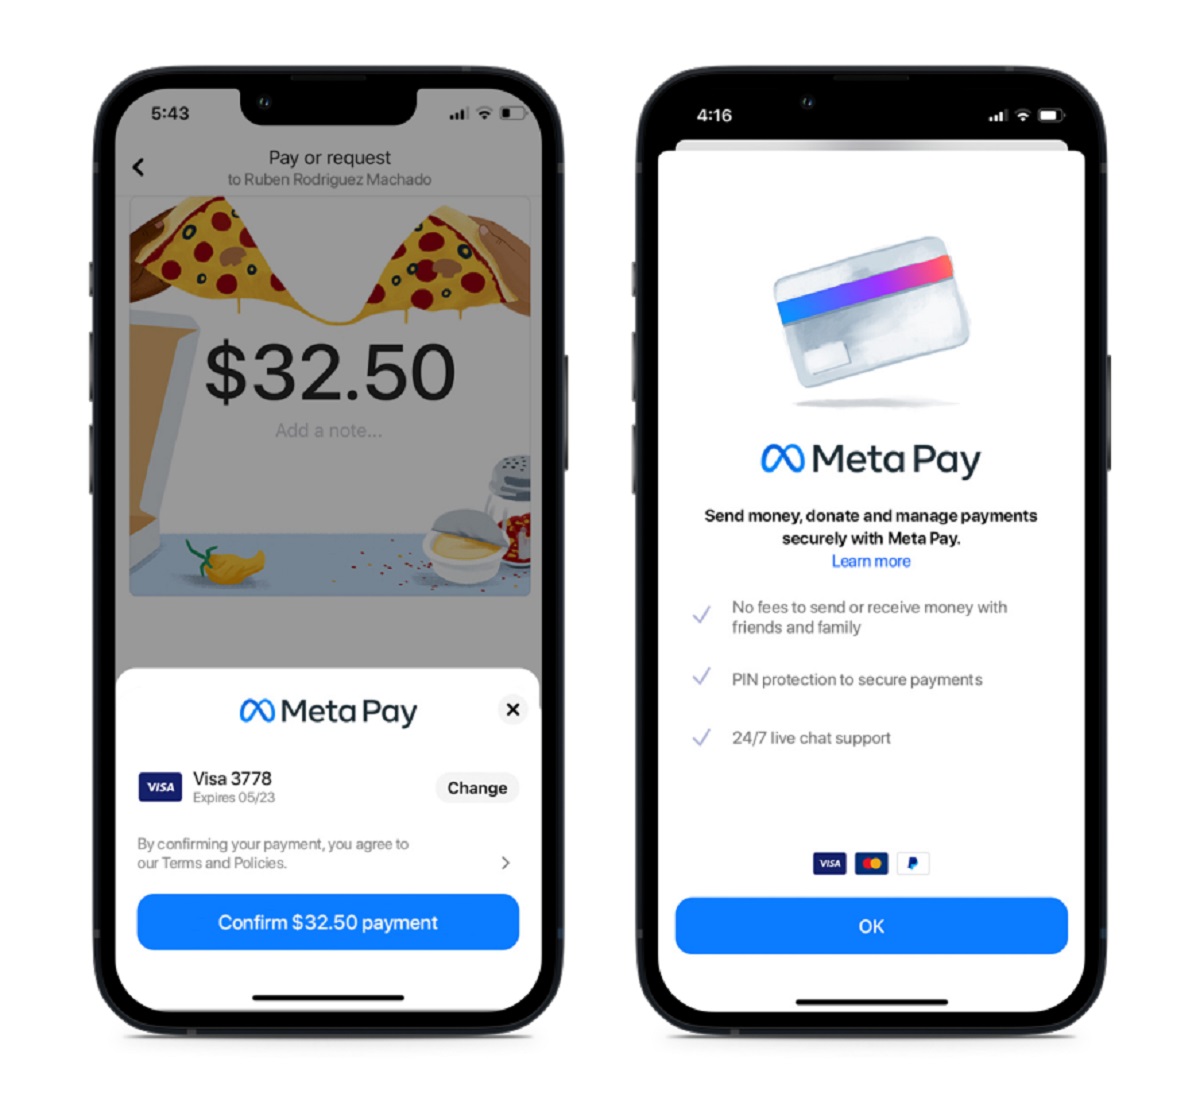
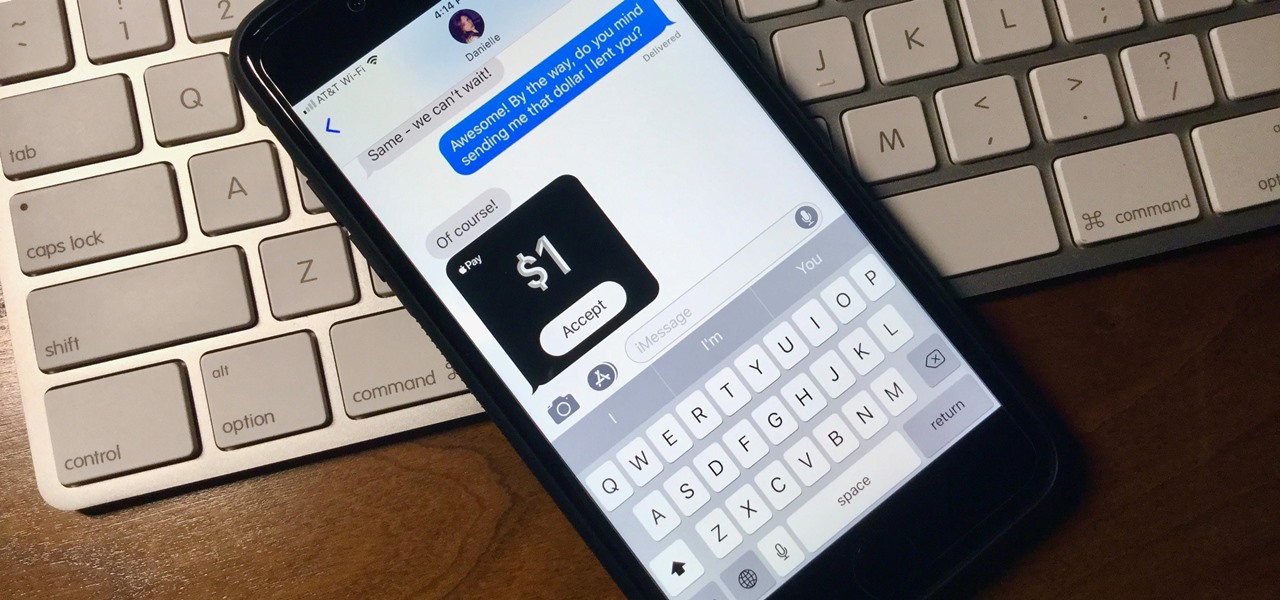
Accepting Money from Friends
Accepting money from friends on Facebook Pay is a straightforward process that allows you to seamlessly receive payments. Whether it’s splitting a bill, reimbursing a friend, or receiving funds for any other reason, here’s how you can accept money on Facebook:
- Open the Facebook app on your mobile device or go to the Facebook website on your computer.
- Access the conversation or message thread with the friend who wants to send you money.
- Tap on the dollar sign ($) or the “Payments” option in the messaging interface.
- Enter the amount you want to request or accept from your friend.
- Add a brief note explaining the purpose of the transaction, if necessary.
- Review the details and click “Request” or “Send” to proceed with the transaction.
- Your friend will receive a notification and can easily complete the payment within the Facebook app or website.
- Once the payment is sent, you will receive a confirmation, and the money will be added to your Facebook Pay balance.
It’s important to note that when you receive money from friends, it will be added to your Facebook Pay balance. From there, you can choose to keep the money in your balance for future transactions or transfer it to your linked bank account. Facebook Pay also allows you to set a preferred currency for transactions, which can be useful if you frequently deal with international payments.
Furthermore, it’s worth mentioning that Facebook Pay transactions between friends are typically free of charge. However, keep in mind that certain payment methods or currency conversions may incur fees. It’s a good idea to review the terms and conditions of your linked payment method to understand any potential charges.
Now that you know how to accept money from friends on Facebook, let’s move on to the next section to learn how to request payments from friends.
Requesting Payment from Friends
Requesting payment from friends on Facebook Pay is a convenient way to remind them about pending transactions or to proactively ask for money owed. Whether you’re splitting expenses or collecting funds for a group gift, here’s how you can request payment from friends:
- Open the Facebook app on your mobile device or go to the Facebook website on your computer.
- Access the conversation or message thread with the friend from whom you want to request payment.
- Tap on the dollar sign ($) or the “Payments” option in the messaging interface.
- Click on the “Request” tab to switch to the payment request mode.
- Enter the amount you want to request and add a brief description or note about the transaction.
- Review the details and click “Request” to send the payment request to your friend.
- Your friend will receive a notification with the payment request and can easily fulfill it within the Facebook app or website.
- Once the payment is sent, you will receive a confirmation, and the money will be added to your Facebook Pay balance.
When requesting payment from friends, it’s essential to be clear about the amount owed and include any relevant details about the transaction. Adding a friendly note or context can help jog their memory and expedite the payment process. Facebook makes it easy for your friend to complete the payment with just a few clicks, ensuring a smooth experience for both parties.
Once the payment is received, you can choose to keep the money in your Facebook Pay balance or transfer it to your linked bank account. Additionally, Facebook Pay provides a transaction history that allows you to keep track of your payments, requests, and balances, making it convenient to stay organized.
Now that you know how to request payment from friends on Facebook, let’s explore how to accept donations on Facebook Pay in the next section.
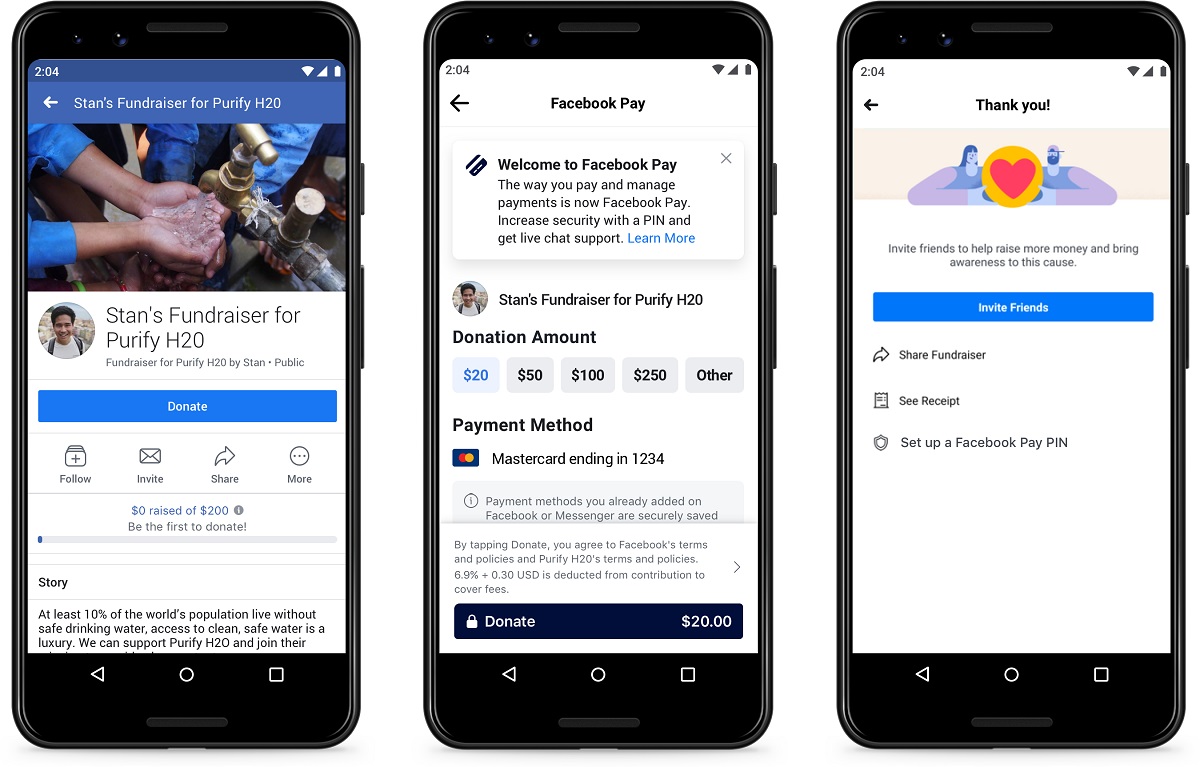
Accepting Donations on Facebook
Accepting donations on Facebook Pay is a powerful way to raise funds for charitable causes or personal campaigns. Whether you’re supporting a non-profit organization or seeking help for medical expenses, Facebook provides a platform to easily collect donations. Here’s how you can accept donations on Facebook:
- Open the Facebook app on your mobile device or go to the Facebook website on your computer.
- In the left-hand sidebar of your Facebook feed, look for the “Fundraisers” section.
- Click on “Create Fundraiser” or “Raise Money” depending on your device.
- Select the type of fundraiser you want to create, such as a personal cause, charity, or non-profit.
- Provide a clear and compelling title for your fundraiser.
- Add a description explaining the purpose of your campaign and why donations are important.
- Set a realistic and achievable fundraising goal.
- Choose a compelling cover photo or video that represents your cause.
- Select a duration for your fundraiser or choose to keep it open-ended.
- Share your fundraiser with your Facebook friends and followers to spread awareness.
Facebook makes it easy for people to donate to your cause directly within the platform, keeping the process simple and secure. Friends and acquaintances can contribute to your fundraiser by clicking on the “Donate” button on your fundraiser page and choosing the desired amount.
When accepting donations on Facebook, it’s essential to provide regular updates and express gratitude to your donors. Share updates on the progress of your campaign, how the funds will be used, and the impact it will have. Showing transparency and appreciation will not only keep your donors engaged but also encourage others to support your cause.
Facebook provides tools to track the progress of your fundraiser, including the total amount raised, the number of donors, and the performance of your campaign. This information can help you evaluate the effectiveness of your fundraising efforts and adjust your strategy if needed.
Now that you know how to accept donations on Facebook, let’s move on to the next section to explore how to accept payments for products or services.
Accepting Payments for Products or Services
If you’re a small business owner, freelancer, or offer products or services, accepting payments on Facebook can be a convenient option. This feature allows you to easily process transactions and receive payments from customers directly within the Facebook ecosystem. Here’s how you can accept payments for products or services:
- Open the Facebook app on your mobile device or go to the Facebook website on your computer.
- In the left-hand sidebar of your Facebook feed, click on the “Shop” tab or navigate to your business page.
- Create a shop on Facebook by adding your products or services and providing detailed descriptions.
- Specify the price, available options (if applicable), and any additional information your customers need to know.
- Enable the “Checkout” feature, which allows customers to complete the purchase without leaving the Facebook platform.
- Configure shipping and return policies, as well as other relevant settings to ensure a smooth buying experience for your customers.
- Promote your products or services through posts, stories, or advertisements to attract potential buyers.
- Customers can click on your products or services, view the details, and proceed to make a purchase directly on Facebook.
- Once the payment is successfully processed, you will receive a notification, and the funds will be added to your Facebook Pay balance.
Accepting payments for products or services on Facebook provides you with a platform to showcase your offerings and reach a wider audience. By leveraging the power of social media, you can increase visibility and engage with customers directly within the Facebook ecosystem.
It’s important to ensure that your product or service descriptions are accurate and enticing, as this can greatly influence customers’ purchasing decisions. Providing high-quality images and detailed specifications can also help customers make informed choices before making a purchase.
Additionally, prompt and reliable customer service is crucial when accepting payments for products or services. Responding to inquiries, assisting with the ordering process, and addressing any concerns or questions can go a long way in building trust and maintaining customer satisfaction.
Now that you know how to accept payments for products or services on Facebook, let’s move on to the next section to explore how to manage payments and transactions.
Managing Payments and Transactions
To ensure a smooth and organized financial experience on Facebook Pay, it’s essential to effectively manage your payments and transactions. Here are some tips for managing your payments and staying on top of your financial activities:
- Regularly review your Facebook Pay activity by accessing the “Payments” section in your Facebook settings.
- Monitor incoming and outgoing payments, ensuring that all transactions are accurate and accounted for.
- Keep track of your Facebook Pay balance and transfer funds to your linked bank account when needed.
- Verify that your linked payment methods are up to date and any necessary updates are made promptly.
- Review your transaction history to analyze your spending patterns and identify any discrepancies or unusual activity.
- If you notice any unauthorized transactions or suspicious behavior, report it to Facebook immediately for assistance.
- Take advantage of any available security features, such as enabling two-factor authentication or setting a strong PIN for added protection.
- Keep communication lines open with your customers or friends regarding payments, ensuring transparency and addressing any concerns promptly.
- If you have a business, regularly reconcile your sales records with the payments received on Facebook to maintain accurate financial records.
- Stay updated with any policy changes or updates related to Facebook Pay to ensure compliance and minimize any potential disruptions.
By actively managing your payments and transactions on Facebook Pay, you can maintain control over your financial activities and minimize the risk of any issues arising. Promptly addressing any discrepancies or concerns and staying vigilant about the security of your account will help ensure a positive and secure experience.
Remember, Facebook Pay offers a convenient platform for handling transactions, but it’s always a good practice to maintain your own financial records and refer to official payment receipts or statements when necessary.
Now that you have a better understanding of managing payments and transactions on Facebook Pay, let’s move towards troubleshooting common issues in the next section.
Troubleshooting Common Issues
While Facebook Pay strives to provide a seamless payment experience, there may be times when you encounter common issues. Here are some troubleshooting steps to help resolve common issues that you might encounter:
- If you are unable to set up Facebook Pay, ensure that you meet the eligibility requirements and that your country supports the feature. Also, ensure that you have a valid payment method linked to your Facebook account.
- If your payment method is not being accepted, double-check that the card or account details are entered correctly and that there are sufficient funds available. You can also try using a different payment method if available.
- If you are experiencing difficulties in adding a payment button to your profile or page, ensure that you are following the correct steps outlined in the “Adding a Payment Button” section. If the issue persists, try accessing your Facebook account from a different device or browser.
- If you are not receiving payments from friends, ensure that the payment request is sent correctly and your friend has completed the transaction. Double-check your notification settings to ensure you are receiving payment notifications.
- If you are having trouble requesting payment from friends, confirm that the request is sent to the correct person and that they have received the payment request notification. Communicate with your friend to ensure they are aware of the request.
- If you encounter difficulties while accepting donations, check that your fundraiser is set up properly, with clear information about your cause and fundraising goal. Make sure your fundraiser is shared effectively with your friends and followers to encourage donations.
- If you are facing challenges in accepting payments for products or services, ensure that your shop is properly set up and that your products or services are accurately described with compelling imagery. Double-check the checkout settings in your shop to ensure a smooth transaction process.
- If you notice any discrepancies or unauthorized transactions in your transaction history, report the issue to Facebook immediately to seek resolution and protect your account from any potential security threats.
If you have exhausted these troubleshooting steps and the issue persists, consider reaching out to Facebook’s customer support for further assistance. They can provide specific guidance and help resolve any technical or account-related issues you may be facing.
Remember, staying patient and proactive in troubleshooting issues will help ensure a smoother experience with Facebook Pay. Regularly checking for updates, following best practices, and reaching out for assistance when needed will contribute to a more seamless payment journey.
Now that we’ve covered common troubleshooting issues, it’s time to wrap up this guide. By following the steps outlined throughout this article, you can confidently accept money on Facebook Pay, whether it’s from friends, customers, or through donations.
Conclusion
Facebook Pay offers a convenient and secure way to accept money within the Facebook ecosystem. Whether you’re splitting expenses with friends, requesting payments, accepting donations, or running a business, Facebook Pay provides a seamless payment solution.
In this guide, we walked you through the process of setting up Facebook Pay, linking a payment method, adding a payment button, accepting money from friends, requesting payments, accepting donations, and managing payments and transactions. By following these steps, you’ll be well-equipped to handle financial activities on Facebook with ease.
Remember to regularly review your financial activity, monitor transactions, and keep your payment information and security settings up to date. If you encounter any issues, refer to the troubleshooting section or reach out to Facebook’s customer support for assistance.
With Facebook Pay, you can streamline your financial interactions, whether it’s conducting personal transactions, supporting causes, or running a business. Make the most of this feature, stay informed, and continue exploring the potential that Facebook Pay has to offer.
Thank you for joining us on this journey to learn how to accept money on Facebook Pay. We hope this guide has been informative and helpful in enhancing your experience with Facebook’s payment feature.