Introduction
Welcome to the world of digital payments! Gone are the days of carrying cash or writing checks. With the advent of technology, sending and receiving money has become easier and more convenient than ever before. One popular platform that has revolutionized peer-to-peer transactions is Facebook Pay on Messenger.
Facebook Pay is a secure and seamless way to send money to your friends, family, or anyone in your Messenger contact list. Whether you need to split a dinner bill, reimburse a friend for concert tickets, or simply send some cash as a gift, Facebook Pay provides a hassle-free solution.
In this article, we’ll guide you through the process of setting up Facebook Pay on Messenger and show you how to use it effectively. We’ll cover everything from enabling Facebook Pay on your Messenger account to adding payment methods and managing contacts. We’ll also provide tips on securely sending and receiving money using Facebook Pay.
Before we dive into the details, it’s important to note that Facebook Pay is currently available in select regions. Make sure you check the availability in your country or region before attempting to set it up.
Now, let’s get started and unlock the power of Facebook Pay on Messenger!
Part 1: Setting up Facebook Pay
Before you can start using Facebook Pay on Messenger, you need to set it up on your account. Follow these steps to get started:
- Open the Messenger app on your mobile device and log in to your account.
- Go to the settings menu by tapping on your profile picture in the top left corner.
- Scroll down and tap on “Facebook Pay” to access the payment settings.
- If prompted, enter your Facebook password for verification.
- Follow the on-screen prompts to review and accept the terms and conditions of Facebook Pay.
- Enter your payment information, including your credit or debit card details.
- Set your preferred payment method and ensure that the billing address is accurate.
- Confirm your selection and proceed to enable Facebook Pay on Messenger.
Once you have completed these steps, you will have successfully set up Facebook Pay on Messenger. Now, let’s move on to the next section to learn how to enable Facebook Pay on your Messenger account.
Part 2: Enabling Facebook Pay on Messenger
Enabling Facebook Pay on your Messenger account allows you to seamlessly send and receive money within the app. Here’s how you can enable it:
- Open the Messenger app and log in to your account, if you haven’t already done so.
- Tap on your profile picture in the top left corner to access the settings menu.
- Scroll down and find the “Facebook Pay” option. Tap on it to open the payment settings.
- If prompted, enter your Facebook password for verification.
- You will see the option to enable Facebook Pay. Toggle the switch to enable it.
- Review the terms and conditions of Facebook Pay and tap on “Accept” to proceed.
- A pop-up message may appear to verify your identity. Follow the on-screen instructions to complete the verification process.
- Once the setup is complete, you’ll receive a confirmation message that Facebook Pay has been enabled on your Messenger account.
With Facebook Pay now enabled on your Messenger, you can easily start sending and receiving money. In the next section, we’ll show you how to add a payment method to use with Facebook Pay.
Part 3: Adding a Payment Method
In order to use Facebook Pay on Messenger, you’ll need to add a payment method. Follow the steps below to add and manage your payment methods:
- Open the Messenger app and log in to your account.
- Tap on your profile picture in the top left corner to access the settings menu.
- Scroll down and tap on “Facebook Pay” to access the payment settings.
- If prompted, enter your Facebook password for verification.
- Tap on the “Add New Payment Method” option.
- Choose your preferred payment method, such as a credit or debit card. You can also add a PayPal account if available in your region.
- Enter the required payment information, including the card number, expiration date, and CVV number.
- Review the information and tap on “Save” to add the payment method to your Facebook Pay account.
Once you’ve added a payment method, it will be securely stored in your Facebook Pay account. You can also manage your payment methods by accessing the payment settings in the Messenger app. This allows you to add, remove, or update your payment methods as needed.
Now that you have added a payment method, you’re ready to start sending and receiving money on Messenger. In the next section, we’ll show you how to add and manage contacts on Messenger.
Part 4: Adding and Managing Contacts on Messenger
In order to send money or request payments using Facebook Pay on Messenger, you’ll need to have your contacts added in the app. Here’s how you can add and manage your contacts:
- Open the Messenger app and log in to your account.
- Tap on the “People” tab at the bottom of the screen.
- Tap on the “Add Friends” button.
- You can choose to add contacts from your phone’s address book or search for a specific person by name.
- If you choose to add contacts from your phone’s address book, Messenger will display a list of people in your contacts who are also using the app. You can then tap on the “Add” button next to their name to add them as a Messenger contact.
- If you choose to search for a specific person, enter their name in the search bar and tap on their profile when it appears. You can then tap on the “Add Friend” button to send them a friend request on Messenger.
- Once you have added a contact, you can manage their privacy settings by tapping on their name in your Messenger contact list. You can choose to block or unfriend a contact, as well as manage their visibility on your Messenger app.
By adding and managing your contacts on Messenger, you can easily send and receive money from friends and family members who are also using the app. In the next section, we’ll show you how to send and receive money on Messenger using Facebook Pay.
Part 5: Sending and Receiving Money on Messenger
Using Facebook Pay on Messenger, you can effortlessly send and receive money from your contacts. Follow the steps below to send and receive money:
- Open the Messenger app and log in to your account.
- Tap on the conversation of the contact you want to send money to.
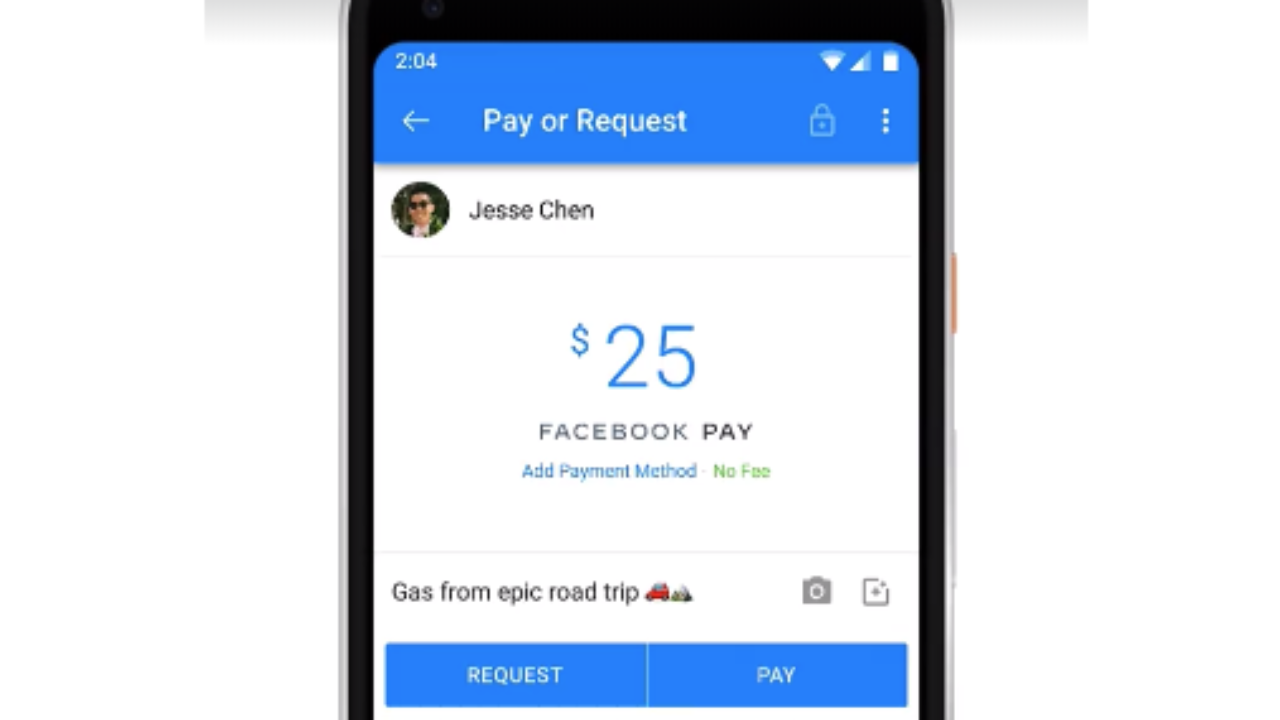
- Tap on the “$” icon at the bottom of the conversation screen.
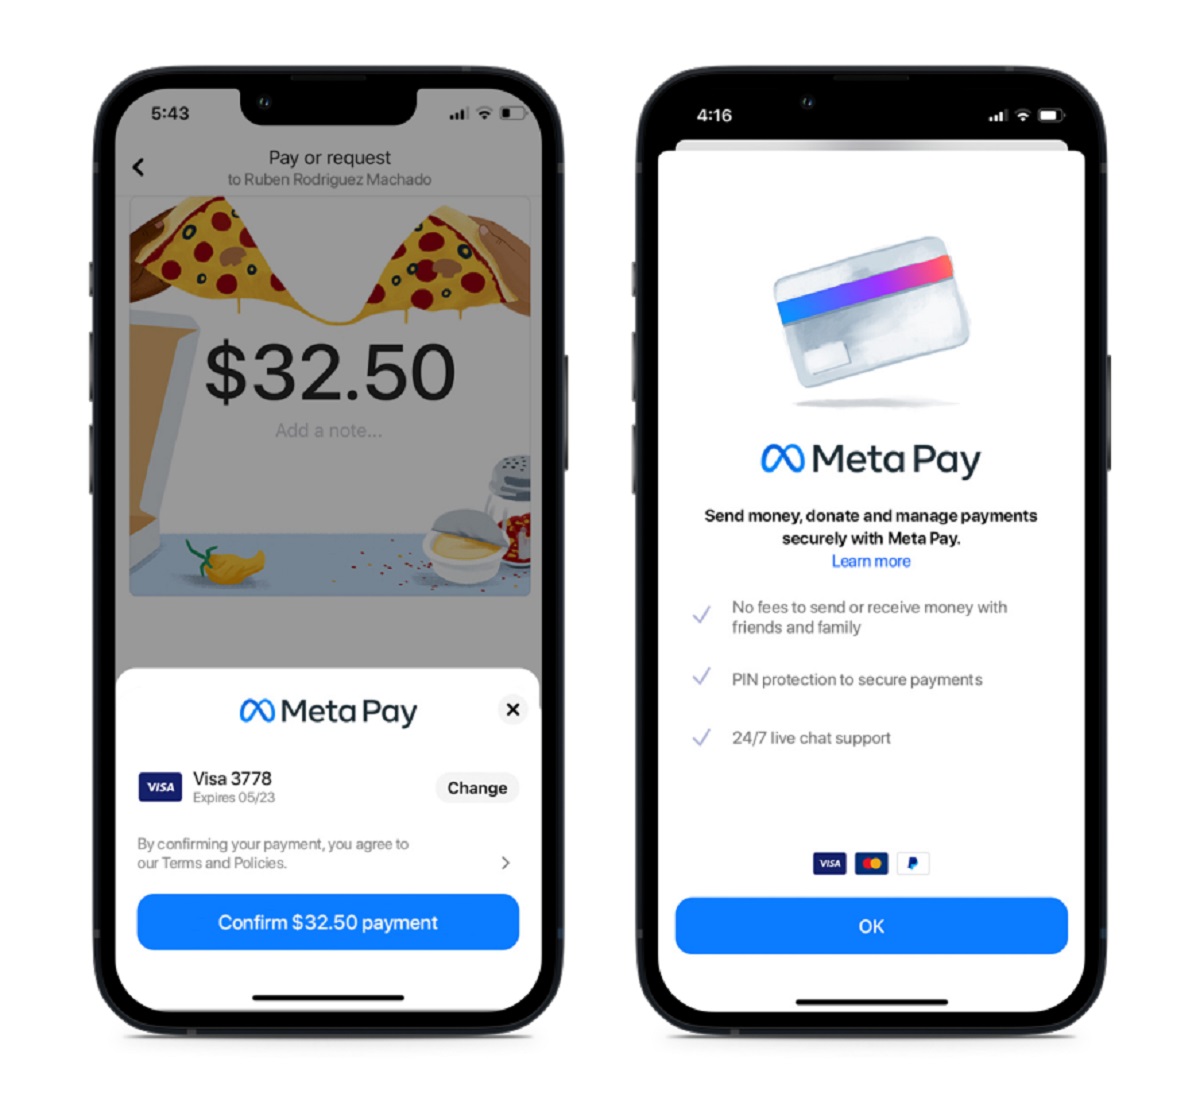
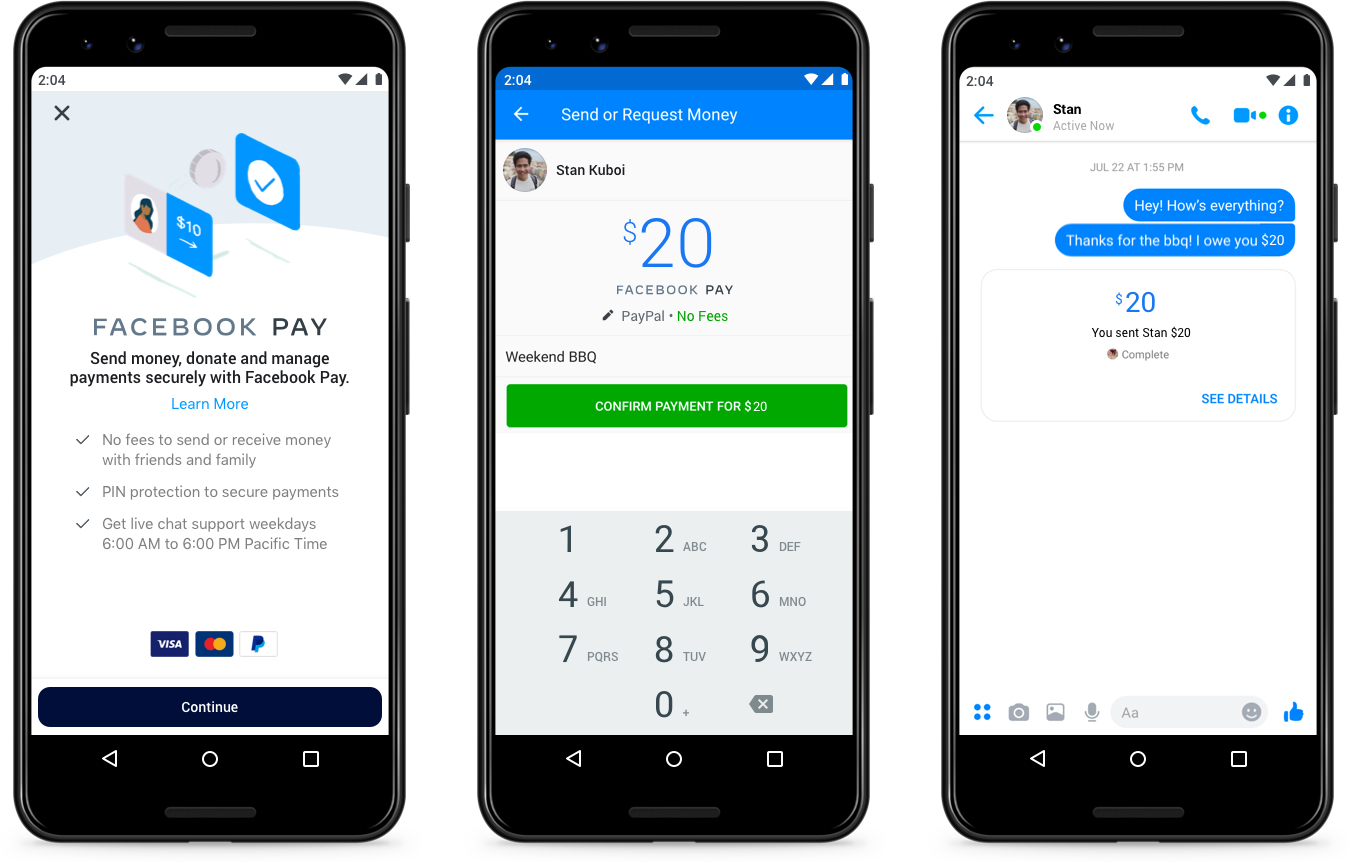
- Enter the amount you want to send and add a note if necessary.
- Tap on “Pay” to send the money to your contact. The funds will be deducted from your linked payment method.
- If someone sends you money, you will receive a notification in Messenger. Tap on the notification to open the conversation and see the details of the transaction.
- You can choose to accept the payment by tapping on “Accept” or decline it by tapping on “Decline”.
- If you accept a payment, the funds will be added to your Facebook Pay balance, which you can then transfer to your linked bank account.
Remember, when sending or receiving money on Messenger, ensure that you only transact with trusted contacts. Double-check the recipient’s information before confirming any payments to avoid any mistakes or potential scams.
Now that you know how to send and receive money on Messenger using Facebook Pay, let’s move on to the final section, where we’ll discuss security and privacy considerations.
Part 6: Security and Privacy Considerations
When using Facebook Pay on Messenger, it’s important to prioritize the security and privacy of your transactions. Here are some important considerations to keep in mind:
1. Secure Your Account: Make sure your Messenger account is protected with a strong and unique password. Enable two-factor authentication for an extra layer of security.
2. Verify Contacts: Before sending or receiving money, ensure that you are transacting with trusted contacts. Double-check the recipient’s information to avoid any mistakes or fraudulent transactions.
3. Protect Your Payment Information: Be cautious while entering your payment method details. Ensure that you are on a secure and trusted network when adding or updating your payment methods.
4. Keep Your App Updated: Regularly update your Messenger app to the latest version to benefit from the latest security patches and enhancements.
5. Be Wary of Scams: Beware of phishing attempts and suspicious messages asking for your payment information. Never share sensitive information with unknown or unverified individuals.
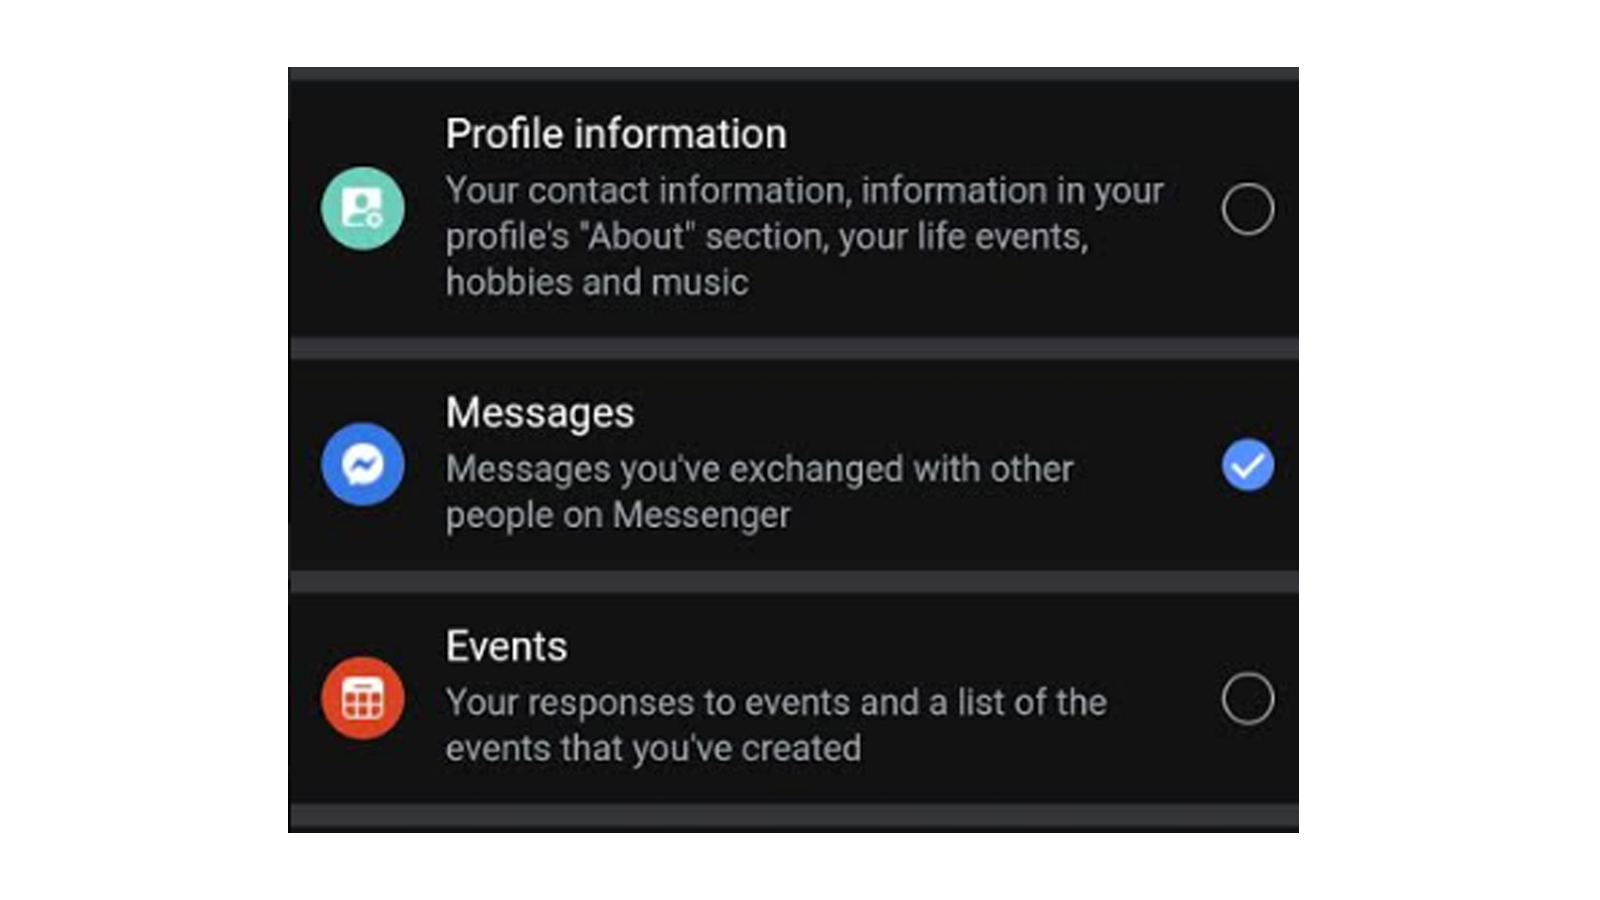
6. Review Your Privacy Settings: Take the time to review and adjust your privacy settings in the Messenger app. Customize who can see your payment activity and adjust the visibility of your transactions.
7. Report Suspicious Activity: If you notice any unauthorized transactions or suspicious activity on your Messenger account, report it to Facebook immediately. They have dedicated support channels to assist you with any security concerns.
By following these security and privacy considerations, you can enjoy the convenience of using Facebook Pay on Messenger while keeping your transactions safe and protected.
Now that you have a better understanding of the security measures, you’re ready to utilize Facebook Pay on Messenger with confidence.
Conclusion
Congratulations! You have now learned how to set up and use Facebook Pay on Messenger. This secure and convenient feature allows you to send and receive money directly within the app, making transactions with your contacts easier than ever before.
In this article, we covered the step-by-step process of setting up Facebook Pay on Messenger, enabling it on your account, and adding payment methods. We also discussed how to add and manage contacts, as well as send and receive money securely. Always remember to prioritize the security and privacy of your transactions, following the best practices we outlined.
Facebook Pay on Messenger offers a seamless way to handle peer-to-peer transactions, whether you need to split a bill, pay your friend back, or send a monetary gift. The convenience and ease of use make it an attractive option for anyone looking to simplify their digital payments.
However, it’s important to note that availability may vary based on your region, so be sure to check if Facebook Pay is accessible in your country. Additionally, keep an eye out for any updates or new features Facebook may introduce in the future, as the platform continues to evolve.
We hope this guide has provided you with valuable insights and instructions on using Facebook Pay on Messenger. Now, it’s time for you to explore and experience the convenience of this digital payment method firsthand. Stay safe, enjoy the benefits of Facebook Pay, and happy transacting!