Introduction
Facebook Pay is a convenient and secure payment platform that allows you to send and receive money right within the Facebook app. Whether you need to split the bill with friends, collect payment for goods or services, or request money from someone, Facebook Pay simplifies the process.
In this article, we will guide you through the steps of requesting money on Facebook Pay. We’ll cover setting up Facebook Pay, creating a payment request, customizing the request, and managing your payment requests. Whether you’re a casual user or a business owner, Facebook Pay offers an easy way to handle financial transactions within the Facebook ecosystem.
To get started, you’ll need to have a Facebook account and the Facebook app installed on your mobile device. Make sure you are logged in to your account before proceeding. Facebook Pay is available in select countries, so ensure your location is eligible for this feature.
With Facebook Pay, you can request money from friends, family, or even groups for various purposes. It’s a seamless way to collect owed money, fundraise for a cause, or simply request payment for goods or services you have provided. Let’s dive into the details of how to request money on Facebook Pay.
Setting Up Facebook Pay
Before you can start requesting money on Facebook Pay, you’ll need to set up your payment options. Follow these steps to get started:
- Open the Facebook app on your mobile device and log in to your account.
- Tap on the menu icon (three horizontal lines) in the top-right corner of the screen.
- Scroll down and select “Settings & Privacy.”
- In the “Settings & Privacy” menu, tap on “Settings.”
- Scroll down and select “Facebook Pay.”
- Tap on “Add Payment Method” to link your preferred payment source, such as a credit or debit card, PayPal, or a bank account.
- Follow the prompts to enter your payment details and complete the setup process.
Once you’ve successfully set up Facebook Pay, you’ll be able to send and receive money through the platform. It’s important to note that Facebook Pay keeps your financial information secure and does not share it with other Facebook users.
If you ever need to update or change your payment methods, you can do so by navigating back to the “Facebook Pay” section in your settings and selecting the “Edit” option next to your listed payment methods.
Now that you have Facebook Pay set up, you’re ready to start creating payment requests and collecting money from friends, groups, or clients. Let’s move on to the next section to learn how to create a payment request on Facebook Pay.
Creating a Payment Request
Once you have Facebook Pay set up, creating a payment request is a simple process:
- Open the Facebook app on your mobile device and log in to your account.
- Tap on the “More” tab at the bottom-right corner of the screen.
- Scroll down and select “Facebook Pay.”
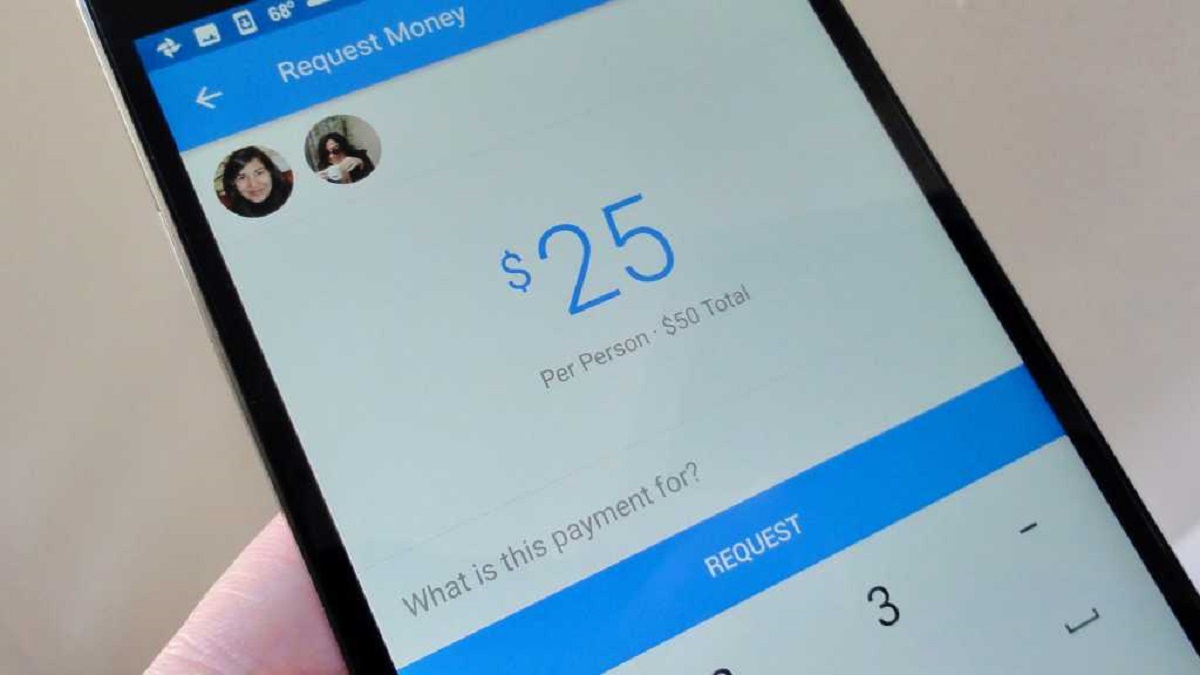
- Tap on the “Request Money” option.
- Enter the name or select the contact from your friends list or groups whom you want to request payment from.
- Next, enter the payment amount you are requesting.
- You can also add a due date for the payment, if necessary, by tapping on the calendar icon and selecting the date.
- If desired, you can include a note explaining the reason for the payment request or any additional details.
- Finally, tap on the “Request” button to send your payment request.
Once the payment request is sent, the recipient will receive a notification and see the request in their Facebook Pay section. They can then choose to accept or decline the request.
It’s worth noting that payment requests can be sent not only to individuals but also to groups for shared expenses or fundraising purposes. Additionally, you can create multiple payment requests simultaneously if you need to request money from different individuals or groups.
Now that you know how to create a payment request on Facebook Pay, let’s explore the options for customizing your payment requests in the next section.
Customizing Your Payment Request
When creating a payment request on Facebook Pay, you have options to customize the request according to your preferences:
- Setting the Payment Amount: Enter the specific amount you wish to request from the individual or group. Whether it’s for a small favor or a larger expense, you can easily adjust the payment amount to fit your needs.
- Adding a Payment Due Date: If you need the payment by a certain date, you can include a due date for the requested amount. This helps provide clarity and urgency to the recipient so they know when the payment is expected.
- Adding a Note to Your Request: You can personalize your payment request by including a note. Use this space to provide further details about the payment, such as the reason for the request, how the money will be used, or any other relevant information.
These customization options allow you to tailor your payment requests to be more informative and clear to the recipient. Utilizing these features can help improve communication and ensure a smooth transaction process.
It’s important to remember that while customization options are available, it’s advisable to keep the payment request concise and relevant. Overloading the request with unnecessary information may make it harder for the recipient to understand and respond to the request promptly.
Now that you’re familiar with customizing payment requests, let’s move on to how you can request money from specific friends or groups on Facebook Pay.
Setting the Payment Amount
When requesting money on Facebook Pay, setting the payment amount is a crucial step. Here’s how you can do it:
- Open the Facebook app on your mobile device and log in to your account.
- Tap on the “More” tab at the bottom-right corner of the screen.
- Scroll down and select “Facebook Pay.”
- Tap on the “Request Money” option.
- Enter the name or select the contact from your friends list or groups whom you want to request payment from.
- Next, enter the payment amount you are requesting.
When setting the payment amount, it’s important to be clear and accurate. Ensure that the amount is fair and reflective of the goods, services, or situation for which the payment is being requested. Take into consideration any agreements or discussions you have had with the recipient regarding the payment.
If you are requesting money for a specific purpose, such as splitting a bill or reimbursing expenses, make sure the payment amount covers the appropriate costs. If the request is related to a donation or fundraising, clearly communicate the suggested donation amount to the recipient.
Keep in mind that Facebook Pay supports various currencies, so you can request payment in your local currency or any other supported currency if necessary. It’s crucial to double-check the amount and currency before sending the payment request to avoid any confusion or potential issues.
By setting the payment amount accurately, you enhance transparency and ensure a smooth payment process between you and the recipient. Now that you know how to set the payment amount, let’s explore how to add a payment due date to your request.
Adding a Payment Due Date
When requesting money on Facebook Pay, you have the option to add a payment due date to your request. Here’s how you can do it:
- Open the Facebook app on your mobile device and log in to your account.
- Tap on the “More” tab at the bottom-right corner of the screen.
- Scroll down and select “Facebook Pay.”
- Tap on the “Request Money” option.
- Enter the name or select the contact from your friends list or groups whom you want to request payment from.
- Next, enter the payment amount you are requesting.
- To add a due date, tap on the calendar icon and select the appropriate date for the payment to be made.
Adding a payment due date helps establish a timeframe within which you expect to receive the payment. This is especially useful when the requested amount is time-sensitive or when there is a specific deadline associated with the payment.
When selecting the due date, consider the payment method being used and allow enough time for the recipient to make the payment comfortably. Choosing a realistic due date helps maintain a smooth payment process and reduces any potential delays or misunderstandings.
Additionally, adding a payment due date provides a clear expectation for the recipient, ensuring timely payment and avoiding any confusion regarding the urgency of the request.
It’s important to note that the payment due date is not a guarantee of receiving the payment by that exact date. Unexpected circumstances or individual factors may affect the recipient’s ability to make the payment within the specified timeframe. However, having a due date helps establish a mutual understanding and encourages prompt payment.
Now that you know how to add a payment due date to your request, let’s move on to the next section on how to include a note with your payment request.
Adding a Note to Your Request
When requesting money on Facebook Pay, you have the option to include a note with your payment request. Here’s how you can do it:
- Open the Facebook app on your mobile device and log in to your account.
- Tap on the “More” tab at the bottom-right corner of the screen.
- Scroll down and select “Facebook Pay.”
- Tap on the “Request Money” option.
- Enter the name or select the contact from your friends list or groups whom you want to request payment from.
- Next, enter the payment amount you are requesting.
- To add a note, tap on the text box provided and type in the message you want to include.
Adding a note to your payment request allows you to provide additional context or information regarding the payment. It can be used to explain the reason for the request, specify the purpose of the payment, or include any necessary details that the recipient should know.
When crafting your note, keep it concise, clear, and professional. Be sure to communicate any specific instructions or expectations related to the payment. If there are specific details or requirements the recipient should be aware of, include them in the note for clarity.
Adding a note can also help create a personal touch to your payment request. If the payment is for a personal favor or a specific occasion, you can use the note to express your gratitude or add a friendly message.
However, it’s important to maintain professionalism in the note, especially if the request is for a business transaction. Clearly communicate the purpose of the payment and any relevant details without going off-topic or including unnecessary information.
By adding a note, you enhance communication and eliminate any potential confusion regarding the payment request. It ensures that both parties have a clear understanding of the transaction and any associated instructions.
Now that you know how to add a note to your payment request, let’s move on to the next section on how to request money from friends on Facebook Pay.
Requesting Money from Friends
One of the convenient features of Facebook Pay is the ability to request money from your friends directly through the app. Here’s how you can request money from friends on Facebook Pay:
- Open the Facebook app on your mobile device and log in to your account.
- Tap on the “More” tab at the bottom-right corner of the screen.
- Scroll down and select “Facebook Pay.”
- Tap on the “Request Money” option.
- Enter the name of the friend from your friends list whom you want to request money from.
- Next, enter the payment amount you are requesting.
- If desired, add a payment due date and include a note with any additional details.
- Tap on the “Request” button to send your payment request.
When requesting money from friends, it’s important to maintain open and clear communication. Be transparent about the reason for the request and provide any necessary details or explanations.
Ensure that the requested amount is fair and reasonable, taking into consideration the nature of your relationship with the friend. Keep in mind that your friends may have their own financial commitments and considerations, so it’s important to be understanding and respectful when requesting money.
By utilizing the Facebook Pay feature to request money from friends, you streamline the payment process and eliminate the need for additional payment platforms or methods. It makes it easier for both parties to track and manage the transaction.
Remember, when requesting money from friends, it’s important to approach the situation with tact and consideration. Understand that not all friends may be in a position to fulfill your request, and be prepared to accept their response graciously.
Now that you know how to request money from friends, let’s move on to the next section on how to request money from groups on Facebook Pay.
Requesting Money from Groups
In addition to requesting money from friends, Facebook Pay allows you to request money from groups where you share common interests or participate in activities together. Here’s how you can request money from groups on Facebook Pay:
- Open the Facebook app on your mobile device and log in to your account.
- Tap on the “More” tab at the bottom-right corner of the screen.
- Scroll down and select “Facebook Pay.”
- Tap on the “Request Money” option.
- Enter the name of the group from your groups list from which you want to request money.
- Next, enter the payment amount you are requesting.
- If desired, add a payment due date and include a note with any additional details.
- Tap on the “Request” button to send your payment request.
When requesting money from groups, it’s important to provide clear and concise information about the purpose of the payment. Ensure that group members understand why you are requesting money and how their contributions will be used.
Communicate the payment request respectfully and considerately within the group. Understand that not all group members may be in a position to contribute, and it’s important to acknowledge and respect their individual circumstances.
When requesting money from groups, it’s helpful to keep the payment amount reasonable and consider the financial capabilities of the group members. If the requested amount is for a shared expense, ensure that the amount is divided fairly among the contributors.
By utilizing the Facebook Pay feature to request money from groups, you simplify the payment process and create a transparent and organized method for collecting contributions. It’s an efficient way to fundraise for a shared goal or split expenses among group members.
Remember to be transparent and accountable for the funds received. Provide updates and information regarding how the money is being utilized within the group, fostering trust and maintaining good relationships.
Now that you know how to request money from groups, let’s move on to the next section on how to send a payment reminder on Facebook Pay.
Sending a Payment Reminder
Occasionally, you may find the need to send a payment reminder to ensure that your payment request on Facebook Pay is not overlooked or forgotten. Here’s how you can send a payment reminder:
- Open the Facebook app on your mobile device and log in to your account.
- Tap on the “More” tab at the bottom-right corner of the screen.
- Scroll down and select “Facebook Pay.”
- Tap on the “Payment Requests” option.
- Find the specific payment request for which you want to send a reminder.
- Tap on the three-dot menu next to the request and select “Send Reminder.”
Sending a payment reminder is a polite way to nudge the recipient to take action and make the requested payment. However, it’s important to be considerate and tactful when sending a reminder, as the recipient may have legitimate reasons for the delay.
In your reminder, be polite and professional, reminding the recipient of the payment request and emphasizing any due dates or deadline implications. Keep the reminder concise and to the point, avoiding any confrontational language or tone.
It’s also helpful to provide any necessary information or clarifications that may assist the recipient in completing the payment. For example, if there were any changes to the requested amount or an alternative payment method, mention it in the reminder.
While sending a payment reminder can be helpful, it’s important to be mindful of the frequency and timing. Sending too many reminders or nagging excessively may strain relationships and create unnecessary tension. Use reminders sparingly and consider the circumstances before sending.
By sending a payment reminder on Facebook Pay, you can gently prompt the recipient to complete the requested payment and keep the transaction moving forward.
Now that you know how to send a payment reminder, let’s move on to the next section on managing your payment requests.
Managing Your Payment Requests
Once you have sent out payment requests on Facebook Pay, it’s important to have a system in place to manage and keep track of them. Here are some key aspects of managing your payment requests:
- Tracking Pending Requests: You can easily keep track of the status of your payment requests within the Facebook Pay section. This allows you to monitor which requests are still pending and which ones have been accepted or declined.
- Cancelling a Payment Request: If you no longer need to collect the requested payment, or if the situation changes, you can cancel a payment request. Locate the specific request in the Facebook Pay section and select the option to cancel it.
- Resending a Payment Request: If a recipient has not responded to or acknowledged your payment request, you have the option to resend it as a reminder. Locate the request in the Facebook Pay section and select the option to resend the request.
Managing your payment requests efficiently helps you stay organized and ensures that you are aware of the status of each request. Regularly check the Facebook Pay section to keep track of pending requests and take appropriate action as needed.
It’s important to remember that payment requests are not binding agreements, and the recipient has the right to accept or decline the request based on their own circumstances. Respect their decision and maintain open communication to avoid misunderstandings or strained relationships.
In addition to managing your own payment requests, it’s also important to handle payment requests from others with care and promptness. Respond to payment requests in a timely manner and communicate your decision clearly to the requestor.
By effectively managing your payment requests, you create a streamlined and organized process for tracking and handling financial transactions through Facebook Pay.
Now that you know how to manage your payment requests, let’s move on to the next section on accepting and declining payment requests from others.
Tracking Pending Requests
When using Facebook Pay to request money, it’s essential to keep track of your pending requests. Tracking pending requests allows you to stay organized and informed about the status of each transaction. Here’s how you can easily track your pending payment requests:
- Open the Facebook app on your mobile device and log in to your account.
- Tap on the “More” tab at the bottom-right corner of the screen.
- Scroll down and select “Facebook Pay.”
- Select the “Payment Requests” option.
In the “Payment Requests” section, you will find a list of your pending requests along with their current status. This enables you to monitor which requests are awaiting a response, which have been accepted, and which have been declined.
By regularly checking this section, you can keep track of the progress of your payment requests and take appropriate actions accordingly. It allows you to follow up with recipients who haven’t responded, manage your finances effectively, and maintain clear communication.
Being aware of the status of your pending requests helps you plan and manage your budget, especially if you’re expecting payments to cover expenses or fulfill financial obligations. It ensures that you have a comprehensive understanding of your financial transactions through Facebook Pay.
Remember, while tracking pending requests is important, it’s crucial to approach the process with patience and understanding. Different individuals may have varying circumstances that affect their response time. Be respectful and maintain open communication to avoid misunderstandings or strained relationships.
Now that you know how to track your pending payment requests, you can stay organized while managing your financial transactions on Facebook Pay. In the next section, we will explore how to cancel a payment request if the need arises.
Cancelling a Payment Request
Sometimes, circumstances may change, or you may no longer need to collect a requested payment on Facebook Pay. In such cases, it’s important to know how to cancel a payment request. Here’s how you can cancel a payment request:
- Open the Facebook app on your mobile device and log in to your account.
- Tap on the “More” tab at the bottom-right corner of the screen.
- Scroll down and select “Facebook Pay.”
- Select the “Payment Requests” option.
- Locate the specific request you want to cancel.
- Select the option to cancel the payment request.
Cancelling a payment request is useful when the situation changes, or if there is no longer a need to collect the requested payment. By cancelling the request promptly, you inform the recipient that the payment is no longer required, preventing any confusion or misunderstandings.
However, it’s important to note that cancelling a payment request doesn’t automatically delete or retract any funds that may have already been sent to you by the recipient. In such cases, you’ll need to privately communicate with the recipient to arrange a refund or return of the funds if necessary.
When cancelling a payment request, it’s good practice to communicate with the recipient about the cancellation and provide an explanation if necessary. This maintains transparency and fosters open communication between both parties.
Remember, cancelling a payment request should be done thoughtfully and respectfully. Be considerate of the recipient’s circumstances and communicate clearly to avoid any potential misunderstandings or strain on your relationship.
Now that you know how to cancel a payment request on Facebook Pay let’s move on to the next section on how to resend a payment request if needed.
Resending a Payment Request
There may be situations where a recipient hasn’t responded to your original payment request on Facebook Pay. In such cases, you have the option to resend the request as a reminder. Here’s how you can resend a payment request:
- Open the Facebook app on your mobile device and log in to your account.
- Tap on the “More” tab at the bottom-right corner of the screen.
- Scroll down and select “Facebook Pay.”
- Select the “Payment Requests” option.
- Find the specific request you want to resend.
- Select the option to resend the payment request.
Resending a payment request serves as a friendly reminder to the recipient that a payment is pending. It can be useful when the recipient may have missed the initial request or simply needs a gentle nudge to complete the payment.
When resending a payment request, it’s important to be courteous and considerate. Remember that the recipient may have valid reasons for not responding promptly, and it’s crucial to approach the situation with respect and understanding.
In your reminder message, maintain a friendly and professional tone. Politely reiterate the nature of the request, any associated due dates, and any other relevant information. Express gratitude for their attention to the matter.
However, it’s important to use this feature judiciously and sparingly. Excessive reminders can be perceived as pushy or intrusive, potentially straining relationships. Consider the context and the nature of your relationship with the recipient before resending a payment request.
By resharing the payment request, you provide the recipient with a gentle reminder to fulfill their payment obligation. This can help ensure a prompt response and maintain smooth transactions through Facebook Pay.
Now that you know how to resend a payment request, you can efficiently manage and follow up on outstanding payments. In the next section, we will explore how to handle payment requests from others, including accepting and declining them.
Handling Payment Requests from Others
When using Facebook Pay, you may receive payment requests from others. Whether it’s for a shared expense, a service provided, or a charitable contribution, it’s important to handle these requests with care. Here’s how you can effectively manage and respond to payment requests from others:
- Accepting a Payment Request: If you agree to fulfill the payment request, you can accept it by following the instructions provided in the request. This will initiate the payment process and allow you to transfer the requested amount securely through Facebook Pay. Ensure that you review the details of the request and have sufficient funds available before accepting.
- Declining a Payment Request: If you are unable or unwilling to fulfill a payment request, you have the option to decline it. Be respectful and honest in your response, providing a clear explanation if necessary. Remember, declining a request should be done thoughtfully, as it may impact your relationship with the requester.
- Sending a Personal Payment: If you want to send money to someone without a formal payment request, you can initiate a personal payment through Facebook Pay. This allows you to transfer funds to friends or family members, settle debts, or contribute to someone’s cause without a specific payment request.
When handling payment requests from others, it’s important to be prompt, considerate, and communicative. Timely responses help maintain clear and efficient financial transactions.
If you choose to accept a payment request, ensure that you complete the payment promptly and notify the requester once the amount has been sent. Communicate openly about any payment details or requirements to avoid any misunderstandings.
When declining a payment request, provide a respectful explanation if appropriate. Open communication can help maintain relationships and prevent any unnecessary tension. Consider alternative ways to support the requester if you are unable to fulfill the payment request.
Sending a personal payment is a convenient way to transfer money to someone without a specific request. It offers flexibility and allows you to directly support your friends, family, or causes that are meaningful to you.
Remember, transparency and open communication are key when handling payment requests from others on Facebook Pay. By effectively managing these requests, you ensure smooth transactions and foster positive relationships within your network.
Now that you know how to handle payment requests from others, let’s conclude this article.
Accepting a Payment Request
When you receive a payment request on Facebook Pay, accepting it is a straightforward process. Here’s how you can accept a payment request:
- Open the Facebook app on your mobile device and log in to your account.
- Tap on the “More” tab at the bottom-right corner of the screen.
- Scroll down and select “Facebook Pay.”
- Locate the specific payment request that you want to accept.
- Follow the instructions provided in the request to initiate the payment process.
- Review the details of the request – including the amount, payment method, and any additional information.
- Ensure that you have sufficient funds available before proceeding.
- Once you are ready, confirm the payment to fulfill the request.
By accepting a payment request, you agree to fulfill the requested payment and transfer the specified amount to the requester. It’s important to carefully review the details of the request and ensure that you are comfortable with the payment before accepting.
After initiating the payment, Facebook Pay will securely process the transaction and transfer the funds according to the chosen payment method. You may receive a confirmation once the payment is successfully completed.
It’s recommended to maintain open communication with the requester throughout the process. Notify them once the payment has been sent, and provide any necessary updates or confirmation regarding the payment.
Remember, accepting a payment request should be done with awareness of your financial capabilities and the nature of the request. If you have any concerns or questions regarding the payment, feel free to discuss them with the requester before accepting.
By accepting a payment request promptly and fulfilling the payment, you contribute to smooth and efficient financial transactions within your network. It demonstrates reliability and fosters trust among your connections on Facebook Pay.
Now that you know how to accept a payment request on Facebook Pay, you can confidently handle and fulfill payment requests from others. In the next section, we will explore how to decline a payment request if necessary.
Declining a Payment Request
Occasionally, you may receive a payment request on Facebook Pay that you are unable or unwilling to fulfill. In such cases, it’s important to know how to decline the payment request respectfully. Here’s how you can decline a payment request:
- Open the Facebook app on your mobile device and log in to your account.
- Tap on the “More” tab at the bottom-right corner of the screen.
- Scroll down and select “Facebook Pay.”
- Locate the specific payment request that you want to decline.
- Consider the details of the request and your reasons for declining it.
- Respond to the request by politely declining it.
- Provide a clear explanation, if appropriate, for your decision.
When declining a payment request, it’s important to be respectful and considerate. Remember that the requester may have valid reasons for making the request and that declining the payment may impact your relationship with them.
If you have a genuine reason for declining the payment request, provide a clear and honest explanation. This helps maintain open communication and prevents any misunderstandings between you and the requester.
While it is not required, you may suggest alternative ways to support the requester if you are unable to fulfill the payment request. This could include offering assistance, providing advice, or exploring other means of supporting their cause or endeavor.
Keep in mind that declining a payment request should be done thoughtfully. Consider the nature of your relationship with the requester, the details of the request, and your own financial circumstances when making your decision.
By declining a payment request gracefully, you demonstrate respect and maintain integrity within your network on Facebook Pay. It’s important to handle such situations with tact and empathy.
Now that you know how to decline a payment request on Facebook Pay, you can effectively manage and respond to requests that you are unable or unwilling to fulfill. In the next section, we will explore how to send a personal payment on Facebook Pay without a specific request.
Sending a Personal Payment
Facebook Pay also allows you to send personal payments to friends, family, or individuals without a specific payment request. Here’s how you can send a personal payment on Facebook Pay:
- Open the Facebook app on your mobile device and log in to your account.
- Tap on the “More” tab at the bottom-right corner of the screen.
- Scroll down and select “Facebook Pay.”
- Tap on the “Send Money” option.
- Enter the name or select the contact from your friends list whom you want to send money to.
- Specify the payment amount you want to send.
- Select the payment method you prefer to use.
- Review the details of the payment and confirm to complete the transaction.
Sending a personal payment through Facebook Pay allows you to transfer funds to individuals without a formal payment request. It’s a convenient way to settle debts, lend a helping hand, or contribute to a cause that’s important to you.
When sending a personal payment, ensure that you have the necessary funds available and review the details of the payment carefully before confirming the transaction. Choose a payment method that is convenient and secure for both you and the recipient.
It’s important to communicate openly with the recipient about the personal payment to ensure that they are aware of the transaction and its purpose. Provide any necessary information or context so that they understand the reason for the payment.
Remember, when sending personal payments on Facebook Pay, it’s essential to respect privacy and security. Ensure that you are sending funds to the correct individual and verify their identity before completing the transaction.
Sending personal payments through Facebook Pay provides a seamless and secure way to transfer funds to individuals within your network. It eliminates the need for cash or other payment platforms, making transactions faster and more convenient.
Now that you know how to send a personal payment on Facebook Pay, you can easily support friends, family, and causes that matter to you. In the next section, we will conclude this article.
Conclusion
Facebook Pay offers a convenient and secure platform for sending and receiving money directly within the Facebook app. In this article, we covered the process of requesting money on Facebook Pay, setting up your payment options, customizing payment requests, and managing your payment requests effectively.
We explored how to request money from friends and groups, as well as how to send payment reminders when needed. Additionally, we discussed the importance of tracking pending requests, canceling payment requests, and resending payment requests as reminders.
Furthermore, we discussed how to handle payment requests from others, including accepting or declining them with respect and clear communication. We also learned how to send personal payments to individuals without a specific request, providing a flexible way to support friends, family, or causes that are important to you.
By utilizing the features and tools available on Facebook Pay, you can streamline your financial transactions, maintain transparency, and enhance communication with those in your network. Remember to approach each payment request and transaction with thoughtfulness and consideration.
Now that you have a comprehensive understanding of requesting money on Facebook Pay, managing payment requests, and handling transactions, you are equipped to navigate the platform confidently. Whether you’re requesting money for shared expenses, fundraising for a cause, or sending personal payments, Facebook Pay offers a user-friendly solution.
So go ahead, make use of Facebook Pay to simplify your financial interactions, and enjoy a seamless and secure way to send and receive money within the Facebook community.