Introduction
Venmo, the popular mobile payment service, has not only revolutionized the way individuals transfer money to each other, but it has also become an invaluable tool for businesses. With the rise of digital payments and the increasing demand for seamless transactions, integrating Venmo into your business operations can provide numerous benefits.
Whether you run a small startup, a freelance business, or even a brick-and-mortar store, Venmo offers a simple and convenient way to accept payments, track transactions, and manage your finances. This article will guide you through the process of setting up a business account on Venmo, accepting payments from customers, paying suppliers and expenses, transferring funds to a bank account, tracking transactions, promoting your business, and providing tips for optimal use.
By leveraging the power of Venmo, you can streamline your payment processes, reduce the risk of fraud, and enhance customer satisfaction. With its user-friendly interface, secure transactions, and growing popularity, Venmo has become a preferred payment method for many individuals and businesses alike.
As the digital economy continues to flourish, it is essential for businesses to adapt and utilize innovative tools like Venmo to stay competitive. So, let’s dive into the world of Venmo for business and discover how it can revolutionize your operations.
Setting Up a Business Account on Venmo
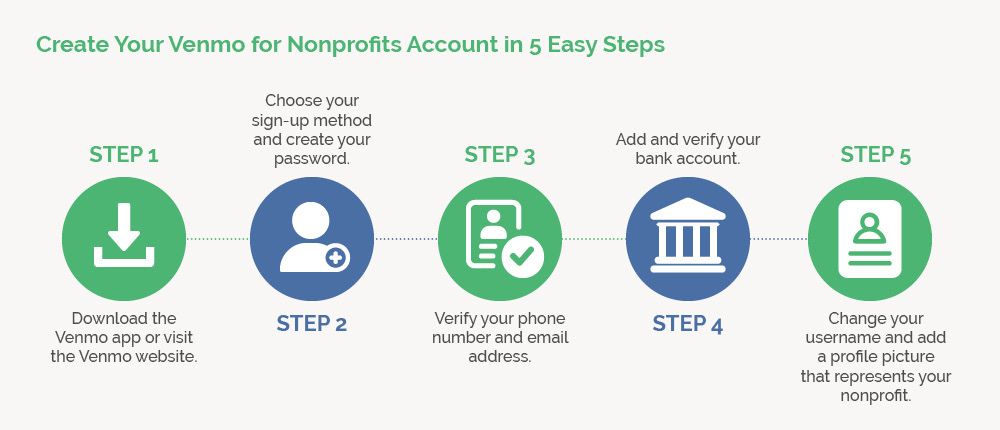
Setting up a business account on Venmo is a straightforward process that can be completed in a few simple steps. Here’s how you can get started:
1. Download the Venmo app: Start by downloading the Venmo app from the App Store or Google Play Store. Venmo is available for both iOS and Android devices, making it accessible to a wide range of smartphone users.
2. Sign up for a business account: Launch the Venmo app and tap on “Sign Up.” Select the option to create a business account and enter your email address, password, and business information. Venmo may also require additional verification documentation, such as your business license or tax ID, depending on the nature of your business.
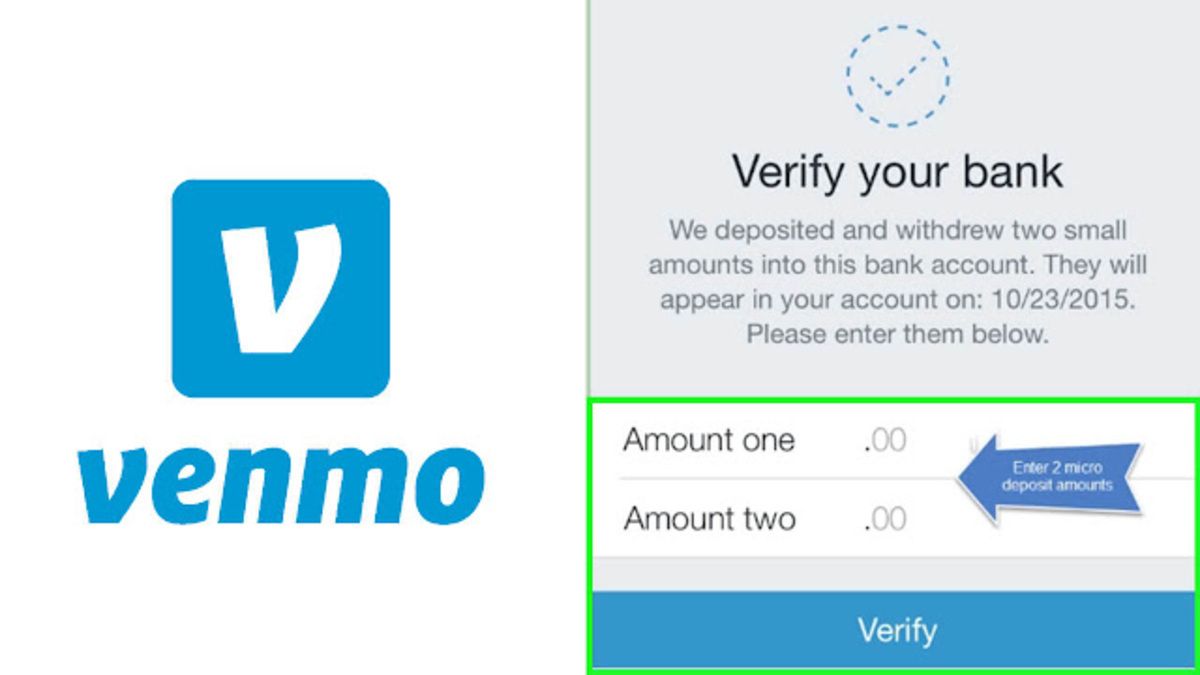
3. Link your bank account: To receive payments from customers, you’ll need to link your business bank account to your Venmo account. Provide the required bank details and follow the prompts to verify your account. It’s essential to ensure that the banking information you provide is accurate to avoid any delays in receiving funds.
4. Customize your business profile: Personalize your business profile by adding your logo, business description, and contact information. This will help customers recognize your brand and establish trust when making payments through Venmo.
5. Set your transaction preferences: Venmo offers different transaction settings for businesses to choose from. You can opt for either “Public” or “Private” transactions, depending on your preference and the level of confidentiality required. Public transactions allow other Venmo users to see the details of the transaction, while private transactions keep the details hidden.
6. Familiarize yourself with Venmo fees and limitations: As a business user, it’s important to understand the fees associated with using Venmo. While sending and receiving payments with Venmo is free for personal accounts, business accounts are subject to certain fees. Take the time to review Venmo’s fee structure and any transaction limitations that may apply.
Once you have successfully set up your business account on Venmo, you’re ready to start accepting payments from your customers. In the next section, we’ll explore how you can seamlessly integrate Venmo into your business operations and optimize its features to enhance your payment processes.
Accepting Payments from Customers
One of the key advantages of using Venmo for your business is the ability to accept payments from your customers in a quick and convenient manner. With Venmo, you can provide your customers with a seamless payment experience that aligns with their preference for digital transactions. Here’s how you can accept payments from customers using Venmo:
1. Communicate your Venmo handle: Inform your customers that you accept payments through Venmo and provide them with your Venmo handle or username. This can be done through various channels such as your website, social media profiles, or even physical signage at your business location. Make sure to prominently display the Venmo logo alongside your handle to increase visibility and encourage customers to make payments through Venmo.
2. Send payment requests: Venmo allows you to send payment requests to your customers for specific products or services. Simply open the Venmo app, tap on the “Request” tab, and enter the amount owed along with a brief description of the payment. You can then send the payment request to your customer, who will receive a notification and be able to make the payment directly from their Venmo account.
3. Generate QR codes: Venmo provides the option to generate QR codes that can be scanned by your customers to initiate a payment. This is especially useful for businesses with physical storefronts or events. Simply create a QR code associated with a specific payment amount, display it at your checkout counter or event booth, and let your customers scan it with their Venmo app to complete the payment effortlessly.
4. Integrate with your website or app: If you have an online presence, you can integrate Venmo as a payment option on your website or mobile app. By integrating Venmo’s API, you can seamlessly add a Venmo payment button to your checkout process, allowing customers to make payments directly from your platform. This provides a frictionless payment experience and increases the likelihood of completing a purchase.
5. Encourage social payments: Venmo has a social aspect to it, allowing users to like and comment on their friends’ transactions. Encourage your customers to share their experience of making a payment to your business on Venmo, which can help create buzz and attract new customers. Consider offering incentives or exclusive promotions for customers who share their Venmo transactions publicly and mention your business.
By leveraging the various methods of accepting payments through Venmo, you can cater to the preferences of your customers and streamline your payment processes. In the next section, we’ll explore how you can use Venmo’s features to create invoices and request payments from your customers.
Creating Invoices and Requesting Payments
Venmo provides convenient features that allow you to create invoices and request payments from your customers in a professional and efficient manner. This eliminates the need for manual invoicing and simplifies the payment process for both you and your customers. Here’s how you can use Venmo to create invoices and request payments:
1. Navigate to the “Invoices” tab: Open the Venmo app and tap on the “Invoices” tab, located at the bottom of the screen. This will take you to the invoice creation page.
2. Fill in the invoice details: Enter the necessary information for the invoice, including the customer’s email address or Venmo username, the amount due, and a description of the products or services provided. You can also specify a due date if needed.
3. Customize the invoice: Venmo allows you to customize the invoice by adding your business logo, invoice number, and any additional notes or terms. This helps to create a professional and branded invoice that reflects your business identity.
4. Preview and send the invoice: Take a moment to review the invoice and ensure that all details are accurate. Once you’re satisfied, click on the “Send” button to deliver the invoice to your customer. Your customer will receive an email or a Venmo notification with a link to view and pay the invoice.
5. Track and manage invoices: Venmo provides a centralized dashboard where you can track and manage all your invoices. You can view the status of each invoice, whether it has been paid, and send reminders to customers for overdue payments. This helps you stay organized and maintain clear communication with your customers regarding their outstanding payments.
6. Request payments without an invoice: If you need to request a payment from a customer without creating a formal invoice, Venmo allows you to send payment requests directly. Simply enter the customer’s email or Venmo username, specify the amount, and include a brief message if necessary. The customer will receive a payment request notification and can make the payment easily through Venmo.
By leveraging Venmo’s invoice creation and payment request features, you can streamline your billing process, improve cash flow management, and increase the likelihood of timely payments from your customers. In the next section, we’ll explore how Venmo can be used to pay suppliers and business expenses.
Paying Suppliers and Business Expenses
Venmo not only allows you to accept payments from customers, but it also provides a convenient way to pay your suppliers and manage your business expenses. By utilizing Venmo’s features, you can streamline your financial transactions and simplify your business operations. Here’s how you can use Venmo to pay suppliers and manage your business expenses:
1. Link your business bank account: Before you can make payments to suppliers or cover business expenses using Venmo, ensure that your business bank account is linked to your Venmo account. This allows you to transfer funds seamlessly between your bank account and your Venmo balance.
2. Request supplier payment details: Reach out to your suppliers and request their Venmo usernames or emails associated with their Venmo accounts. This information will be required to initiate payments to them using Venmo.
3. Transfer funds to your Venmo balance: If you have funds in your linked bank account, you can transfer them to your Venmo balance to cover the supplier payments or expenses. Open the Venmo app, navigate to the “Settings” menu, and select “Transfer Money.” Follow the prompts to transfer funds from your bank account to your Venmo balance.
4. Initiate supplier payments: Once you have the supplier’s Venmo username or email, you can initiate payments to them using Venmo. Open the Venmo app, tap on the “Pay or Request” tab, enter the supplier’s information, specify the payment amount, and include any necessary notes or descriptions. Confirm the payment, and the funds will be transferred from your Venmo balance to the supplier’s Venmo account.
5. Track and categorize expenses: Venmo provides a transaction history and categorization feature that allows you to track and analyze your business expenses. You can assign categories to each transaction, such as supplies, utilities, or travel, to make it easier to generate financial reports and monitor your spending patterns.
6. Set up recurring payments: If you have regular monthly or recurring expenses, such as rent or utilities, you can set up recurring payments using Venmo. This helps to automate your payment processes and ensures that your recurring expenses are always paid on time.
By leveraging Venmo for supplier payments and business expenses, you can simplify your financial management, reduce the need for manual transactions, and efficiently track your expenses. In the next section, we’ll explore how you can transfer funds from your Venmo account to your business bank account.
Transferring Funds to a Bank Account
As a business owner, you may need to transfer funds from your Venmo account to your linked bank account for various reasons, such as cash flow management or accessing funds for business expenses. Venmo allows you to easily transfer your funds, ensuring you have the flexibility and control over your finances. Here’s how you can transfer funds from your Venmo account to a bank account:
1. Open the Venmo app: Launch the Venmo app on your mobile device and ensure that you are logged in to your Venmo business account.
2. Go to the “Settings” menu: Tap on the three horizontal lines in the top left corner of the app to open the Venmo menu. Then, select “Settings” from the options listed.
3. Select “Transfer Money”: In the “Settings” menu, you will find a list of options. Choose “Transfer Money” from the available choices.
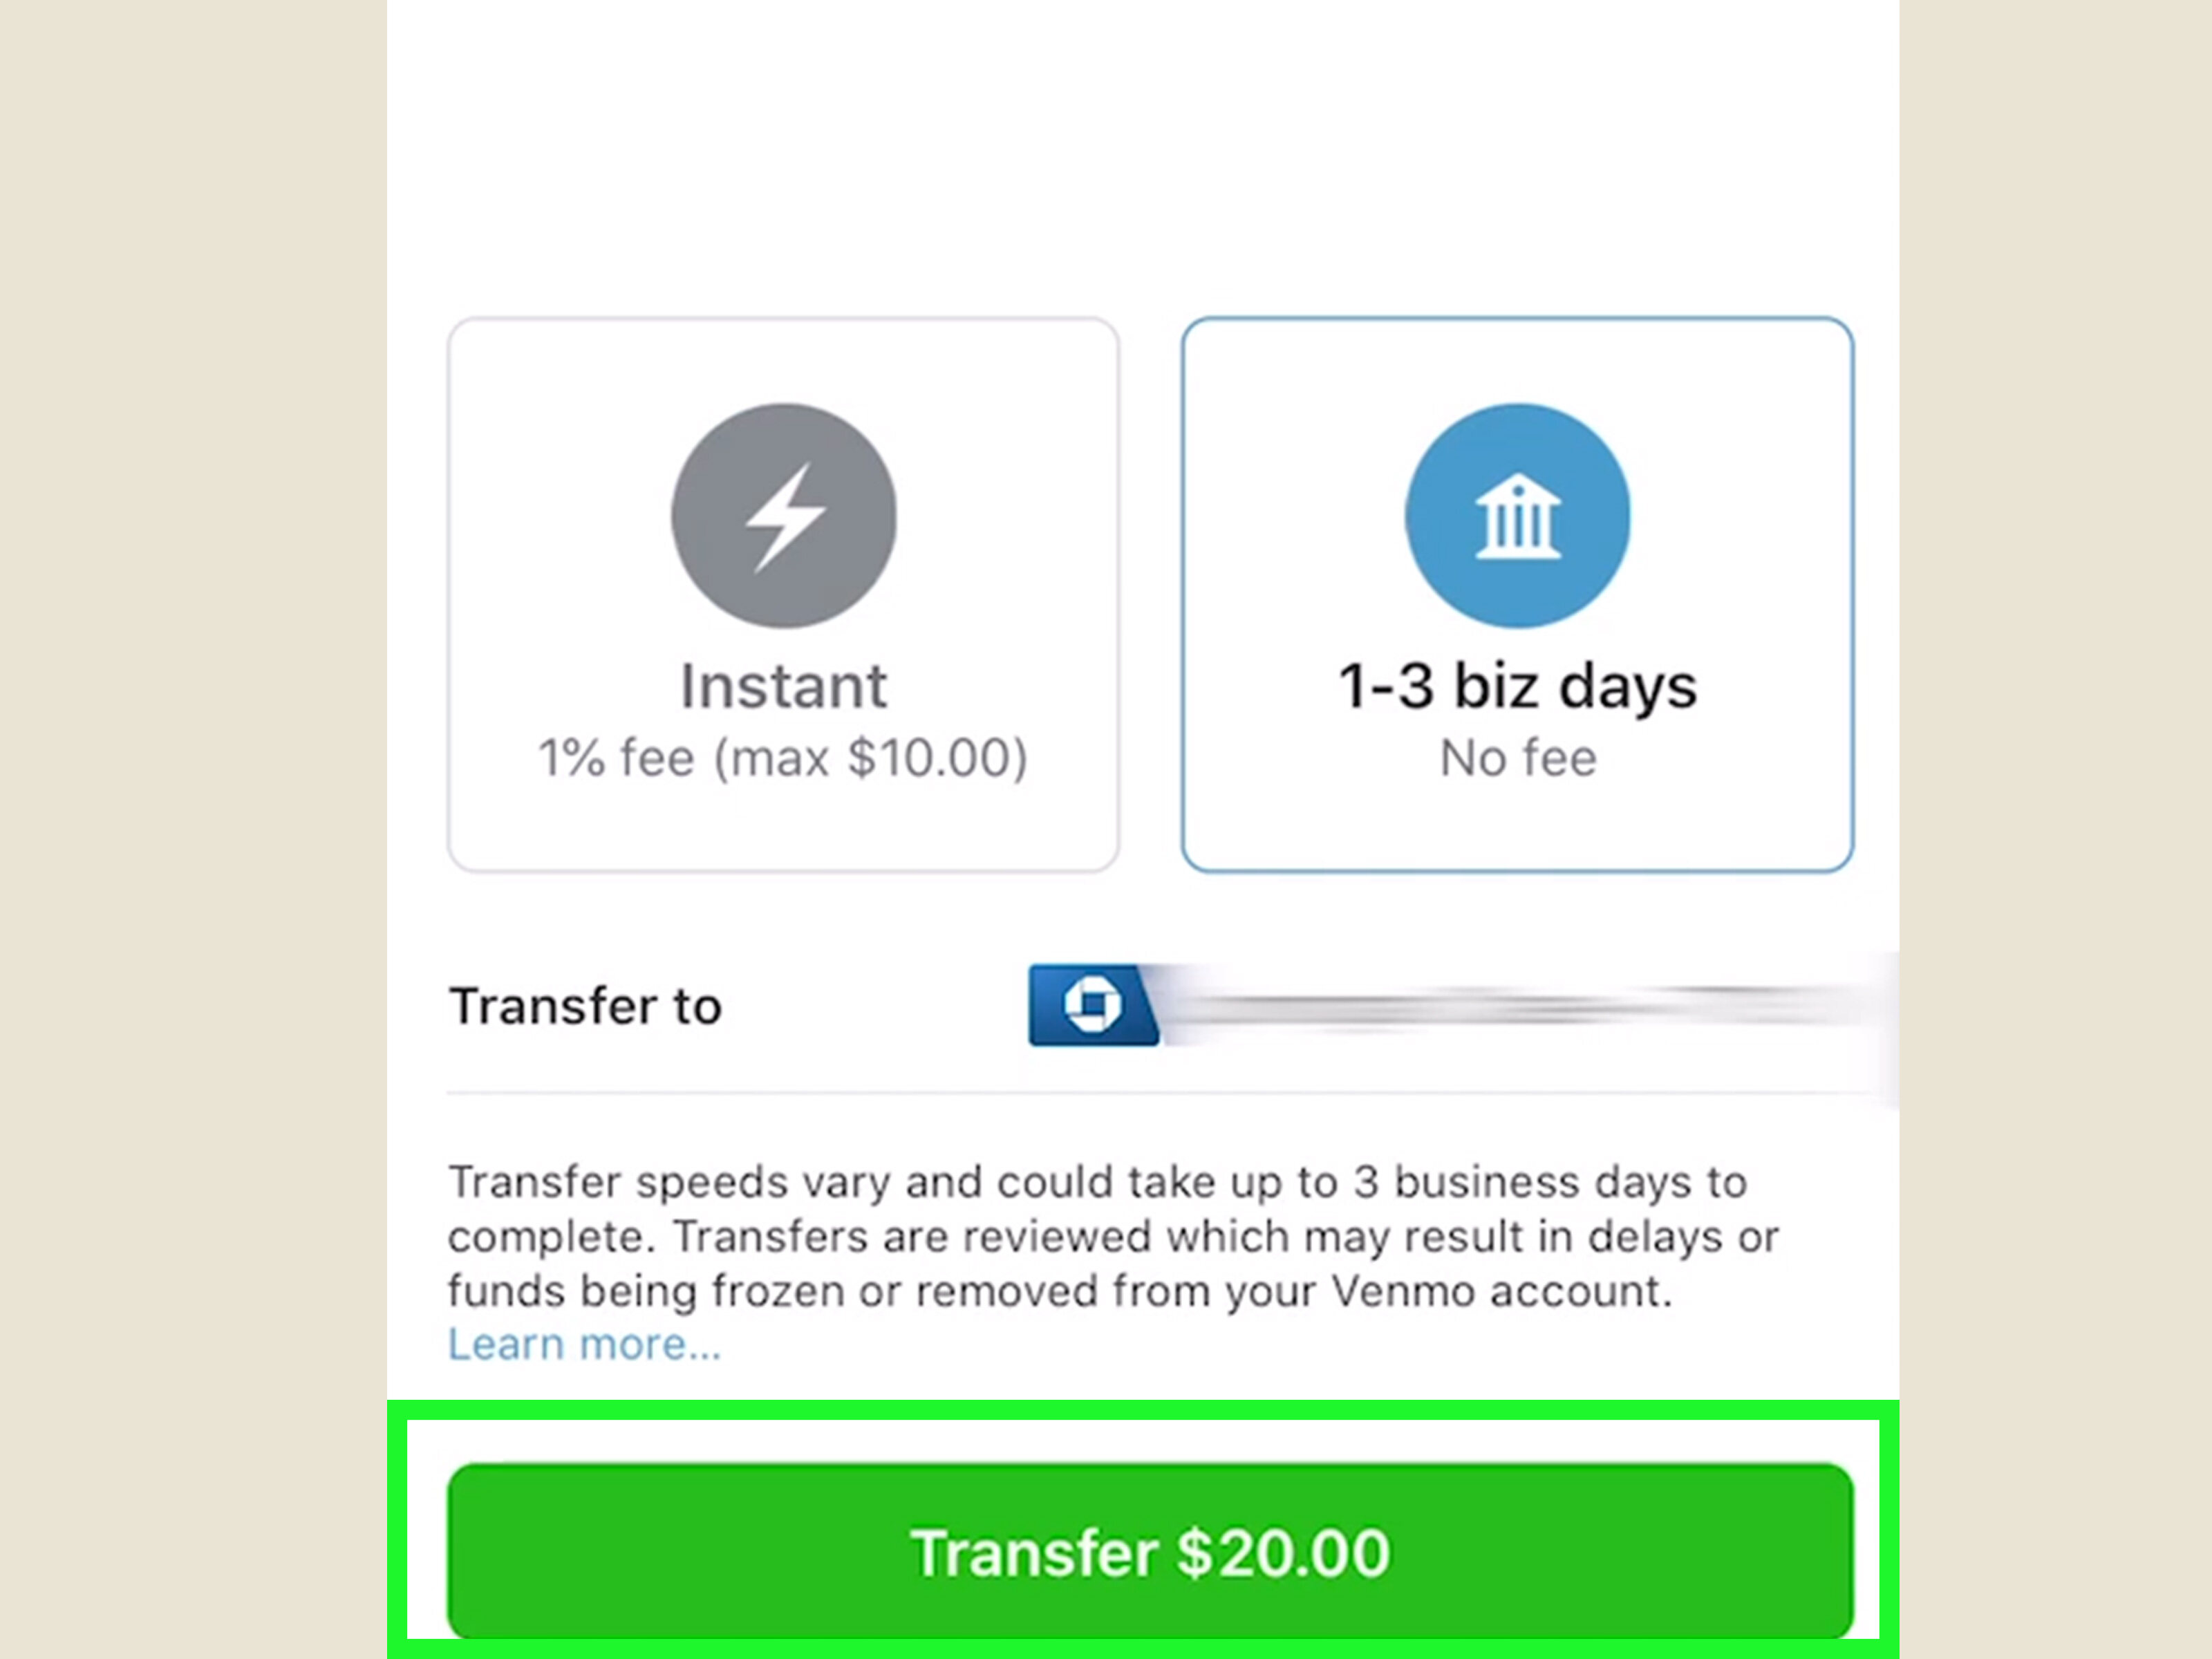
4. Choose the transfer method: Venmo offers two transfer options – “Instant” or “Standard.” With the “Instant” transfer, you can move funds immediately to your bank account for a small fee. The “Standard” transfer is free but may take 1-3 business days to complete, depending on your bank’s processing time.
5. Enter the transfer amount: Specify the amount you wish to transfer from your Venmo balance to your bank account. Make sure you have the necessary funds available in your Venmo balance for the transfer.
6. Select the bank account: If you have multiple bank accounts linked to your Venmo account, choose the one to which you want to transfer the funds. Verify that the bank account details are correct.
7. Initiate the transfer: Once you have reviewed all the details and confirmed that everything is accurate, click on the “Transfer” button to initiate the transfer process. Venmo will process the transfer and provide a confirmation of the transaction.
8. Keep track of the transfer: Venmo provides a transaction history where you can monitor the status of your transfer. You can check whether the transfer is in progress, completed, or if any issues have occurred.
By utilizing Venmo’s fund transfer feature, you can conveniently move funds from your Venmo balance to your bank account and effectively manage your cash flow. This flexibility ensures that your business has access to the funds it needs, exactly when it needs them.
In the next section, we’ll explore how you can track your transactions, generate reports, and maintain accurate financial records with the help of Venmo.
Tracking Transactions and Generating Reports
Tracking and managing your business transactions is vital for maintaining accurate financial records and gaining insights into your business’s financial health. Venmo provides tools that allow you to track your transactions, categorize expenses, and generate reports to help you monitor and analyze your business finances. Here’s how you can track transactions and generate reports using Venmo:
1. Transaction history: Venmo offers a transaction history feature that allows you to view a detailed list of all transactions, including payments received, payments sent, and transfers to and from your bank account. You can access this history through the Venmo app by navigating to the transaction tab or menu.
2. Categorization: To organize your transactions and better understand your spending patterns, Venmo allows you to assign categories to each transaction. You can categorize transactions based on expenses, such as supplies, equipment, marketing, or travel. This categorization feature provides a comprehensive overview of your business expenditures.
3. Export transactions: Venmo enables you to export your transaction history to a CSV file, which can be opened in spreadsheet software such as Microsoft Excel or Google Sheets. This export feature allows you to manipulate and analyze your transaction data further, making it easier to generate custom reports and gain deeper insights into your business finances.
4. Generating reports: While Venmo does not have built-in report generation capabilities, you can utilize the exported transaction data to create reports that suit your business’s specific needs. By importing the CSV file into a spreadsheet software, you can apply filters, perform calculations, and create visually appealing charts and graphs to represent your financial data.
5. Integration with accounting software: If you use accounting software for your business, such as QuickBooks or Xero, you can simplify the tracking and reporting process by integrating Venmo with your accounting software. This integration allows you to automatically sync your Venmo transactions and categorize them within your accounting system, streamlining your financial processes and ensuring accurate bookkeeping.
By utilizing Venmo’s transaction tracking features, categorization capabilities, and CSV export functionality, you can maintain a clear record of your business transactions and generate customized reports that provide valuable insights into your financial performance. This empowers you to make data-driven decisions and effectively manage your business’s finances.
In the next section, we’ll explore how you can integrate Venmo with your website or application to provide a seamless payment experience for your customers.
Integrating Venmo with Your Website or App
Integrating Venmo with your website or mobile application can enhance your customers’ payment experience and streamline your business operations. By incorporating Venmo’s functionality directly into your platform, you can provide a seamless and convenient payment option for your customers. Here’s how you can integrate Venmo with your website or app:
1. Venmo API: Venmo provides an Application Programming Interface (API) that allows developers to integrate Venmo’s payment functionality into their websites or mobile apps. By accessing and implementing the Venmo API, you can embed a Venmo payment button directly on your checkout page or payment gateway.
2. Request Venmo permissions: To integrate Venmo into your website or app using the Venmo API, you must first request permissions from Venmo. This involves creating a Venmo Developer Account, registering your application, and obtaining the necessary API credentials, such as client ID and secret.
3. Incorporate the Venmo payment button: Once you have the required permissions and credentials, you can add the Venmo payment button to your website or app’s payment flow. This button allows your customers to make payments through Venmo directly from your platform, ensuring a seamless and hassle-free payment experience.
4. Implement the payment flow: When a customer chooses to pay with Venmo on your website or app, you will need to implement the payment flow using the Venmo API. This involves authenticating the customer’s Venmo account, processing the payment request, and confirming the transaction’s success or failure.
5. Handle payment notifications: After a successful payment, Venmo sends a notification webhook to your website or app to inform you of the transaction details. Ensure that you have the appropriate handlers in place to receive and process these notifications, update your internal order or transaction records, and provide confirmation to the customer.
6. Test and optimize: Before making the Venmo integration live, thoroughly test the payment flow on your website or app to ensure it functions correctly and provides a seamless user experience. Pay attention to details such as proper error handling, clarity in payment instructions, and responsiveness across different devices.
By integrating Venmo with your website or app, you enhance the convenience and ease of making payments for your customers. This not only boosts customer satisfaction but also increases the likelihood of completed transactions on your platform. Additionally, integrating Venmo can help streamline your payment processes and reduce the need for manual payment handling.
In the next section, we’ll explore how you can promote your business and leverage Venmo’s social features to expand your customer base.
Promoting Your Business with Venmo
Venmo offers unique opportunities for businesses to promote their products or services, engage with customers, and increase brand visibility. With its social features and growing user base, Venmo can serve as a powerful marketing tool. Here’s how you can leverage Venmo to promote your business:
1. Share transactions publicly: Venmo allows users to share their payment transactions publicly, creating an opportunity for your customers to showcase their interaction with your business. Encourage your customers to share their payments to your business publicly on Venmo, along with a positive comment or review. This can help generate organic word-of-mouth promotion as others in their network see those transactions and become aware of your brand.
2. Offer incentives for social sharing: To encourage more customers to share their transactions publicly, consider offering incentives such as discounts or exclusive promotions for those who share their payments to your business and mention your brand in the transaction description. This not only promotes your business but also rewards your customers for their engagement.
3. Collaborate with influencers: Identify influencers or micro-influencers in your industry who have a strong presence on Venmo. Collaborate with them to create sponsored transactions or promotional campaigns that highlight your products or services. This can help you tap into their audience and increase brand exposure to a targeted group of potential customers.
4. Utilize the Venmo feed: The Venmo feed is a feature that allows users to see the payments and interactions of their friends and contacts. Consider leveraging this feature by engaging with your customers directly on Venmo. When customers make payments to your business, like and comment on their transactions to show appreciation. This interaction can help build a sense of community and encourage repeat business.
5. Incorporate Venmo into your marketing materials: Include the Venmo logo and payment option on your website, promotional materials, or even physical signage at your business location. Make it known that you accept Venmo as a payment method, increasing visibility and attracting customers who prefer this convenient payment option.
6. Engage with Venmo communities: Join relevant Venmo communities and engage with users who may have an interest in your products or services. Participate in conversations, provide helpful insights, and establish yourself as an authoritative and approachable business in the community. Avoid overtly promoting your business but instead focus on providing value and building relationships.
By proactively promoting your business on Venmo, you can harness the power of social sharing, influencer collaborations, and community engagement to increase brand recognition, attract new customers, and foster a positive reputation. Be creative, authentic, and mindful of the community guidelines and etiquette when utilizing these promotional strategies.
In the next section, we’ll provide some valuable tips for effectively using Venmo for your business.
Tips for Using Venmo for Business
While using Venmo for your business offers numerous benefits, it’s important to implement some best practices to optimize your experience and ensure a smooth transaction process. Here are some valuable tips for effectively using Venmo for your business:
1. Clearly communicate Venmo as a payment option: Make it clear to your customers that you accept Venmo as a payment method. Display the Venmo logo prominently on your website, social media profiles, and physical signage. Additionally, communicate your Venmo handle or username to customers so they can easily find and make payments to your business.
2. Set payment instructions: When requesting payments or sending payment requests through Venmo, provide clear and concise instructions to your customers. Specify the purpose of the payment, include any necessary details or reference numbers, and emphasize the importance of accurate payment amounts.
3. Be mindful of transaction fees: While receiving payments from customers is free for personal Venmo accounts, business accounts are subject to certain fees. Familiarize yourself with Venmo’s fee structure to understand any transaction fees that may apply to your business. Consider factoring these fees into your pricing strategy or implementing a minimum purchase amount to offset the charges.
4. Protect customer privacy: When using Venmo, respect your customers’ privacy and ensure that you handle their personal information securely. Avoid posting or sharing any sensitive customer information publicly or inappropriately. Maintain transparency in your privacy policy and adhere to data protection regulations to build trust with your customers.
5. Promptly confirm payments: As customers make payments to your business through Venmo, promptly confirm the receipt of payment and acknowledge their contribution. This helps establish trust and provides reassurance to your customers that their transactions have been successfully processed.
6. Keep accurate records: Maintain accurate records of all transactions conducted through Venmo. Make it a habit to log transactions, categorize expenses, and track payments in your accounting system or spreadsheets. This ensures proper bookkeeping, simplifies tax reporting, and facilitates financial analysis of your business.
7. Provide exceptional customer service: Consistently deliver excellent customer service to your customers, even in your Venmo interactions. Respond promptly to customer inquiries, provide helpful support, and strive to resolve any payment-related issues or disputes in a professional and timely manner.
8. Stay informed about updates and features: Venmo regularly introduces new features and updates to enhance its service. Stay informed about these updates and explore how they can benefit your business. Follow Venmo’s official channels, such as their blog or social media accounts, to stay up to date with the latest news and developments.
By following these tips, you can optimize your use of Venmo for your business and provide a seamless payment experience for your customers. Remember to prioritize customer satisfaction, maintain transparency, and uphold the highest standards of privacy and security in all your Venmo transactions.
With these tips in mind, you are well-equipped to make the most out of Venmo for your business operations.
Conclusion
Venmo presents an array of opportunities for businesses to streamline their payment processes, enhance customer satisfaction, and increase brand visibility. With its user-friendly interface, secure transactions, and social features, Venmo has become a preferred payment method for many individuals and businesses alike.
In this article, we explored the various aspects of using Venmo for business, starting from setting up a business account and accepting payments from customers. We delved into creating invoices, paying suppliers and business expenses, transferring funds to a bank account, tracking transactions, generating reports, and integrating Venmo with your website or app. Moreover, we discussed how to leverage Venmo’s social features to promote your business and provided essential tips for effectively using Venmo in your operations.
By leveraging Venmo effectively, businesses can modernize their payment systems, improve cash flow management, and enhance customer experiences. However, it’s crucial to remain mindful of fees, protect customer privacy, and maintain accurate financial records. Prioritizing exceptional customer service and staying informed about updates and features ensures a successful and seamless integration of Venmo into your business operations.
As the digital economy continues to evolve, it’s essential to adapt and leverage innovative tools like Venmo to stay competitive. By utilizing Venmo’s features and implementing best practices, businesses can optimize their payment processes, gain valuable insights from transaction data, and foster stronger relationships with customers.
So, whether you run a small startup, freelance business, or brick-and-mortar store, it’s time to embark on your Venmo journey and experience the convenience, efficiency, and growth opportunities it offers for your business.