Introduction
Welcome to the digital age, where technology has revolutionized the way we conduct business and interact with one another. Nonprofits, too, have embraced the power of technology to further their causes and reach a wider audience. One such technology that has gained immense popularity is Venmo, a mobile payment service that allows users to send and receive money conveniently and securely.
While Venmo is commonly used for personal transactions between friends and family, it can also be leveraged by nonprofit organizations. By setting up a Venmo business account, nonprofits can tap into a vast network of potential donors and simplify the donation process.
In this article, we will guide you through the process of setting up Venmo for your nonprofit organization. We will explore the benefits of using Venmo, provide step-by-step instructions on creating a business account, linking your nonprofit’s bank account, setting up donation options, promoting your Venmo account, and managing donations. We will also discuss the importance of privacy and security when using Venmo for your nonprofit.
So, if you’re looking to embrace the convenience and accessibility of mobile payments to boost your nonprofit’s fundraising efforts, read on to discover how to set up Venmo for your nonprofit organization.
Why should nonprofits consider using Venmo?
As a nonprofit organization, it is vital to adapt to the changing landscape of technology to engage and connect with your supporters effectively. Venmo provides several compelling reasons for nonprofits to utilize its platform for collecting donations:
- Convenience: Venmo allows donors to contribute to your nonprofit with just a few taps on their mobile devices. This ease of use eliminates the need for writing checks or filling out lengthy forms, making the donation process hassle-free.
- Accessibility: With Venmo being widely used by individuals across different age groups, it opens up a large pool of potential donors for your nonprofit. This inclusive approach enables you to reach a broader audience and increase your chances of receiving contributions.
- Social Sharing: Venmo incorporates social media-like features, enabling users to share their transactions within their network. By leveraging this feature, your nonprofit can tap into the powerful word-of-mouth marketing, as supporters share their donations and encourage others to contribute as well.
- Real-Time Updates: Venmo provides instant notifications, allowing your nonprofit to receive immediate updates on received donations. This real-time tracking helps you stay informed and show appreciation by promptly acknowledging your supporters’ contributions.
- Low Transaction Fees: Venmo offers reasonable transaction fees compared to other payment processing platforms, thus allowing your nonprofit to maximize the impact of every dollar donated.
- Donation Privacy: Venmo allows donors to choose their privacy settings, deciding whether to display their contributions publicly or keep them private. This flexibility caters to the preferences of your supporters and respects their privacy wishes.
By embracing Venmo as a payment method for your nonprofit organization, you simplify the donation process, enhance donor engagement, and expand your reach. It offers convenience, accessibility, social sharing, real-time updates, cost-effectiveness, and donation privacy, all of which are essential factors in establishing trust and encouraging supporters to contribute to your cause.
Creating a Venmo business account for your nonprofit
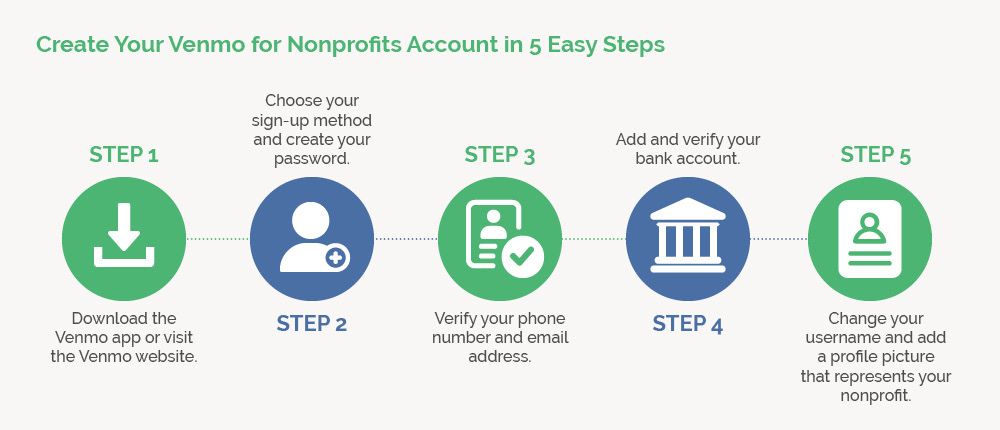
To start accepting donations on Venmo as a nonprofit organization, you will need to create a Venmo business account. Follow these steps to set up your account:
- Download the Venmo app: Visit the App Store or Google Play Store and download the Venmo app onto your mobile device. Ensure that you are downloading the official Venmo app.
- Sign up for a business account: Open the Venmo app and tap on “Sign Up.” Choose the option to set up a business account. Provide the necessary information, including your nonprofit organization’s name, email address, phone number, and a secure password.
- Verify your identity: Venmo will request additional information to verify your nonprofit’s identity. This could include your EIN (Employer Identification Number), IRS determination letter, or other relevant documentation. Follow the instructions provided to complete the verification process.
- Set up payment preferences: Configure your payment preferences by linking your nonprofit’s bank account to your Venmo business account. This allows you to transfer funds from Venmo to your organization’s bank account seamlessly.
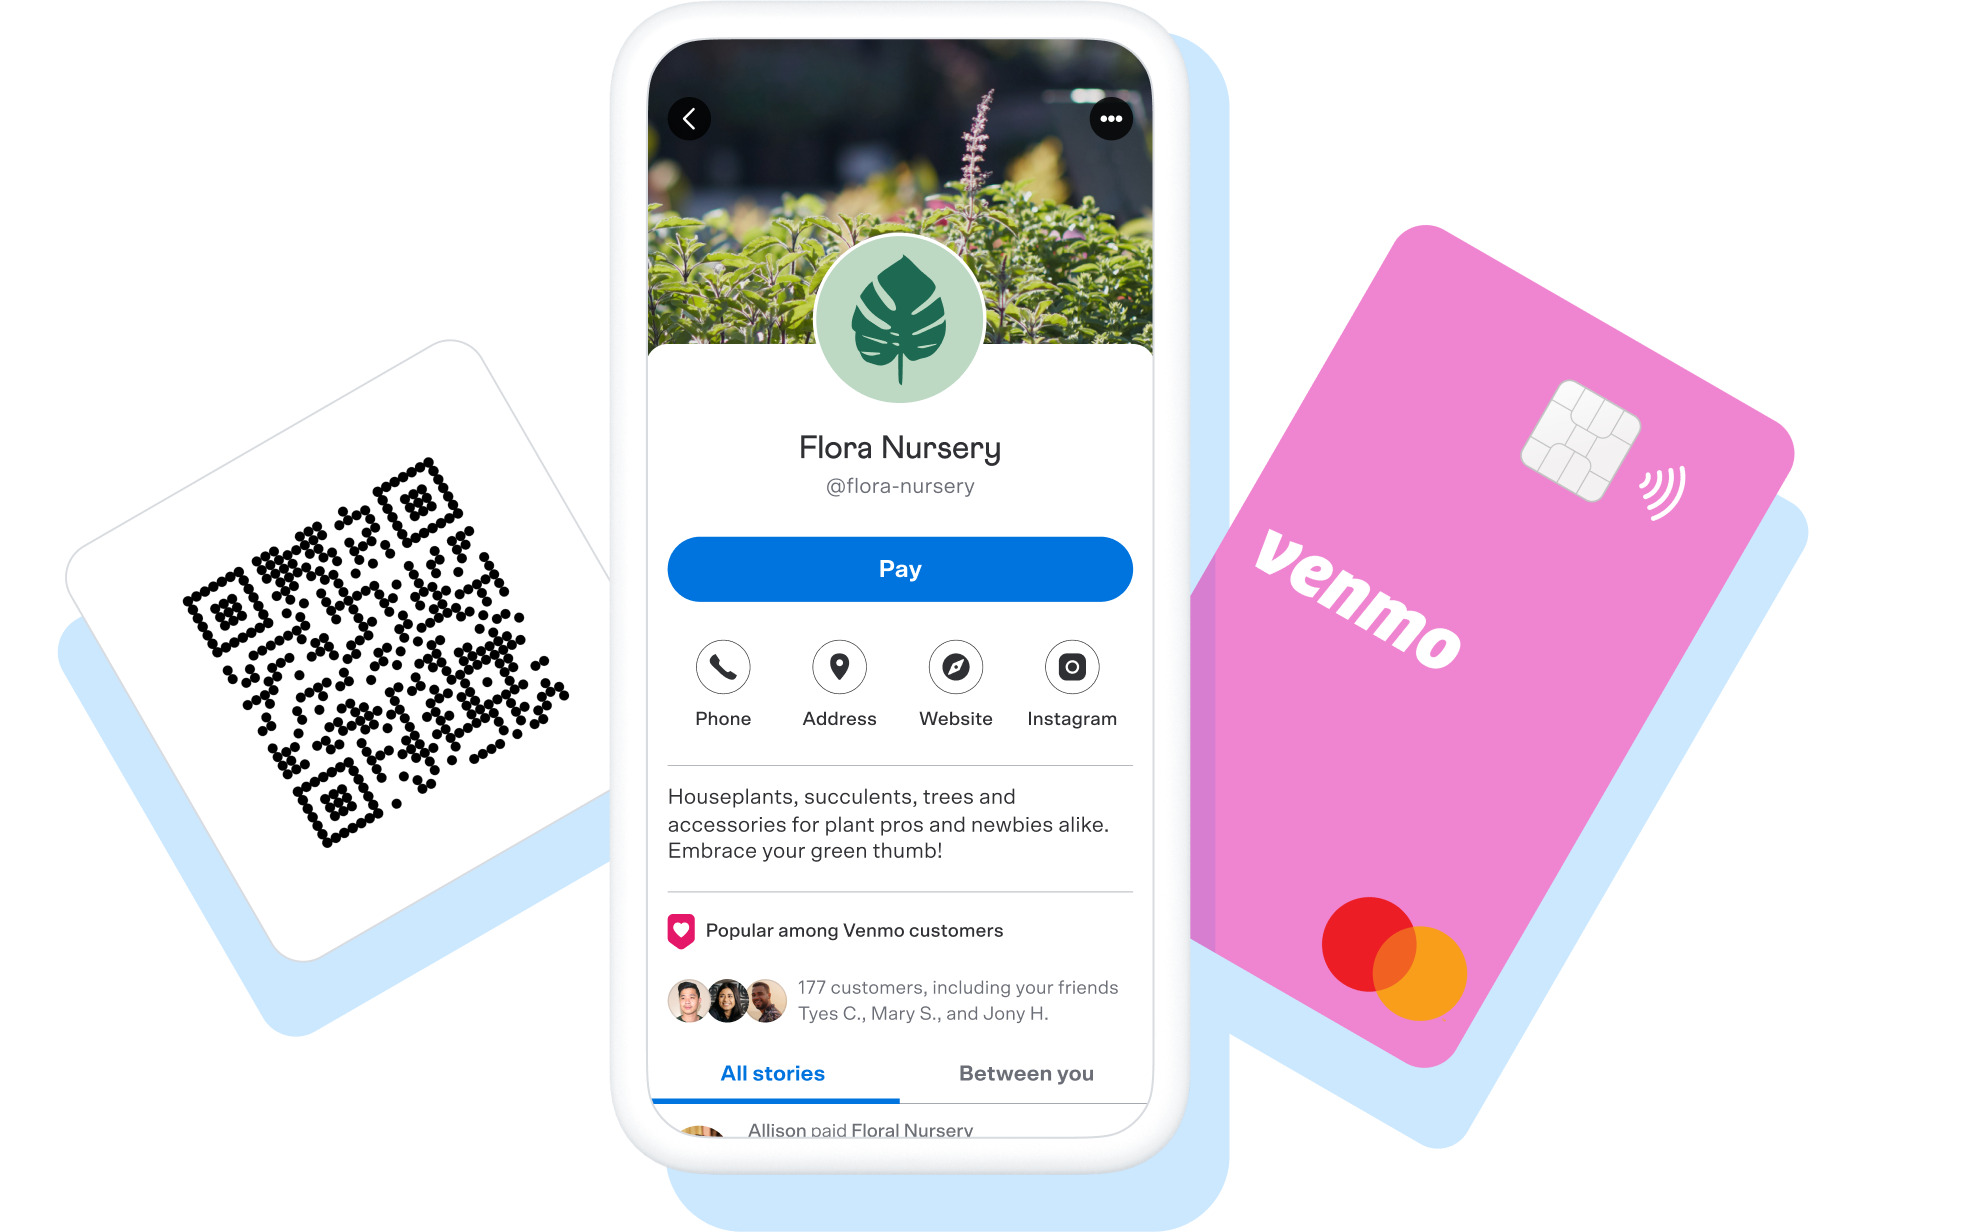
- Customize your Venmo profile: Enhance your organization’s profile on Venmo by adding a recognizable profile picture, a clear and concise description of your mission, and any relevant links or contact information. This will help potential donors understand and connect with your cause.
It is important to note that Venmo’s business accounts are designed specifically for sole proprietors and small businesses. While nonprofits are generally eligible to create business accounts, Venmo does not offer non-profit-specific features or functionality at this time.
Once your Venmo business account is set up, you can proceed to the next steps of setting up your nonprofit’s profile, linking your bank account, creating donation options, and promoting your Venmo account to start receiving donations from generous supporters.
Setting up your nonprofit’s profile on Venmo
After creating your Venmo business account, it’s time to set up your nonprofit’s profile to make it appealing and easy for donors to identify and support your cause. Here are the steps to follow:
- Access your Venmo business account: Open the Venmo app on your mobile device and log in using your business account credentials.
- Navigate to the profile settings: Tap on the profile icon located at the top left corner of the app screen. This will take you to your business account’s profile page.
- Edit your profile picture: Tap on the profile picture icon to upload a relevant image that represents your nonprofit’s logo or mission. Choose a clear and recognizable image that is visually appealing and reflects your organization’s values.
- Add a description: Tap on the “Edit Profile” button and enter a compelling description of your nonprofit. Clearly state your mission, the causes you support, and the impact of donations. Keep the description concise yet engaging, highlighting the work your nonprofit does and why it’s important.
- Include contact information and relevant links: Under the “Edit Profile” section, provide your nonprofit’s contact information, such as an email address or phone number, so donors can reach out if they have questions or need further information. Additionally, you may include relevant links, such as your nonprofit’s website or social media pages, to help donors learn more about your organization’s activities and projects.
- Double-check your profile: Before saving your profile changes, review all the details and ensure they are accurate and up to date. This is your opportunity to make a positive impression on potential donors, so take the time to ensure everything is correct.
By creating a visually appealing profile and providing comprehensive information about your nonprofit, you increase your chances of attracting donors and elicit their trust in supporting your cause. Remember to periodically review and update your profile to keep it fresh and relevant to your nonprofit’s ongoing initiatives.
Linking your nonprofit’s bank account to Venmo
To seamlessly transfer funds received through Venmo to your nonprofit’s bank account, you need to link your bank account to your Venmo business account. Follow these steps:
- Launch the Venmo app: Open the Venmo app on your mobile device and log in to your business account.
- Access the settings: Tap on the profile icon at the top left corner of the app screen, then select “Settings.”
- Find the “Bank Accounts” section: Within the “Settings” menu, locate the “Bank Accounts” option. Tap on it to proceed.
- Add your bank account: Tap on the “+ Add Bank” button to initiate the bank account linking process. Provide the required information, including your bank’s routing number and account number. Venmo may also require additional verification steps, such as micro-deposits, to ensure the validity of the account.
- Verify your bank account: Once you’ve provided the necessary information, Venmo will send micro-deposits (small amounts of money) to your linked bank account. Verify these deposits in the Venmo app to confirm that the account is valid and properly linked.
- Set your primary bank account: If you have multiple bank accounts linked to your Venmo business account, select the primary bank account for receiving funds. This will be the default account for transferring money from Venmo to your nonprofit’s bank.
It’s essential to ensure that the bank account linked to Venmo belongs to your nonprofit organization. This allows for accurate financial tracking and easy reconciliation of donations received.
Once your bank account is successfully linked, you can begin accepting donations on Venmo, knowing that the funds will be transferred securely to your nonprofit’s account. Be sure to monitor your linked bank account regularly to keep track of incoming funds and ensure a smooth financial management process.
Creating donation options on Venmo for your nonprofit
Now that you have set up your Venmo business account and linked your nonprofit’s bank account, it’s time to create donation options to make it easy for supporters to contribute. Venmo offers several ways to set up donation options:
- One-time donations: Enable one-time donations to allow supporters to make a single contribution to your nonprofit. Specify the suggested donation amount or leave it open-ended, allowing donors to contribute any amount they desire.
- Recurring donations: Consider offering recurring donation options for supporters who wish to contribute on a regular basis. Venmo allows donors to set up recurring payments, such as monthly or quarterly, to provide continuous support to your cause.
- Campaign-specific donations: If your nonprofit is running specific fundraising campaigns or events, create dedicated donation options for these initiatives. This allows donors to contribute directly to the cause they feel strongly about, increasing their connection and motivation to support your organization.
- Fundraiser collaborations: Collaborate with individuals or groups hosting fundraisers on Venmo and create donation options specifically for these partnerships. This symbiotic relationship can amplify your fundraising efforts and expand your donor base.
- Custom donation descriptions: Make your donation options more engaging by providing custom descriptions that explain how the funds will be used or the impact of each donation. This gives donors a clearer understanding of how their contribution will make a difference.
To create these donation options:
- Access your Venmo business account: Open the Venmo app and log in using your business account credentials.
- Navigate to the “Settings” menu: Tap on the profile icon at the top left corner of the app screen, then select “Settings.”
- Select “Payment Options”: Within the “Settings” menu, find and tap on “Payment Options.”
- Choose donation types: Tap on “Donation” and select the desired donation types you want to provide, such as one-time or recurring donations.
- Set donation details: Specify the suggested donation amount (if applicable) and provide any additional details or descriptions for each donation option.
By offering various donation options on Venmo, you cater to the preferences and capabilities of your supporters, making it convenient for them to contribute in a way that best suits their circumstances. This flexibility encourages increased donor participation and promotes ongoing support for your nonprofit’s mission.
Promoting your Venmo account and donation options
Now that your Venmo account and donation options are set up, it’s crucial to promote them to maximize visibility and encourage donations. Here are some strategies to effectively promote your Venmo account:
- Utilize social media: Leverage the power of social media platforms to raise awareness about your Venmo account and donation options. Share compelling stories, images, and videos that illustrate the impact of donations and provide clear instructions on how followers can contribute through Venmo.
- Include Venmo details on your website: Add a prominent “Donate with Venmo” button on your nonprofit’s website. Provide a brief explanation of how Venmo donations work and include your Venmo username or a scannable QR code to make it easy for visitors to access your Venmo account directly.
- Send email newsletters: Regularly communicate with your mailing list by including information about your Venmo account and the donation options available. Highlight success stories and the impact of previous donations to inspire and encourage supporters to contribute through Venmo.
- Partner with influencers: Collaborate with influential individuals or organizations within your nonprofit’s niche. Engage them to promote your Venmo donation options to their followers, who may find relevance in supporting your cause through their trusted endorsement.
- Engage with your community: Attend community events, networking sessions, and meetings relevant to your nonprofit’s mission. Share information about your Venmo account and donation options while emphasizing the ease and convenience of contributing through a trusted platform like Venmo.
- Express gratitude: Show appreciation by publicly thanking donors who contribute through Venmo. Recognize their generosity on social media, your website, or through personalized emails. This not only fosters a sense of appreciation but also encourages others to follow suit.
Remember, consistent and strategic promotion is key to garnering attention and encouraging donations through Venmo. By utilizing various channels and engaging with your community, you can boost visibility and attract generous supporters who resonate with your nonprofit’s mission.
Monitoring and managing donations on Venmo
As donations begin to come in through Venmo, it’s crucial for your nonprofit to monitor and manage these contributions effectively. Here are some key steps to ensure smooth donation management:
- Regularly review your Venmo activity: Log in to your Venmo business account regularly to monitor incoming donations and review the associated activity. This allows you to stay up to date with donor contributions and identify any potential issues or discrepancies.
- Acknowledge and express gratitude: Take the time to acknowledge and thank your donors promptly for their contributions. Consider sending a personalized email, a thank-you card, or publicly recognizing their support on social media. This not only shows appreciation but also fosters stronger donor relationships.
- Maintaining accurate records: Keep meticulous records of all donations received through Venmo. Document the donor’s name, transaction details, and the purpose of the donation. This information will be invaluable for financial reporting, tax purposes, and future donor engagement efforts.
- Ensure transparency and accountability: Be transparent about how donations received through Venmo are used by your nonprofit. Share updates with your supporters to demonstrate the impact their contributions are making and strengthen trust in your organization’s financial management.
- Integrate with your existing donor management system: Consider integrating Venmo with your existing donor management system or database to streamline data entry and ensure a centralized record of all donations. Automation can help reduce manual entry errors and improve efficiency.
- Regularly reconcile your bank account: Periodically reconcile your nonprofit’s bank account with the funds received through Venmo. This helps ensure that all funds have been correctly transferred and provides an accurate financial picture for your organization.
By diligently monitoring and managing donations on Venmo, your nonprofit can maintain transparency, strengthen donor relationships, and demonstrate good stewardship of the funds entrusted to your organization. This level of attentive management also allows you to have a comprehensive understanding of your fundraising efforts and make informed decisions to further your mission.
Ensuring privacy and security for your nonprofit
When utilizing a digital payment platform like Venmo for collecting donations, it is crucial to prioritize privacy and security to protect both your nonprofit and your donors. Here are some important measures to ensure privacy and security for your nonprofit:
- Secure account access: Implement strong password practices for your Venmo business account, including using a combination of letters, numbers, and special characters. Enable multi-factor authentication for an extra layer of security.
- Protect donor data: Safeguard the personal information of your donors by ensuring that you have proper data protection measures in place. Familiarize yourself with Venmo’s privacy policy and adhere to applicable data protection regulations.
- Communicate securely: Use secure communication methods, such as encrypted email or secure messaging platforms, when handling sensitive donor information. Avoid transmitting personal or financial data through unsecured channels.
- Stay informed about security updates: Regularly update the Venmo app on your mobile device to ensure that you have the latest security patches and enhancements. Stay informed about any security alerts or guidance provided by Venmo and promptly address any recommended actions.
- Educate your staff and volunteers: Train your nonprofit’s staff and volunteers on best practices for privacy and security when using Venmo or handling donor information. This includes being cautious with sharing login credentials, avoiding phishing attempts, and understanding proper data-handling protocols.
- Privacy settings: Familiarize yourself with Venmo’s privacy settings and ensure that your organization’s desired level of privacy is in place. This might include determining whether to publicly display donor transactions or allowing donors to choose privacy settings for their contributions.
- Regularly review transactions: Monitor your Venmo account regularly and carefully review any transactions to identify any suspicious or unauthorized activities. Report any potential fraudulent transactions immediately to Venmo’s support team.
By implementing these privacy and security measures, you demonstrate your commitment to protecting both your organization and the personal information of your donors. This fosters trust and confidence in your nonprofit’s ability to handle donations responsibly, encouraging continued support from your generous donors.
Conclusion
Embracing the use of Venmo for your nonprofit organization can revolutionize your fundraising efforts, providing a convenient and efficient way for supporters to contribute to your cause. By following the steps outlined in this article, you can successfully set up your Venmo business account, link your nonprofit’s bank account, create donation options, and promote your Venmo account to reach a wider audience.
Venmo’s user-friendly interface, social sharing capabilities, and low transaction fees make it an attractive payment platform for nonprofits. By leveraging its features, you can simplify the donation process, expand your donor base, and foster stronger connections with your supporters.
However, it is essential to prioritize privacy and security when handling donor information and accessing your Venmo business account. By implementing the recommended security measures and staying vigilant, you can ensure that the personal data of your donors and your organization remains protected.
Remember to regularly monitor and manage donations received through Venmo, expressing gratitude to your donors and maintaining accurate records. This not only enhances transparency but also strengthens donor relationships and demonstrates your organization’s commitment to stewarding funds responsibly.
As you navigate the dynamic landscape of nonprofit fundraising, embracing new technologies like Venmo can provide your organization with a competitive edge and open doors to a wider range of support. By implementing the strategies and best practices outlined in this article, you can harness the power of Venmo to further your nonprofit’s mission and create a positive impact in the world.