Introduction
Welcome to the world of Facebook Pay! As a business owner, you know the importance of providing convenient payment options to your customers. Facebook Pay allows you to accept payments securely and seamlessly through your business page on the popular social media platform.
With the rise of online shopping and the increasing number of people engaging with businesses on Facebook, it has become essential for businesses to offer an integrated payment solution. By enabling Facebook Pay on your business page, you can streamline transactions and provide a hassle-free payment experience for your customers.
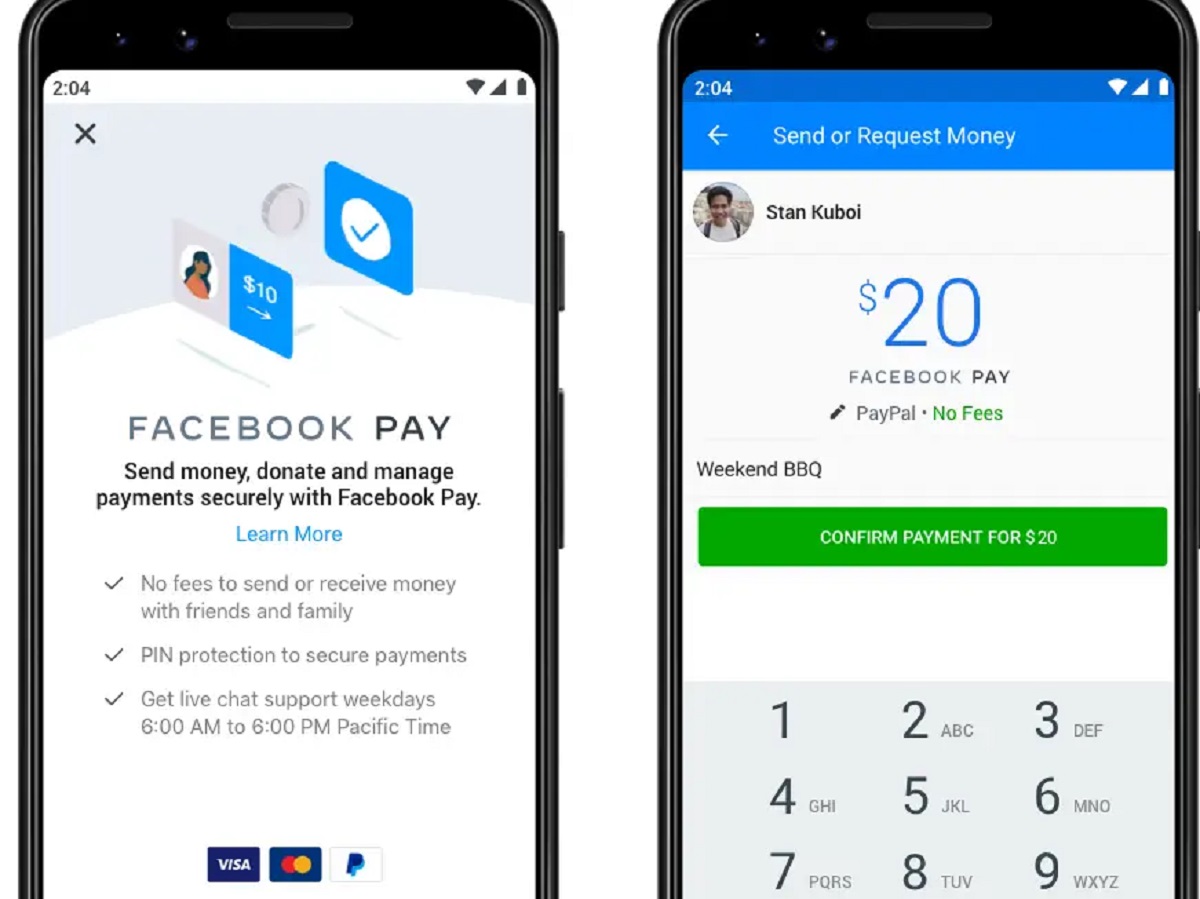
Facebook Pay is a feature that allows users to make purchases, donations, and send money to friends and family directly through Facebook. It is designed to be simple, secure, and convenient, making it an ideal option for businesses looking to improve their payment process.
In this guide, we will walk you through the process of setting up Facebook Pay on your business page, adding a payment method, enabling checkout, managing payments, and promoting your products/services with the help of Facebook Pay. We will also cover some troubleshooting tips to help you resolve any common issues that may arise.
Whether you are a small business owner, an entrepreneur, or a creative professional, this guide will equip you with the knowledge and tools necessary to leverage Facebook Pay and facilitate transactions on your business page. So, let’s dive in and discover the world of Facebook Pay!
What is Facebook Pay?
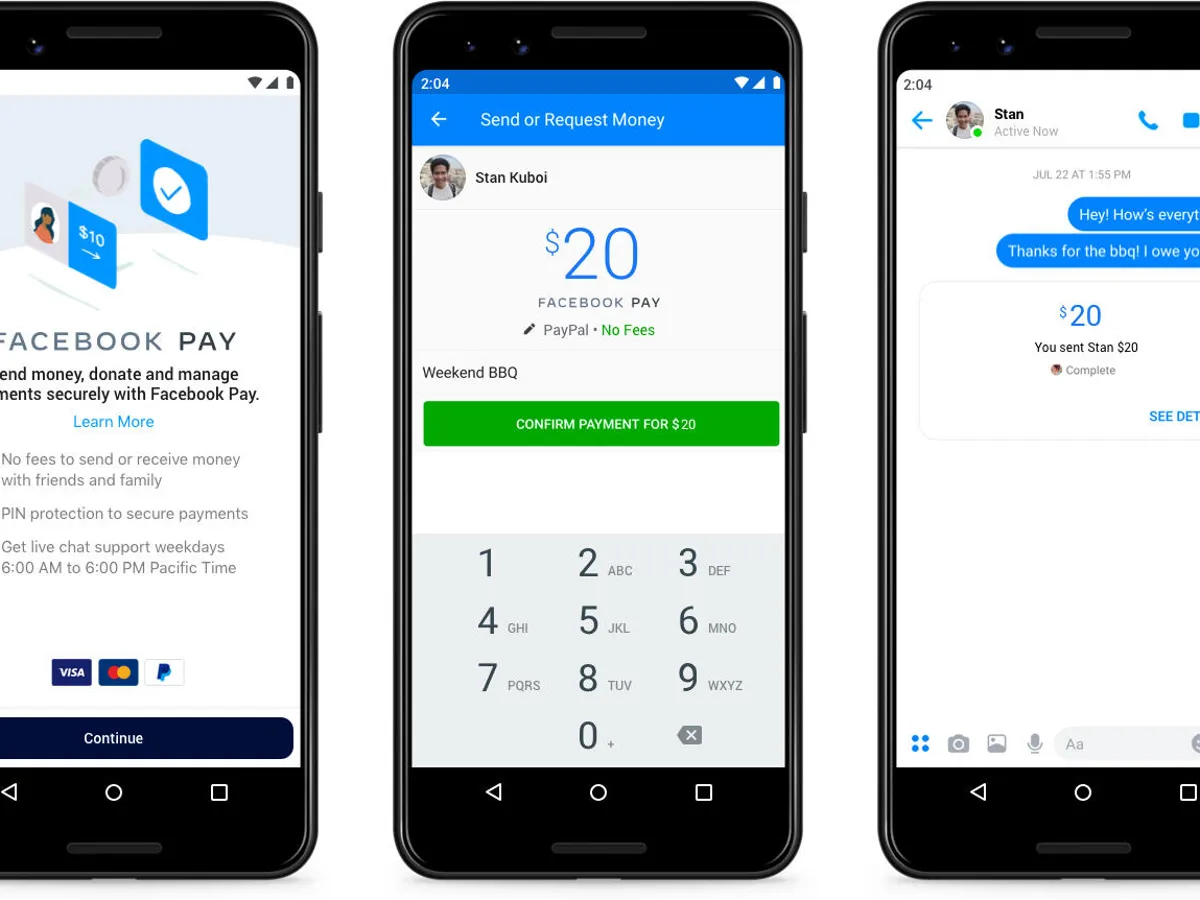
Facebook Pay is a secure and convenient payment feature available on the Facebook platform. It allows users to make purchases, donate to fundraisers, and send money to friends and family without leaving the social media site.
By integrating Facebook Pay into your business page, you can offer a seamless payment experience to your customers. It eliminates the need for them to navigate away from Facebook to complete their transactions, enhancing convenience and encouraging more sales.
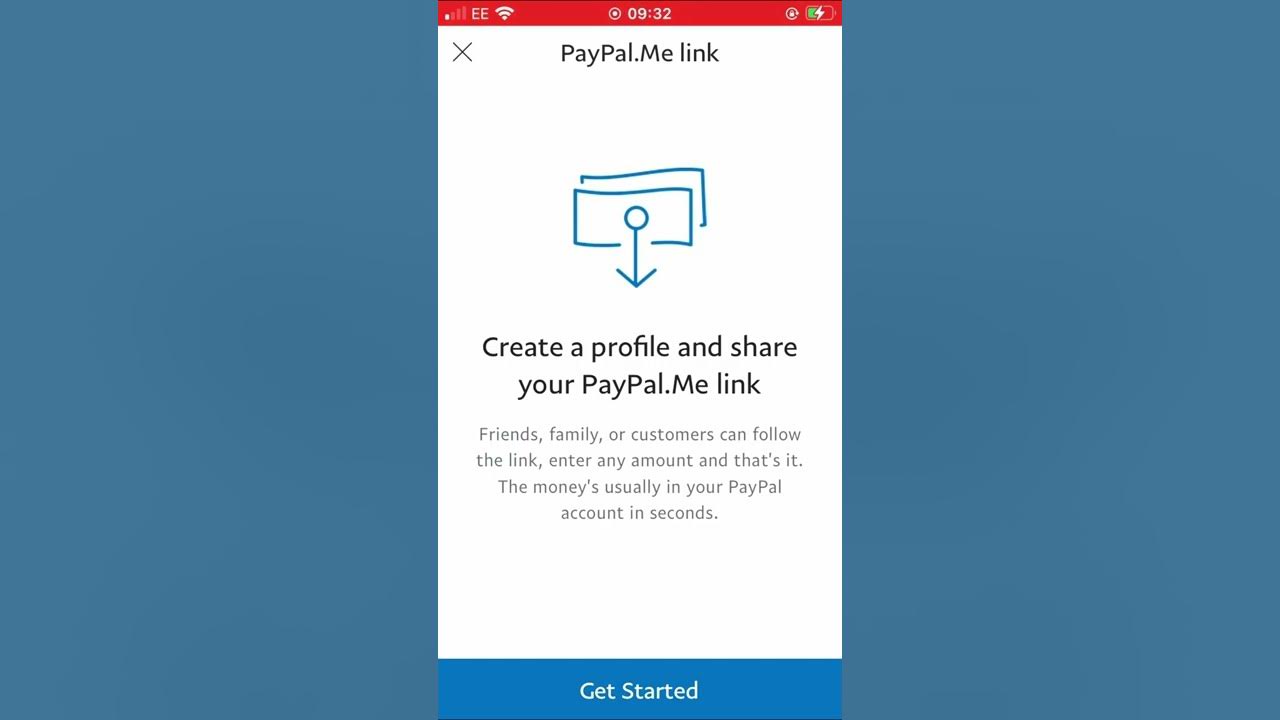
One of the key advantages of Facebook Pay is its accessibility. It enables users to make payments using different methods, including credit and debit cards, PayPal, and even digital wallets like Apple Pay and Google Pay. This versatility accommodates the diverse preferences of customers, ensuring that nobody is left out.
Another significant benefit of Facebook Pay is its security features. It adheres to stringent security protocols, protecting both businesses and customers from potential fraud and unauthorized transactions. Sensitive payment information is encrypted and stored securely, giving users peace of mind when making purchases through Facebook Pay.
Moreover, Facebook Pay offers an easy and seamless checkout process. Customers can complete their transactions with just a few taps or clicks, without the need to repeatedly enter their payment and shipping information. This convenience can reduce cart abandonment rates and encourage impulse purchases.
Additionally, Facebook Pay provides businesses with detailed insights and analytics on their sales and revenue. You can easily track and analyze customer behavior, identify trends, optimize your marketing strategies, and make data-driven decisions to grow your business.
Facebook Pay is not only beneficial for businesses, but it also offers a great user experience for customers. Through its integration with the Facebook platform, users can easily discover and purchase products or services from their favorite brands or businesses—making it a win-win situation for both sides.
Now that we understand what Facebook Pay is and its advantages, let’s explore how to set it up on your business page and make the most of this powerful payment feature.
Setting up Facebook Pay on your Business Page
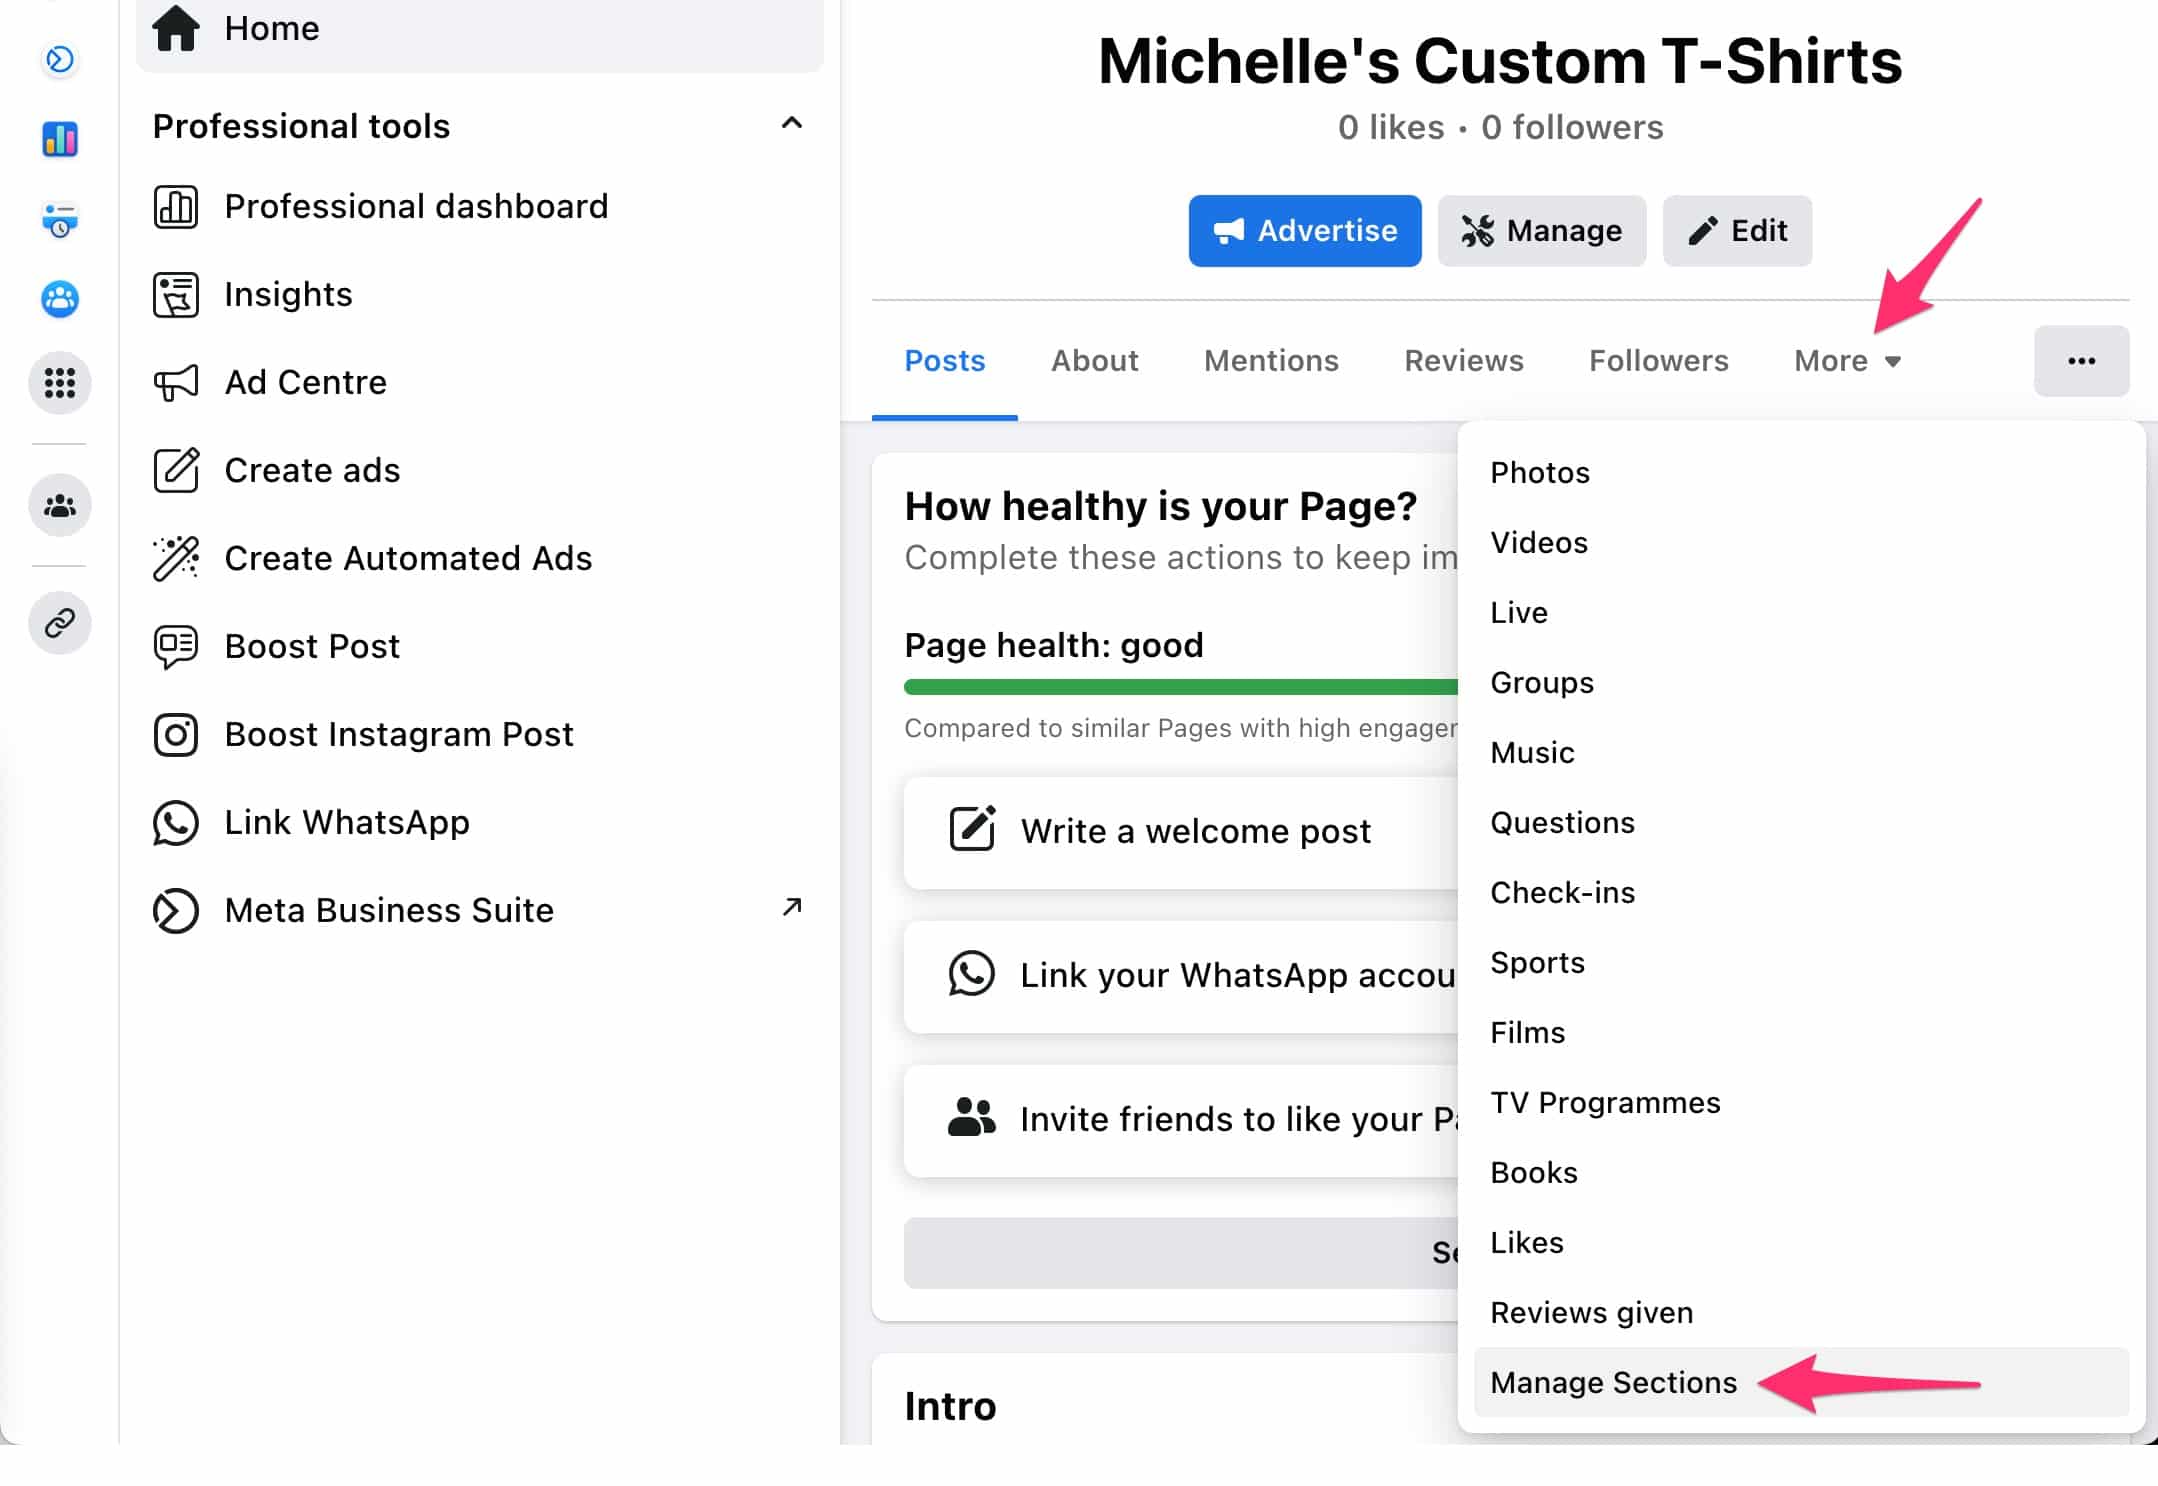
Setting up Facebook Pay on your business page is a straightforward process that can be completed in just a few steps. Here’s how to get started:
- Log in to your Facebook account and navigate to your business page.
- Click on the “Settings” tab located at the top right corner of your page.
- In the left-hand menu, click on “Templates and Tabs.”
- Scroll down and find the “Add a Tab” section. Look for the “Payment Options” tab and click on the “Add Tab” button next to it.
- Once the Payment Options tab is added, click on “Settings” to configure Facebook Pay for your business page.
- Review and agree to the terms and conditions of Facebook Pay and click on the “Continue” button.
- Set up your business details, including your business name, contact information, and payment email address.
- Choose your preferred currency for transactions, ensuring it aligns with your business operations.
- Enable instant notifications to stay updated on payments, refunds, and other transaction-related activities.
- Click on the “Save Changes” button to finalize the setup process.
Once you have completed these steps, Facebook Pay will be successfully set up on your business page. It’s important to note that Facebook Pay availability may vary depending on your location and business category.
By enabling Facebook Pay on your business page, you expand your payment options and provide a convenient and secure method for customers to make purchases. Additionally, it helps to build trust and credibility with your audience, as transactions are processed through a trusted platform like Facebook.
In the next section, we will explore how to add a payment method to your business page to start accepting payments through Facebook Pay.
Adding a Payment Method to your Business Page
Once you have set up Facebook Pay on your business page, the next step is to add a payment method that customers can use to make purchases. Here’s how you can do it:
- Go to your business page and click on the “Shop” tab.
- Under the “Shop” tab, click on the “Manage Shop” button.
- In the “Payment Methods” section, click on the “Add Payment Method” button.
- Choose the payment method that you want to add from the available options, such as credit/debit card, PayPal, or digital wallets.
- Enter the required details for the selected payment method, such as card number, expiration date, and CVV code for credit/debit cards, or your PayPal email address for PayPal payments.
- Verify the payment method by following the additional steps or prompts provided by the chosen payment provider.
- Once the payment method is successfully added and verified, customers will be able to use it to make purchases directly on your business page.
It’s important to ensure that the payment method you add complies with your business’s payment policies and regulations. If you have any specific requirements or preferences for payment methods, consider communicating them clearly with your customers to avoid any confusion or disputes.
By adding a payment method to your business page, you open up a wide range of options for your customers to make payments securely and conveniently. This flexibility can significantly improve the overall shopping experience and increase customer satisfaction.
Now that you have successfully added a payment method, the next step is to set up the price/unit for your products or services. We will explore this process in the following section.
Setting up Price/Unit for Products/Services
Once you have added a payment method to your business page, it’s time to set up the price or unit for your products or services. This step is crucial as it determines how much customers will be charged for each item or service they purchase through Facebook Pay. Here’s how you can set up the price or unit:
- Go to your business page and click on the “Shop” tab.
- Under the “Shop” tab, click on the “Manage Shop” button.
- Locate the product or service you want to set the price/unit for and click on “Edit Item” or a similar option.
- Scroll down to the “Pricing and Variations” section.
- Enter the price per unit for the product or service. If you offer multiple variations (e.g., sizes, colors), ensure you set the price for each individual variation.
- If applicable, specify the currency in which the price should be displayed.
- Optionally, you can set up additional pricing options, such as bulk discounts or promotional prices for a limited time.
- Click on the “Save” or “Update” button to finalize the price/unit setup.
It’s important to set reasonable and competitive prices for your products or services. Research your market, analyze the pricing strategies of your competitors, and consider the value and quality you are providing to determine an optimal pricing structure.
Furthermore, ensure that the prices you set comply with your business’s financial and legal requirements. Take into account any applicable taxes, fees, or shipping costs to avoid any complications or surprises for both you and your customers during the checkout process.
Setting up the price/unit for your products or services accurately is crucial for a smooth and transparent transaction process. Be diligent in reviewing and updating your pricing information as needed to maintain consistency and accuracy.
Once you have set up the price/unit, the next step is to enable the Facebook Pay checkout on your business page, which we will explore in the following section.
Enabling Facebook Pay Checkout on your Business Page
Enabling the Facebook Pay checkout on your business page is a crucial step to allow customers to seamlessly make purchases through the platform. By enabling this feature, you create a convenient and efficient shopping experience. Here’s how you can enable Facebook Pay checkout:
- Log in to your Facebook account and navigate to your business page.
- Click on the “Settings” tab located at the top right corner of your page.
- In the left-hand menu, click on “Templates and Tabs.”
- Scroll down and find the “Add a Tab” section. Look for the “Shop” tab and click on the “Add Tab” button next to it.
- Once the Shop tab is added, click on “Settings” to configure the Facebook Pay checkout for your business page.
- In the “Checkout Settings” section, click on the “Edit” button.
- Choose the checkbox that says “Enable payment processing” to enable Facebook Pay checkout.
- Review and agree to the terms and conditions of Facebook Pay.
- Ensure that all necessary information, such as payment methods, shipping options, and return policies, are accurately set up.
- Click on the “Save” or “Update” button to finalize the checkout settings.
Enabling the Facebook Pay checkout gives your customers the ability to see the total cost of their purchase, select their preferred payment method, and complete the transaction without leaving the platform. This streamlined process can significantly improve conversion rates and customer satisfaction.
Additionally, make sure to provide clear and concise information about your shipping options, estimated delivery times, and return policies. Clear communication regarding these details can help minimize customer queries and potential misunderstandings, ensuring a smooth post-purchase experience.
By enabling Facebook Pay checkout, you create a secure and convenient environment for your customers to make purchases directly on your business page. This eliminates the need for them to navigate external websites or complete additional steps, resulting in a seamless and efficient buying process.
Now that you have enabled Facebook Pay checkout, the next section will guide you on how to manage payments and sales through Facebook Pay effectively.
Managing Payments and Sales through Facebook Pay
Once you have enabled Facebook Pay on your business page and customers start making purchases, it’s important to effectively manage payments and sales to ensure a smooth and efficient process. Here are some tips to help you manage payments and sales through Facebook Pay:
- Regularly review your notifications and emails: Stay alert and check your notifications and emails regularly to stay updated on new orders, payment confirmations, and customer inquiries. Respond to customer queries promptly to provide excellent customer service.
- Track your sales and revenue: Utilize the tools provided by Facebook Pay to track your sales and revenue. Analyze the data to identify trends, understand customer preferences, and make informed business decisions.
- Monitor inventory and order fulfillment: Keep a close eye on your inventory levels and ensure timely order fulfillment. Update your inventory as new products become available or remove out-of-stock items to avoid customer dissatisfaction.
- Manage refunds and returns: Handle refund and return requests promptly and professionally. Clearly communicate your refund and return policies to customers and provide a seamless process for returning products or receiving refunds.
- Stay vigilant against fraud: Be vigilant and monitor for any suspicious activity or signs of fraud. Report any fraudulent transactions to Facebook and implement security measures to protect your business and customers.
- Provide exceptional customer service: Offer excellent customer support to create a positive buying experience. Respond to customer inquiries, resolve issues, and provide timely updates to ensure customer satisfaction.
- Continuously optimize your product listings: Regularly review and optimize your product listings. Ensure accurate and compelling product descriptions, high-quality images, and relevant keywords to attract potential buyers and increase conversions.
- Seek feedback and reviews: Encourage customers to leave feedback and reviews about their experience with your products or services. Positive reviews can build trust and credibility, attracting more customers to your business.
By effectively managing payments and sales through Facebook Pay, you can streamline your business operations, improve customer satisfaction, and drive growth. Stay organized, maintain clear communication, and adapt to customer needs to ensure a smooth and successful selling process.
In the next section, we will explore how you can promote your products or services on your business page using Facebook Pay.
Promoting Products/Services on your Business Page with Facebook Pay
Now that you have set up Facebook Pay on your business page and have started managing payments and sales, it’s time to maximize your reach and promote your products or services. Here are some effective strategies to promote your offerings on your business page using Facebook Pay:
- Create visually appealing posts: Use high-quality images, videos, and graphics to showcase your products or services. Create visually appealing posts that catch the attention of your audience and highlight the unique features and benefits of what you offer.
- Write compelling product descriptions: Craft compelling and persuasive product descriptions that effectively communicate the value and benefits of your offerings. Use persuasive language and highlight key features to entice your audience to make a purchase.
- Offer exclusive discounts and promotions: Create exclusive discounts, offers, or promotions for customers who make a purchase through Facebook Pay. This incentive can encourage more people to buy from you and create a sense of urgency.
- Run targeted Facebook ads: Utilize Facebook’s advertising platform to reach a wider audience and target specific demographics, interests, or behaviors. Set a budget for your ads and monitor their performance to optimize your marketing efforts.
- Engage with your audience: Actively engage with your audience by responding to comments, messages, and reviews. Show genuine interest in their questions or concerns and provide exceptional customer service. This engagement builds trust and loyalty among your customers.
- Utilize Facebook Live: Host live stream sessions where you can showcase your products or services in action. Engage with your audience in real-time, answer questions, and offer exclusive deals or giveaways during the live stream.
- Collaborate with influencers: Collaborate with influencers or bloggers in your niche to promote your products or services. Partnering with influencers can help you reach a wider audience and increase brand awareness.
- Share user-generated content: Encourage your customers to share their experiences with your products or services. Repost or share user-generated content on your page to showcase positive testimonials and reviews.
- Utilize Facebook analytics: Utilize the insights provided by Facebook’s analytics tools to track the performance of your promotional efforts. Analyze the data to understand which strategies are driving the most engagement and conversions.
By implementing these strategies, you can effectively promote your products or services on your business page with Facebook Pay. Remember to be consistent, creative, and responsive in your marketing efforts to engage and attract more customers.
In the next section, we will address some common issues and provide troubleshooting tips for Facebook Pay.
Troubleshooting Common Issues with Facebook Pay
While Facebook Pay provides a seamless payment experience, occasionally, you may encounter some common issues. Here are some troubleshooting tips to help you resolve them:
- Payment Declined: If a customer’s payment is declined, ask them to double-check their payment method and ensure that they have sufficient funds or a valid card. Alternatively, they can try using a different payment method or contact their bank for assistance.
- Missing Transactions: If you notice any missing transactions, check your notifications and emails to ensure that you haven’t missed any orders. If there are any discrepancies, contact Facebook support for further assistance.
- Shipping Issues: If you encounter shipping issues, such as delayed or lost packages, quickly address any concerns raised by your customers. Provide them with updated tracking information and work with your shipping provider to resolve any delivery-related issues.
- Refunds and Returns: Handle refund and return requests promptly according to your business’s refund policy. Clearly communicate the process to customers and ensure that refunds are processed in a timely manner.
- Technical Glitches: If you experience any technical issues with Facebook Pay, such as page errors or payment processing failures, try clearing your browser cache and cookies. If the problem persists, reach out to Facebook support for assistance.
- Customer Support: Ensure that you have a reliable and responsive customer support system in place. Address customer inquiries or concerns promptly and provide clear communication to resolve any issues they may encounter during the payment process.
- Security Concerns: If you suspect any security breaches or fraudulent activity, report them to Facebook immediately. Implement additional security measures, such as two-factor authentication, to protect your business and customers.
- Education and Communication: Educate your customers about the benefits and security of Facebook Pay. Address any concerns they may have and provide clear instructions on how to use Facebook Pay for a seamless payment experience.
- Staying Updated: Stay updated on any changes or updates to Facebook Pay policies and features. Regularly visit the Facebook Business Help Center or join relevant communities to stay informed about best practices and troubleshooting advice.
By addressing these common issues and resolving them promptly, you can ensure a positive customer experience and maintain the trust and loyalty of your customers. Handle any issues with professionalism and maintain open lines of communication with your customers for a smooth and enjoyable transaction process.
In the next section, we will conclude our guide on Facebook Pay and summarize the key takeaways from this tutorial.
Conclusion
Congratulations! You have now learned how to leverage Facebook Pay to enhance the payment experience on your business page. By setting up Facebook Pay, adding payment methods, and enabling the checkout process, you can streamline transactions and provide a convenient and secure payment option for your customers.
We explored various strategies to effectively manage payments and sales, promote your products or services, and troubleshoot common issues that may arise with Facebook Pay. By implementing these strategies and staying responsive to customer needs, you can create a seamless and enjoyable shopping experience for your customers.
Remember to regularly review your settings, inventory, and customer feedback to optimize and enhance your business page. Utilize the insights and analytics provided by Facebook to make data-driven business decisions and continuously improve your strategies.
As you navigate the world of Facebook Pay, it’s important to stay updated on any changes or new features introduced by Facebook. Visit the Facebook Business Help Center, join relevant communities, and keep an eye on industry news to stay abreast of best practices and new opportunities.
Now that you have the knowledge and tools to effectively utilize Facebook Pay on your business page, it’s time to take action and start maximizing its potential. Embrace the power of Facebook Pay to offer a seamless, secure, and convenient payment experience for your customers, and watch your business grow.
Thank you for joining us on this journey, and we wish you every success in leveraging Facebook Pay to drive your business forward.