Introduction
So, you inserted your SD card into your device, expecting to access your files or add new ones, only to find that it’s read-only. Frustrating, isn’t it? Don’t worry, you’re not alone in this predicament. Many users have encountered the issue of their SD card being read only, and it can be quite inconvenient when you need to write or modify data on it.
But what exactly does it mean when your SD card is read only? In simple terms, it means that you can view and access the existing files on the card, but you cannot write or delete any data from it. This restriction prevents you from making any changes to the files stored on the SD card, such as adding new photos, videos, or documents.
There are several reasons why your SD card might be read-only. It could be due to a physical write protection switch, file system errors, virus or malware infections, improper ejection, or even a damaged or corrupted SD card. Understanding these reasons will help you troubleshoot and fix the issue, so you can regain full control over your SD card.
In this article, we will explore these reasons in detail and provide you with steps to troubleshoot and fix your read-only SD card. Whether you’re using a digital camera, a smartphone, or any other device that utilizes an SD card, we’ve got you covered. Let’s dive into the possible causes of a read-only SD card and learn how to resolve this frustrating issue.
Definition of Read Only
Before we delve into the reasons behind an SD card being read only, let’s first understand what exactly “read only” means in the context of storage devices. When a storage device, such as an SD card, is marked as read only, it means that you can only view and access the existing data on the card, but you cannot modify or delete any files.
Think of it as having a book that you can read, but you cannot write or make any changes to the content. Similarly, a read-only SD card allows you to open and retrieve information from the stored files, but it prevents you from making any alterations or adding new data.
The read-only attribute is implemented to protect the integrity and stability of the data on the SD card. This feature helps to prevent accidental deletion or modification of important files and acts as a safeguard against data loss. It is commonly used in devices wherein data security and integrity are of utmost importance, such as digital cameras and smartphones.
When an SD card is set to read only mode, the device recognizes it as a write-protected storage medium. This means that any attempt to modify or delete files will be rejected by the system. You may receive error messages or notifications stating that you do not have the necessary permissions to perform the desired actions on the SD card.
It’s important to note that the read-only status applies to the entire SD card and not just specific files or folders. If the SD card is read only, all files and data stored on it will be inaccessible for modification.
Now that we have a clear understanding of what it means for an SD card to be read only, let’s explore the various reasons that could lead to this issue. By identifying the cause, you can take the necessary steps to fix it and regain full control over your SD card.
Reasons for SD Card Being Read Only
There are several possible reasons why your SD card may be read only. Understanding these reasons will help you troubleshoot and fix the issue effectively. Let’s take a closer look at each of these reasons:
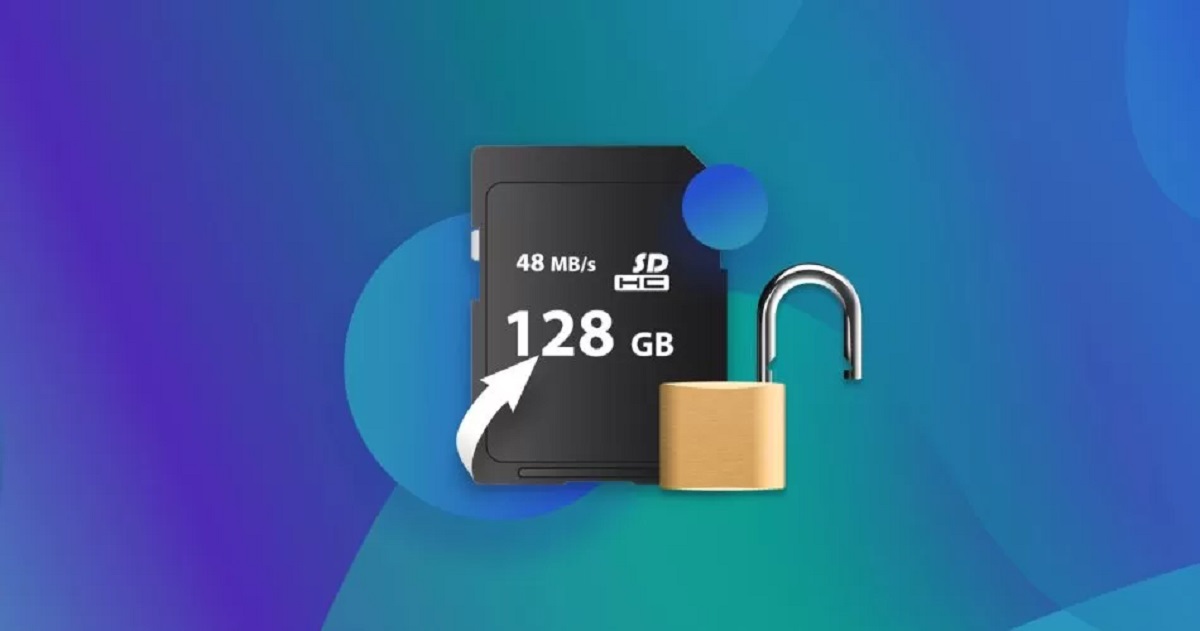
- Physical Write Protection Switch: Many SD cards, especially those used in digital cameras, have a small physical switch on the side. This switch is designed to protect the card from being overwritten or modified accidentally. If this switch is in the locked position, it will prevent any write operations on the SD card and make it read only. Check the position of the write protection switch and ensure it is in the unlocked position.
- File System Errors: File system errors can occur on the SD card, which can lead to it being read only. These errors can result from improper ejection, sudden power loss during file transfers, or using the SD card across multiple devices without safely ejecting it first. When the file system encounters errors, it can default to a read-only mode to prevent further damage to the data. Running a disk error checking tool can help identify and fix any file system errors.
- Virus or Malware Infection: SD cards can be susceptible to virus or malware infections, especially if they have been connected to infected devices or downloaded files from untrustworthy sources. In some cases, these infections can cause the SD card to become read only as a security measure to prevent further spread of the malicious software. Scanning the SD card with an updated antivirus program can help detect and remove any viruses or malware that may be causing the issue.
- Improper Ejection: Removing the SD card abruptly or without safely ejecting it from the device can lead to file system errors or data corruption. When the SD card is not ejected properly, it can result in the card being read only. Always remember to safely eject the SD card from the device before removing it to avoid any potential issues.
- Damaged or Corrupted SD Card: Physical damage or logical corruption of the SD card can also cause it to become read only. If the card is physically damaged, such as a cracked or bent card, it may trigger the read-only mode to protect the data from further damage. Similarly, if the file system on the card becomes corrupted, it can result in a read-only state. In such cases, formatting the SD card may be necessary to resolve the issue.
By considering these reasons, you can identify the specific cause of your SD card being read only and proceed with the appropriate troubleshooting steps. Now that we’ve explored the reasons behind this issue, let’s move on to the next section where we will discuss troubleshooting and fixing a read-only SD card.
Physical Write Protection Switch
One of the most common reasons for an SD card being read-only is the position of the physical write protection switch. Many SD cards, especially those used in digital cameras, have a small switch on the side that allows you to enable or disable write protection. When the switch is in the locked position, it prevents any write operations on the SD card, effectively making it read-only.
To check if the physical write protection switch is causing the issue, locate the switch on the side of your SD card. It is usually a small slider that can be moved up or down. If the switch is in the locked position, simply slide it to the unlocked position. Make sure the switch clicks into place to ensure it is properly engaged.
Once you have unlocked the write protection switch, reinsert the SD card into the device and check if it is still read-only. In most cases, adjusting the position of the switch will resolve the issue, allowing you to write and modify data on the SD card again.
It’s worth noting that not all SD cards have a physical write protection switch. If your SD card does not have one, or if the switch is already in the unlocked position, move on to the next troubleshooting steps to resolve the read-only issue.
Remember, if you frequently switch the SD card between devices or handle it often, it is possible for the write protection switch to accidentally move to the locked position. So, double-checking the position of the switch whenever you encounter a read-only SD card issue is always a good idea.
Now that we’ve covered the potential issue related to the physical write protection switch, let’s move on to the next section where we will address file system errors as a possible cause of the read-only SD card problem.
File System Errors
File system errors can occur on an SD card for various reasons, such as improper ejection, sudden power loss during file transfers, or using the same SD card across multiple devices without safely ejecting it first. These errors can lead to the SD card being read only, as the file system defaults to a protective mode to prevent further damage to the data.
To address file system errors and potentially resolve the read-only SD card issue, you can run a disk error checking tool on your computer. The specific steps may vary depending on your operating system, but the general process involves the following:
- Connect the SD card to your computer: Use a card reader or the appropriate slot on your computer to connect the SD card.
- Open the File Explorer or Finder: Navigate to “My Computer” (Windows) or “Finder” (Mac) to access the SD card.
- Right-click on the SD card: In the File Explorer (Windows) or Finder (Mac), right-click on the SD card’s drive letter or icon.
- Select “Properties” or “Get Info”: From the context menu, choose “Properties” (Windows) or “Get Info” (Mac) to open the SD card’s properties or information window.
- Navigate to the “Tools” or “First Aid” tab: Look for the “Tools” tab in the properties window (Windows) or the “First Aid” tab in the information window (Mac).
- Click on “Check” or “Repair Disk”: In the “Tools” or “First Aid” tab, click on the “Check” or “Repair Disk” button to initiate the file system error checking process.
- Follow the on-screen instructions: The disk error checking tool will scan the SD card for errors and attempt to fix them. Follow any prompts or instructions that appear on your screen to complete the process.
Once the file system error checking process is complete, remove the SD card from your computer and reinsert it into the device. Check if the SD card is now able to write and modify data. If the read-only issue persists, move on to the next troubleshooting step.
It’s important to note that running a disk error checking tool does not guarantee a 100% success rate in resolving the read-only SD card problem. If the issue persists, it may be necessary to explore other possible causes such as virus or malware infections, as we will discuss in the next section.
Virus or Malware Infection
Another possible reason for an SD card being read only is a virus or malware infection. SD cards can become infected with malicious software if they have been connected to infected devices or if files downloaded from untrustworthy sources are stored on them. In some cases, to prevent the spread of the infection, the SD card may be automatically set to read-only mode.
To address this possibility and resolve the read-only SD card issue, you should scan the SD card for viruses or malware using an updated antivirus or anti-malware program. Follow these general steps to perform a scan on your computer:
- Connect the SD card to your computer: Use a card reader or the appropriate slot on your computer to connect the SD card.
- Open your antivirus software: Launch the antivirus or anti-malware program that you have installed on your computer.
- Select the SD card for scanning: Look for the option to perform a full scan or a custom scan, and choose the SD card as the target location for scanning.
- Initiate the scan: Start the scanning process and allow the antivirus program to thoroughly scan the SD card for any viruses or malware.
- Follow the instructions provided: If the antivirus software detects any threats, follow the recommended actions to remove or quarantine the infected files.
Once the scan is complete, remove the SD card from your computer and reinsert it into the device. Check if the SD card is now writable and if the read-only issue has been resolved. If the problem persists, move on to the next troubleshooting step.
Remember, keeping your antivirus software updated and regularly scanning your storage devices, including SD cards, can help prevent virus or malware infections and ensure the overall security of your data.
If the read-only issue persists despite scanning for viruses or malware, proceed to the next section where we will tackle the possibility of the issue being caused by improper ejection of the SD card.
Improper Ejection
Improper ejection of an SD card from a device can lead to file system errors, which in turn can cause the SD card to become read only. When the SD card is not ejected properly, such as removing it abruptly without using the appropriate device ejection method, it can result in data corruption or damage to the file system.
To address the possibility of improper ejection causing the read-only SD card issue, follow these steps:
- Power off the device: Turn off the device that the SD card was last inserted into, such as a camera or smartphone.
- Remove the SD card: Carefully remove the SD card from its slot or card reader. Handle it gently to avoid any physical damage.
- Inspect the SD card and slot: Examine the SD card for any visible damage or debris. Also, inspect the slot or card reader on the device for any obstructions or foreign objects.
- Clean the contacts: If there is visible dirt or dust on the SD card contacts, use a soft, lint-free cloth to clean them. Avoid using any liquids or harsh cleaning substances.
- Reinsert the SD card: Properly and securely insert the SD card back into the device, ensuring it is correctly aligned with the slot or card reader.
- Power on the device: Turn on the device and check if the SD card is now recognized and writable. Test if you can write or modify data on the SD card without encountering the read-only issue.
By properly ejecting the SD card from the device and ensuring that both the card and the device are clean and undamaged, you can minimize the chances of file system errors and prevent the SD card from becoming read only.
If the read-only issue persists after following these steps, proceed to the next section where we will discuss the possibility of a damaged or corrupted SD card as the cause of the problem.
Damaged or Corrupted SD Card
In some cases, an SD card may become read-only due to physical damage or logical corruption. Physical damage can occur if the card is dropped, bent, or exposed to extreme conditions. On the other hand, logical corruption can happen when the file system on the SD card becomes damaged or inaccessible.
To troubleshoot and address a damaged or corrupted SD card, follow these steps:
- Physically inspect the SD card: Examine the SD card for any visible signs of damage, such as cracks, dents, or scratches. If it appears to be physically damaged, it may be necessary to replace the SD card, as physical damage cannot be easily repaired.
- Attempt to read the SD card on another device: Insert the SD card into a different device or a card reader and check if it is recognized. If the SD card is not detected on multiple devices, it may indicate a more severe physical damage or complete failure of the card.
- Attempt data recovery: If the SD card is recognized on another device but still appears as read only, you can try using data recovery software to extract your files. These programs can sometimes recover data from damaged or corrupted cards, allowing you to retrieve your important files before considering reformatting the card.
- Format the SD card: If all else fails and you have successfully recovered your data, you may need to format the SD card. Formatting will erase all data on the card, but it can help repair logical errors and restore the SD card to a usable state. Be aware that formatting the card will permanently delete all files, so make sure to back up your data before proceeding with this step.
- Replace the SD card: If the SD card is physically damaged and is not functioning properly even after attempted data recovery or formatting, it is advisable to replace the SD card with a new one. This will ensure that you have a reliable and functional storage medium for your data.
By following these steps, you can determine if the SD card is damaged or corrupted and take the necessary actions to resolve the read-only issue. Keep in mind that prevention is always better than cure, so it’s important to handle your SD cards with care and back up your data regularly to avoid data loss.
As a last resort, seeking professional assistance from a data recovery service or contacting the SD card manufacturer may be necessary if the data on the card is particularly valuable or if you are unable to resolve the issue by yourself.
Troubleshooting and Fixing Read Only SD Card
Encountering a read-only SD card can be frustrating, but there are several troubleshooting steps you can take to resolve the issue. By following these steps, you can regain write access to your SD card and continue using it for storing and modifying your data. Let’s explore the troubleshooting and fixing process for a read-only SD card:
- Check the physical write protection switch: Make sure the physical write protection switch on the side of the SD card is in the unlocked position. If it’s locked, move it to the unlocked position.
- Run a disk error checking tool: Use a disk error checking tool on your computer to scan and fix any file system errors on the SD card. This can help resolve any issues that may be causing the SD card to become read only.
- Scan for viruses or malware: Use an up-to-date antivirus or anti-malware program to scan the SD card for any infections that could be causing the read-only issue. Remove any detected threats and ensure your SD card is clean.
- Ensure proper ejection: Always eject the SD card properly from your device to prevent file system errors. This will minimize the chances of the SD card being read only due to improper ejection.
- Check for physical damage or corruption: Inspect the SD card for any physical damage and try it on different devices to see if it is recognized. If it appears physically damaged or is not functioning properly, data recovery or replacing the SD card may be necessary.
It’s important to note that these troubleshooting steps may not guarantee a solution for all cases of read-only SD cards. If none of the above steps resolve the issue, you may need to seek professional assistance or consider replacing the SD card.
Remember to always handle your SD cards with care, back up your data regularly, and practice safe ejection methods to minimize the chances of encountering read-only issues in the future.
By following the troubleshooting steps outlined above, you can increase the chances of restoring write access to your SD card and continue using it efficiently for storing and managing your files.
Checking Physical Write Protection Switch
A common reason for an SD card being read only is the position of the physical write protection switch. This switch, typically found on the side of the SD card, controls the write protection feature. When the switch is in the locked position, it prevents any write operations on the SD card, effectively making it read only.
To troubleshoot this issue, you need to check the position of the physical write protection switch and ensure it’s in the correct position. Here’s how you can do it:
- Locate the physical write protection switch: Look for a small switch on the side of your SD card. It is usually labeled as “Lock” and “Unlock” or “Write Protect” and “Write Enable.”
- Slide the switch to the unlocked position: If the switch is currently in the locked position, slide it to the unlocked position. You should feel a click or see a visual indication that the switch is now unlocked.
- Reinsert the SD card: Remove the SD card from the device and reinsert it, ensuring that it goes in properly and securely.
Once you have unlocked the write protection switch and reinserted the SD card, check if it is still read only. If the issue was caused by the physical write protection switch being in the locked position, adjusting it to the unlocked position should resolve the problem. You should now be able to write and modify data on the SD card.
It’s worth noting that not all SD cards have a physical write protection switch. If your SD card doesn’t have one, or if the switch is already in the unlocked position, move on to the next troubleshooting step to investigate other potential causes of the read-only issue.
By checking and adjusting the position of the physical write protection switch, you can eliminate this possibility as the cause of the read-only SD card problem. Now, let’s move on to the next step and address the potential issue of file system errors.
Running Disk Error Checking
File system errors can often cause an SD card to become read only. These errors could occur due to improper ejection, sudden power loss, or using the SD card on multiple devices without safely ejecting it first. To address this issue, you can run a disk error checking tool to identify and fix any file system errors on the SD card.
Follow the steps below to run a disk error check on your SD card:
- Connect the SD card to your computer: Use a card reader or the appropriate slot on your computer to connect the SD card.
- Open the File Explorer or Finder: Navigate to “My Computer” (Windows) or “Finder” (Mac) to access the SD card.
- Right-click on the SD card: In the File Explorer (Windows) or Finder (Mac), right-click on the SD card’s drive letter or icon.
- Select “Properties” or “Get Info”: From the context menu, choose “Properties” (Windows) or “Get Info” (Mac) to open the SD card’s properties or information window.
- Navigate to the “Tools” or “First Aid” tab: Look for the “Tools” tab in the properties window (Windows) or the “First Aid” tab in the information window (Mac).
- Click on “Check” or “Repair Disk”: In the “Tools” or “First Aid” tab, click on the “Check” or “Repair Disk” button to initiate the disk error checking process.
- Follow the on-screen instructions: The disk error checking tool will scan the SD card for any errors and attempt to fix them. Follow any prompts or instructions that appear on your screen to complete the process.
Once the disk error checking process is complete, remove the SD card from your computer and reinsert it into the device. Check if the SD card is now writable and if the read-only issue has been resolved.
If the disk error check doesn’t find or fix any errors, or if the read-only issue persists, you may need to move on to the next troubleshooting step to explore other potential causes, such as virus or malware infections.
By running a disk error checking tool, you can identify and repair file system errors that may have caused your SD card to become read only. This step can help restore the functionality of your SD card and allow you to write and modify data once again.
Scanning for Viruses or Malware
SD cards can be vulnerable to virus or malware infections, especially if they have been connected to infected devices or used to store files downloaded from untrustworthy sources. In some cases, these infections can cause the SD card to become read only as a protective measure to prevent further spread of the malicious software. To address this possibility, you need to scan the SD card for viruses or malware using an up-to-date antivirus or anti-malware program.
Follow the steps below to scan your SD card for viruses or malware:
- Connect the SD card to your computer: Use a card reader or the appropriate slot on your computer to connect the SD card.
- Open your antivirus software: Launch the antivirus or anti-malware program installed on your computer. Make sure it is up to date with the latest virus definitions.
- Select the SD card for scanning: Look for the option to perform a full scan or a custom scan, and choose the SD card as the target location for scanning.
- Initiate the scan: Start the scanning process and allow the antivirus program to thoroughly scan the SD card for any viruses or malware.
- Follow the instructions provided: If the antivirus software detects any threats, it will prompt you with recommended actions to take, such as quarantining or deleting the infected files. Follow these instructions to remove the threats from your SD card.
Once the scan is complete and any infected files have been dealt with, remove the SD card from your computer and reinsert it into the device. Check if the SD card is now recognized as writable and if the read-only issue has been resolved.
If the scanning process doesn’t detect any viruses or malware, or if the read-only issue persists, then it’s necessary to move on to the next troubleshooting step and consider other possible causes, such as improper ejection or physical damage to the SD card.
By scanning your SD card for viruses or malware, you can eliminate the possibility of an infection causing the read-only issue. It helps ensure the security and integrity of your data and allows you to use the SD card normally once again.
Safely Ejecting the SD Card
Improperly ejecting an SD card from a device can lead to file system errors, which can cause the SD card to become read only. To prevent this issue, it’s important to ensure that you always eject the SD card properly from your device. Safely ejecting the SD card allows the device to complete any ongoing read or write operations and ensures that all data is written correctly before removal.
Follow these steps to safely eject an SD card from your device:
- Save and close any files: Before ejecting the SD card, make sure to save and close any files you have accessed or modified on the card. This ensures that all changes are finalized before removal.
- Find the eject option on your device: Depending on your device, there are different ways to eject the SD card. Look for an eject icon or an option to safely remove hardware. On Windows, you can often find it in the system tray, while on Mac, you can click and drag the SD card icon to the trash.
- Select the eject option: Click on the eject option for the SD card. Wait for the device to confirm or signal that it is safe to remove the SD card.
- Remove the SD card: Once you receive confirmation or a notification that it is safe to remove the SD card, gently push the SD card out of its slot or use the appropriate mechanism to release it from the card reader.
By safely ejecting the SD card, you minimize the risk of file system errors and prevent the card from becoming read only. It allows for proper synchronization and ensures the integrity of your data.
If you have been previously experiencing read-only issues with your SD card, practicing proper ejection methods moving forward can help prevent future occurrences. However, if the read-only issue persists, it may be necessary to explore other potential causes, such as physical damage or corruption of the SD card.
Now that we’ve covered the importance of safely ejecting an SD card, let’s move on to the next troubleshooting step and address the possibility of a damaged or corrupted SD card as the cause of the read-only issue.
Formatting the SD Card
If you have tried the previous troubleshooting steps and the SD card is still read only, formatting the card may be necessary. Formatting erases all data on the SD card and reconfigures it with a new file system, effectively resolving any file system errors or read-only issues. However, it’s important to note that formatting the SD card will permanently delete all files stored on it, so be sure to back up your data before proceeding.
Follow these steps to format your SD card:
- Connect the SD card to your computer: Use a card reader or the appropriate slot on your computer to connect the SD card.
- Open the File Explorer or Finder: Navigate to “My Computer” (Windows) or “Finder” (Mac) to access the SD card.
- Identify the SD card: Locate the SD card in the list of available drives or devices.
- Right-click on the SD card: In the File Explorer (Windows) or Finder (Mac), right-click on the SD card’s drive letter or icon.
- Select “Format” or “Erase”: From the context menu, choose the option to format or erase the SD card.
- Configure the formatting settings: In the formatting window, choose the file system format (such as FAT32 or exFAT) and allocation unit size. You can usually leave these settings at their default values.
- Start the formatting process: Click on the “Start” or “Format” button to begin the formatting process. Depending on the size and speed of your SD card, it may take a few moments to complete.
- Confirm the formatting: Once the formatting process is finished, a confirmation message will appear. Click “OK” or “Done” to close the formatting window.
After formatting the SD card, you can safely remove it from your computer and reinsert it into your device. The SD card should no longer be read only, and you’ll be able to write and modify data on it.
Formatting the SD card can be an effective way to resolve read-only issues caused by file system errors or other software-related problems. However, if the problem persists after formatting the card, it may indicate physical damage or defects requiring the replacement of the SD card.
Remember to regularly back up your data to prevent data loss and consider formatting the SD card as a last resort. By following these steps, you can potentially resolve the read-only issue and ensure the smooth operation of your SD card.
Conclusion
Encountering a read-only SD card can be frustrating, but by understanding the possible causes and following the appropriate troubleshooting steps, you can regain write access to your SD card. Throughout this article, we have explored various reasons for an SD card being read only, including the physical write protection switch, file system errors, virus or malware infections, improper ejection, and physical damage or corruption. By checking the physical write protection switch, running disk error checking, scanning for viruses or malware, safely ejecting the SD card, and formatting if necessary, you can address these issues and potentially resolve the read-only problem.
Remember to always handle your SD card with care, practice safe ejection methods, and keep your devices and antivirus software up to date. Regularly backing up your data will also help prevent data loss in case of any unforeseen issues with your SD card. If you have tried all the troubleshooting steps and the read-only issue persists, it may indicate a more severe problem that requires professional assistance or the replacement of the SD card.
We hope that this article has provided you with valuable insights and guidance on troubleshooting and fixing a read-only SD card. By following the steps outlined here, you can resolve the issue and continue using your SD card for storing and managing your data effectively.


