Introduction
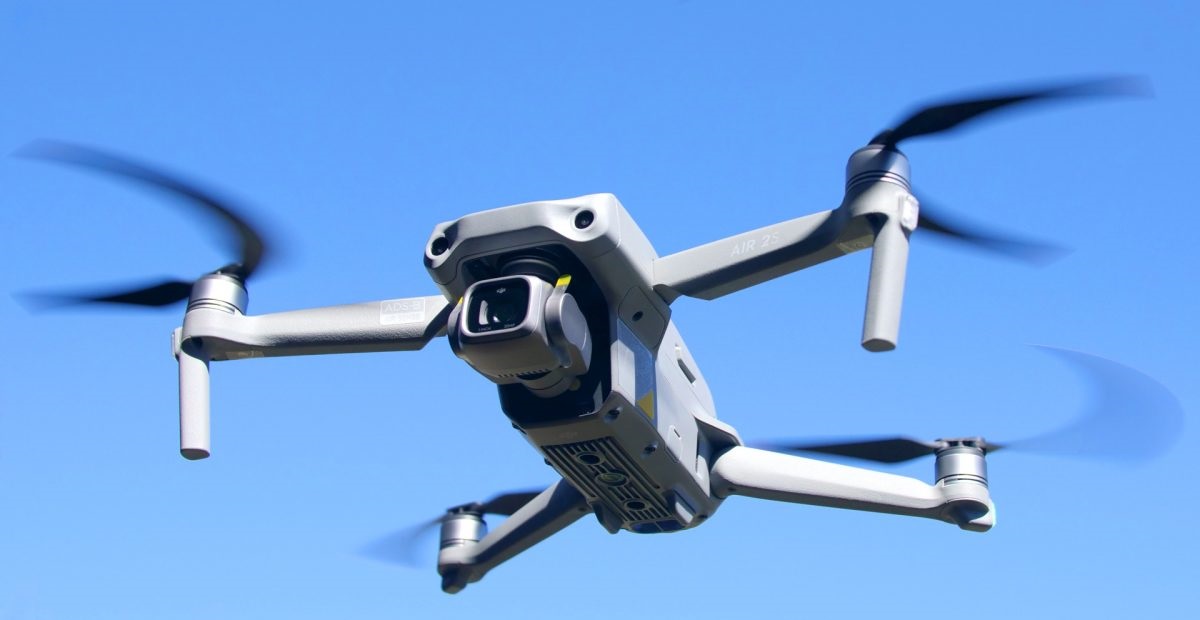
Drones have become increasingly popular in recent years, offering a unique perspective and stunning aerial footage. However, one common issue that drone enthusiasts often encounter is choppy footage. Nothing is more frustrating than capturing beautiful scenes only to find that the video playback is filled with stutters and glitches.
Choppy drone footage can be caused by various factors, including slow frame rates, interference, low battery power, poor quality SD cards, improper drone settings, windy conditions, and even software issues. But worry not, as there are ways to address and fix these issues, ensuring smooth and high-quality footage.
In this article, we will delve into the common causes of choppy drone footage and explore solutions to overcome them. Whether you are a professional videographer or simply an enthusiast looking to capture breathtaking aerial shots, understanding these causes and remedies will greatly enhance your drone footage.
So, let us now dive deeper and explore each factor that can contribute to choppy drone footage, and the steps you can take to improve the smoothness and overall quality of your aerial videos.
Common Causes of Choppy Drone Footage
When it comes to choppy drone footage, there are several common causes that may affect the smoothness and overall quality of your video. Understanding these causes is crucial in troubleshooting and finding the appropriate solutions. Let’s explore them in detail:
- Slow Frame Rates: One of the main causes of choppy drone footage is low frame rates. Frame rate refers to the number of frames captured per second. If your drone’s frame rate is set too low, it can result in choppy or stuttering footage. To ensure smooth video playback, it is recommended to use higher frame rates, such as 30 or 60 frames per second.
- Interference: Interference from other electronic devices, Wi-Fi signals, or even nearby power lines can disrupt the drone’s communication with the remote controller. This interference can cause video signal disruption and lead to choppy footage. It is advisable to fly in areas with minimal interference and always maintain a clear line of sight between the drone and the controller.
- Low Battery Power: Insufficient battery power can also contribute to choppy footage. When the drone’s battery level is low, it may not be able to transmit video smoothly, resulting in stuttering or freezing frames. Always ensure that your drone has enough battery power for a smooth flight and uninterrupted video transmission.
- Poor Quality SD Card: The quality and speed of the SD card used in your drone can significantly impact video recording and playback. If you use a low-quality or slow SD card, it may not be able to write and read data fast enough, leading to choppy footage. Invest in high-quality, high-speed SD cards with ample storage capacity for optimal performance.
- Improper Drone Settings: Incorrect drone settings can also cause choppy footage. Ensure that your drone is set to the appropriate video resolution, frame rate, and encoding format. Incorrect settings can overload the drone’s processing capabilities and result in choppy video playback.
- Windy Conditions: Windy weather can adversely affect the stability of the drone, leading to shaky and unstable footage. Strong gusts of wind can cause the drone to veer off course, resulting in choppy and distorted video. It is advisable to avoid flying in windy conditions and instead choose calmer days for smoother footage.
- Software Issues: Glitches or bugs in the drone’s firmware or the accompanying mobile app can also contribute to choppy footage. Ensure that your drone’s software is up to date and consider reinstalling or updating the app if you experience persistent issues. Keeping the software in optimal condition can enhance the performance and smoothness of your drone footage.
By understanding these common causes of choppy drone footage, you can now move forward to explore the solutions and techniques that can help you achieve smooth and high-quality aerial videos. So, let’s move on to the next section and discover how to fix choppy drone footage.
Slow Frame Rates
One of the main causes of choppy drone footage is slow frame rates. The frame rate refers to the number of video frames captured per second. When the frame rate is set too low, it can result in choppy or stuttering footage.
Typically, most consumer drones offer standard frame rates of 24, 30, or 60 frames per second (fps). Higher frame rates provide smoother and more fluid footage. If you are experiencing choppy footage, it is recommended to increase the frame rate to ensure better video playback.
However, it’s important to note that higher frame rates require more processing power and may result in larger file sizes. Make sure your drone and video editing software can handle the chosen frame rate and manage the increased file size efficiently.
When selecting the appropriate frame rate for your footage, consider the specific purpose of your video. For cinematic shots or slow-motion sequences, a frame rate of 24 or 30 fps is sufficient. On the other hand, for capturing fast-paced action or sports events, a higher frame rate of 60 fps can provide smoother results.
Keep in mind that adjusting the frame rate alone may not always solve the issue of choppy footage. Other factors, such as interference or software issues, may also contribute to the problem. It’s important to troubleshoot and address each potential cause to ensure smooth and high-quality footage.
To adjust the frame rate on your drone, refer to the user manual or the drone’s settings menu. Different drones have varying methods for changing the frame rate, so familiarize yourself with your specific model’s controls.
In summary, slow frame rates can lead to choppy drone footage. Increasing the frame rate can help achieve smoother video playback. However, it’s advisable to consider the capabilities of your drone and video editing software to ensure optimal performance. Addressing other potential causes and troubleshooting any interference or software issues will also contribute to improved footage quality.
Interference
Interference is another common cause of choppy drone footage. Various electronic devices, Wi-Fi signals, and nearby power lines can disrupt the communication between the drone and the remote controller, resulting in video signal disruption and choppy footage.
To minimize interference and ensure smooth video transmission, follow these tips:
- Fly in areas with minimal interference: Choose open spaces away from crowded areas or buildings with heavy Wi-Fi congestion. These areas are more likely to have interference that can affect the quality of your video signal.
- Maintain line of sight: Always keep a clear line of sight between the drone and the remote controller. Fly the drone within the recommended range specified by the manufacturer. Obstacles like trees or buildings can obstruct the signal and result in choppy footage.
- Avoid flying near power lines: Power lines can produce electromagnetic interference that can disrupt the drone’s signal. Maintain a safe distance from power lines to prevent video signal disruption and ensure smoother footage.
- Power off or move away electronic devices: Other electronic devices such as smartphones, tablets, or laptops operating near the drone can interfere with the video transmission. Power off these devices or move them away from the drone to reduce interference and improve video quality.
- Use frequency bands with less interference: Some drones offer the option to select different frequency bands for video transmission. Consider using a less congested band to avoid interference from other wireless devices operating in the same frequency range.
By implementing these measures, you can minimize interference and maximize the quality of your video signal, resulting in smoother and less choppy footage. Keep in mind that external factors such as crowded events or busy urban areas may still pose challenges in avoiding interference completely. However, being mindful of potential sources of interference and taking appropriate precautions will greatly enhance the overall video quality.
Low Battery Power
Insufficient battery power is another common cause of choppy drone footage. When the drone’s battery level drops too low, it may struggle to transmit video smoothly, resulting in stuttering or freezing frames.
To ensure smooth video playback and minimize the risk of choppy footage due to low battery power, follow these guidelines:
- Monitor battery levels: Always keep an eye on the drone’s battery level during flight. Most drones have battery indicators on their remote controllers or in the accompanying smartphone app. Pay attention to these indicators to ensure you have sufficient battery power for smooth video transmission.
- Plan your flight time: Calculate the estimated flight time of your drone based on battery capacity and flight conditions. Avoid pushing your drone’s battery to its limits by planning your flight time accordingly. Allow for a buffer of extra flight time to ensure you don’t deplete the battery too quickly.
- Take shorter flights: If you frequently experience choppy footage due to low battery power, consider taking shorter flights. By reducing the flight time, you can conserve battery power and maintain a stable video transmission throughout the session.
- Use spare batteries: Investing in spare batteries for your drone can be a game-changer. Having extra batteries allows you to swap them out when one runs low, ensuring uninterrupted video transmission and preventing choppy footage. This way, you can capture longer sequences and have backup power when needed.
- Practice battery management: Proper battery management can significantly improve the smoothness of your drone footage. Start each flight with fully charged batteries, avoid extreme temperature conditions, and follow the manufacturer’s guidelines for charging and storing your drone’s batteries. This will help ensure optimal battery performance and minimize the risk of choppy video due to low battery power.
By following these guidelines and effectively managing your drone’s battery power, you can prevent or mitigate the issue of choppy footage caused by low battery levels. Remember, maintaining a stable power supply is essential for smooth video transmission and high-quality aerial footage.
Poor Quality SD Card
Another factor that can contribute to choppy drone footage is using a poor quality SD card. The quality and speed of the SD card used in your drone can significantly impact the recording and playback of your videos.
Here are some considerations and tips regarding SD cards to avoid choppy footage:
- Choose a high-quality SD card: It’s important to invest in a reputable and high-quality SD card for your drone. Look for brands known for their reliability and performance. A poor quality SD card may not be able to write and read data fast enough, leading to choppy footage.
- Opt for fast transfer speeds: Look for SD cards with fast write and read speeds to ensure smooth and uninterrupted video recording. Avoid cards with low-class ratings, as they may struggle to keep up with the high data transfer rate required for video recording.
- Sufficient storage capacity: Choose an SD card with ample storage capacity to accommodate your video recording needs. Running out of storage space can impact video recording and result in dropped frames or choppy footage. It’s recommended to have multiple SD cards or a high-capacity card to avoid this issue.
- Format the SD card: Before using a new SD card, format it in your drone or using the recommended formatting method. Formatting ensures compatibility and optimal performance with your drone, reducing the risk of recording issues and choppy footage.
- Regularly backup and clear the SD card: It’s a good practice to regularly transfer your video files from the SD card to your computer or an external storage device. This not only frees up space but also minimizes the chances of data corruption and potential issues that could lead to choppy footage.
By using a high-quality SD card with fast transfer speeds and sufficient storage capacity, formatted correctly, and regularly maintained, you can significantly reduce the risk of choppy footage caused by the SD card. Remember, the SD card plays a crucial role in recording and storing your videos, so it’s worth investing in a reliable and high-performing option.
Improper Drone Settings
Improper drone settings can also contribute to choppy footage. It’s crucial to ensure that your drone is set to the appropriate video resolution, frame rate, and encoding format for optimal performance and smooth video playback.
Here are some key considerations and tips regarding drone settings to avoid choppy footage:
- Choose the right video resolution: Selecting the appropriate video resolution is essential for capturing high-quality footage. Higher resolutions may require more processing power, so ensure that your drone can handle the chosen resolution without sacrificing performance. Opt for a resolution that meets your specific needs while maintaining smooth video playback.
- Adjust the frame rate: We’ve discussed the importance of frame rates previously, but it’s worth reiterating. Slow frame rates can result in choppy footage, so make sure you have set the frame rate to an appropriate level for your desired video smoothness. Higher frame rates, such as 30 or 60 frames per second, generally provide smoother video playback.
- Consider the encoding format: Different drones offer various encoding formats, such as H.264 or H.265. Make sure you select the appropriate encoding format supported by your drone and video editing software. Some formats may be more efficient in terms of file size and playback, which can contribute to smooth and non-choppy footage.
- Check exposure and white balance: Incorrect exposure or white balance settings can impact the overall quality of your footage and contribute to choppiness. Ensure that you have properly adjusted the exposure and white balance settings based on the lighting conditions of your shooting environment. This will help maintain a consistent and visually pleasing video.
- Enable any stabilization features: Many drones offer built-in stabilization features like electronic image stabilization or gimbal stabilization. These features can help reduce shakes and vibrations, resulting in smoother footage. Make sure you have enabled and calibrated these stabilization features appropriately.
By paying attention to the drone settings and ensuring they are properly configured, you can minimize the risk of choppy footage. Understanding the capabilities of your drone and making appropriate adjustments based on the shooting conditions will ultimately contribute to a smoother and more enjoyable video playback experience.
Windy Conditions
When it comes to capturing smooth drone footage, weather conditions play a significant role, and windy conditions can have a detrimental impact on the stability of your drone’s flight and the quality of the footage.
Here are some tips to minimize the impact of windy conditions on your drone footage:
- Check weather conditions before flying: Before taking your drone to the skies, check the weather forecast in your area. Avoid flying in excessively windy conditions, as strong gusts can cause your drone to become unstable and result in shaky footage.
- Fly in more sheltered areas: Look for areas that provide natural wind barriers, such as hills, trees, or buildings. By flying in sheltered spaces, you can reduce the direct impact of strong winds on your drone, resulting in smoother footage.
- Adjust flight altitude and speed: When faced with windy conditions, consider flying at lower altitudes and reducing your drone’s speed. Lower altitudes experience less wind, which can help maintain stability. Slowing down the drone’s speed will also allow for more control and smoother footage.
- Enable drone stabilization features: Many drones come equipped with stabilization features like GPS assistance or gyroscopes. Utilize these features to maintain stability and minimize the impact of gusts of wind on your drone’s flight, resulting in smoother footage.
- Use the appropriate camera settings: In windy conditions, it’s important to adjust your camera settings accordingly. Increase the shutter speed to capture sharper images and reduce motion blur caused by gusts. Additionally, consider using a narrower aperture to increase the depth of field, resulting in a clearer and more stable image.
Keep in mind that while these tips can help minimize the impact of windy conditions, there will still be limitations to what your drone can handle. Always prioritize safety and avoid flying in excessively strong winds that may pose a risk to your equipment or surroundings.
By being mindful of the weather conditions and incorporating these tips, you can increase the chances of capturing smooth and stable footage even in slightly windy conditions.
Software Issues
Software issues can also contribute to choppy drone footage. Glitches or bugs in the drone’s firmware or the accompanying mobile app can disrupt the overall performance and smoothness of the footage. Being aware of potential software issues and taking necessary steps will ensure a seamless video capturing experience.
Here are some key considerations and tips to address software-related choppy footage:
- Keep your drone’s firmware up to date: Manufacturers often release firmware updates to address software bugs and improve the drone’s performance. Regularly check for firmware updates for your specific drone model and install them following the manufacturer’s instructions. This ensures you have the latest software enhancements that can improve video playback.
- Update your mobile app or controller software: If you’re using a mobile app or controller to control your drone, ensure that the app or software is up to date. Developers often release updates and fixes to address software issues and improve functionality. Keeping your app or software up to date can minimize potential compatibility issues and enhance the overall performance of your drone.
- Reinstall the mobile app: If you encounter persistent software issues, such as freezing or crashing, try reinstalling the drone’s mobile app. This step can help eliminate any corrupted files or settings that may be causing the choppy footage. Make sure to back up any important flight data or settings before reinstalling the app.
- Check the app or software compatibility: Ensure that the mobile app or software you’re using is compatible with your drone model. Some drones have proprietary apps or specific compatibility requirements. Using an outdated or incompatible app can lead to synchronization issues and result in choppy footage.
- Contact customer support: If you have exhausted all troubleshooting steps and are still experiencing software-related issues, reach out to the manufacturer’s customer support. They can provide guidance and specific solutions tailored to your drone model and software setup.
By staying proactive with software updates, troubleshooting, and remaining in touch with customer support, you can address software-related issues that may contribute to choppy footage. Remember, maintaining reliable and up-to-date software is vital for achieving the best possible video recording experience.
Ways to Fix Choppy Drone Footage
If you’ve been experiencing choppy drone footage, don’t worry! There are several ways to fix this issue and ensure smooth and high-quality aerial videos. Let’s explore some effective solutions:
- Increase Frame Rates: Adjusting the frame rate of your drone can significantly improve the smoothness of the footage. Increase the frame rate to a higher setting, such as 30 or 60 frames per second, to capture smoother and more fluid video playback.
- Avoid Interference: Interference from other electronic devices or Wi-Fi signals can disrupt the drone’s communication and result in choppy footage. Fly in areas with minimal interference and maintain a clear line of sight between the drone and the remote controller to minimize signal disruption.
- Ensure Sufficient Battery Power: Low battery power can also contribute to choppy footage. Always monitor your drone’s battery level and fly with fully charged batteries. Consider investing in spare batteries for longer flight times and uninterrupted video transmission.
- Use High-Quality SD Cards: Poor quality or slow SD cards can impact video recording and playback. Invest in high-quality SD cards with fast write and read speeds to ensure smooth video recording and prevent choppy footage. Make sure to format the SD card properly before use.
- Adjust Drone Settings: Improper drone settings, such as incorrect video resolution or frame rate, can result in choppy footage. Ensure that your drone is set to the appropriate settings based on your shooting requirements. Review the user manual or consult the manufacturer’s guidelines for optimal settings.
- Choose Calm Weather Conditions: Windy conditions can negatively affect the stability of your drone and result in shaky footage. Avoid flying in strong gusts and choose calm weather conditions to ensure smoother flights and steady video recording.
- Update Software: Regularly update your drone’s firmware and accompanying mobile app or controller software. Software updates often address bugs and improve performance, ensuring smoother video transmission and playback. Stay proactive and keep your software up to date.
By implementing these solutions, you can fix choppy drone footage and capture smooth, professional-quality aerial videos. Remember to identify the specific causes of the choppy footage in your case and address them accordingly. By troubleshooting and making the necessary adjustments, you’ll be able to enjoy stunning and seamless footage from your drone.
Increase Frame Rates
Adjusting the frame rate of your drone can significantly improve the smoothness of your footage. The frame rate refers to the number of frames captured per second, and a higher frame rate results in smoother and more fluid video playback.
By increasing the frame rate, you allow the drone to capture more frames per second, reducing the visible gaps between frames and creating a smoother video. Typically, most consumer drones offer standard frame rates of 24, 30, or 60 frames per second (fps).
When facing choppy footage, it is worth considering increasing the frame rate to ensure a smoother viewing experience. Higher frame rates, such as 30 or 60 fps, are generally recommended as they capture more frames within a given time frame. This enhanced frame density helps to reduce visible jumps and stutters, resulting in smoother video playback.
It’s important to note that increasing the frame rate may require more processing power from your drone and can result in larger file sizes. Ensure that your drone and video editing software can handle the chosen frame rate effectively without compromises in performance and storage capacity.
When choosing the appropriate frame rate, consider the purpose of your video. For cinematic shots or slow-motion sequences, a frame rate of 24 or 30 fps is typically sufficient. On the other hand, for capturing fast-paced action or sports events, a higher frame rate of 60 fps can provide smoother results.
To adjust the frame rate on your drone, refer to the user manual or the drone’s settings menu. Different drones have varying methods for changing the frame rate, so familiarize yourself with your specific model’s controls.
In summary, increasing the frame rate of your drone can significantly improve the smoothness of your aerial footage. Higher frame rates capture more frames per second, minimizing visible gaps and resulting in smoother video playback. However, it’s crucial to consider the capabilities of your drone and video editing software to ensure optimal performance and handling of larger file sizes.
Avoid Interference
Interference from various sources can disrupt the communication between your drone and the remote controller, leading to signal disruption and choppy footage. To ensure smooth video transmission and minimize interference, there are several steps you can take:
Fly in areas with minimal interference: Choose open spaces away from crowded areas or buildings with heavy Wi-Fi congestion. These areas are more likely to have interference that can affect the quality of your video signal. By flying in locations with minimal interference, you can reduce the risk of choppy footage and maintain a stable connection between your drone and remote controller.
Maintain line of sight: Always ensure you have a clear line of sight between your drone and the remote controller. Obstacles like trees, buildings, or even large crowds can obstruct the signal and lead to signal disruption. By maintaining visual contact with your drone throughout the flight, you can minimize the chances of interference and capture smoother footage.
Avoid flying near power lines: Power lines can produce electromagnetic interference that can disrupt the drone’s signal. It is advisable to maintain a safe distance from power lines to prevent video signal disruption and ensure a smooth and uninterrupted video transmission.
Power off or move away electronic devices: Other electronic devices such as smartphones, tablets, or laptops operating near the drone can interfere with the video transmission. Power off these devices or move them away from your operating area to reduce interference and improve video quality. Keeping other electronics away from the drone’s flight path can result in a cleaner and more stable video signal.
Use frequency bands with less interference: Some drones offer the option to select different frequency bands for video transmission. Consider using a less congested band to avoid interference from other wireless devices operating in the same frequency range. By choosing a less crowded frequency band, you can minimize the chances of signal interference and achieve a smoother video transmission.
By implementing these measures, you can minimize interference and greatly enhance the quality of your drone footage. Although it may not be possible to completely eliminate all sources of interference, being aware of potential sources and taking appropriate precautions can significantly improve the overall video transmission and result in smoother, more enjoyable footage.
Ensure Sufficient Battery Power
Having sufficient battery power is crucial for capturing smooth and uninterrupted drone footage. When the drone’s battery level drops too low, it may struggle to transmit video smoothly, resulting in choppy or disrupted footage. To ensure a seamless video recording experience, consider the following tips:
Monitor battery levels: Keep a close eye on your drone’s battery level during flight. Most drones have battery indicators on their remote controllers or accompanying smartphone apps. Regularly check these indicators to ensure you have enough battery power for smooth video transmission. It’s recommended to land the drone and change or charge the batteries when the levels become low.
Plan flight time and battery capacity: Calculate the estimated flight time of your drone based on its battery capacity and flight conditions. Avoid pushing your drone’s battery to its limits by planning your flight time accordingly. It’s always advisable to allow for a buffer of extra flight time to ensure smooth video transmission without the risk of running out of battery power mid-flight.
Take shorter flights: If you frequently experience choppy footage due to low battery power, consider taking shorter flights. By reducing the flight time, you can conserve battery power and maintain a stable video transmission throughout the session. This approach can also help minimize the risk of running out of battery power before completing your video recording.
Invest in spare batteries: Having spare batteries for your drone is highly recommended. With spare batteries on hand, you can quickly swap them out when one runs low, ensuring uninterrupted video transmission and preventing choppy footage. This way, you can extend your flight time and capture those crucial moments without worrying about battery levels.
Practice battery management: Proper battery management is essential for smooth drone footage. Start each flight with fully charged batteries and avoid extreme temperature conditions that could negatively impact battery performance. Follow the manufacturer’s guidelines for charging and storing your drone’s batteries. By taking care of your batteries and ensuring their optimal performance, you can minimize the risk of choppy footage due to insufficient battery power.
By implementing these strategies to ensure sufficient battery power, you can maintain a stable and smooth video transmission while capturing drone footage. Remember to always prioritize safety and check your battery levels before each flight, allowing for uninterrupted and high-quality recording.
Use High-Quality SD Cards
The quality and performance of the SD card used in your drone can significantly impact the recording and playback of your videos. To avoid choppy footage and ensure smooth video recording, it is crucial to use high-quality SD cards. Consider the following tips when selecting and using SD cards for your drone:
Choose a reputable brand: Invest in SD cards from reputable brands known for their reliability and performance. Opting for well-established brands ensures better compatibility, durability, and overall quality of the card.
Look for fast transfer speeds: SD cards with faster write and read speeds are essential for smooth video recording. Faster transfer speeds enable the card to handle the high data transfer rate required for video recording, reducing the risk of dropped frames or choppy footage. Look for cards with Class 10 or UHS-I or UHS-II speed ratings to ensure optimal performance.
Consider storage capacity: Choose an SD card with ample storage capacity to accommodate your video recording needs. Running out of space during recording can lead to interrupted footage or dropped frames. It is advisable to have multiple SD cards or a high-capacity card to avoid this issue.
Format the SD card correctly: Before using a new SD card in your drone, it is important to format it using your drone or the recommended formatting method. Formatting ensures compatibility and optimal performance of the card with your drone, reducing the risk of recording issues and choppy footage.
Regularly backup and clear the SD card: It is good practice to transfer your video files from the SD card to your computer or another storage device regularly. This not only frees up space on the card but also minimizes the chances of data corruption and potential issues that could lead to choppy footage. Always remember to back up your footage before clearing the SD card.
By using high-quality SD cards, you can ensure a smooth and uninterrupted video recording experience with your drone. Investing in reliable and fast SD cards will help minimize the risk of dropped frames, choppy footage, and recording issues, resulting in higher-quality and more enjoyable aerial videos.
Adjust Drone Settings
Improper settings on your drone can contribute to choppy footage, affecting the smoothness and overall quality of your videos. To address this issue and ensure optimal performance, it is crucial to adjust the drone settings correctly. Consider the following tips:
Video resolution: Selecting the appropriate video resolution is essential for capturing high-quality footage. Different drones offer various resolution options. Make sure to choose a resolution that meets your specific needs while still allowing for smooth video playback. Higher resolutions may require more processing power, so ensure that your drone can handle the chosen resolution without compromising performance.
Frame rate: The frame rate determines the number of frames captured per second. Slow frame rates can lead to choppy footage, so it is essential to set the frame rate appropriately. Increasing the frame rate to higher settings, like 30 or 60 frames per second, can result in smoother video playback and reduce visible jumps or stutters.
Encoding format: Consider the encoding format used by your drone for video recording. Different drones offer various encoding formats, such as H.264 or H.265. Ensure that you select the appropriate encoding format supported by your drone and video editing software. Some formats may be more efficient in terms of file size and playback, leading to smoother footage.
Exposure and white balance: Incorrect exposure or white balance settings can impact the overall quality of your footage and contribute to choppiness. Ensure that you adjust the exposure and white balance settings appropriately based on the lighting conditions of your shooting environment. This will help maintain a consistent and visually pleasing video.
Stabilization features: Many drones come equipped with built-in stabilization features like electronic image stabilization or gimbal stabilization. Ensure that you have enabled and calibrated these features correctly. Stabilization helps reduce shakes and vibrations, resulting in smoother footage, especially in windy or turbulent conditions.
By adjusting the drone settings correctly, you can minimize the risk of choppy footage and capture smoother, high-quality aerial videos. Understanding the capabilities of your drone and making appropriate adjustments based on the shooting conditions will contribute to a better video recording experience.
Choose Calm Weather Conditions
The weather conditions in which you fly your drone play a significant role in capturing smooth and stable footage. It is important to choose calm weather conditions to minimize external factors that can affect the stability of your drone and the quality of your footage. Here are some tips to ensure optimal flying conditions:
Check the weather forecast: Before taking your drone out, check the weather forecast to ensure you have a clear understanding of the conditions. Avoid flying in inclement weather such as heavy rain, thunderstorms, or strong winds, as these can negatively impact the stability of your drone and result in shaky and choppy footage. Always prioritize safety and follow local aviation guidelines.
Avoid windy conditions: One of the main challenges in capturing smooth footage is flying in windy conditions. Strong gusts of wind can cause your drone to lose stability and result in shaky footage. Choose days with calm winds to ensure a stable flight and smoother videos. If you experience windy conditions during your flight, consider flying at lower altitudes where wind speeds may be reduced.
Fly in the morning or evening: The time of day can also affect the flying conditions for your drone. The morning and evening hours generally offer more favorable weather conditions with less wind and smoother air. Flying during these times can help minimize turbulence and result in smoother footage.
Consider temperature and humidity: Extreme temperature conditions can affect the performance of your drone. High temperatures can cause the drone’s components to overheat, while extremely cold temperatures can reduce battery life and overall performance. Additionally, high levels of humidity can cause foggy lenses and affect the visibility of your footage. Therefore, it’s important to fly in moderate temperature and humidity conditions for optimal results.
Plan flight locations: Choose suitable flying locations that are sheltered from strong winds and potential obstacles. Open fields, parks, or areas with natural windbreaks like trees or buildings can provide a more stable environment for flying your drone. By researching and selecting appropriate locations, you can reduce the risk of choppy footage caused by unpredictable wind patterns.
By selecting calm weather conditions for your drone flights, you can enhance the stability of your drone and achieve smoother footage. Being mindful of weather forecasts, avoiding windy conditions, flying during optimal times, considering temperature and humidity, and planning flight locations will greatly contribute to capturing high-quality aerial videos with minimal choppiness.
Update Software
Regularly updating your drone’s firmware and accompanying software is crucial for fixing bugs, improving performance, and ensuring smooth video transmission. Up-to-date software provides the latest features and enhancements that can enhance your overall drone experience. Here are some important considerations regarding software updates:
Check for firmware updates: Manufacturers often release firmware updates to address software bugs, introduce new features, and improve the overall performance of their drones. Visit the manufacturer’s website or check their official app for any available updates. Keeping your drone’s firmware up to date is essential for optimal performance and stability during flight.
Update mobile app or controller software: If you’re using a mobile app or controller to operate your drone, make sure to keep the app or software up to date. Developers frequently release updates that address software issues, improve compatibility, and enhance functionality. Regularly check for updates in your app store or directly within the app to take advantage of the latest improvements.
Installation and update process: To update your drone’s software, follow the manufacturer’s instructions carefully. Typically, you will need to connect your drone to your computer via USB or use a Wi-Fi connection to initiate the update process. Read the release notes and follow the steps provided by the manufacturer to ensure a successful update without any potential complications.
Benefits of software updates: Software updates often include bug fixes, compatibility improvements, and new features that can enhance your drone’s performance and video transmission. These updates can address issues that may cause choppy footage. By keeping your drone’s software up to date, you can benefit from the latest optimizations and ensure a smoother flying and recording experience.
Customer support and forums: If you encounter any issues during the update process, or if you’re experiencing persistent choppy footage despite updating, reach out to the manufacturer’s customer support or consult online forums for guidance. They can provide specific solutions tailored to your drone model and software setup to help resolve any software-related issues.
Regularly updating your drone’s firmware and software ensures that you are benefiting from the latest improvements and bug fixes. By staying proactive and keeping your software up to date, you can enhance the overall performance of your drone and minimize potential software-related causes of choppy footage.
Conclusion
Choppy drone footage can be frustrating, but by understanding and addressing the common causes, you can achieve smooth and high-quality aerial videos. Slow frame rates, interference, low battery power, poor quality SD cards, improper drone settings, windy conditions, and software issues are all factors that can contribute to choppy footage.
To fix choppy drone footage, consider the following actions: increasing frame rates for smoother playback, avoiding interference by flying in less congested areas and maintaining a clear line of sight, ensuring sufficient battery power by monitoring levels and using spare batteries, using high-quality and fast SD cards for efficient data transfer, adjusting drone settings for optimal performance, choosing calm weather conditions for stable flights, and keeping software up to date to address bugs and improve performance.
By implementing these solutions, you can overcome the challenges and achieve smooth and uninterrupted drone footage. It’s essential to tailor the troubleshooting steps to your specific drone model, flying conditions, and equipment setup. Regular maintenance and staying proactive with updates and proper flight practices will go a long way in capturing breathtaking aerial videos without the frustration of choppy footage.