Introduction
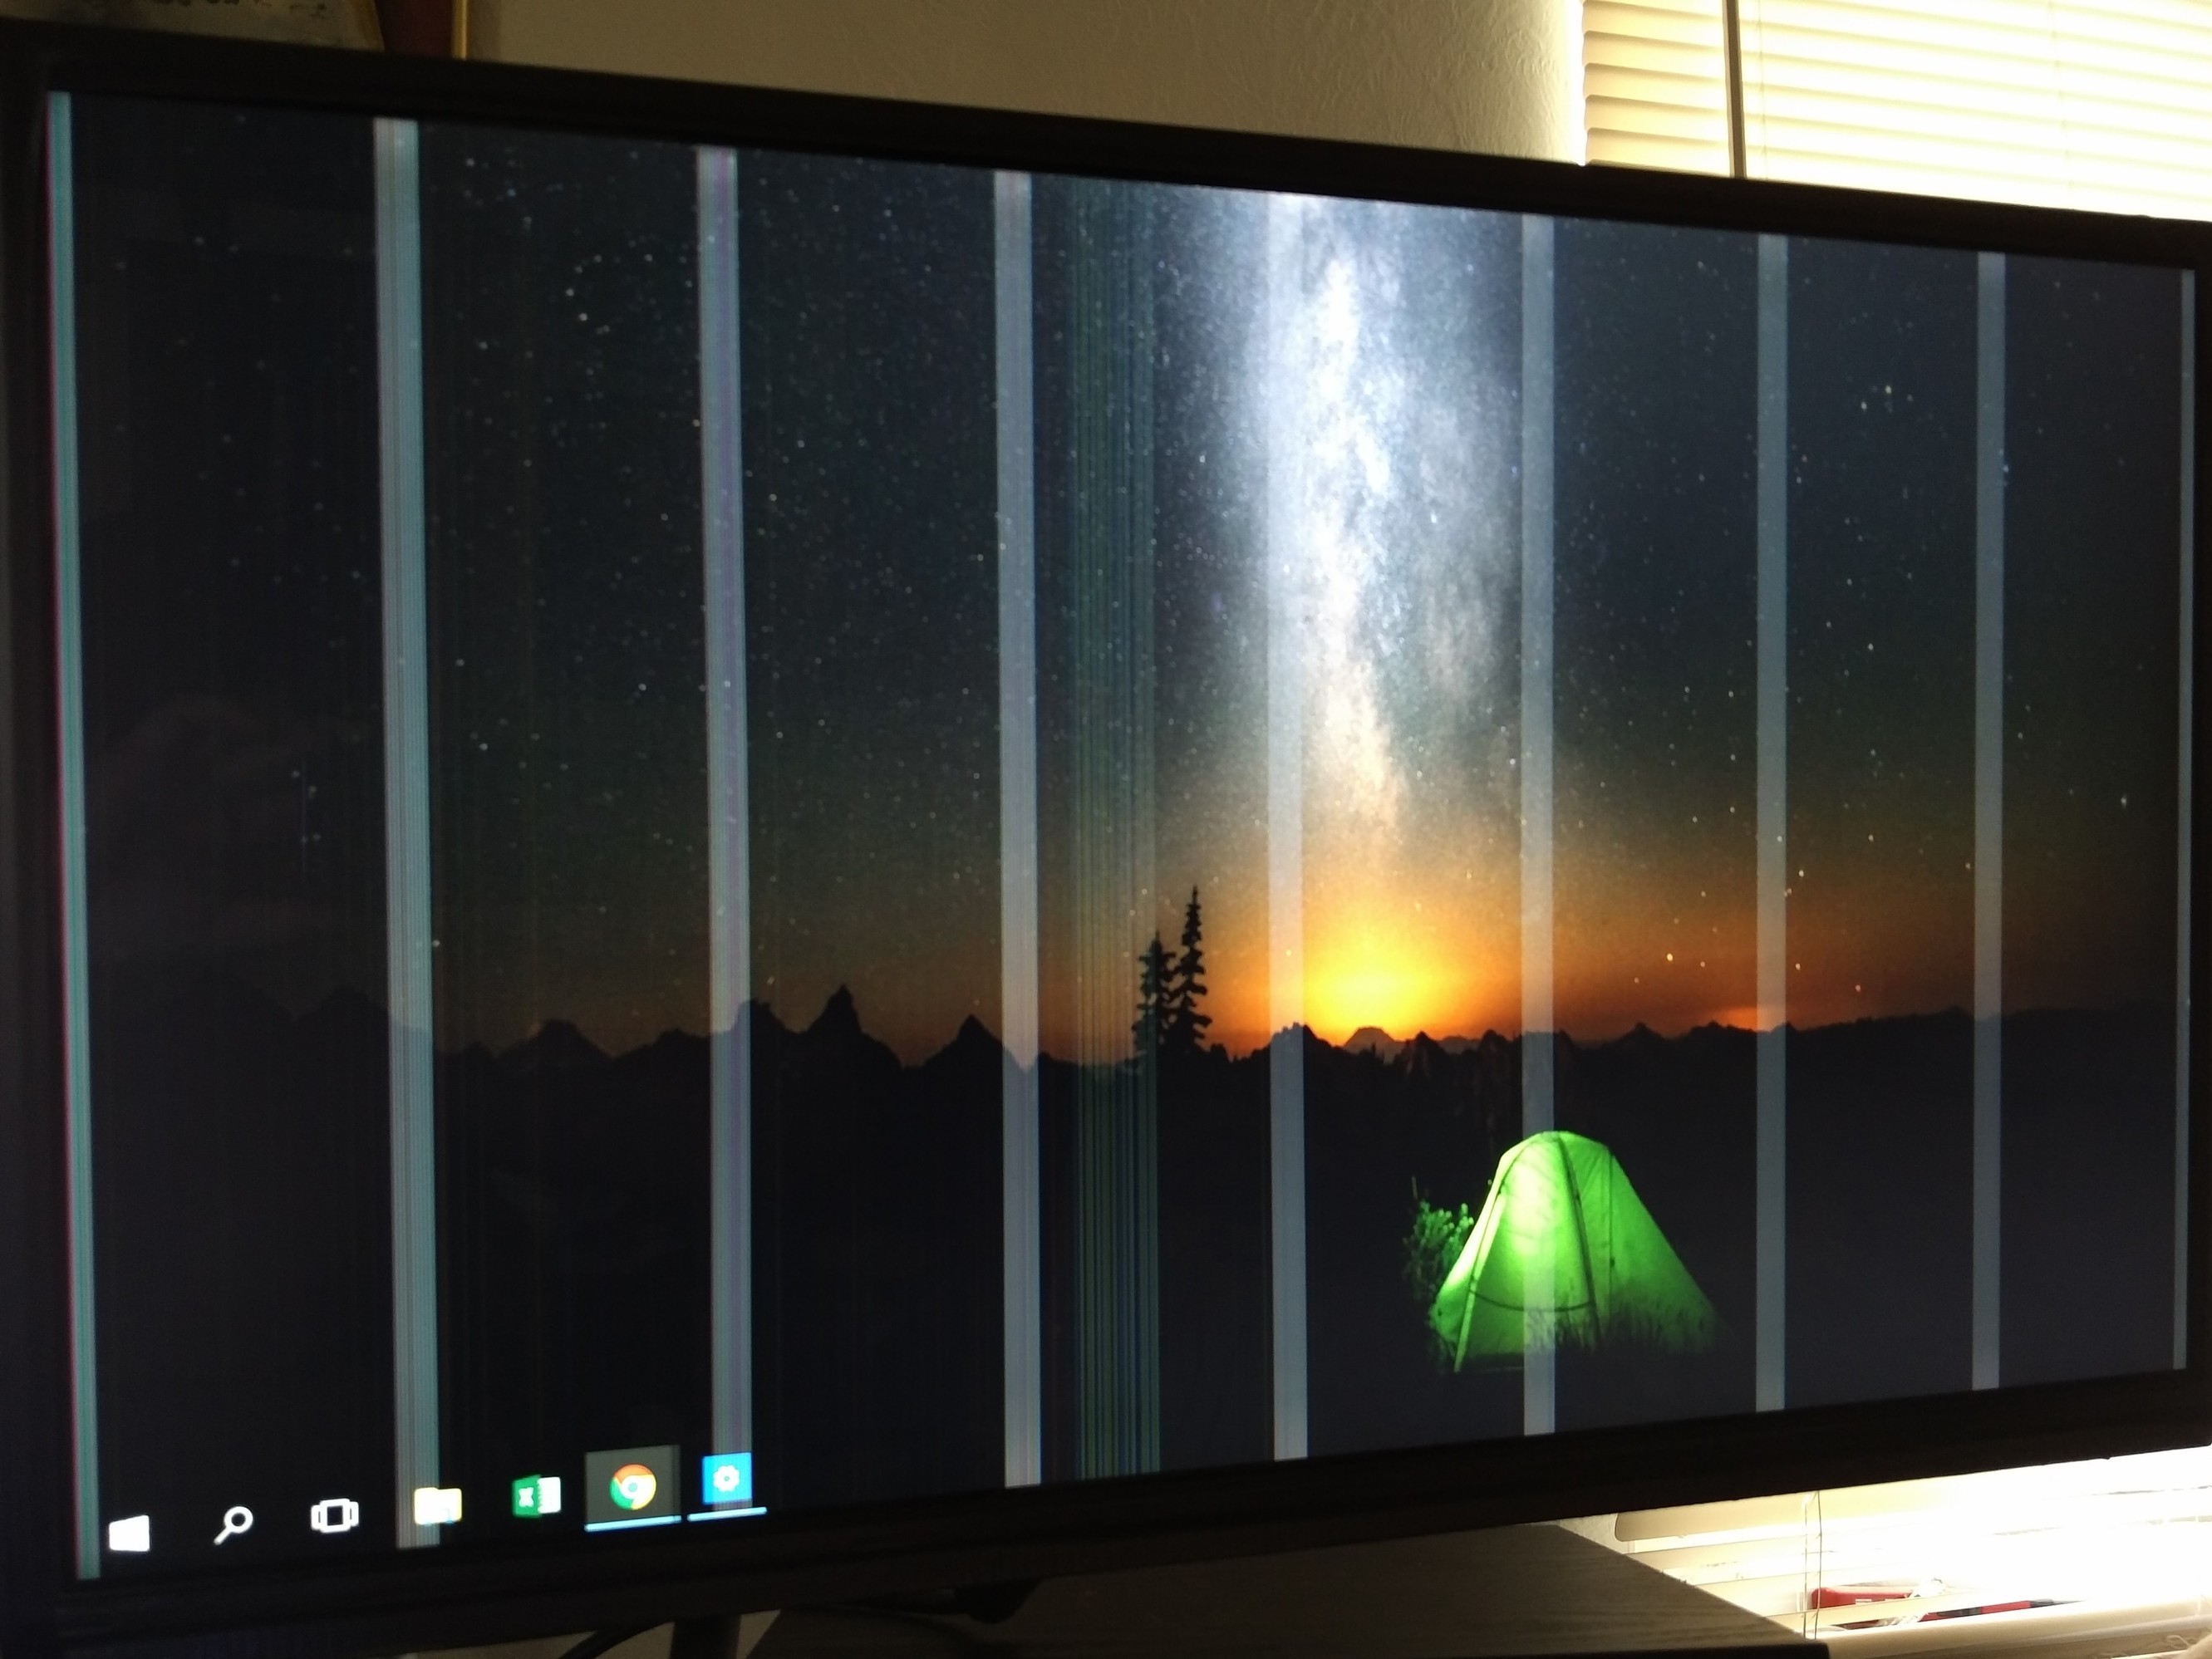
Welcome to the world of technology, where monitors have become an essential part of our daily lives. Whether you’re using it for work, entertainment, or both, a clear and vibrant display is crucial for an optimal user experience. However, at times, you may notice those annoying lines appearing on your monitor, disrupting your viewing pleasure and raising concerns about the health of your device.
The presence of lines on a monitor can cause frustration and confusion, leading you to wonder why they are there and how to fix them. Fortunately, there are several common causes for these lines, and in this article, we will explore the potential reasons behind their appearance and provide you with practical solutions to resolve the issue.
Understanding the root cause of the problem is the key to finding an appropriate solution. Lines on a monitor can be caused by various factors, including loose or damaged connections, aging or defective monitors, graphics card issues, overheating, and electromagnetic interference. By familiarizing yourself with these causes, you can diagnose the problem and take necessary actions to rectify it.
In the following sections, we will delve into each of these causes in detail, outlining their potential impact on your monitor’s performance and discussing the steps you can take to alleviate the issue. So, let’s dive right in and discover the reasons behind those pesky lines on your monitor.
Common Causes of Lines on a Monitor
Lines on a monitor can be a result of several different factors. Here are the most common causes that you should be aware of:
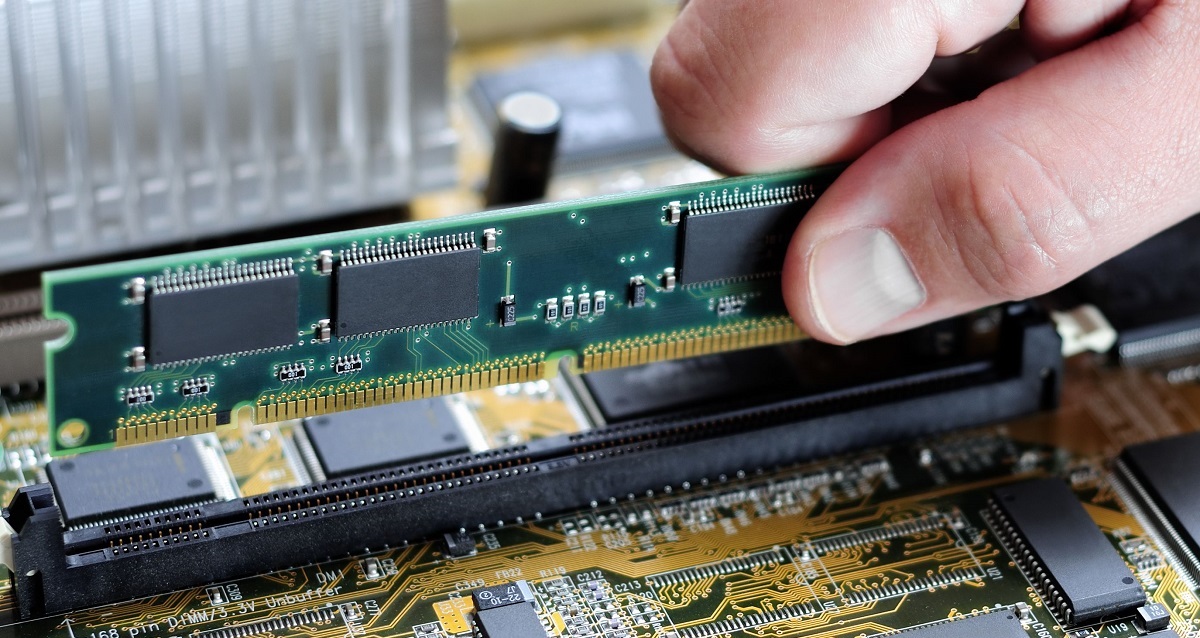
- Loose or Damaged Cable Connections: One of the primary culprits behind monitor lines is loose or damaged cable connections. If the cable connecting your monitor to your computer or power source is not securely fastened or has physical damage, it can disrupt the signal and lead to the appearance of lines on the screen.
- Aging or Defective Monitor: Over time, the components of a monitor can deteriorate, resulting in various issues, including the presence of lines. The age of the monitor, as well as manufacturing defects, can contribute to this problem. If you’ve been using the same monitor for a long time or recently purchased a faulty one, it might be the reason for the lines.
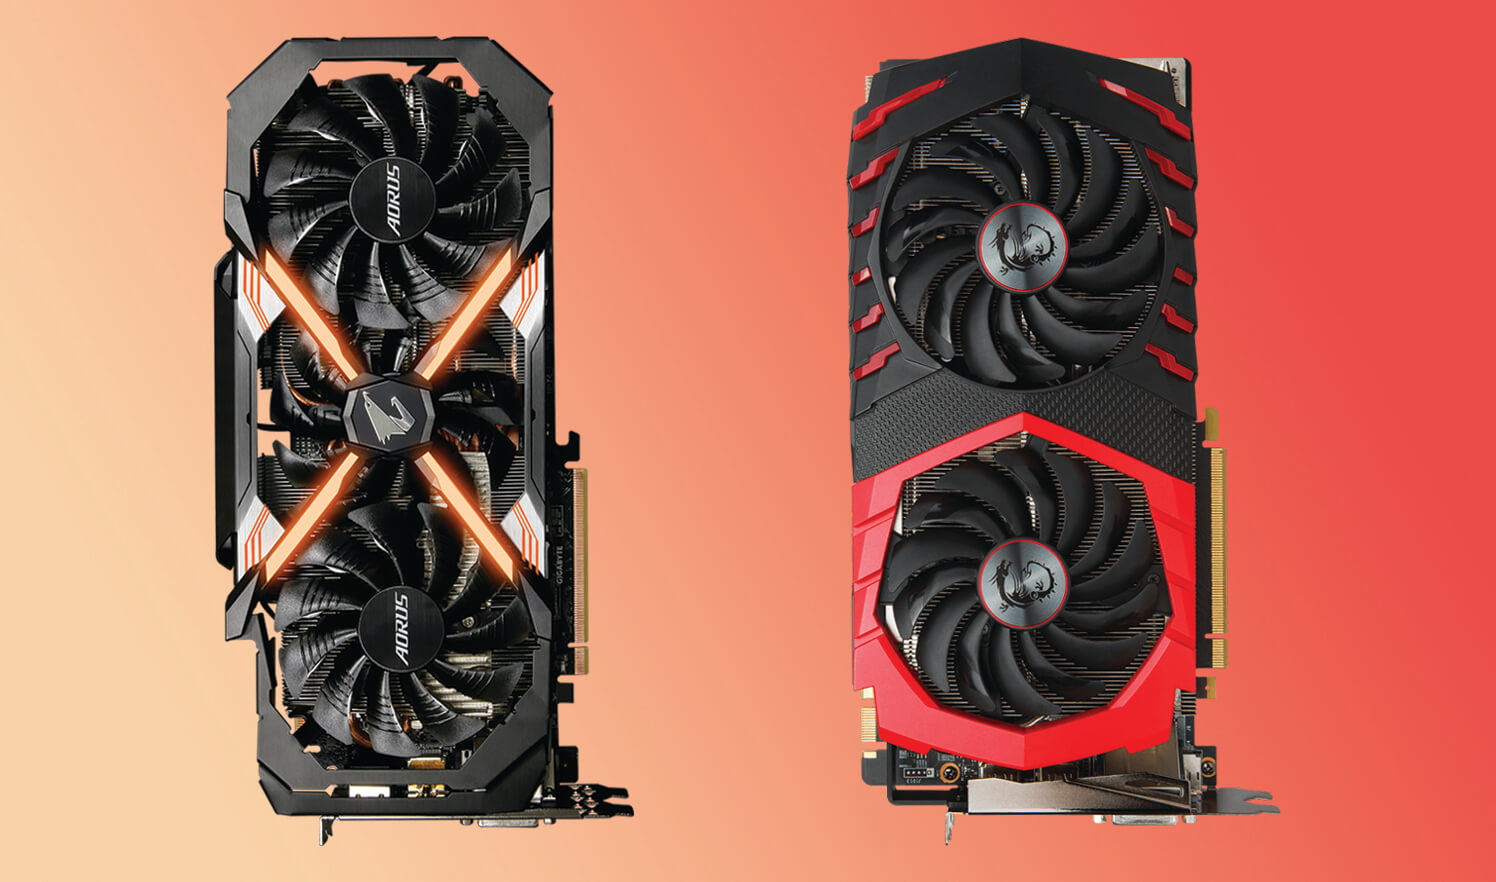
- Graphics Card Issues: A malfunctioning or outdated graphics card can also cause lines on your monitor. Your graphics card is responsible for rendering images and videos on your screen, so if it’s not functioning correctly, you may experience visual abnormalities, including lines.
- Overheating: Excessive heat can affect the performance of both your monitor and graphics card. When these components become overheated, it can lead to screen artifacts, such as lines, as well as other issues like distorted images or sudden shutdowns.
- Electromagnetic Interference: Surrounding electromagnetic fields from devices like speakers, radios, or cell phones can cause interference with your monitor’s signal and result in the appearance of lines. The closer these devices are to your monitor, the higher the chance of interference.
Now that we have identified the common causes behind the lines on a monitor, it’s time to explore the effective methods to fix this issue. By addressing these causes, you can potentially get rid of those annoying lines and enjoy a clean and flawless display. Continue reading to learn about the solutions that will help you restore the optimal performance of your monitor.
Loose or Damaged Cable Connections
When it comes to lines on a monitor, one of the most common culprits is loose or damaged cable connections. A faulty connection between your monitor and computer can cause signal disruptions, leading to the appearance of lines on the screen.
To fix this issue, start by checking all the cable connections. Ensure that the power cable, video cable (HDMI, DisplayPort, DVI, or VGA), and any other peripheral cables are securely plugged into their respective ports. If you notice any loose connections, firmly reattach them.
Inspect the cables for any visible damage, such as frayed wires or bent pins. If you find any, replace the damaged cables with new ones. Damaged cables can compromise the signal quality and lead to visual abnormalities, including lines on the monitor.
In addition to checking the physical connections, it is also important to ensure that the correct input source is selected on the monitor. Sometimes, lines can appear if the monitor is receiving a weak or incompatible signal. Use the monitor’s menu or OSD (On-Screen Display) buttons to navigate to the input settings and verify that the selected input source matches the one you are using.
Once you have rechecked and secured all the cable connections, power on your computer and monitor to see if the lines have disappeared. If the issue persists, move on to the next potential cause to determine the best course of action.
By addressing loose or damaged cable connections, you can eliminate one of the common causes of lines on a monitor. Taking the time to properly connect and maintain your cables can help ensure a stable and reliable signal, resulting in a clear and uninterrupted display.
Aging or Defective Monitor
As monitors age, their components may deteriorate, leading to various issues, including the appearance of lines. Additionally, monitors that are faulty or have manufacturing defects can also contribute to this problem.
If you have been using the same monitor for a long time and recently noticed lines on the screen, it could be a sign of age-related deterioration. Over time, the internal components of a monitor, such as capacitors or the LCD panel, can wear out or become damaged. This can result in irregularities in the display, including the presence of lines.
To determine if your monitor is the cause of the issue, try connecting it to a different computer or use a different monitor with your current computer. If the lines persist with the same monitor but disappear when using a different one, it indicates that the aging or defective monitor is the culprit.
If your monitor is within its warranty period, contact the manufacturer for assistance. They may offer a repair or replacement depending on the circumstances. However, if your monitor is out of warranty, you may need to consider purchasing a new one.
Prioritize quality and reliability when selecting a new monitor. Look for one that meets your specific needs and has positive reviews indicating a low likelihood of encountering similar issues. Investing in a reputable brand and model can help minimize the chances of experiencing lines or other problems in the future.
Remember, the age and condition of your monitor can significantly impact its performance. If you suspect that your monitor is aging or defective, considering a replacement can provide a long-term solution and restore a clear and pristine display.
Graphics Card Issues
A malfunctioning or outdated graphics card can also be a culprit behind the appearance of lines on your monitor. The graphics card is responsible for rendering images and videos, so if it’s experiencing issues, it can result in visual abnormalities, including lines.
To address graphics card-related issues, start by ensuring that you have the latest drivers installed. Graphics card manufacturers regularly release driver updates to optimize performance and fix any known bugs or glitches. Visit the manufacturer’s website and download the latest drivers for your specific graphics card model.
Once you have updated your drivers, restart your computer to apply the changes. This can help resolve any software-related conflicts and potentially eliminate the presence of lines on your monitor.
If updating the drivers doesn’t resolve the issue, consider checking the physical connection between the graphics card and the monitor. Ensure that the cable connecting the monitor to the graphics card is securely plugged in. If the lines persist, try using a different cable or testing the monitor and graphics card with another computer to determine if the issue lies with the graphics card itself.
If your graphics card is malfunctioning or outdated, you may need to consider replacing it. Upgrading to a newer and more powerful graphics card can not only resolve the issue of lines but also enhance your overall visual experience with improved performance and capabilities.
However, before making any changes to your graphics card, it is advisable to seek professional assistance, especially if you are not familiar with hardware installations. A technician can diagnose the problem accurately and provide the necessary guidance to resolve the graphics card-related issues.
By troubleshooting and addressing any graphics card problems, you can potentially eliminate the lines on your monitor and ensure a smooth and uninterrupted display.
Overheating
Overheating can significantly impact the performance of both your monitor and graphics card, leading to visual abnormalities such as lines on the screen. Excessive heat can cause components to malfunction and compromise the overall stability of your system.
To prevent overheating, ensure that your computer and monitor have proper ventilation. Make sure that they are placed in an area with good airflow and that the vents are not obstructed by dust or other objects. Consider using a cooling pad or stand to provide additional airflow to your device.
If your computer or graphics card has fans, periodically clean them to remove any dust buildup. Dust can impede the cooling system and cause components to overheat. Use compressed air or a soft brush to gently clean the fans and vents, ensuring a proper flow of air and maintaining optimal operating temperatures.
You can also monitor the temperature of your graphics card using software applications specifically designed for this purpose. These applications can provide real-time temperature readings and help you identify any potential overheating issues. If you notice that your graphics card temperature is consistently reaching high levels, it may be necessary to address the cooling system, such as by installing additional fans or upgrading the cooling solution.
Another helpful measure to prevent overheating is to avoid running demanding software or games for extended periods without breaks. Intensive tasks can put a strain on your system, causing temperatures to rise. Take regular breaks to allow your computer and graphics card to cool down.
By proactively addressing overheating issues, you can ensure that your monitor and graphics card function optimally, minimizing the chances of lines and other visual disturbances on your screen.
Electromagnetic Interference
Electromagnetic interference (EMI) can be another potential cause of lines on your monitor. EMI refers to the disruption of an electronic signal due to electromagnetic fields generated by nearby devices or power sources.
To minimize electromagnetic interference, ensure that your monitor is located away from any potential sources of interference. Keep it at a distance from devices such as speakers, radios, cell phones, or other electronic equipment that emit electromagnetic radiation. The closer these devices are to your monitor, the higher the chance of interference.
Consider rearranging your workspace to create more distance between your monitor and these devices. You can also try repositioning the cables to reduce the risk of interference. Use shorter and high-quality cables to minimize the chances of electromagnetic interference affecting your display.
In addition, consider using shielded cables or ferrite cores. Shielded cables have layers of shielding that can block or reduce electromagnetic interference. Ferrite cores are cylindrical magnets that can be attached to the ends of cables to suppress interference. These measures can help mitigate the impact of EMI on your monitor’s performance.
If you suspect that electromagnetic interference may be causing the lines on your monitor, try unplugging nearby devices one by one to identify the source of the issue. This process of elimination can help you pinpoint and resolve the problem.
It’s important to note that not all lines on your monitor may be attributable to electromagnetic interference. If you have ruled out other potential causes and suspect EMI, experimenting with repositioning and shielding can be a good starting point.
By taking steps to minimize electromagnetic interference, you can create an environment where your monitor can function without external disruptions, resulting in a clear and uninterrupted display.
How to Fix Lines on a Monitor
Now that we have explored the common causes of lines on a monitor, let’s discuss the steps you can take to fix this issue:
- Check Cable Connections: Start by ensuring that all cable connections are secure and free from damage. Reattach any loose connections and replace damaged cables if necessary. Also, verify that the correct input source is selected on the monitor to avoid a weak or incompatible signal.
- Replace or Repair the Monitor: If your monitor is aging, defective, or out of warranty and you suspect it to be the cause of the lines, consider replacing it with a new one. Alternatively, you can contact the manufacturer for repair options if it is still under warranty.
- Troubleshoot the Graphics Card: Update your graphics card drivers to the latest version and restart your computer. Ensure the cable connecting the monitor to the graphics card is securely attached. If the issue persists, consult a professional or consider replacing the graphics card if it is malfunctioning or outdated.
- Ensure Proper Ventilation: Prevent your monitor and computer from overheating by maintaining proper ventilation. Place them in an area with good airflow, clean the fans and vents regularly, and avoid running demanding tasks without breaks.
- Minimize Electromagnetic Interference: Keep your monitor away from devices that emit electromagnetic radiation, such as speakers, radios, and cell phones. Rearrange your workspace to create distance between the monitor and potential sources of interference. Additionally, use shielded cables or ferrite cores to reduce the impact of electromagnetic interference.
By following these steps, you can address the common causes of lines on a monitor and potentially resolve the issue. However, if the lines persist or if you are unsure about performing troubleshooting steps on your own, it is advisable to seek professional assistance to ensure an accurate diagnosis and appropriate solution.
Check Cable Connections
One of the first steps to take when encountering lines on a monitor is checking the cable connections. Loose or damaged cable connections can disrupt the signal and result in visual abnormalities on the screen. By ensuring that the cables are securely connected, you can potentially resolve the issue.
Start by inspecting the cable connecting your monitor to your computer or power source. Ensure that it is firmly plugged in at both ends. Sometimes, cables can become loose due to movement or accidental tugs, resulting in a weak or unstable connection. Firmly reattach any loose cables to get a secure connection.
While inspecting the cable, also check for any visible damage, such as frayed wires or bent pins. Damaged cables can lead to poor signal quality, which can manifest as lines on the monitor. If you identify any damage, it is crucial to replace the damaged cable with a new one to restore a clear and uninterrupted display.
Additionally, verify that the correct input source is selected on the monitor. Many monitors have multiple input options, such as HDMI, DisplayPort, DVI, or VGA. Ensure that you have selected the input source that matches the cable you are using. Selecting an incorrect input source can result in a weak or incompatible signal, which may lead to lines or other visual disturbances on the screen.
If you have made any adjustments or reconnected cables, power on your computer and monitor to see if the lines have disappeared. In many cases, ensuring proper cable connections can rectify the issue, providing a clear and smooth display.
Checking cable connections is a straightforward and essential step in troubleshooting lines on a monitor. By taking the time to inspect and secure the cables, you can potentially resolve the issue quickly without the need for further intervention.
Replace or Repair the Monitor
If you have checked the cable connections and the lines on your monitor persist, the next step is to consider replacing or repairing the monitor itself. Aging, defective, or damaged monitors can be a common cause of line issues.
If your monitor is relatively old or showing signs of age-related deterioration, it may be time to consider replacing it. Over time, components such as capacitors or the LCD panel can wear out, leading to visual abnormalities, including the appearance of lines. Purchasing a new monitor will not only potentially resolve the issue but also provide a better display experience with improved technology and features.
However, before deciding to replace the monitor, it is worth checking if it is still under warranty. If your monitor is within the warranty period, contact the manufacturer or retailer to inquire about repair or replacement options. They may be able to offer a solution depending on the specific situation and warranty terms.
If your monitor is out of warranty or the issue is not covered, consider consulting a professional for repair options. Local electronics repair shops or manufacturer-certified service centers may be able to diagnose and repair the monitor. The cost of repairs will depend on the extent of the damage and the availability of spare parts.
When replacing or repairing the monitor, it is essential to prioritize quality and reliability. Look for reputable brands and models that have positive reviews and a good track record. Reading customer feedback and conducting research can provide insights into the likelihood of encountering similar issues with a particular monitor.
Ultimately, deciding whether to replace or repair the monitor will depend on factors such as the extent of the issue, the age and condition of the monitor, and your budget. Assessing these factors will help you make an informed decision that ensures a clear and uninterrupted display.
Troubleshoot the Graphics Card
If you have checked the cable connections and the lines on your monitor persist, the issue may be related to your graphics card. A malfunctioning or outdated graphics card can cause visual abnormalities, including lines on the screen. To address this possibility, follow these troubleshooting steps:
1. Update Graphics Card Drivers: Outdated or incompatible graphics card drivers can lead to display issues. Visit the website of your graphics card manufacturer, such as NVIDIA or AMD, and download the latest drivers for your specific graphics card model. Install the updated drivers and restart your computer to apply the changes. This can potentially resolve software-related issues and improve compatibility with your monitor.
2. Check Physical Connections: Ensure that the cable connecting your monitor to the graphics card is securely and properly attached. Sometimes, a loose or faulty connection can result in visual abnormalities. Consider reseating the cable or trying a different cable to rule out any issues with the cable itself.
3. Test with Another Monitor: Connect your graphics card to a different monitor or try using your current monitor with another computer. If the lines do not appear when using a different monitor, it indicates that the issue is likely specific to your monitor rather than the graphics card. However, if the lines persist with a different monitor, it suggests that the graphics card may be the cause of the problem.
4. Monitor Graphics Card Temperatures: Overheating can cause graphics card issues and lead to visual abnormalities. Install software, such as MSI Afterburner or GPU-Z, to monitor the temperature of your graphics card. If the temperature exceeds safe levels (usually around 80-85 degrees Celsius), it may be necessary to address the cooling system. Ensure that the graphics card fans are working properly and clean any dust accumulation on them to improve cooling efficiency.
5. Seek Professional Help: If you are unsure about performing troubleshooting steps or if the lines persist after attempting these solutions, it is advisable to seek professional assistance. A computer technician can diagnose the issue accurately and provide appropriate guidance on resolving graphics card-related problems.
By troubleshooting the graphics card, you can identify and potentially resolve any issues that may be causing lines on your monitor. However, if the problem persists, it may be necessary to consider replacing the graphics card with a newer and more reliable model.
Ensure Proper Ventilation
Overheating can contribute to the appearance of lines on a monitor. It is crucial to ensure that both your monitor and computer have proper ventilation to dissipate heat effectively. Insufficient airflow and heat buildup can cause components to malfunction, resulting in visual abnormalities on the screen.
First, make sure that your monitor and computer are positioned in an area with good airflow. Avoid placing them in enclosed spaces or against walls where heat can become trapped. Adequate ventilation allows for the proper exchange of hot air with cooler air, helping to regulate temperatures.
Check the vents on your monitor and computer to ensure that they are not blocked by dust, debris, or other obstructions. Accumulated dust can impede the cooling system and cause components to overheat. Use compressed air or a soft brush to gently clean the vents, removing any dust buildup.
If your monitor or computer has fans, regularly clean them as well. Dust can accumulate on fan blades, reducing their efficiency and negatively impacting airflow. Clean the fans using compressed air or a soft brush, ensuring that they are free from dust and spinning properly to effectively cool the internal components.
In addition to regular cleaning, consider using a cooling pad or stand to help improve ventilation. These accessories come with built-in fans that provide additional airflow to your device, helping to dissipate heat more efficiently.
Another important factor in ensuring proper ventilation is to avoid running demanding tasks or software for long periods without breaks. Intensive activities such as gaming or video editing can put a strain on your system and generate more heat. Taking regular breaks allows your computer and monitor to cool down and prevents excessive heat buildup.
By ensuring proper ventilation, you can maintain optimal operating temperatures for your monitor and computer, reducing the chances of lines and other visual disturbances on your screen. Good airflow promotes the longevity and performance of your devices, ensuring a clear and uninterrupted display.
Minimize Electromagnetic Interference
Electromagnetic interference (EMI) can be a common cause of lines on a monitor. EMI occurs when electromagnetic fields from nearby devices or power sources interfere with the monitor’s signal, resulting in visual disturbances. Here are some steps you can take to minimize electromagnetic interference:
1. Distance from Interference Sources: Keep your monitor away from devices that emit electromagnetic radiation, such as speakers, radios, or cell phones. These devices can generate strong electromagnetic fields that can interfere with your monitor’s signal. Increasing the distance between your monitor and these devices can help minimize the chances of EMI affecting your display.
2. Repositioning and Shielding: Rearrange your workspace to create distance between your monitor and potential sources of interference. Avoid placing devices that emit electromagnetic radiation close to your monitor. Additionally, consider using shielded cables or ferrite cores. Shielded cables have layers of shielding that help block or reduce electromagnetic interference. Ferrite cores are cylindrical magnets that can be attached to the ends of cables to suppress interference.
3. Test Different Power Outlets: Sometimes, nearby power sources can introduce electromagnetic interference. Try plugging your monitor into different power outlets to see if the lines persist. It is also recommended to use surge protectors or line conditioners to minimize any interference caused by fluctuations in the power supply.
4. Reduce Wi-Fi Interference: Wi-Fi signals can also contribute to electromagnetic interference. To minimize this, ensure that your Wi-Fi router is placed away from your monitor. Consider adjusting the channel or frequency settings on your router to reduce interference with your monitor’s signal.
5. Shielding Material: If you are experiencing excessive electromagnetic interference, you can consider using shielding materials for your monitor or creating a shielded environment. Conductive films or foils can be applied to the back of the monitor or around the workspace to help minimize external electromagnetic fields.
It is important to note that while these steps can help in minimizing electromagnetic interference, not all lines on a monitor may be attributed to EMI. If you have ruled out other potential causes and suspect EMI, experimenting with repositioning devices, shielding, and distance can help reduce interference and improve the display quality of your monitor.
By taking measures to minimize electromagnetic interference, you can create a better environment for your monitor, resulting in a clearer and more stable display without disruptive lines.
Conclusion
Lines on a monitor can be frustrating, but understanding the common causes and implementing the appropriate solutions can help restore a clear and uninterrupted display. Loose or damaged cable connections, an aging or defective monitor, graphics card issues, overheating, and electromagnetic interference are the primary culprits behind the appearance of lines.
To fix the issue, start by checking cable connections and ensuring that they are secure and undamaged. Replace or repair the monitor if it is aging or defective, considering reputable brands and models. Troubleshoot the graphics card by updating drivers, checking physical connections, and monitoring temperatures. Ensure proper ventilation for your devices, allowing for adequate airflow and preventing overheating. Additionally, minimize electromagnetic interference by creating distance from devices emitting electromagnetic radiation and using shielded cables or ferrite cores.
By following these steps and troubleshooting the potential causes, you can address the issue of lines on your monitor effectively. However, if the lines persist or if you are uncertain about performing the troubleshooting steps, it is recommended to seek professional assistance to ensure a proper diagnosis and appropriate resolution.
Remember to prioritize the longevity and performance of your devices by keeping them clean, properly ventilated, and situated in an environment with minimal electromagnetic interference. Regular maintenance and care can help prevent future occurrences of lines on your monitor and ensure an optimal visual experience.