Introduction
Welcome to this guide on how to connect a Thermaltake case fan with an RGB controller to your motherboard. As PC enthusiasts, we understand the importance of having a well-cooled and visually appealing system. Thermaltake offers a range of case fans with RGB lighting options that can elevate the aesthetic appeal of your PC rig.
RGB lighting has become increasingly popular in the gaming and PC building community. It allows you to customize and breathe life into your system by adding vibrant colors and dynamic lighting effects. However, to make the most of your RGB case fans, it is crucial to understand how to properly connect them to your motherboard’s RGB headers.
The RGB controller that comes with Thermaltake case fans serves as the hub for managing and controlling the RGB lighting effects. It allows you to choose from various color options, lighting modes, and even sync the lighting with other compatible devices in your system. By utilizing the RGB controller, you can create a stunning visual display that matches your preferred color scheme or complements your gaming setup.
To fully harness the RGB lighting capabilities of your Thermaltake case fan, you need to connect the RGB controller to the appropriate RGB headers on your motherboard. These headers provide the power and control signals necessary to synchronize the lighting effects across different components.
In this guide, we will walk you through the process of identifying the RGB controller on your Thermaltake case fan and locating the corresponding RGB headers on your motherboard. We will also provide step-by-step instructions for connecting the RGB controller to the motherboard, as well as configuring the RGB lighting effects in the motherboard’s BIOS or software.
By the end of this guide, you will have a clear understanding of how to connect your Thermaltake case fan with an RGB controller to your motherboard, allowing you to unleash the full potential of your system’s RGB lighting.
What is a Thermaltake Case Fan RGB Controller?
A Thermaltake case fan RGB controller is a device that allows you to control and customize the RGB lighting effects of your Thermaltake case fans. It is an essential component for enthusiasts who want to add a touch of vibrant lighting to their PC setup.
The RGB controller serves as a centralized hub for managing the RGB lighting of your case fans. It enables you to choose from a wide range of colors, lighting modes, and effects to create a visually stunning and personalized system. With the RGB controller, you can bring your PC to life and enhance the overall aesthetics of your rig.
Thermaltake case fan RGB controllers are designed to be user-friendly and intuitive. They often come with buttons or dials that allow you to easily adjust the color, brightness, and lighting effects with a simple touch or turn. Some advanced controllers even feature software integration, which allows you to customize and synchronize the RGB lighting across multiple Thermaltake devices for a cohesive and mesmerizing display.
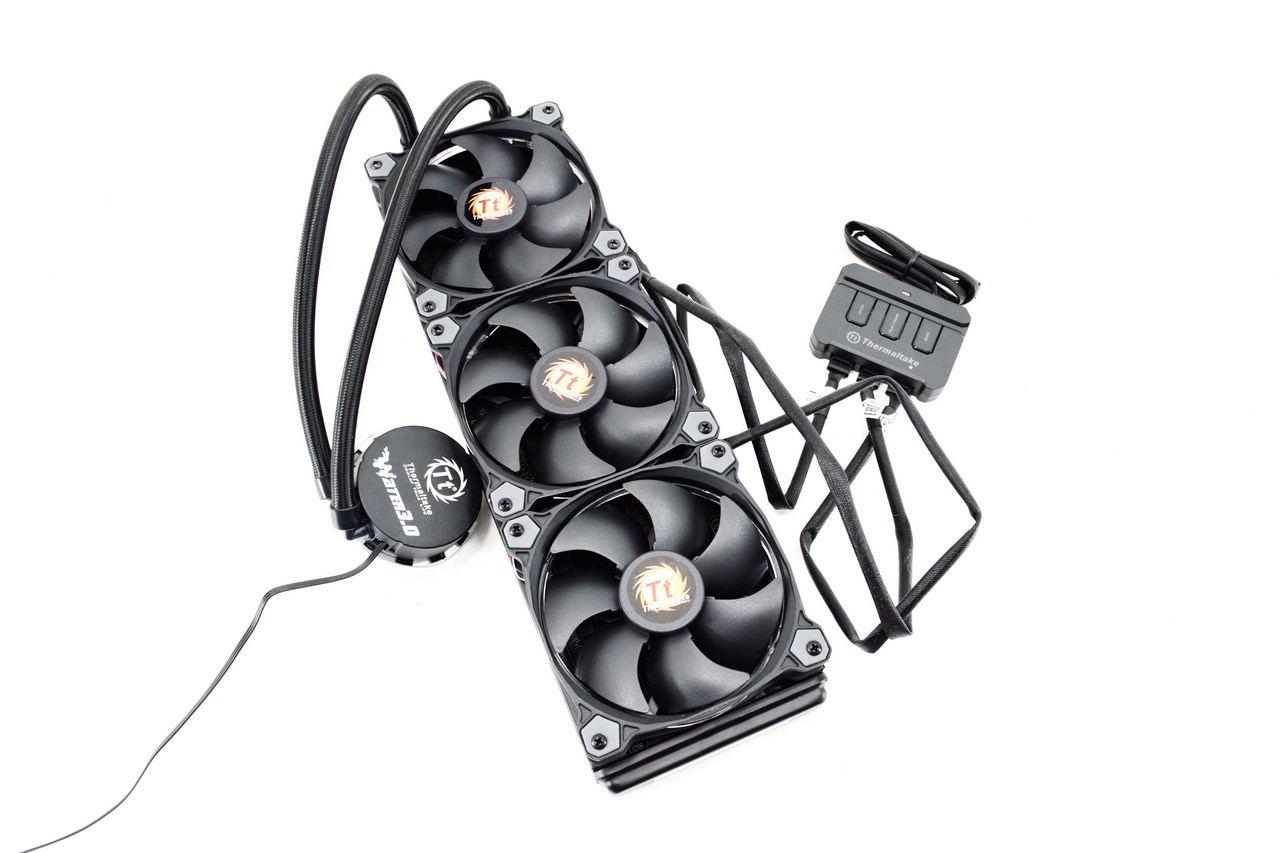
The RGB controller is typically included in the packaging of your Thermaltake case fan. It connects to the fan through a dedicated cable and also requires a separate power source, often through a SATA power connector. This ensures that the fan’s RGB lighting operates independently from the fan’s cooling function.
One of the key advantages of using a Thermaltake case fan RGB controller is the flexibility and versatility it offers. You can experiment with different lighting effects, such as static, breathing, cycling, or even synchronized patterns, to suit your personal style or complement your gaming experience. The ability to adjust the lighting effects on the fly allows you to create the perfect ambiance for any occasion, whether it’s a gaming session or a casual browsing session.
In summary, a Thermaltake case fan RGB controller is a device that enables you to take full control of the RGB lighting effects of your Thermaltake case fans. It empowers you to unleash your creativity and personalize your PC setup with stunning and dynamic lighting displays that enhance the overall visual appeal of your system.
Finding the RGB Controller on the Thermaltake Case Fan
Before you can connect the RGB controller to your motherboard, you need to locate it on your Thermaltake case fan. The RGB controller is usually integrated into the fan itself or attached as a separate module. Here are the steps to help you find the RGB controller on your Thermaltake case fan:
- Inspect the fan: Start by examining your Thermaltake case fan and look for any cables or connectors that are not directly related to the fan’s power and cooling functions. The RGB controller is typically connected to the fan through a separate cable.
- Check the packaging: If you can’t find the RGB controller on the fan, refer to the packaging or instruction manual that came with the Thermaltake case fan. It should provide information on where the RGB controller is located or how to access it.
- Look for a control module: Some Thermaltake case fans have a separate control module that houses the RGB controller. This module can be attached to the fan through a cable or installed in a specific location in your case. It may have buttons or dials for adjusting the RGB lighting settings.
- Identify the RGB cable: Once you have located the RGB controller or control module, identify the cable that connects it to the fan. This cable is usually labeled or distinguishable from the other cables connected to the fan. It is typically a 4-pin connector with RGB markings.
Remember to handle the RGB controller and cables with care to avoid any damage. If you are still having trouble locating the RGB controller on your Thermaltake case fan, referring to the product’s documentation or reaching out to Thermaltake’s customer support can provide further assistance.
Now that you have found the RGB controller on your Thermaltake case fan, you are one step closer to connecting it to your motherboard and unleashing the vibrant RGB lighting effects. In the next section, we will explore the motherboard’s RGB headers, which are crucial for establishing the connection between the RGB controller and the motherboard.
Understanding the Motherboard RGB Headers
Motherboards come equipped with RGB headers that allow you to connect external devices, such as a Thermaltake case fan RGB controller, and control their RGB lighting. RGB headers are connectors specifically designed to provide power and control signals to RGB devices.
There are two common types of RGB headers found on motherboards: 4-pin RGB headers and 3-pin ARGB (Addressable RGB) headers. It is important to understand the differences between these headers before connecting the Thermaltake case fan RGB controller:
- 4-pin RGB headers: These headers are used for non-addressable RGB devices and feature four pins. Each pin serves a specific purpose, including one pin for +12V power, one pin for Ground (GND), and two pins for controlling the RGB lighting. The two control pins are usually denoted as R (Red) and B (Blue) or G (Green), representing the primary colors of the RGB spectrum.
- 3-pin ARGB headers: These headers are designed for addressable RGB devices and offer more advanced lighting control options. Unlike 4-pin RGB headers, each individual LED on an addressable RGB device can be controlled independently, allowing for more intricate lighting effects. 3-pin ARGB headers often have +5V, Data, and Ground (GND) pins.
When connecting the Thermaltake case fan RGB controller to your motherboard, make sure to refer to the motherboard’s manual to identify the type of RGB header it supports. It is essential to use the correct type of header to ensure proper compatibility and functionality of the RGB lighting.
It is also important to note that some motherboards may have specific headers dedicated to RGB or ARGB, while others may include a combination of both. Depending on your motherboard, you may have multiple RGB headers available. This allows you to connect and control multiple RGB devices simultaneously, including multiple Thermaltake case fans with RGB controllers.
If your motherboard does not have enough RGB headers for all your RGB devices, there are alternative solutions available. You can use RGB splitters or controllers that allow you to expand the number of RGB devices you can connect.
Understanding the motherboard’s RGB headers is crucial for properly connecting the Thermaltake case fan RGB controller and ensuring compatibility between the RGB devices. In the next section, we will explore where to connect the Thermaltake case fan RGB controller on the motherboard and provide step-by-step instructions for the connection process.
Where to Connect Thermaltake Case Fan RGB Controller on the Motherboard
Connecting the Thermaltake case fan RGB controller to the motherboard is a crucial step in integrating the RGB lighting into your PC system. To ensure seamless communication and control, it is important to connect the RGB controller to the appropriate RGB headers on your motherboard.
To determine where to connect the Thermaltake case fan RGB controller on the motherboard, follow these steps:
- Refer to the motherboard manual: Start by consulting the motherboard’s manual for specific instructions on locating the RGB headers. The manual will provide detailed information about the location and type of RGB headers available on your motherboard.
- Identify the RGB headers: Once you have accessed the motherboard manual, locate the RGB headers on the motherboard. They are commonly labeled as “RGB,” “RGB Header,” or similar variations. The motherboard may have 4-pin RGB headers or 3-pin ARGB headers, as explained in the previous section.
- Plan your connections: Take note of the number of RGB headers available on the motherboard and consider the number of Thermaltake case fans with RGB controllers you plan to connect. If you have multiple fans, ensure that you have enough headers to accommodate all the connections. Alternatively, you can utilize RGB splitters or controllers to expand the number of RGB devices you can connect to a single header.
Once you have identified the RGB headers on the motherboard and planned your connections, you are ready to connect the Thermaltake case fan RGB controller. Ensure that you align the pins correctly and firmly insert the connector into the RGB header. Be gentle when handling the cables to avoid damaging any components.
It is important to note that the specific location and layout of the RGB headers can vary depending on the motherboard model and manufacturer. For some motherboards, the headers may be located near the edge, while others may have them positioned closer to the CPU socket or the DIMM slots. Take your time to carefully review the motherboard layout and markings to make accurate connections.
With the Thermaltake case fan RGB controller connected to the appropriate RGB headers on the motherboard, you have established the crucial link for controlling and synchronizing the RGB lighting. In the next section, we will explore the process of configuring the RGB lighting in the motherboard’s BIOS or software.
Connecting Thermaltake Case Fan RGB Controller to an RGB Header
Now that you have identified the RGB headers on your motherboard, it is time to connect the Thermaltake case fan RGB controller to the appropriate RGB header. Properly connecting the RGB controller ensures that the RGB lighting of your Thermaltake case fans can be controlled and synchronized with your motherboard’s software or BIOS.
Follow these step-by-step instructions to connect the Thermaltake case fan RGB controller to an RGB header on your motherboard:
- Ensure your PC is turned off: Before making any connections, ensure that your PC is powered off and unplugged. Safety should always be a priority when working with hardware components.
- Locate the RGB header: Refer to the motherboard manual or visually inspect the motherboard to locate the RGB header you plan to connect the Thermaltake case fan RGB controller to.
- Identify the RGB connector: Take a close look at the Thermaltake case fan RGB controller cable and locate the corresponding RGB connector. It should be a 4-pin or 3-pin connector, depending on the type of RGB header your motherboard supports.
- Align the connector: Align the RGB connector with the RGB header on the motherboard, ensuring that the pins of the connector match the holes or slots on the header.
- Connect the RGB controller: Gently and firmly insert the RGB connector into the RGB header on the motherboard. Apply even pressure to ensure a secure connection. Be cautious not to force the connector as this can damage the pins or the header.
- Double-check the connection: Once the RGB controller is connected to the RGB header, double-check the connection to ensure it is properly seated. A secure connection is crucial for the RGB lighting to function correctly.
Once the Thermaltake case fan RGB controller is successfully connected to the RGB header on your motherboard, you have established the physical connection required for controlling and managing the RGB lighting effects. However, to fully utilize the RGB lighting capabilities, you need to configure the RGB lighting in your motherboard’s BIOS or software, which we will discuss in the next section.
Configuring the RGB Lighting in the Motherboard’s BIOS or Software
Now that you have connected the Thermaltake case fan RGB controller to the RGB header on your motherboard, it’s time to configure and customize the RGB lighting effects. Depending on your motherboard, you can control the RGB lighting through either the motherboard’s BIOS or specialized software provided by the motherboard manufacturer.
Here are the general steps to configure the RGB lighting in the motherboard’s BIOS or software:
- Access the motherboard’s BIOS or software: Restart your PC and enter the BIOS by pressing the designated key during the boot process. The key to access the BIOS varies depending on the motherboard manufacturer but is often Del or F2. Alternatively, if your motherboard supports software control, open the manufacturer’s RGB control software from the desktop.
- Navigate to the RGB lighting settings: In the BIOS or software interface, look for the section related to RGB lighting control. The location and naming may vary depending on the motherboard manufacturer, so refer to the motherboard manual or software documentation if needed.
- Customize the RGB lighting effects: Once you have accessed the RGB lighting settings, you can typically choose from a variety of options, including color selection, lighting modes (e.g., static, breathing, pulsating), and even synchronization with other RGB devices. Experiment with the settings to create your desired RGB lighting effects.
- Apply and save the changes: After customizing the RGB lighting effects to your liking, apply the changes in the BIOS or software interface. In the BIOS, you may need to navigate to the “Exit” or “Save & Exit” menu to save the changes. In the software interface, there is often a “Save” or “Apply” button. Make sure to save the changes to ensure the configured RGB lighting effects persist on subsequent reboots.
It is important to note that the exact options and functionalities available for configuring RGB lighting may vary depending on the motherboard model and manufacturer. Some motherboards offer more advanced RGB lighting customization features, such as the ability to create custom lighting profiles or synchronize the lighting effects with specific software or games. Consult your motherboard’s manual or software documentation for specific instructions and recommended practices.
With the RGB lighting configured and customized to your preferences, you can now enjoy the visually stunning and personalized RGB effects of your Thermaltake case fan. However, if you encounter any issues with the RGB lighting connectivity, refer to the troubleshooting section in the next segment for assistance.
Troubleshooting RGB Lighting Connectivity Issues
While connecting and configuring RGB lighting on your Thermaltake case fan, you may encounter some connectivity issues. Here are a few troubleshooting steps to help resolve common problems:
- Check the connections: Ensure that the RGB connector from the Thermaltake case fan RGB controller is securely inserted into the RGB header on the motherboard. If the connection is loose or not properly aligned, it can cause connectivity issues. Double-check the connection and reseat the connector if necessary.
- Verify power supply: Confirm that the case fan RGB controller is receiving power by checking the SATA power connector. Make sure it is properly connected and providing power to the RGB controller. Faulty power supply can prevent the RGB lighting from functioning.
- Review compatibility: Ensure that the RGB controller and motherboard are compatible. Verify the type of RGB header your motherboard supports (4-pin RGB or 3-pin ARGB) and ensure the Thermaltake case fan RGB controller matches the header type. Using the correct type of connector is crucial for proper connectivity.
- Update motherboard firmware and software: Outdated firmware or software may cause compatibility issues with the RGB lighting. Check the manufacturer’s website for any available updates for your motherboard’s firmware or RGB control software. Install the updates if available and try reconnecting the RGB lighting.
- Inspect cables and connectors: Carefully examine the RGB controller cables and connectors for any signs of damage or bent pins. If any issues are detected, you may need to replace the cable or connector to establish a proper connection. Damaged cables can disrupt the RGB signal and prevent the lighting effects from working correctly.
- Check software settings: Ensure that the RGB lighting is enabled and configured correctly in the BIOS or software interface. Sometimes, RGB lighting settings may be disabled by default or require specific adjustments to activate the lighting effects. Review the motherboard manual or software documentation for guidance on how to configure the RGB lighting settings properly.
- Consult manufacturer support: If all else fails, don’t hesitate to reach out to Thermaltake or your motherboard manufacturer’s customer support for further assistance. They can provide more specific troubleshooting steps or offer a resolution to any RGB lighting connectivity issues.
By following these troubleshooting steps, you should be able to address most RGB lighting connectivity issues and ensure that your Thermaltake case fan’s RGB lighting functions as intended. Remember to proceed with caution when handling hardware components and consult the manufacturer’s documentation for any specific instructions or recommendations.
With your RGB lighting connectivity issues resolved, you can now enjoy the vibrant and customizable lighting effects of your Thermaltake case fan.
Conclusion
Configuring and connecting the Thermaltake case fan RGB controller to your motherboard allows you to unlock the full potential of RGB lighting effects, enhancing the visual appeal of your PC rig. By following the steps outlined in this guide, you can seamlessly connect the RGB controller, understand the motherboard’s RGB headers, and configure the RGB lighting through the motherboard’s BIOS or software.
The Thermaltake case fan RGB controller serves as a centralized hub for controlling and customizing the RGB lighting effects. Its user-friendly interface and wide range of color options and lighting modes allow you to personalize your PC setup to match your unique style or gaming aesthetic.
Understanding the RGB headers on your motherboard is crucial for correctly connecting the Thermaltake case fan RGB controller. Whether you have 4-pin RGB headers or 3-pin ARGB headers, properly connecting the RGB controller ensures seamless communication and synchronization of the RGB lighting effects.
By accessing the motherboard’s BIOS or software, you can further configure and customize the RGB lighting effects to your preferences. Experiment with different colors, modes, and synchronization options to create mesmerizing lighting displays that elevate your PC setup.
If you encounter any issues during the RGB lighting connectivity process, remember to check the connections, power supply, compatibility, and software settings. Troubleshooting common connectivity problems can help ensure the RGB lighting functions correctly and offers a visually captivating experience.
In conclusion, by following the steps and tips in this guide, you can successfully connect and configure the Thermaltake case fan RGB controller on your motherboard. Unleash your creativity and transform your PC setup into a visually stunning masterpiece with the captivating RGB lighting effects of Thermaltake case fans.