Introduction
Google Photos is a powerful and convenient platform that allows you to store, organize, and share your photos and videos. Whether you’re a professional photographer or just someone who loves capturing special moments, Google Photos provides a seamless experience across various devices.
With its user-friendly interface and advanced features, Google Photos has become the go-to choice for many individuals and businesses. Whether you want to access your photos from the web or use the app on your mobile device, Google Photos offers a variety of options to suit your needs.
In this article, we will guide you through the different ways to access, download, and use Google Photos. We will walk you through the process of uploading, organizing, and sharing your photos and videos. Furthermore, we’ll explore editing features and discuss how you can back up and sync your media to ensure its safety.
Whether you’re using an Android device or an iOS device, we’ve got you covered. Read on to discover the wonders of Google Photos and unleash the full potential of your media collection.
Accessing Google Photos on the Web
Accessing Google Photos on the web is incredibly convenient and allows you to easily view and manage your entire photo and video library. To access Google Photos on the web, simply follow the steps below:
- Open your preferred web browser.
- Type in photos.google.com in the address bar.
- Log in to your Google account. If you don’t have one, you can easily create a new account.
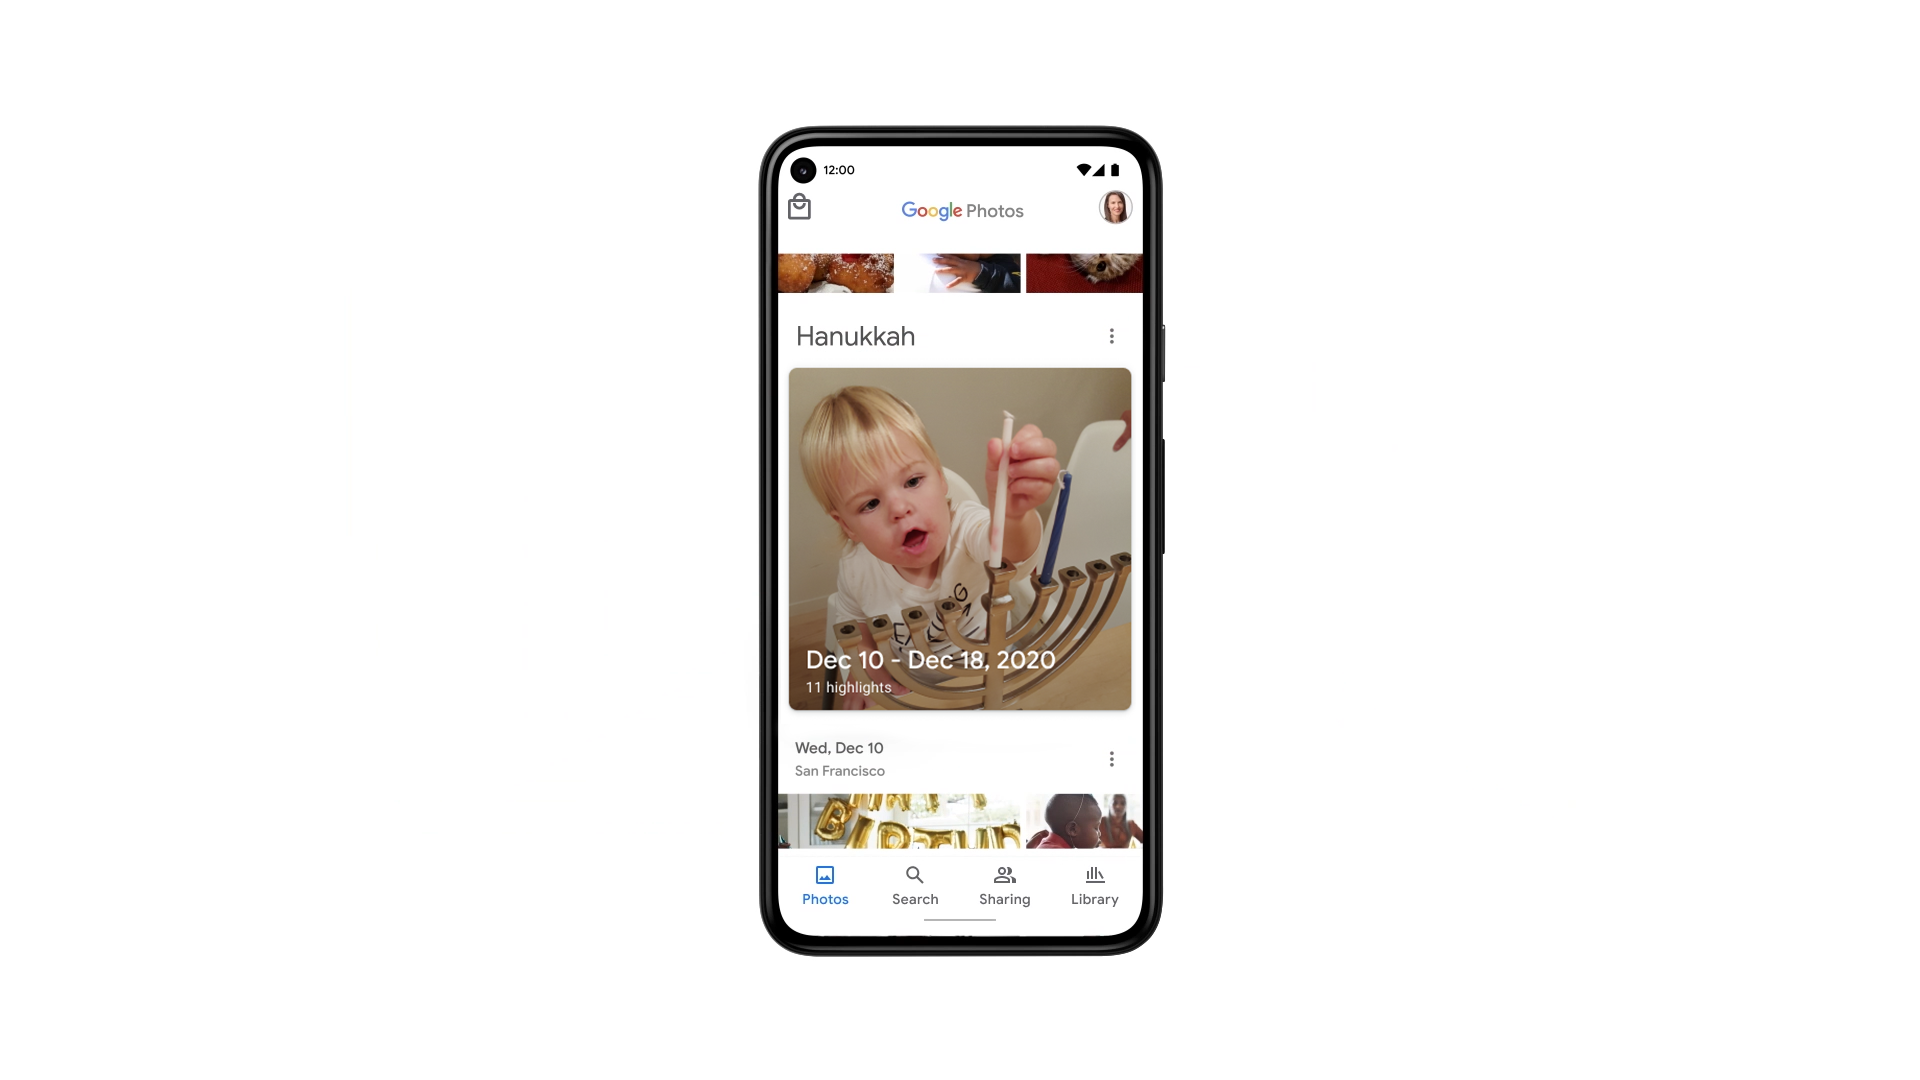
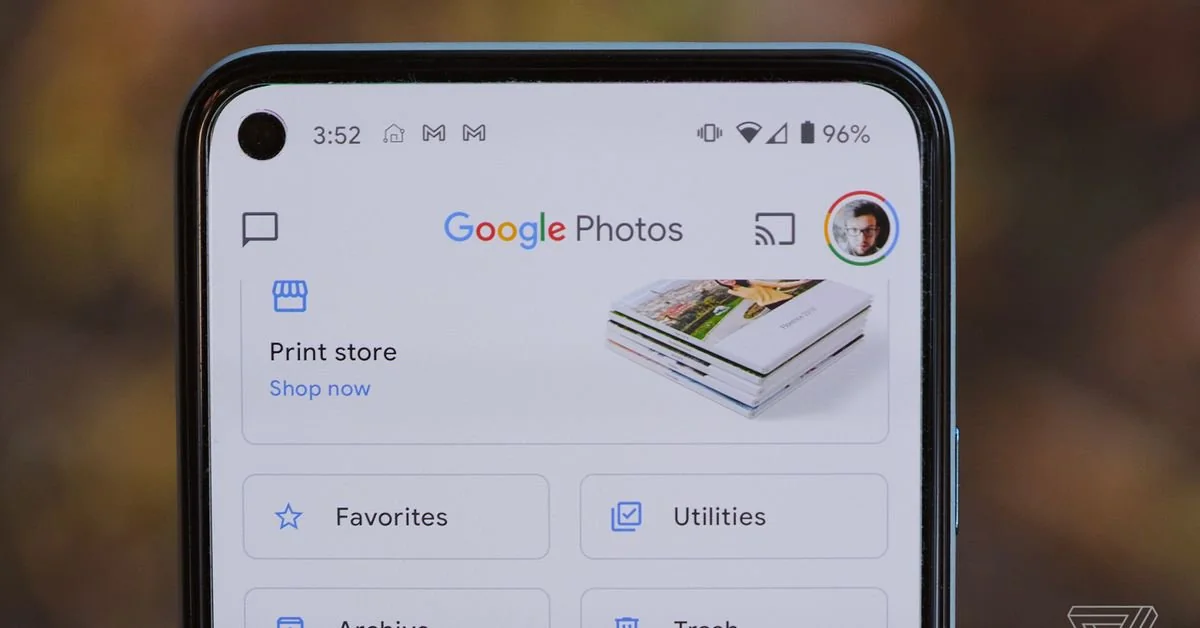
- Once logged in, you will be greeted by the Google Photos home page, where you can start exploring your media collection.
Once you’re in, you’ll notice that Google Photos is divided into four main tabs: Photos, Albums, Sharing, and For You. Let’s dig into each of these tabs to understand their functionalities:
- Photos: This tab displays all your photos and videos in chronological order, with the most recent ones appearing at the top. You can scroll down to browse through your entire collection or use the search bar to find specific media.
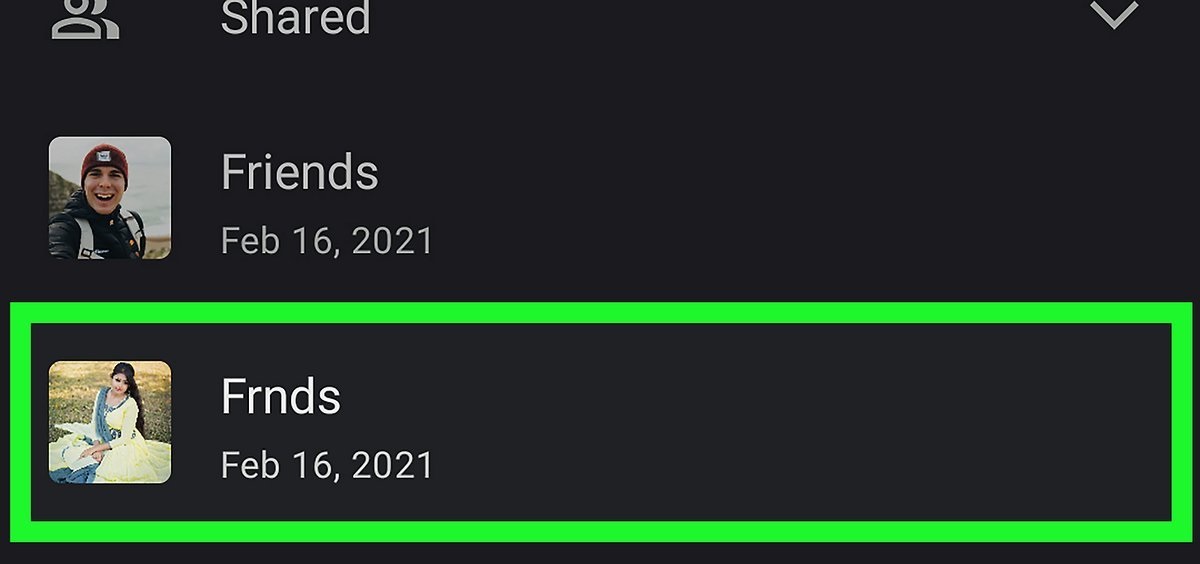
- Albums: In this tab, you can create and manage albums to organize your photos and videos. You can create albums based on specific events, people, or any other criteria that suits you. Simply click on the “+” button to create a new album and start adding media to it.
- Sharing: This tab allows you to view and manage the photos and videos that have been shared with you by others. You can also create shared albums to collaborate on media collections with friends, family, or colleagues.
- For You: This tab provides you with personalized suggestions, such as animations, collages, and stylized photos created from your media. It’s a great way to discover new ways to showcase your photos and videos.
With these tabs, accessing and navigating through your media on Google Photos becomes a breeze. The intuitive interface and powerful search capabilities make finding, organizing, and sharing your memories a delightful experience.
Now that you know how to access Google Photos on the web, let’s explore how to download the Google Photos app on your device for even more convenience and mobility.
Downloading the Google Photos App
To fully maximize the benefits of Google Photos, you can download the Google Photos app on your mobile device. This allows you to access your photos and videos on the go, easily upload new media, and take advantage of additional features. Here’s how you can download the Google Photos app:
- Android Devices:
- Open the Google Play Store on your Android device.
- Search for “Google Photos” using the search bar at the top.
- Tap on the Google Photos app when it appears in the search results.
- Tap on the “Install” button to download and install the app on your device.
- Once the installation is complete, you can find the Google Photos app on your home screen or app drawer.
- iOS Devices (iPhone, iPad):
- Open the App Store on your iOS device.
- Search for “Google Photos” using the search bar at the bottom.
- Tap on the Google Photos app when it appears in the search results.
- Tap on the “Get” button or the cloud icon with an arrow to download and install the app on your device.
- Once the installation is complete, you can find the Google Photos app on your home screen.
After downloading and installing the Google Photos app, you can log in with your Google account to access your media. The app will automatically sync with your online Google Photos library, ensuring that your photos and videos are always up to date across all your devices.
The Google Photos app offers a seamless user experience, allowing you to view, organize, and share your photos and videos with ease. It also provides additional features, such as the ability to create animations, movies, and collages directly from your device. Plus, you can enable automatic backup to ensure that all your new photos and videos are safely stored in the cloud.
By downloading the Google Photos app, you’ll have quick and convenient access to your entire media collection wherever you go. Now that you have the app installed, let’s explore how to use Google Photos on Android devices.
Google Photos on Android Devices
Google Photos provides a seamless experience on Android devices, allowing you to effortlessly manage and enjoy your photo and video collection. Here are some key features and functionalities of Google Photos on Android:
- Automatic Backup: When you enable backup and sync, all new photos and videos taken with your Android device are automatically backed up and saved to your Google Photos account. This ensures that your media is safe and accessible from any device with an internet connection.
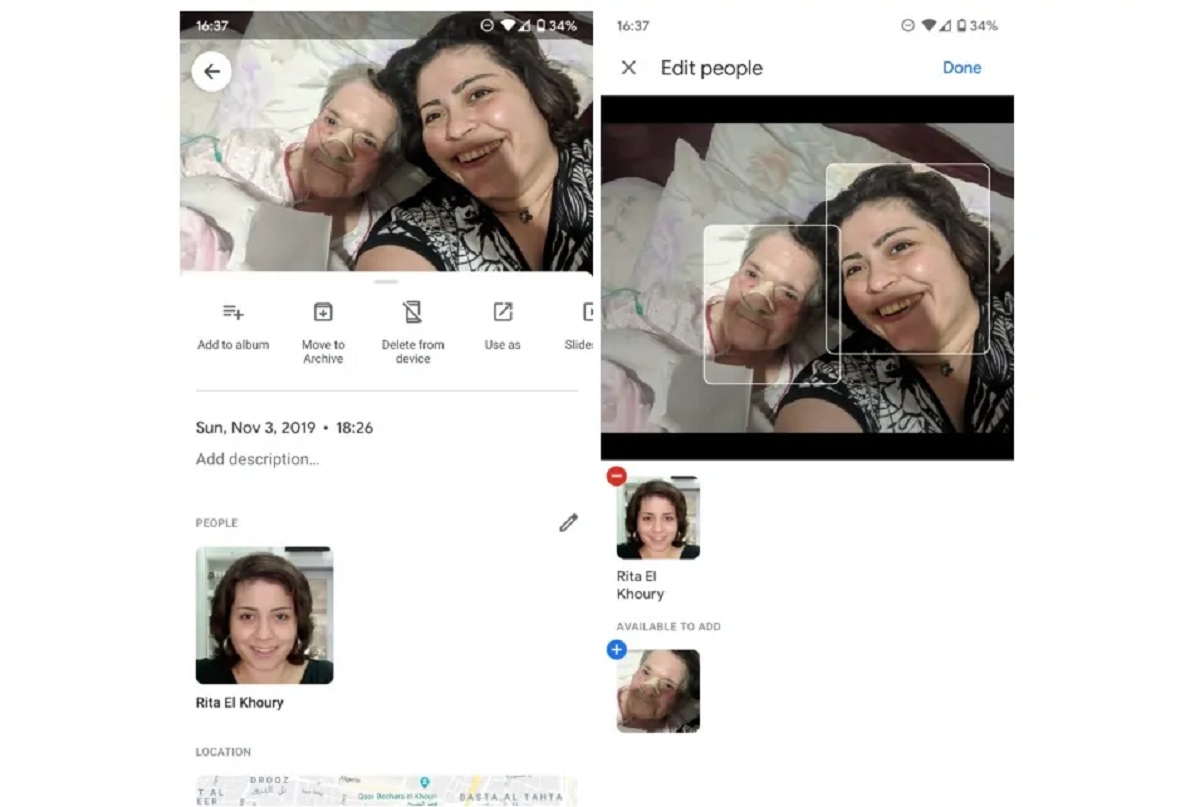
- Search and Organization: Google Photos utilizes advanced image recognition technology to automatically categorize and tag your photos. This makes it easy to search for specific people, places, objects, or even events. You can also manually create albums and add photos to further organize your collection.
- Assistant: The Assistant feature in Google Photos provides smart suggestions and automatic creations, such as collages, animations, and stylized photos. It analyzes your photos and videos to offer personalized recommendations that enhance your memories.
- Sharing: Google Photos allows you to easily share your media with others. You can create shared albums and invite friends and family to contribute and view the content. Additionally, you can generate links to share specific photos or videos with anyone, even if they don’t have the Google Photos app.
- Editing Tools: Google Photos offers a range of editing tools to enhance and customize your photos. You can adjust brightness, contrast, and saturation, apply filters, crop and rotate images, or even make minor retouches. The edits you make are non-destructive, meaning you can revert to the original photo at any time.
- Storage Management: With Google Photos, you have unlimited free storage for high-quality photos and videos. If you prefer to store your photos in their original quality, they will count towards your Google account’s storage quota. However, Google provides various storage plans, allowing you to upgrade if needed.
Using Google Photos on Android devices is a breeze. Simply open the app, and you’ll be greeted with your photo library, organized by date. From here, you can navigate through your photos, perform searches, create albums and animations, edit your media, and more.
In addition to the on-device features, Google Photos seamlessly integrates with other Android apps. For example, you can easily share a photo from your Google Photos library through messaging apps, social media platforms, or email. This makes it incredibly convenient to share your precious memories with others.
Google Photos on Android devices offers a powerful suite of tools and features that make managing and enjoying your photo and video collection a breeze. It’s an essential app for any Android user who wants to keep their memories safe, organized, and easily accessible on the go.
Google Photos on iOS Devices
Google Photos offers a seamless experience on iOS devices, allowing you to effortlessly manage and enjoy your photo and video collection. Here are some key features and functionalities of Google Photos on iOS:
- Automatic Backup: When you enable backup and sync, all new photos and videos taken with your iOS device are automatically backed up and saved to your Google Photos account. This ensures that your media is safe and accessible from any device with an internet connection.
- Search and Organization: Google Photos utilizes advanced image recognition technology to automatically categorize and tag your photos. This makes it easy to search for specific people, places, objects, or even events. You can also manually create albums and add photos to further organize your collection.
- Assistant: The Assistant feature in Google Photos provides smart suggestions and automatic creations, such as collages, animations, and stylized photos. It analyzes your photos and videos to offer personalized recommendations that enhance your memories.
- Sharing: Google Photos allows you to easily share your media with others. You can create shared albums and invite friends and family to contribute and view the content. Additionally, you can generate links to share specific photos or videos with anyone, even if they don’t have the Google Photos app.
- Editing Tools: Google Photos offers a range of editing tools to enhance and customize your photos. You can adjust brightness, contrast, and saturation, apply filters, crop and rotate images, or even make minor retouches. The edits you make are non-destructive, meaning you can revert to the original photo at any time.
- Storage Management: With Google Photos, you have unlimited free storage for high-quality photos and videos. If you prefer to store your photos in their original quality, they will count towards your Google account’s storage quota. However, Google provides various storage plans, allowing you to upgrade if needed.
Using Google Photos on iOS devices is a seamless experience. After downloading the app from the App Store and logging in with your Google account, you’ll have access to your entire photo and video library. You can easily navigate through your media, search for specific items, create albums, and perform various actions to enhance and organize your collection.
Google Photos integrates well with iOS devices, allowing you to share photos and videos with other apps and services. You can easily share your media through messaging apps, social media platforms, or email. Additionally, you can stream your Google Photos content to compatible casting devices, such as Apple TV, to enjoy a slideshow of your memories on the big screen.
With Google Photos on iOS devices, you can effortlessly organize, edit, and share your photos and videos with ease. It’s a powerful tool for preserving your memories and ensuring they are safely stored in the cloud for easy access from any device.
Uploading Photos and Videos to Google Photos
Uploading your precious photos and videos to Google Photos is a straightforward process, whether you’re using the web version or the mobile app on Android or iOS devices. Here’s a step-by-step guide on how to upload your media:
- Using the Web Version:
- Open Google Photos on the web by going to photos.google.com and sign in to your Google account.
- Click on the “Upload” button, which looks like a cloud with an arrow pointing up.
- Select the photos and videos you want to upload from your computer, or you can simply drag and drop them into the Google Photos window.
- Once the upload is complete, you will find your photos and videos in the “Photos” tab, and they will also be available on your mobile devices with the Google Photos app.
- Using the Mobile App (Android and iOS):
- Open the Google Photos app on your Android or iOS device.
- Tap on the “Library” icon at the bottom of the screen to view your media collection.
- Tap on the “Upload” button, which is represented by a cloud with an upward-pointing arrow.
- Select the photos and videos you want to upload from your device’s gallery or other apps.
- Once the upload is complete, your media will be available in the “Photos” tab, organized by date, and accessible on both the web version and other mobile devices logged in to your Google account.
When uploading photos and videos, it’s important to keep in mind that Google Photos offers unlimited storage for media uploaded in high quality. If you prefer to maintain the original quality of your files, they will count towards your Google account’s storage quota.
Once you’ve uploaded your photos and videos, you can easily organize them by creating albums, assigning tags, or relying on Google Photos’ advanced image recognition technology. This ensures that you can quickly search for specific items and access your memories with ease.
Now that your photos and videos are securely stored on Google Photos, let’s explore how to view, organize, and share your media within the platform.
Viewing and Organizing your Photos and Videos
Google Photos provides a user-friendly interface that makes it easy to view and organize your vast collection of photos and videos. Whether you’re using the web version or the mobile app, here’s how you can navigate and organize your media:
Viewing Photos and Videos:
- When you open Google Photos, you’ll typically start in the “Photos” tab. Here, you can scroll through your media in chronological order, with the most recent photos and videos appearing at the top. You can swipe up or down to navigate.
- To view a specific photo or video, simply tap on it. It will open up in full screen, allowing you to appreciate the details and relive the moment.
- If you want to zoom in on a photo or video, you can use the standard pinch-to-zoom gesture.
- In the mobile app, you can swipe left or right to navigate between photos and videos while in full-screen mode.
Organizing Photos and Videos:
- Albums: To organize your media, you can create albums based on specific events, people, or any other criteria you prefer. Simply tap on the “Albums” tab, and then click on the “+” button to create a new album. Name the album and start adding relevant photos and videos to it.
- Search: Google Photos utilizes advanced image recognition technology to automatically categorize and tag your photos. You can use the search bar to find specific photos or videos by typing keywords, such as people’s names, locations, objects, or events. This makes it incredibly convenient to locate specific media in your vast collection.
- Assistant: The Assistant in Google Photos provides smart suggestions and automatic creations to help you organize and enhance your media. For example, it might create collages, animations, or stylized photos based on your collection. You can access the Assistant tab to view these suggestions and creations.
- Sorting and Filtering: In the “Photos” tab, you can sort your media by date or by individual faces in your photos. This makes it easy to browse through your collection and find specific photos within a certain time frame or featuring a particular person.
By utilizing these features, you can easily manage and locate your photos and videos within Google Photos. Whether you’re looking for a recent snapshot, a specific event, or a cherished memory, Google Photos provides the tools to organize your media library and access it efficiently.
Now that you know how to view and organize your media, let’s explore how you can easily share your photos and videos directly from Google Photos.
Sharing Photos and Videos from Google Photos
Sharing your favorite photos and videos with loved ones is effortless with Google Photos. Whether you want to share individual items or create shared albums for collaborative experiences, here’s how you can easily share your media:
Sharing Individual Photos and Videos:
- In the Google Photos app or web version, navigate to the photo or video you want to share.
- Tap on the “Share” button, which looks like an upward-pointing arrow.
- Select the method you prefer to share the media, such as messaging apps, social media platforms, or email.
- Follow the prompts to choose the recipients and send the photo or video.
When you share a photo or video, Google Photos creates a link that can be accessed directly by the recipients. They can view the media without requiring a Google Photos account.
Creating Shared Albums:
- Go to the “Albums” tab in the Google Photos app or web version.
- Tap on the “+” button to create a new album.
- Name the album and add the desired photos and videos.
- Once the album is created, tap on the “Share” button.
- Invite specific individuals or generate a link to allow anyone to view or contribute to the shared album.
Shared albums are a great way to collaborate and share memories with friends, family, or colleagues. People you invite can add their own photos and videos to the album, creating a collective experience.
Collaborative Sharing:
- If someone shares a photo or video with you through Google Photos, you can add it to your library by tapping on the “Add to library” button.
- Shared photos and videos appear in the “Sharing” tab, allowing you to easily browse through the items shared with you.
- If you want to contribute to someone else’s shared album, open the shared album, tap on the “+” button, and select the photos and videos you want to add.
With Google Photos, sharing unforgettable moments with others is a hassle-free experience. Whether you’re sharing individual media, creating shared albums, or collaborating on memories, the platform provides the tools to effortlessly share and cherish moments with your loved ones.
Now that you know how to share your photos and videos, let’s explore the editing capabilities in Google Photos.
Editing Photos in Google Photos
Google Photos offers a range of powerful editing tools that allow you to enhance and personalize your photos. Whether you want to make minor adjustments or get creative with effects, here’s how you can edit your photos in Google Photos:
Basic Editing Tools:
- Open the Google Photos app or web version and navigate to the photo you want to edit.
- Tap on the “Edit” button, which looks like a pencil icon, to access the editing tools.
- Here are some basic editing tools you can find in Google Photos:
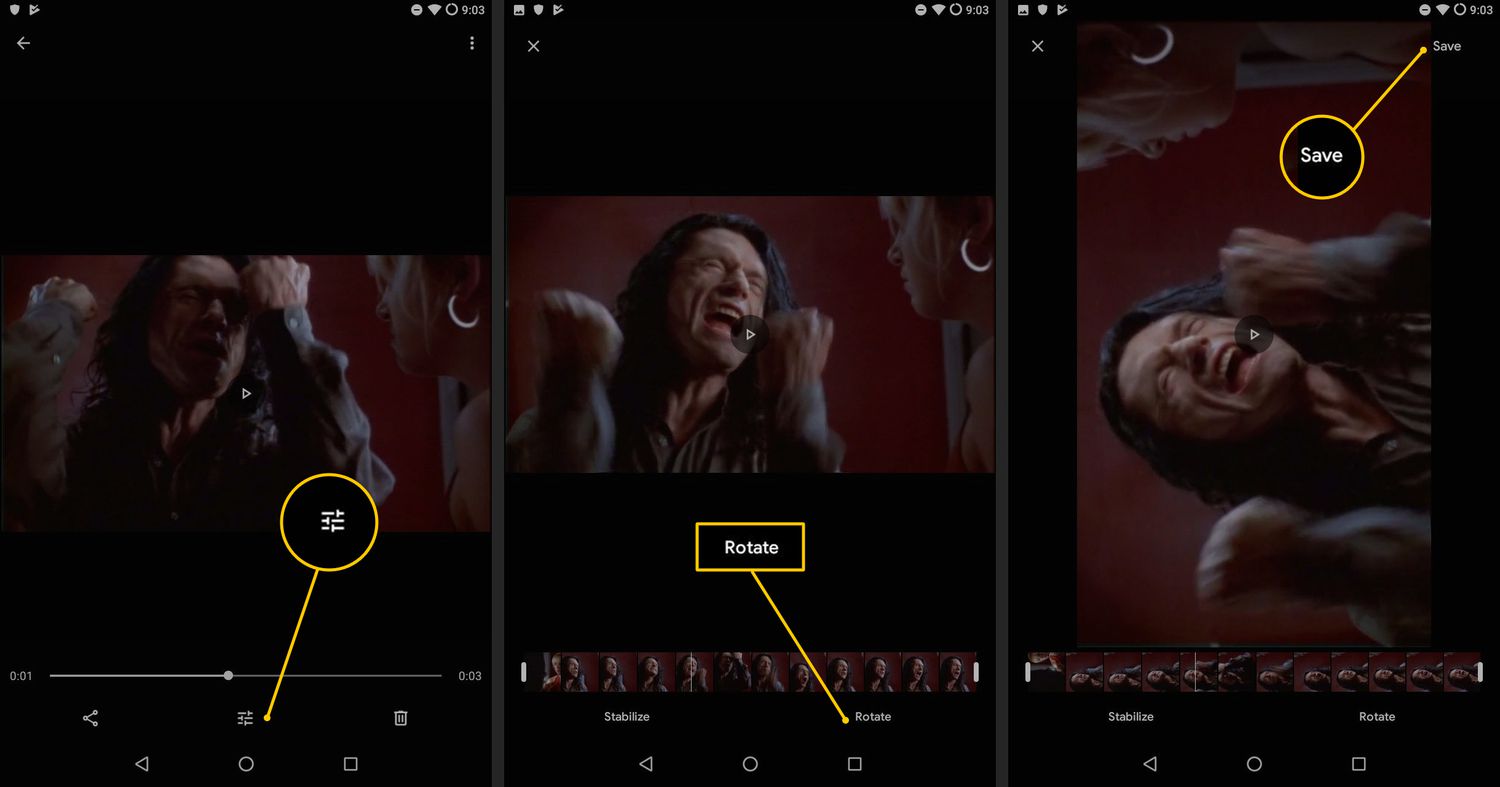
- Crop and Rotate: Adjust the composition of your photo by cropping or rotating it. You can manually adjust the cropping, or select predefined aspect ratios to maintain consistency.
- Filters: Apply various preset filters to enhance the mood and tone of your photos. From vibrant and dramatic to vintage and black-and-white, there’s a filter to suit every style.
- Lighting and Color: Fine-tune the lighting and color of your photo. Adjust brightness, contrast, and saturation to make your photo pop or create a more subdued look.
- Auto Enhance: Let Google Photos automatically enhance your photo with a single tap. This feature applies intelligent adjustments to improve the overall look and quality without compromising the originality of the image.
- After making edits, tap “Save” to apply the changes to your photo.
Advanced Editing Tools:
- For more advanced editing capabilities, you can tap on the “Adjust” button in the editing menu. Here, you’ll find additional tools to further refine your photo:
- Sharpness: Adjust the sharpness of your photo to enhance details and make your subject stand out.
- Vignette: Add a subtle dark or light vignette effect around the edges of your photo to make the center of the image more prominent.
- Color Pop: Make the subject of your photo stand out by converting the background to black and white while retaining the color for the main subject.
- Portrait Blur: Apply a blurred effect to simulate a shallow depth of field and create a professional-looking portrait.
- Experiment with different editing options to achieve the desired look for your photo.
One of the great advantages of editing photos in Google Photos is that all edits are non-destructive. This means that the original version of your photo is always preserved, and you can revert back to it at any time.
Once you’re satisfied with the edits, the updated version of your photo will be saved, and the changes will be reflected across all devices connected to your Google account.
With Google Photos’ robust editing tools, you can transform your photos and make them truly shine. From basic adjustments to advanced effects, Google Photos provides the flexibility to unleash your creativity and improve the visual impact of your images.
Now that you know how to edit your photos in Google Photos, let’s explore how you can back up and sync your entire media library.
Backing up and Syncing your Photos and Videos
One of the most valuable features of Google Photos is its ability to back up and sync your entire photo and video library across devices. This ensures that your precious memories are safe, accessible, and up to date. Here’s how you can back up and sync your media with Google Photos:
Automatic Backup:
- The first step is to enable backup and sync on your device.
- Open the Google Photos app on your Android or iOS device or access the web version.
- In the settings menu, tap on “Back up & sync,” then toggle the switch to enable it.
- When enabled, Google Photos will automatically back up all the new photos and videos you capture with your device’s camera. This ensures that your media is securely stored in the cloud.
- You can choose whether to upload your media in high quality (which provides unlimited free storage) or original quality (which may count towards your Google account’s storage quota).
Syncing Across Devices:
- Once you enable backup and sync, your photos and videos will be available on all devices that are logged in with your Google account.
- This means that you can access your media on multiple devices, such as your phone, tablet, computer, or even smart TVs.
- All changes you make to your media, such as edits or organization, will be synced across all devices in real-time. This ensures that your collection remains consistent and up to date.
Benefits of Backing up and Syncing:
- Peace of mind: By backing up your photos and videos with Google Photos, you don’t have to worry about losing them due to device damage, loss, or accidental deletion.
- Easy access: With syncing enabled, you can view and manage your media seamlessly on any device connected to your Google account, allowing you to relive your memories anytime, anywhere.
- Space-saving: Backing up your photos and videos to the cloud frees up valuable space on your device, ensuring that you never have to worry about running out of storage.
- Convenience: Once your media is backed up and synced, you can seamlessly switch between devices without any interruption. The consistent experience allows for uninterrupted enjoyment of your memories.
With Google Photos’ backup and sync feature, your entire media library is safe and readily accessible across devices. It’s a convenient solution for preserving your memories and ensuring that they are always available whenever you need them.
Now that we’ve covered the process of backing up and syncing your photos and videos, let’s explore another useful feature of Google Photos – freeing up space on your device.
Free Up Space on Your Device with Google Photos
Running out of storage on your device can be a frustrating experience. Luckily, Google Photos provides a practical solution to free up space while ensuring that your photos and videos are safely backed up. Here’s how you can use Google Photos to free up space on your device:
Automatic Device Storage Management:
- When you enable backup and sync in the Google Photos app, you have the option to enable “Free up device storage.”
- This feature allows Google Photos to automatically detect and remove photos and videos from your device’s storage that have already been successfully backed up to the cloud.
- Once the media is safely stored in Google Photos, you can confidently delete them from your device, knowing that they can be accessed anytime from the cloud.
Manual Space Saving:
- If you prefer to have more control over which photos and videos get removed from your device, you can manually free up space in the Google Photos app.
- Open the Google Photos app and tap on the “Library” icon at the bottom of the screen to view your media.
- In the “Photos” tab, tap on the “Manage Storage” option to access the space-saving tools.
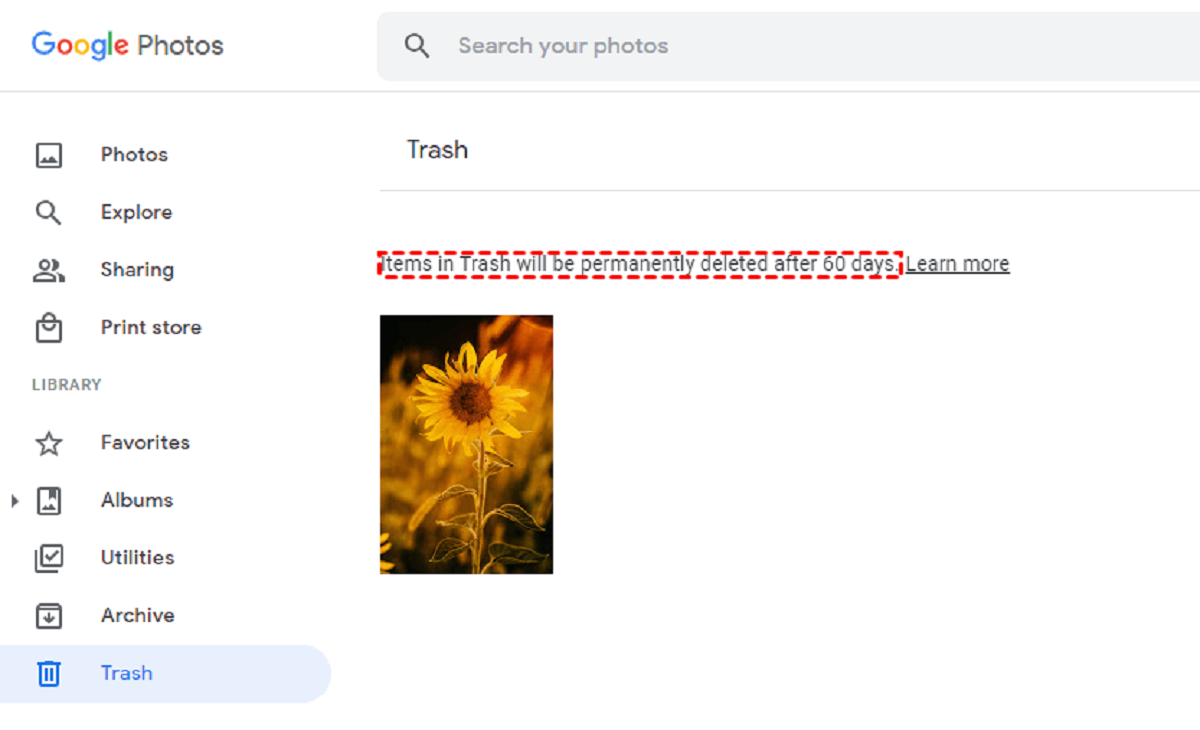
- You’ll be presented with suggestions for photos and videos that have already been backed up to the cloud and can be safely removed from your device to free up space.
- Select the items you want to remove, then tap “Remove” to delete them from your device’s storage.
Benefits of Freeing up Space:
- More storage capacity: By utilizing Google Photos to free up space on your device, you can reclaim valuable storage and use it for other files or apps.
- Streamlined performance: A device with ample storage space operates more efficiently, resulting in faster performance and smoother user experience.
- Simplified organization: By keeping only the necessary files and offloading the rest to Google Photos, you can focus on organizing and accessing your most important media.
- Peace of mind: Knowing that your photos and videos are securely stored in the cloud, you can confidently remove them from your device without the fear of losing them.
With Google Photos, you can effortlessly free up space on your device while keeping your photos and videos safe. Whether you choose automatic device storage management or manually remove items, Google Photos provides a seamless solution to optimize your device’s storage capacity.
Now that you’ve learned how to free up space on your device, let’s recap what we’ve covered in this article and highlight the key benefits of using Google Photos.
Conclusion
Google Photos is a powerful and versatile platform that revolutionizes the way we store, organize, and share our photos and videos. Whether you access Google Photos on the web or through the mobile app on Android or iOS devices, it offers a seamless experience with a plethora of features that elevate your digital media collection.
From uploading and organizing your photos and videos to editing them and sharing your memories, Google Photos provides a user-friendly interface and intuitive tools that cater to both novice users and photography enthusiasts. The ability to back up and sync your entire library ensures that your precious moments are safely stored in the cloud and accessible across devices, freeing up valuable storage space on your device.
With Google Photos, you can easily search for specific photos, create albums, generate collages and animations, apply filters, and make edits to enhance the visual appeal of your media. The seamless integration with other apps and platforms allows for effortless sharing with friends and family, either through individual files or by creating collaborative shared albums.
Google Photos’ unlimited free storage for high-quality media and additional storage options for original quality files provide flexibility to suit your specific needs. By enabling automatic backup and syncing, you can be confident that your photo and video collection will remain up to date and accessible from any device, anywhere, anytime.
Whether you’re a casual photographer, a seasoned professional, or someone who simply loves capturing special moments, Google Photos offers a comprehensive solution for organizing, preserving, and sharing your memories. It represents a convenient and reliable platform to manage your media collection while providing peace of mind knowing that your memories are backed up and safe.
So, dive into the world of Google Photos, unleash your creativity, and embark on a journey to relive and share your most cherished moments with the world.