Introduction
When it comes to the world of 3D printing, there are several crucial factors to consider, such as the type of material, print speed, and printer settings. However, one often overlooked aspect that plays a significant role in the print’s quality and structural integrity is the wall thickness.
The wall thickness refers to the distance between the exterior and interior surfaces of an object in a 3D print. It determines the strength, durability, and overall functionality of the printed model. Achieving the optimal wall thickness is vital for ensuring successful and precise prints.
This article aims to delve deeper into the concept of wall thickness in 3D printing, why it matters, and factors to consider when determining the appropriate thickness for your prints. Whether you are a beginner or an experienced enthusiast, understanding wall thickness will help you create high-quality prints that meet your specific requirements.
Before we dive into the details, it’s important to note that the ideal wall thickness can vary based on the printer’s capabilities, material type, and the intended purpose of the printed object. A thorough understanding of these factors will guide you in making informed decisions regarding the wall thickness for your 3D prints.
Understanding Wall Thickness in 3D Printing
Wall thickness plays a critical role in the structural integrity and overall quality of 3D prints. It refers to the distance between the external and internal surfaces of an object. When designing a 3D model, the wall thickness determines the strength, durability, and functionality of the final print.
The ideal wall thickness can vary depending on several factors, including the material being used, the complexity of the design, and the intended purpose of the printed object. For instance, a thin wall might be suitable for decorative prints, while a thicker wall is necessary for functional parts that require strength and durability.
It is crucial to strike a balance with the wall thickness. If the walls are too thin, the print may lack structural integrity and be prone to breakage. On the other hand, if the walls are too thick, it can result in longer print times, unnecessary use of material, and even difficulty in achieving intricate details.
When deciding on the appropriate wall thickness for your 3D print, you should consider the capabilities of your printer. Some printers may struggle with printing very thin walls accurately, while others can handle them with ease. Understanding your printer’s capabilities will help you determine the minimum viable wall thickness for your prints.
Additionally, the material used for printing also influences the optimal wall thickness. Different materials have varying physical properties, such as flexibility or brittleness. These properties directly impact the required thickness to maintain the desired strength and functionality of the printed object.
To get a better understanding of wall thickness, it helps to think of it in terms of layers. In 3D printing, objects are built layer by layer. Each layer contributes to the overall wall thickness. Therefore, the number of layers required to achieve a specific wall thickness will depend on the layer height settings in your 3D printer software.
Overall, understanding the concept of wall thickness in 3D printing is crucial for producing high-quality, functional prints. By considering factors such as printer capabilities, material properties, and the purpose of the printed object, you can determine the optimal wall thickness for your specific needs.
Why Wall Thickness Matters
The wall thickness of a 3D print is not just a superficial aspect; it has a significant impact on the final outcome of the print. Here are several reasons why wall thickness matters in 3D printing:
- Structural integrity: Adequate wall thickness ensures that the printed object is sturdy and can withstand the forces it will encounter. Without sufficient thickness, the print may have weak points, making it susceptible to breaking or deformation.
- Functionality: Depending on the purpose of the printed object, the wall thickness directly influences its functionality. Functional parts, such as mechanical components or enclosures, require thicker walls to withstand stress and perform their intended function.
- Optimal print quality: Wall thickness affects the overall print quality, including smoothness, detail resolution, and surface finish. With an optimal wall thickness, you can achieve sharper details and a more polished appearance, enhancing the visual appeal of the print.
- Printability: The wall thickness should be within the capabilities of your 3D printer. If the walls are too thin, your printer may struggle to accurately reproduce them. On the other hand, extremely thick walls can lead to difficulties with printability and even cause issues such as warping or delamination.
- Material consumption: Wall thickness directly affects the amount of material required for a print. Thicker walls increase material usage, which can impact the overall cost and time required to complete a print. Optimizing the wall thickness can help minimize material consumption without compromising the print’s quality and functionality.
By understanding why wall thickness matters in 3D printing, you can make informed decisions and design prints that meet your specific requirements. Balancing structural integrity, functionality, print quality, printability, and material consumption will result in successful, high-quality prints that fulfill their intended purpose.
Factors to Consider for Determining Wall Thickness
When determining the appropriate wall thickness for your 3D prints, it’s essential to consider several factors that can influence the final outcome. These factors will help you strike a balance between the structural integrity, functionality, and printability of the object. Here are some key factors to consider:
- Printed object’s purpose: The intended purpose of the printed object is a crucial factor in determining the wall thickness. Functional parts that require strength and durability, such as mechanical components or enclosures, often benefit from thicker walls. On the other hand, decorative prints may allow for thinner walls to achieve intricate details.
- Material properties: Different materials have varying physical properties that impact the required wall thickness. Some materials may be more brittle and require thicker walls to prevent cracking or breaking. Others may have more flexibility, allowing for thinner walls while maintaining adequate durability.
- Print size and scale: The size and scale of the print can influence the optimal wall thickness. Larger prints typically require thicker walls to ensure stability and structural integrity. Smaller prints, on the other hand, may allow for thinner walls without compromising functionality.
- Print resolution: The desired level of detail and resolution in the print can impact the wall thickness. As the wall thickness increases, it becomes more challenging to achieve fine details. Balancing the desired level of detail with the necessary wall thickness is vital for achieving the desired print quality.
- Printer capabilities: Understanding your 3D printer’s capabilities is crucial when determining the appropriate wall thickness. Some printers excel at printing thin walls accurately, while others may struggle. Consider the minimum viable wall thickness that your printer can consistently and reliably reproduce.
- Print time and material consumption: Thicker walls typically require more print time and material consumption. Finding a balance between wall thickness and print time/material efficiency is essential, especially when considering large-scale or batch printing.
By carefully considering these factors, you can make informed decisions about the wall thickness for your 3D prints. There is no one-size-fits-all approach, as the optimal thickness will vary depending on the specific project and desired outcome. Striking the right balance between these factors will ensure successful prints that meet your functional and aesthetic requirements.
Recommended Wall Thickness for Different Types of Prints
The recommended wall thickness for 3D prints can vary depending on the type of object you are printing. While there are no hard and fast rules, here are some general guidelines to help you determine the suitable wall thickness for different types of prints:
- Decorative prints: If you are printing purely for decorative purposes, you can often use thinner walls to achieve intricate and delicate designs. A wall thickness of around 1-2mm can be sufficient for most decorative prints, allowing for detailed features while maintaining the overall structure.
- Functional parts: When printing functional parts that require strength and durability, thicker walls are necessary. Depending on the size and complexity of the part, a wall thickness of 2-4mm or more may be recommended. Thicker walls provide the necessary structural integrity, ensuring the part can withstand the intended use.
- Hollow objects: For objects with hollow interiors, it is important to consider the wall thickness of both the outer and inner surfaces. Thicker walls on the outer surface ensure a strong overall structure, while thinner walls on the inner surface can save material and reduce print time.
- Large-scale prints: Larger prints often require thicker walls to maintain stability and prevent warping or distortion. It is advisable to increase the wall thickness proportionally to the size of the print to ensure sufficient strength and durability.
- Flexible prints: If you are printing with flexible or rubber-like materials, such as TPU or TPE, thinner walls are typically recommended. These materials have natural flexibility, so thin walls can still provide adequate strength while allowing for the desired flexibility and elasticity.
- Specialty prints: Certain specialized prints, such as models with overhangs or complex geometries, may require adjustments to the wall thickness. Thicker walls in critical areas can provide added support, ensuring successful print completion and preventing structural issues.
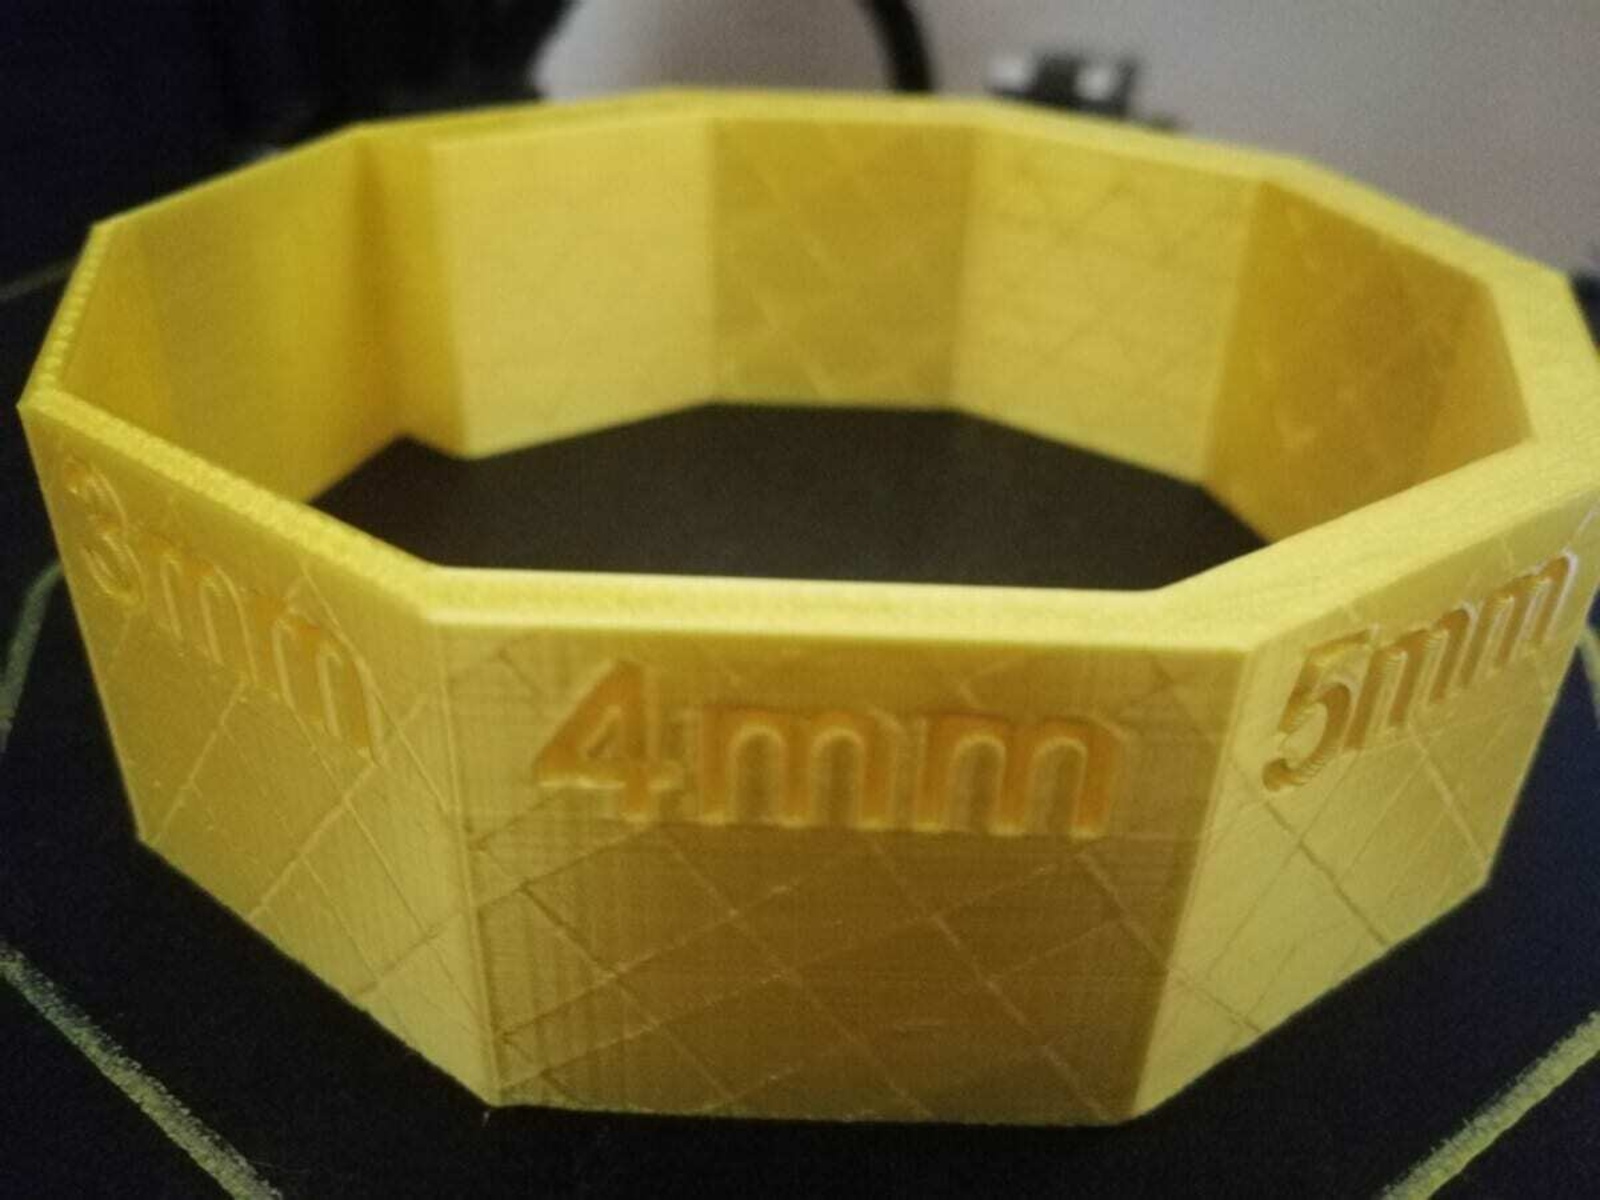
It’s important to note that these recommendations should be used as a starting point and can vary based on factors such as material properties, printer capabilities, and the specific requirements of your project. Before printing, consider testing different wall thicknesses to determine the optimal balance between strength, functionality, and print quality.
Tips for Designing with Appropriate Wall Thickness
Designing 3D prints with the appropriate wall thickness is crucial for achieving successful and high-quality results. Here are some tips to help you design with the right wall thickness:
- Research material specifications: Different materials have different requirements for wall thickness. Research the specifications of the material you plan to use and consider its flexibility, brittleness, and overall strength. This information will help you determine the minimum viable wall thickness for your design.
- Consider print orientation: The orientation in which you print your design can affect wall thickness. Printing vertically can result in thicker walls, while printing horizontally may require thinner walls. Experiment with different orientations to find the optimal balance.
- Design with supports in mind: If your design requires support structures, consider their impact on wall thickness. Thin walls adjacent to supports may be more prone to deformations or print failures. Adjust your design to provide adequate support or strengthen those areas.
- Adjust wall thickness strategically: Determine the critical areas of your design that require increased strength and durability. Focus on reinforcing those sections by adjusting the wall thickness accordingly. This will help maintain the structural integrity of the overall print while saving material in non-critical areas.
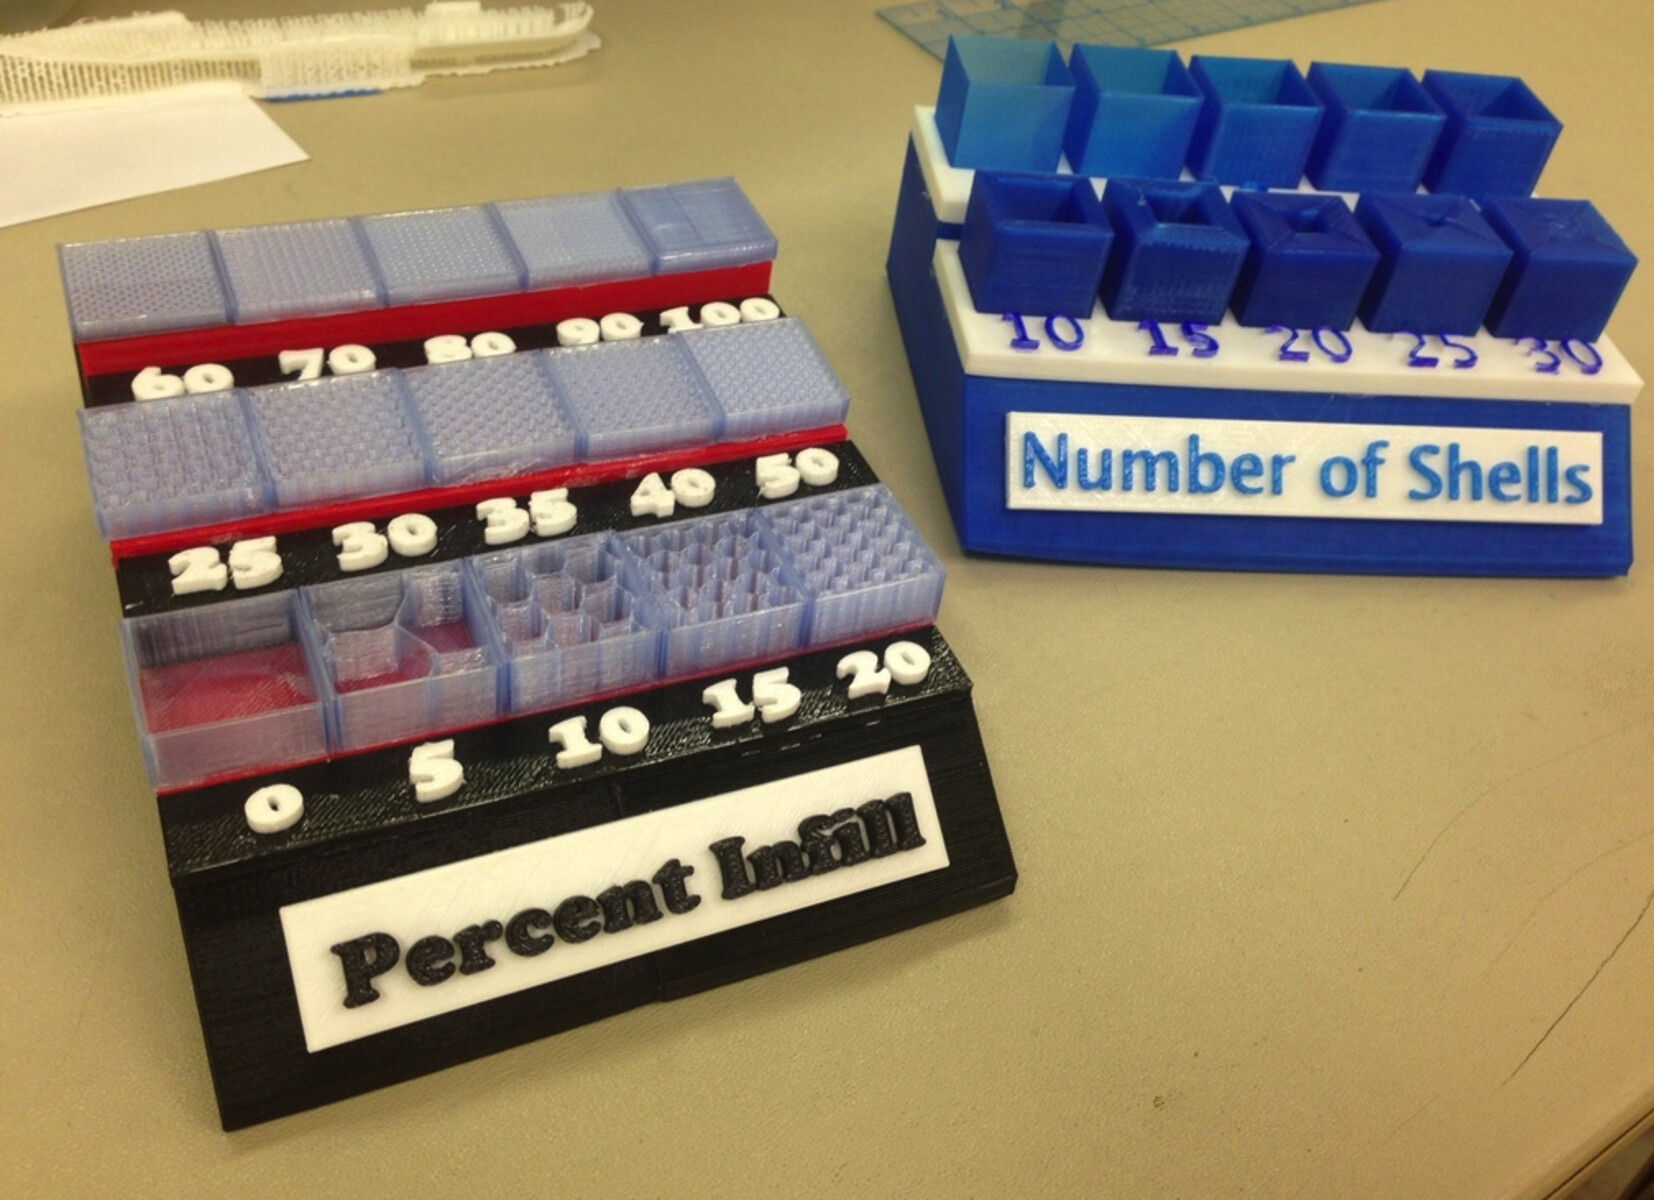
- Perform test prints: Before committing to a final design, consider running test prints with different wall thicknesses. This will allow you to evaluate the structural integrity, functionality, and print quality of the design. Make adjustments as needed based on the results of your test prints.
- Take printer capabilities into account: Understand the capabilities of your 3D printer, such as its nozzle size and layer height capabilities. These factors can impact the accuracy and reliability of printing thin walls. Design within the capabilities of your printer to ensure successful and consistent prints.
- Seek feedback and iterate: Collaboration and feedback from other experienced designers or the 3D printing community can provide valuable insights. Engage in discussions and share your designs to gather feedback and iterate on your designs for improved wall thickness optimization.
By following these tips, you can design with appropriate wall thickness, achieving optimal results in terms of strength, functionality, and print quality. Remember to consider the specific requirements of your project and adapt these tips accordingly.
Common Challenges with Wall Thickness in 3D Printing
While designing with the appropriate wall thickness is essential, it is not without its challenges. Understanding these common challenges will help you overcome them and create successful 3D prints:
- Thin walls and print accuracy: Printing very thin walls can be challenging for some printers, especially those with larger nozzle sizes or limited resolution capabilities. Thin walls may not print accurately, leading to imperfections, gaps, or even failed prints.
- Warpage and curling: Thick walls in combination with poor bed adhesion or incorrect print settings can lead to warpage and curling. When the walls cool unevenly, they can contract, causing the print to warp or curl. This can affect the print’s overall structural integrity.
- Limited accessibility: Designing objects with intricate details or hard-to-reach areas can be challenging when considering wall thickness. Thin walls in complex designs may be difficult to print without support structures, which can affect the final aesthetics and functionality of the object.
- Print time and material consumption: Thicker walls can significantly increase print time and material consumption. This can be a concern, especially when working on larger models or prototypes. Balancing the desired wall thickness with print time and material efficiency is crucial for cost-effective printing.
- Structural integrity: Achieving the right wall thickness is key to ensuring proper structural integrity. Insufficient wall thickness can result in weak spots, making the print prone to breaking or deformation. Conversely, excessive wall thickness can add unnecessary weight and material usage without providing significant benefits.
- Design limitations: Designing for specific wall thickness requirements can impose limitations on the overall design. It may limit the complexity or intricacy of certain features, especially in designs that require thin or delicate walls. Creativity and careful consideration are necessary to overcome these limitations.
Overcoming these challenges requires a combination of experience, iterative design, and a deep understanding of your printer’s capabilities. By fine-tuning your designs, adjusting print settings, and seeking advice from the 3D printing community, you can overcome common challenges associated with wall thickness in 3D printing.
Troubleshooting Wall Thickness Issues
When encountering problems with wall thickness in 3D printing, it’s important to identify and address the issues promptly. Here are some troubleshooting steps to help you resolve common wall thickness-related problems:
- Printing thin walls: If you are experiencing difficulties printing thin walls accurately, consider adjusting your printer settings. Reduce the print speed, ensure proper cooling, and experiment with different layer heights to achieve better precision.
- Warpage and curling: Warpage and curling can result from poor bed adhesion or inadequate cooling. Ensure your printer’s bed is properly leveled and use adhesion aids like a brim or raft if necessary. Additionally, improve cooling by adding additional fans or adjusting cooling settings in your slicing software.
- Need for support structures: When designing objects with thin or intricate features, it may be necessary to add support structures. Use support material when printing overhangs or areas where thin walls are not self-supporting. Be mindful of the placement and removal of support structures to minimize their impact on the final print’s aesthetics.
- Structural weakness: If your prints suffer from structural weakness, consider increasing the wall thickness in critical areas. Reinforcing the weak points can enhance the overall strength and durability of the print. Alternatively, evaluate the material being used and consider switching to a stronger or more suitable option.
- Design limitations: If your design is limited by wall thickness requirements, consider redesigning certain aspects to incorporate additional support or strengthening features. Explore alternative approaches or seek inspiration from similar designs that have successfully overcome similar limitations.
- Optimizing print time and material consumption: Balancing wall thickness with print time and material consumption is crucial for cost-effective printing. If print time and material usage become a concern, consider adjusting the wall thickness slightly or optimizing infill density to find the right balance.
Remember, troubleshooting wall thickness issues often involves a combination of adjusting design parameters, printer settings, and material choices. Take an iterative approach, test different solutions, and seek advice from experienced individuals or online communities to help diagnose and solve specific issues you may encounter.
Conclusion
Understanding and designing with appropriate wall thickness is crucial for achieving successful 3D prints that are structurally sound, functional, and visually appealing. By considering various factors such as the intended purpose of the print, material properties, printer capabilities, and the specific requirements of your project, you can optimize the wall thickness to meet your desired outcomes.
Throughout this article, we have explored the importance of wall thickness in 3D printing and its impact on print quality, durability, functionality, and material consumption. We have discussed common challenges encountered with wall thickness, along with troubleshooting steps to overcome them.
Designing with appropriate wall thickness requires a careful balance of factors such as strength, functionality, printability, and material efficiency. It often involves a process of iteration, testing, and adjustment to achieve optimal results.
By following best practices, considering the specific requirements of your print, and exploring the knowledge and expertise of the 3D printing community, you can overcome challenges, troubleshoot issues, and create high-quality prints with consistent and appropriate wall thickness.
Remember, there are no one-size-fits-all solutions when it comes to wall thickness in 3D printing. It ultimately depends on the unique characteristics of your design, the materials and printer you are using, and the desired outcome of your print. Continuously refine your understanding and techniques, and keep experimenting to improve your skills in designing with appropriate wall thickness.


