Introduction
With the advancement of technology and the surge in digital data, the need for efficient data storage and management has become paramount. This has led to the widespread use of server racks, which are essential for housing and organizing servers, as well as networking equipment, in data centers and server rooms.
A server rack provides a centralized location for securely mounting and storing server hardware, allowing for easy access, efficient cooling, and effective cable management. These racks are designed to accommodate various standard server sizes and offer a structured framework for organizing them.
In this article, we will explore the A side and Z side of a server rack – two distinct sides that play essential roles in the overall functionality of the rack. We will delve into their anatomy, key differences, common uses, and best practices for organizing them.
Whether you are a data center professional, an IT enthusiast, or simply interested in understanding server rack infrastructure, this article will provide you with valuable insights into the A and Z sides of server racks.
What is a server rack?
A server rack, also known as a rack cabinet or equipment rack, is a standardized framework that is specifically designed to house servers, networking equipment, and other electronic devices in a data center or server room. It provides a central location for the storage, organization, and management of these critical components.
A server rack typically consists of a vertical frame with mounting slots or rails at regular intervals, allowing for the installation and secure attachment of servers and other equipment. These racks come in standard sizes, such as 19 inches wide and multiple units (U) in height, enabling compatibility with various server sizes and form factors.
One of the primary purposes of a server rack is to provide physical protection and security for the equipment housed within it. The rack’s sturdy construction and lockable doors ensure that unauthorized individuals cannot access the devices, safeguarding sensitive data and preventing unauthorized modifications.
Moreover, server racks facilitate efficient cooling of the equipment, as they are designed with ventilation and airflow management in mind. They often have perforated front and rear doors, as well as built-in cable management features, to ensure optimal airflow and prevent equipment overheating. Proper cooling is crucial for maintaining the stable operation and longevity of servers.
Another key advantage of server racks is their ability to simplify cable management. They typically include cable management features such as cable routing guides, cable trays, and cable management arms, which help in organizing and securing the network and power cables associated with the rack-mounted equipment. This not only improves the aesthetics of the server room but also makes troubleshooting and maintenance tasks more convenient and less time-consuming.
Overall, server racks provide a structured and organized solution for housing servers and networking equipment. They offer physical protection, efficient cooling, and streamlined cable management, all of which contribute to the seamless operation and longevity of the equipment they house.
The anatomy of a server rack
To understand the A side and Z side of a server rack, it is essential to grasp the basic anatomy of a server rack. While the specific design may vary slightly depending on the manufacturer, server racks generally consist of several key components.
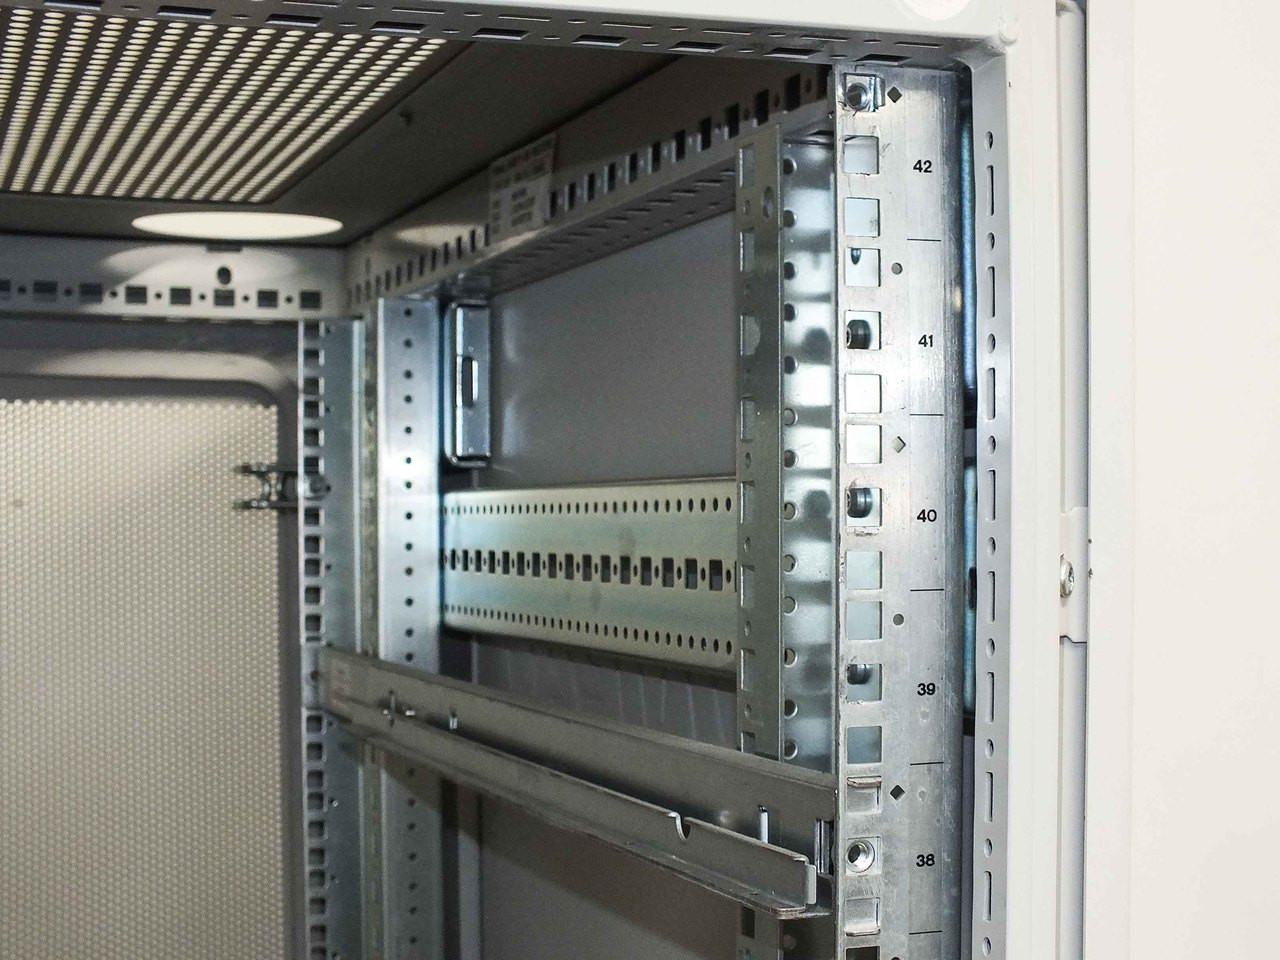
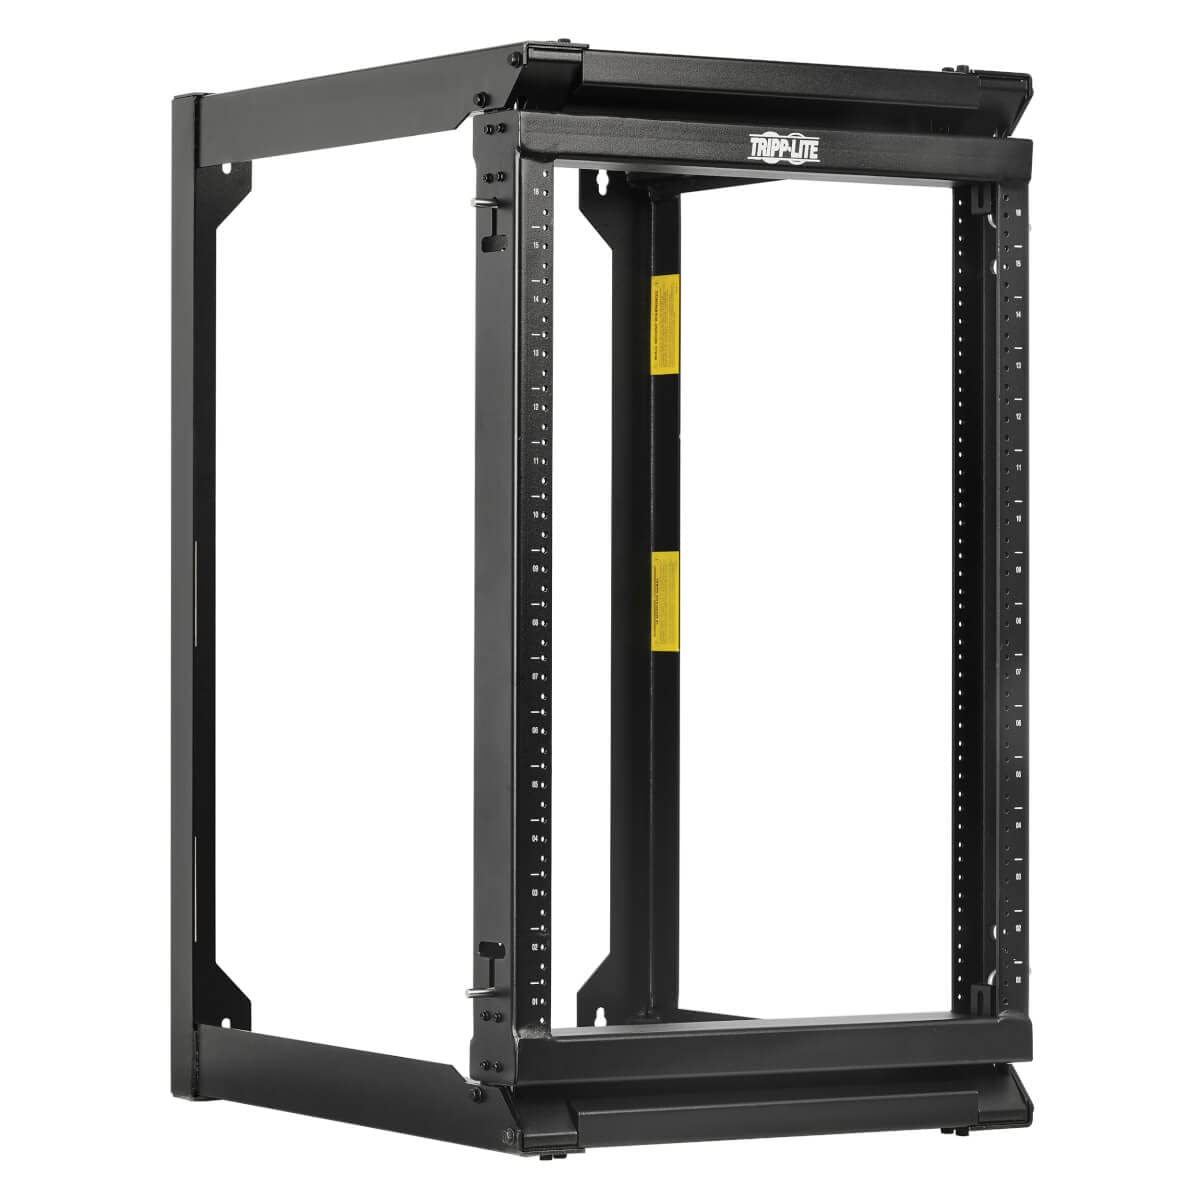
1. Frame: The frame forms the main structure of the server rack and is typically made of steel or aluminum. It provides rigidity and stability to support the weight of the mounted equipment. The frame also includes mounting holes or slots to accommodate the installation of server rails or shelves.
2. Mounting Rails: These are horizontal bars or brackets located at the front and rear of the server rack. They have standardized spacing, typically 19 inches apart, to align with the width of the rack-mounted equipment. The mounting rails allow for easy attachment and adjustment of devices within the rack.
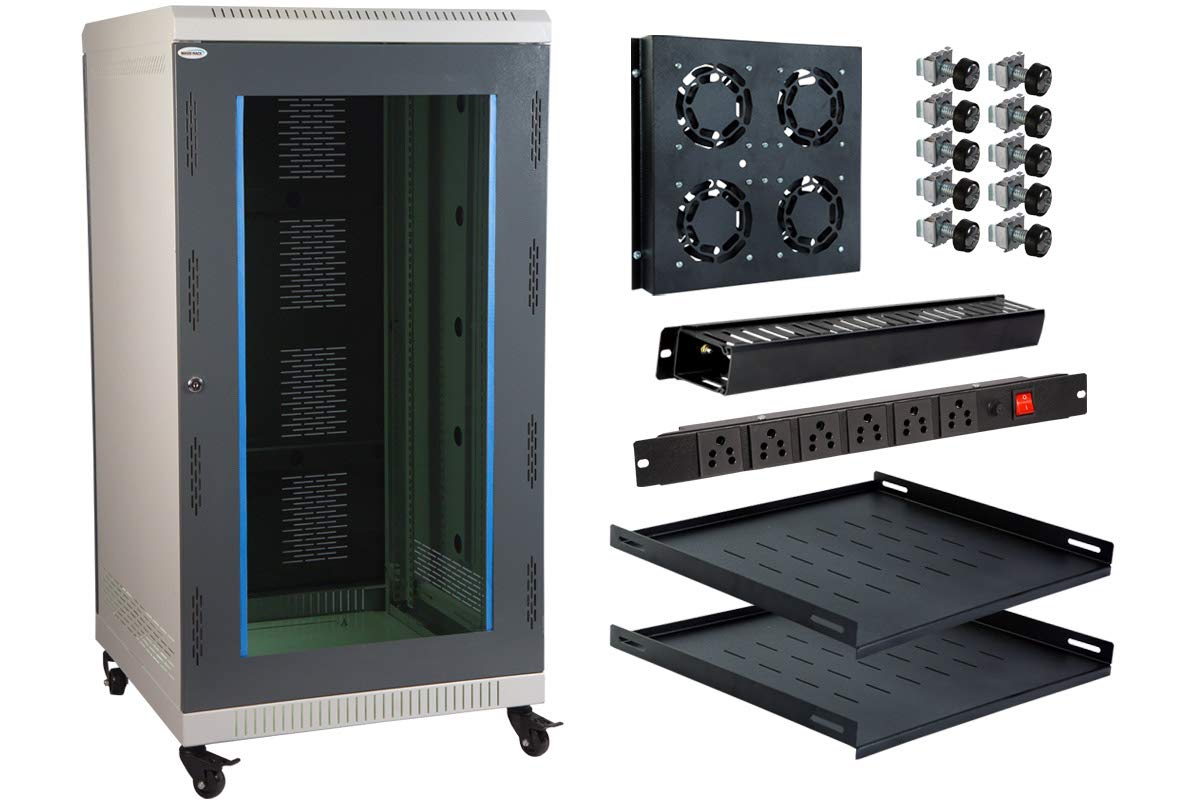
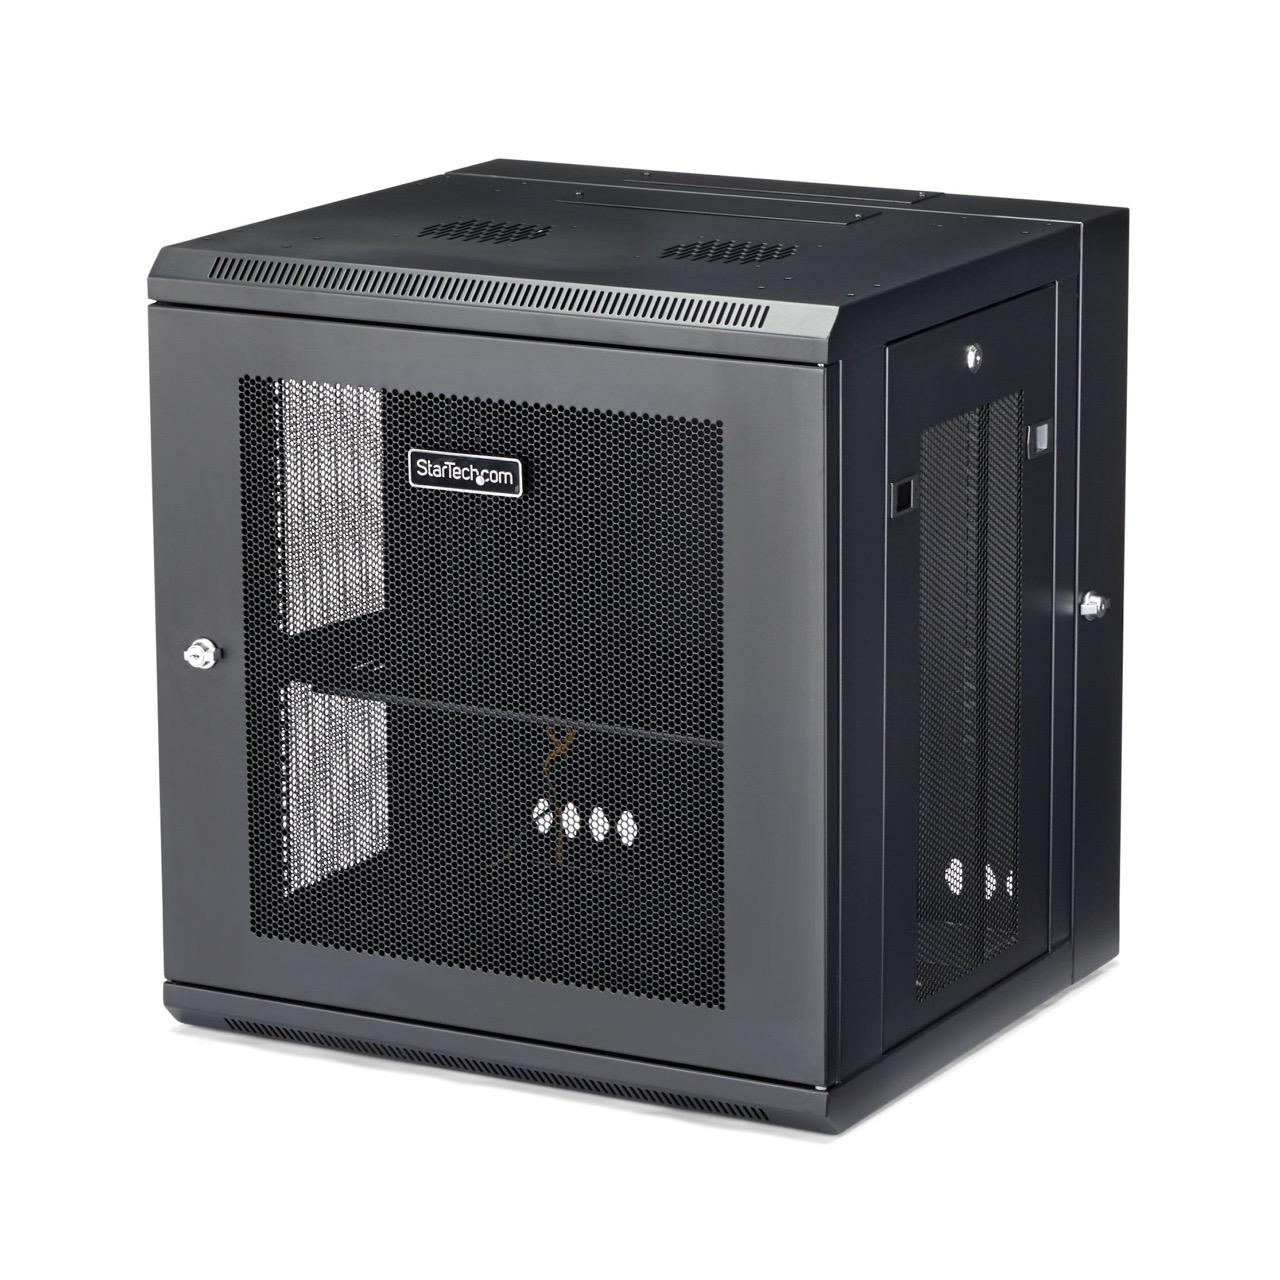
3. Side Panels: Server racks often feature removable side panels that provide access to the interior of the rack. These panels can be easily detached for maintenance or installation purposes. They are usually made of metal and enhance the overall security of the rack by protecting the equipment from unauthorized access.
4. Front and Rear Doors: The front and rear doors of a server rack are designed with perforations or mesh patterns to allow for proper airflow. The doors can be solid or transparent, depending on the level of visibility required. They are typically lockable to provide security and prevent unauthorized access to the equipment.
5. Cooling Fans: In order to maintain optimal temperature conditions, server racks are often equipped with cooling fans. These fans help circulate the air within the rack, dissipating heat generated by the servers and other equipment.
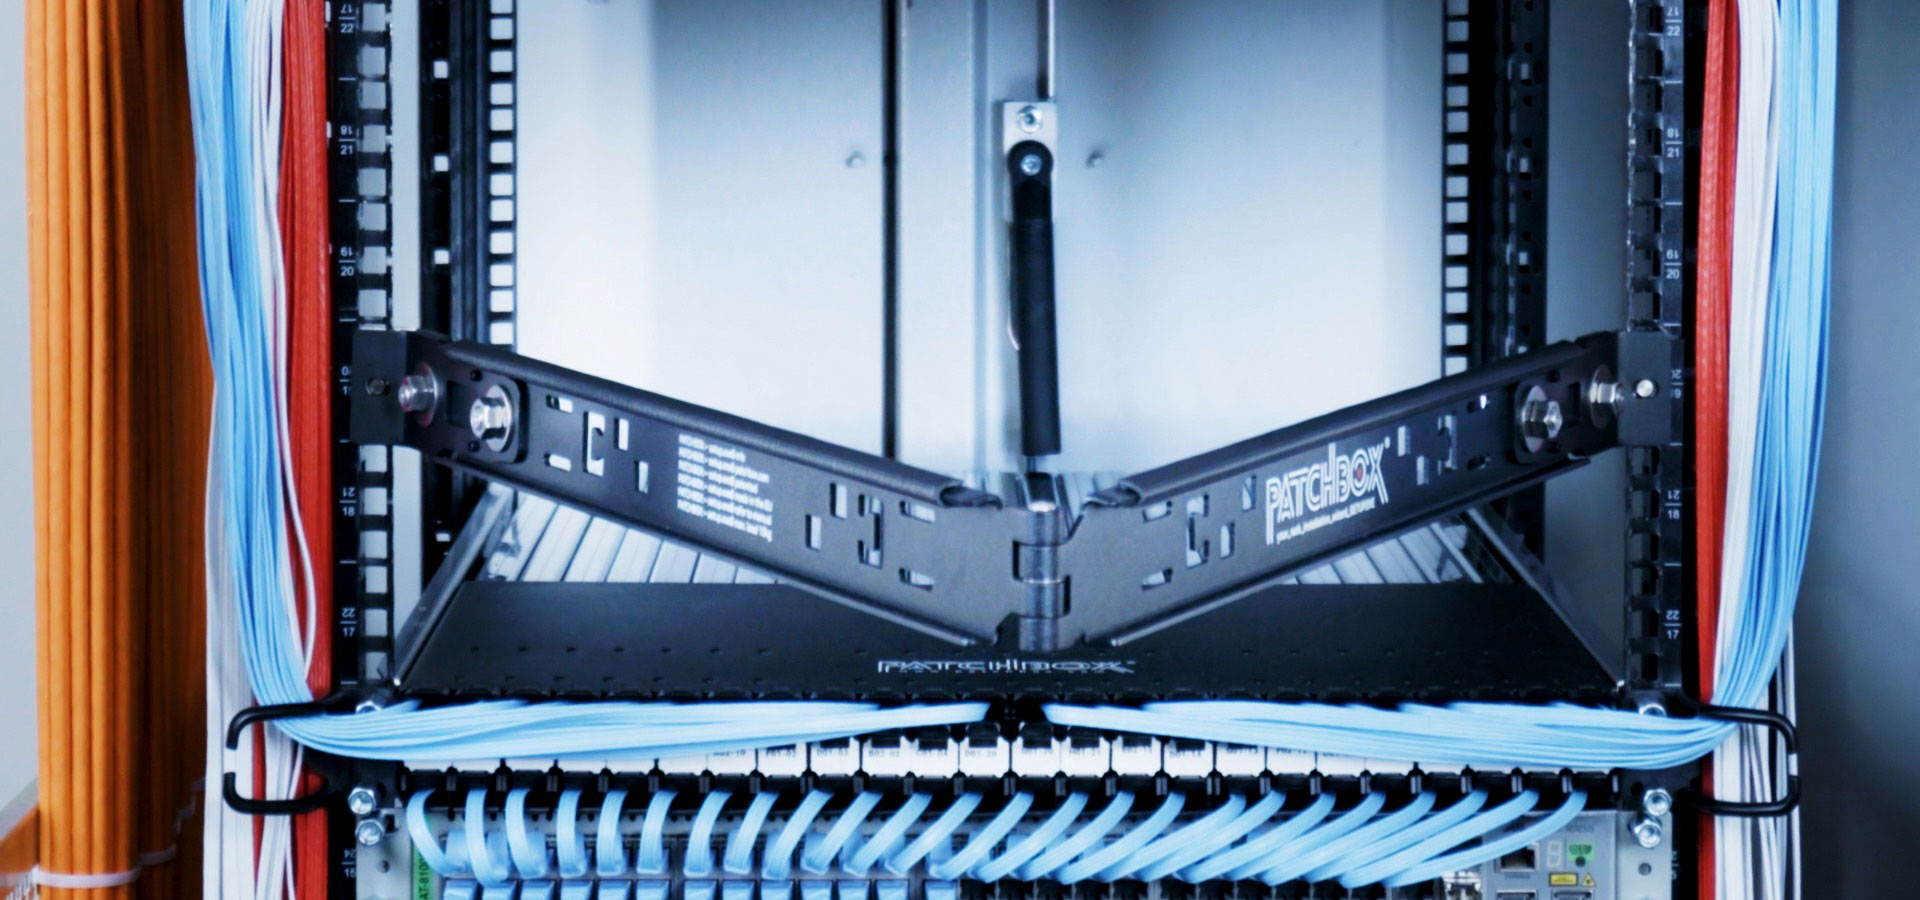
6. Cable Management Features: Server racks incorporate various cable management features to organize and conceal network and power cables. These can include cable management arms, cable routing guides, cable trays, and Velcro straps. Proper cable management not only improves the overall appearance of the rack but also facilitates easier troubleshooting and maintenance.
Understanding the anatomy of a server rack provides a foundation for comprehending the functionalities and purposes of the two distinct sides – the A side and the Z side. Let’s explore these sides in more detail.
The A side of a server rack
The A side of a server rack refers to the front side, also known as the “equipment side” or “customer side.” It is the side of the rack that is easily accessible and visible to users and technicians.
On the A side, you will find the front doors of the server rack, which are typically solid or transparent with perforations to allow for airflow. These doors can be locked to ensure the security of the equipment. Opening the front doors provides access to the rack-mounted servers and other devices.
The A side is where the majority of the equipment is installed and maintained. It typically houses server units, networking switches, power distribution units (PDUs), and other related equipment. The equipment is mounted on the front rails of the server rack, which provide stability and support.
Cable management is an important aspect of the A side. Proper cable management ensures that the network and power cables are organized and neatly routed, minimizing the risk of cable damage and improving airflow. Cable management features, such as cable routing guides and cable trays, aid in keeping the A side well-organized and easily navigable.
Additionally, the A side often includes LED indicator lights or display panels on the front of the server rack. These lights or panels provide essential information about the status and functioning of the equipment, such as power status, network connectivity, and fault notifications. This allows technicians to quickly identify and address any issues.
In summary, the A side of a server rack is the front-facing side that is accessible to users and technicians. It houses the primary equipment, offers easy access for maintenance and troubleshooting, and incorporates cable management features and indicator lights.
The Z side of a server rack
The Z side of a server rack, also known as the “rear side” or “back side,” is the opposite side of the A side. It is the less accessible and less visible side of the rack, facing away from users and technicians.
The Z side of the server rack usually consists of a rear door that provides access to the back of the equipment. This door may be solid or also incorporate perforations or mesh patterns to promote airflow. The rear door is often lockable to maintain the security of the rack.
The Z side of the server rack is primarily dedicated to cable management and ventilation. It accommodates the rear portion of the server units and other equipment, allowing for the connection of power cords, network cables, and other necessary connections.
On the Z side, you will find vertical cable management options, such as cable management fingers or rings, that help organize and route cables neatly. These cable management options prevent tangling, ensure proper cable tension, and facilitate airflow for efficient cooling.
In terms of cooling, the Z side of the server rack plays a crucial role. It usually features additional cooling components, such as exhaust fans, that expel hot air generated by the equipment. These fans create airflow from front to back, ensuring that the servers remain at optimal temperatures.
The Z side may also include additional components, such as power distribution units (PDUs) or fiber optic patch panels. These devices are often installed on the rear rails of the server rack, providing a convenient location for cable connections and distribution.
While the Z side is less accessible, it is still imperative for technicians to maintain and manage the server rack effectively. Proper cable management and ventilation on the Z side contribute to the overall functionality and reliability of the rack-mounted equipment.
In summary, the Z side of a server rack is the rear-facing side that is primarily dedicated to cable management and ventilation. It features vertical cable management options, additional cooling components, and may include power distribution units or fiber optic patch panels.
Key differences between the A and Z sides
While both the A and Z sides of a server rack play important roles in the overall functionality and organization of the equipment, there are some key differences between the two sides:
1. Accessibility: The A side is the front-facing side of the server rack and is readily accessible to users and technicians. It allows easy access to the front of the equipment for installation, maintenance, and troubleshooting. On the other hand, the Z side is the rear-facing side, which is less accessible and primarily dedicated to cable management and ventilation.
2. Equipment Installation: The A side is where most of the equipment, such as server units and networking switches, is mounted and installed. It features front rails designed to securely hold the equipment. The Z side, on the other hand, typically houses cable management options, exhaust fans, and additional components like power distribution units (PDUs) or fiber optic patch panels.
3. Cable Management: While cable management is important on both sides, the A side primarily focuses on organizing and routing cables coming from the front of the equipment. It incorporates features like cable routing guides, trays, and arms to maintain proper cable organization and airflow. The Z side, however, is dedicated to vertical cable management, ensuring that the cables are neatly organized and do not obstruct airflow.
4. Cooling: The A side of the server rack primarily relies on front-to-back airflow to cool the equipment. The perforated front doors allow cool air to enter through the front, while the equipment’s fans expel hot air to the rear. In contrast, the Z side features additional cooling components such as exhaust fans to expel hot air generated by the equipment, enhancing overall cooling efficiency.
5. Visibility: The A side is designed to provide visibility of the equipment and its status. It often includes LED indicator lights or display panels on the front of the rack to provide information on power status, network connectivity, and errors. The Z side, being less accessible, does not prioritize visibility in the same way.
Understanding the key differences between the A and Z sides of a server rack allows technicians to effectively utilize and manage both sides for optimal equipment performance and organization.
Common uses for the A side
The A side of a server rack serves several common uses that are crucial for the efficient operation and management of the equipment. Let’s explore some of the most common uses for the A side:
1. Equipment Installation: The A side is where the majority of the equipment is installed. This includes server units, networking switches, patch panels, and other related devices. The front-facing rails on the A side provide stability and support for mounting the equipment securely.
2. Maintenance and Troubleshooting: The A side allows technicians easy access to the front of the equipment, facilitating maintenance and troubleshooting tasks. It enables them to perform hardware upgrades, replace components, and troubleshoot any issues that may arise, minimizing downtime and ensuring smooth operations.
3. Cable Management: Proper cable management is essential for maintaining a clean and organized A side. Cable routing guides, trays, and arms are commonly used to keep the network and power cables neatly organized and prevent tangling. Well-managed cables improve airflow, minimize cable stress, and make future equipment changes or cable replacements easier.
4. Monitoring and Indicator Lights: The A side often features LED indicator lights or display panels on the front of the rack-mounted equipment. These lights provide real-time information on power status, network connectivity, and potential faults. They allow technicians to quickly identify issues and take necessary actions to resolve them promptly.
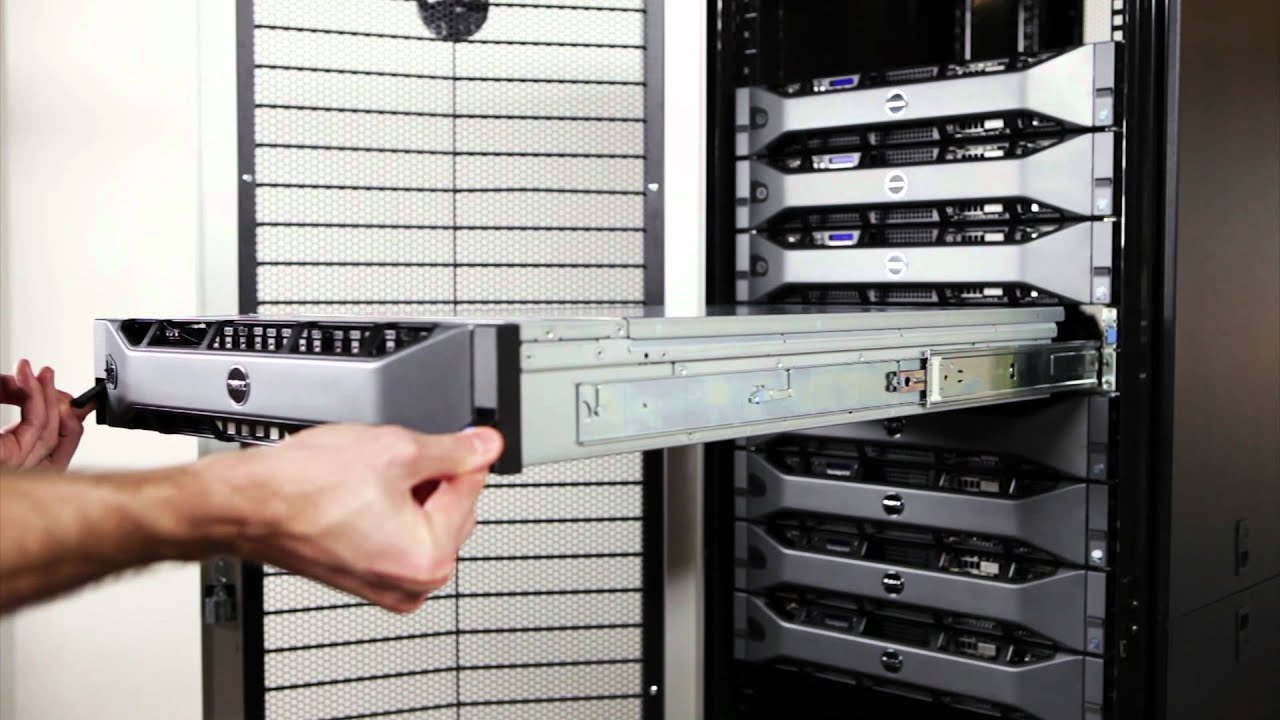
5. Server Unit Replacement: In the event of a server unit failure or upgrade, the A side provides convenient access for removing and replacing the server. Technicians can easily slide the server unit out from the A side, disconnecting the necessary cables, and replace or repair the faulty unit without disturbing the rear connections.
6. Equipment Labeling and Documentation: The A side is often utilized for labeling the equipment and documenting important information. Labels help identify the servers and devices, making it easier to locate and manage specific components. Additionally, documentation including equipment specifications, network configurations, and warranty information can be attached or stored on the A side for quick reference.
Overall, the A side of a server rack is essential for equipment installation and maintenance, cable management, monitoring, server unit replacement, and proper documentation. Its accessibility and organization contribute to the smooth operation of the equipment housed within the server rack.
Common uses for the Z side
The Z side of a server rack serves important purposes that are integral to the overall functionality and organization of the equipment. Let’s delve into some common uses for the Z side:
1. Cable Management: The Z side of the server rack is primarily dedicated to cable management. It accommodates the rear portion of the equipment, allowing for proper cable organization and routing. Vertical cable management options, such as cable management fingers or rings, help keep the cables neatly aligned and prevent tangling. This aids in maintaining a clean and organized setup.
2. Ventilation and Cooling: Effective ventilation is crucial for the proper functioning of the server rack. The Z side of the rack features exhaust fans that expel hot air generated by the equipment. These fans create airflow from front to back, promoting proper cooling and helping to maintain optimal operating temperatures.
3. Power Distribution Units (PDUs): The Z side often houses power distribution units (PDUs), which are used to distribute power to the equipment within the rack. PDUs typically have multiple outlets, allowing for efficient power distribution and minimizing cable clutter. The Z side provides a convenient location for connecting the power cords of the equipment to the PDUs.
4. Fiber Optic Patch Panels: In setups involving fiber optic connectivity, the Z side is commonly used for installing fiber optic patch panels. These panels allow for the termination and organization of fiber optic cables, facilitating reliable and high-speed data transmission. The Z side’s rear-facing panel is ideal for easy cable connections, making it simpler to manage and troubleshoot fiber optic cabling.
5. Equipment Rear Access: While the A side is primarily used for front access to the equipment, the Z side provides rear access to the rack-mounted devices. This allows technicians to access the back of the equipment for cable connections, updates, or maintenance tasks. Rear access also avoids disturbance to the front connections, particularly when replacing or troubleshooting equipment.
6. Documentation Storage: The Z side of the server rack can also be utilized for storing documentation, such as equipment manuals, wiring diagrams, or network configurations. By attaching this information to the rear door or utilizing available storage options, technicians can have quick access to important reference materials when needed.
In summary, the Z side of a server rack is primarily used for cable management, ventilation, housing power distribution units and fiber optic patch panels, providing equipment rear access, and conveniently storing documentation. These functions contribute to the overall organization, cooling, and maintenance of the server rack and its associated equipment.
Best practices for organizing the A and Z sides
Proper organization of both the A and Z sides of a server rack is essential for maximizing efficiency, improving airflow, and simplifying maintenance and troubleshooting. Here are some best practices for organizing these sides:
1. Labeling and Documentation: Labeling the equipment and cables on both sides is crucial for easy identification and troubleshooting. Use clear and standardized labels to identify servers, switches, patch panels, and cables. Additionally, maintain up-to-date documentation that includes equipment specifications, network configurations, and cable mapping for quick reference.
2. Cable Management: Implement effective cable management practices on both the A and Z sides to optimize airflow and minimize cable tangling. Use cable management arms, routing guides, trays, and Velcro straps to keep cables organized and neatly routed. Ensure that cables are properly secured and not blocking ventilation pathways.
3. Color Coding: Consider using color-coded cables and labels to differentiate between various types of cables, such as network, power, and fiber optic cables. This practice makes it easier to identify and trace cables during maintenance or troubleshooting, reducing the likelihood of errors and streamlining cable management.
4. Rack Unit Optimization: Plan the rack unit utilization on both sides to maximize space and minimize wasted capacity. Leave room for future expansion and ensure that the equipment is properly sized and allocated within the rack. This prevents overcrowding and allows for better airflow and ease of maintenance.
5. Proper Cooling: Ensure that the cooling system, including fans and vents on both sides of the server rack, are functioning optimally. Monitor and maintain the airflow to prevent heat buildup and ensure that hot air is effectively expelled from the rack. Regularly clean air filters and fans to keep them free from dust and debris that can hinder cooling performance.
6. Regular Maintenance: Schedule routine maintenance and inspections for both the A and Z sides of the server rack. Check for loose cables, damaged equipment, and any signs of overheating. Perform equipment and cable audits periodically to ensure that everything is properly labeled, secure, and in optimal working condition.
7. Proper Weight Distribution: Distribute the weight of the equipment evenly across the A and Z sides to maintain stability and prevent strain. Consider the weight capacities of the rack and its components, and distribute heavier equipment evenly to avoid unbalanced loading.
By following these best practices, you can keep both the A and Z sides of the server rack organized, maintain proper cooling, facilitate efficient maintenance and troubleshooting, and ensure smooth operation of the equipment housed within the rack.
Conclusion
Server racks play a critical role in the efficient management and organization of servers and other equipment in data centers and server rooms. Understanding the A and Z sides of a server rack is essential to optimize functionality and ensure proper organization.
The A side serves as the front-facing side, providing access to the equipment and housing the majority of the server units and networking devices. It focuses on equipment installation, maintenance, cable management, and monitoring. The Z side, on the other hand, is the rear-facing side primarily dedicated to cable management, ventilation, and additional components such as power distribution units and fiber optic patch panels.
By effectively organizing the A and Z sides, you can enhance airflow, simplify cable management, streamline maintenance and troubleshooting, and ensure the smooth operation of the equipment within the rack. Best practices include proper labeling, documentation, cable management, color coding, rack unit optimization, cooling, regular maintenance, and proper weight distribution.
Remember, a well-organized server rack improves accessibility, reduces downtime, and provides a secure and efficient environment for your critical equipment. Whether you are a data center professional, an IT enthusiast, or someone looking to enhance their knowledge of server rack infrastructure, implementing these best practices will contribute to a more reliable and effective server rack setup.