Introduction
Wiring your house with Ethernet is a smart and efficient way to upgrade your home network. With the increasing number of connected devices in our homes, a reliable and fast internet connection is essential. Ethernet wiring offers many benefits, from improved network performance to increased security and flexibility.
Gone are the days of relying solely on Wi-Fi for all your internet needs. While wireless connections are convenient, they can be prone to interference and signal loss, especially in large homes or areas with many obstructions. Ethernet wiring provides a stable, high-speed internet connection that is not affected by distance or interference, ensuring a seamless online experience.
By wiring your house with Ethernet, you can take advantage of faster data transfer speeds, which is crucial for activities such as streaming high-definition videos, online gaming, video conferencing, and large file transfers. Whether you use your devices for work, entertainment, or both, having a wired connection offers a more reliable and consistent performance.
Another major advantage of Ethernet wiring is enhanced security. Unlike Wi-Fi signals, which can be intercepted by unauthorized users, Ethernet connections are more secure as they are physically connected to your devices. This makes it more difficult for hackers to gain access to your network and helps protect your personal data and sensitive information.
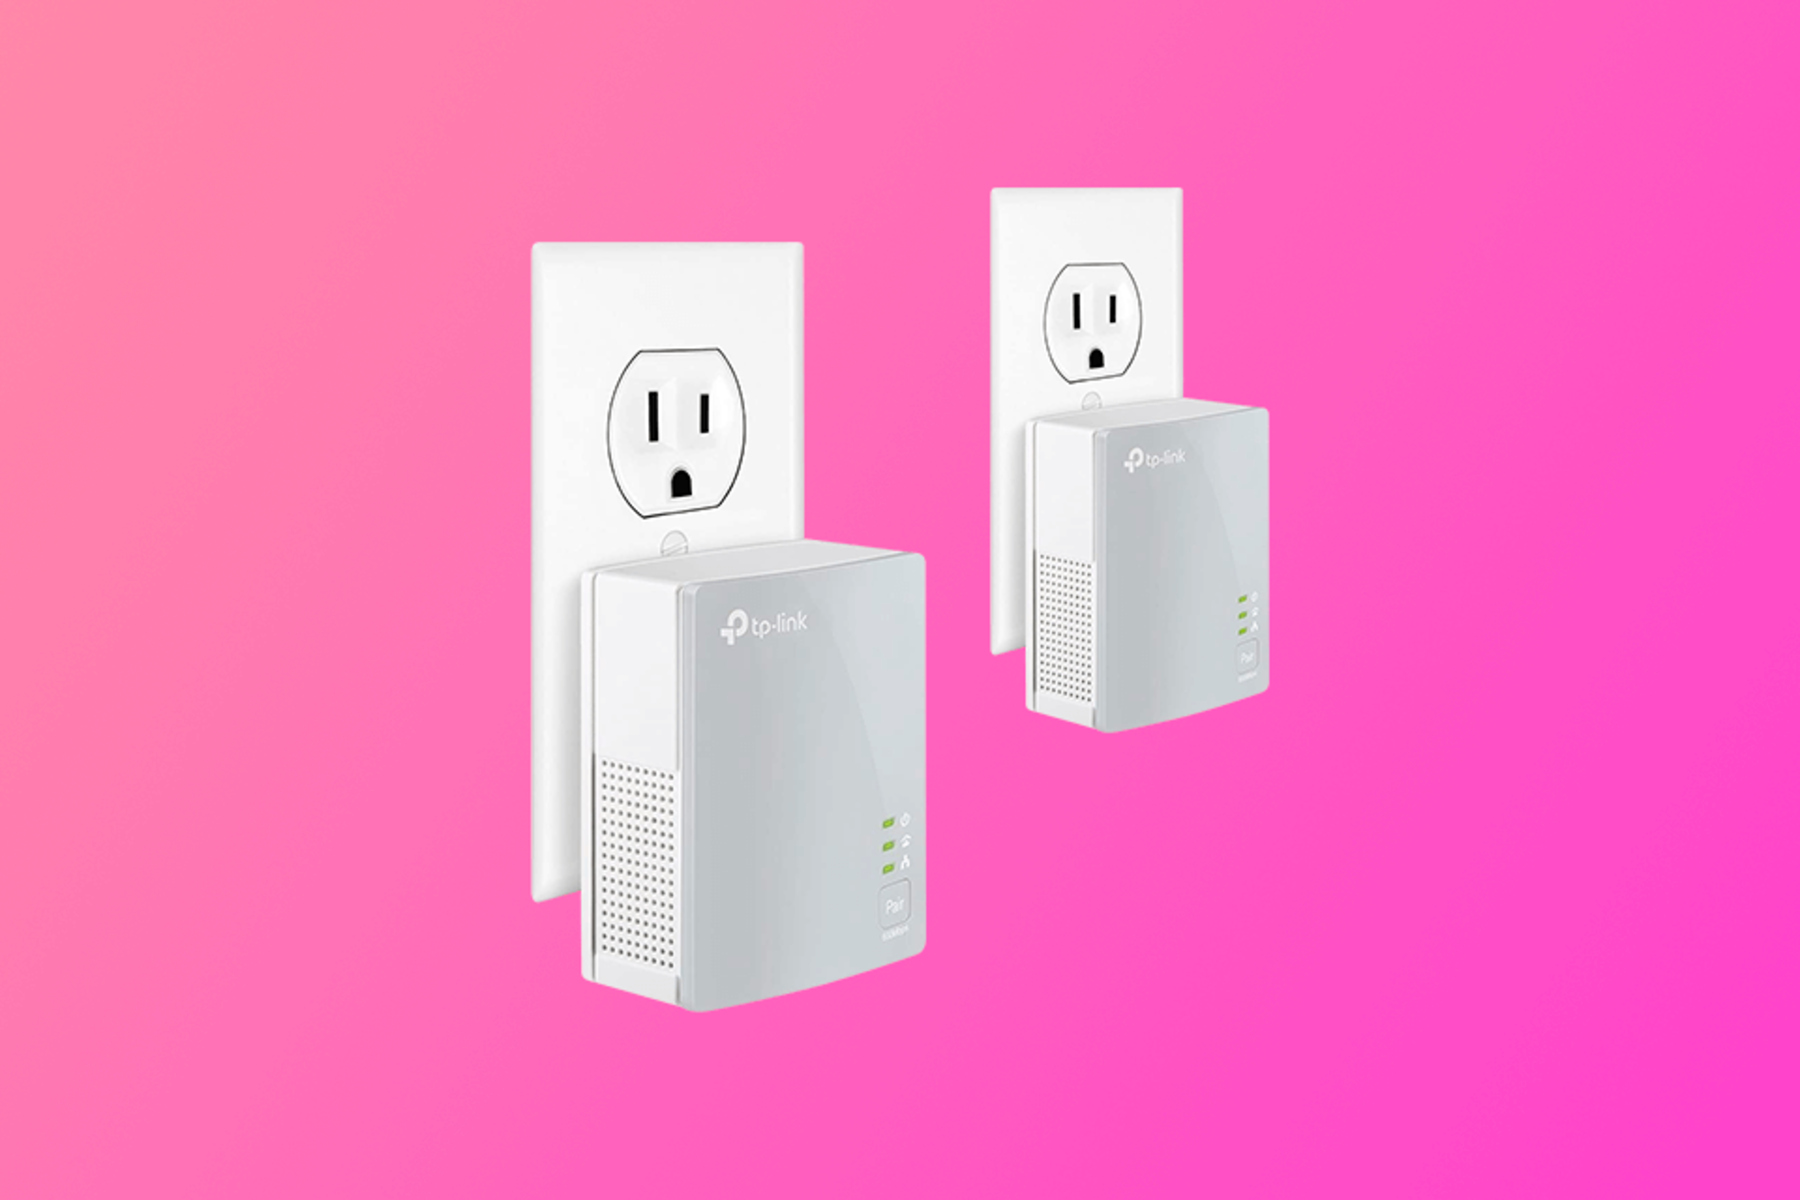
Flexibility is yet another benefit of wiring your house with Ethernet. With Ethernet cables running throughout your home, you can easily add and relocate network devices, such as computers, smart TVs, gaming consoles, and printers, without the need for additional Wi-Fi extenders or repeaters. Ethernet wiring allows you to create a reliable and seamless network that can meet the needs of your ever-expanding array of connected devices.
In this guide, we will explore the step-by-step process of wiring your house with Ethernet. We will discuss the necessary tools and materials, helpful tips for planning the network layout, choosing the right Ethernet cables, running the cables, installing wall jacks, terminating and testing the connections, and connecting devices to the network. By the end of this article, you will have the knowledge and confidence to create a robust Ethernet network throughout your house.
Benefits of Wiring a House with Ethernet
Wiring your house with Ethernet provides numerous advantages that go beyond just faster internet speeds. Let’s explore some of the key benefits:
1. Enhanced Network Performance: Ethernet offers faster and more reliable internet connections compared to Wi-Fi. This is especially important for bandwidth-intensive activities like streaming 4K videos, online gaming, and video conferencing. With Ethernet, you can enjoy seamless and uninterrupted online experiences.
2. Increased Security: Unlike wireless networks, where signals can be intercepted, Ethernet connections are physical and more secure. By choosing Ethernet over Wi-Fi, you reduce the risk of unauthorized access to your network, protecting your personal information and data from potential hackers.
3. Seamless Connectivity: With Ethernet wiring, you can achieve seamless connectivity throughout your house. Whether you’re in the basement, garage, or top floor, Ethernet connections remain stable and fast. No more worrying about dead zones or weak signals.
4. Flexibility for Devices: Ethernet wiring allows you to easily connect multiple devices to your network. From computers and gaming consoles to smart TVs and printers, you can effortlessly add and relocate devices without the limitations of Wi-Fi connectivity. This flexibility is especially beneficial for homes with multiple users and devices.
5. Future-Proofing: As technology continues to advance, the need for faster and more reliable internet connections will only grow. By wiring your house with Ethernet, you are future-proofing your home network. Ethernet cables have a longer lifespan and can support higher data transfer rates, ensuring that your network can keep up with evolving technology.
6. Reduced Interference: Wi-Fi signals can be affected by various factors such as walls, appliances, and neighboring networks. Ethernet wiring eliminates these interference issues by providing a dedicated and consistent connection. Say goodbye to buffering and lag during your favorite online activities.
7. Increased Home Value: A house wired with Ethernet can be an attractive selling point for potential buyers. In today’s connected world, having a reliable and high-speed network infrastructure is highly sought after. Wiring your house with Ethernet can increase the value of your home and make it more appealing in the real estate market.
These are just some of the many benefits of wiring a house with Ethernet. By investing the time and effort to install Ethernet cables throughout your home, you will enjoy an improved internet experience, enhanced security, and the flexibility to connect a wide range of devices. Upgrade your home network today and reap the numerous benefits of Ethernet wiring.
Tools and Materials Needed
Before you begin wiring your house with Ethernet, it’s essential to gather the necessary tools and materials. Here’s a list of what you’ll need:
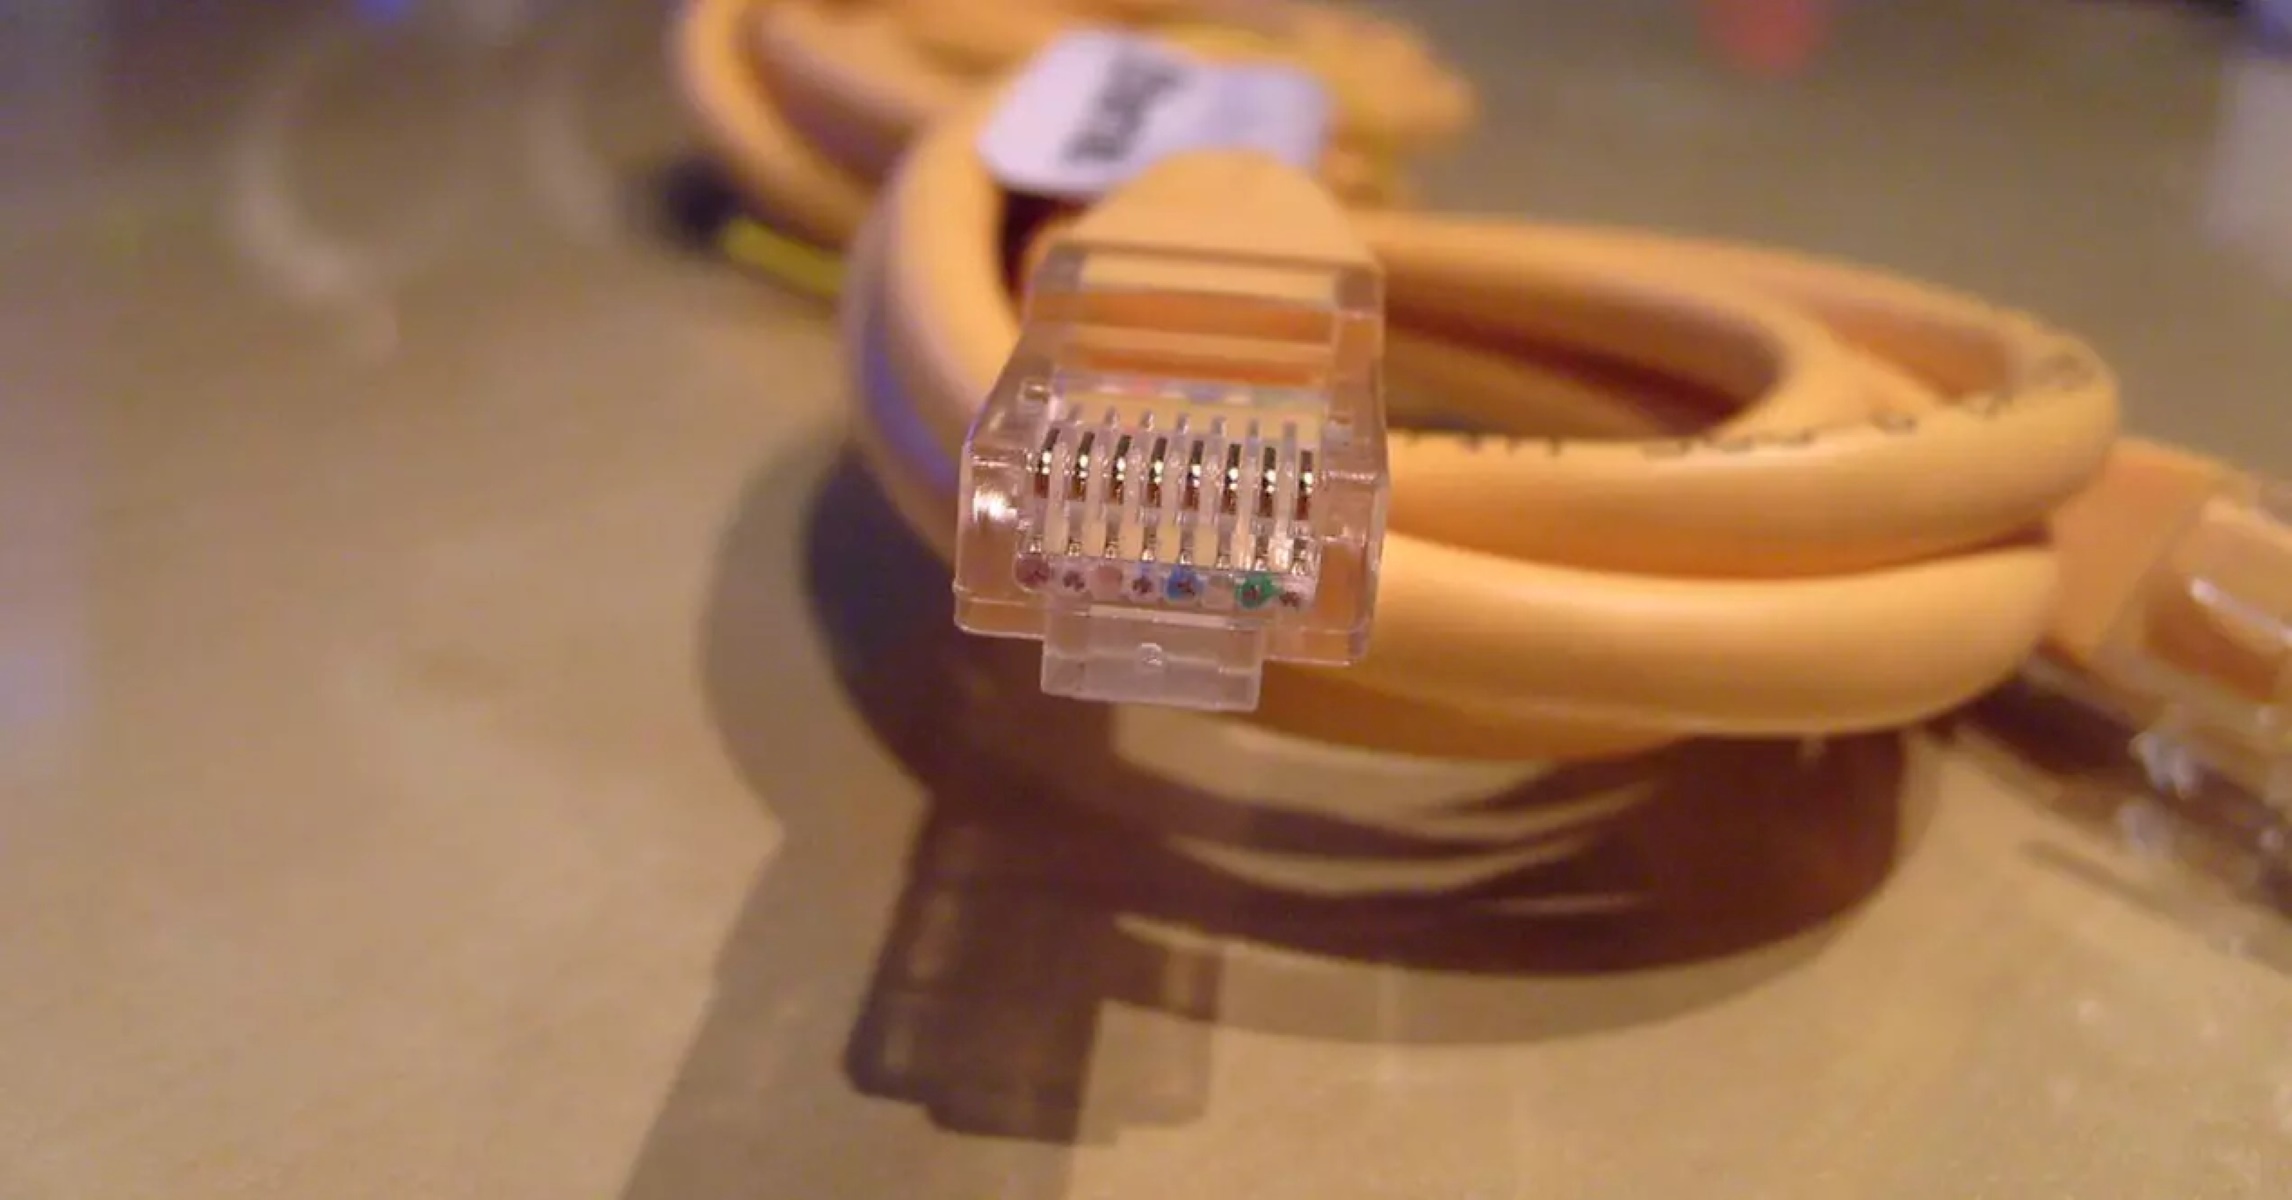
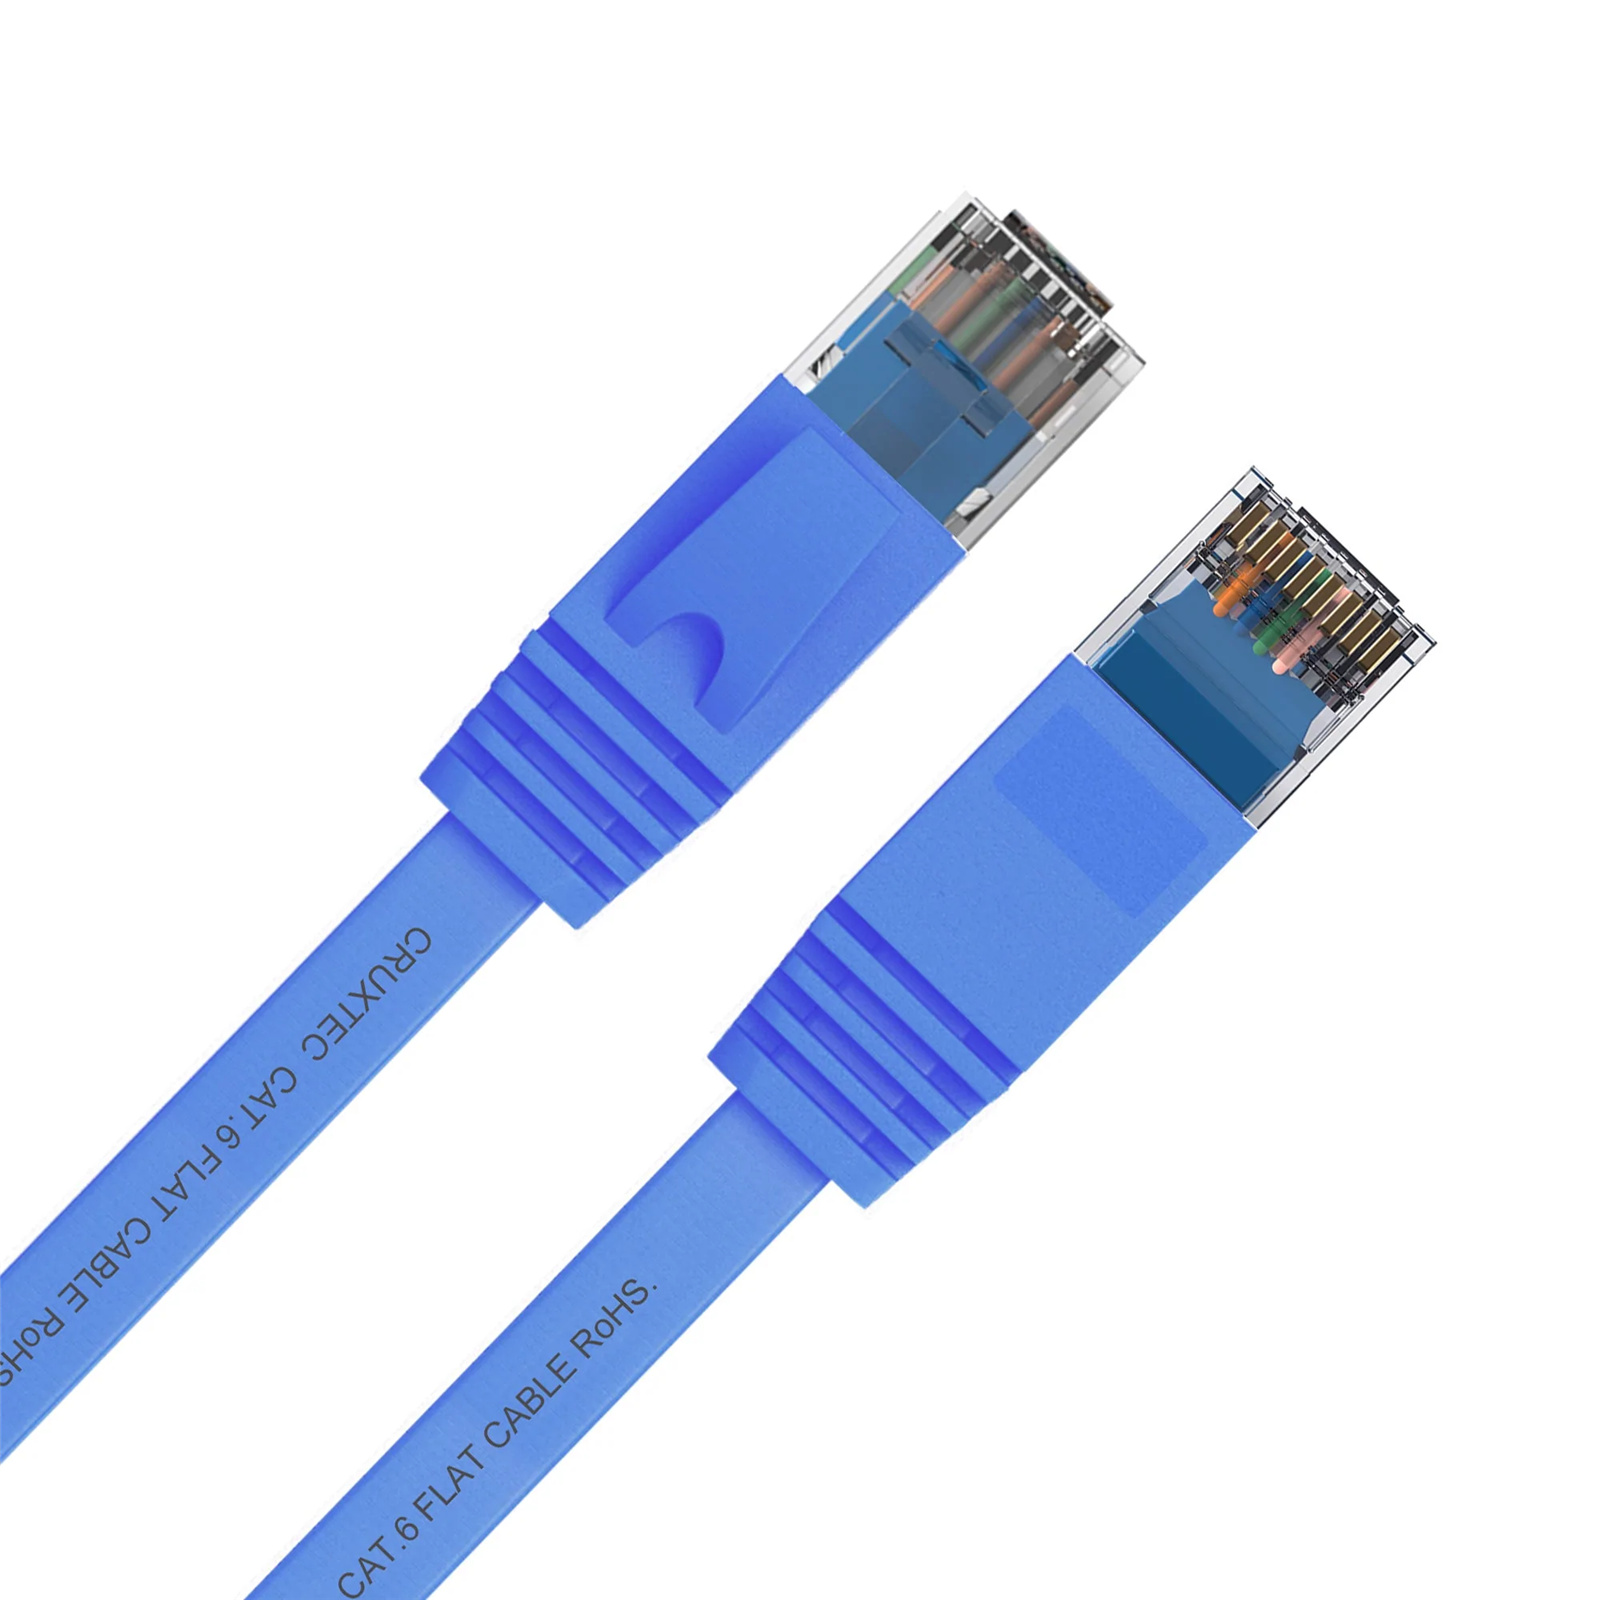
1. Ethernet Cables: The backbone of your wired network, Ethernet cables come in different categories (CAT5e, CAT6, CAT6a) and lengths. Choose cables based on your network demands and the distance between devices.
2. Cable Tester: A cable tester is crucial for checking the integrity and connectivity of your Ethernet cables. It helps identify any wiring faults or issues that may affect network performance.
3. Cable Crimper: A cable crimper is used to terminate Ethernet cables by attaching RJ45 connectors onto the cable ends. Make sure to choose a high-quality crimper for reliable and secure terminations.
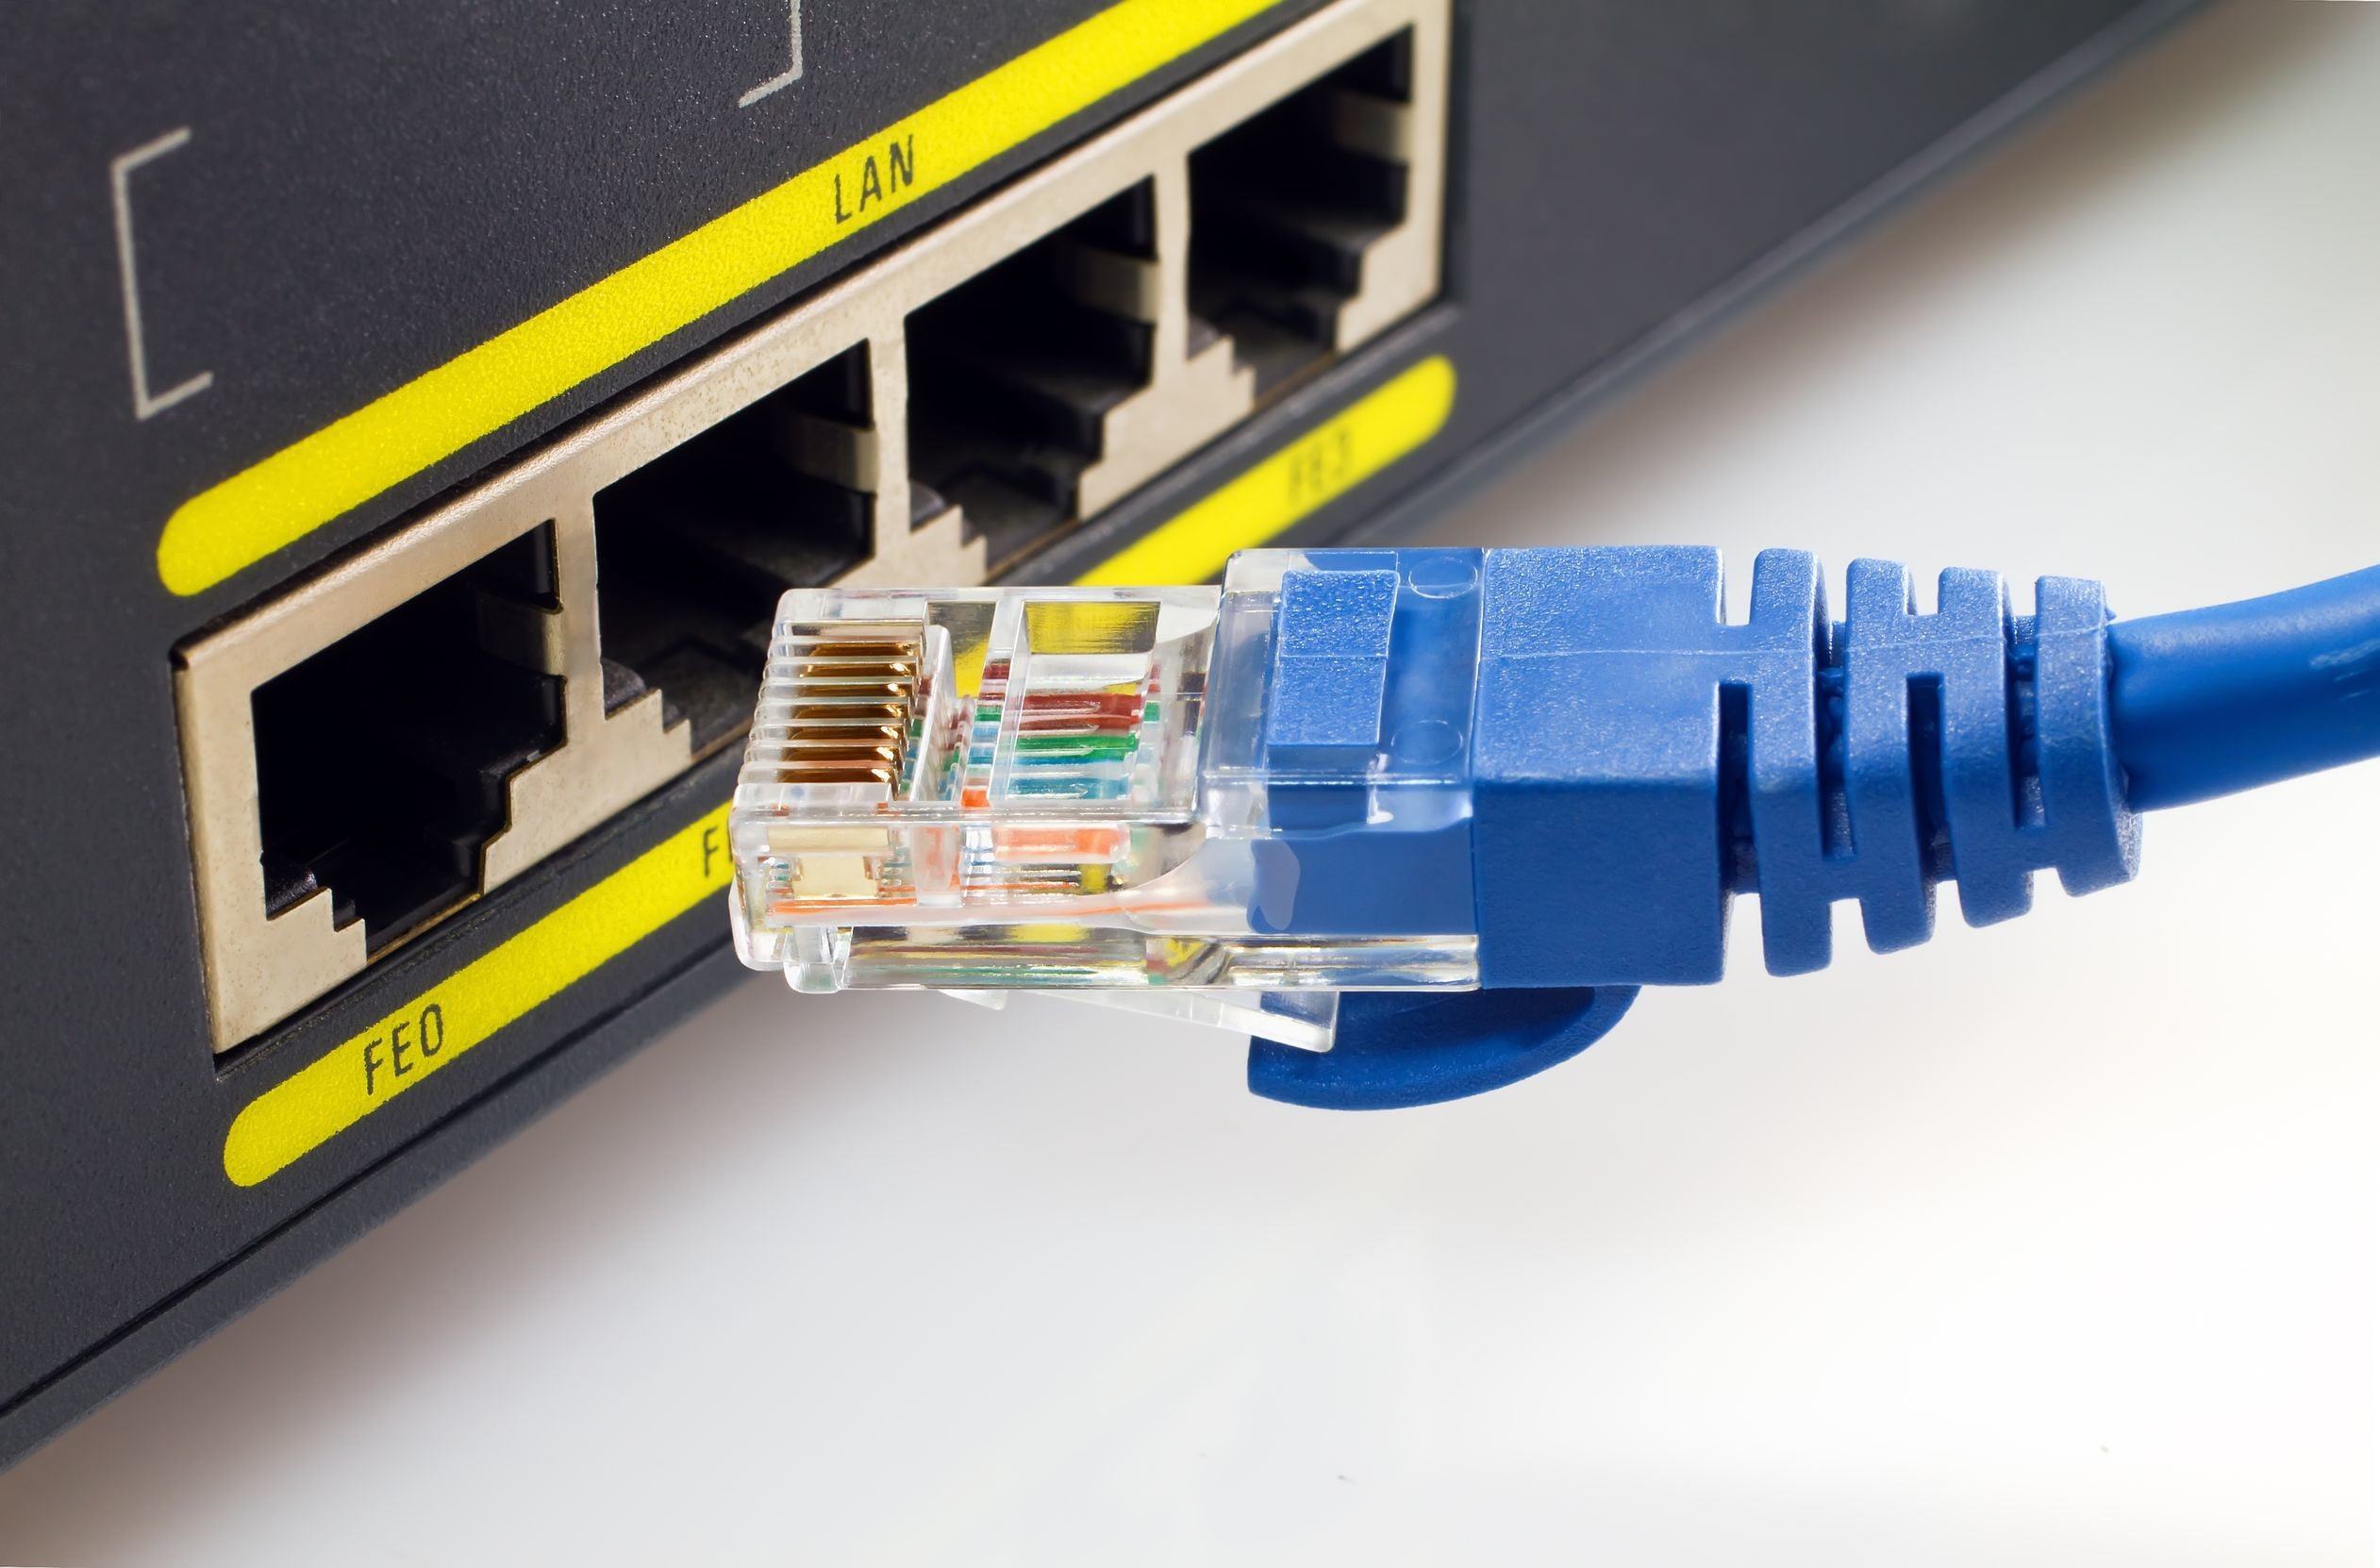
4. RJ45 Connectors: These connectors are used to attach Ethernet cables to devices. Opt for high-quality connectors that provide a stable and secure connection.
5. Cable Stripping Tool: A cable stripping tool is used to remove the outer jacket of Ethernet cables, exposing the individual wire pairs for termination.
6. Fish Tape or Wire Puller: These tools are useful for running Ethernet cables through walls, conduits, or crawl spaces. They help guide the cables and make the installation process more efficient.
7. Wall Plates and Wall Jacks: Wall plates and wall jacks provide a clean and professional-looking finish for your Ethernet connections. Choose wall plates that fit your home’s aesthetics and wall jacks compatible with your chosen Ethernet cables.
8. Screwdriver and Drill: These tools will be necessary for attaching wall plates, drilling holes, or mounting wall jacks. Ensure you have the appropriate screwdriver bits and drill bits for your specific installation needs.
9. Labeling and Cable Management: Use labels or cable ties to organize and identify your Ethernet cables. This will make troubleshooting and future modifications much easier.
10. Safety Equipment: Ensure you have safety goggles, gloves, and any other protective equipment necessary for the installation process. Safety should always be a top priority when working with tools and materials.
By having these tools and materials ready, you’ll be well-prepared to tackle the installation of your Ethernet network. Before starting, familiarize yourself with the user manuals or instructional guides for each tool, ensuring you follow proper procedures for optimal results and safety.
Planning the Ethernet Network
Before you start running Ethernet cables throughout your house, it’s crucial to plan your network to ensure optimal performance and efficiency. Here are some important considerations for planning your Ethernet network:
1. Determine the Number of Ethernet Outlets: Assess your network requirements and identify the number of Ethernet outlets you’ll need in each room. Consider the devices you’ll be connecting and the potential growth of your network in the future.
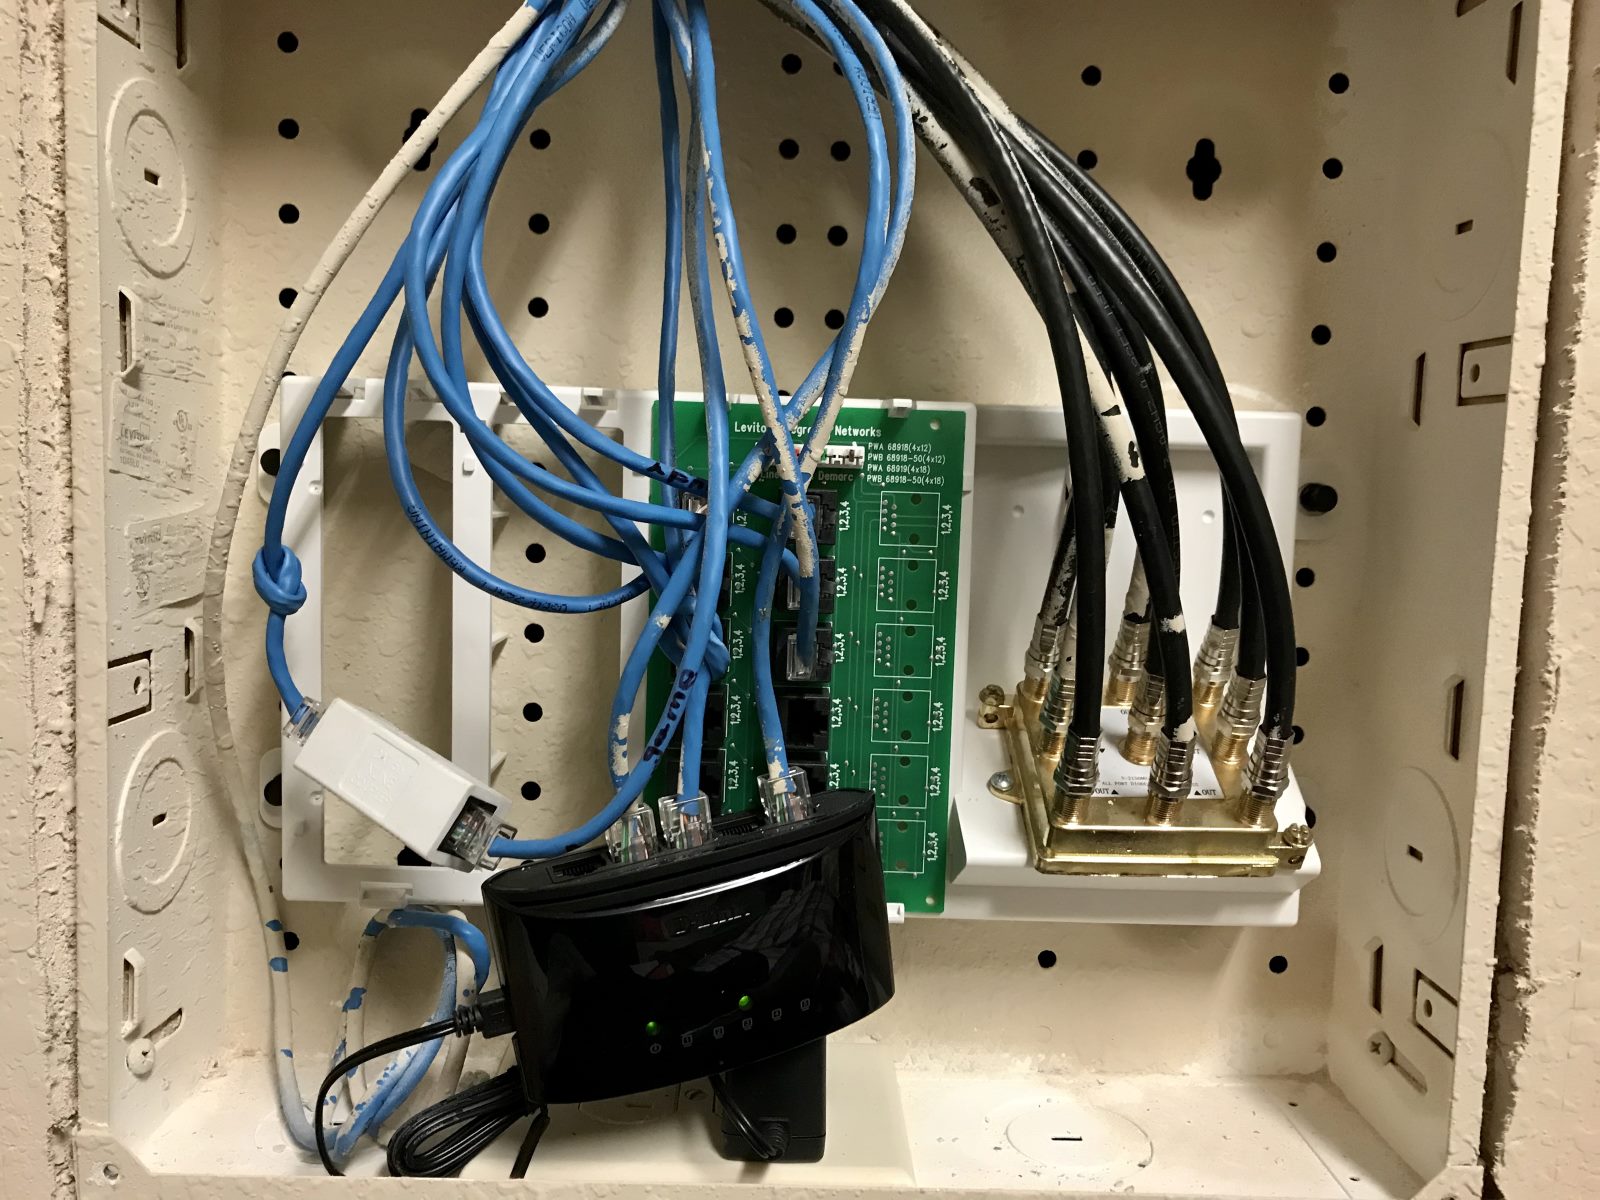
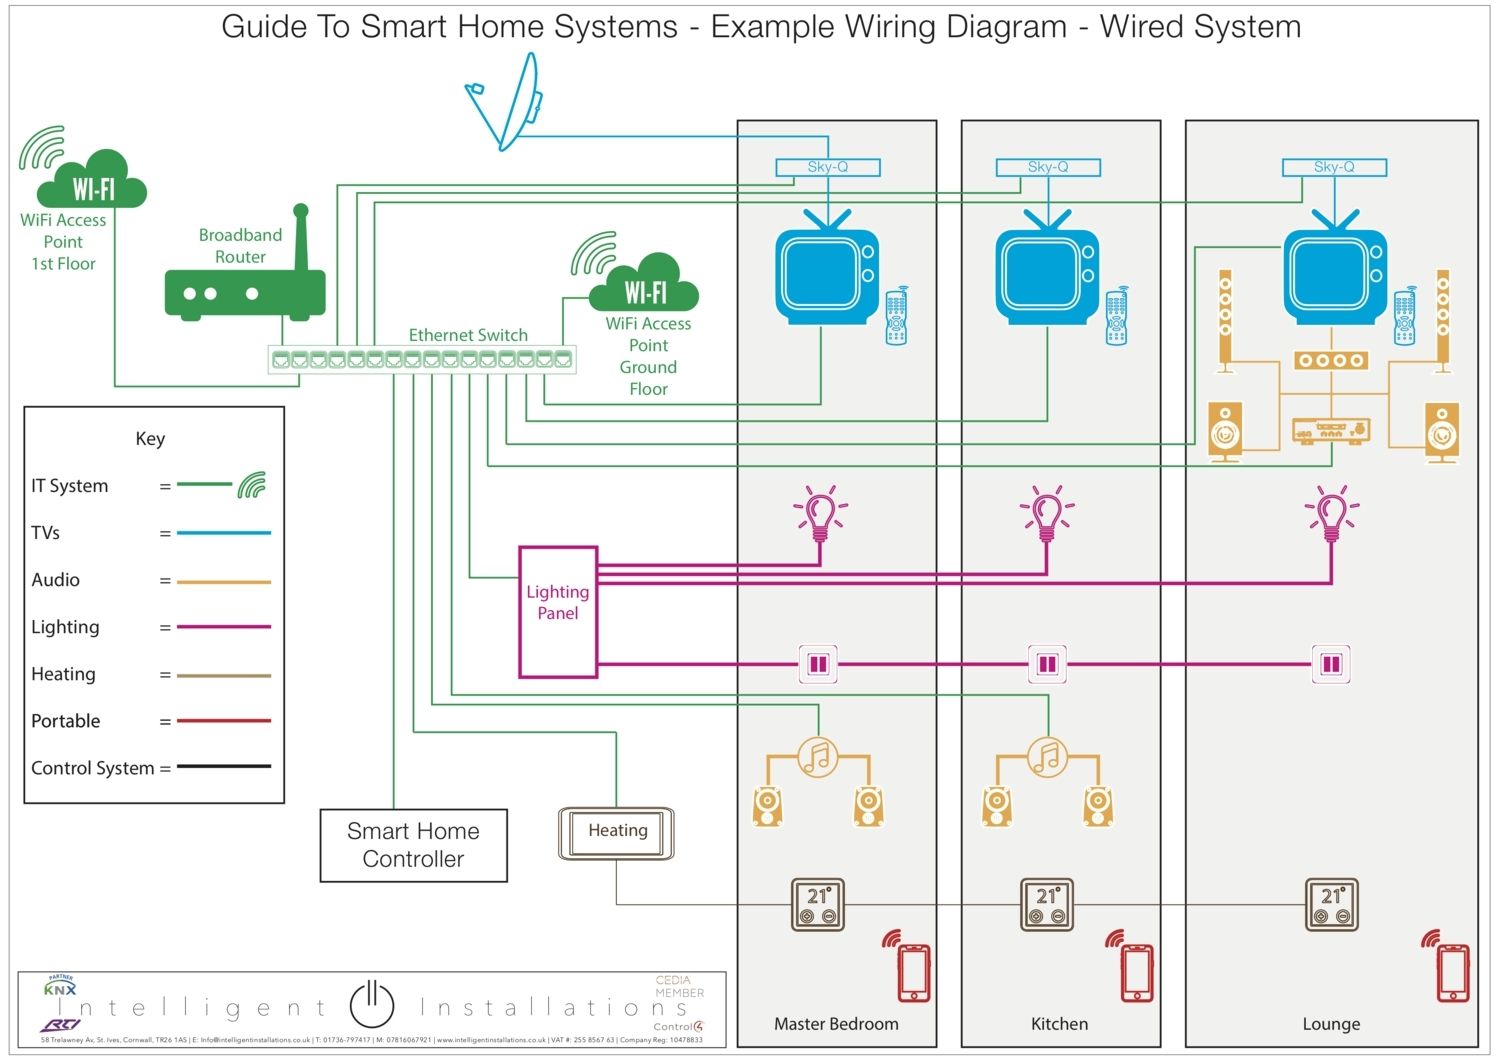
2. Identify the Central Location: Determine a central location, such as a utility room or basement, where you can install a network switch or router to connect all the Ethernet cables. This central location will provide a hub for distributing the internet connection to different rooms in your house.
3. Plan the Ethernet Cable Routes: Consider the most efficient routes for running the Ethernet cables from the central location to each room or area where you require a connection. Take into account obstacles, such as walls or furniture, and aim for the shortest and most direct paths whenever possible.
4. Consider Existing Wiring: If your house already has pre-existing structured wiring, such as coaxial cables or phone lines, you may be able to repurpose them for Ethernet use. This can simplify the installation process and reduce the need for extensive cable runs.
5. Allow for Future Expansion: It’s advisable to plan for potential future expansion of your network. Consider running extra Ethernet cables and leaving some room within your central location for additional network switches or routers.
6. Consult Building Codes and Regulations: Check local building codes and regulations regarding network installation, especially if you’re planning to run cables through walls, attics, or other concealed spaces. Compliance with these regulations will help ensure a safe and proper installation.
7. Document Your Network Plan: Create a detailed diagram or floor plan that outlines the location of Ethernet outlets, cable routes, and central equipment. This documentation will be valuable for troubleshooting, future modifications, or when seeking assistance from professionals.
8. Seek Professional Advice if Needed: If you’re unsure about any aspect of planning your Ethernet network, it’s recommended to consult with a professional network installer or electrician. They can provide expert guidance and advice based on your specific requirements and the layout of your house.
By carefully planning your Ethernet network, you can ensure efficient connectivity, minimize cable runs, and lay the foundation for a reliable and scalable home network. Take the time to consider these factors before proceeding with the installation process to avoid potential issues or the need for rework in the future.
Choosing the Right Ethernet Cable
Choosing the correct Ethernet cable is essential for achieving optimal performance and reliability in your wired network. There are several factors to consider when selecting the right Ethernet cable for your needs:
1. Cable Category: Ethernet cables are categorized based on their specifications and capabilities. The most commonly used categories are CAT5e, CAT6, and CAT6a. CAT5e cables are suitable for most home networks, offering speeds up to 1 Gbps over short distances. CAT6 cables can handle higher bandwidths and are recommended for demanding applications or longer cable runs. CAT6a cables support even higher speeds and are ideal for professional environments or future-proofing your network.
2. Cable Length: Consider the distance between your devices and the central equipment when selecting Ethernet cables. It’s recommended to measure the actual distances and allow some extra length for flexibility during installation. If you need longer cable runs, such as for connecting devices in different rooms, ensure you choose cables that can reliably transmit data over extended distances without degradation.
3. Shielding: Ethernet cables come in two types of shielding: shielded (STP) and unshielded (UTP). Shielded cables have an additional layer of metallic shielding that helps reduce electrical interference and crosstalk. They are useful in environments with high levels of electromagnetic interference, such as near electrical cables or in industrial settings. Unshielded cables are sufficient for most residential applications.
4. Connectors: Ethernet cables typically come with RJ45 connectors that are compatible with most network devices. Ensure the connectors are of high quality and provide a secure and reliable connection. Look for connectors that are gold-plated for better conductivity and corrosion resistance.
5. Compatibility: Check the compatibility of the Ethernet cables with your network devices and equipment. Verify that they support the required network speeds and are compatible with your network switch or router.
6. Future-Proofing: If you anticipate upgrading your network in the future or require higher speeds, consider investing in higher-category cables, such as CAT6 or CAT6a. These cables offer greater bandwidths and are better suited for handling future advancements in network technology.
7. Budget: Consider your budget and weigh it against the performance requirements of your network. While higher-category cables may offer better performance, they are often more expensive. Balance your budget with your network needs to make an informed decision.
By considering these factors, you can choose the right Ethernet cable to optimize the performance and reliability of your wired network. Remember, selecting the appropriate cable is crucial to ensuring a seamless and efficient connection between your devices, ultimately enhancing your overall network experience.
Running Ethernet Cables
Running Ethernet cables is a crucial step in wiring your house with a robust and reliable network. Here are some guidelines to help you properly run Ethernet cables:
1. Plan the Cable Routes: Refer to your network plan and identify the most efficient and direct routes for running the Ethernet cables. Consider the layout of your house, including walls, floors, and ceilings, and choose paths that minimize obstructions and cable lengths.
2. Use Fish Tape or Wire Puller: To guide the Ethernet cables through walls, conduits, or crawl spaces, use a fish tape or wire puller. These tools make it easier to navigate tight spaces and ensure smooth cable runs without damaging the walls or other structures.
3. Drill Holes (If Necessary): If you need to run cables between floors or through walls, you may need to drill holes to facilitate the cable runs. Consider the cable diameter and use an appropriately sized drill bit to avoid excessive damage to the structure.
4. Label Cables: As you run the Ethernet cables, be sure to label them at both ends. Labeling will help you easily identify and trace the cables when terminating or troubleshooting the network. Use durable labels that can withstand the installation process and maintain their readability over time.
5. Avoid Electrical Interference: Keep the Ethernet cables away from sources of electrical interference, such as power cables, fluorescent lights, or large appliances. Maintaining a distance of at least 12 inches between Ethernet and power cables can help minimize the risk of signal degradation.
6. Use Cable Clips or Cable Ties: Secure the Ethernet cables along their running paths using cable clips or cable ties. These accessories will keep the cables organized, prevent them from getting tangled or damaged, and provide a clean and professional look.
7. Minimize Cable Bends and Stress: Avoid sharp bends or excessive stress on the Ethernet cables during installation. Excessive bending or pulling can cause signal loss or damage to the cables. Ensure that there is enough slack at both ends of the cable runs to accommodate any future modifications or adjustments.
8. Test Continuity: After running each Ethernet cable, use a cable tester to check its continuity and ensure that there are no wiring faults or connectivity issues. Testing the cables during installation will save you time and effort in troubleshooting later.
Remember, proper installation of Ethernet cables is vital for maintaining optimal network performance and reliability. Take your time to run the cables neatly and securely, following best practices to ensure a successful installation that will serve your network needs for years to come.
Installing Ethernet Wall Jacks
Installing Ethernet wall jacks is an important step in wiring your house with Ethernet and provides a convenient and professional way to connect devices to your network. Here’s how to install Ethernet wall jacks:
1. Choose the Type of Wall Jack: There are various types of Ethernet wall jacks available, including keystone jacks and surface-mount jacks. Choose the type that best suits your needs and matches the cables and connectors you are using.
2. Select the Location: Determine the desired location for the Ethernet wall jack in each room where you want to connect devices. Ideally, choose a central and easily accessible spot on a wall that is close to where you envision using network devices.
3. Cut a Hole: Use a drywall saw or utility knife to cut a hole in the wall for the wall jack. Take caution to avoid any electrical or plumbing fixtures behind the wall. Ensure the hole is large enough to accommodate the size of the wall jack and its mounting bracket.
4. Mount the Wall Jack: Attach the mounting bracket of the wall jack inside the hole, ensuring it is securely fastened to the wall. Keystone jacks will typically snap into the mounting bracket, while surface-mount jacks may require screws for proper installation.
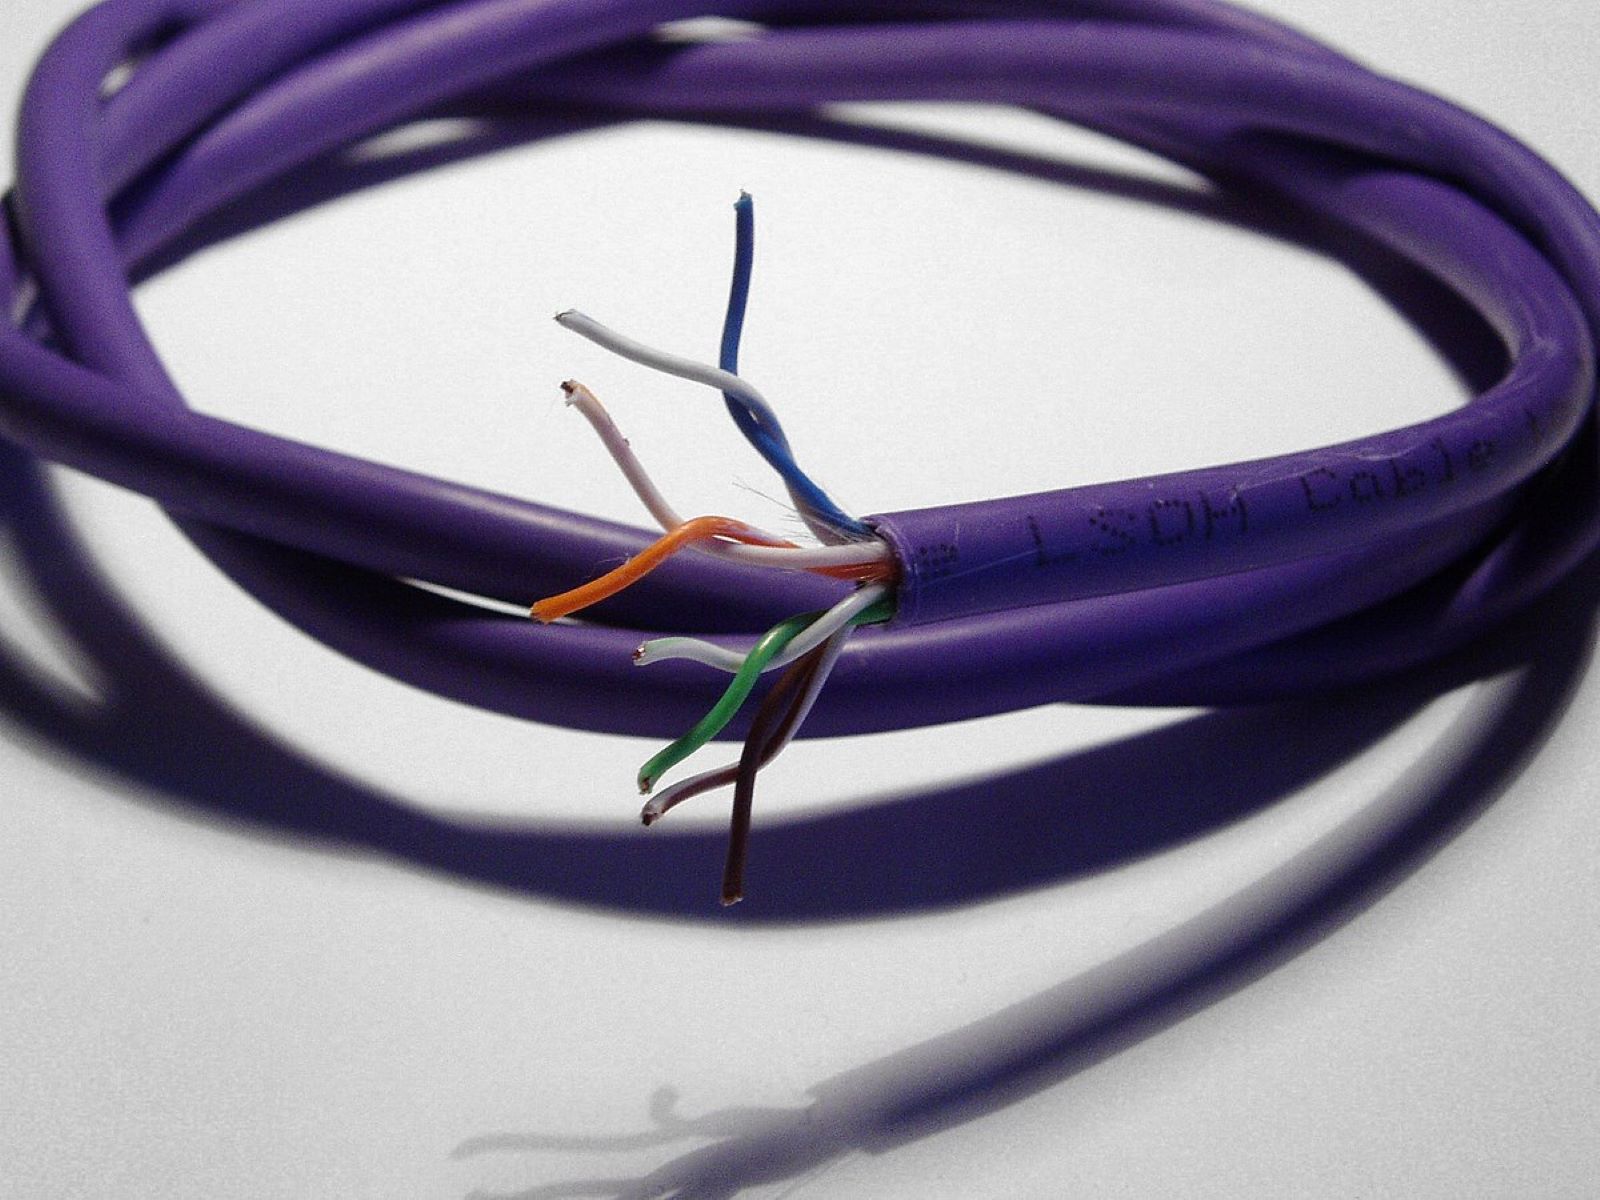
5. Terminate the Ethernet Cable: Strip the outer sheath of the Ethernet cable to expose the individual wire pairs. Follow the color-coding scheme for T568A or T568B and carefully punch down each wire into the corresponding slots on the back of the wall jack. Ensure a secure connection for each wire.
6. Trim Excess Wires: Once all the wires are punched down, trim any excess wire length to maintain a clean and organized installation. Be careful not to cut the wires too short, as that may affect connectivity and proper termination.
7. Secure the Wall Jack: Place the front faceplate or cover onto the wall jack and fasten it securely. Ensure that the wall jack is flush with the wall and tightly secured in place.
8. Test the Connection: After installing the wall jack, use a cable tester to verify the connectivity and ensure that the Ethernet cable is properly terminated. Test both ends of the cable to ensure a successful connection.
9. Repeat for Each Wall Jack: Repeat the above steps for installing Ethernet wall jacks in each room where you want to have network connectivity. Plan your cable runs and wall jack locations carefully to achieve the desired network coverage throughout your house.
Installing Ethernet wall jacks provides a clean and organized way to connect devices to your Ethernet network. Follow these steps carefully to ensure proper installation and reliable network connectivity in each room of your house.
Termination and Testing
Termination and testing are crucial steps in ensuring the proper functioning and reliability of your Ethernet network. Here’s how to terminate and test Ethernet cables:
1. Termination:
– Strip the outer sheath of the Ethernet cable to expose the individual wire pairs. Use a cable stripper or knife, being careful not to damage the inner wires.
– Sort and arrange the wire pairs according to the T568A or T568B color-coding scheme. Untwist the wires slightly to prepare them for termination.
– Insert each wire pair into the appropriate slots of an RJ45 connector. Ensure that each wire reaches the end of the connector and maintains its correct color order.
– Use a crimping tool to firmly secure the RJ45 connector to the Ethernet cable. Apply even pressure to ensure the wires make proper contact with the connector’s pins.
2. Testing:
– Use a cable tester to verify the integrity and connectivity of the Ethernet cables. Connect one end of the Ethernet cable to the tester’s main unit and the other end to the remote unit.
– Initiate a cable test using the tester’s interface or controls. The tester will send signals through the cable and analyze the response to identify any wiring faults or connectivity issues.
– Check the tester’s display or results to ensure that all wires are properly connected and that there are no shorts, opens, or miswires. If any issues are detected, re-terminate the cable accordingly.
3. Cable Certification:
– For professional installations or critical applications, consider using a cable certifier. A certifier provides a more comprehensive analysis, including detailed reports on crosstalk, impedance, and cable length.
– Connect the cable certifier to the Ethernet cable and run the certification process. This will confirm that the cable meets the performance standards for its category, such as CAT5e, CAT6, or CAT6a.
4. Document and Label:
– Document the termination details for each Ethernet cable, including the cable route, wall jack location, and device connections. This documentation will be valuable for future reference and troubleshooting.
– Label each terminated Ethernet cable at both ends for easy identification and organization. Use clear and durable labels that won’t fade or peel over time.
Proper termination and testing of Ethernet cables ensure reliable network connections and help identify any wiring issues that could affect performance. Taking the time to terminate and test cables correctly will result in a stable and efficient Ethernet network.
Connecting Devices to the Ethernet Network
Once you have wired your house with Ethernet and installed the necessary wall jacks, it’s time to connect your devices to the network. Here are the steps to connect devices to the Ethernet network:
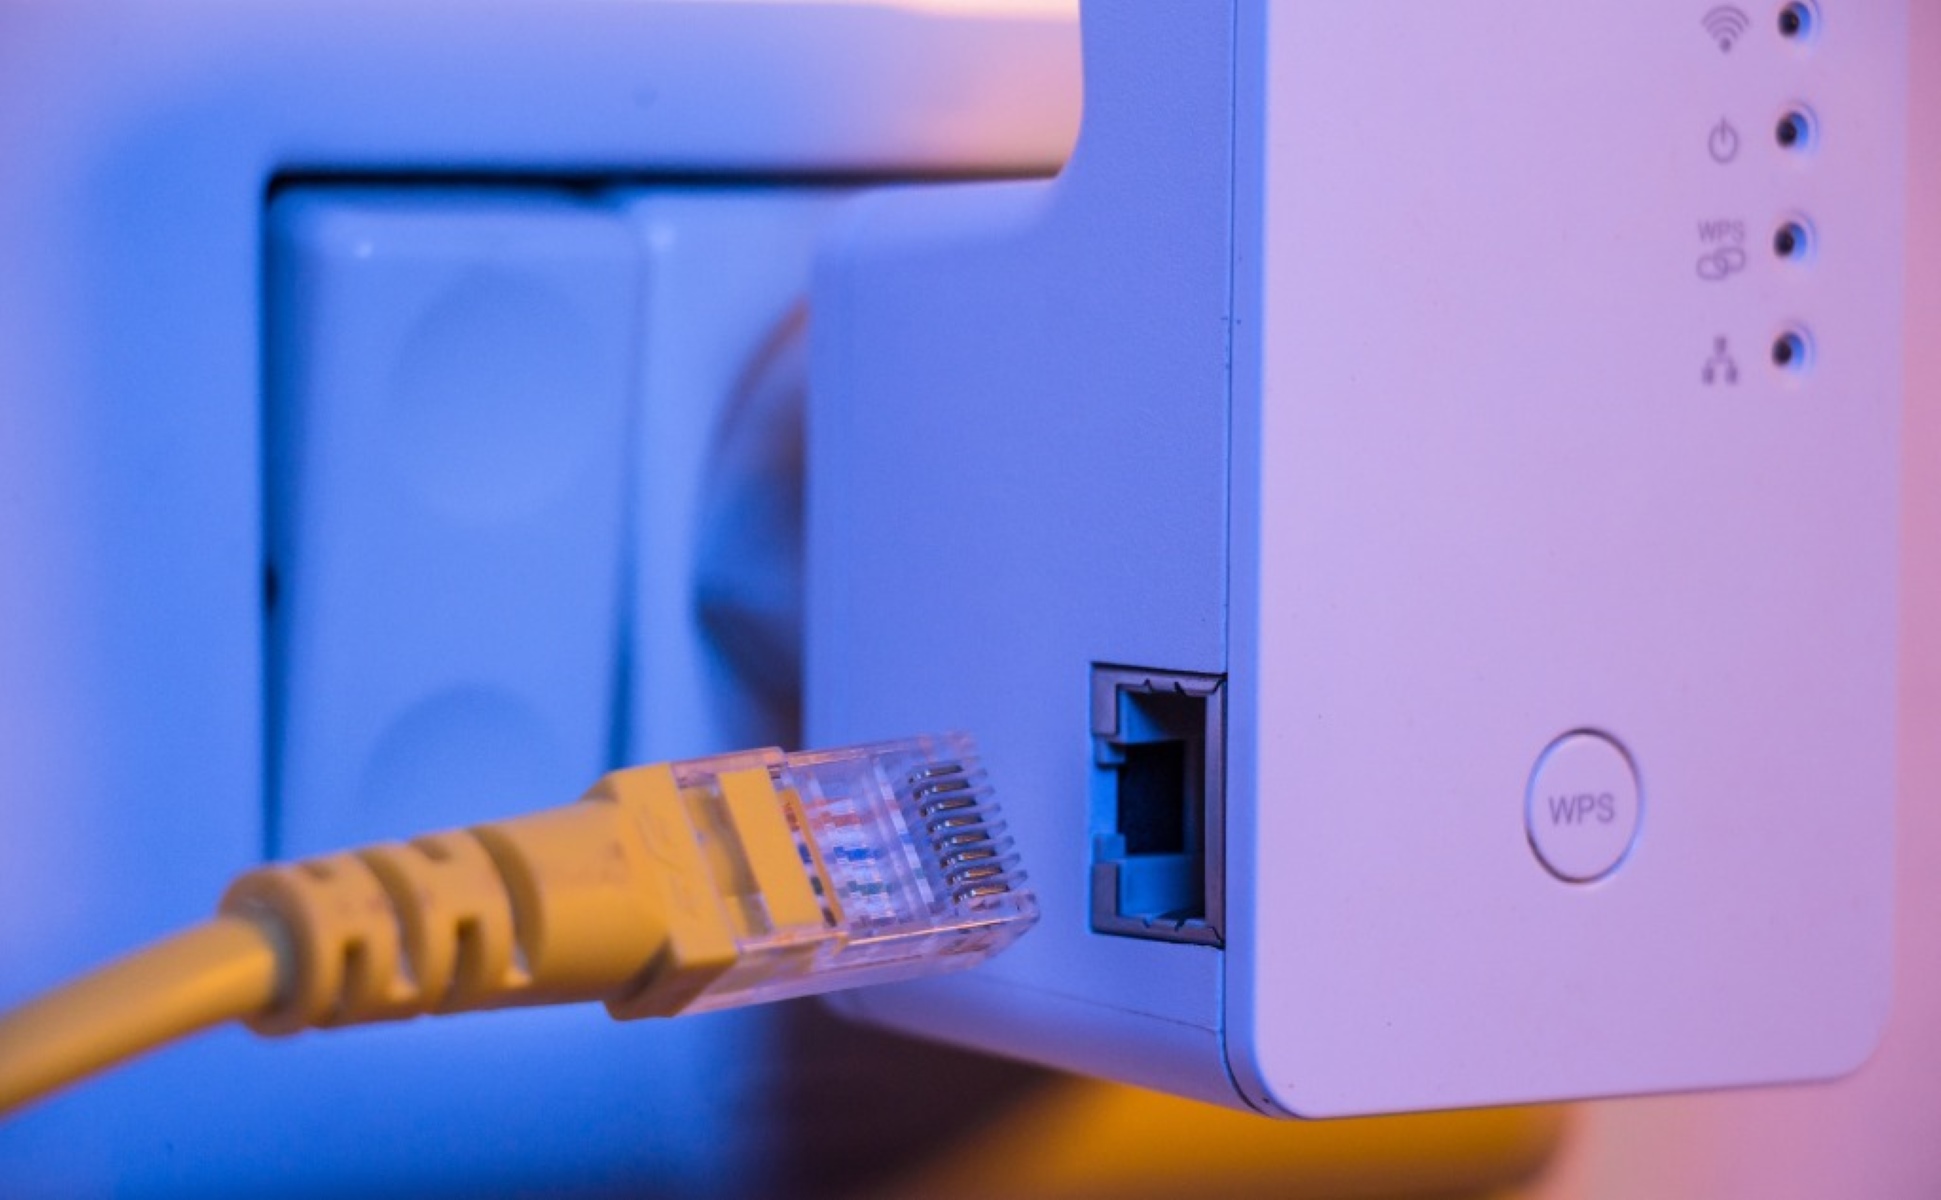
1. Locate the Ethernet Port:
– Identify the Ethernet port on your device. Most modern devices, such as computers, gaming consoles, and smart TVs, have built-in Ethernet ports. The port looks like a larger version of a phone jack and is labeled with an Ethernet symbol.
2. Prepare the Ethernet Cable:
– Ensure that you have an Ethernet cable of the appropriate length to connect your device to the Ethernet wall jack. Check that the cable is terminated correctly with an RJ45 connector at each end.
3. Connect the Ethernet Cable:
– Insert one end of the Ethernet cable into the Ethernet port of your device. Ensure a secure connection by pushing the connector in until it clicks into place or feels firmly connected.
– Take the other end of the Ethernet cable and insert it into the Ethernet wall jack. Again, make sure the connection is secure and fully inserted.
4. Check Network Connectivity:
– Once the device is connected, check for network connectivity. The device should automatically detect the Ethernet connection and establish a network connection.
– On your device, navigate to the network settings and ensure that the Ethernet connection is enabled. The device should display a connected status and provide network information such as IP address and network speed.
5. Test Network Performance:
– Conduct a speed test or use network diagnostic tools to verify the network performance. Run activities that require internet connectivity, such as browsing websites, streaming videos, or downloading files, to ensure the Ethernet connection is stable and delivering optimal speeds.
– If you encounter any issues with network connectivity or performance, double-check the Ethernet cable connections, verify the termination of cables, and troubleshoot any potential network configuration or device-specific issues.
6. Repeat for Other Devices:
– Repeat the above steps for connecting other devices to the Ethernet network. Each device should have its own Ethernet cable connected to the corresponding Ethernet wall jack.
– Ensure that you have enough Ethernet cables and wall jacks to accommodate the desired number of devices in each room or area of your house.
By following these steps, you can easily connect your devices to the Ethernet network and enjoy the benefits of a wired internet connection. Ethernet provides a reliable and stable connection for a seamless online experience, whether you’re working, gaming, or streaming media.
Troubleshooting Tips
While setting up your Ethernet network, you may encounter occasional issues or face challenges. Here are some troubleshooting tips to help you resolve common problems and ensure smooth network operation:
1. Check Cable Connections:
– Verify that all Ethernet cable connections are secure and properly terminated. Loose or poorly connected cables can result in sporadic or no network connectivity.
2. Test Different Ports:
– If a particular Ethernet wall jack or network port doesn’t seem to be working, try connecting the device to a different Ethernet port on your network switch or router. It’s possible that the port itself may be faulty.
3. Verify Power and Link Lights:
– Look for power and link lights on your network equipment, such as switches or routers. A solid power light indicates that the device is receiving power, while a blinking or solid link light indicates an active network connection. If these lights are not present or not functioning correctly, it may indicate an issue with the equipment.
4. Restart Network Equipment:
– Try restarting your network equipment, including your modem, router, and switches. Sometimes a simple reboot can resolve temporary network issues.
5. Check Network Settings:
– Ensure that your devices have the correct network settings, including IP addresses, subnet masks, and gateway addresses. DHCP (Dynamic Host Configuration Protocol) should be enabled to automatically assign IP addresses to devices.
6. Update Firmware and Drivers:
– Check for firmware updates for your network equipment, such as the router or switch, and install them if available. Similarly, ensure that your device’s network drivers are up to date. Outdated firmware or drivers can cause compatibility issues and hinder network performance.
7. Disable Wi-Fi Connections:
– If you’re experiencing inconsistent network performance, disable Wi-Fi connections on your devices and rely solely on the Ethernet network. This helps eliminate potential conflicts or interference from multiple connections.
8. Test with Different Cables:
– If you suspect a faulty Ethernet cable, try using a different cable to see if the issue persists. Sometimes, cables can wear out or become damaged, affecting network performance.
9. Consult Documentation and Support:
– Refer to the user manuals and documentation for your network equipment and devices. They may provide specific troubleshooting steps or guidance for resolving common issues.
– If you’re unable to resolve the problem on your own, don’t hesitate to reach out to customer support for assistance. They can provide further troubleshooting steps or advise on potential hardware issues.
By following these troubleshooting tips, you can quickly identify and resolve common network issues, ensuring a smooth and reliable Ethernet network experience. Remember to approach troubleshooting with patience and systematically test each potential source of the problem to pinpoint the root cause.
Conclusion
Wiring your house with Ethernet is a practical and beneficial step to upgrade your home network. By following the steps outlined in this guide, you can create a reliable, high-speed, and secure network infrastructure that offers numerous advantages over a traditional Wi-Fi setup.
We explored the benefits of wiring a house with Ethernet, including enhanced network performance, increased security, seamless connectivity, flexibility for devices, future-proofing, reduced interference, and increased home value. These benefits make Ethernet wiring a worthwhile investment for users who desire a stable and efficient network.
Throughout the process, we discussed the tools and materials needed, the importance of proper planning, choosing the right Ethernet cables, running the cables, installing Ethernet wall jacks, termination and testing, connecting devices, and troubleshooting tips. Each step is important and contributes to the success of your Ethernet network.
By taking the time to plan and execute your Ethernet wiring project properly, you can enjoy a network that provides faster speeds, increased reliability, and better security than Wi-Fi alone. Whether you’re an online gamer, streamer, remote worker, or simply a technology enthusiast, a wired Ethernet network offers a foundation for seamless connectivity and improved online experiences.
Remember, if you encounter any challenges during the installation or experience issues with your Ethernet network, refer back to the troubleshooting tips and consult relevant documentation or customer support for guidance.
So, grab your tools, plan your network, choose the right Ethernet cables, and start wiring your house for a robust and efficient Ethernet network. Enjoy the enhanced connectivity and the ability to fully leverage your internet connection for all your devices and activities.