Introduction
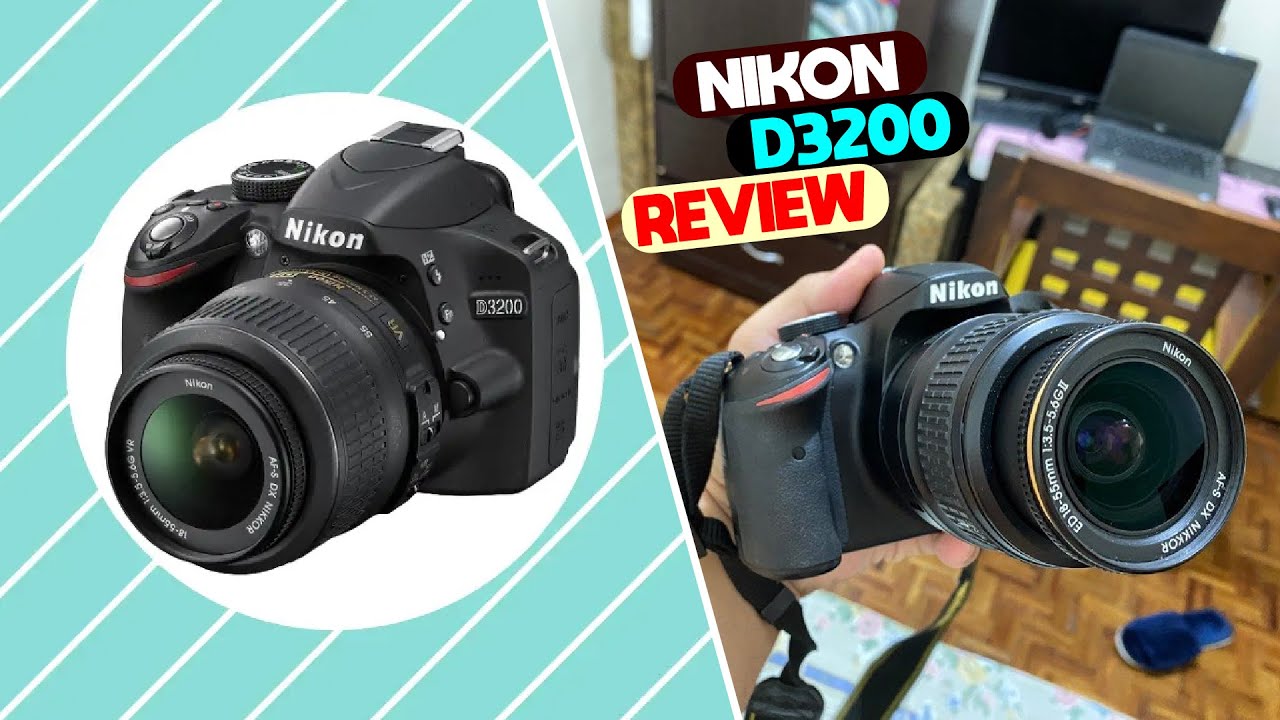
Welcome to the world of photography with the Nikon D D3300 24.2 MP Digital SLR Camera! Whether you’re an aspiring photographer or a seasoned professional, this powerful camera is sure to elevate your photography skills. With its advanced features and easy-to-use interface, the Nikon D D3300 is a great choice for capturing stunning images with exceptional detail and clarity.
In this guide, we will explore how to make the most of the Nikon D D3300 and take your photography to the next level. We’ll cover everything from understanding the buttons and controls on the camera, to adjusting settings, shooting modes, basic photography tips, and even troubleshooting common issues. By the end of this guide, you’ll have a comprehensive understanding of this camera’s capabilities and be able to capture amazing photos in various shooting situations.
With its 24.2 megapixel CMOS sensor and EXPEED 4 image processor, the Nikon D D3300 delivers remarkable image quality and sharpness. It also features an ISO range of 100-12800, allowing you to capture stunning photos even in low light conditions. The camera’s 11-point autofocus system ensures precise focus on your subject, while the 5 frames per second continuous shooting speed enables you to capture fast-moving action with ease.
Additionally, the Nikon D D3300 offers a range of shooting modes, including manual, aperture priority, shutter priority, and auto modes, giving you the flexibility to control every aspect of your photography. The camera also features a built-in flash for situations where additional light is needed, and a video mode for capturing high-definition videos.
Throughout this guide, we’ll provide you with practical tips and techniques to help you get the most out of your Nikon D D3300. We’ll delve into topics such as mastering exposure, using the autofocus system effectively, shooting in different lighting conditions, and transferring and editing your photos on your computer.
So, grab your Nikon D D3300 and let’s dive into the wonderful world of photography together. Whether you’re capturing beautiful landscapes, breathtaking portraits, or unforgettable moments, this guide will equip you with the knowledge and skills to make your images truly shine. Let’s get started!
Getting Started with the Nikon D D3300
Before you can start capturing amazing photos with your Nikon D D3300, it’s important to familiarize yourself with the camera and its basic functions. In this section, we will guide you through the initial setup process and provide a step-by-step walkthrough to get you up and running quickly.
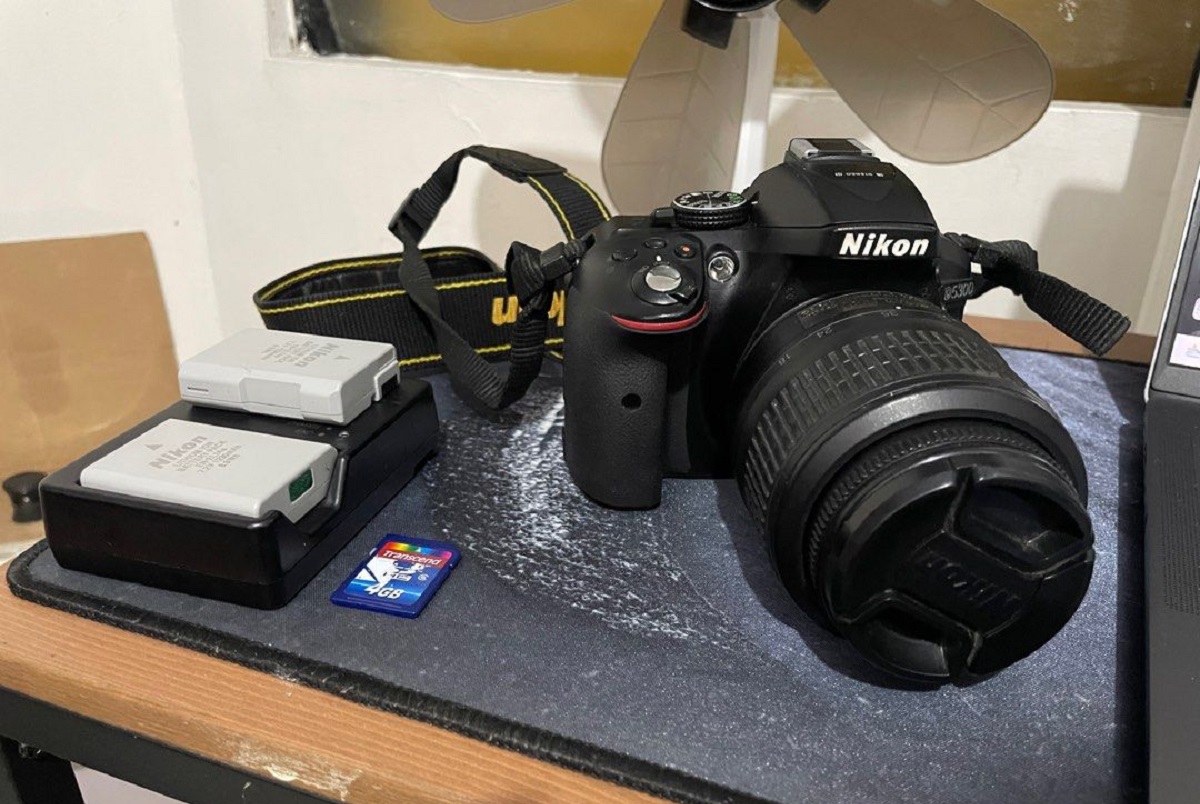
The first step is to insert the battery into the camera and attach the lens. The Nikon D D3300 is compatible with a wide range of lenses, so choose one that suits your shooting needs. Once the battery is inserted and the lens is securely attached, you’re ready to power on the camera.
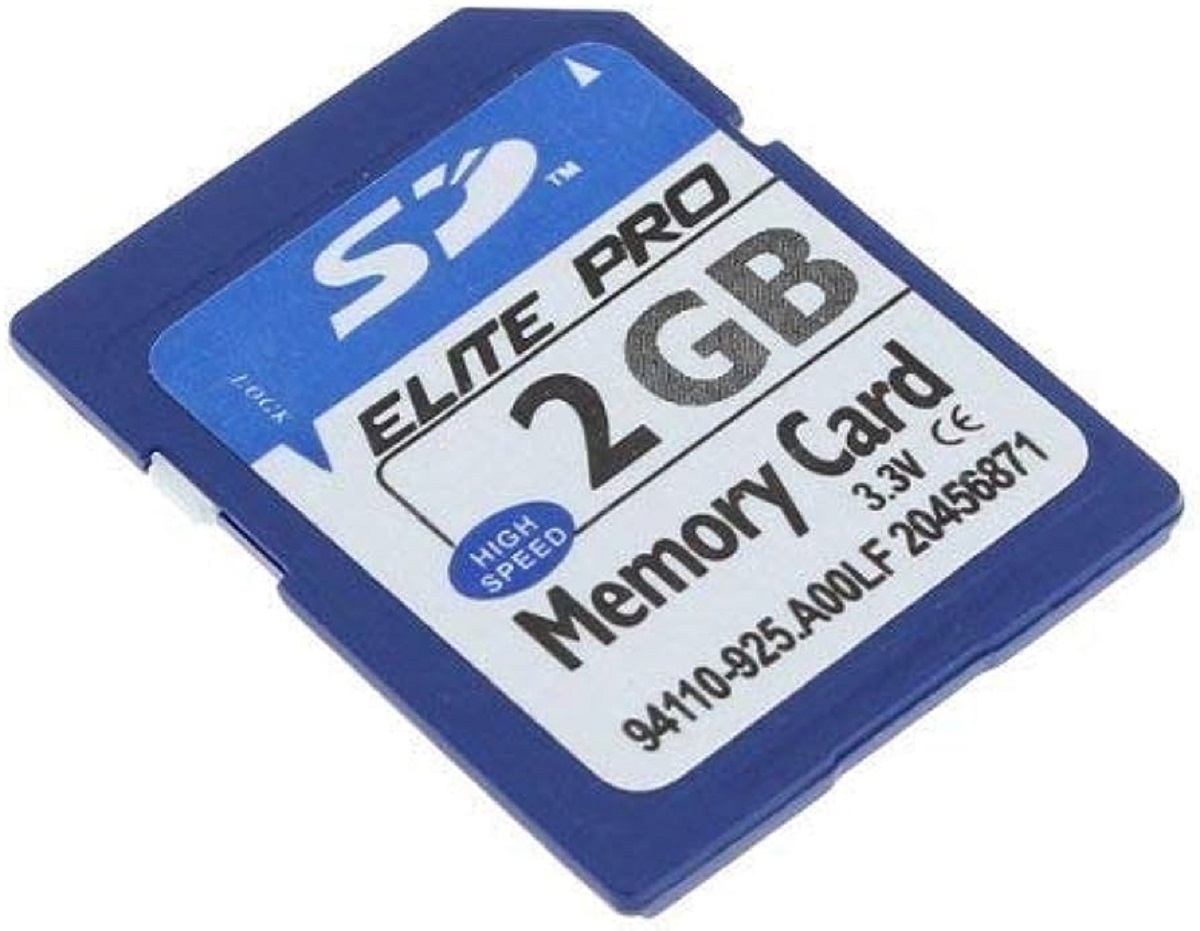
Upon powering on the camera, you’ll be prompted to set the date, time, and language preferences. Follow the on-screen instructions to configure these settings. Next, you’ll need to format the memory card. Formatting the memory card ensures that it is properly set up for use with your camera and can prevent any potential issues that may arise from using an improperly formatted card.
After formatting the memory card, it’s time to adjust the display settings. The Nikon D D3300 features a bright and vibrant LCD screen that allows you to easily navigate through the camera’s menu and view your images. You can adjust the screen brightness and customize the information displayed on the screen to suit your preferences.
Now that the initial setup is complete, let’s explore the basic buttons and controls of the Nikon D D3300. On the top of the camera, you’ll find the mode dial, which allows you to select different shooting modes such as auto, manual, aperture priority, and more. Familiarize yourself with these modes as they will be crucial in capturing the desired effect in your photos.
The camera’s control buttons are located on the back and sides, and each button serves a specific function. The multi-selector, located on the back of the camera, allows you to navigate through the menu and make selections. The exposure compensation button, shutter release button, and playback button are also located on the top and back of the camera for easy access.
Additionally, the Nikon D D3300 features a built-in flash that can be manually activated or set to automatically pop up when additional light is needed. Be sure to experiment with the flash settings to achieve the desired lighting effect in your photos.
Now that you’re familiar with the basic setup and controls of the Nikon D D3300, it’s time to start capturing beautiful images. In the following sections, we’ll explore different shooting modes, provide photography tips, and delve into advanced features of the camera. So, grab your camera and let’s unleash your creativity!
Understanding the Buttons and Controls on the Camera
The Nikon D D3300 is equipped with a variety of buttons and controls that allow you to navigate through its menu, adjust settings, and capture stunning photographs. Familiarizing yourself with these buttons and controls is essential for maximizing the camera’s capabilities. Let’s take a closer look at the key buttons and controls on the Nikon D D3300.
Starting with the top of the camera, you’ll find the mode dial which is used to select various shooting modes. These modes include auto, manual, aperture priority, shutter priority, and more. Experimenting with different shooting modes will help you achieve the desired effect in your photos.
Located on the back of the camera is the multi-selector. This multi-directional pad allows you to navigate through the camera’s menu and make selections. By pressing the center button, you can access additional shooting information and make adjustments to settings such as ISO, white balance, and exposure compensation.
Next to the multi-selector, you’ll find the playback button. Pressing this button allows you to review your captured images and videos on the camera’s LCD screen. You can zoom in on images to check for sharpness or delete unwanted photos with the delete button located nearby.
On the top right side of the camera, there is a mode button that can be used to access quick settings such as image quality, image size, and white balance. This button provides a convenient way to make adjustments on the go without delving into the camera’s menu.
The exposure compensation button, located near the shutter release button, allows you to adjust the exposure level for your photos. This can be particularly useful in situations where the camera’s metering may not accurately capture the desired exposure.
Another important control on the Nikon D D3300 is the shutter release button. Half-pressing the shutter release button activates the autofocus system and meters the exposure, while fully pressing it captures the image. The camera’s autofocus system can be customized to suit your needs, whether it’s using single-point autofocus, dynamic-area autofocus, or 3D tracking autofocus.
The rear of the camera also features a dedicated video recording button, allowing you to quickly switch to video mode and start recording without having to go through multiple menus.
These are just a few of the buttons and controls on the Nikon D D3300. Exploring each button’s function and experimenting with different settings will enable you to take full control of your camera and capture stunning photographs. Keep in mind that practice makes perfect, so take the time to familiarize yourself with these controls and unleash your creativity!
Adjusting Camera Settings
One of the key advantages of the Nikon D D3300 is its ability to adjust various camera settings to achieve the desired results in your photographs. Understanding and utilizing these settings will allow you to have full control over your images. Let’s explore the different camera settings available on the Nikon D D3300.
The first setting to consider is the image quality. The Nikon D D3300 offers a range of image quality options, including RAW and JPEG formats. RAW files capture more detailed data and allow for greater flexibility in post-processing, while JPEG files are compressed and ready to be shared instantly. Consider your needs and the post-processing workflow when selecting the appropriate image quality.
Next is the image size setting, which determines the resolution of your photos. The Nikon D D3300 allows you to choose from various image sizes, including large, medium, and small. Keep in mind that larger image sizes result in higher resolution, but also occupy more space on your memory card.
White balance is another important setting to consider. It allows you to adjust the color temperature to match the light conditions during your shoot. You can choose from presets such as daylight, cloudy, fluorescent, and more. Additionally, the Nikon D D3300 offers a custom white balance option that allows you to set a custom value based on the environment you are shooting in.
ISO sensitivity is a critical setting that determines the camera’s sensitivity to light. A lower ISO setting, such as 100, is ideal for well-lit conditions, while a higher ISO, such as 1600 or even higher, is suitable for low-light situations. Keep in mind that higher ISO settings can introduce noise into your photos, so finding the right balance is crucial.
Additionally, the Nikon D D3300 offers various autofocus settings to ensure your subjects are sharply focused. You can choose between single-point autofocus, dynamic-area autofocus, and 3D tracking autofocus. Experimenting with different autofocus settings will help you find the one that suits your shooting style and subject matter.
Exposure compensation is another setting that allows you to adjust the exposure level for your photos. This setting comes in handy when you want to intentionally over- or underexpose your images for creative effect. By adjusting the exposure compensation, you can brighten or darken your photos without changing the aperture or shutter speed.
The Nikon D D3300 also offers different metering modes, such as matrix metering, center-weighted metering, and spot metering. These modes determine how the camera measures the light in the scene and calculates the exposure. It’s important to understand the nuances of each metering mode and choose the one that suits the specific lighting conditions and subject.
These are just a few of the camera settings available on the Nikon D D3300. Explore the camera’s menu and experiment with different settings to achieve the desired results in your photos. Remember, mastering these settings will give you greater control over your images and allow you to unleash your creativity!
Shooting Modes: Which One Should You Choose?
The Nikon D D3300 offers a variety of shooting modes to cater to different photography needs and skill levels. Each shooting mode has its own benefits and is designed to assist you in capturing the best possible photos in various situations. Let’s explore the different shooting modes available on the Nikon D D3300 and when you should consider using them.
Auto Mode: The simplest and most beginner-friendly mode is the Auto mode. In this mode, the camera takes care of all the settings, including exposure, focus, and white balance. It’s a great mode to start with if you’re new to photography or just want to quickly capture a moment without worrying about technical details.
Programmed Auto (P) Mode: This mode gives you more control over the camera settings while still offering some automated assistance. The camera sets the exposure, but you can make adjustments to settings like ISO, white balance, and exposure compensation. Programmed Auto mode is a good choice for those who want more flexibility without diving into manual settings.
Aperture Priority (A/Av) Mode: If you want to have control over the depth of field in your photos, Aperture Priority mode is your best bet. You can set the desired aperture (f-stop) while the camera adjusts the other settings to achieve proper exposure. This mode is particularly useful for portraits, landscapes, and other situations where you want to control the background blur and sharpness.
Shutter Priority (S/Tv) Mode: Shutter Priority mode is ideal for capturing motion. In this mode, you set the desired shutter speed, and the camera adjusts the other settings accordingly. Fast shutter speeds freeze action, while slow shutter speeds create motion blur. Shutter Priority mode is great for sports photography, wildlife, and any situation where capturing movement is crucial.
Manual (M) Mode: Manual mode offers full control over all camera settings, including aperture, shutter speed, ISO, and more. It gives you complete creative control but requires a deeper understanding of exposure and camera settings. Manual mode is recommended for experienced photographers who want precise control over every aspect of their photos.
When selecting a shooting mode, consider the scene and the effect you want to achieve. If you’re not sure which mode to use, don’t be afraid to experiment and try different modes. Practice and hands-on experience will help you become more comfortable and confident with selecting the appropriate shooting mode for different situations.
Remember, the shooting modes on the Nikon D D3300 are tools to assist you in achieving your desired results. Take the time to understand their functionality and explore their capabilities. By mastering these shooting modes, you’ll be able to capture stunning photos in various shooting scenarios and unleash your creativity to its full potential.
Basic Photography Tips for the Nikon D D3300
Whether you’re a beginner or an experienced photographer, it’s always helpful to have some basic photography tips to enhance your skills and maximize the capabilities of your Nikon D D3300. Here are some tips to help you capture stunning photos:
1. Understand the Exposure Triangle: The exposure triangle consists of three elements – aperture, shutter speed, and ISO. Understanding how these three factors work together will allow you to control the exposure and achieve the desired results in your photos.
2. Pay Attention to Lighting: Lighting is crucial in photography. Take note of the direction, intensity, and quality of light in your scene. Experiment with different lighting conditions to create dramatic or soft and flattering effects.
3. Use the Rule of Thirds: The rule of thirds is a basic composition guideline that helps you create a well-balanced and visually pleasing photo. Imagine dividing your frame into a grid of nine equal sections and position your subject along the lines or at the points where the lines intersect.
4. Experiment with Different Perspectives: Don’t be afraid to change your perspective and explore different angles and viewpoints. Get down low, shoot from above, or try shooting from unconventional angles to add interest and uniqueness to your photos.
5. Master the Art of Focus: Understanding how to achieve sharp focus is essential for capturing clear and crisp images. Experiment with different focusing modes and learn to use the autofocus points effectively to ensure your subject is in focus.
6. Pay Attention to Composition: Composition plays a vital role in creating visually appealing photos. Consider elements like leading lines, symmetry, patterns, and the placement of your subject within the frame to create a strong composition.
7. Experiment with Depth of Field: Aperture plays a key role in controlling the depth of field in your photos. Experiment with different aperture settings to control what’s in focus and create a blurry background (shallow depth of field) or a sharper background (deep depth of field).
8. Be Patient and Observant: Photography requires patience and the ability to observe your surroundings. Take your time to explore your scene, anticipate the decisive moment, and wait for the perfect timing to capture the shot.
9. Practice, Practice, Practice: The more you practice with your Nikon D D3300, the better you’ll become at using its features and capturing great photos. Take your camera with you wherever you go and experiment with different techniques and settings.
10. Review and Learn from Your Photos: After each shoot, take the time to review your photos and analyze what works and what doesn’t. Learn from your mistakes and build on your successes to continually improve your photography skills.
By applying these basic photography tips and practicing regularly with your Nikon D D3300, you’ll gradually develop your own unique style and capture stunning photos that truly showcase your creative vision.
Using the Auto Focus System
The Nikon D D3300 features a sophisticated auto focus (AF) system that allows you to achieve sharp and accurately focused images. Understanding how to utilize the AF system effectively will significantly enhance your photography experience. Here are some tips on using the auto focus system on your Nikon D D3300:
1. AF Modes: The Nikon D D3300 offers different AF modes to suit various shooting scenarios. The default AF mode is Single-servo AF (AF-S), which is ideal for stationary subjects. Continuous-servo AF (AF-C) is suitable for capturing moving subjects, and Manual focus (MF) allows you to manually adjust the focus.
2. AF Points: The camera offers 11 focus points, allowing you to choose the specific area in the frame where you want the camera to focus. The center focus point is often the most accurate, but don’t hesitate to use the other focus points to suit your composition.
3. Single-Point AF Selection: In Single-servo AF mode (AF-S), you can use a single focus point to pinpoint the exact area you want to focus on. This mode is great for still subjects and provides precise control over the focus point.
4. Dynamic-Area AF Selection: In Continuous-servo AF mode (AF-C), the Dynamic-Area AF selection allows you to track moving subjects. The camera will continuously adjust the focus as the subject moves within the selected focus points. This mode is useful for capturing action shots.
5. Auto-Area AF Selection: The Auto-Area AF selection is a fully automated mode where the camera determines the focus point based on the scene. This mode is suitable for situations where you don’t have time to manually select a focus point or if the subject is unpredictable.
6. Back-Button Focus: Consider using the back-button focus technique, where you assign the focus function to a button on the back of the camera, separate from the shutter release button. This allows you to have more control and flexibility over when to focus, particularly in situations where you need to lock focus and recompose the shot.
7. AF-Assist Illuminator: In low-light situations, the AF-assist illuminator can help the camera to focus more accurately. By emitting a beam of light, it provides additional illumination for the autofocus system to work effectively in dimly lit environments.
8. Continuous AF Tracking: For tracking moving subjects, use the 3D-tracking AF mode. This mode automatically tracks the subject as it moves within the frame, adjusting the focus continuously. It’s a great option for sports photography or any scenario where the subject is in constant motion.
Remember to practice using the auto focus system in different shooting scenarios to become familiar with its capabilities. Understanding the various AF modes and mastering the selection and tracking techniques will enable you to capture sharp and well-focused images with your Nikon D D3300.
Mastering Exposure: Aperture, Shutter Speed, and ISO
Exposure is a fundamental aspect of photography that determines the overall brightness and balance of your images. Mastering exposure involves understanding the three key elements: aperture, shutter speed, and ISO. By controlling these settings on your Nikon D D3300, you can achieve the desired exposure and creative effects in your photos.
Aperture: Aperture refers to the opening of the lens through which light passes into the camera. It is measured in f-stops, such as f/2.8, f/5.6, etc. A wider aperture (lower f-stop number) allows more light to enter the camera, resulting in a shallower depth of field, where your subject is in focus while the background is blurred. On the other hand, a smaller aperture (higher f-stop number) allows less light to enter, resulting in a larger depth of field, where both the subject and the background are in focus.
Shutter Speed: Shutter speed determines the length of time the camera’s shutter remains open, allowing light to reach the camera’s sensor. It is measured in fractions of a second, such as 1/1000, 1/250, etc. A fast shutter speed freezes motion and is ideal for capturing action shots, sports, or any fast-moving subjects. Conversely, a slow shutter speed allows for longer exposure times and can create motion blur effects, such as silky waterfalls or light trails.
ISO: ISO determines the camera’s sensitivity to light. A low ISO, such as ISO 100, is suitable for well-lit situations, while a higher ISO, like ISO 800 or ISO 1600, is better for low-light conditions. However, higher ISO settings can introduce digital noise or grain to your photos. So, finding the right balance between ISO and the other exposure settings is crucial for maintaining image quality.
Understanding how aperture, shutter speed, and ISO work together is essential for achieving proper exposure. For example, if you want to capture a well-exposed portrait with a blurred background, you can use a wide aperture (e.g., f/2.8) to achieve a shallow depth of field, a fast shutter speed to freeze any motion, and adjust the ISO to maintain the desired exposure level. Experimenting with these settings in different lighting conditions will help you gain a better understanding of their impact on your photos.
Additionally, your Nikon D D3300 offers various exposure metering modes, such as matrix metering, center-weighted metering, and spot metering. These modes determine how the camera reads the light in the scene and calculates the exposure. Metering modes help you achieve accurate exposure in different lighting situations.
By mastering the principles of exposure and understanding how aperture, shutter speed, and ISO work together, you can take full control over the exposure and unleash your creativity with your Nikon D D3300.
Using the Built-in Flash
The built-in flash on your Nikon D D3300 is a versatile tool that can provide additional light when shooting in low-light conditions or to fill in shadows in a well-lit scene. Understanding how to use the built-in flash effectively will enhance your photography and allow you to capture better-exposed images. Here are some tips for using the built-in flash on your Nikon D D3300:
1. Keep it Balanced: The built-in flash can be useful in balancing the exposure of your subject and the background. However, be careful not to rely too heavily on the flash, as it can create harsh lighting and wash out details. Experiment with different flash settings to achieve a natural balance between the ambient light and the flash illumination.
2. Flash Modes: Your Nikon D D3300 offers different flash modes to suit various shooting scenarios. In the “auto flash” mode, the camera automatically determines if flash is needed based on the lighting conditions. The “fill-flash” mode fires the flash to fill in shadows on your subject. The “red-eye reduction” mode helps reduce the occurrence of red-eye caused by the flash. Experiment with these different modes to see which one best suits your needs.
3. Flash Compensation: Flash compensation allows you to adjust the intensity of the flash output. It can be useful in situations where the flash output is too strong or too weak. Just like exposure compensation, flash compensation lets you make adjustments to achieve the desired lighting effect.
4. Bounce Flash: If the built-in flash produces harsh or direct light, you can soften it by bouncing the flash off a nearby surface, such as a ceiling or a white wall. This technique helps diffuse the light and create a more natural and pleasing look. Experiment with different angles and surfaces to achieve the desired effect.
5. Slow Sync Flash: The slow sync flash is a technique that combines a longer shutter speed with the flash. It allows you to capture a well-exposed subject illuminated by the flash while also capturing the ambient light in the background. This technique can be particularly useful for capturing night scenes or any situation where you want to include the surrounding environment.
6. External Flash: While the built-in flash can be handy in many situations, consider investing in an external flash for more versatility and control over your lighting. External flash units offer features like bounce flash, swivel heads, and higher power output, allowing you to achieve more professional-looking results in your photography.
By experimenting with the built-in flash on your Nikon D D3300, you can harness its capabilities to improve your photos in various lighting conditions. Remember to balance the flash with the ambient light, use the different flash modes wisely, and consider advanced techniques like bounce flash and slow sync to create more visually appealing images.
Shooting in Different Lighting Conditions
As a photographer, it’s important to understand how to adapt to different lighting conditions to capture the best possible images. The Nikon D D3300 provides you with the tools to overcome various lighting challenges and make the most of any lighting situation. Here are some tips for shooting in different lighting conditions:
1. Daylight: When shooting in daylight, take advantage of the natural light by positioning your subject to make use of soft and even lighting. Avoid shooting in harsh, midday sunlight, as it can create unflattering shadows. Consider using a diffuser or reflector to soften or redirect the light for more pleasing results.
2. Golden Hour: The golden hour, which occurs during the hour after sunrise and the hour before sunset, offers beautiful warm and soft light. It’s an ideal time for capturing landscapes, portraits, and other subjects with a magical and golden glow. Take advantage of this time to create stunning images with a captivating atmosphere.
3. Backlighting: Backlighting occurs when the main light source is positioned behind your subject. It can create a dramatic effect, but it can also result in underexposed subjects. When photographing against the light, use exposure compensation to ensure your subject is properly exposed. You can also use fill flash or a reflector to add some light to your subject’s face.
4. Low Light: Shooting in low-light conditions can be challenging but also offers opportunities for creative photography. Increase your ISO setting to make your camera more sensitive to light. Use a wide aperture and a slower shutter speed, being mindful of camera shake. Consider using a tripod or other stabilization techniques to keep your camera steady.
5. Indoor Lighting: When shooting indoors, be aware of different light sources like fluorescent or incandescent light bulbs, which can cast a color cast on your images. Consider adjusting the white balance setting to compensate for the artificial lighting. You can also make use of bounce flash or diffusers to soften the light and create a more natural look.
6. Night Photography: Night photography offers a unique and magical atmosphere. Experiment with long exposures to capture light trails, starry skies, or cityscapes at night. Use a tripod to avoid camera shake, and consider using a remote shutter release to prevent any unwanted movement during long exposures.
Remember, each lighting condition presents its own opportunities and challenges. Take the time to observe the light, make adjustments to your camera settings, and be creative in your approach. With practice and experience, you’ll become more adept at capturing stunning images in any lighting situation with your Nikon D D3300.
Using the Video Mode
Your Nikon D D3300 is not just capable of capturing stunning photos; it also includes a video mode that allows you to record high-quality videos. With a few adjustments and considerations, you can unleash your creativity and capture memorable moments in motion. Here are some tips for using the video mode on your Nikon D D3300:
1. Select the Right Settings: Set your camera to video mode by switching the mode dial to the video symbol. Choose the appropriate video quality and frame rate based on your needs. The Nikon D D3300 offers full HD video recording at various frame rates, allowing you to capture smooth and high-quality footage.
2. Stabilize Your Camera: Stability is crucial for capturing smooth and steady videos. Consider using a tripod or a camera stabilizer to minimize shaking and ensure professional-looking footage. This is particularly important when shooting in situations with low light or when using zoom.
3. Pay Attention to Lighting: Good lighting is just as important in video as it is in photography. Consider the lighting conditions and adjust accordingly. If the lighting is inadequate, you can use additional lighting sources or increase the camera’s ISO setting. Avoid using the built-in flash while recording videos, as it can be too harsh and disrupt the footage.
4. Use Manual Focus: When shooting videos, consider using manual focus instead of relying on auto focus. Manual focus gives you better control over the focus point, preventing the camera from constantly refocusing and potentially ruining your shot. Take the time to focus accurately and adjust as needed during recording.
5. Experiment with Composition and Angles: Don’t be afraid to experiment with different compositions and angles to add visual interest to your videos. Use different perspectives, camera movements, and framing techniques to enhance the storytelling and capture engaging footage.
6. Consider Audio: Pay attention to the audio quality when recording videos. The built-in microphone on the Nikon D D3300 might not provide the best sound quality, as it can pick up background noise and produce echo. Consider using an external microphone for better audio recording results.
7. Approach Post-Processing: To enhance your videos, consider post-processing them using video editing software. This allows you to trim, add transitions, incorporate music, and adjust the color grading to achieve the desired look and feel. Experiment with different editing techniques to bring your footage to life.
With the video mode on your Nikon D D3300, you have the ability to capture dynamic moments and tell compelling stories through motion. Experiment with different settings, techniques, and post-production to elevate your video recording skills and create visually stunning and engaging videos.
Transferring Photos from the Camera to Your Computer
Transferring photos from your Nikon D D3300 to your computer is a simple and straightforward process. There are several methods you can use to transfer your photos, depending on your preferences and available equipment. Here are a few ways to transfer your photos:
1. USB Cable: The most common method is to use a USB cable to connect your Nikon D D3300 directly to your computer. Make sure your camera is powered off, then connect one end of the USB cable to the camera’s USB port and the other end to a USB port on your computer. Once connected, power on your camera, and your computer should recognize it as an external storage device. You can then browse the camera’s folders and transfer the photos to your computer.
2. Memory Card Reader: If your computer does not have a built-in SD card reader, you can use an external memory card reader. Remove the memory card from your Nikon D D3300 and insert it into the card reader. Connect the card reader to your computer’s USB port, and the computer will recognize the memory card as a removable storage device. You can then copy and transfer the photos from the memory card to your computer.
3. Wireless Transfer: Some Nikon D D3300 models have built-in Wi-Fi capabilities, allowing you to transfer photos wirelessly to your computer or smartphone. To use this method, you’ll need to install Nikon’s wireless transfer app on your mobile device or computer. Follow the instructions to establish a connection between your camera and the device, then you can transfer photos wirelessly through the app.
4. XQD or CF Card Reader: If you’re using an XQD or CF card with your Nikon D D3300, you’ll need a compatible card reader specific to that type of memory card. Connect the card reader to your computer’s USB port, insert the XQD or CF card, and the computer will recognize it as a removable storage device. You can then transfer the photos from the card to your computer.
Regardless of the method you choose, it’s important to handle your camera and memory card with care during the transfer process. Avoid disconnecting the camera or removing the memory card while files are being transferred to prevent data corruption. Once your photos are safely transferred to your computer, you can organize, edit, and share them as desired.
Remember to regularly backup your photos to avoid data loss. Having multiple copies of your precious images ensures their safety and allows you to free up space on your memory card for future photo shoots with your Nikon D D3300.
Editing and Enhancing Photos with Software
Once you have transferred your photos from your Nikon D D3300 to your computer, you can further enhance and unleash their full potential through photo editing software. Whether you’re a beginner or an experienced photographer, editing software allows you to bring out the best in your images. Here are some tips on editing and enhancing your photos:
1. Choose the Right Software: There are various photo editing software options available, ranging from free to paid versions. Adobe Photoshop and Lightroom are popular choices among professionals but may have a steeper learning curve. If you’re a beginner, consider starting with more user-friendly software like Adobe Photoshop Elements, GIMP, or Lightroom CC.
2. Adjust Exposure and Contrast: Use the software’s exposure and contrast adjustments to fine-tune the overall brightness and contrast of your photo. By adjusting these settings, you can bring out details in the shadows and highlights, making your images more vibrant and appealing.
3. Enhance Colors: Enhance the colors in your photos using the software’s saturation and vibrance adjustments. Be cautious not to overdo it and maintain a natural look. By selectively adjusting colors, you can make your subject stand out or create a specific mood in your image.
4. Sharpen and Reduce Noise: Apply sharpening techniques to enhance the details and sharpness of your photos. However, be mindful of not going too far, as excessive sharpening can create artifacts. You can also utilize noise reduction tools to reduce any digital noise present in your low-light or high-ISO images.
5. Crop and Straighten: Use the cropping tool to remove any unwanted elements or to create a more pleasing composition. Additionally, straighten any tilted horizons or lines in your photos to improve the overall balance and aesthetic appeal.
6. Experiment with Filters and Effects: Get creative with filters and effects available in the software. Apply black and white or vintage effects, add artistic overlays, or experiment with different styles to add a unique touch to your photos. However, be careful not to overuse them, as subtlety often yields the best results.
7. Save Your Original Files: When editing your photos, always work on a copy of the original file, preserving the original untouched version. This ensures that you can always go back to the original if needed. Save your edited photos in a high-resolution format and consider saving a web-optimized version for sharing online.
8. Learn and Practice: Photo editing is a skill that develops with time and practice. Take advantage of online tutorials, courses, and resources to learn new techniques and expand your editing skills. The more you practice, the better you’ll become at enhancing and bringing your vision to life.
Remember, photo editing software should be used as a tool to enhance your photos, not to make up for poor photography skills. It’s always best to strive for capturing well-exposed, composed, and sharp photos from the start with your Nikon D D3300. But with the right software and editing techniques, you can take your photos to the next level and truly showcase your artistic vision.
Troubleshooting Common Issues
While your Nikon D D3300 is a reliable camera, it’s not uncommon to encounter some common issues or challenges during your photography journey. Understanding how to troubleshoot these issues can help you overcome them and ensure a smooth shooting experience. Here are some common issues photographers may face and suggestions for troubleshooting:
1. Blurry Images: Blurry images can result from various factors, such as camera shake, incorrect focus, or slow shutter speed. To solve this issue, stabilize your camera by using a tripod or increasing the shutter speed. Check that your subject is in focus, and if needed, switch to manual focus for more control over the sharpness.
2. Overexposed or Underexposed Photos: Exposure problems can occur due to incorrect settings or challenging lighting conditions. Use exposure compensation to adjust the exposure level, and consider using the camera’s histogram to ensure a balanced exposure. In post-processing, you can also adjust exposure levels or use graduated filters to correct exposure issues.
3. Memory Card Errors: If you encounter errors or issues with your memory card, ensure it is properly inserted and not corrupted. Try reformatting the card in your camera or inserting a different memory card to see if the problem persists. If the issue continues, the card may need to be replaced.
4. Battery Drain: If you experience rapid battery drain, check if any power-hungry features like Wi-Fi or image stabilization are enabled. Using a fully charged and genuine Nikon battery is recommended. It’s also a good idea to carry a spare battery to avoid running out of power during important shoots.
5. Focus Hunt or Slow Autofocus: If your autofocus system is struggling to lock onto the subject or is slow, ensure that your lens and camera contacts are clean. Consider changing autofocus modes or selecting a different AF point. If necessary, switch to manual focus and use focus peaking or magnification to achieve precise focus.
6. Noise in High ISO Images: When shooting in low-light conditions at high ISO settings, noise may become more pronounced. To mitigate this, use noise reduction software during post-processing or consider shooting in RAW format, which provides more flexibility in noise reduction adjustments. Additionally, using a fast lens and adding additional lighting can help reduce the need for high ISO settings.
7. Camera Freezing or Malfunctioning: If your camera freezes or malfunctions, try removing the battery and reinserting it after a few moments. Check if the firmware is up to date and update it if necessary. If the issue persists, contact Nikon customer support for further assistance.
8. Spots or Dust on Images: Spots or dust on your images may be caused by particles on the camera’s sensor. Use the built-in sensor cleaning function or consider getting your camera professionally cleaned. If the spots persist, you can remove them during post-processing using spot removal tools.
Remember, troubleshooting common issues often requires a combination of technical knowledge and practical experience. Familiarize yourself with your camera’s settings and functions, and don’t hesitate to consult the camera’s manual or seek online resources for specific issues. With time and practice, you’ll become well-equipped to address any challenges that arise and capture exceptional photos with your Nikon D D3300.
Conclusion
Congratulations! You now have a comprehensive understanding of the Nikon D D3300 24.2 MP Digital SLR Camera and how to make the most of its capabilities. From getting started with the camera and understanding its buttons and controls, to adjusting settings, exploring shooting modes, and troubleshooting common issues, you are well-equipped to capture stunning photos and videos.
Remember to always practice and experiment with your Nikon D D3300. The more you use it, the more familiar you will become with its features and settings, allowing you to unlock your creativity and capture incredible shots.
Utilize the various shooting modes to adapt to different scenarios, experiment with exposure settings to achieve the desired results, and take advantage of the built-in flash and video mode to further expand your creative possibilities.
Additionally, photo editing software can elevate your images to the next level. Enhance your photos, correct exposure, adjust colors, and experiment with different effects to truly showcase your artistic vision. However, always remember that editing should be used to enhance your photos, not replace the importance of capturing well-exposed and composed images from the start.
Lastly, if you encounter any challenges or issues, refer to the troubleshooting section or seek assistance from Nikon’s customer support. With proper troubleshooting techniques, you can overcome common issues and continue your photography journey smoothly.
Now, it’s time to grab your Nikon D D3300 and embark on your photography adventures. From capturing breathtaking landscapes to capturing intimate portraits or documenting life’s precious moments, your Nikon D D3300 will be by your side, helping you create memories and tell stories through the art of photography. Enjoy the journey and happy shooting!