Introduction
When it comes to capturing stunning photographs, nothing beats the power and versatility of a digital single-lens reflex (DSLR) camera. Whether you’re a professional photographer or an enthusiastic hobbyist, understanding the key components of a DSLR camera can greatly enhance your photography skills and the overall quality of your images.
A DSLR camera combines advanced technology with the creative control of interchangeable lenses, making it the preferred choice for photographers who want to elevate their craft. This article will provide a comprehensive overview of the essential components that make up a DSLR camera, ensuring you have a solid understanding of how each element contributes to capturing outstanding images.
From the lens to the image sensor, from the shutter to the viewfinder, each component plays a crucial role in the functioning and performance of a DSLR camera. By gaining a deeper understanding of these components, you’ll be better equipped to make informed decisions when choosing the right camera for your needs, as well as to utilize its capabilities to their fullest potential.
Additionally, grasping the functionality of each component will enable you to manipulate settings such as exposure, focus, and white balance, allowing you to express your artistic vision and capture breathtaking shots in any situation.
Join us as we explore and unravel the mysteries behind the components that form the backbone of a DSLR camera. Whether you’re a beginner just starting your photographic journey or a seasoned professional looking to brush up on your knowledge, this article will provide valuable insights into the inner workings of this remarkable piece of photographic equipment.
Lens
The lens of a DSLR camera is one of the most important components, as it directly influences the quality and versatility of your photographs. It acts as the window through which light enters and interacts with the image sensor, making it a crucial factor in a camera’s performance.
DSLR cameras have interchangeable lenses, allowing you to choose the perfect lens for each photographic situation. There is a wide variety of lenses available, ranging from wide-angle lenses for capturing sweeping landscapes, to telephoto lenses for bringing distant subjects closer. Each lens has its own unique characteristics and capabilities, giving you the flexibility to capture different perspectives and creative effects.
The quality of a lens is determined by factors such as its construction, the quality of the glass elements, and the precision of the lens coatings. High-quality lenses minimize distortion, aberrations, and flare, resulting in sharper images with vibrant colors and excellent contrast.
In addition to the lens’s optical quality, the focal length is another important aspect to consider. The focal length of a lens determines its angle of view and magnification. Lenses with shorter focal lengths have wider angles of view, making them perfect for landscapes or group shots. On the other hand, lenses with longer focal lengths have narrower angles of view and are ideal for capturing distant subjects or achieving a shallow depth of field.
Another crucial feature of a lens is its aperture size. The aperture controls the amount of light that enters the camera, influencing both the exposure and the depth of field. Lenses with larger apertures (smaller f-numbers) allow more light to enter, making them suitable for low-light conditions and creating a shallow depth of field, which can isolate the subject from the background.
When choosing a lens for your DSLR camera, consider your photography style and the subjects you will be capturing. Whether you’re interested in portrait photography, landscape photography, or macro photography, there is a lens available to meet your specific needs.
Investing in high-quality lenses can significantly improve the overall image quality of your photographs. Keep in mind that lenses are an essential part of your photographic gear, so it’s worth allocating a significant portion of your budget to acquire lenses that match your creative vision.
In summary, the lens of a DSLR camera determines both the technical and creative aspects of your photographs. It impacts the quality, perspective, and depth of field, making it a crucial component in capturing stunning images. By understanding the different types of lenses, their attributes, and how they interact with your camera, you’ll be well-equipped to explore the vast possibilities of DSLR photography.
Image Sensor
The image sensor is the heart of a DSLR camera’s digital imaging system. It serves as the electronic equivalent of traditional film, capturing light and converting it into a digital signal. The quality and sensitivity of the image sensor greatly impact the clarity, color accuracy, and low-light performance of your photographs.
There are primarily two types of image sensors used in DSLR cameras: the CCD (Charge-Coupled Device) and the CMOS (Complementary Metal-Oxide-Semiconductor). Both have their advantages and disadvantages, and camera manufacturers choose one depending on the camera’s specific requirements.
CCD sensors were more commonly used in older DSLR models and are known for producing high-quality images with low noise levels. These sensors, however, consume more power and tend to be slower in terms of data processing. On the other hand, CMOS sensors are the prevalent type in modern DSLR cameras due to their improved power efficiency and faster readout speeds. They offer excellent low-light performance and allow for higher burst rates, making them ideal for capturing action shots.
The size of the image sensor also plays a crucial role in determining image quality. In general, larger sensors have larger pixels, which can capture more light and produce better image quality, especially in low-light conditions. Full-frame sensors, which are the same size as traditional 35mm film, are highly regarded for their exceptional image quality. However, APS-C and micro four-thirds sensors, which are smaller in size, are also widely used and offer a more affordable option for many photographers.
Furthermore, the megapixel count of an image sensor should also be considered. Megapixels refer to the number of pixels on the sensor, with higher megapixel counts generally resulting in larger image sizes and more detailed images. However, it’s important to note that megapixels alone do not determine image quality, and factors such as lens quality and image processing also play a significant role.
The image sensor works in conjunction with the camera’s image processor to convert the captured light into a digital image. The processor performs tasks such as noise reduction, color correction, and compression to produce the final image file. The quality of the image processor can greatly impact the overall image quality and the camera’s performance in terms of speed and continuous shooting capability.
Understanding the significance of the image sensor in a DSLR camera allows you to make informed decisions when choosing a camera that meets your photography needs. The sensor size, type, and megapixel count all contribute to the camera’s overall performance and the quality of the images you capture.
In summary, the image sensor is a critical component of a DSLR camera, as it captures light and converts it into a digital signal. The type, size, and megapixel count of the sensor greatly impact the image quality, low-light performance, and overall functionality of the camera. By considering these factors, you can choose a DSLR camera that best suits your photography requirements and captures stunning images with remarkable clarity and detail.
Shutter
The shutter is a vital component of a DSLR camera that controls the duration of exposure, allowing light to reach the image sensor and capture the desired moment. It acts as a barrier between the lens and the image sensor, opening and closing to control the amount of light that enters the camera.
There are two main types of shutters found in DSLR cameras: mechanical and electronic. Mechanical shutters consist of a physical curtain that moves across the image sensor. When you press the shutter button, the first curtain opens, allowing light to reach the sensor. After the desired exposure time has elapsed, the second curtain closes to end the exposure. Mechanical shutters provide precise control over exposure, making them suitable for various photography styles and techniques.
On the other hand, electronic shutters function differently. Instead of physical curtains, they utilize the image sensor itself to control the exposure. Electronic shutters provide near-silent operation and allow for faster shutter speeds, making them advantageous for capturing subjects in motion or situations where a quiet operation is desired. However, some electronic shutters may introduce rolling shutter effects, especially when capturing fast-moving subjects or panning the camera.
The shutter speed refers to the length of time the shutter remains open, determining the amount of light that reaches the image sensor. It is measured in fractions of a second, such as 1/1000th, 1/250th, or 1/30th of a second. Faster shutter speeds freeze motion, making them ideal for capturing fast-action shots, while slower shutter speeds allow for the blurring of motion, creating a sense of movement or capturing long-exposure photographs.
Another important aspect to consider is the shutter durability and lifespan. DSLR cameras are built to endure rigorous use, and the shutter mechanism is designed to withstand thousands of actuations. Manufacturers provide a shutter durability specification, indicating the expected number of actuations before the shutter may need to be replaced. It is important to consider this factor, especially if you anticipate photographing in high-volume situations or if you plan to keep the camera for an extended period.
The ability to control the shutter speed is a fundamental tool in photography. Whether you’re freeze-framing the action of a sports event or creating dreamy long-exposure shots of cityscapes, mastering the use of the shutter speed allows you to exercise creative control over your images.
In summary, the shutter is a crucial component of a DSLR camera, controlling the duration of exposure and allowing light to reach the image sensor. Understanding the different types of shutters, their function, and the role of shutter speed empowers you to capture the perfect moment with precision and creativity. By exploring the possibilities of different shutter speeds, you can master the art of freezing or blurring motion and capture visually stunning images that convey the desired mood and emotion.
Viewfinder
The viewfinder is an essential component of a DSLR camera that allows photographers to frame and compose their shots. It is a window through which you can see the scene you are about to capture, providing a real-time preview of the image before pressing the shutter button.
DSLR cameras generally offer two types of viewfinders: optical and electronic. Optical viewfinders utilize mirrors and prisms to redirect light coming through the lens to the eyepiece, providing a direct, unfiltered view of the scene. This type of viewfinder offers a clear and natural view, allowing you to see the subject in real-time without any digital processing or time lag.
Electronic viewfinders (EVF), on the other hand, display a digital representation of the scene through a small LCD screen within the viewfinder. These viewfinders use the camera’s image sensor to capture the scene and display it on the LCD screen, simulating the final image. EVFs offer additional information such as exposure settings, histograms, and focus peaking, providing valuable tools for monitoring and adjusting the shot on the fly.
Both types of viewfinders have their advantages and cater to different needs and shooting styles. Optical viewfinders deliver a natural, unprocessed view of the scene, making them well-suited for fast-paced photography such as sports or wildlife, where real-time action needs to be captured effectively. On the other hand, electronic viewfinders provide additional information and pre-visualization capabilities, making them useful for situations that require precise exposure or focus control, such as landscape or portrait photography.
Viewfinders also come in different magnifications and eyepoint distances to accommodate various user preferences and visual requirements. A larger magnification allows for a more detailed view of the scene, while a longer eyepoint distance allows for comfortable viewing, particularly for individuals who wear glasses.
Additionally, some DSLR cameras offer the option of using the LCD screen as a live viewfinder. This enables you to compose your shots using the camera’s rear display, similar to how you would frame images on a smartphone. Live view mode is beneficial when shooting from awkward angles or when precise framing is required, especially in macro or low-level photography.
The viewfinder is an essential tool for composing your shots and ensuring accurate framing. It provides critical information that allows you to make on-the-spot adjustments and capture the image you envision. Whether you prefer the immediacy of an optical viewfinder or the versatility of an electronic viewfinder, mastering the use of the viewfinder enhances your photography skills and helps you capture compelling and well-composed images.
In summary, the viewfinder is a key component of a DSLR camera that allows photographers to frame and compose their shots effectively. Whether you choose an optical or electronic viewfinder, understanding their advantages and differences empowers you to make informed decisions and capture stunning images with precision and creativity.
LCD Screen
The LCD screen is a crucial component of a DSLR camera that serves multiple functions and provides photographers with a versatile tool for composing, reviewing, and adjusting their shots. It is a high-resolution color display located on the rear of the camera body.
The primary function of the LCD screen is to provide a real-time preview of the image before capturing it, known as Live View. This feature allows you to see exactly what the camera sees, making it particularly useful for composing shots from unique angles, such as low-level or overhead perspectives. Live View is also valuable when shooting in challenging lighting conditions or when precise focusing is required.
In addition to live view, the LCD screen is used to navigate the camera’s menu system. The menu allows you to access and adjust various camera settings, such as ISO, white balance, exposure compensation, and shooting modes. The LCD screen provides a clear, intuitive interface for making these adjustments, ensuring easy and efficient camera operation.
Furthermore, the LCD screen serves as a playback tool, allowing you to review your captured images and videos. You can zoom in to check details and sharpness, evaluate exposure and color accuracy, and delete unwanted shots directly from the screen. This on-the-spot review capability enables you to quickly assess the success of your shots and make necessary adjustments if needed.
Some DSLR cameras feature a vari-angle or tilting LCD screen, which can be rotated and angled to different positions. This flexibility enhances shooting in various scenarios, such as high or low angles, self-portraits, or shooting over crowds. A vari-angle LCD enables you to compose shots from unique perspectives without the need to contort your body or rely solely on the camera’s viewfinder.
The resolution and size of the LCD screen are important factors to consider when selecting a DSLR camera. Higher resolution screens with more pixels offer a greater level of detail, making it easier to assess image sharpness and make precise adjustments. A larger screen size enhances the overall viewing experience, allowing for better image composition and menu navigation.
It’s worth mentioning that using the LCD screen extensively can drain the camera’s battery faster than using the viewfinder. Consider using the viewfinder when capturing images for an extended period to conserve battery life.
In summary, the LCD screen is a versatile tool in a DSLR camera that serves multiple functions. It provides a real-time preview of the image, enables menu navigation, and facilitates the review of captured photos and videos. Whether through Live View, menu access, or image playback, the LCD screen plays a vital role in helping photographers compose, adjust, and evaluate their shots with ease and confidence.
Image Processor
The image processor is a crucial component of a DSLR camera that handles various tasks, including data processing, image enhancement, and file compression. It is responsible for converting the raw data captured by the image sensor into a high-quality, usable image file.
The image processor performs a range of functions to optimize the captured image. This includes tasks such as noise reduction, color correction, sharpening, and tonal adjustments. These processes ensure that the final image exhibits accurate colors, reduced noise levels, and improved overall image quality.
One of the key functions of the image processor is to handle the camera’s continuous shooting capabilities or burst mode. It processes and stores a rapid sequence of images, allowing you to capture a series of shots in quick succession. The speed and efficiency of the image processor determine the camera’s maximum burst rate, providing photographers with the ability to capture decisive moments in fast-paced situations, such as sports or wildlife photography.
Additionally, the image processor plays a vital role in managing the camera’s autofocus system. It processes information from the image sensor and calculates autofocus points, tracking subjects and maintaining focus accuracy. The speed and accuracy of the autofocus system are dependent on the capabilities of the image processor.
The brand and model of the camera often determine the specific image processing algorithms used. Different manufacturers incorporate their unique processing technologies, resulting in variations in image rendering and characteristics. Some cameras provide customizable picture profiles or creative filters that allow photographers to apply specific looks and effects to their images directly in-camera.
The image processor also handles the file compression and storage of the image files. It uses various image file formats, such as JPEG or RAW, to store the captured image data. JPEG files are compressed and smaller in size, making them suitable for sharing and online use. RAW files, on the other hand, offer uncompressed and unprocessed data, allowing for greater flexibility in post-processing and preserving all the details captured by the sensor.
As technology advances, camera manufacturers continually develop and update their image processing engines. Newer generations of image processors often offer improved performance, enhanced noise reduction, better dynamic range, and faster processing speeds. It’s worth considering the image processor’s capabilities when purchasing a DSLR camera, as it directly affects the overall image quality and operational efficiency.
In summary, the image processor is a critical component of a DSLR camera that handles the processing and optimization of captured images. It applies various algorithms for noise reduction, color correction, sharpening, and tonal adjustments to produce high-quality image files. The image processor also manages continuous shooting capabilities, autofocus performance, and file compression. Understanding the capabilities and advancements in image processing technology allows photographers to choose a camera that produces exceptional image quality and meets their specific needs.
Memory Card
The memory card is an essential component of a DSLR camera that serves as the storage medium for capturing and storing image files. It provides a portable and reliable way to store and transfer your images, ensuring that you can capture an abundance of photographs without worrying about running out of storage space.
There are several types of memory cards available for DSLR cameras, with the most common being Secure Digital (SD) cards. SD cards come in various capacities, ranging from a few gigabytes (GB) to multiple terabytes (TB). The capacity of the memory card determines how many images and videos you can store before needing to offload them onto a computer or external storage device.
In addition to capacity, the speed of the memory card is an important consideration. Faster memory cards, typically labeled with a speed class or a UHS (Ultra High-Speed) rating, offer quicker read and write speeds. This is particularly important when capturing images in burst mode or recording high-definition video, as it ensures that the camera can write the data to the memory card quickly and efficiently without buffer delays.
Another factor to consider is the durability and reliability of the memory card. Look for memory cards that are resistant to shock, vibration, extreme temperatures, and water. This ensures that your precious image files are protected, even in challenging shooting environments.
It’s important to note that DSLR cameras often support multiple types of memory cards, such as SD, CompactFlash (CF), or XQD cards, depending on the camera model. Compatibility with different memory card types allows you to choose the option that best suits your storage needs, budget, and personal preferences.
When it comes to managing your memory cards, it’s important to have a backup strategy in place. Having multiple memory cards allows you to swap them out when one becomes full, ensuring you never miss a shot. It’s also a good practice to regularly transfer your images to a secure storage solution, such as a computer, external hard drive, or cloud storage, to safeguard against data loss.
Lastly, it’s recommended to format your memory cards in-camera before using them to ensure optimal performance and compatibility. Formatting erases any existing data and prepares the memory card for use with your specific camera model.
In summary, the memory card is a vital accessory for a DSLR camera, providing a portable and convenient means of storing and transferring your image files. Capacity, speed, durability, and compatibility are important factors to consider when selecting a memory card. By using reliable and appropriately sized memory cards and employing a backup strategy, you can ensure that your images are safely stored and readily accessible whenever you need them.
Battery
The battery is a crucial component of a DSLR camera that provides power to the camera’s various functions and allows you to capture images and videos. Without a reliable and long-lasting battery, your camera would be rendered unusable, making it essential to understand and manage battery usage to ensure uninterrupted shooting.
DSLR cameras typically use rechargeable lithium-ion batteries, which offer high energy density and long-lasting power. These batteries provide a steady source of power and can be recharged multiple times, making them more cost-effective and environmentally friendly compared to disposable batteries.
Battery life can vary depending on the camera model, shooting conditions, and usage. The number of images you can capture on a single charge is often specified by the camera manufacturer and is influenced by factors such as the use of the LCD screen, flash, continuous shooting, and image stabilization. It’s important to check the battery life specifications for your specific camera and consider carrying spare batteries or a high-capacity battery for extended shooting sessions.
To optimize battery usage and prolong battery life, there are several practices you can follow. First, using the camera’s viewfinder instead of the LCD screen for framing and composing shots can significantly reduce power consumption. Additionally, disabling features such as Wi-Fi, GPS, or image stabilization when not in use can help conserve battery power. Lowering the brightness level of the LCD screen and activating the camera’s power-saving mode are also effective ways to extend battery life.
It’s important to note that lithium-ion batteries have a limited lifespan and gradually lose their capacity over time, even with proper usage and care. Therefore, it may be necessary to replace your battery after a certain period to ensure optimal performance.
When charging the battery, follow the manufacturer’s instructions and use the provided charger. Avoid using third-party chargers, as they may not provide the same level of safety and performance. It’s recommended to fully charge the battery before each shoot to ensure maximum capacity and reliability.
Carrying spare batteries is a prudent practice, especially when shooting in remote locations or for extended periods without access to power outlets. Keep spare batteries in a protective case or bag to prevent accidental damage or discharge.
In summary, the battery is a critical component of a DSLR camera, providing the necessary power to capture images and videos. Understanding battery life, optimizing usage, and carrying spare batteries are essential for uninterrupted shooting. By following best practices for battery management, you can ensure that your camera remains powered and ready to capture the perfect shot whenever inspiration strikes.
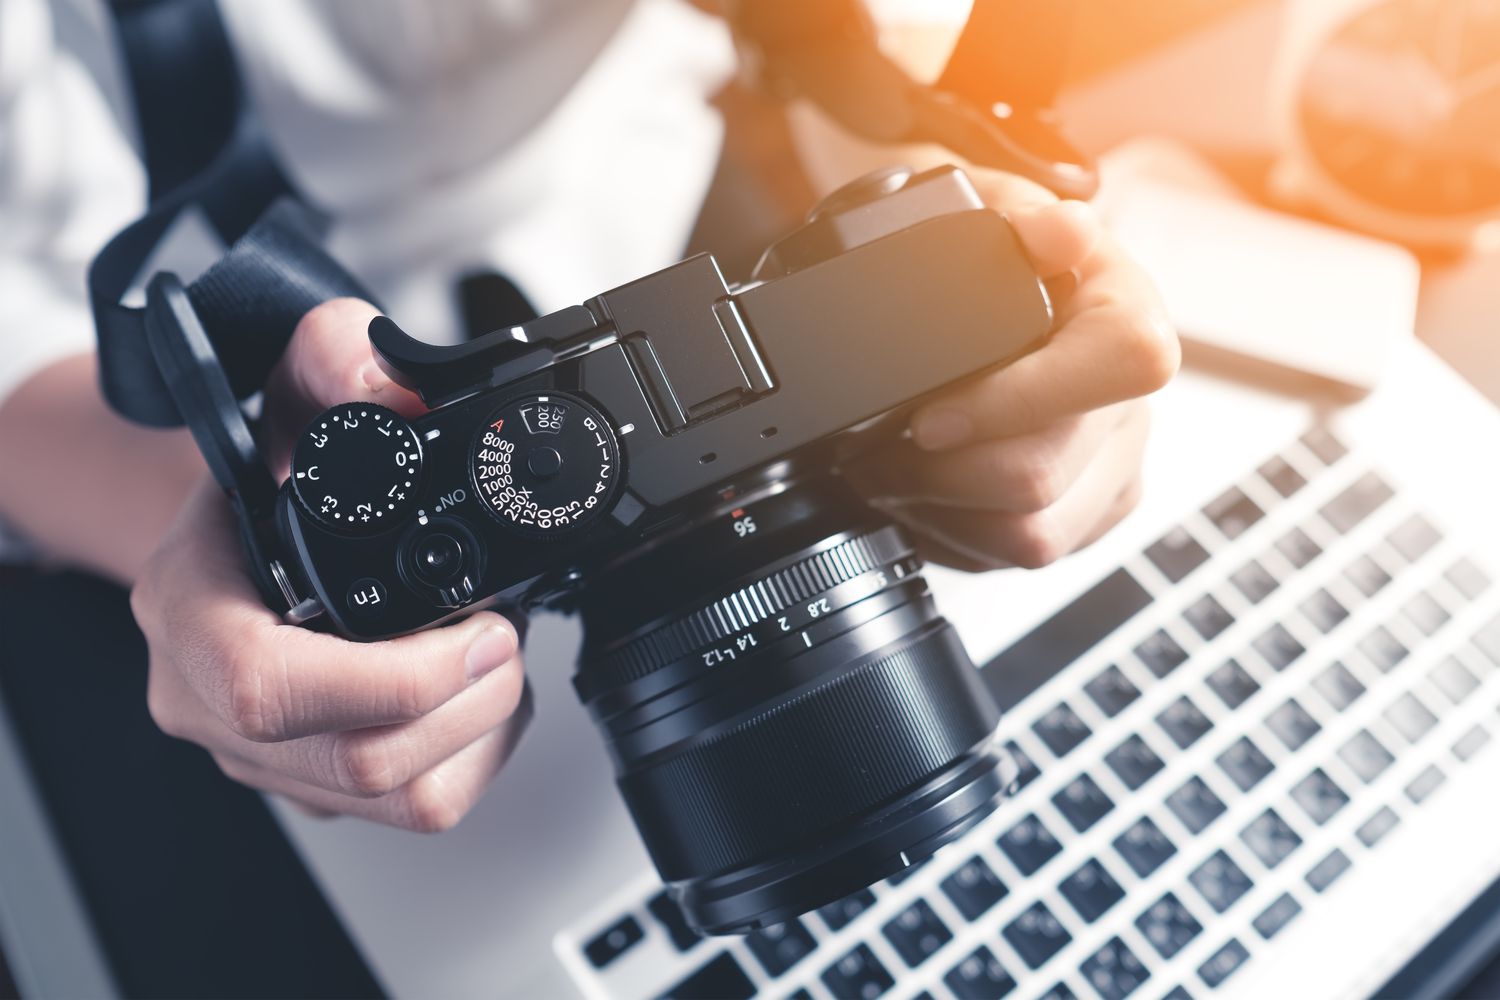
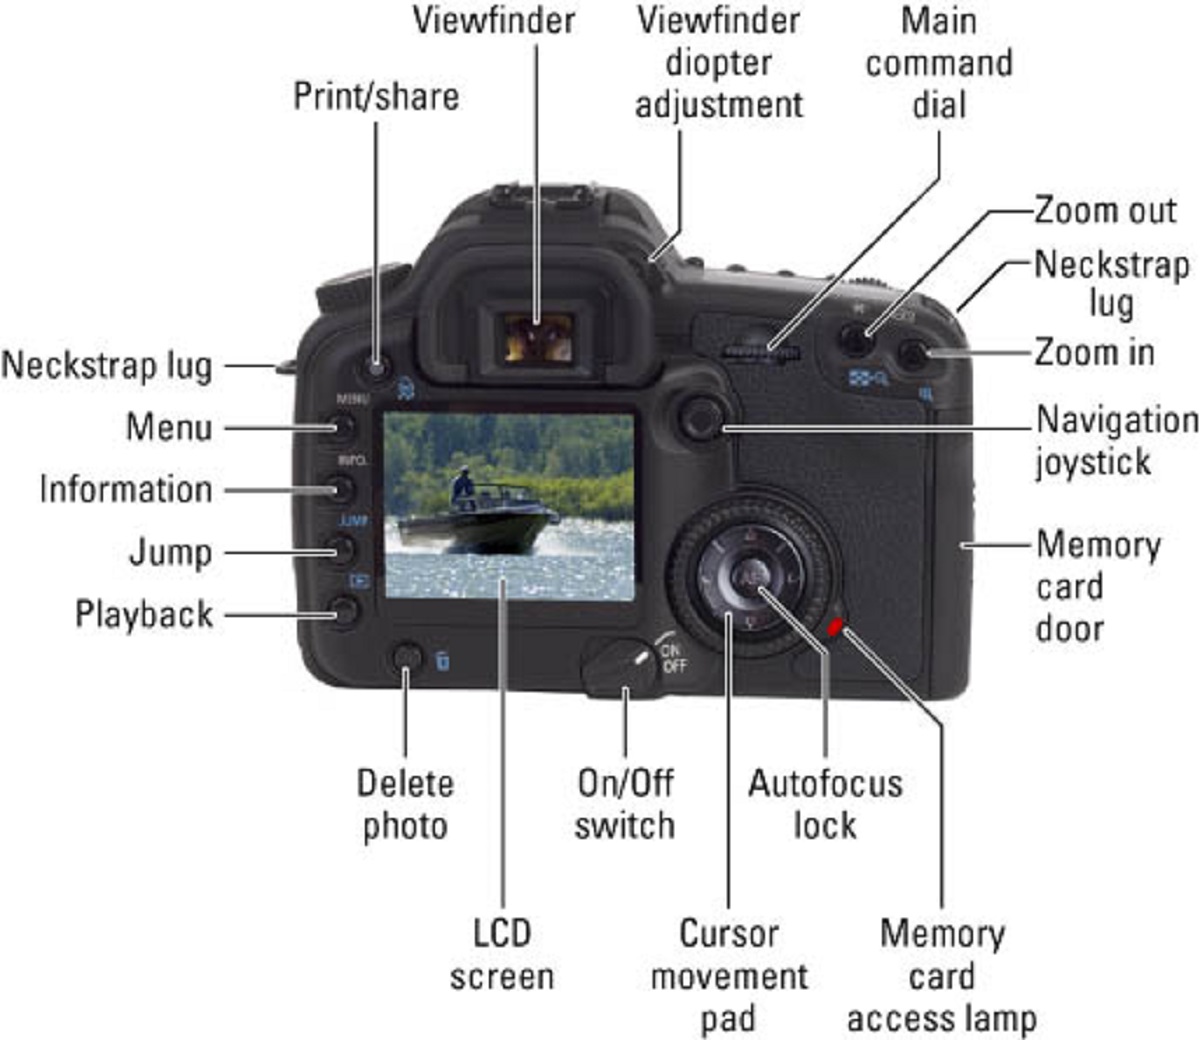
Controls and Buttons
The controls and buttons on a DSLR camera are essential for navigating its various functions and settings. They provide quick and convenient access to important features, allowing you to adjust settings on the fly and capture the perfect shot with ease.
DSLR cameras have a variety of physical controls and buttons, each serving a specific purpose. The main control dial typically located on the top of the camera body allows you to adjust essential settings such as shutter speed, aperture, exposure compensation, and shooting modes. It provides quick access to these key settings, enabling you to make precise adjustments without delving into complex menus.
The mode dial is another prominent control on DSLR cameras, allowing you to select different shooting modes based on your preferences or the shooting scenario. Common shooting modes include program mode (P), aperture priority mode (A/Av), shutter priority mode (S/Tv), and manual mode (M), each offering varying levels of control over exposure settings.
Additional buttons and controls are available for adjusting various settings such as ISO, white balance, autofocus modes, metering modes, and image playback. These controls provide quick access to important settings, allowing you to make adjustments on the fly without taking your eyes off the viewfinder.
Many DSLR cameras also feature customizable buttons or function buttons that can be assigned specific functions based on your shooting preferences. This allows you to personalize the camera’s controls and tailor them to your specific needs, enhancing operational efficiency and convenience.
The placement of controls and buttons on the camera body is carefully designed to allow for intuitive and efficient operation. Familiarizing yourself with the layout and function of each control is essential for seamless and quick adjustments in the field. Regular use and practice will help develop muscle memory for locating and manipulating controls without having to take your eyes off the viewfinder.
It’s worth noting that camera models from different manufacturers may have variations in the layout and naming of controls. However, the fundamental functions and purposes of these controls remain similar across various DSLR cameras.
In addition to physical controls, many DSLR cameras now offer touchscreen functionality on the LCD screen, allowing you to navigate menus, change settings, and even focus on specific areas of the frame with a simple touch. Touchscreen controls provide an intuitive and user-friendly interface, making camera operation more accessible, especially for those transitioning from smartphones or other touch-enabled devices.
In summary, the controls and buttons on a DSLR camera are key components for adjusting settings, navigating menus, and capturing images with precision and efficiency. Understanding the purpose and function of each control allows you to master your camera’s operation and make quick adjustments on the go. Whether using physical controls or touchscreen functionality, becoming familiar with your camera’s controls enables you to unlock its full potential and capture stunning photographs with ease.
Auto Focus System
The auto focus (AF) system is a vital feature of a DSLR camera that allows you to achieve sharp and focused images quickly and accurately. It utilizes a combination of sensors, algorithms, and motors to automatically adjust the lens focus, ensuring that your subject appears sharp and well-defined.
DSLR cameras offer various types of auto focus systems, including single-point AF, zone AF, and wide-area AF. Single-point AF allows you to manually select a specific focus point within the frame, giving you precise control over the focus area. Zone AF and wide-area AF, on the other hand, automatically select focus points based on the camera’s algorithm and provide more flexibility for tracking moving subjects or capturing scenes with multiple potential focus points.
The auto focus system also offers different focus modes, including single-shot AF and continuous AF. In single-shot AF mode, the camera focuses on the subject when the shutter button is halfway pressed and locks the focus until the image is captured. This mode is well-suited for static subjects or situations where focus accuracy is crucial. In continuous AF mode, the camera constantly adjusts the focus as the subject moves, allowing you to capture fast-action shots or subjects in motion.
Advanced DSLR cameras often include additional features to enhance autofocus performance. These may include predictive focus tracking, which anticipates subject movement and adjusts focus accordingly, or face detection AF, which automatically focuses on human faces for portrait photography.
The number and arrangement of autofocus points can vary across different camera models. More autofocus points provide better coverage and allow for more accurate focusing, especially when composing shots with off-center subjects. Advanced DSLR cameras typically offer a higher number of autofocus points, allowing for greater control and flexibility in focusing.
When using the auto focus system, it’s essential to understand its limitations and potential challenges. Certain shooting conditions, such as low light or low contrast scenarios, may present difficulties for the auto focus system to accurately lock onto a subject. In such cases, manual focus or the use of additional focusing aids, such as focus assist lamps or focus peaking, may be necessary to achieve optimal focus.
It’s important to note that modern DSLR cameras often utilize hybrid auto focus systems, combining phase-detection and contrast-detection autofocus. Phase-detection autofocus is traditionally faster and more suitable for capturing moving subjects, while contrast-detection autofocus excels in accuracy and precision, particularly in stationary situations.
In summary, the auto focus system is a crucial feature of a DSLR camera that allows for quick, accurate, and hassle-free focusing. Understanding the different autofocus modes, focus points, and focus tracking features enhances your ability to capture sharp and well-focused images. Being aware of the system’s limitations and knowing when to utilize manual focus or additional focusing aids ensures maximum control over focus accuracy, regardless of shooting conditions.
Exposure Control
Exposure control is a fundamental aspect of photography that determines the overall brightness and tonal characteristics of an image. It allows you to manipulate the amount of light that reaches the camera’s image sensor, ensuring that your photographs are properly exposed and convey the desired mood and visual impact.
DSLR cameras provide several tools and settings for controlling exposure. These include aperture, shutter speed, and ISO sensitivity. Understanding how to manipulate these settings allows you to achieve proper exposure and unlock creative control over your images.
The aperture refers to the size of the lens opening, which determines the amount of light that enters the camera. It is measured in f-numbers, with larger f-numbers indicating a smaller aperture and less light entering the camera, and smaller f-numbers indicating a larger aperture and more light intake. The aperture also directly impacts the depth of field, controlling how much of the image is in focus. A larger aperture (smaller f-number) results in a shallow depth of field, with the subject in sharp focus and the background intentionally blurred, while a smaller aperture (larger f-number) creates a larger depth of field with more of the scene in focus.
Shutter speed refers to the length of time the camera’s shutter remains open, determining the amount of light that reaches the image sensor. It is measured in fractions of a second, such as 1/1000th, 1/250th, or 1/30th of a second. Faster shutter speeds freeze motion, making them ideal for capturing fast-action shots, while slower shutter speeds allow for the blurring of motion, creating a sense of movement or capturing long-exposure photographs.
ISO sensitivity represents the camera’s ability to capture light. It determines the image sensor’s sensitivity to light, with higher ISO settings resulting in greater sensitivity and the ability to capture images in low-light conditions. However, increasing the ISO also introduces more noise or grain in the image, which can degrade image quality. Striking a balance between capturing enough light and minimizing noise is crucial when adjusting the ISO sensitivity.
The exposure triangle is a concept that illustrates the relationship between aperture, shutter speed, and ISO sensitivity. By understanding how these three elements interact, you can make adjustments to achieve the desired exposure. For example, if you need more light, you can widen the aperture, use a slower shutter speed, or increase the ISO sensitivity. Conversely, if you need less light, you can narrow the aperture, use a faster shutter speed, or decrease the ISO sensitivity.
In addition to manual exposure control, DSLR cameras also offer semi-automatic and automatic exposure modes. These modes, such as aperture priority (A/Av), shutter priority (S/Tv), and program (P), allow the camera to automatically adjust settings based on the selected parameter while still giving you control over other aspects of the exposure triangle. The program mode (P) offers full auto exposure, where the camera selects all the exposure settings for you. Automatic exposure modes are useful for beginners or situations where quick adjustments are necessary, while manual mode offers complete control over the exposure settings.
Exposure compensation is another feature available in many DSLR cameras, allowing you to subtly adjust the overall exposure to achieve the desired brightness levels. Positive exposure compensation brightens the image, while negative exposure compensation darkens it. This feature is useful when shooting in challenging lighting conditions or when you want to intentionally over or underexpose for creative effect.
In summary, exposure control is a fundamental aspect of photography, allowing you to manipulate aperture, shutter speed, and ISO sensitivity to achieve proper exposure. Understanding the relationship between these settings and how to adjust them effectively enables you to capture well-exposed images that accurately convey your creative vision. Whether using manual exposure control or semi-automatic modes, mastering exposure techniques empowers you to make informed decisions and capture visually stunning photographs.
White Balance
White balance is a crucial setting in DSLR cameras that ensures accurate color reproduction by adjusting the camera’s response to different lighting conditions. It allows you to capture images that have a natural and accurate representation of colors, regardless of the color temperature or lighting source.
Light sources emit different colors, known as color temperatures, which are measured in Kelvin (K). For example, daylight has a higher color temperature, appearing bluish, while tungsten light has a lower color temperature, appearing more yellowish. The human eye automatically adjusts to these color temperature differences, making white objects appear white under various lighting conditions.
The white balance setting in a DSLR camera allows you to replicate this auto-adjustment behavior, ensuring that white objects in your photographs appear truly white. By selecting the appropriate white balance setting, the camera adjusts the color response to match the light source, resulting in accurate color reproduction throughout the image.
Most DSLR cameras offer several white balance presets, such as daylight, cloudy, shade, tungsten, fluorescent, and flash. These presets are based on the most common lighting conditions and provide a good starting point for achieving accurate colors. Additionally, most DSLR cameras also offer a custom white balance option, where you can calibrate the white balance based on a neutral or gray target in the scene for precise color reproduction.
In addition to the presets and custom white balance, DSLR cameras also often have an auto white balance mode. In this mode, the camera automatically analyzes the scene and selects the white balance setting it deems appropriate. While auto white balance can be reliable in many situations, it may occasionally result in inaccuracies, especially in challenging or mixed lighting conditions.
It’s important to note that white balance doesn’t only affect the accuracy of color reproduction but can also be used creatively to convey a specific mood or atmosphere. Adjusting the white balance towards cooler or warmer tones can enhance the overall feel of an image and evoke different emotions.
In post-processing, white balance can also be adjusted to correct any color cast that may have been captured incorrectly. RAW image files preserve all the color information captured by the sensor, allowing for greater flexibility and control in post-processing to fine-tune the white balance.
Understanding white balance and its impact on color reproduction is essential for capturing images with accurate colors. By selecting the appropriate white balance setting, you can ensure that the colors in your photographs look natural and true to life. Experimenting with different white balance settings and exploring the creative possibilities of white balance adjustments allows you to add another layer of artistic control to your photography.
In summary, white balance is a critical setting in DSLR cameras that ensures accurate color reproduction by adjusting the camera’s response to different lighting conditions. Understanding the different white balance presets, custom calibration, and the creative use of white balance empowers you to capture photographs with impeccable color accuracy and artistic expression.
Flash
The flash is a versatile tool in a DSLR camera that provides additional light to illuminate a scene. It is particularly useful in situations where the available light is insufficient or when you need to fill in shadows and add a pop of light to your photographs.
DSLR cameras often come with a built-in pop-up flash, which provides a basic level of illumination. This built-in flash can be helpful for quick snapshots or in situations where you need additional light but don’t have an external flash unit available.
In addition to the built-in flash, external flash units, also known as speedlights or external flashes, are commonly used with DSLR cameras. These external flashes offer more power, versatility, and control over the illumination. They often allow for tilt and swivel capabilities, allowing you to direct the flash’s light more precisely and avoid harsh, direct lighting on your subjects.
The flash can be used in different modes, such as manual mode or TTL (Through-The-Lens) mode. In manual mode, you have full control over the flash power, allowing you to adjust it according to the desired light output. TTL mode, on the other hand, utilizes the camera’s metering system to automatically calculate the required flash power based on the scene’s lighting conditions.
One crucial aspect of using flash is understanding flash sync speed. Flash sync speed refers to the fastest shutter speed at which the camera can synchronize with the flash, ensuring that the flash fires at the correct moment in relation to the exposure. When using flash, ensure that the shutter speed is within the flash sync range to avoid improper exposure due to curtain interference.
Another feature often found in external flash units is the ability to use off-camera flash techniques. This allows you to take the flash off the camera and position it in different locations to create more dynamic and creative lighting effects. This technique can be especially useful for portrait photography, product photography, and other situations where you want to control the direction and quality of light.
When using flash, it’s important to be mindful of the distance between the flash and the subject. Using flash too close to the subject may result in overexposure and harsh lighting, while using it too far may result in underexposure and insufficient illumination. Experimenting with different flash-to-subject distances and using accessories such as diffusers, reflectors, and bounce cards can help achieve more pleasing and balanced lighting effects.
In summary, the flash is a versatile tool in a DSLR camera that provides additional light to illuminate a scene. Whether using the built-in flash or an external flash unit, understanding flash modes, flash sync speed, and off-camera flash techniques expands your creative possibilities and allows you to capture well-lit, visually engaging photographs. Experimenting with different flash techniques and accessories enables you to control light, enhance the overall quality of your images, and turn ordinary scenes into extraordinary ones.
Connectivity Options
Modern DSLR cameras are equipped with various connectivity options that enhance the camera’s functionality and streamline the process of transferring and sharing your images. These connectivity features allow you to easily and conveniently connect your camera to other devices, such as computers, smartphones, or wireless networks.
One of the common connectivity options is USB connectivity. DSLR cameras typically have a USB port that allows you to connect the camera directly to a computer or laptop. This enables you to transfer images and video files quickly and efficiently for further editing or storage. USB connectivity also enables you to tether your camera to a computer, providing real-time image preview and control capabilities directly from your computer screen.
Wireless connectivity is becoming increasingly common in DSLR cameras. Wi-Fi and Bluetooth functionalities allow you to connect your camera to smartphones, tablets, or other wireless devices. This enables you to transfer images wirelessly, control your camera remotely, or use your mobile device as a live viewfinder. Wireless connectivity also offers the convenience of instantly sharing your images on social media platforms or cloud storage services without the need for a computer.
Near Field Communication (NFC) is another connectivity option found in some DSLR cameras. NFC allows for quick and effortless pairing between the camera and NFC-enabled devices by simply tapping them together. This streamlines the process of establishing connections and sharing files between devices.
Social media integration is a feature offered in some DSLR cameras, allowing you to directly upload your images to popular social media platforms. With built-in Wi-Fi or Bluetooth capabilities, you can connect your camera to your social media accounts and share your images with just a few simple steps, without the need for transferring files to a computer first.
In addition to wireless connectivity, some DSLR cameras provide built-in GPS functionality. This allows you to automatically geotag your images, adding precise location information to each photo. Geotagging is useful for organizing and tracking your images based on the shooting location or for creating visual travel logs.
It’s important to note that the availability of connectivity options may vary depending on the camera model and brand. Different camera manufacturers offer different features, levels of wireless compatibility, and integration with specific devices or applications.
Understanding the connectivity options of your DSLR camera allows you to take full advantage of its capabilities and streamline your workflow. Whether transferring images to a computer, sharing files wirelessly, or utilizing social media integration, the connectivity options enable you to expand the reach of your photographs and enhance your creative process.
In summary, DSLR cameras offer a range of connectivity options, including USB, wireless (Wi-Fi, Bluetooth, NFC), and social media integration, that enable you to transfer, share, and control your images conveniently. Understanding and utilizing these connectivity features enhances your workflow, allowing for seamless transfers, remote control capabilities, instant sharing, and geotagging. Exploring the connectivity options of your DSLR camera empowers you to fully leverage its capabilities and share your photographic vision with ease and efficiency.