Introduction
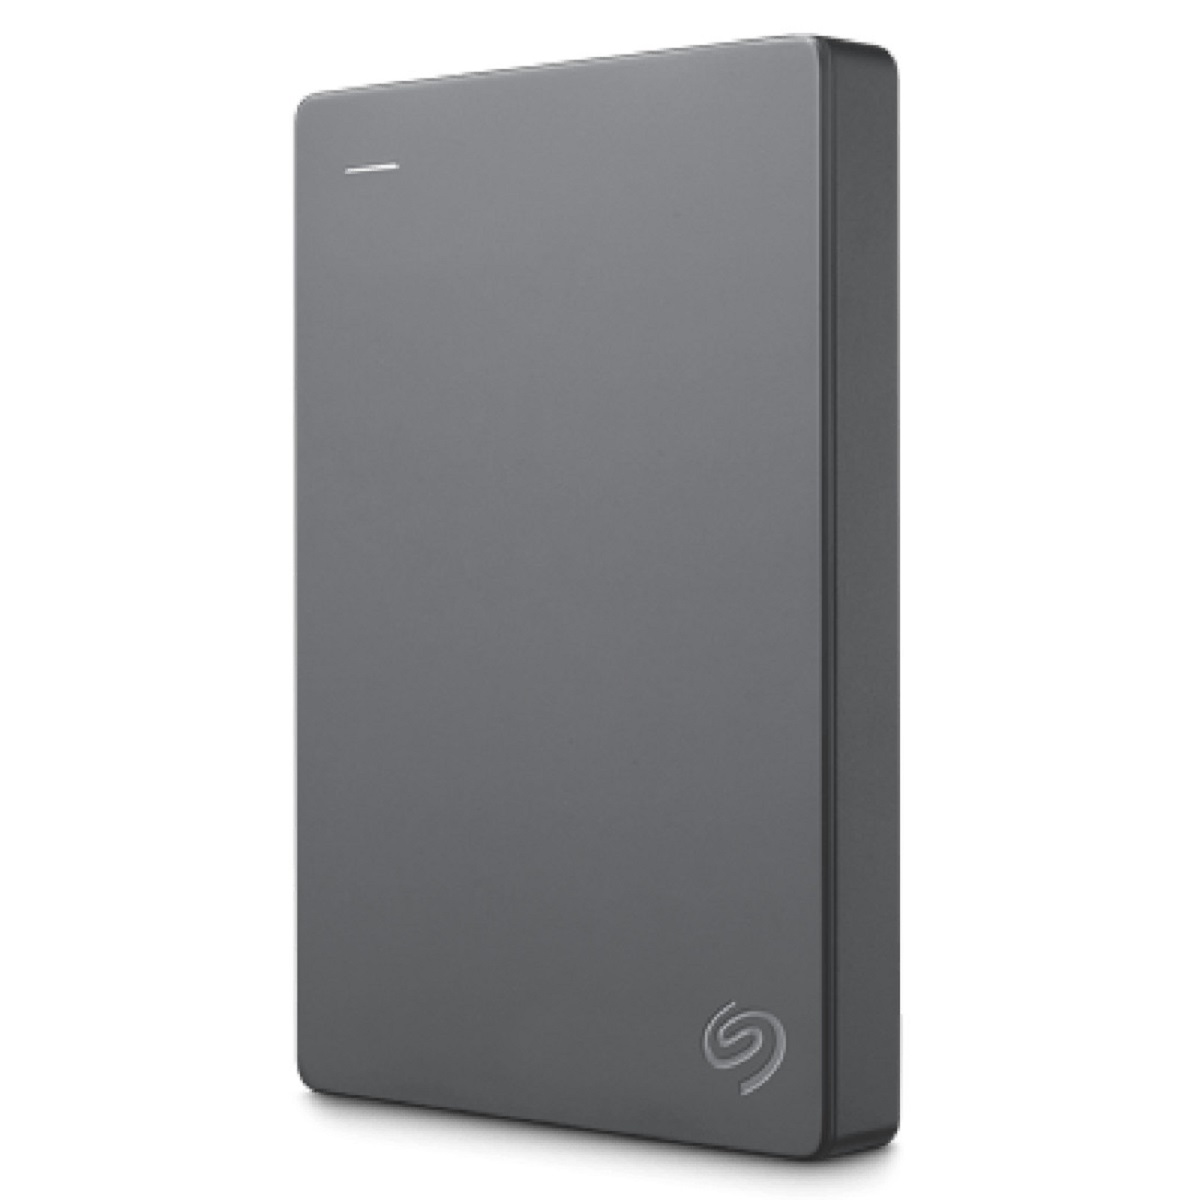
Welcome to the world of Seagate external hard drives! Whether you are a tech enthusiast, a creative professional, or someone who simply needs extra storage space, Seagate offers a range of reliable and high-performance external hard drives that can meet your needs. In this guide, we will walk you through the process of using a Seagate external hard drive with your Windows 10 computer, from connecting it to your computer to safely ejecting it.
Seagate external hard drives provide a convenient solution for storing and backing up your important files, such as documents, photos, videos, and music. These portable storage devices offer large capacities, fast transfer speeds, and compatibility with Windows 10, making them ideal for both personal and professional use.
Whether you are a business professional who needs to carry important presentations or a student who wants to keep their study materials organized, a Seagate external hard drive is a reliable and versatile tool that can simplify your digital life.
In this guide, we will break down the process of using a Seagate external hard drive with your Windows 10 computer into manageable steps. We will cover how to connect the external hard drive to your computer, how to format it to ensure compatibility, how to transfer files to the drive, and finally, how to safely eject it.
By following these steps, you can take full advantage of the features and benefits that a Seagate external hard drive offers. So, let’s get started and make the most of your Seagate device with your Windows 10 computer.
Step 1: Connect the Seagate External Hard Drive to your Windows 10 computer
Before you can start using your Seagate external hard drive, you’ll need to connect it to your Windows 10 computer. Follow these steps to establish a connection:
- Locate an available USB port on your Windows 10 computer. These ports are typically found on the sides or back of the computer.
- Take the USB cable that came with your Seagate external hard drive and plug one end into the USB port on your computer.
- Take the other end of the USB cable and plug it into the USB port on your Seagate external hard drive. Ensure that the connection is secure.
Once the USB cable is connected to both your computer and the external hard drive, your Windows 10 computer should recognize the device. It may take a few moments for the computer to detect the new hardware and install any necessary drivers.
You can verify that the Seagate external hard drive is properly connected by checking the “This PC” or “My Computer” window on your Windows 10 desktop. Look for the external hard drive under the “Devices and Drives” section. It should be listed with the designated name you assigned to it or its default name provided by the manufacturer.
Congratulations! You have successfully connected your Seagate external hard drive to your Windows 10 computer. Now, you’re ready to move on to the next step: formatting the drive to ensure compatibility with your system.
Step 2: Format the Seagate External Hard Drive
Once you have connected your Seagate external hard drive to your Windows 10 computer, the next step is to format the drive. Formatting is necessary to prepare the drive for use with your operating system and to ensure compatibility.
Formatting the Seagate external hard drive will erase any existing data on the drive, so it’s important to back up any important files before proceeding with the formatting process.
Follow these steps to format your Seagate external hard drive:
- Open the “File Explorer” on your Windows 10 computer by clicking the folder icon in the taskbar or by pressing the “Windows” key + “E” on your keyboard.
- In the File Explorer, locate and right-click on the Seagate external hard drive. A context menu will appear.
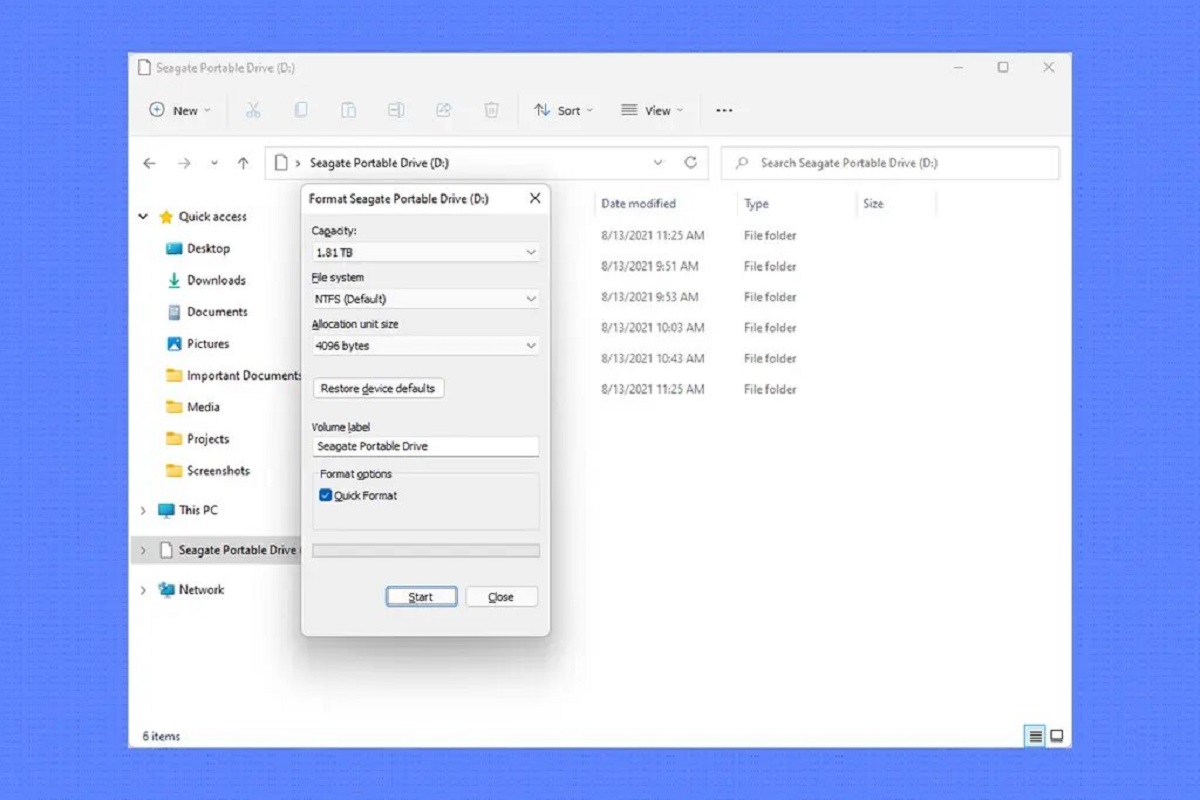
- From the context menu, select “Format…” to open the formatting options for the drive.
- In the Format window, you can choose the file system and allocate unit size for the drive. For compatibility with Windows 10, it is recommended to select the “NTFS” file system. You can also give your external hard drive a name by entering it in the “Volume label” field.
- Once you have selected the desired formatting options, click on the “Start” button to begin the formatting process.
- A warning message will appear, informing you that all data on the drive will be erased. Make sure you have backed up any important files, and then click “OK” to proceed.
- The formatting process will now begin. It may take some time, depending on the size of the drive. Once the process is complete, you will see a confirmation message.
After formatting, your Seagate external hard drive is now ready to be used with your Windows 10 computer. It is now compatible with your system, and you can proceed to transfer files to the drive.
Step 3: Transfer Files to the Seagate External Hard Drive
Now that you have successfully connected and formatted your Seagate external hard drive, it’s time to transfer files to it. Follow these steps to transfer your files:
- Open the “File Explorer” on your Windows 10 computer by clicking the folder icon in the taskbar or by pressing the “Windows” key + “E” on your keyboard.
- In the File Explorer, locate the files or folders that you want to transfer to the Seagate external hard drive.
- Select the files or folders by clicking on them. You can select multiple files or folders by holding down the “Ctrl” key while clicking on them.
- Once you have selected the files or folders, right-click on them and select “Copy” from the context menu.
- In the File Explorer, navigate to the Seagate external hard drive. It should be listed under “Devices and Drives” in the left-hand pane.
- Open the Seagate external hard drive by double-clicking on it.
- Right-click inside the drive’s window and select “Paste” from the context menu. This will transfer the selected files or folders to the external hard drive.
- The progress of the file transfer will be displayed. Depending on the size of the files and the speed of your computer, it may take some time to complete the transfer.
- Once the transfer is complete, you can verify the files’ presence on the Seagate external hard drive by checking the drive’s window. The transferred files or folders should be visible.
Congratulations! You have successfully transferred your files to the Seagate external hard drive. You can now safely disconnect the drive from your Windows 10 computer.
Remember to keep your files organized on the external hard drive and create backups regularly to ensure the safety and availability of your data.
Step 4: Safely Eject the Seagate External Hard Drive
After you have transferred your files to the Seagate external hard drive, it is important to safely eject the drive before physically disconnecting it from your Windows 10 computer. Safely ejecting the drive ensures that all the data has been written to the drive and helps prevent data corruption or loss.
Follow these steps to safely eject your Seagate external hard drive:
- Ensure that all file transfer operations to or from the Seagate external hard drive have been completed. Close any open files or folders associated with the drive.
- In the system tray located at the bottom-right corner of your Windows 10 desktop, find the “Safely Remove Hardware” icon. It may appear as a USB plug or a green checkmark.
- Click on the “Safely Remove Hardware” icon to display a list of removable devices currently connected to your computer.
- From the list, locate and select your Seagate external hard drive. It may be listed with its designated name or as a generic device.
- After selecting the Seagate external hard drive, a notification will appear, indicating that it is now safe to remove the device. You can now physically disconnect the drive from your computer.
- Wait for a moment to ensure that all data has been written and any pending operations have been completed before removing the USB cable.
- Gently unplug the USB cable from both your computer and the Seagate external hard drive without pulling or twisting it.
By following these steps, you have safely ejected the Seagate external hard drive from your Windows 10 computer, minimizing the risk of data loss or damage. Your files are now securely stored on the external hard drive, and you can use it with other computers or devices as needed.
Remember to always follow this safe eject process whenever you want to disconnect a USB storage device, as it helps protect the integrity and longevity of your data.
Conclusion
Using a Seagate external hard drive with your Windows 10 computer can greatly enhance your storage capabilities and provide a reliable backup solution for your important files. By following the steps outlined in this guide, you can easily connect, format, transfer files, and safely eject the Seagate external hard drive.
Throughout this guide, we have discussed the importance of connecting the external hard drive to your Windows 10 computer, formatting it to ensure compatibility, transferring files to the drive, and safely ejecting it. These steps are essential in maximizing the functionality and longevity of your Seagate external hard drive.
Remember, before connecting and formatting the drive, it is crucial to backup any important files to prevent data loss. Additionally, following the proper procedure for ejecting the drive ensures that all data is written and avoids potential data corruption.
With your Seagate external hard drive successfully connected and set up on your Windows 10 computer, you can enjoy the benefits of expanded storage space, faster file transfers, and the peace of mind that comes with reliable data backup.
Whether you are using the external hard drive for personal or professional purposes, Seagate’s high-performance and user-friendly devices are designed to meet your needs. So, take full advantage of this powerful tool and free up precious space on your computer by offloading files onto your Seagate external hard drive.
Keep in mind that regularly organizing and backing up your files on the external hard drive is essential for maintaining an efficient and secure digital storage system. By integrating your Seagate external hard drive into your everyday workflow, you can streamline your digital life and protect your valuable data.
Now that you have completed this guide, you are well-equipped to make the most out of your Seagate external hard drive with your Windows 10 computer. Happy file storage, transfer, and peace of mind!