Introduction
Are you a fan of ice cream but want to enjoy a dairy-free alternative? Look no further, as almond milk ice cream is a delicious and creamy option to satisfy your sweet cravings. Whether you have dietary restrictions or simply prefer the taste of almond milk, making your own almond milk ice cream at home can be a fun and rewarding experience.
In this guide, we will take you through the process of using an ice cream maker with almond milk. You’ll learn how to choose the right ice cream maker, prepare almond milk, create the perfect ice cream base, and add flavors and mix-ins to create delectable combinations. With a few simple steps and some delicious ingredients, you’ll be enjoying a refreshing scoop of homemade almond milk ice cream in no time.
One of the first steps in making almond milk ice cream is selecting the right ice cream maker for your needs. There are various types available, including electric and manual machines. Electric ice cream makers are convenient and efficient, while manual ones allow for a more traditional and hands-on approach. Consider factors such as capacity, freezing time, and ease of use when making your decision.
Next, you’ll need to prepare your almond milk. You can choose to make your own almond milk from scratch or purchase a ready-made version from the store. If making your own, soak almonds overnight, blend them with water, and strain the mixture to remove any solids. This fresh almond milk will provide a rich and creamy base for your ice cream.
To create the perfect ice cream base, you’ll need to combine your almond milk with sweeteners, thickeners, and flavorings. Sweeteners like sugar, honey, or maple syrup can be used to add a touch of sweetness. Thickeners such as cornstarch or arrowroot powder will help give the ice cream a creamy texture. Additionally, you can incorporate flavors like vanilla extract, cocoa powder, or fruit purees to enhance the taste.
Once your ice cream base is ready, it’s important to chill it thoroughly. This step ensures that the mixture is cold enough to freeze properly in the ice cream maker. Transfer the base to the refrigerator and let it chill for a few hours or overnight.
Now it’s time to use the ice cream maker. Follow the manufacturer’s instructions to assemble the machine and pour the chilled base into the freezer bowl. Turn on the machine and let it churn the mixture until it reaches a soft-serve consistency. This typically takes around 20-30 minutes, but it may vary depending on the specific model of your ice cream maker.
Adding flavors and mix-ins is what makes homemade ice cream so exciting. You can get creative and experiment with various options like crushed cookies, chocolate chips, fresh fruits, or nuts. Simply fold them into the churned ice cream during the last few minutes of churning to distribute them evenly.
After the ice cream has reached the desired consistency, transfer it to a lidded container and place it in the freezer. Let it harden for at least 2-4 hours, or until it reaches your preferred firmness before serving.
Now that you know the basic steps of using an ice cream maker with almond milk, it’s time to gather your ingredients and start creating your own delicious flavors. With a little practice and experimentation, you’ll soon discover the perfect combinations that suit your taste buds. So get ready to enjoy the creamy, dairy-free delight of almond milk ice cream straight from your own kitchen!
Choosing the Right Ice Cream Maker
When it comes to making almond milk ice cream, selecting the right ice cream maker is crucial for achieving the best results. There are several factors to consider before making your purchase, including capacity, freezing time, and ease of use.
Firstly, think about the capacity you need. Ice cream makers come in a range of sizes, from small models perfect for individual servings to larger machines that can make several quarts of ice cream at once. Consider how much ice cream you plan to make and how many people you’ll be serving when deciding on the capacity that suits your needs.
Next, consider the freezing time of the ice cream maker. Some models require pre-freezing the bowl, while others have built-in freezing mechanisms. If you opt for a model with a freezer bowl, make sure you have enough freezer space to accommodate it. Additionally, take note of the freezing time required for the bowl to reach the optimal temperature for churning. Longer freezing times may result in delayed gratification, so plan accordingly.
Ease of use is another important aspect to consider. Look for an ice cream maker that is user-friendly and has clear instructions. Some machines come with timers and automatic shutoffs, making the process more convenient and allowing you to multitask while your ice cream churns. Additionally, consider the cleaning process and ensure that the parts are removable and dishwasher-safe for easy maintenance.
There are two main types of ice cream makers: electric and manual. Electric machines are the most common and convenient option. They typically consist of a base unit with a motor that churns the ice cream and a removable freezer bowl that needs to be pre-frozen. Electric ice cream makers take care of the churning process for you, allowing you to simply pour in your ice cream base and let the machine do the work. These models are generally more expensive but offer convenience and efficiency.
On the other hand, manual or hand-cranked ice cream makers provide a more traditional and nostalgic experience. These models typically have a hand crank that needs to be turned manually to churn the ice cream. While they require more effort, they can be a fun and engaging activity, especially for kids. Manual ice cream makers are generally more affordable and don’t require pre-freezing, making them a suitable option if you don’t have much freezer space.
Ultimately, the choice between an electric or manual ice cream maker will depend on your personal preference and the level of convenience you desire. Whichever type you choose, ensure that it aligns with your specific needs and fits within your budget.
By carefully considering the capacity, freezing time, ease of use, and type of ice cream maker, you can select the perfect machine to create delicious almond milk ice cream at home. Remember, investing in a quality ice cream maker will not only enhance your ice cream-making experience but also enable you to enjoy a variety of homemade frozen treats whenever you desire.
Preparing Almond Milk
One of the key ingredients in almond milk ice cream is, of course, almond milk. You have the option to either make your own almond milk from scratch or purchase a ready-made version from the store. Let’s explore both options.
If you choose to make your own almond milk, you’ll need raw almonds and water. Start by soaking the almonds in water overnight or for at least 8 hours. This will soften the almonds and make them easier to blend.
After the soaking period, drain the water and rinse the almonds thoroughly. Place the soaked almonds in a blender and add fresh water. The ratio of almonds to water is typically 1 cup of almonds to 4 cups of water, but you can adjust it according to your preferred consistency.
Blend the mixture on high speed for a few minutes until you get a smooth and creamy liquid. To achieve the best results, you can blend the almonds in batches if your blender has a smaller capacity. The blending process breaks down the almonds and releases the flavors into the water.
Once the blending is complete, strain the almond milk using a nut milk bag or cheesecloth to remove any solids or grit. Squeeze and wring the bag or cloth to extract as much milk as possible, leaving behind the almond pulp.
Your homemade almond milk is now ready to be used in your ice cream base. You can store it in a sealed container in the refrigerator for up to five days. Remember to give it a good shake before using it in your ice cream mixture, as some separation may occur after being stored.
If you prefer the convenience of ready-made almond milk, you can find a wide variety of options in grocery stores. Look for unsweetened almond milk to have more control over the sweetness of your ice cream. Read the labels and choose a brand that contains only natural ingredients without any added preservatives or artificial flavorings.
Whichever option you choose, making almond milk ice cream allows you to enjoy the rich and creamy flavors of almonds while avoiding dairy. Whether you decide to make your own almond milk or opt for a store-bought version, you’ll be able to create a delicious and refreshing ice cream base that is perfect for your taste preferences.
Now that you have your almond milk ready, it’s time to move on to the next step—creating the perfect ice cream base.
Creating the Perfect Ice Cream Base
Now that you have your almond milk prepared, it’s time to create the perfect ice cream base. This is where you’ll incorporate sweeteners, thickeners, and flavorings to give your almond milk ice cream a delectable taste and creamy texture.
Start by adding sweeteners to your almond milk. Common options include granulated sugar, honey, or maple syrup. The amount of sweetener you add will depend on your personal preference and the level of sweetness you desire. Start with a smaller amount and taste the mixture as you go, gradually adding more if needed. Remember that freezing dulls the sweetness, so it’s best to have a slightly sweeter base than you would typically prefer.
Next, consider incorporating a thickener to give your ice cream a smooth and creamy consistency. Cornstarch and arrowroot powder are commonly used thickeners. To use them, mix a small amount of the chosen thickener with a little bit of almond milk to create a slurry. Gradually add the slurry to the rest of the almond milk mixture while whisking continuously. Cook the mixture over low heat, stirring constantly until it thickens. This will help prevent any lumps from forming.
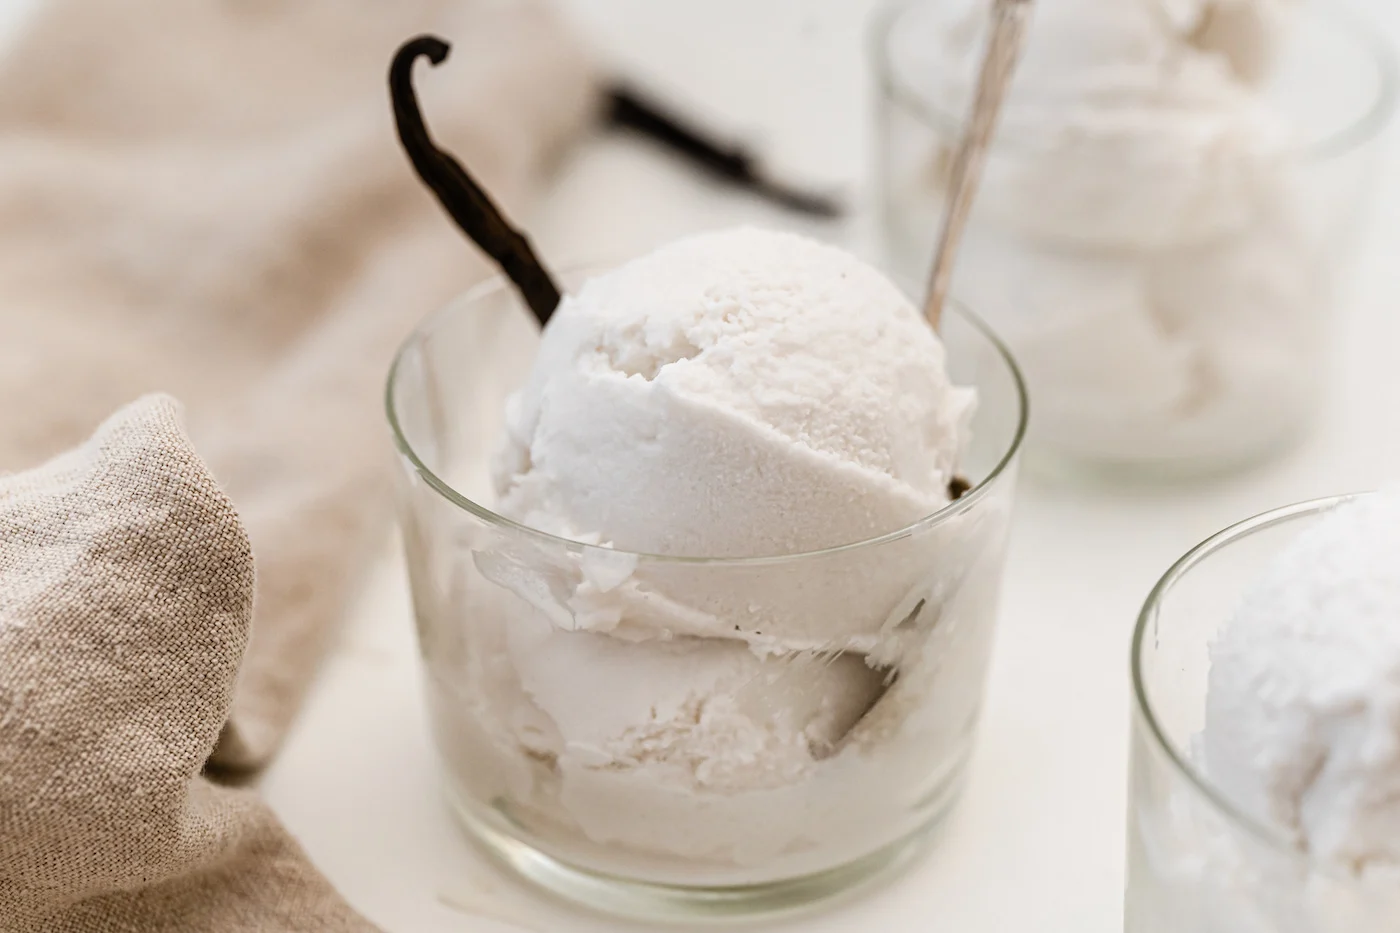
Once your mixture has thickened, you can add flavorings to enhance the taste of your ice cream. Vanilla extract is a classic choice and pairs beautifully with the nutty flavors of almond milk. You can also consider incorporating other flavorings, such as cocoa powder for a chocolatey twist, or fruit purees to add a burst of fruity freshness.
When adding flavorings, start with small amounts and adjust according to your taste preferences. Remember that the flavors will intensify slightly once the ice cream is frozen, so be cautious not to overpower the taste initially. You can always taste and adjust the flavors before freezing.
Ensure that all of your ingredients are well blended together to create a homogeneous ice cream base. You can whisk the mixture by hand or use a blender for a smoother consistency. Take your time to thoroughly combine the ingredients, ensuring that the sweeteners, thickeners, and flavorings are evenly distributed throughout.
Once you have created the perfect ice cream base, it’s time to move on to the next step—chilling the mixture to prepare it for the ice cream maker. Place the mixture in a lidded container and refrigerate it for a minimum of two hours or overnight. This step allows the flavors to meld together and ensures that the mixture is thoroughly chilled, which will result in a smoother and creamier texture when churned.
With your ice cream base ready and chilled, you are now equipped to move on to the next exciting step—using the ice cream maker to turn your almond milk mixture into a delightful frozen treat.
Chilling the Ice Cream Base
After you’ve created the perfect ice cream base by combining your almond milk with sweeteners, thickeners, and flavorings, it’s important to chill the mixture before using the ice cream maker. Chilling the ice cream base is a crucial step as it helps the mixture to properly freeze and churn, resulting in a smooth and creamy texture.
Transfer the ice cream base to a lidded container, making sure that it is well-sealed. Place the container in the refrigerator and let it chill for at least two hours or, ideally, overnight. This extended refrigeration period allows the flavors to meld together and enhances the overall taste of the ice cream.
During the chilling process, the cold temperature helps to solidify the fats in the almond milk base, which contributes to the creaminess of the final product. It also allows the flavors to develop and intensify, giving your ice cream a rich and well-rounded taste.
While chilling, it’s a good idea to give the ice cream base a gentle stir every hour or so. This helps prevent any separation or settling of ingredients, ensuring a consistent flavor throughout the mixture.
If you’re short on time, you can place the ice cream base in the freezer for about 30 minutes to an hour to speed up the chilling process. However, it’s important not to leave it in the freezer for too long, as it can start to freeze, making it difficult to pour into the ice cream maker.
Remember that the longer you chill the ice cream base, the better the results will be. Allowing it to chill overnight not only fully develops the flavors but also gives the mixture ample time to reach the ideal temperature for churning.
Before using the chilled ice cream base in the ice cream maker, give it a good stir to ensure that all the ingredients are well-incorporated. If you notice any lumps or separation in the mixture, gently whisk or blend it until smooth.
Now that the ice cream base is properly chilled, it’s time to move on to the exciting step of using the ice cream maker to transform your base into irresistibly creamy almond milk ice cream. With your chilled base ready, you’ll be one step closer to enjoying your homemade frozen treat.
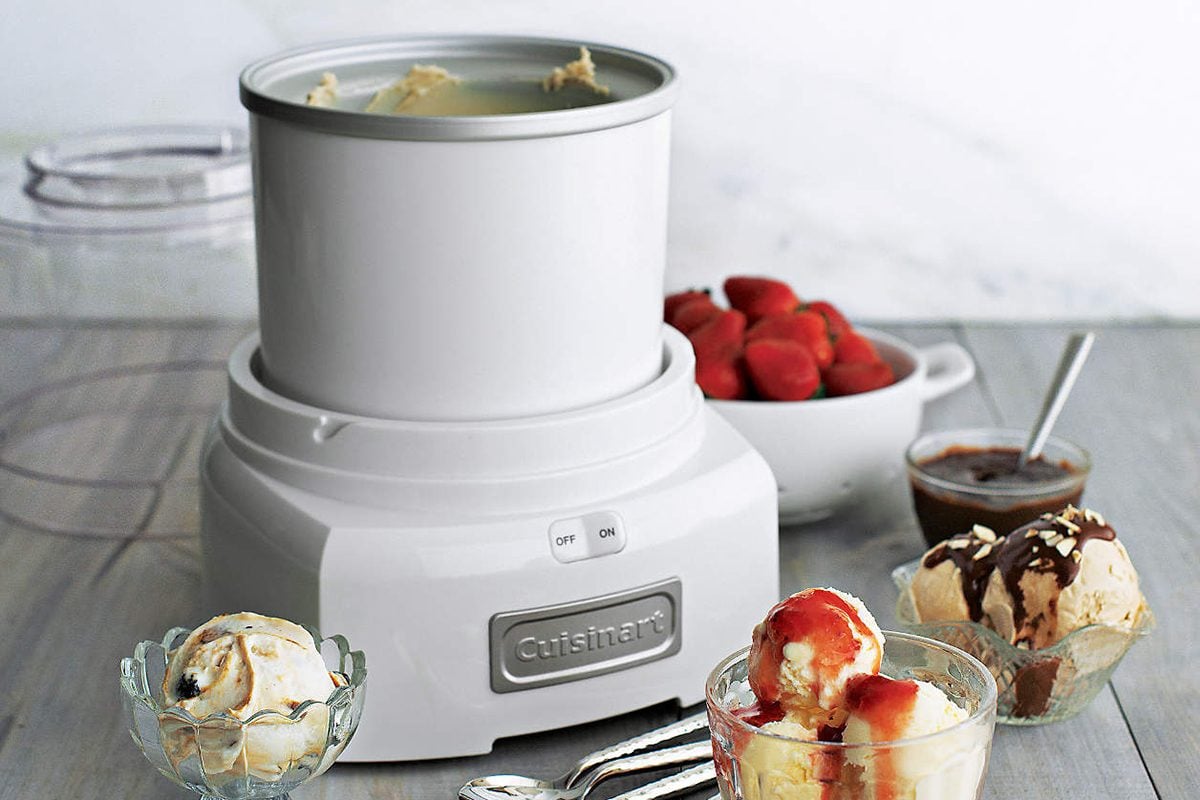
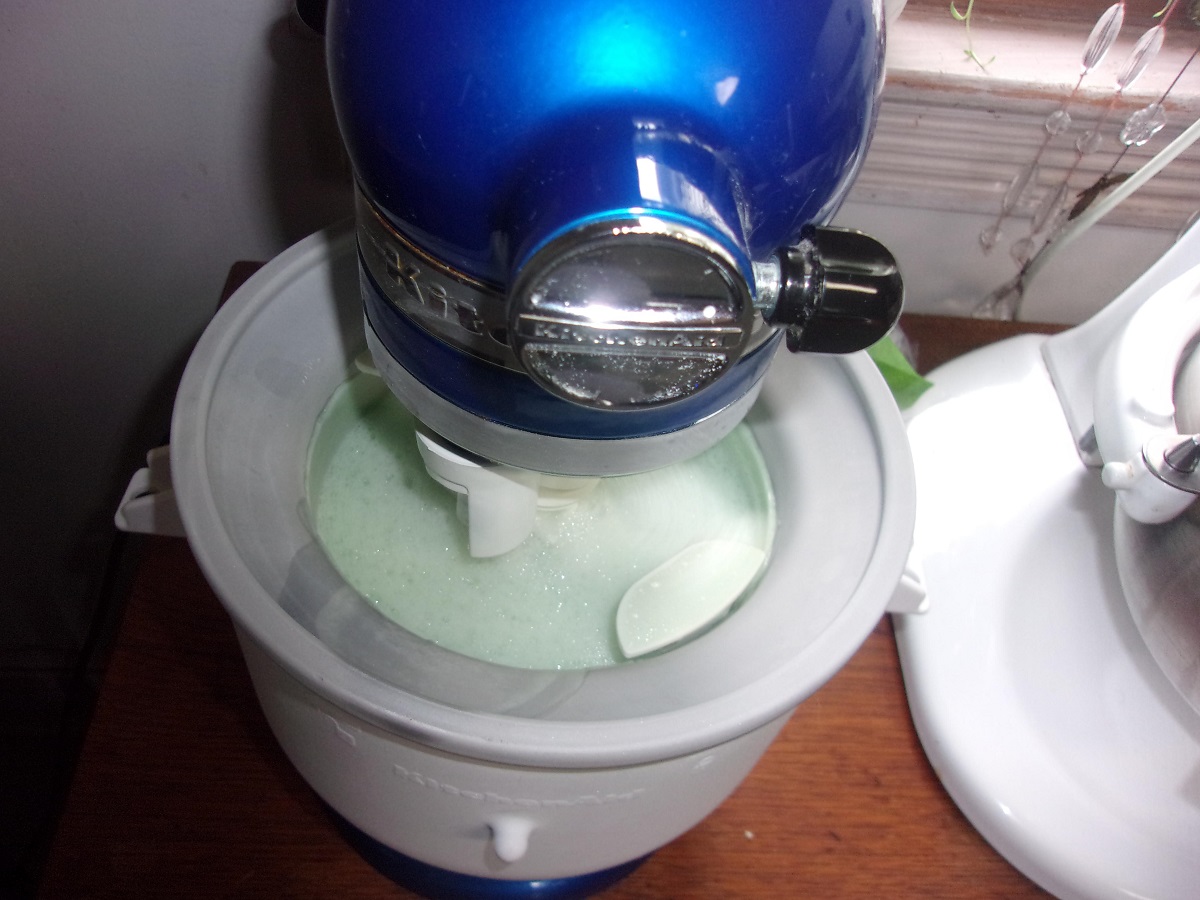
Using the Ice Cream Maker
Now that you have prepared and chilled your almond milk ice cream base, it’s time to bring out your ice cream maker and turn that creamy mixture into a delightful frozen treat. Using an ice cream maker is a simple and enjoyable process that requires a few easy steps.
Start by assembling your ice cream maker according to the manufacturer’s instructions. This typically involves attaching the paddle or dasher to the motorized unit and placing the freezer bowl into the machine. Make sure all parts are securely in place before proceeding.
Next, take your chilled ice cream base from the refrigerator and give it a quick stir to ensure it is well-mixed. Remove the freezer bowl from the ice cream maker and pour the base mixture into the bowl. Leave some space at the top, as the mixture will expand during the churning process.
Once the base is in the bowl, carefully reattach the freezer bowl into the ice cream maker. Ensure that it is secured properly before moving on to the next step.
Now it’s time to turn on the ice cream maker. Most models have a simple on/off switch or button. Once you’ve switched on the machine, the paddle or dasher will begin to rotate, churning the ice cream base and incorporating air into the mixture.
The churning process typically takes around 20-30 minutes, although this may vary depending on the specific model of your ice cream maker. During this time, the freezer bowl will freeze the mixture while the paddle continuously stirs it, creating the smooth and creamy texture of ice cream.
While the ice cream is churning, you can periodically check on its progress. Lift the lid of the ice cream maker to examine the consistency of the ice cream. It should gradually thicken and reach a soft-serve consistency. Be careful not to disturb the freezing process too frequently, as this can prolong the overall churning time.
Once the ice cream has reached the desired consistency, it’s time to turn off the machine. Carefully remove the freezer bowl from the ice cream maker to prevent any unnecessary melting of the ice cream. You’ll notice that the ice cream is still somewhat soft at this point.
If you prefer a softer texture, you can serve the ice cream immediately. Use a rubber spatula to transfer the ice cream to bowls or cones, and indulge in the creamy goodness right away.
However, for a firmer consistency, transfer the churned ice cream to a lidded container and place it in the freezer for an additional 2-4 hours, or until it reaches your desired level of firmness. This step allows the ice cream to freeze completely and develop a more solid texture for scooping.
Now that you’ve successfully used your ice cream maker, you can enjoy your homemade almond milk ice cream. Whether you serve it immediately or let it firm up in the freezer, be ready to savor each spoonful of the creamy, dairy-free delight you’ve created.
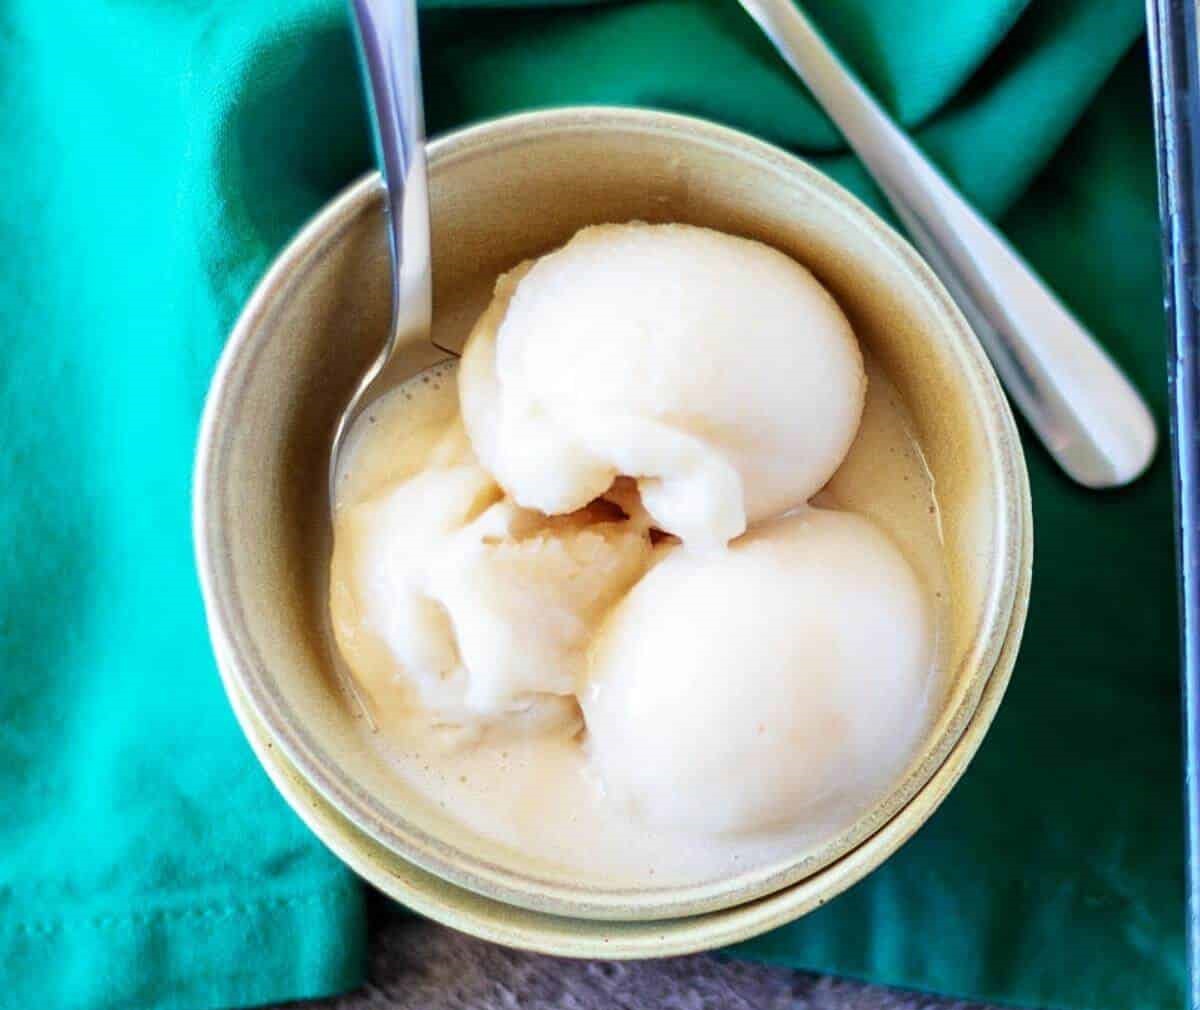
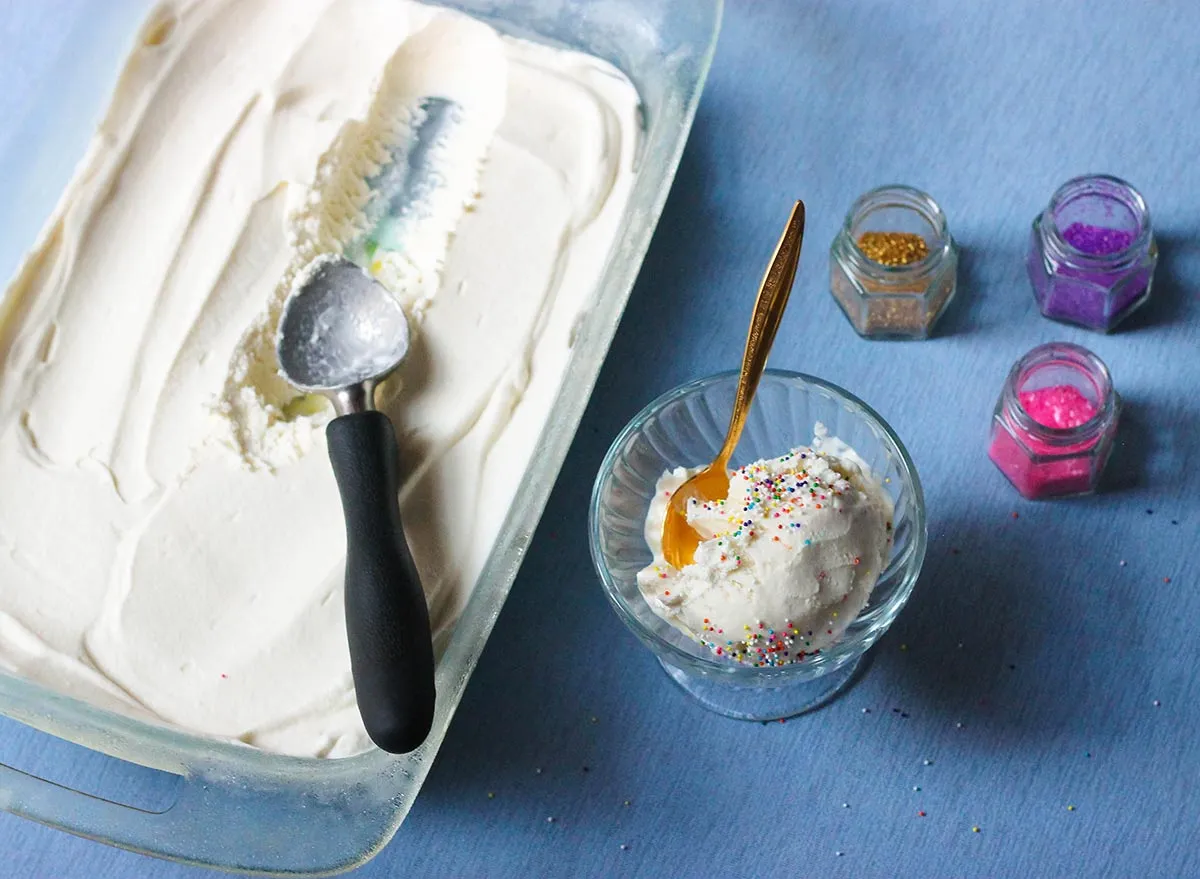
Adding Flavors and Mix-ins
One of the most enjoyable aspects of making your own almond milk ice cream is the ability to customize it with a variety of flavors and mix-ins. Once your ice cream base is churned to the desired consistency, you can add a plethora of ingredients to create unique and delicious combinations that suit your taste preferences.
Start by considering different flavor options to enhance the taste of your ice cream. Vanilla extract is a classic choice that complements the nutty flavors of almond milk. You can add a teaspoon or two of vanilla extract to the ice cream base and mix it in before churning to infuse it with that familiar, comforting taste.
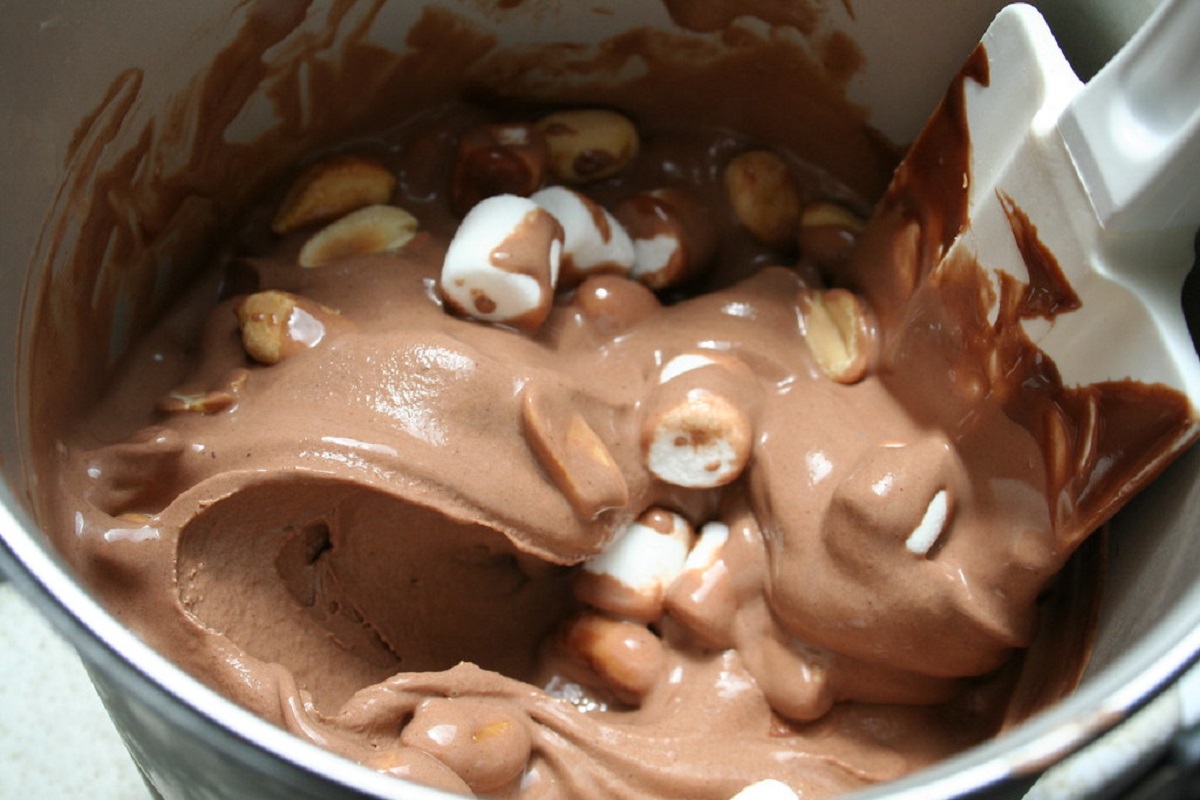
If you’re a chocolate lover, cocoa powder is a great addition to create a rich and indulgent chocolate almond milk ice cream. Simply add a few tablespoons of unsweetened cocoa powder to the base mixture and whisk it in until well combined. Adjust the amount according to your desired level of chocolate intensity.
For those who enjoy fruity flavors, consider incorporating fruit purees or extracts into your ice cream base. You can experiment with flavors like strawberry, raspberry, or even tropical fruits like mango or pineapple. Blend the fruit of your choice into a smooth puree and strain out any seeds or fibers before adding it to the ice cream base. Mix it well to distribute the flavor throughout the mixture before churning.
If you prefer a crunch in your ice cream, you can add various mix-ins, such as chopped nuts, chocolate chips, or cookie pieces. Fold these ingredients into the churned ice cream during the last few minutes of churning to evenly distribute them. Be sure to use mix-ins that are suitable for freezing and won’t become too hard or unpleasantly chewy when frozen.
Furthermore, you can get creative with additional flavorings. Consider adding a dash of cinnamon, a sprinkle of espresso powder, or a touch of almond or mint extract to give your ice cream a unique twist. However, be mindful of the intensity of these flavorings, as a little goes a long way.
When it comes to mix-ins, think beyond just adding them to the base. You can also layer them in the container when storing the ice cream in the freezer. For example, create a ripple effect by alternating layers of ice cream and fudge sauce or jam. This adds visual appeal and exciting bursts of flavor as you scoop and serve the ice cream.
Remember to keep the overall balance of flavors in mind. While it’s fun to experiment and explore new taste combinations, avoid overwhelming the base with too many flavors or mix-ins. Allow the almond milk to shine as the star ingredient, while the other flavors and add-ins complement and enhance the overall experience.
Adding flavors and mix-ins is a wonderful way to elevate your almond milk ice cream and create a truly personalized treat. Embrace your creativity, follow your taste buds, and enjoy the process of discovering delightful combinations that will make your homemade ice cream truly unforgettable.
Tips for Freezing and Storing Almond Milk Ice Cream
Once you have churned your almond milk ice cream to perfection, it’s time to properly freeze and store it to maintain its texture and flavor. Here are some helpful tips to ensure that your frozen creation stays delicious and enjoyable:
- Transfer the churned ice cream from the ice cream maker into a lidded, freezer-safe container. Choose a container that is the appropriate size for the amount of ice cream you have made, allowing for some room at the top to accommodate expansion.
- Smooth the surface of the ice cream with a spatula or the back of a spoon to create an even layer. This helps prevent ice crystals from forming and gives the ice cream a more pleasing appearance when scooping.
- Place a piece of plastic wrap directly on the surface of the ice cream before sealing the container with the lid. This extra layer helps create a barrier, preventing air and ice crystals from affecting the texture and taste of the ice cream.
- Label the container with the date it was made. While homemade ice cream is best enjoyed within a couple of weeks, having a date on the container can help you keep track of its freshness.
- Store the ice cream container in the coldest part of your freezer, away from the door where temperature fluctuations are more likely to occur. Keeping the ice cream at a consistent temperature helps maintain its smoothness and prevents the formation of large ice crystals.
- When serving the ice cream, allow it to sit at room temperature for a few minutes to soften slightly. This makes scooping easier and ensures a creamy texture.
- If you happen to have leftovers, avoid repeated thawing and refreezing, as it can negatively impact the texture. Instead, store any remaining ice cream in a smaller, airtight container or wrap it tightly with plastic wrap to minimize air exposure.
- If you find that your almond milk ice cream becomes too hard after being stored in the freezer, let it sit at room temperature for a few minutes to soften before scooping. Alternatively, you can place the container in the refrigerator for about 10-15 minutes to allow it to soften slightly.
- If you’re planning to store the ice cream for an extended period, consider using an airtight container or covering it with an extra layer of plastic wrap to further protect it from freezer burn and maintain its freshness.
By following these tips, you can ensure that your homemade almond milk ice cream retains its creamy texture and delicious flavors. Whether you enjoy it immediately after churning or savor it over time, the proper freezing and storing techniques will help you enjoy every scoop of your delectable creation.
Troubleshooting Common Issues
While making almond milk ice cream can be a rewarding experience, it’s not uncommon to encounter a few bumps along the way. Here are some common issues that may arise during the process and their possible solutions:
Ice Cream Base Not Chilling Properly: If your ice cream base is not chilling effectively in the refrigerator, ensure that the temperature is set correctly and that the refrigerator is functioning optimally. Additionally, double-check that the container is sealed tightly to prevent warm air from entering.
Ice Cream Not Freezing in the Ice Cream Maker: If your ice cream is not freezing properly in the machine, ensure that the freezer bowl has been properly pre-frozen according to the manufacturer’s instructions. Make sure the ice cream base is adequately chilled before pouring it into the machine. If the issue persists, the freezer bowl may need a longer freezing time or there may be a problem with the machine itself.
Ice Cream Too Soft After Churning: If your ice cream is too soft after churning, it may not have churned for a sufficient amount of time. Check the manufacturer’s instructions for the recommended churning time, as it may vary between models. Alternatively, the room temperature may be too warm, so consider placing the freshly churned ice cream in the freezer for a short while to firm it up.
Ice Crystals in the Ice Cream: The presence of ice crystals in your ice cream can be attributed to several factors. To prevent this issue, make sure your ice cream base is properly chilled before churning. Avoid excessive air exposure during storage by pressing plastic wrap directly onto the surface of the ice cream before sealing it with a lid. Additionally, be cautious with mix-ins that contain high water content, as they can contribute to the formation of ice crystals.
Ice Cream Too Hard in the Freezer: If your ice cream becomes too hard in the freezer, it may have been stored at an extremely low temperature. Allow it to sit at room temperature for a few minutes to soften before serving. You can also place the container in the refrigerator for a short while to soften it slightly.
Inconsistent Texture: If your ice cream has a grainy or icy texture, it may be due to insufficient fat content in the ice cream base. Consider adjusting the ratio of almond milk to a higher fat content liquid, such as coconut milk or cream. Additionally, ensure that your sweeteners and flavorings are well blended into the base mixture to maintain a consistent texture.
Flavors Not Strong Enough: If the flavors of your almond milk ice cream are not coming through strongly, consider increasing the amount of flavorings or mix-ins used. Adjust the quantities of sweeteners, extracts, or other flavor enhancers to your desired taste preference. Remember to taste the mixture before freezing and make any necessary adjustments.
By troubleshooting these common issues, you can overcome any challenges that may arise while making almond milk ice cream. Don’t be discouraged if things don’t go perfectly the first time—experimentation and practice will help you refine your process and create the perfect batch of creamy and delicious almond milk ice cream.
Conclusion
Creating almond milk ice cream at home is a delightful and rewarding experience that allows you to indulge in a creamy and dairy-free frozen treat. By following the steps outlined in this guide, you can use an ice cream maker to churn your own delicious flavors and enjoy the versatility of almond milk as the base.
We began by discussing the importance of choosing the right ice cream maker for your needs, considering factors such as capacity, freezing time, and ease of use. We then explored the process of preparing almond milk, whether by making your own or purchasing a ready-made version.
Next, we covered the crucial steps of creating the perfect ice cream base, including incorporating sweeteners, thickeners, and flavorings. Chilling the ice cream base thoroughly before using the ice cream maker ensures proper freezing and a smooth texture.
Using the ice cream maker allows you to effortlessly churn your ice cream base into a luscious treat. We provided tips and guidelines for achieving the ideal consistency and introduced various ways to add flavors and mix-ins to customize your creations.
Finally, we explored important tips for freezing and storing your almond milk ice cream to maintain its flavor and texture over time. We also addressed common troubleshooting issues that may arise, allowing you to overcome any challenges along the way.
Now armed with the knowledge and guidance provided in this guide, you can confidently embark on your almond milk ice cream-making journey. Get creative and experiment with different flavors and mix-ins to create unique and delightful combinations. Whether you prefer classic flavors like vanilla or more adventurous options, homemade almond milk ice cream offers a world of possibilities.
So, gather your ingredients, fire up your ice cream maker, and embark on the delicious adventure of making your very own almond milk ice cream. With a little practice, you’ll be treating yourself and your loved ones to the perfect scoop of creamy, dairy-free goodness in no time. Enjoy every spoonful of this delectable frozen delight!