Introduction
Welcome to our guide on how to use an HDMI cable on an Xbox 360! In this day and age of technology, gaming consoles have become much more than just a source of entertainment. They have evolved into powerful devices that offer immersive gaming experiences with stunning graphics and high-quality audio. To fully unlock the potential of your Xbox 360, using an HDMI cable is a must.
But what exactly is an HDMI cable? HDMI stands for High-Definition Multimedia Interface, and it is a digital connection used to transmit audio and video signals between devices. HDMI cables have become the industry standard for high-definition transmissions, providing superior quality and clarity.
By connecting your Xbox 360 to your TV or monitor using an HDMI cable, you can unlock the full potential of your console by enjoying high-definition graphics and immersive audio. Say goodbye to the days of blurry images and poor sound quality – with an HDMI cable, you can experience gaming like never before.
In this guide, we will take you through the step-by-step process of using an HDMI cable on your Xbox 360. Whether you are a seasoned gamer or a beginner, our instructions will make it easy for you to connect your console to your TV or monitor and start enjoying a visually stunning and engaging gaming experience.
Before we dive into the steps, make sure you have the necessary equipment – an HDMI cable, your Xbox 360 console, and a TV or monitor with an HDMI port. With these items ready, let’s get started on unlocking the full potential of your Xbox 360 by using an HDMI cable!
What is an HDMI cable?
An HDMI cable, also known as a High-Definition Multimedia Interface cable, is a digital connection used to transmit high-quality audio and video signals between devices. It has become the standard cable for connecting various devices, including gaming consoles, TVs, monitors, Blu-ray players, and more.
Unlike other types of cables, such as component or composite cables, HDMI cables transmit uncompressed digital signals, resulting in superior image and sound quality. This means that when you use an HDMI cable to connect your Xbox 360 to your TV or monitor, you can enjoy crisp and vibrant high-definition graphics and immersive, high-fidelity audio.
One of the significant advantages of HDMI cables is their ability to carry both audio and video signals in a single cable. This eliminates the need for multiple cables to connect your devices, simplifying the setup process and reducing cable clutter. With an HDMI cable, you can connect your Xbox 360 to your TV or monitor with a single cable, streamlining the connection and improving the overall aesthetic of your gaming setup.
HDMI cables also support various video and audio formats, including standard definition, high definition, and even ultra-high definition resolutions like 4K and 8K. They can carry both stereo and multi-channel audio, including surround sound formats like Dolby Digital and DTS. This versatility ensures that you can enjoy the best possible audio and video experience when gaming on your Xbox 360.
HDMI cables come in different versions, with each version offering increased bandwidth and supporting additional features. The most common HDMI cable versions are HDMI 1.4, HDMI 2.0, and HDMI 2.1. The latest HDMI 2.1 version offers support for features like Dynamic HDR, Variable Refresh Rate (VRR), and Auto Low Latency Mode (ALLM), which enhance the gaming experience by delivering smoother graphics and reducing input lag.
Overall, an HDMI cable is an essential component for anyone looking to optimize their gaming experience on the Xbox 360. By using an HDMI cable, you can unlock the full potential of your console, enjoying stunning visuals, and immersive audio for a truly exceptional gaming experience.
Why use an HDMI cable on an Xbox 360?
If you want to take your gaming experience on the Xbox 360 to the next level, using an HDMI cable is an absolute must. Here are several reasons why:
- High-definition graphics: The Xbox 360 is capable of delivering stunning high-definition graphics, but to fully appreciate them, you need to connect your console to a compatible display using an HDMI cable. HDMI cables transmit uncompressed digital signals, ensuring that you enjoy crisp and vibrant visuals with no loss in image quality.
- Enhanced audio quality: Along with exceptional graphics, the Xbox 360 also offers immersive audio experiences. By using an HDMI cable, you can carry both video and audio signals in a single cable, allowing you to enjoy high-quality audio without the need for additional connections. HDMI supports various audio formats, including surround sound, ensuring that you hear every detail in your games.
- Simplified setup: HDMI cables simplify the process of connecting your Xbox 360 to your TV or monitor. With a single cable, you can transmit both audio and video signals, eliminating the need for multiple cables and connections. This not only streamlines your setup but also reduces cable clutter and provides a cleaner and more organized gaming environment.
- Compatibility and versatility: HDMI cables are widely compatible with different devices, including modern TVs, monitors, and home theater systems. Whether you have a Full HD display or a cutting-edge 4K TV, HDMI cables can handle various resolutions, ensuring that you get the best possible image quality on your specific display. Additionally, HDMI cables support various audio formats, making them suitable for surround sound systems and ensuring compatibility with different audio setups.
- Future-proofing your setup: HDMI cable technology continues to evolve. Each new version of HDMI introduces increased bandwidth and additional features, such as support for higher resolutions and enhanced gaming technologies. By using an HDMI cable on your Xbox 360, you future-proof your gaming setup, ensuring that you can take advantage of emerging technologies and features as they become available.
In summary, by using an HDMI cable on your Xbox 360, you unlock the full potential of your console, enjoying high-definition graphics, immersive audio, simplified setup, compatibility with various devices, and the ability to future-proof your gaming experience. So, if you want to take your gaming to the next level, don’t hesitate to connect your Xbox 360 using an HDMI cable.
Step 1: Gather the necessary equipment
Before you can connect your Xbox 360 using an HDMI cable, you need to ensure that you have all the necessary equipment ready. Here’s what you’ll need:
- HDMI cable: The most crucial component is an HDMI cable. Make sure you have a high-quality HDMI cable suitable for connecting your Xbox 360 to your TV or monitor. Ideally, it should be long enough to reach from your console to your display without tension or strain.
- Xbox 360 console: Of course, you’ll need your Xbox 360 console itself. Ensure that it is in good working condition and that you have the necessary power cables and controllers ready.
- TV or monitor with HDMI port: An HDMI port is essential for connecting your Xbox 360. Make sure your TV or monitor has at least one available HDMI port. Most modern displays come with multiple HDMI ports, so you can easily connect other devices if needed.
- Power supply and cables: Ensure that your TV or monitor is connected to a power outlet and that all necessary cables are plugged in securely. Additionally, make sure your Xbox 360 console is properly powered and connected to a power source.
- Optional audio equipment: If you want to use external speakers or a surround sound system, gather any additional audio equipment you may need, such as speakers, a receiver, or an audio amplifier. Ensure that you have the necessary audio cables to connect your Xbox 360 to this equipment, if required.
Once you have gathered all the necessary equipment, ensure that everything is in good working condition and that you have the correct cables and connections. If you are missing any items, make a note to acquire them before moving forward with the setup process.
Now that you have all the necessary equipment ready, let’s move on to the next step: locating the HDMI port on your Xbox 360 console.
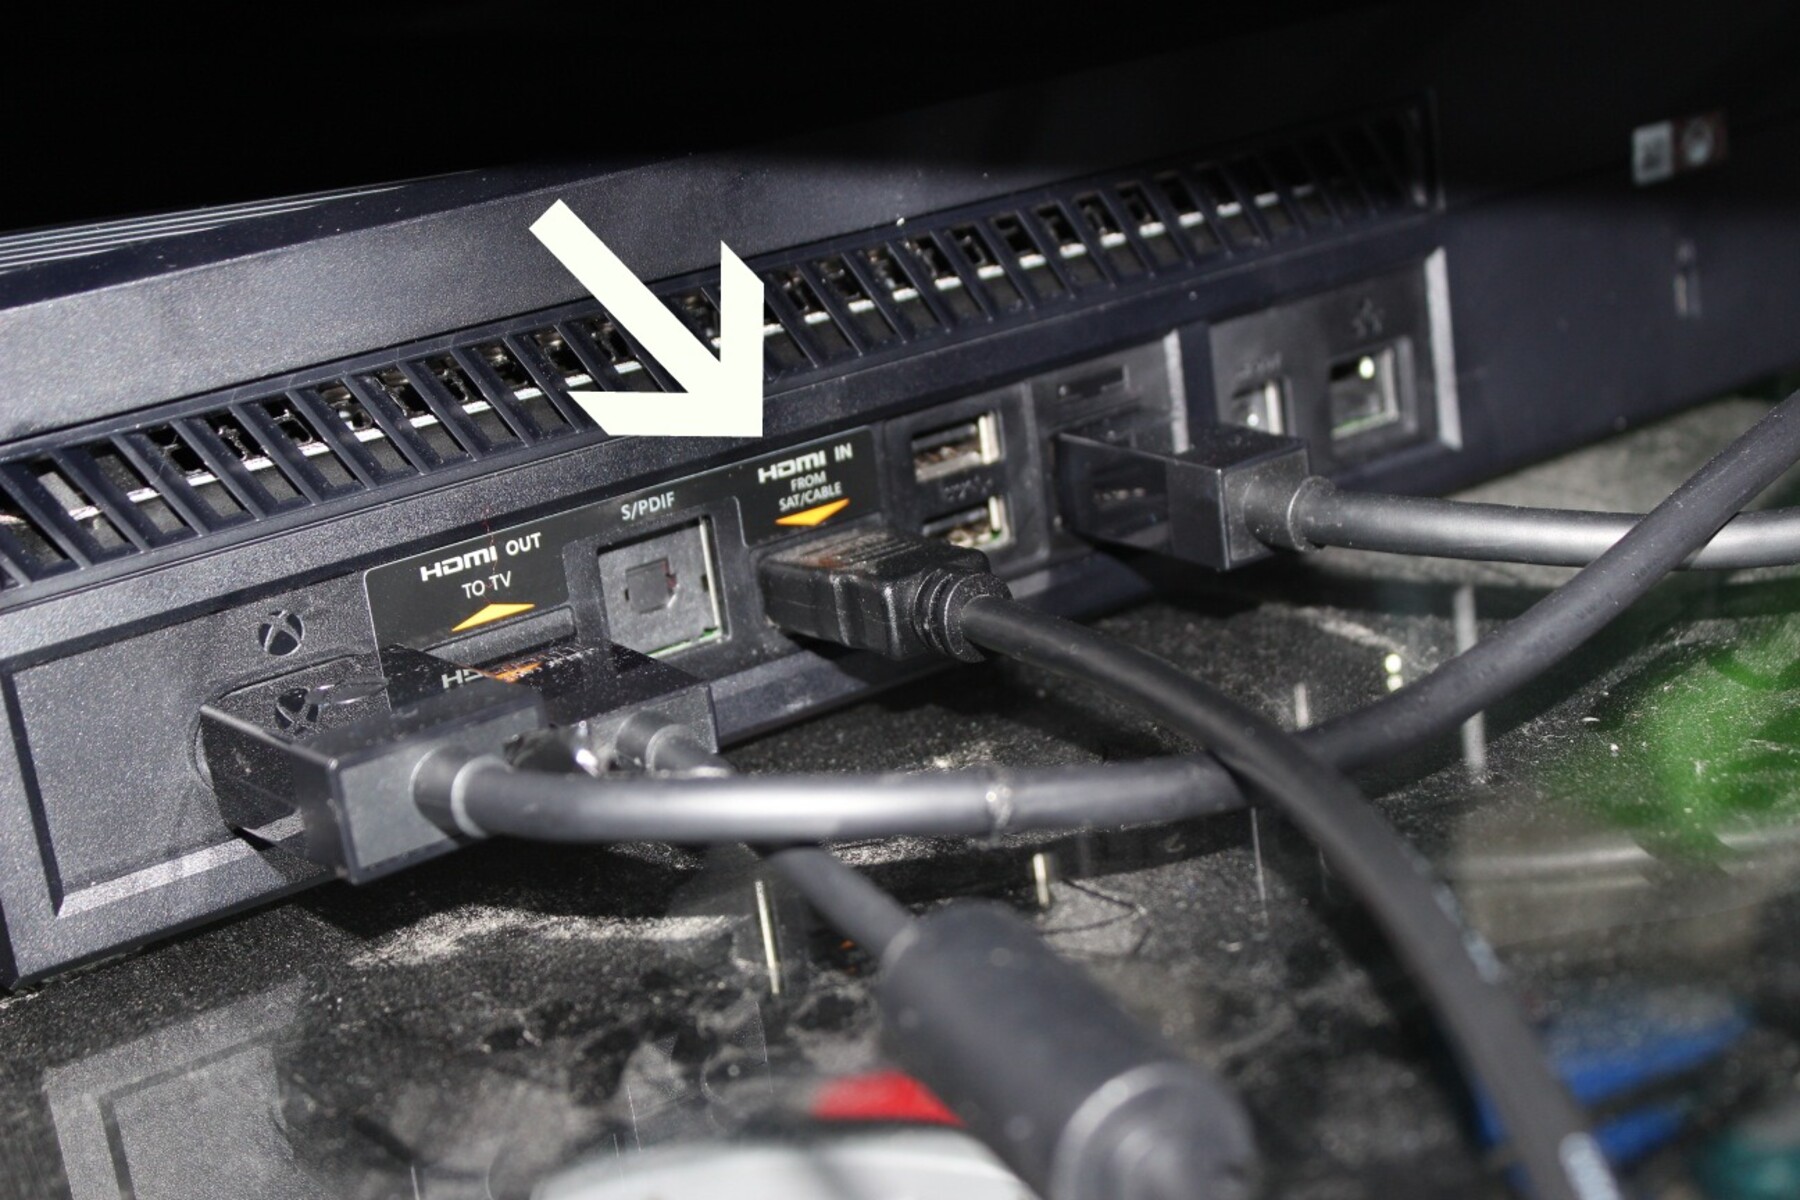
Step 2: Locate the HDMI port on your Xbox 360
Now that you have gathered all the necessary equipment, it’s time to locate the HDMI port on your Xbox 360 console. The HDMI port is where you will connect one end of the HDMI cable. Follow these steps to find the HDMI port:
- Locate the back of your Xbox 360 console. This is where you will find the various ports and connections.
- Look for the HDMI port. On most Xbox 360 models, the HDMI port is a small rectangular socket labeled “HDMI” or “HDMI Out.” It is usually located near the power port and the AV (Audio/Video) port.
- Once you have located the HDMI port, ensure that it is clean and free from any debris or obstructions. A clear and unobstructed HDMI port will ensure optimal connectivity.
It’s essential to handle the HDMI port with care to avoid any damage. Avoid applying excessive force or inserting the HDMI cable at an angle that may cause bending or misalignment. A gentle and straight connection is ideal for maintaining a secure and reliable connection.
Now that you have located the HDMI port on your Xbox 360, you are ready to move on to the next step: locating the HDMI port on your TV or monitor.
Step 3: Locate the HDMI port on your TV or monitor
With the HDMI port on your Xbox 360 located, the next step is to find the HDMI port on your TV or monitor. This is where you will connect the other end of the HDMI cable. Follow these steps to locate the HDMI port:
- Take a look at the back or side of your TV or monitor. This is where the various ports and connections are typically located.
- Look for the HDMI port. HDMI ports on TVs and monitors are usually labeled as “HDMI,” and they may be numbered if there are multiple HDMI ports available. The HDMI port is typically rectangular in shape and can be located near other video and audio ports.
- If your TV or monitor has multiple HDMI ports, choose an available HDMI port for connecting your Xbox 360. Note the number or location of the HDMI port for future reference.
- Ensure that the HDMI port is clear and free from any dust or debris. It’s essential to have a clean HDMI port for a secure and reliable connection.
It’s crucial to handle the HDMI port on your TV or monitor with care. As with the Xbox 360 HDMI port, avoid applying excessive force or inserting the HDMI cable at an angle that may cause damage to the port or cable. A gentle and straight connection is ideal to ensure a proper and stable connection.
Once you have located the HDMI port on your TV or monitor, you are now ready to proceed to the next step: connecting one end of the HDMI cable to your Xbox 360.
Step 4: Connect one end of the HDMI cable to the Xbox 360
Now that you have located the HDMI port on your Xbox 360 console, it’s time to connect one end of the HDMI cable to the console. Follow these steps:
- Take one end of the HDMI cable and gently insert it into the HDMI port on the back of your Xbox 360 console. Ensure that the HDMI cable is aligned with the HDMI port and that you insert it straight without applying undue force.
- Once the HDMI cable is inserted into the HDMI port, push it in until it fits snugly. You should feel a slight click or resistance when the cable is securely connected.
- Take a moment to check that the HDMI cable is properly connected and that it is not loose. A loose connection can result in poor video or audio quality. If needed, gently wiggle the cable to ensure a secure fit.
- Inspect the other end of the HDMI cable to confirm that it is still unconnected and ready for the next step.
It’s important to note that HDMI cables are designed to be inserted in one direction only. Ensure that you align the HDMI cable’s plug with the HDMI port on your Xbox 360 correctly. Applying excessive force or inserting the HDMI cable at an angle can cause damage to the port or cable.
Now that you have successfully connected one end of the HDMI cable to your Xbox 360, it’s time to move on to the next step: connecting the other end of the HDMI cable to your TV or monitor.
Step 5: Connect the other end of the HDMI cable to the TV or monitor
With one end of the HDMI cable securely connected to your Xbox 360 console, it’s time to connect the other end of the cable to your TV or monitor. Follow these steps:
- Take the other end of the HDMI cable and gently insert it into the HDMI port on your TV or monitor. Ensure that the HDMI cable is aligned with the HDMI port and insert it straight into the port without applying excessive force.
- Push the HDMI cable into the HDMI port until it fits securely. You should feel a slight click or resistance when the cable is properly connected.
- Check that the HDMI cable is securely connected to the HDMI port on your TV or monitor. Ensure that it is not loose and that there is no visible gap between the HDMI cable and the port.
- If your TV or monitor has multiple HDMI ports, remember the specific port you used to connect your Xbox 360. This will help you navigate the input options on your TV or monitor later.
Just like connecting the HDMI cable to your Xbox 360, be careful to insert the HDMI cable into the HDMI port on your TV or monitor correctly. Avoid applying too much force or inserting the cable at an angle that could damage the port or cable.
Once you have successfully connected the other end of the HDMI cable to your TV or monitor, you are ready to proceed to the next step: turning on your Xbox 360 and TV or monitor.
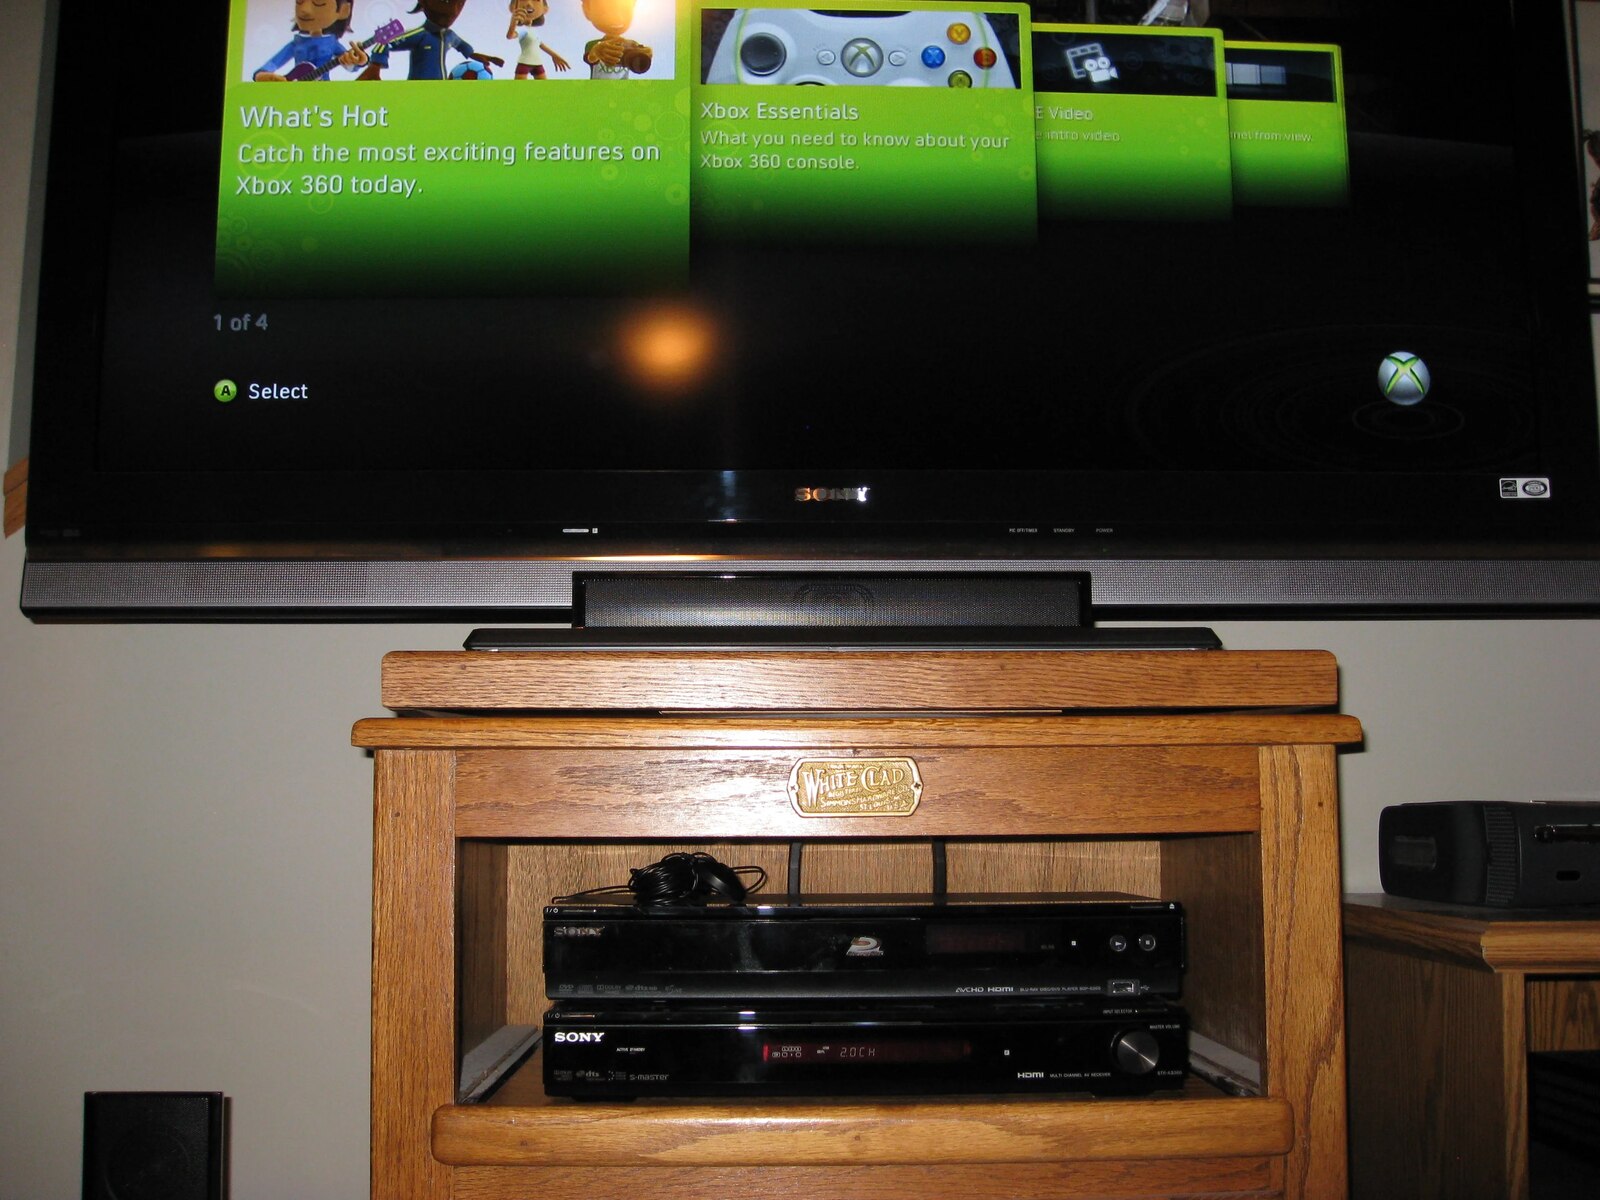
Step 6: Turn on your Xbox 360 and TV or monitor
With the HDMI cable connected to both your Xbox 360 and your TV or monitor, it’s time to turn on your devices and prepare for the setup process. Follow these steps:
- Ensure that your Xbox 360 console is connected to a power source and that it is in standby mode or completely powered off.
- Locate the power button on your Xbox 360 console and press it to turn on the console. You may need to hold the power button for a few seconds until you see the power light illuminate.
- Next, locate the power button on your TV or monitor and press it to turn on the display. If you are using a monitor, ensure that it is also connected to a power source.
- Wait for both your Xbox 360 console and your TV or monitor to power on completely. You may see your TV or monitor display a “No Signal” message initially.
It’s essential to ensure that your Xbox 360 and TV or monitor are powered on to establish a connection. If you encounter any issues, double-check your connections and make sure that all cables are securely plugged in.
Once your Xbox 360 and TV or monitor are powered on, you are ready to proceed to the next step: adjusting the display settings on your Xbox 360.
Step 7: Adjust display settings on the Xbox 360
Now that your Xbox 360 and TV or monitor are powered on, it’s time to adjust the display settings on your console to ensure optimal visual performance. Follow these steps:
- Grab your Xbox 360 controller and press the silver Xbox Guide button located in the center. This will bring up the Xbox Guide menu on your display.
- Using the controller’s directional pad, navigate to the Settings tab in the Xbox Guide menu.
- Select the System Settings option and press the A button to enter the System Settings menu.
- In the System Settings menu, scroll down and select the Display option. Press the A button to enter the Display settings.
- In the Display settings menu, you will see various options related to video output and display resolution. Select the appropriate settings for your TV or monitor. If you’re unsure, choose the highest resolution option supported by your display.
- Once you have selected the desired display settings, navigate to the Confirm button and press A on your controller to save the settings.
- Exit the System Settings menu by pressing the B button on your controller until you return to the Xbox Guide menu.
It’s important to choose the correct display settings to match the capabilities of your TV or monitor. Selecting the wrong settings may result in a distorted or unsupported signal. Refer to your TV or monitor’s manual to determine the optimal display settings if you are unsure.
Once you have adjusted the display settings on your Xbox 360, you are ready to move on to the next step: testing the connection and enjoying high-quality video and audio.
Step 8: Test the connection and enjoy high-quality video and audio
With the display settings adjusted on your Xbox 360, it’s time to test the connection and experience the benefits of using an HDMI cable. Follow these steps:
- Ensure that your Xbox 360 console and TV or monitor are powered on and that they are on the correct input or source channel. For example, if you connected your Xbox 360 to HDMI port 1 on your TV, make sure your TV is set to HDMI 1 input.
- On your Xbox 360 controller, press the Xbox Guide button to bring up the Xbox Guide menu on your display.
- Navigate to the Games & Apps tab in the Xbox Guide menu and select the game or application you want to launch.
- Once the game or application starts, pay attention to the visuals and audio. You should notice a significant improvement in video quality, with sharper details and vibrant colors. The audio should also be clear and immersive, enhancing the overall gaming experience.
- If you experience any display or audio issues, double-check your connections and ensure that your display settings are correctly configured. Troubleshoot any problems based on the specific issue you are facing.
Now is the time to sit back, relax, and enjoy the enhanced gaming experience brought by using an HDMI cable on your Xbox 360. Immerse yourself in stunning graphics and immersive audio as you explore the vast world of gaming.
Remember, if you have additional audio equipment, such as external speakers or a surround sound system, ensure that they are powered on and correctly connected to your Xbox 360. Adjust the audio settings on your console if necessary to optimize the audio experience.
If you’re satisfied with the visual and audio quality, you can start exploring the wide variety of games and applications available for the Xbox 360, taking full advantage of the high-definition capabilities provided by the HDMI connection.
Congratulations! You have successfully connected your Xbox 360 to your TV or monitor using an HDMI cable and can now enjoy the benefits of high-quality video and audio while gaming.
Conclusion
Congratulations on successfully setting up your Xbox 360 with an HDMI cable! By following the steps outlined in this guide, you have unlocked the full potential of your console, experiencing high-definition graphics and immersive audio like never before.
An HDMI cable provides numerous benefits when connecting your Xbox 360 to your TV or monitor. The use of HDMI ensures that you can enjoy crisp and vibrant visuals with no loss in image quality, while also delivering high-fidelity audio for an immersive gaming experience.
Throughout this guide, we have covered important steps such as gathering the necessary equipment, locating the HDMI ports on your Xbox 360 and TV or monitor, connecting the HDMI cable, adjusting display settings, and testing the connection. Each step was designed to make the setup process simple and hassle-free.
Now that you have completed the setup, take the time to explore the extensive library of games available for the Xbox 360. Immerse yourself in breathtaking worlds brought to life by the stunning visuals and captivating sound quality that the HDMI connection provides.
Remember, if you ever encounter any issues with the HDMI connection or experience any display or audio problems, refer back to this guide and double-check your connections and settings. Troubleshooting is a normal part of any setup process, and with these instructions in hand, you can resolve any issues quickly.
Enjoy your gaming sessions with the enhanced gaming experience provided by the HDMI connection on your Xbox 360. Immerse yourself in the vast array of games, from thrilling action adventures to immersive role-playing experiences, all brought to life in stunning high-definition.
Thank you for following this guide, and we hope you have a fantastic time gaming with your Xbox 360!