Reasons to Upgrade to SSD
Upgrading to a solid-state drive (SSD) is a smart move that can greatly enhance the performance and speed of your computer. Here are several compelling reasons why you should consider making the switch from a traditional hard drive to an SSD:
- Improved Speed: One of the primary advantages of an SSD is its lightning-fast speed. Unlike traditional hard drives that rely on spinning disks to access data, an SSD utilizes flash memory, resulting in significantly faster boot times and file transfers. With an SSD, you can experience improved overall system responsiveness and reduced loading times for applications and games.
- Enhanced Durability: Unlike traditional hard drives that have delicate moving parts, SSDs are more durable and resistant to physical shock. This means your data is better protected from accidental drops or bumps. Additionally, SSDs are less susceptible to data loss due to mechanical failure, making them a more reliable option for storing important files and documents.
- Energy Efficiency: SSDs require less power to operate compared to traditional hard drives. This translates to longer battery life for laptops and lower electricity bills for desktop computers. By upgrading to an SSD, you can enjoy improved energy efficiency while reducing your overall carbon footprint.
- No Noise: An SSD operates silently since it doesn’t rely on spinning disks or moving parts like traditional hard drives. This absence of noise can be a real benefit, especially if you use your computer in quiet environments or during late-night work sessions.
- Compact and Lightweight: SSDs are typically smaller and weigh less than traditional hard drives. This makes them an ideal choice for laptops and other portable devices, where space and weight considerations are important. By upgrading to an SSD, you can enjoy a lighter and more portable computer without sacrificing storage capacity.
- Improved Multitasking: With their faster read and write speeds, SSDs enable smoother multitasking capabilities. This means you can open multiple applications and switch between them seamlessly without experiencing significant lag or slowdowns. Whether you’re a professional running resource-intensive software or a gamer juggling multiple tasks, an SSD can greatly enhance your productivity and gaming experience.
With all these benefits, it’s evident that upgrading to an SSD can significantly improve your computer’s performance, durability, energy efficiency, and overall user experience. Whether you’re a casual user or a power user, investing in an SSD is a wise decision that will make your computing life faster, smoother, and more enjoyable.
Understanding What an SSD is
If you’re considering upgrading to a solid-state drive (SSD), it’s important to have a clear understanding of what it is and how it differs from a traditional hard drive. An SSD, unlike a hard drive, does not have any moving parts or spinning disks. Instead, it uses flash memory technology to store and retrieve data electronically.
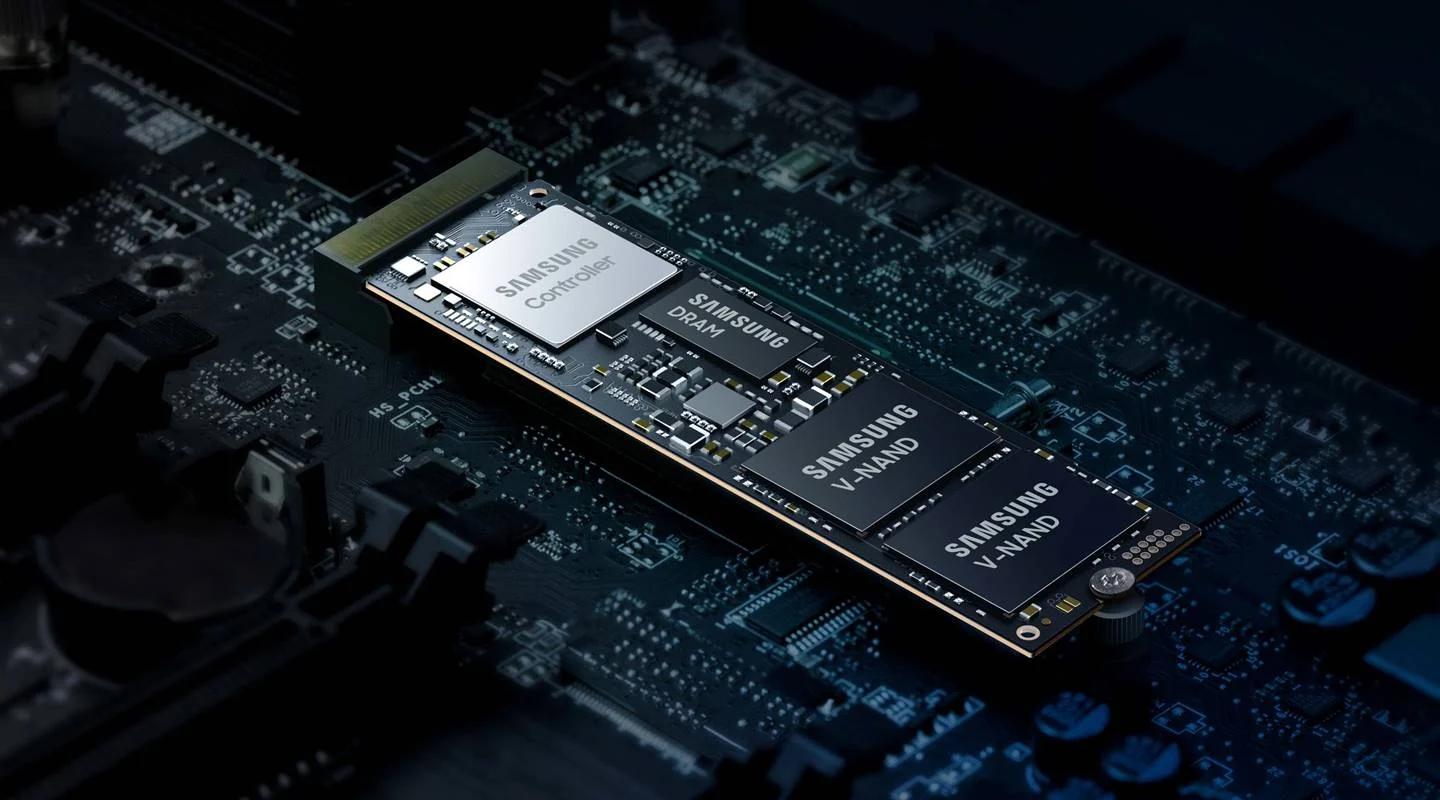
The main component of an SSD is the NAND flash memory, which is a type of non-volatile memory that retains data even when the power is turned off. This allows for faster and more efficient data access compared to mechanical hard drives. The lack of moving parts in an SSD also means there is less friction, resulting in reduced heat generation and lower power consumption.
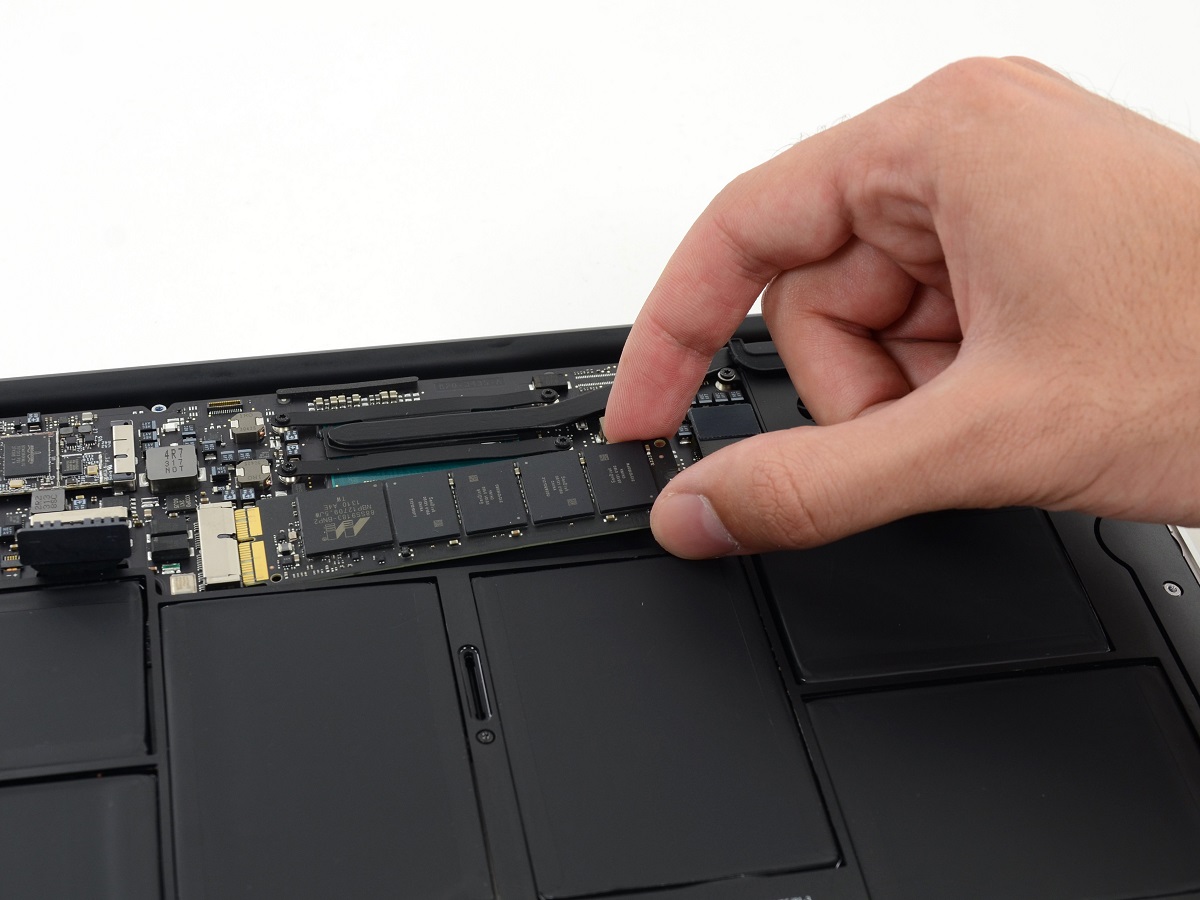
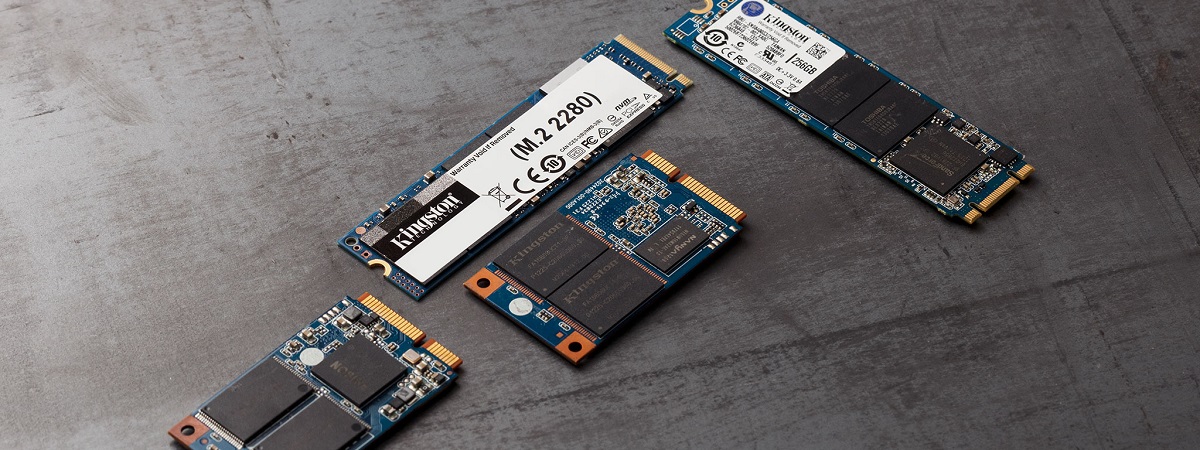
SSDs come in various form factors, including 2.5-inch drives for laptops and desktop computers, as well as smaller M.2 drives that are commonly used in ultrabooks and compact PCs. These form factors are designed to fit into standard drive bays or utilize dedicated PCIe slots on motherboards.
When it comes to storage capacity, SSDs range from a few hundred gigabytes (GB) to multiple terabytes (TB). While the cost per gigabyte of SSDs is generally higher than traditional hard drives, the prices have been steadily declining over the years, making SSDs more affordable and accessible for consumers.
One key advantage of SSDs is their speed. The absence of moving parts allows for near-instantaneous data access and transfer rates. This means that tasks such as booting up your computer, launching applications, and loading files can be significantly faster compared to a traditional hard drive.
Another benefit of SSDs is their durability. Since there are no mechanical components, SSDs are more resistant to physical shock and vibration, which makes them ideal for laptops and portable devices. Additionally, SSDs have a longer lifespan compared to hard drives, as they are not prone to mechanical failures.
It’s important to note that while SSDs offer numerous advantages, they do have a limited number of write cycles before they may start to degrade. However, modern SSDs come with advanced wear-leveling algorithms and TRIM support, which help to prolong their lifespan and maintain optimal performance.
In summary, an SSD is a high-performance storage device that utilizes flash memory to provide faster data access, improved durability, and energy efficiency compared to traditional hard drives. Understanding the fundamental characteristics and benefits of SSDs can help you make an informed decision when considering an upgrade for your computer.
Choosing the Right SSD
When it comes to upgrading to a solid-state drive (SSD), choosing the right one for your needs is crucial. Here are some factors to consider when selecting an SSD:
- Storage Capacity: Determine how much storage space you require for your files, applications, and operating system. SSDs are available in various capacities, ranging from a few hundred gigabytes (GB) to several terabytes (TB). Choose a capacity that suits your needs, keeping in mind that the price per gigabyte tends to decrease as the capacity increases.
- Form Factor: Consider the form factor that is compatible with your computer. Common form factors include 2.5-inch drives, which are suitable for most laptops and desktops, and M.2 drives, which are commonly used in ultrabooks and compact PCs. Ensure that your computer has the appropriate drive bay or PCIe slot for the chosen form factor.
- Speed and Performance: Look for an SSD with high read and write speeds to ensure fast data access and transfer rates. Pay attention to the specifications such as sequential read/write speeds and random read/write speeds, as these indicators provide insights into the overall performance of the SSD.
- Interface Compatibility: Check the compatibility of the SSD’s interface with your computer. The most common interfaces for SSDs are SATA III (6 Gbps) and NVMe (PCIe). SATA III is suitable for most systems, while NVMe offers faster performance for computers that support this interface.
- Endurance and Reliability: Consider the endurance rating or the total bytes written (TBW) of the SSD. This rating indicates the amount of data that can be written to the drive over its lifespan. Higher-endurance SSDs are recommended for tasks that involve extensive writing, such as video editing or database management.
- Brand and Customer Reviews: Research reputable SSD brands known for their reliability, performance, and customer support. Read customer reviews to gain insights into the experiences of other users and consider their feedback when making your decision.
- Price and Warranty: Compare prices from different sellers to ensure you’re getting the best value for your budget. Take into account additional factors such as warranty coverage, as longer warranty periods provide added peace of mind for potential hardware failures.
By considering these factors, you can choose an SSD that meets your storage requirements and delivers the performance and reliability you desire. Remember to review the specifications, seek recommendations, and read customer reviews to ensure you select the right SSD for your specific needs.
Backing Up Your Data
Before upgrading to a solid-state drive (SSD), it is essential to back up your data to ensure it remains safe during the transition. Here are some steps to follow when backing up your data:
- Identify Important Files: Determine which files, folders, and applications are essential and need to be backed up. Focus on documents, photos, videos, music, and other irreplaceable data.
- Choose a Backup Method: Select a backup method that suits your needs. Options include external hard drives, cloud storage services, or network-attached storage (NAS) devices. Each method has its advantages, so consider factors such as capacity, accessibility, and security when making your decision.
- Transfer Files to Backup Storage: Copy or transfer your selected files and folders to your chosen backup storage. If using an external hard drive, connect it to your computer and use a file transfer tool, such as File Explorer or Time Machine, to complete the backup process. For cloud storage, follow the instructions provided by the service to upload your data securely.
- Verify Data Integrity: Once the backup process is complete, verify the integrity of your data. Check that all files have been correctly transferred and can be accessed without any errors or corruption. This step ensures that you have a reliable backup in case of any data loss during the SSD upgrade process.
- Create a System Image (Optional): Consider creating a system image of your entire operating system and settings. This allows you to restore your computer to its previous state if any issues arise during the SSD upgrade process. System image creation tools, such as Windows Backup and Restore or Time Machine, can streamline this process.
- Test the Backup: Perform a test restore from your backup storage to ensure that the files can be successfully recovered. This step provides peace of mind and allows you to identify any potential issues with the backup process beforehand.
- Maintain Regular Backup Practices: Establish a regular backup routine to ensure continuous data protection. Consider using automated backup software or cloud backup services that can periodically back up your data without manual intervention. Regular backups minimize the risk of data loss from accidental deletion, hardware failure, or other unforeseen circumstances.
By following these steps and adopting a proactive approach to data backup, you can avoid the potential loss of important files and ensure a smooth transition to your new SSD. Remember to double-check your backups and verify their integrity before proceeding with the upgrade process.
Gathering the Necessary Tools
Before upgrading to a solid-state drive (SSD), it’s important to gather the necessary tools to ensure a smooth and efficient installation process. Here are some essential tools you’ll need:
- SSD: Of course, you’ll need the SSD itself. Make sure you have purchased the correct size and form factor that is compatible with your computer.
- Screwdriver: Most computers require a screwdriver to access and remove the existing hard drive or secure the SSD in place. Determine the type and size of screwdriver needed and ensure you have it on hand.
- External Storage: You’ll need an external storage device, such as an external hard drive or a USB flash drive, to back up your data before the upgrade. This ensures that your important files are safe before making any changes to your computer.
- Data Transfer Cable or Enclosure: If you want to directly transfer your data from the old hard drive to the new SSD, you may need a data transfer cable or enclosure. This allows you to connect both drives simultaneously and clone the data from one to the other.
- Operating System Installation Media (optional): If you plan to perform a fresh installation of the operating system on the new SSD, make sure you have the installation media ready. This can be a USB drive or a DVD containing the operating system installation files.
- Wrist Strap (optional): To prevent damage from static electricity, you may want to use an anti-static wrist strap during the upgrade process. This helps dissipate any static charge from your body and reduces the risk of electrostatic discharge damaging sensitive components.
- Documentation and Manuals: Gather any documentation or manuals provided with your computer or SSD. These resources can provide valuable information specific to your device, such as instructions for removing the existing hard drive or accessing the necessary drive bays.
- Internet Connection: You may need an internet connection to download the necessary drivers or firmware updates for your new SSD. This ensures that you have the latest software versions to optimize the performance and compatibility of the drive.
By collecting these tools and resources before starting the upgrade process, you can ensure that you have everything you need to complete the installation smoothly. Take the time to gather these tools and familiarize yourself with any instructions or documentation provided to make the process as efficient and hassle-free as possible.
Preparing Your Computer for the Upgrade
Before proceeding with the installation of a solid-state drive (SSD), it’s important to properly prepare your computer to ensure a successful upgrade process. Here are the steps to follow:
- Back Up Your Data: As mentioned previously, ensure that you have backed up all your important data to an external storage device or cloud storage. This ensures that your files and documents are safe and can be easily restored to the new SSD.
- Take Note of Existing Settings and Configurations: Make a note of any specific settings or configurations on your current system, such as BIOS settings, software licenses, passwords, and network settings. This will help you recreate these settings on the new SSD.
- Power Off and Disconnect: Shut down your computer and disconnect it from the power source. For laptops, remove the battery as well. This step ensures the safety of both you and your computer during the upgrade process.
- Ground Yourself: Before handling any internal components, discharge static electricity from your body by touching a grounded object or using an anti-static wrist strap. This helps prevent accidental damage to sensitive electronic components.
- Open the Computer Case: Depending on your computer’s make and model, you may need to remove a panel or access door to gain access to the internal components. Consult the manufacturer’s instructions or seek online resources for specific guidance.
- Note Existing Hard Drive Connections: Take note of how your existing hard drive is connected to the motherboard. This includes the data cables, power cables, and any mounting brackets or screws that secure the drive in place.
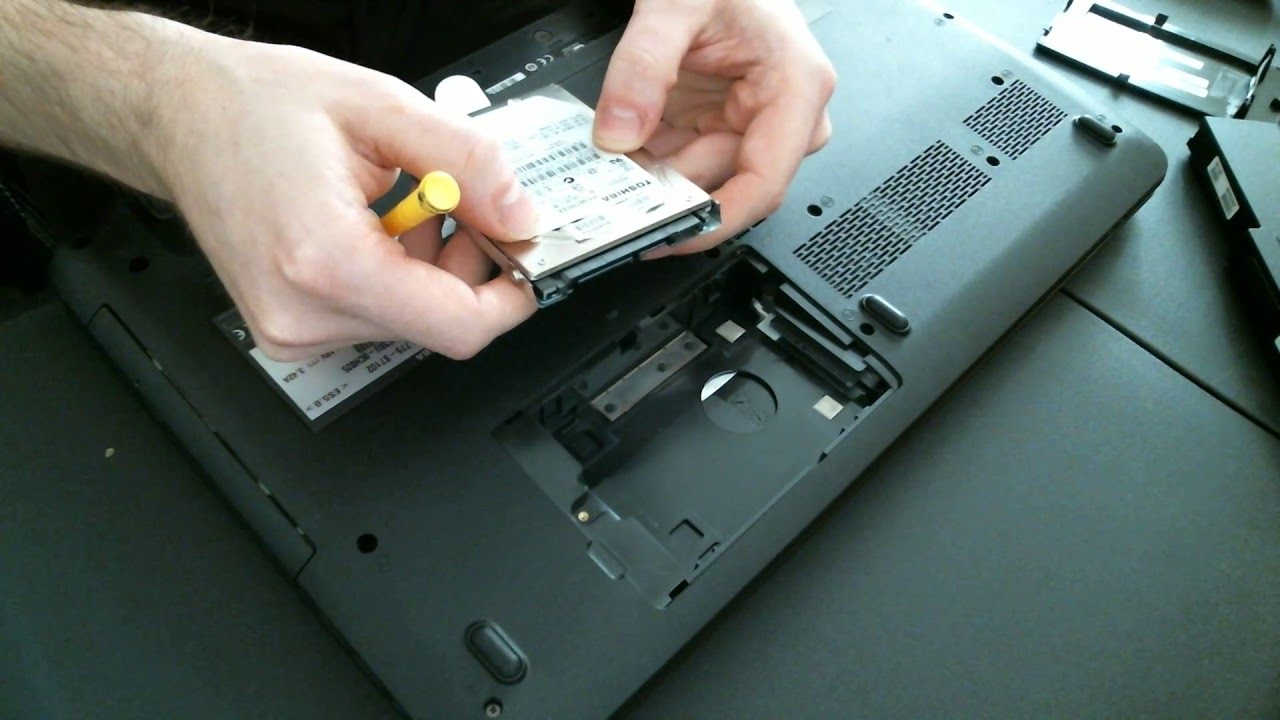
- Remove Existing Hard Drive: Carefully disconnect the data and power cables from the existing hard drive. Remove any screws or brackets securing the drive to the computer case. Gently slide the drive out of its mounting bay.
- Insert the SSD: Carefully insert the SSD into the empty drive bay, aligning it with the appropriate connectors. Secure the SSD in place using the mounting brackets or screws that were previously removed.
- Connect the SSD: Attach the data and power cables to the SSD, ensuring a secure and proper connection. Refer to the manufacturer’s instructions or consult online resources for guidance if needed.
- Close the Computer Case: Place the computer case panel or access door back in position securely. Reinsert any screws or locking mechanisms to secure the case.
- Power On and Verify: Reconnect your computer to the power source, and power it on. Ensure that the SSD is recognized by your computer and accessible in the operating system. Verify that the SSD is functioning correctly before proceeding with the next steps.
By following these steps, you can prepare your computer for the SSD upgrade and ensure a smooth transition. Remember to exercise caution and refer to specific instructions for your computer model if needed to avoid any unnecessary complications during the preparation process.
Physically Installing the SSD
Once you have prepared your computer for the upgrade, the next step is to physically install the solid-state drive (SSD). Following the correct installation procedure is crucial to ensure a secure and reliable connection. Here’s how to physically install the SSD:
- Power Off: Turn off your computer and disconnect it from the power source. For laptops, remove the battery as well. This step ensures the safety of both you and your computer during the installation process.
- Ground Yourself: Before proceeding, discharge static electricity from your body by touching a grounded object or using an anti-static wrist strap. This helps prevent accidental damage to sensitive electronic components.
- Open the Computer Case: Depending on your computer’s make and model, you may need to remove a panel or access door to gain access to the internal components. Consult the manufacturer’s instructions or seek online resources for specific guidance.
- Locate the Drive Bay: Identify the appropriate drive bay for installing the SSD. This may be a standard 2.5-inch drive bay or a slot specifically designed for the SSD’s form factor (e.g., M.2).
- Prepare the Drive: If your SSD is not already mounted in a drive bracket, attach the appropriate bracket or adapter to securely hold the SSD in place. Refer to the manufacturer’s instructions for specific guidance.
- Insert the SSD: Carefully insert the SSD into the drive bay or slot, aligning it with the connector. Apply gentle pressure to ensure a firm and secure connection.
- Secure the SSD: Depending on the mounting mechanism, attach any screws or clips to hold the SSD in place. This ensures that the drive remains securely installed in the computer.
- Connect the Cables: Attach the appropriate data and power cables to the SSD. Ensure a secure connection by firmly pushing the connectors into their respective slots. Refer to the manufacturer’s instructions or consult online resources for guidance if needed.
- Close the Computer Case: Place the computer case panel or access door back in position securely. Reinsert any screws or locking mechanisms to secure the case.
- Power On and Verify: Reconnect your computer to the power source, and power it on. Ensure that the SSD is recognized by your computer and accessible in the operating system. Verify that the SSD is functioning correctly before proceeding with the next steps.
By following these steps, you can physically install the SSD in your computer, providing a stable and reliable connection. Remember to handle the SSD with care, ensure proper alignment, and securely fasten it in place to avoid any potential issues during the installation process.
Transferring Your Operating System and Files
Once the solid-state drive (SSD) is physically installed in your computer, the next step is to transfer your operating system and files from the old storage device to the new SSD. This process ensures that your computer retains all your data and programs without the need for a fresh installation. Here’s how to transfer your operating system and files:
- Clone Your Old Drive: Use a disk cloning software to clone your old drive onto the new SSD. This process creates an exact replica of your old drive, transferring all the operating system files, settings, and personal data.
- Connect the SSD (via Data Transfer Cable or Enclosure): If you are using a data transfer cable or enclosure, connect the SSD to your computer. Follow the software instructions to initiate the cloning process, selecting the old drive as the source and the SSD as the target.
- Start the Cloning Process: Once the source and target drives are selected, start the cloning process. The software will begin copying all the data from the old drive to the new SSD. This process may take some time, depending on the size of your data.
- Verify the Cloned Data: After the cloning process is complete, verify the integrity of the cloned data. Check that all your files, settings, and programs are intact and accessible on the SSD.
- Disconnect the Old Drive (Optional): If you no longer need the old drive, you can disconnect it from your computer. This step ensures that your computer boots from the SSD and avoids any confusion between the drives.
- Update Drive Boot Order (if necessary): In some cases, you may need to update the drive boot order in your computer’s BIOS settings. Access the BIOS and set the SSD as the primary boot drive, ensuring that your computer starts up from the SSD.
- Test and Optimize: Restart your computer and ensure that it boots up successfully from the SSD. Verify that all your programs and files are functioning properly. Additionally, consider optimizing your SSD by enabling features such as TRIM and adjusting power management settings. Consult the SSD manufacturer’s instructions or online resources for specific guidance.
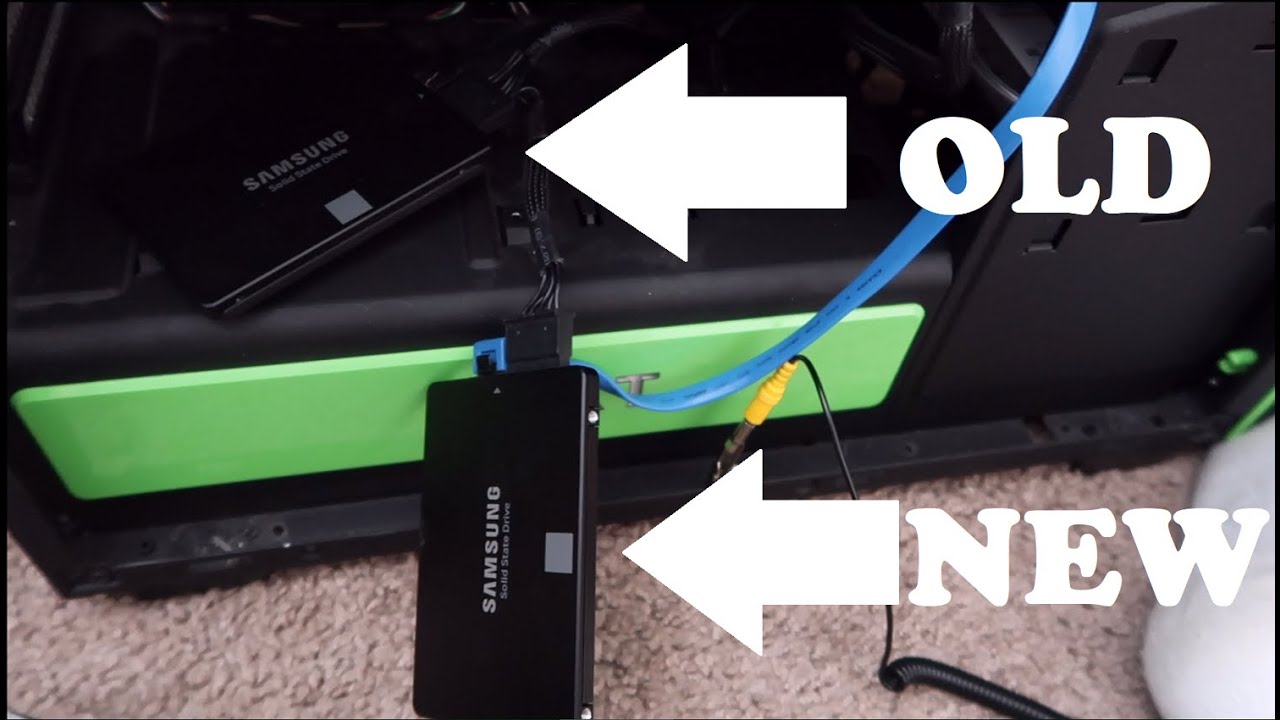
- Keep the Old Drive for Data Storage: If you still have space in your computer, consider keeping the old drive as a secondary storage device. You can utilize it for data storage, backups, or less frequently accessed files.
By following these steps, you can successfully transfer your operating system and files from the old drive to the new SSD, ensuring a seamless transition with all your data intact. Remember to verify the cloned data, update the boot order if necessary, and optimize your SSD settings for the best performance.
Updating the BIOS and Drivers
After installing a solid-state drive (SSD), it’s important to update your computer’s Basic Input/Output System (BIOS) and drivers to ensure compatibility and optimal performance. Here’s a step-by-step guide on how to update the BIOS and drivers:
- Determine Your Motherboard’s Manufacturer and Model: Identify the manufacturer and model of your motherboard. You can typically find this information in the BIOS or by checking the documentation or manufacturer’s website.
- Check for BIOS Updates: Visit the manufacturer’s website and look for BIOS updates specifically designed for your motherboard model. Download the latest BIOS update, ensuring that it is compatible with your computer’s architecture (e.g., 32-bit or 64-bit).
- Create a Bootable USB Drive: Format a USB drive to FAT32 and create a bootable drive using the downloaded BIOS update. Most motherboard manufacturers provide instructions or utilities to create a bootable drive.
- Enter BIOS Setup: Restart your computer and access the BIOS setup by pressing a specific key (typically Del, Esc, F2, or F10) during the boot process. Consult your motherboard manual or manufacturer’s website for the specific key.
- Update the BIOS: Within the BIOS setup, locate the option to update the BIOS. Select the bootable USB drive as the update source and follow the on-screen instructions to update the BIOS. Do not interrupt the update process to avoid causing permanent damage to your motherboard.
- Update Drivers: Once the BIOS update is complete, restart your computer and log in to the operating system. Visit the manufacturer’s website and download the latest drivers for your motherboard, including chipset, audio, network, and graphics drivers.
- Install Driver Updates: Run the downloaded driver files and follow the installation prompts. Restart your computer if prompted to ensure the driver updates take effect.
- Verify Driver Installation: After updating the drivers, open the Device Manager in your operating system and check for any remaining outdated or missing drivers. Update them accordingly using the manufacturer’s website or automatic driver update tools.
- Test and Verify: Restart your computer and ensure that it boots up without any issues. Verify that all hardware components are functioning properly, such as audio, network connectivity, and graphics performance. Make necessary adjustments if any issues arise.
By following these steps, you can update the BIOS and drivers of your computer to ensure compatibility and maximize the performance of your new SSD. Regularly checking for updates and keeping your system up to date is essential for a smooth and efficient computing experience.
Optimizing Your SSD
After installing a solid-state drive (SSD), it’s important to optimize its performance and longevity to get the most out of your investment. Here are some effective strategies for optimizing your SSD:
- Enable TRIM: TRIM is a feature that allows the operating system to inform the SSD which data blocks are no longer in use. This helps the SSD maintain optimal performance and extends its lifespan. Ensure that TRIM is enabled in your operating system settings.
- Avoid Defragmentation: Unlike traditional hard drives, SSDs do not benefit from defragmentation. In fact, frequent defragmentation can decrease the lifespan of an SSD. Modern operating systems typically recognize SSDs and disable automatic defragmentation by default.
- Disable Hibernation: If you have limited storage capacity on your SSD, consider disabling the hibernation feature. Hibernation writes a large file (equal to the amount of RAM in your system) to the drive, which can consume a significant portion of the SSD’s space.
- Move Page File to Another Drive: Adjust the location of the page file (also known as virtual memory) to a different drive if you have multiple drives in your system. Placing the page file on a separate drive can reduce unnecessary write operations on the SSD and help prolong its lifespan.
- Optimize Power Management Settings: Adjust the power management settings in your operating system to prevent unnecessary disk activity on the SSD. For example, disable features like indexing, system restore, or scheduled tasks that cause frequent read and write operations.
- Keep Enough Free Space: Maintain sufficient free space on your SSD to ensure optimal performance. Aim to keep at least 10-20% of the SSD’s total capacity free to allow for efficient wear leveling and garbage collection algorithms to work effectively.
- Regularly Update Firmware: Check for firmware updates from the SSD manufacturer’s website. Firmware updates often include performance enhancements, bug fixes, and compatibility improvements. Follow the manufacturer’s instructions carefully when updating the firmware.
- Backup and Monitor Health: Regularly back up your data, as SSDs, like any storage device, can still fail. Use manufacturer-provided diagnostic tools or third-party software to monitor the health and performance of your SSD. Promptly address any issues that arise.
- Avoid Excessive Writes: While modern SSDs have improved durability, excessive writes can still affect their lifespan. For example, avoid running unnecessary read/write intensive applications or storing non-essential temporary files on the SSD.
- Properly Shut Down or Restart: Always use the proper shut down or restart procedure for your operating system. Abruptly powering off your computer can cause data corruption on the SSD and potentially impact its performance and longevity.
By implementing these optimization strategies, you can enhance the performance and lifespan of your SSD. Regularly monitor your SSD’s health and make adjustments as needed to ensure smooth operation and reliability for years to come.
Troubleshooting Common Issues
While solid-state drives (SSDs) offer numerous benefits, there may be certain issues that you may encounter during or after the installation. Here are some common SSD-related problems and troubleshooting steps to resolve them:
- SSD Not Recognized: If your SSD is not detected by the computer, ensure that it is properly connected to the motherboard and power supply. Try reconnecting the SATA or NVMe cable and ensure it is securely seated. If the issue persists, try connecting the SSD to a different SATA or PCIe slot to rule out any faulty connections.
- Boot Failure: If you encounter boot failure after installing the SSD, ensure that the SSD is set as the primary boot device in the BIOS settings. Check the boot order and prioritize the SSD over other drives. If necessary, you may need to reinstall the operating system on the SSD for it to boot correctly.
- Slow Performance: If your SSD is not performing as expected, check if the TRIM command is enabled and functioning. Update your SSD firmware and ensure that you are using the latest drivers. Additionally, free up space on the SSD and check for any background processes or applications that may be consuming excessive resources.
- Overheating: If your SSD is overheating, ensure that it is adequately ventilated and not in close proximity to heat-generating components. Consider installing additional case fans or a dedicated SSD cooler if necessary. Avoid running resource-intensive tasks for prolonged periods of time that might increase the temperature of the SSD.
- Data Corruption: If you experience data corruption or errors on the SSD, first check the health of the SSD using diagnostic software provided by the manufacturer or third-party tools. Run a thorough scan to identify any potential hardware issues. If necessary, back up your data and contact technical support for further assistance.
- Incompatibility: Incompatibility issues may arise if the SSD is not compatible with your motherboard or operating system. Ensure that the SSD is listed in the compatibility list provided by the manufacturer. Update your motherboard’s BIOS to the latest version to enhance compatibility. If the issue persists, contact the SSD manufacturer for specific guidance.
- Data Loss: If you accidentally delete or lose data on the SSD, immediately stop using the drive to minimize the risk of overwriting the deleted data. Use data recovery software or consult professional data recovery services to attempt to recover the lost data. Regularly back up your data to prevent significant data loss in the future.
- Crashes or Freezes: If your computer crashes or freezes intermittently after installing the SSD, first ensure that all connections are secure and your operating system and drivers are up to date. Check for any conflicting software or incompatible drivers that may be causing instability. Conduct a comprehensive malware scan to rule out any security issues.
- Seek Professional Assistance: If you encounter persistent issues that you are unable to resolve, consider seeking professional assistance. Contact technical support from the SSD manufacturer or consult with a computer technician who is experienced in dealing with SSD-related problems.
By following these troubleshooting steps, you can address common issues that may arise when installing or using an SSD. Remember to thoroughly investigate the problem and seek professional help if needed to ensure the optimal performance and reliability of your SSD.
Enjoying the Benefits of SSD
After successfully installing a solid-state drive (SSD), you can now fully enjoy its numerous benefits. Here are some of the advantages you can expect to experience:
- Lightning-Fast Speed: With an SSD, you’ll experience significantly faster boot times and quicker file transfers compared to traditional hard drives. Your computer will feel more responsive, allowing you to launch applications and access files in a fraction of the time.
- Improved Productivity: The faster performance of an SSD enables smoother multitasking, making it easier to switch between applications seamlessly. Resource-intensive tasks such as video editing, rendering, and running virtual machines will be more efficient, allowing you to complete your work faster.
- Better Gaming Experience: SSDs reduce loading times in games, resulting in a more immersive and enjoyable gaming experience. Games will load faster, allowing you to jump into the action without delay. Additionally, faster read and write speeds provide smoother gameplay, minimizing lag and stuttering.
- Enhanced Durability: Unlike traditional hard drives with moving parts, SSDs are more durable and resistant to physical shock. They are less prone to damage from accidental drops or movement. This durability ensures that your data remains safe and accessible even in challenging conditions.
- Quiet and Energy Efficient: SSDs operate silently since they have no moving parts. This absence of noise is especially beneficial during long work sessions or in quiet environments. Additionally, SSDs consume less power, extending the battery life of laptops and reducing electricity costs for desktop computers.
- Portability and Lightweight Design: If you installed the SSD in a laptop or portable device, you’ll appreciate the increased portability and reduced weight. SSDs are lighter and more compact than traditional hard drives, making them ideal for on-the-go use.
- Reliable and Long-Lasting: SSDs have a longer lifespan and are more reliable than mechanical hard drives. They are less prone to mechanical failure, making them ideal for storing important files and critical data. With proper maintenance and care, an SSD can provide years of seamless operation.
- Easier Maintenance: Unlike hard drives, SSDs do not require regular defragmentation or other maintenance tasks. This reduces the need for ongoing system optimization and frees up your time for more productive activities.
By harnessing the power of an SSD, you’ll experience a remarkable improvement in your computer’s performance, efficiency, and overall user experience. Whether you’re a professional looking to boost productivity or a casual user seeking faster and smoother computing, an SSD is a valuable upgrade that will undoubtedly enhance your digital interactions.