Introduction
Welcome to the ultimate guide on how to turn on your Samsung monitor! Whether you’ve just purchased a brand new monitor or you’re experiencing difficulties powering it up, this comprehensive tutorial will walk you through the necessary steps to get your monitor up and running in no time.
A high-quality monitor is essential for a seamless computing experience, be it for work, gaming, or entertainment purposes. However, the process of turning on a Samsung monitor may vary slightly depending on the specific model and features. In this guide, we will cover the general steps and settings required to power up your Samsung monitor and ensure optimal performance.
Before we dive into the technical aspects, it’s important to note that safety should always be a priority when working with electrical devices. Make sure to follow proper precautions, such as unplugging the monitor during setup and avoiding contact with any exposed wires.
So, without further ado, let’s get started on turning on your Samsung monitor!
Ensuring the Power Source
Before attempting to turn on your Samsung monitor, it’s crucial to ensure that it is properly connected to a reliable power source. Follow these steps to ensure a secure power connection:
- Check the Power Cord: Ensure that the power cord is securely plugged into both the monitor and a power outlet. Sometimes, the cord may become loose due to vibrations or accidental unplugging. Confirm that the connections are snug.
- Inspect the Outlet: Verify that the power outlet is working correctly. Try plugging in another electronic device to confirm if power is flowing properly. If the outlet is faulty, try a different one in the vicinity.
- Use a Surge Protector: To protect your monitor from power surges and voltage fluctuations, consider plugging it into a surge protector. This will help safeguard the monitor’s internal components from potential damage.
- Check for Indicator Lights: Many Samsung monitors have indicator lights that show the power status. Look for a small LED light on the display panel or the power button. If the light is off, it indicates a power issue, and you may need to troubleshoot further.
By ensuring a proper power connection, you can eliminate any potential issues related to power supply and ensure that your Samsung monitor is ready to be turned on.
Connecting the Cables
Once you have confirmed the power source, it’s time to connect the necessary cables to your Samsung monitor. Follow these steps to ensure a proper cable connection:
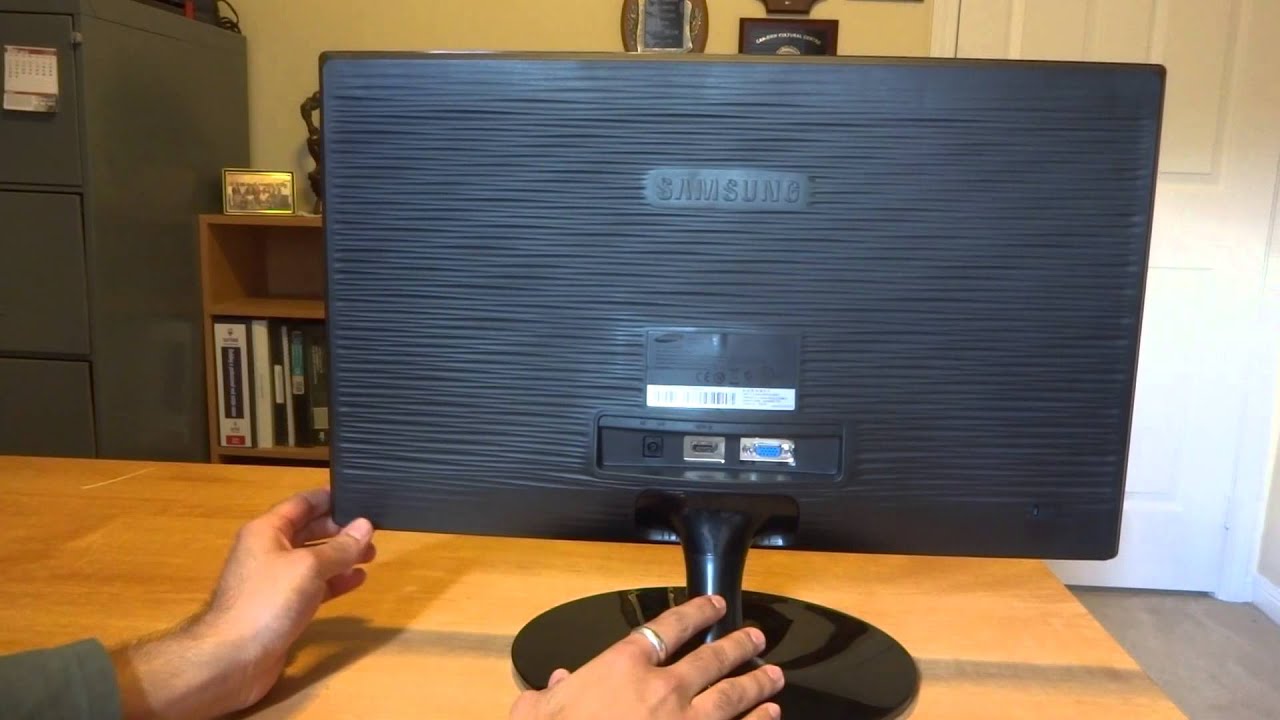
- Video Cable Connection: Locate the video input ports on the monitor. Common video cable options include HDMI, DisplayPort, and VGA. Check the available ports and choose the appropriate cable for your setup. Connect one end of the cable to the matching port on the back of the monitor, and the other end to the corresponding port on your computer or device.
- Audio Cable Connection (if applicable): If your monitor supports audio output, you may need to connect an audio cable separately. Check the audio input options on your monitor and connect the cable from the audio source, such as a computer or gaming console, to the matching port on the monitor.
- Power Cable Connection: Confirm that the power cable is securely plugged into the monitor’s power input port. Connect the other end of the cable to a stable power outlet.
- USB Connection (optional): Some Samsung monitors come with USB ports that can be used for connecting peripherals or charging devices. If applicable, locate the USB ports on the monitor and connect your USB devices as needed.
Once all the necessary cables are connected, double-check that they are securely plugged in and free from any damage. Loose or faulty cable connections can prevent the monitor from turning on or cause issues with the display quality. Take a moment to ensure that the cables are properly seated before moving on to the next step.
Adjusting Settings on the Monitor Panel
After ensuring the proper cable connections, it’s time to adjust the settings on your Samsung monitor’s control panel. The control panel is typically located either on the front, bottom, or side of the monitor. Follow these steps to adjust the necessary settings:
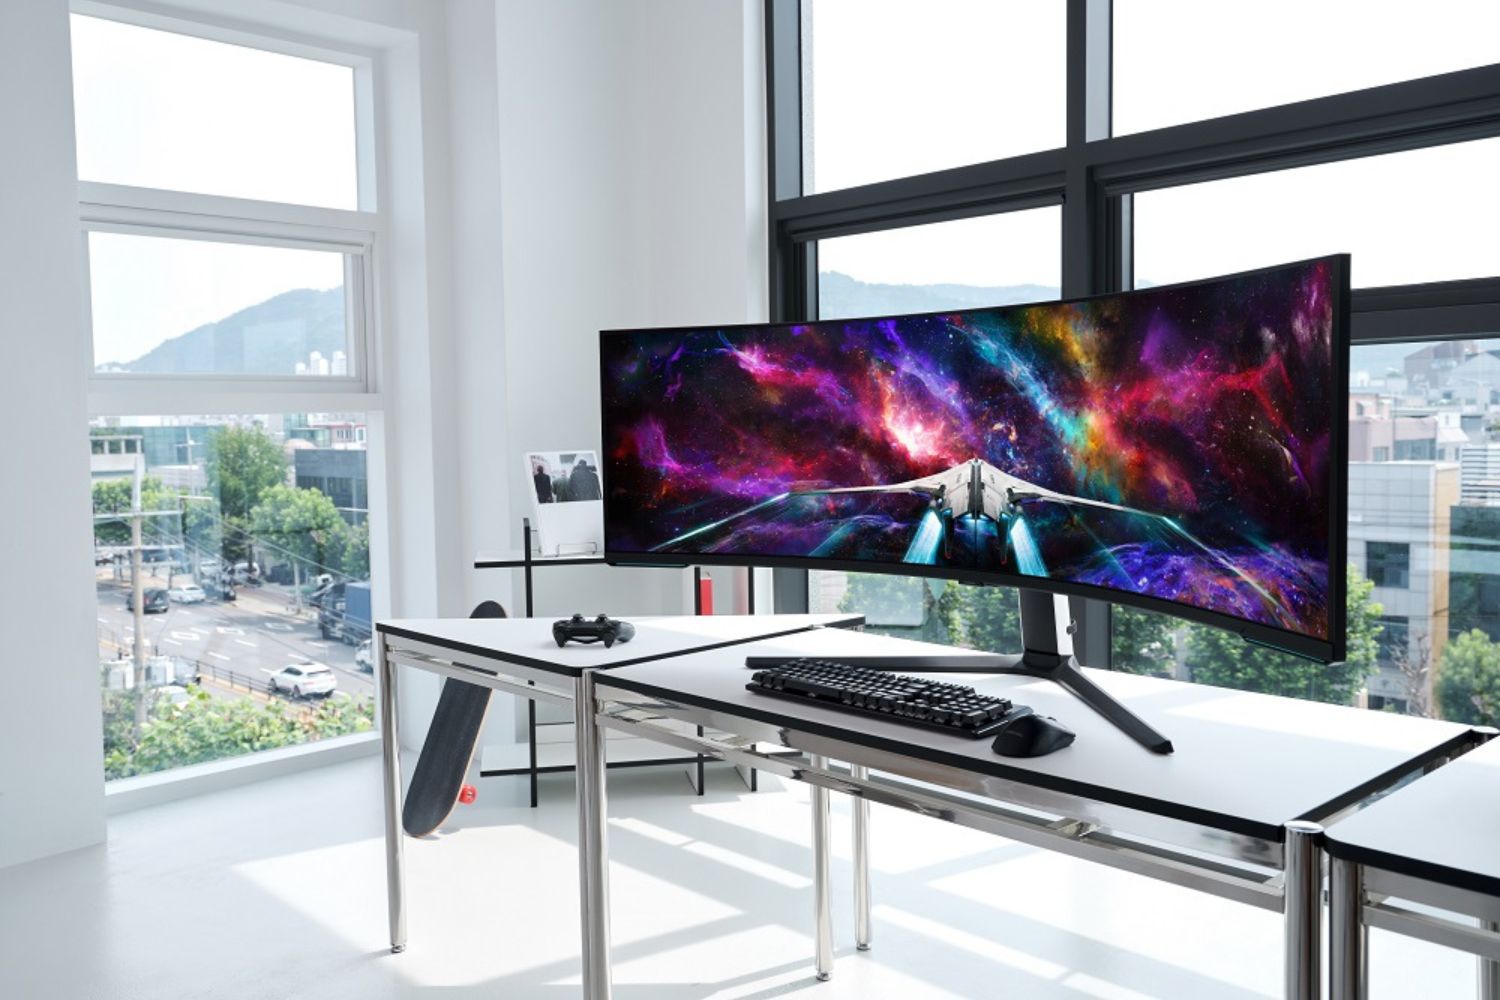
- Power Button: Locate the power button on the monitor’s control panel. Press the power button to turn on the monitor. Some Samsung monitors may have a separate power button or a joystick-style button that controls multiple settings.
- Brightness and Contrast: Adjust the brightness and contrast levels to your preference. Keep in mind that excessive brightness can strain your eyes, while low brightness may make the display difficult to see. Find a comfortable balance for optimal viewing.
- Color Calibration: Samsung monitors often offer color calibration options to enhance the display’s color accuracy. Navigate to the color settings in the control panel and make adjustments if desired.
- Resolution and Refresh Rate: Ensure that the monitor is set to the correct resolution and refresh rate for the best display performance. Higher resolutions provide sharper images, while higher refresh rates result in smoother motion.
- Input Selection: If your monitor has multiple input options, such as HDMI and DisplayPort, use the control panel to select the appropriate input source. This ensures that the monitor is receiving the signal from the correct device.
Take your time to explore the control panel options and adjust the settings according to your preferences. The control panel allows you to fine-tune the monitor’s display and customize it to suit your specific needs.
Using the On-screen Display (OSD) Menu
In addition to adjusting settings on the monitor panel, Samsung monitors often come equipped with an on-screen display (OSD) menu. The OSD menu provides advanced customization options and allows you to manipulate various display settings. Follow these steps to access and navigate the OSD menu:
- Accessing the OSD Menu: Press the menu button on the monitor’s control panel to open the OSD menu. The menu button is typically labeled with an icon that resembles a monitor or a box.
- Navigating the Menu: Use the directional buttons on the control panel to navigate through the OSD menu. Press the up, down, left, and right buttons to move through the menu options.
- Selecting Options: Once you’ve navigated to the desired setting or option, press the select or enter button on the control panel to make a selection.
- Adjusting Settings: Within the OSD menu, you’ll find a plethora of display settings to tweak, including color temperature, aspect ratio, image sharpness, response time, and more. Use the corresponding buttons on the control panel to make adjustments as needed.
- Save and Exit: After making the desired changes in the OSD menu, look for the option to save or apply the settings. Once saved, you can exit the OSD menu and your monitor will display the adjusted settings.
Using the OSD menu provides a deeper level of control over your Samsung monitor’s display settings. It allows you to fine-tune the colors, sharpness, and other visual aspects to match your preferences or specific requirements for different applications, such as gaming or photo editing.
Troubleshooting Common Issues
While turning on your Samsung monitor is usually a straightforward process, you may encounter some common issues along the way. Here are a few troubleshooting tips to help you overcome potential problems:
- No Power: If your Samsung monitor does not power on, double-check the power cord connections and ensure that the outlet is working correctly. If the monitor still does not turn on, try plugging it into a different outlet or test it with another power cable.
- No Display: If the monitor powers on but there is no display, ensure that the video cables are securely connected to both the monitor and the device. Check if the input source on the monitor matches the output source on the device (e.g., HDMI or DisplayPort).
- Blurred or Distorted Images: Adjust the sharpness and resolution settings in the OSD menu to improve image clarity. It’s also worth checking if the graphics drivers on your computer or device are up to date.
- No Sound: If your Samsung monitor has built-in speakers and you’re not hearing any sound, check the audio cable connections and ensure that the volume is not muted or set too low. Also, confirm that the audio output settings on your computer or device are properly configured.
- Stuck or Unresponsive Buttons: If the control panel buttons on your monitor become stuck or unresponsive, gently clean the buttons and the surrounding area with a soft, lint-free cloth. Avoid using excessive force or liquid cleaners that may cause damage.
If you encounter any persistent issues that cannot be resolved through troubleshooting, refer to the user manual or contact Samsung customer support for further assistance. They will be able to provide specific guidance tailored to your monitor model and address any technical difficulties you may be facing.
Conclusion
Congratulations! You have successfully learned how to turn on your Samsung monitor and troubleshoot common issues that may arise during the process. Properly ensuring the power source, connecting the cables, adjusting settings on the monitor panel, utilizing the on-screen display (OSD) menu, and troubleshooting problems are crucial steps in getting your Samsung monitor up and running.
Remember to always prioritize safety when working with electrical devices, and double-check that the power connections are secure before attempting to turn on the monitor. Additionally, be mindful of adjusting the display settings to create a personalized viewing experience that suits your preferences and needs.
If you encounter any persistent issues or require more in-depth guidance, refer to the user manual provided with your specific Samsung monitor model or reach out to Samsung’s customer support for expert assistance.
We hope this comprehensive guide has provided you with the knowledge and confidence to effortlessly turn on and optimize your Samsung monitor. Enjoy crisp and vibrant visuals as you embark on your computing, gaming, or entertainment ventures!