Introduction
Removing the stand from your Samsung monitor can be a simple and straightforward process. Whether you need to mount your monitor on a different stand or wall mount it, getting rid of the stand can help you save space and achieve a sleeker setup. In this guide, we will walk you through the step-by-step process of removing the stand from your Samsung monitor.
Before we begin, it is important to note that the process may vary slightly depending on the model of your Samsung monitor. Therefore, we recommend consulting the user manual or online resources specific to your monitor model for detailed instructions. Additionally, it is always a good idea to exercise caution and ensure that you have the necessary tools before proceeding with any modifications to your monitor.
Removing the stand will require you to have some basic tools on hand, such as a screwdriver and a soft cloth to protect the monitor’s screen from scratches. By following the instructions carefully and taking necessary precautions, you can remove the stand from your Samsung monitor in no time.
Tools Needed
Before you begin the process of removing the stand from your Samsung monitor, it’s essential to gather the necessary tools. Having the right tools on hand will ensure a smooth and hassle-free experience. Here are the tools you will need:
- Screwdriver: You will need a screwdriver to loosen and remove the screws that secure the stand to the monitor. The type of screwdriver required may vary depending on the screw heads used in your specific monitor model. It’s recommended to have a set of screwdrivers with different sizes and types to be prepared for any screw heads.
- Soft Cloth or Microfiber Cloth: To protect the monitor’s screen from scratches during the process, it’s advisable to have a soft cloth or microfiber cloth. This will ensure that your monitor remains in pristine condition throughout the stand removal process.
- Clean Workspace: Although not a tool in the traditional sense, having a clean and well-organized workspace is crucial. Make sure you have enough space to lay down your monitor and place the tools securely without any obstructions. This will make the process more efficient and help prevent any accidental damage.
- Optional: Anti-Static Wrist Strap: An anti-static wrist strap is recommended, especially if you are working in an environment prone to static electricity. This strap will help protect sensitive electronic components from static discharge during the stand removal process.
Once you have gathered these tools, you are ready to proceed with removing the stand from your Samsung monitor. Remember to position your monitor on a stable surface and handle it with care throughout the process to avoid any unnecessary damage.
Step 1: Gather necessary materials
Before you start removing the stand from your Samsung monitor, it’s important to gather all the necessary materials and prepare your workspace. By having everything you need within reach, you can ensure a smooth and efficient process. Here’s what you need to do:
- Read the user manual: Begin by referring to the user manual specific to your Samsung monitor model. It will provide detailed instructions on removing the stand. If you don’t have the manual, you can usually find it on the Samsung website or conduct a quick internet search using your monitor’s model number.
- Find a suitable workspace: Look for a well-lit, clean, and spacious area to work on. Make sure you have enough room to lay down the monitor comfortably and have easy access to the back of it. Clear off any clutter from your workspace to minimize the risk of accidentally knocking items into your monitor or stand.
- Gather the necessary tools: As mentioned earlier in the article, a few essential tools will be required for removing the stand. Double-check that you have a suitable screwdriver to fit the screws on your monitor’s stand. Additionally, have a soft cloth or microfiber cloth ready to protect the screen.
- Protective measures: If possible, ground yourself by using an anti-static wrist strap to prevent static electricity discharge that may harm your monitor’s internal components. This step is especially important if you are working in a static-prone environment.
- Turn off and unplug the monitor: Before you start disassembling your monitor, ensure that it is turned off and unplugged from the power source. This will minimize the risk of electric shock and protect both you and the monitor during the process.
By following these steps and gathering the necessary materials, you are now ready to move on to the next step of removing the stand from your Samsung monitor. Stay tuned for the next section, where we will guide you through the preparation of your workspace.
Step 2: Prepare your workspace
Before you start removing the stand from your Samsung monitor, it’s crucial to prepare your workspace to ensure a smooth and safe process. By organizing your workspace properly, you can minimize the risk of accidental damage to your monitor and make the task more efficient. Follow these steps to prepare your workspace:
- Clean the area: Clear off any clutter on your workspace to create a clean and unobstructed area. Remove any objects that could accidentally fall onto your monitor or stand during the process.
- Select a stable surface: Find a sturdy and flat surface to place your monitor. This can be a desk or table. Ensure there is enough space to comfortably maneuver your monitor and reach its back without any restrictions.
- Place a soft cloth or mat: To protect your monitor’s screen, put a soft cloth or mat on the surface where you will be working. This will prevent scratches or smudges while you handle the monitor.
- Arrange your tools: Lay out the necessary tools you gathered earlier, such as the appropriate screwdriver and any additional tools specified in the user manual. Have them readily accessible on your workspace to avoid any delays or disruptions during the process.
- Position your monitor: Carefully position your monitor on the stable surface and adjust it so that the back of the monitor is facing upward. Make sure the monitor is well-supported and stable to prevent any accidental falls or movements.
- Review the manual: Take a final look at the user manual specific to your monitor model. Familiarize yourself with the instructions and any safety precautions mentioned. This will help you navigate the process smoothly and without any confusion.
Once you have prepared your workspace, you are now ready to proceed with the removal of the stand. In the next section, we will guide you through the process of locating the stand attachment on your Samsung monitor.
Step 3: Locate the stand attachment
Before you can remove the stand from your Samsung monitor, you need to locate the stand attachment points on the monitor. By identifying these attachment points, you will know where to focus your efforts during the removal process. Follow these steps to locate the stand attachment:
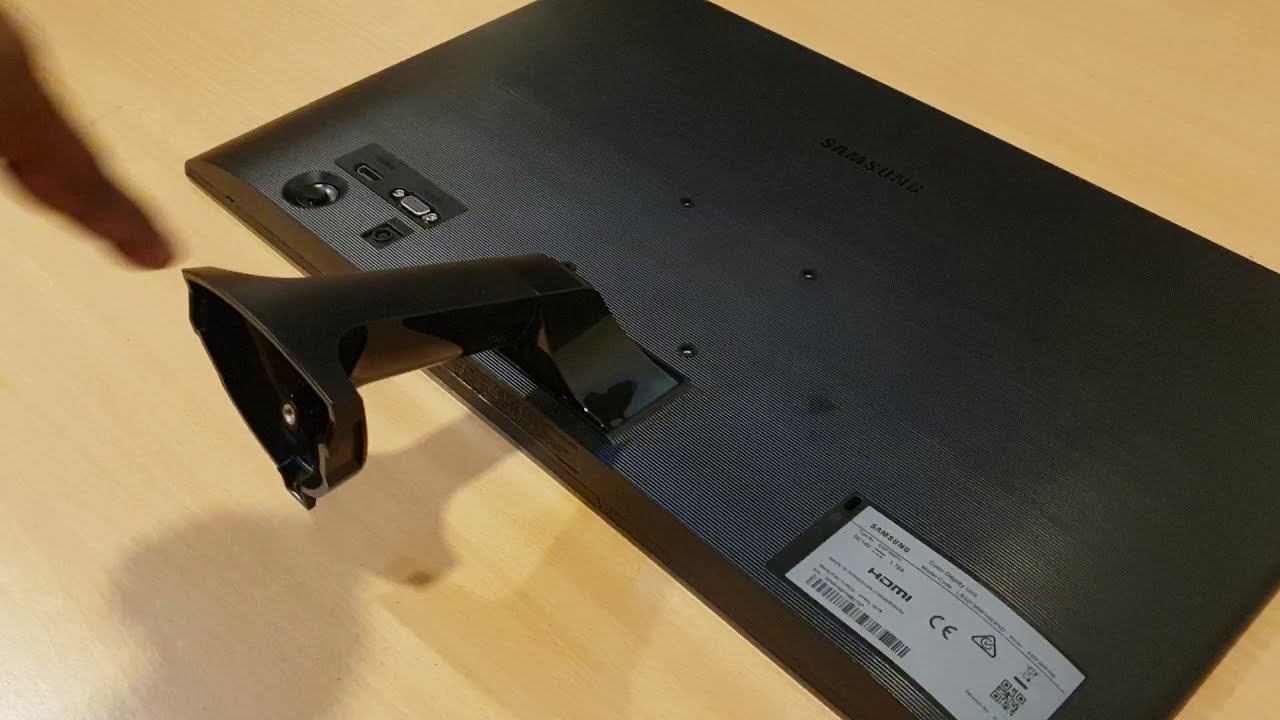
- Examine the back of the monitor: Turn your monitor around so that the back is facing you. Take a close look at the lower part of the monitor’s rear panel. This is where the stand is typically attached.
- Inspect for screws or release buttons: Look for any screws or release buttons near the stand attachment area. These screws or buttons are usually used to secure the stand to the monitor. They may vary in number and placement depending on your Samsung monitor model.
- Refer to the user manual: If you can’t easily locate the stand attachment points, refer to the user manual or online resources specific to your Samsung monitor model. The user manual will often provide clear visual diagrams or descriptions of the stand attachment area, making it easier to find.
- Observe any labeling or markings: Some Samsung monitors may have labels or markings near the stand attachment area. These labels may indicate the location of screws or provide instructions on how to remove the stand. Pay attention to any markings or symbols that may guide you.
- Check for stand release mechanisms: Some monitor models may feature unique stand release mechanisms that allow for quick and easy removal. These mechanisms could be in the form of clips, locks, or levers. If your monitor has any such mechanisms, familiarize yourself with their operation before proceeding.
Once you have located the stand attachment points and have a clear understanding of where to focus your efforts, you are ready to move on to the next step—the actual removal of the stand. We will guide you through the process in the next section, so stay tuned.
Step 4: Unscrew the stand
Now that you have located the stand attachment points on your Samsung monitor, it’s time to proceed with unscrewing the stand. By carefully removing the screws that secure the stand, you will be able to detach it from the monitor. Follow these steps to unscrew the stand:
- Prepare the screwdriver: Depending on the type of screws used in your monitor, select the appropriate screwdriver from your toolkit. Ensure that the size and type of the screwdriver match the screws you need to unscrew.
- Position the monitor: Place your monitor in a stable position, with its back facing upward. This will give you easy access to the stand attachment points and screws.
- Identify the screws: Observe the stand attachment area and locate the screws that secure the stand. These screws are typically found at the bottom of the monitor, near the stand attachment points. They may be visible or hidden behind plastic covers that need to be removed.
- Begin unscrewing: Using the appropriate screwdriver, start unscrewing the screws in a counterclockwise direction. Be gentle yet firm to avoid stripping the screws or damaging the surrounding areas. If there are multiple screws, start with one and gradually work your way to the others.
- Place screws in a safe location: As you remove the screws, set them aside in a safe location. Keeping them organized and separate from other tools will make it easier for reassembly later if needed. Consider using a small container or magnetic tray to prevent the screws from getting lost.
- Remove the stand: Once all the screws are removed, gently lift the stand away from the monitor. Take care not to put excessive force or twist the stand, as this could damage the monitor or stand attachment points.
With the stand successfully unscrewed and detached from your Samsung monitor, you have completed this step. In the next section, we will guide you through the process of detaching the stand from the monitor. Keep reading to learn how to proceed.
Step 5: Detach the stand from the monitor
Now that you have unscrewed the stand from your Samsung monitor, it’s time to detach the stand completely. By safely removing the stand, you will be able to free up your monitor and proceed with your desired setup. Follow these steps to detach the stand from the monitor:
- Lift the monitor: Carefully lift the monitor while holding onto the top and sides. Ensure that you have a firm grip on the monitor to prevent it from slipping or falling.
- Keep the monitor steady: As you hold the monitor, keep it steady and stable. Avoid excessive movements or tilting that could potentially damage the monitor or cause it to fall.
- Inspect the stand attachment area: Take a moment to inspect the stand attachment area on the back of the monitor. Make sure there are no additional screws, locking mechanisms, or latches holding the stand in place.
- Detach the stand: With a firm and gentle motion, pull the stand away from the monitor. It should detach easily now that the screws have been removed.
- Set aside the stand: Once the stand is detached, set it aside in a safe place. You may choose to keep it for future use or store it away if you no longer need it.
- Inspect the monitor: After detaching the stand, take a moment to inspect the monitor for any damage or loose parts. Ensure that there are no remaining screws or debris in the stand attachment area.
By following these steps, you have successfully detached the stand from your Samsung monitor. In the next section, we will cover the final step of this process: storing or disposing of the stand. Continue reading to learn more.
Step 6: Store or dispose of the stand
Now that you have detached the stand from your Samsung monitor, you need to decide whether you want to store it for future use or dispose of it. Depending on your needs and preferences, follow these steps to store or dispose of the stand:
- Storage option: If you plan to store the stand for future use, find a safe and dry place to keep it. Consider using a labeled storage box or bag to keep it organized and free from dust or damage. Store it in an area where it won’t be in the way or at risk of getting knocked over or damaged.
- Reuse or repurpose: Think about whether the stand can be reused or repurposed for another device or project. If you have other monitors or devices that are compatible with the stand, it can be a practical solution to save space and reduce waste.
- Donate or sell: If you no longer have a need for the stand but it is in good condition, consider donating it to a local charity, school, or community center. Alternatively, you may choose to sell it online or through local classifieds as it could be of use to someone else.
- Recycling: If the stand is damaged beyond repair or you can’t find a suitable use for it, the most eco-friendly option is to recycle it. Check with your local recycling center or electronic waste disposal facility to determine the proper recycling method for the stand.
- Dispose responsibly: If recycling is not available or feasible, ensure you dispose of the stand responsibly. Do not throw it in regular trash bins, as it may end up in a landfill and contribute to environmental pollution. Instead, research local disposal guidelines to find the appropriate disposal method.
- Reassemble if needed: If you ever need to reattach the stand in the future, refer to the user manual or online resources specific to your Samsung monitor model. Follow the instructions carefully to ensure the stand is securely attached to the monitor.
By considering these options and taking the necessary steps, you can appropriately store or dispose of the stand from your Samsung monitor. Congratulations on completing the entire process! You now have a stand-free monitor that can be mounted on a different stand or wall-mounted to accommodate your desired setup. Enjoy the newfound freedom and versatility of your monitor!
Conclusion
Removing the stand from your Samsung monitor is a straightforward process that can provide you with a more versatile setup and save valuable space. By following the step-by-step guide outlined in this article, you can easily detach the stand and achieve the desired configuration for your monitor.
We began by emphasizing the importance of gathering the necessary tools and preparing a clean workspace. This ensures a smooth and efficient removal process. By referring to the user manual specific to your Samsung monitor model, you can find detailed instructions and specific information about the stand attachment points.
We then guided you through the process of unscrewing the stand, taking care to use the appropriate screwdriver and store the screws in a safe place. With the screws removed, we discussed how to detach the stand from the monitor, ensuring a gentle yet firm approach to avoid any damage.
Finally, we discussed the options for storing or disposing of the stand, including reusing or repurposing it, donating or selling it, recycling it, or disposing of it responsibly. These choices allow you to make the most environmentally conscious decision based on your individual circumstances.
Now that you have successfully removed the stand from your Samsung monitor, the possibilities for configuring your setup are endless. Whether you choose to mount your monitor on a different stand, wall-mount it, or explore other creative solutions, you can enjoy a clutter-free workspace and customize your monitor placement to suit your needs.
Remember, it is essential to exercise caution when modifying any electronic device. Ensure that you follow the instructions provided by Samsung or consult the user manual specific to your monitor model to avoid any unintended damage or voiding of warranty.
We hope this guide has been helpful in assisting you with removing the stand from your Samsung monitor. Enjoy the newfound flexibility and enhanced functionality of your monitor setup!