Introduction
With the rapid rise of technology, staying connected has become more important than ever. One essential feature for seamless internet connectivity on your iPhone is 4G. The 4G network offers faster speeds and improved data capabilities, allowing you to stream videos, browse the web, and download content with ease. However, if you’re having trouble enabling 4G on your iPhone, this guide will walk you through the steps to turn it on.
Before we dive into the troubleshooting methods, it’s crucial to ensure that your iPhone model is compatible with 4G. Older iPhone models, such as the iPhone 4 or 4S, may not support 4G networks. However, most newer models, including the iPhone 5 and later, should have 4G capabilities. To check if your iPhone is 4G-enabled, follow the instructions in the next section.
If your iPhone is compatible, but you’re still unable to access 4G, it might be due to a few settings issues. In some cases, a simple tweak in the settings or a software update can resolve the problem. This guide will provide step-by-step instructions on how to troubleshoot the issue and enable 4G on your iPhone.
It’s important to note that these troubleshooting methods are applicable to various iPhone models, including the iPhone 5, 6, 7, 8, X, XR, XS, 11, and 12. Whether you’re using an older model or the latest iPhone, the steps outlined in this guide should help you enable 4G connectivity.
Now that you know what to expect in this guide, let’s move on to the first step: checking the compatibility of your iPhone.
Step 1: Checking Compatibility
The first step in enabling 4G on your iPhone is to ensure that your device is compatible with 4G networks. Not all iPhone models support 4G, particularly older models. To check the compatibility of your iPhone, follow these steps:
- Open the “Settings” app on your iPhone. You can find the Settings app on your home screen, typically represented by a gear icon.
- Scroll down and tap on “General”.
- From the General menu, tap on “About”.
- Look for the “Model” or “Model Number” section. This will display the model identifier of your iPhone.
- Refer to the Apple support website or do a quick search to determine if your iPhone model supports 4G. Compare the model identifier with the supported 4G iPhone models listed on Apple’s website.
If your iPhone model is compatible with 4G, you can proceed to the next step. However, if your iPhone model is not 4G-compatible, enabling 4G on your device is not possible. In this case, you may want to consider upgrading to a newer iPhone model to enjoy the benefits of 4G connectivity.
Now that you’ve confirmed the compatibility of your iPhone, it’s time to move on to the next step: verifying your cellular data settings.
Step 2: Verifying Cellular Data
Before diving into more complex troubleshooting steps, it’s essential to ensure that your cellular data settings are correctly configured. Sometimes, incorrect settings or a temporary glitch can prevent your iPhone from accessing 4G. Follow these steps to verify your cellular data settings:
- Open the “Settings” app on your iPhone.
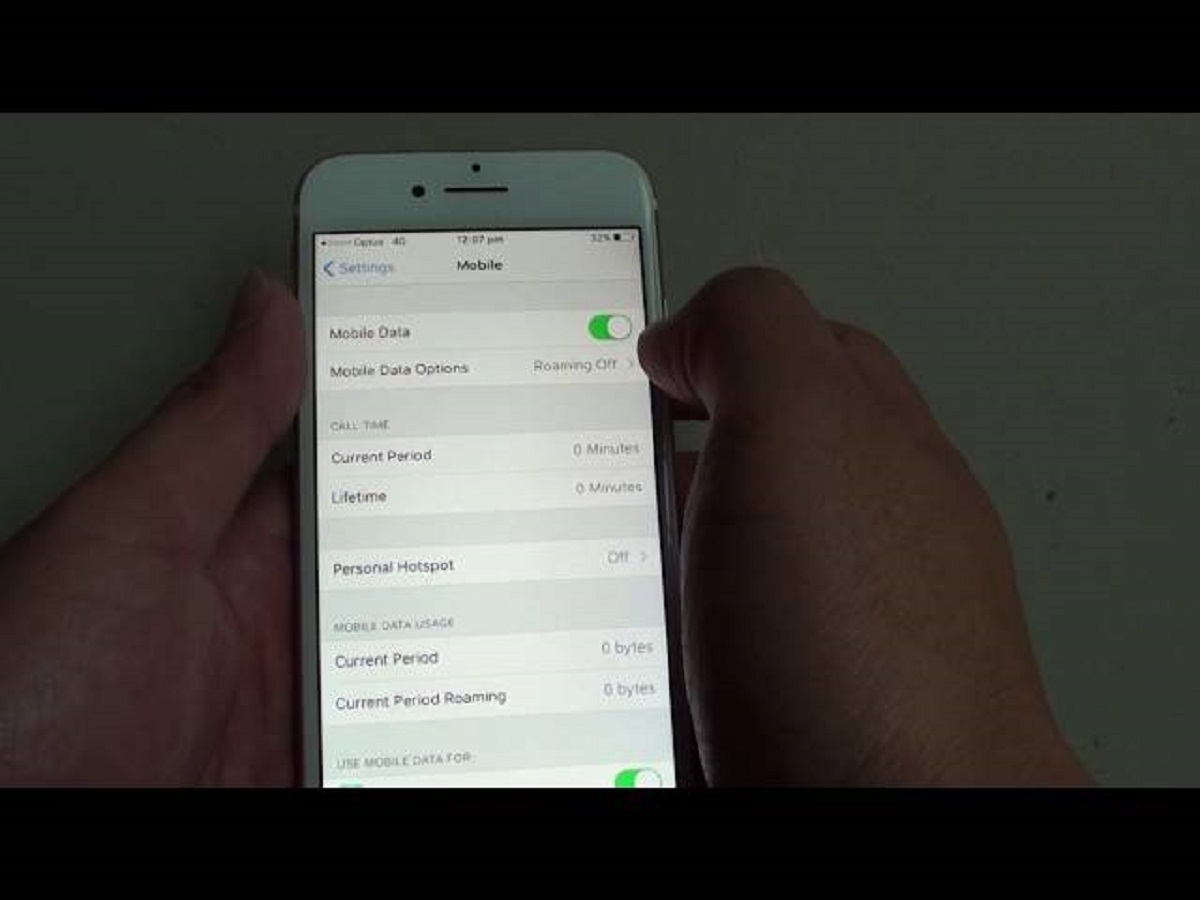
- Tap on “Cellular” or “Mobile Data” depending on your iOS version.
- Ensure that the “Cellular Data” or “Mobile Data” toggle is enabled. If it’s already enabled, try toggling it off and on again to refresh the settings.
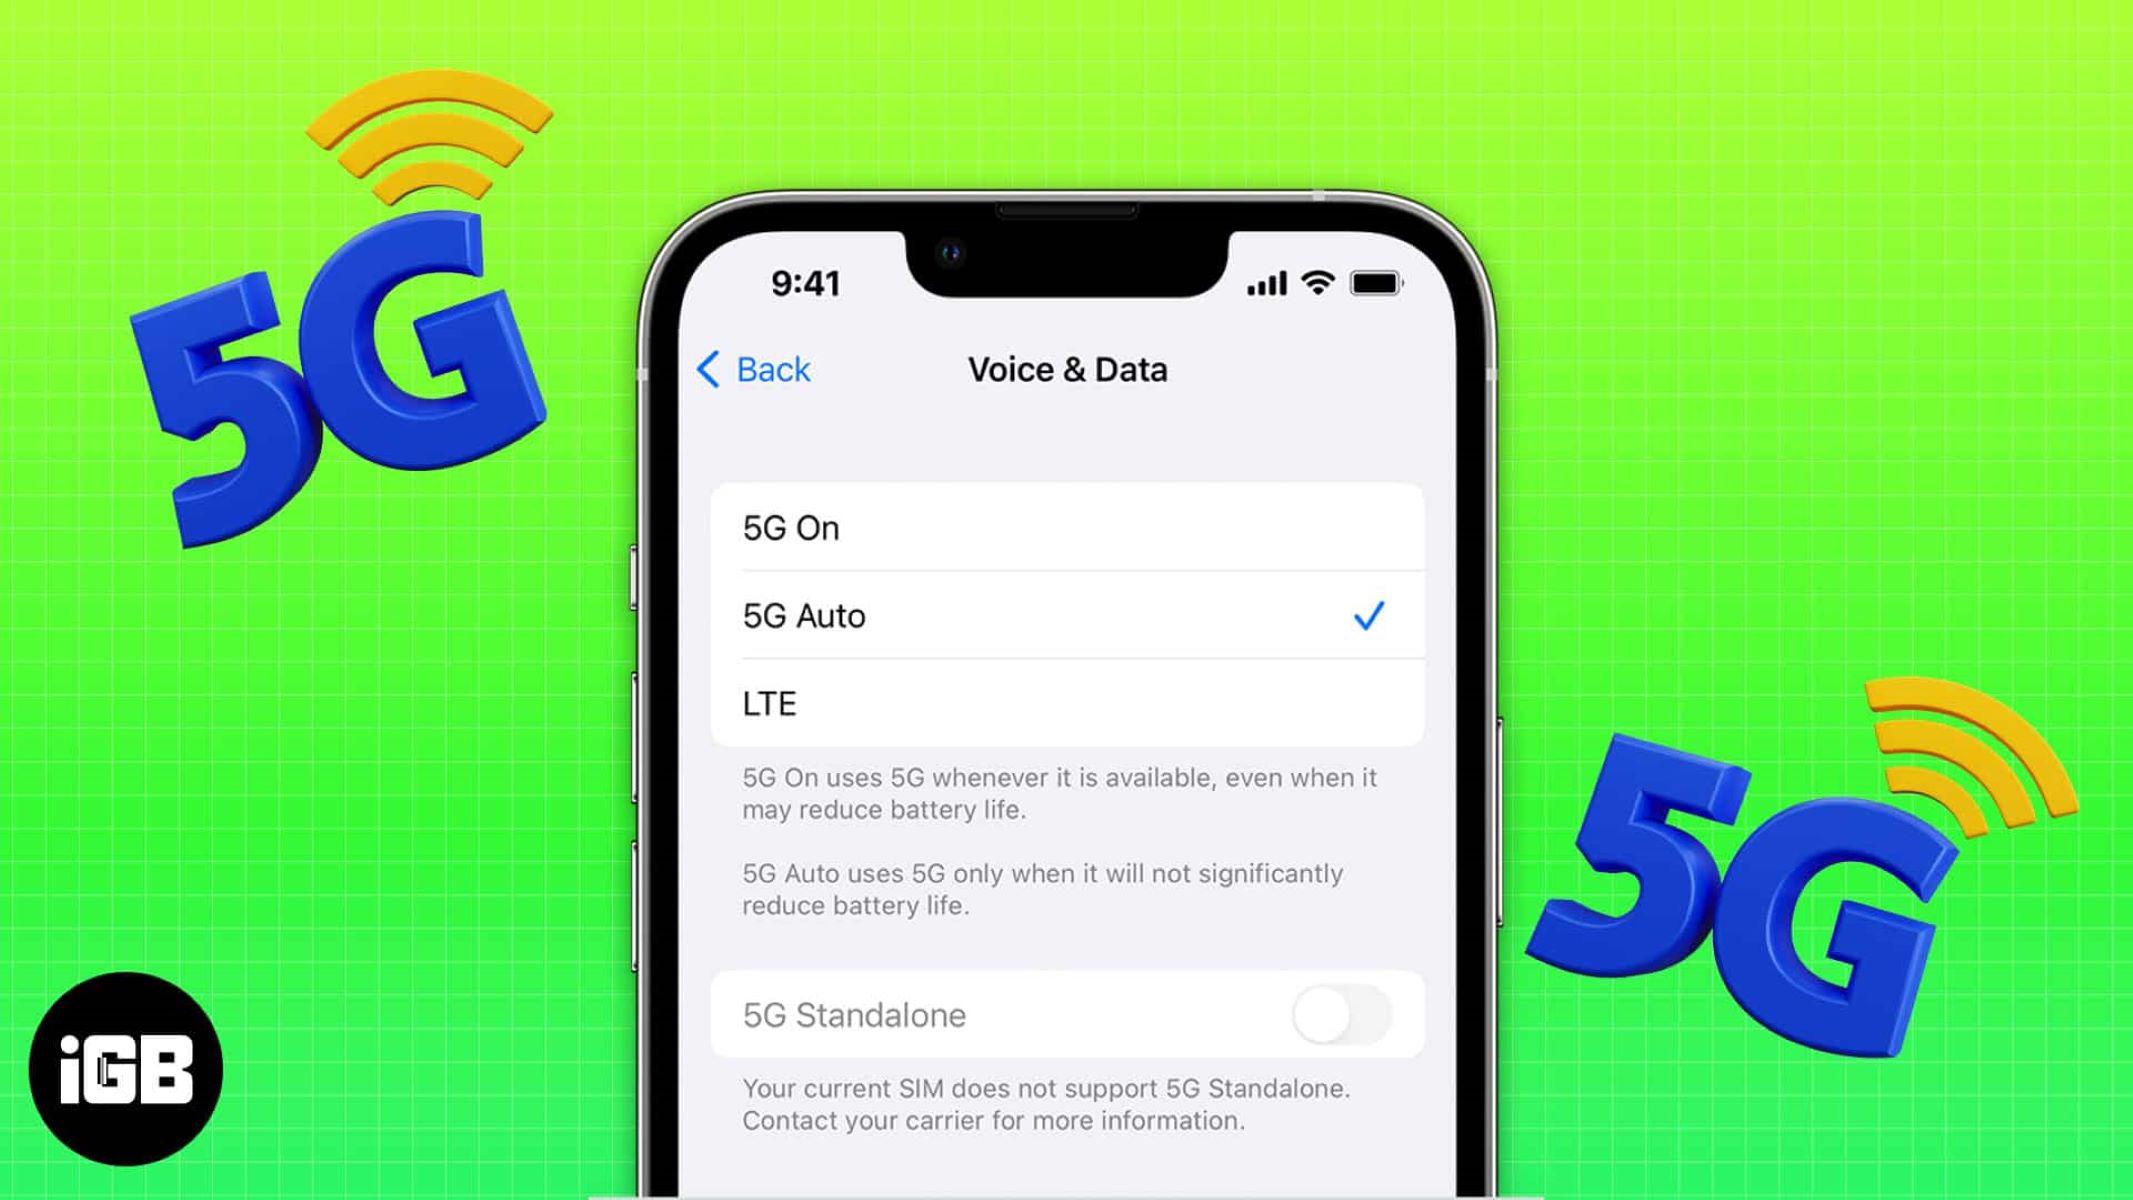
- Scroll down and make sure that the “Enable LTE” or “Enable 4G” option is selected. If it’s set to “Data Only” or “Off”, toggle it to “Voice & Data” or “On”.
- Go back to the previous screen and verify that the “Data Roaming” option is also enabled if you’re traveling internationally.
Once you’ve adjusted the cellular data settings as needed, exit the Settings app and test if you can connect to 4G. If you still encounter difficulties, proceed to the next step to update your iOS.
Keep in mind that if you have exceeded your data limit or if your cellular plan does not include 4G data, you may need to contact your service provider to upgrade your plan or resolve any account-related issues.
Now that you’ve ensured the proper cellular data settings, let’s move on to the next step: updating your iOS.
Step 3: Updating iOS
Updating your iPhone’s iOS to the latest version can resolve software-related issues that may be interfering with your ability to access 4G. Software updates often include bug fixes and improvements that can enhance the overall performance of your device, including cellular connectivity. Here’s how you can update your iOS:
- Connect your iPhone to a stable Wi-Fi network.
- Open the “Settings” app.
- Tap on “General.”
- Select “Software Update.”
- If an update is available, tap on “Download and Install.”
- If prompted, enter your passcode and agree to the terms and conditions.
- Wait for the update to download and install. Your iPhone may restart during the process.
After the update is complete, check if your iPhone can connect to 4G. If not, move on to the next step: resetting network settings.
It’s worth noting that downloading and installing an iOS update may consume a considerable amount of data. Therefore, it is advisable to connect to a Wi-Fi network to avoid exceeding your cellular data limit or incurring additional charges from your service provider.
Updating your iOS can often resolve various software-related issues, so it’s essential to keep your iPhone’s software up to date. Now that you’ve updated your iOS, let’s move on to resetting network settings in the next step.
Step 4: Resetting Network Settings
If updating your iOS didn’t resolve the issue, you can try resetting your network settings. Resetting network settings can help fix any misconfigured network settings or conflicts that may be preventing your iPhone from connecting to 4G. Follow these steps to reset your network settings:
- Open the “Settings” app on your iPhone.
- Tap on “General”.
- Scroll down and select “Reset”.
- Tap on “Reset Network Settings”.
- Enter your passcode if prompted.
- Confirm the network settings reset by tapping on “Reset Network Settings” again.
- Your iPhone will restart automatically after the process is complete.
Once your iPhone restarts, reconnect to your Wi-Fi network and check if you can access 4G. If not, proceed to the next step, which involves turning on 4G in the cellular settings.
Keep in mind that resetting network settings will erase your saved Wi-Fi networks, VPN settings, and Bluetooth connections. You will need to reconnect to Wi-Fi networks and reconfigure any VPN or Bluetooth settings after the reset.
Now that you’ve reset your network settings, let’s move on to the next step: turning on 4G in the cellular settings.
Step 5: Turning on 4G in Cellular Settings
If you’ve followed the previous steps and still haven’t been able to enable 4G on your iPhone, the next troubleshooting step is to manually turn on 4G in the cellular settings. Sometimes, this option can be disabled or set to a different network mode. Here’s how you can check and enable 4G in the cellular settings:
- Open the “Settings” app on your iPhone.
- Tap on “Cellular” or “Mobile Data” depending on your iOS version.
- Next, toggle the “Cellular Data” or “Mobile Data” option to enable it if it’s disabled.
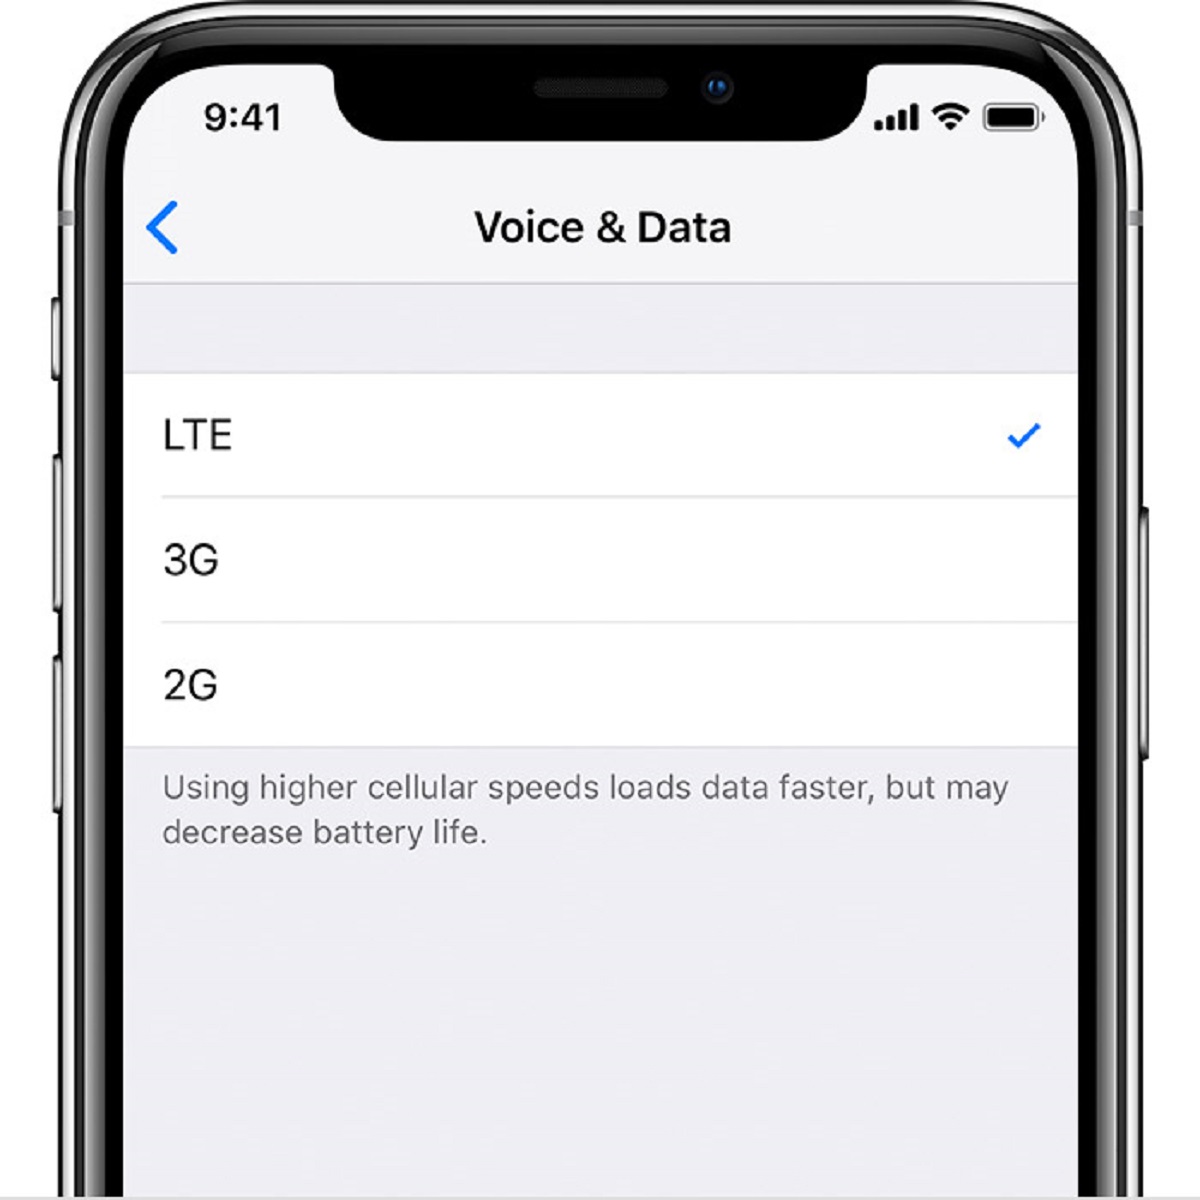
- Scroll down and locate the “Voice & Data” or “Cellular Data Options” section.
- Tap on “Enable LTE” or “Enable 4G”.
- Select the “Voice & Data” or “Data Only” option to enable 4G. If the option was already enabled, try toggling it off and on again.
After enabling 4G in the cellular settings, exit the Settings app and test if you can connect to 4G. If everything is successfully configured, you should be able to utilize the faster speeds and improved data capabilities of the 4G network.
If you’re still unable to access 4G on your iPhone, even after enabling it in the cellular settings, it’s recommended to contact your service provider for further assistance. They can check for any network issues specific to your account or location and provide additional troubleshooting steps if necessary. They may also be able to verify if there are any outages or known issues that could be causing the problem.
Now that you’ve checked and enabled 4G in the cellular settings, let’s move on to the final step: contacting your service provider.
Step 6: Contacting Service Provider
If you’ve followed all the previous steps and are still unable to enable 4G on your iPhone, it may be time to reach out to your service provider for assistance. They can provide specific troubleshooting steps, check your account settings, and diagnose any network-related issues that may be preventing 4G connectivity. Here’s what you can do:
- Find the customer service contact information for your service provider. This can usually be found on their website, billing statements, or in the “Settings” app under “Cellular” or “Mobile Data” (look for “Carrier Services” or “Service Provider”).
- Call or visit their website to access customer support.
- Explain the issue you’re facing, the steps you’ve already taken to troubleshoot, and any error messages you may have encountered.
- Follow their instructions and provide any requested information or perform any additional steps they suggest.
Your service provider may troubleshoot the issue remotely, reset your network settings on their end, or guide you through more advanced troubleshooting options. They may also escalate the issue to their technical support team if necessary.
Remember to be patient and courteous when contacting your service provider. They are there to assist you and will do their best to resolve the issue and restore your 4G connectivity.
If your service provider confirms that there are no issues on their end and your iPhone is compatible with 4G, but you’re still unable to enable 4G, you may want to consider visiting an authorized service center for further diagnostics and assistance.
With the help of your service provider’s support, you should be able to resolve any issues preventing 4G connectivity on your iPhone.
Now that you’ve completed all the troubleshooting steps and contacted your service provider, you should have a better understanding of the issue and be closer to enabling 4G on your iPhone.
Conclusion
Enabling 4G on your iPhone can significantly enhance your browsing, streaming, and download experience. If you’ve been struggling to access 4G on your device, this guide has provided you with a step-by-step troubleshooting process to help you resolve the issue.
We began by checking the compatibility of your iPhone with 4G networks and verifying the cellular data settings. We then explored the importance of updating your iOS and resetting network settings. Next, we walked through the process of manually turning on 4G in the cellular settings. Lastly, we discussed the significance of contacting your service provider for further assistance and troubleshooting.
Throughout this guide, we’ve provided you with detailed instructions and tips to enable 4G on your iPhone. By following these steps, you can troubleshoot common issues and get your device connected to the high-speed 4G network.
Remember, while these methods are often effective, it’s possible that 4G connectivity issues may be caused by factors beyond your control, such as network outages or service provider limitations. In such cases, reaching out to your service provider for support is essential.
We hope this guide has been helpful in resolving your 4G connectivity issues and improving your iPhone’s data capabilities. Enjoy the enhanced speeds and seamless internet experience that 4G has to offer!