Introduction
Transferring data from one SD card to another is a common task for Nintendo 3DS users. Whether you’re upgrading to a larger capacity SD card or simply want to backup your data, the process is relatively simple and can be accomplished in just a few steps.
By transferring the data from your old SD card to a new one, you can ensure that your saved games, photos, and other important files are preserved. This means you won’t have to start your game progress from scratch or lose any memorable moments captured through the 3DS’s camera.
In this guide, we will walk you through the process of transferring your Nintendo 3DS data from one SD card to another. We will provide step-by-step instructions that are easy to follow, ensuring that you can complete the transfer without any hassle.
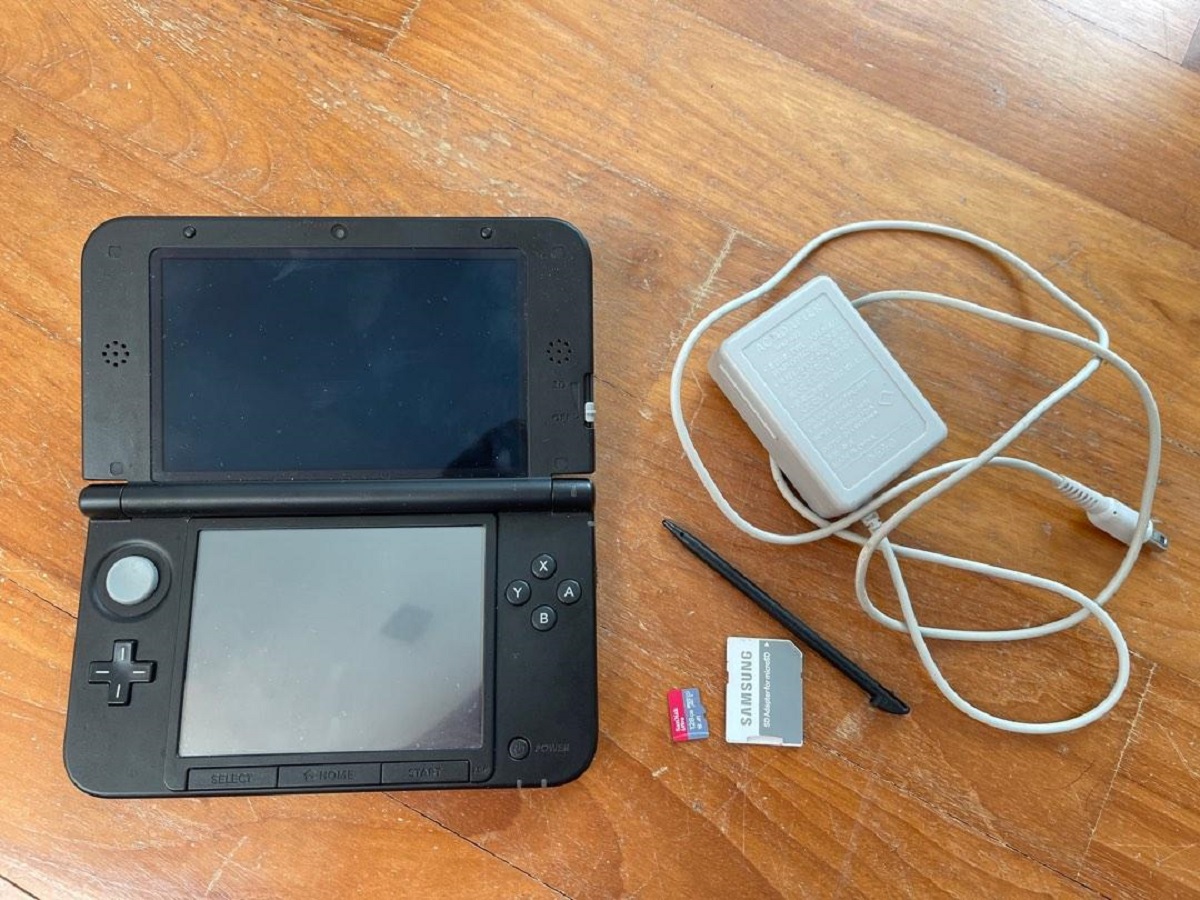
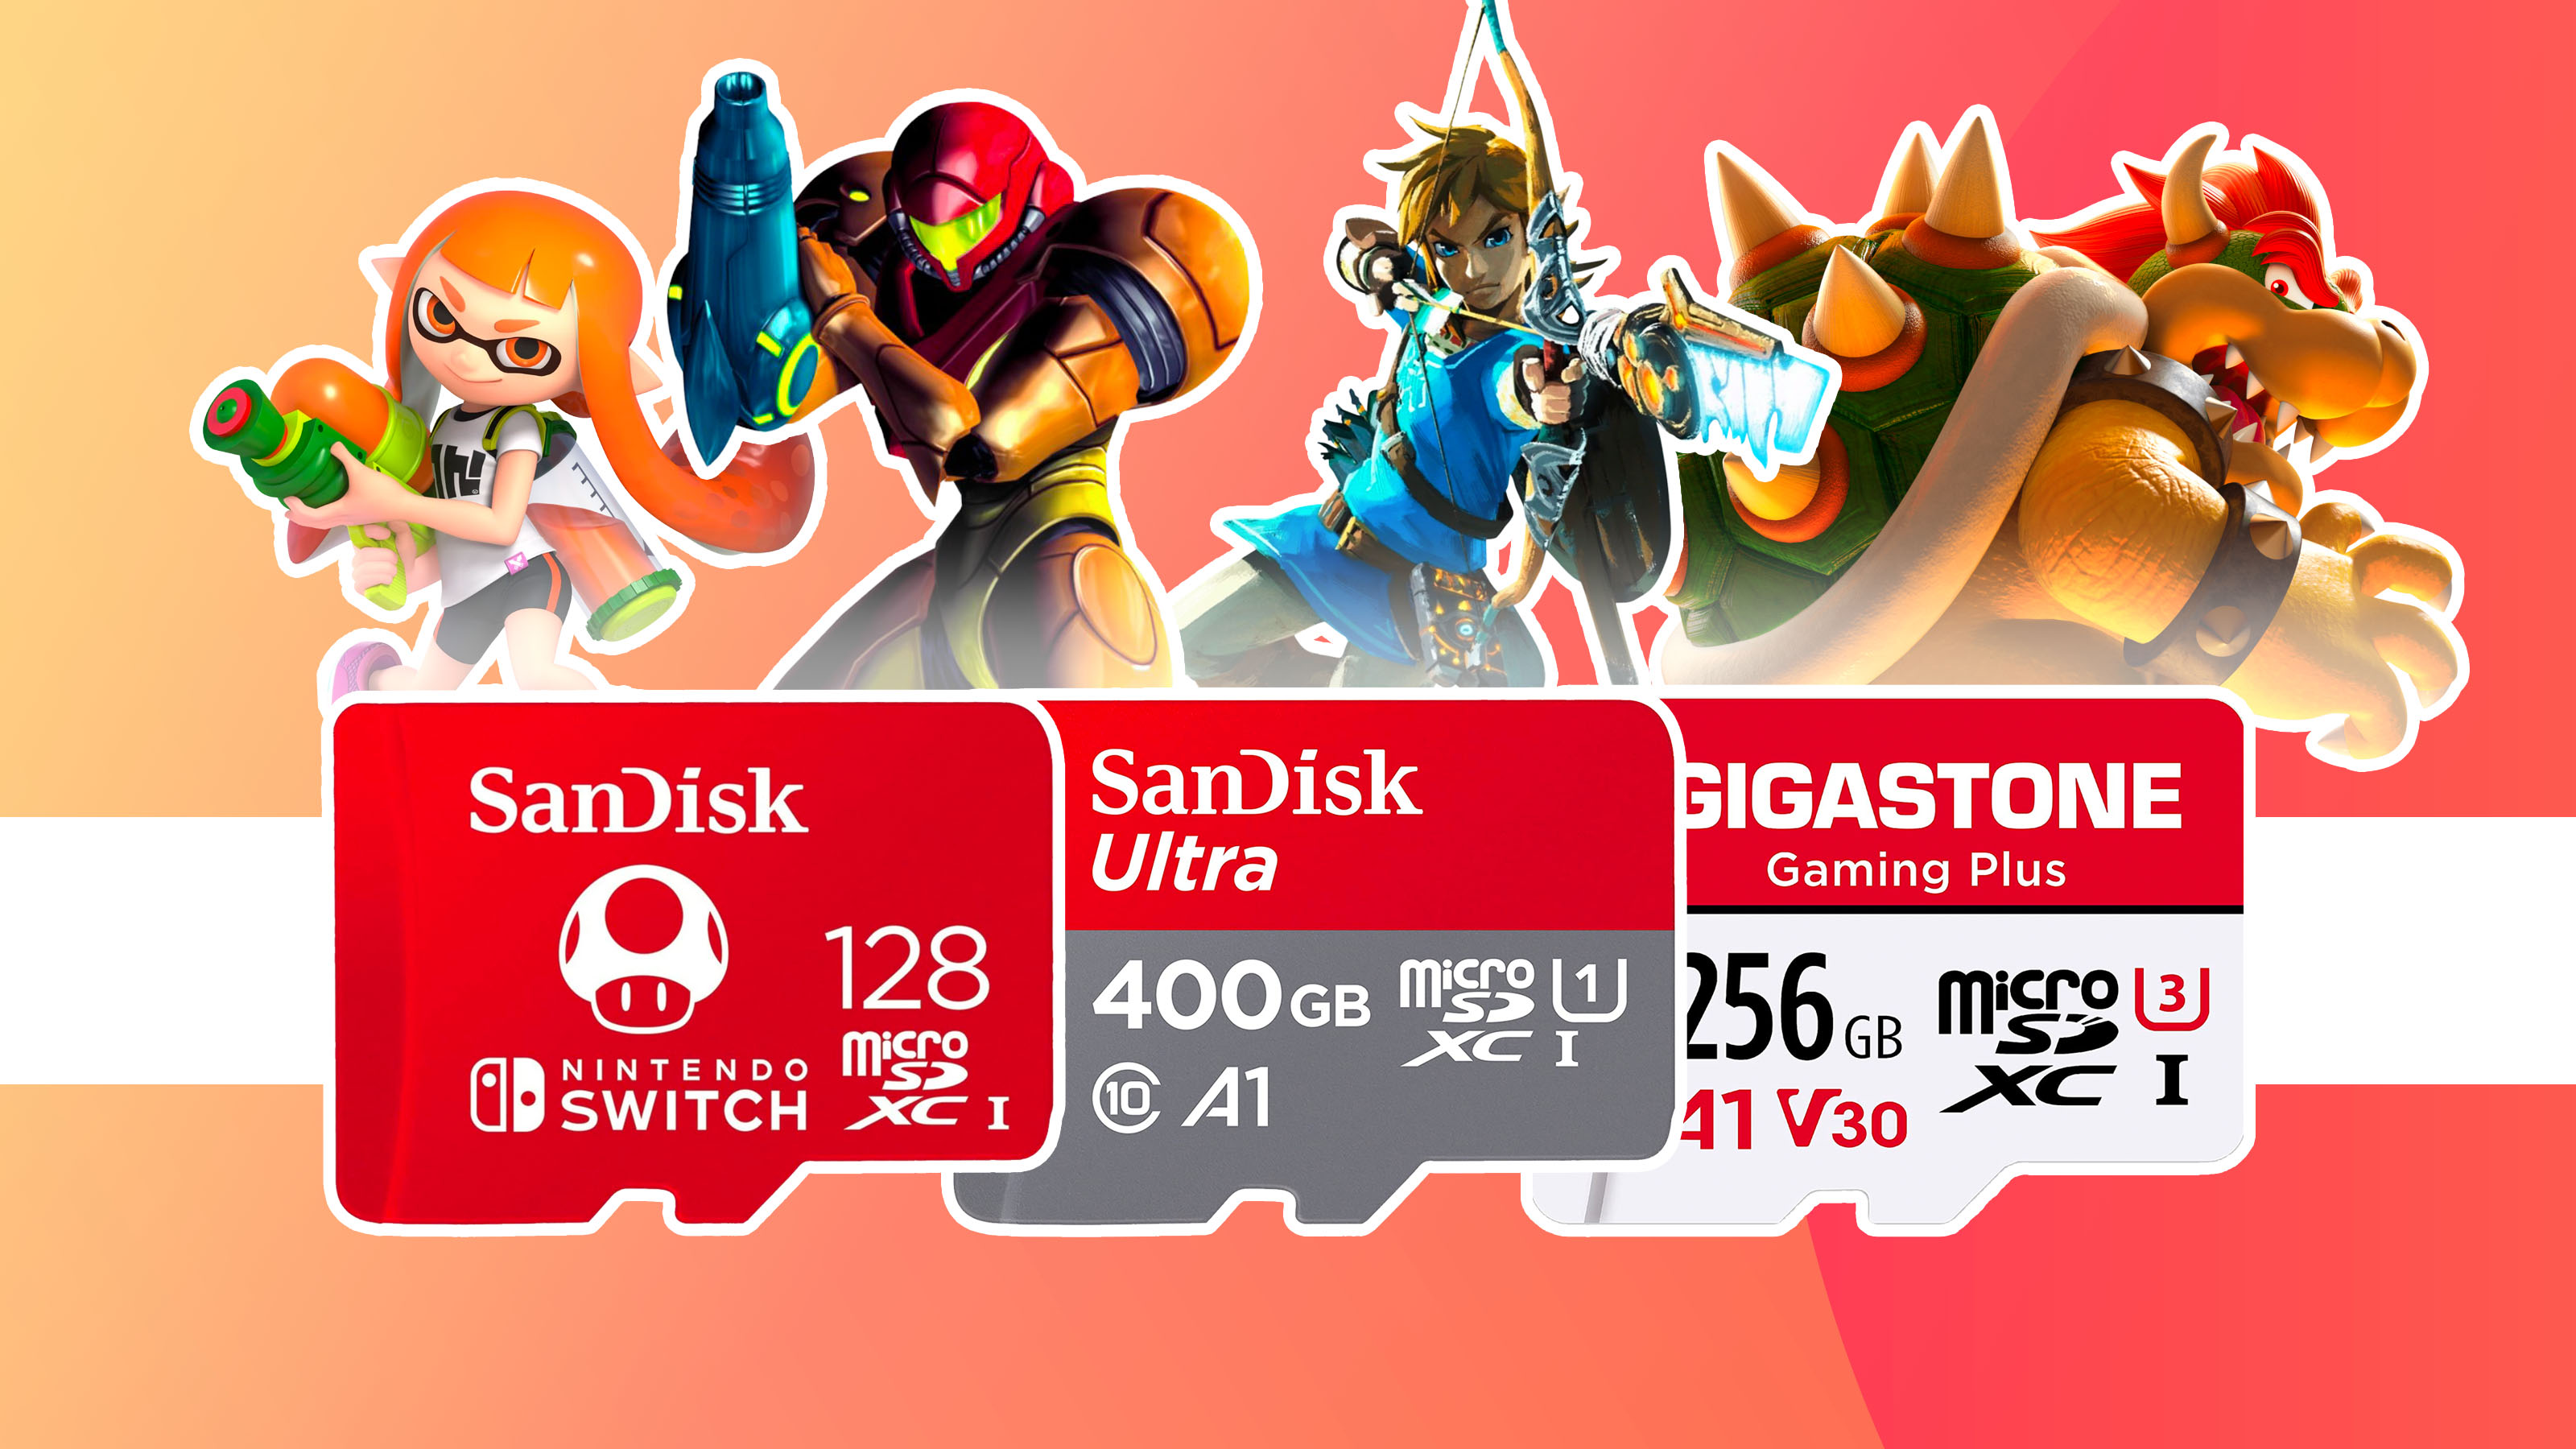
Before we begin, it’s important to note that you will need a compatible SD card for this process. Ensure that your new SD card is formatted correctly and that it has enough storage capacity to accommodate the data from your old SD card.
Now, let’s dive into the steps needed to transfer your Nintendo 3DS data seamlessly.
Step 1: Power off your Nintendo 3DS
The first step in transferring your Nintendo 3DS data to a new SD card is to power off your device. Make sure to save any ongoing games or applications before proceeding with the transfer.
To power off your Nintendo 3DS, simply press and hold the power button located on the right-hand side of the console. A dialog box will appear on the touchscreen, giving you the option to power off the device. Tap on “Power off” to initiate the shutdown process.
Wait a few seconds for the Nintendo 3DS to completely power down. You can verify that the device is turned off by ensuring that the screens are dark, and there are no indicator lights on.
It is important to power off your Nintendo 3DS before removing or inserting an SD card to avoid any potential data corruption or damage to the device.
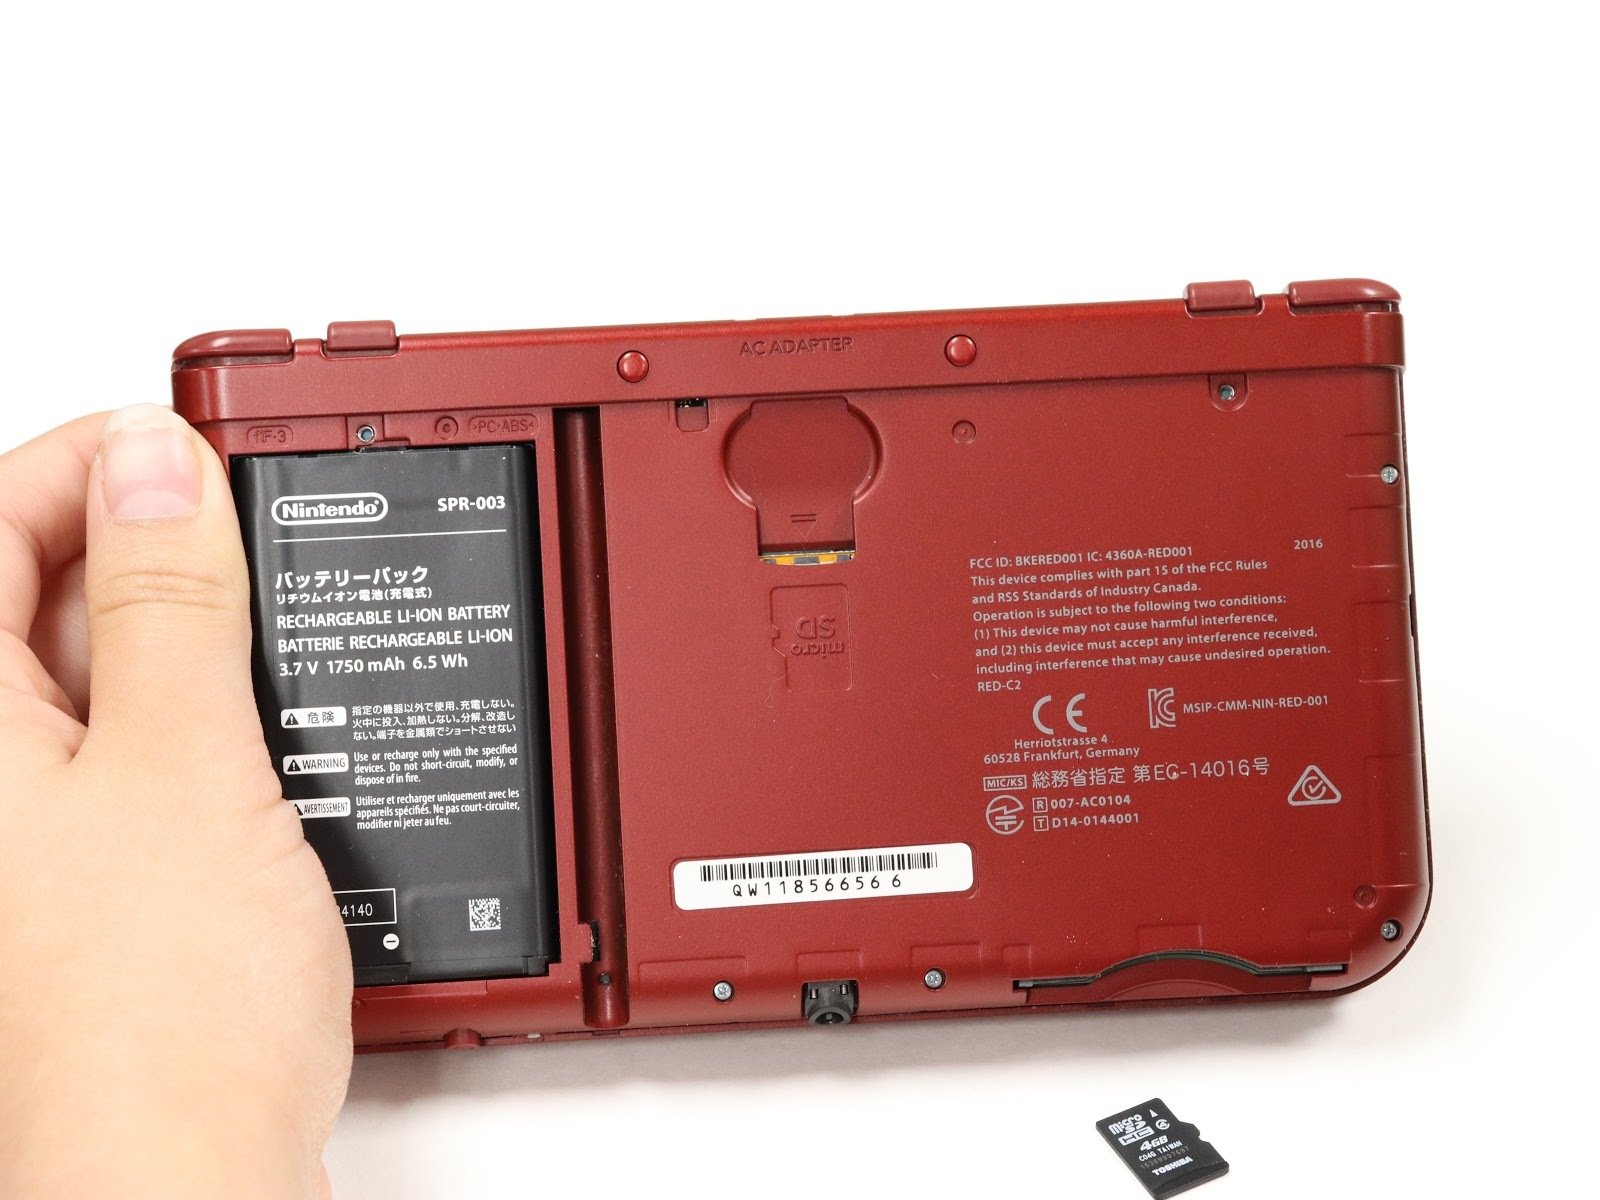
Note: If you have a New Nintendo 3DS, New Nintendo 3DS XL, or New Nintendo 2DS XL, you will need to remove the back cover to access the SD card slot. Simply remove the two screws on the back of the device using a small Phillips-head screwdriver, and gently slide off the back cover.
You are now ready to proceed to the next step, which involves removing the SD card from your Nintendo 3DS.
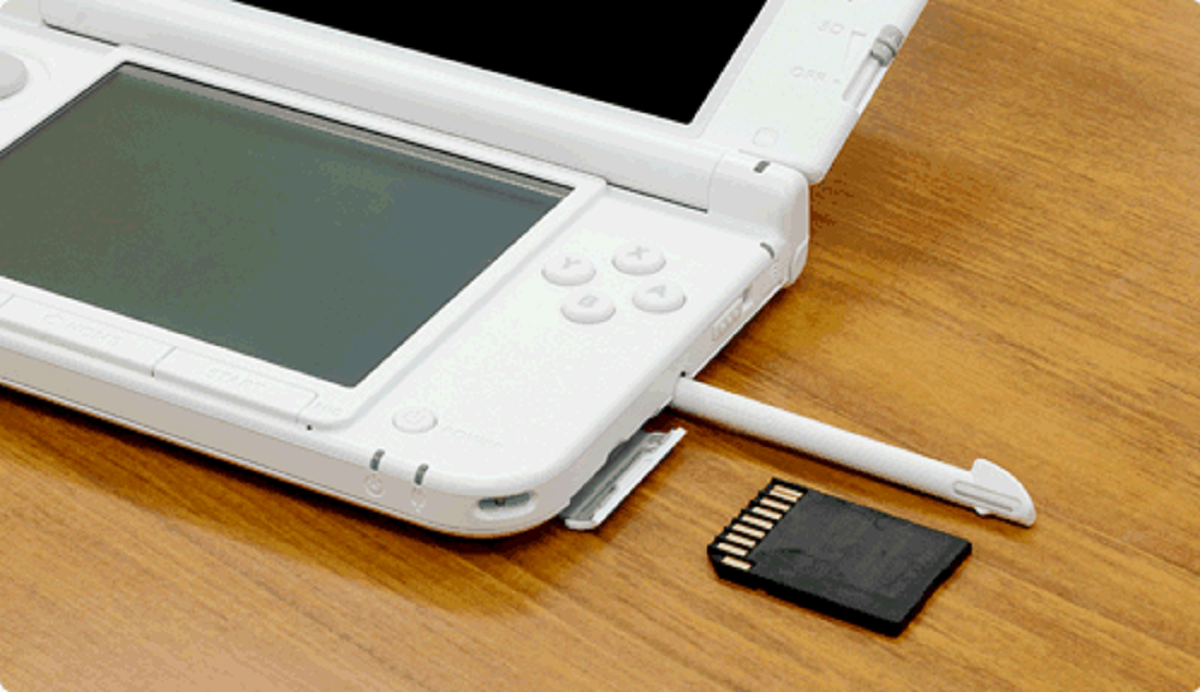
Step 2: Remove the SD card
With your Nintendo 3DS powered off, it’s time to remove the current SD card from the device. The SD card slot is located on the back of the console, underneath the removable cover.
If you have a regular Nintendo 3DS, Nintendo 3DS XL, or Nintendo 2DS, you can simply open the back cover by sliding the switch or pushing the tab, depending on the specific model. Once the cover is opened, you will be able to see the SD card slot on the right-hand side of the device.
Gently press on the edge of the SD card to release it from the slot. The card will partially pop out, allowing you to grasp it and remove it completely. Make sure to handle the SD card carefully to avoid any physical damage.
If you have a New Nintendo 3DS, New Nintendo 3DS XL, or New Nintendo 2DS XL, you will need to remove the back cover first. As mentioned in the previous step, remove the screws on the back of the device and slide off the cover to access the SD card slot.
Press on the SD card to release it from the slot, and carefully remove it from the device. Take care not to touch the metal contacts on the card, as this can potentially cause damage or interfere with data transfer.
Once you have successfully removed the SD card from your Nintendo 3DS, you can proceed to the next step of the transfer process.
Step 3: Insert the new SD card
Now that you have removed the old SD card from your Nintendo 3DS, it’s time to insert the new one. Make sure you have a compatible and properly formatted SD card with enough storage capacity to accommodate your data.
Locate the SD card slot on your Nintendo 3DS. For regular Nintendo 3DS, Nintendo 3DS XL, or Nintendo 2DS models, the slot is located on the right-hand side of the device, underneath the back cover.
If you have a New Nintendo 3DS, New Nintendo 3DS XL, or New Nintendo 2DS XL, you will need to remove the back cover by unscrewing the screws and sliding it off to access the SD card slot.
Take the new SD card and gently insert it into the card slot. Make sure the card is oriented correctly, with the label facing up and the connector end going into the slot first.
Push the card gently until it clicks into place. This ensures that the SD card is securely inserted and will not come loose during gameplay or data transfer.
If you encounter any resistance or difficulty when inserting the SD card, double-check that you have oriented it correctly and are not trying to force it into the slot. A properly inserted SD card should fit snugly without excessive force.
Once you have successfully inserted the new SD card, you can proceed to the next step of the transfer process.
Step 4: Turn on your Nintendo 3DS
Now that you have inserted the new SD card into your Nintendo 3DS, it’s time to power on the device. Press and hold the power button located on the right-hand side of the console to turn it on.
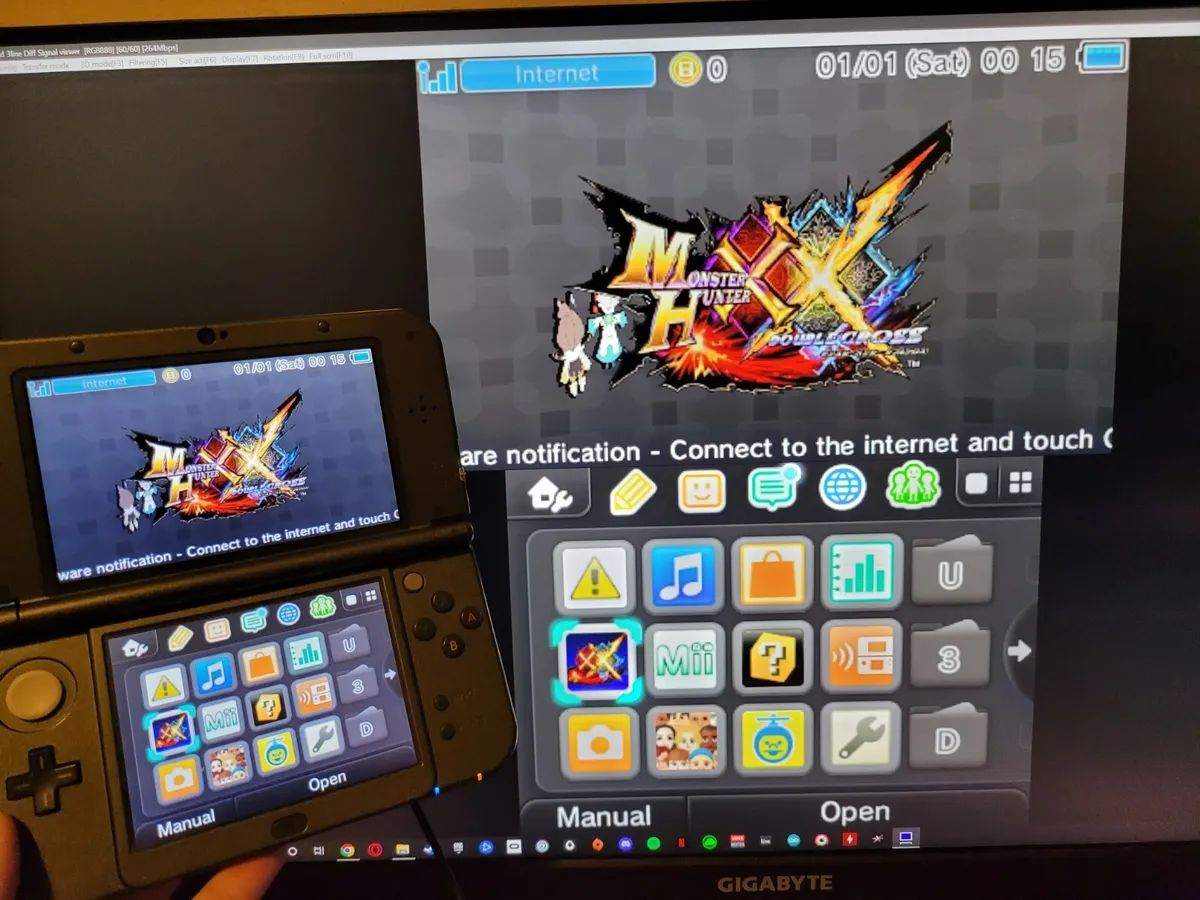
After a few seconds, you will see the Nintendo 3DS logo appear on the top screen, indicating that the device is booting up. Once the home menu is displayed on the bottom screen, you can release the power button.
It may take a moment for the Nintendo 3DS to fully boot up and load the home menu. During this time, you may see a message indicating that the SD card has been changed. This is normal and part of the system’s detection process for the new SD card.
If you receive a prompt to format the SD card, do not proceed with the format as it will erase all data on the card. Make sure that your new SD card is properly formatted before inserting it into the Nintendo 3DS.
Once the home menu is fully loaded, you are ready to proceed to the next step and access the system settings to initiate the data transfer process.
By turning on your Nintendo 3DS with the new SD card properly inserted, you have ensured that the console recognizes the card and is ready for the transfer. Now, let’s move on to the next step and access the system settings on your Nintendo 3DS!
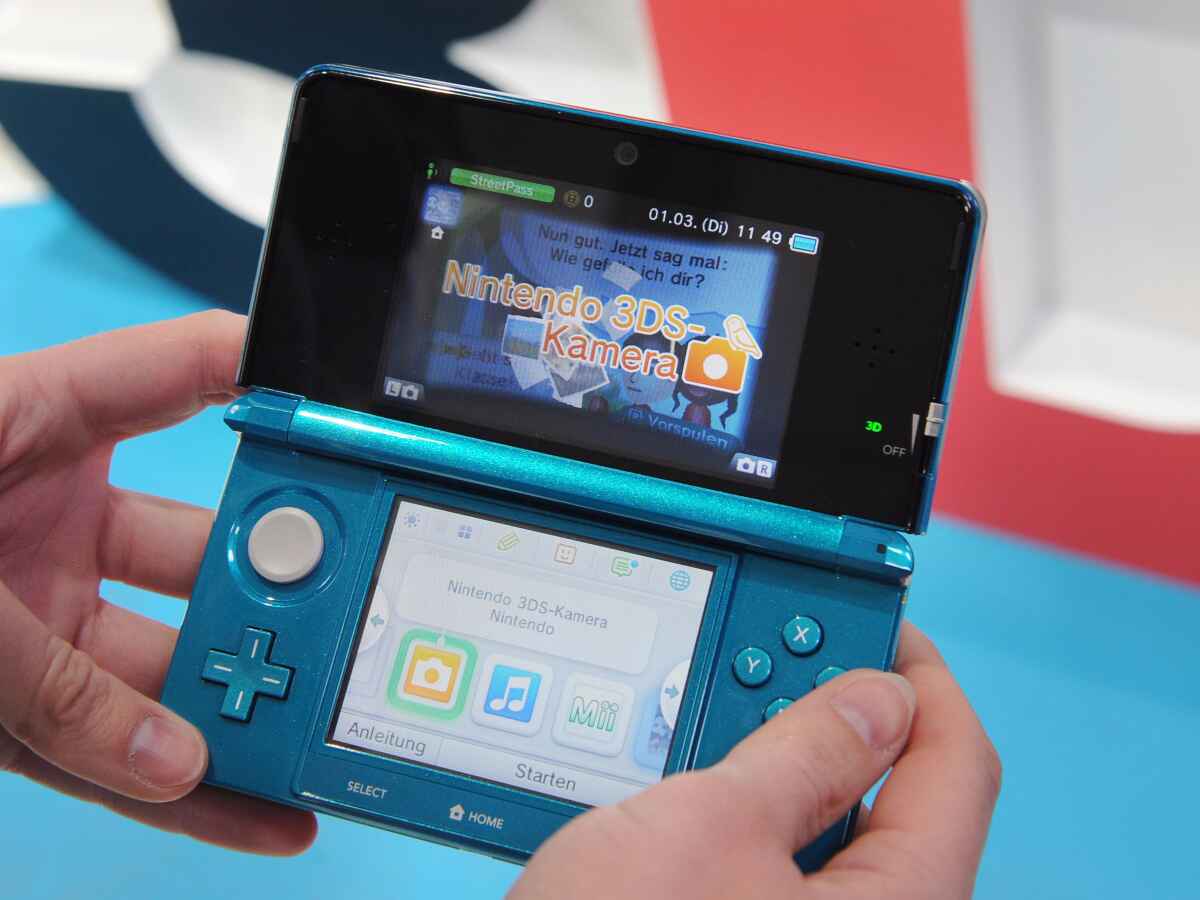
Step 5: Access System Settings
Now that your Nintendo 3DS is powered on with the new SD card inserted, it’s time to access the system settings. The system settings menu allows you to manage various aspects of your Nintendo 3DS, including data transfers.
To access the system settings, navigate to the home menu by pressing the Home button located below the touchscreen. This will bring up the home menu, where you can find various application icons and system settings.
On the top screen of your Nintendo 3DS, you will see different icons representing applications and settings. Use the circle pad or the touchscreen to navigate to the right until you reach the rightmost page of the home menu. Here, you will find an icon labeled “System Settings.”
Select the “System Settings” icon by tapping on it with the stylus or by pressing the A button on your Nintendo 3DS. This will open the system settings menu, where you can access different options and configuration settings for your device.
Take a moment to familiarize yourself with the various settings available in the system settings menu. You will use these settings to initiate the data transfer process in the next steps.
Keep in mind that the exact appearance and layout of the system settings menu may vary depending on the model of your Nintendo 3DS. However, the option to initiate a data transfer should be easily accessible within the system settings menu, regardless of the model.
Now that you have accessed the system settings on your Nintendo 3DS, you are ready to proceed to the next step and navigate to the data management section to initiate the data transfer process.
Step 6: Navigate to Data Management
After accessing the system settings menu on your Nintendo 3DS, the next step is to navigate to the data management section. This is where you will find the option to transfer your SD card data to the new SD card.
In the system settings menu, you will see various categories and options. Use the circle pad or the touchscreen to scroll down until you find the option labeled “Data Management.”
Select the “Data Management” option by tapping on it with the stylus or pressing the A button on your Nintendo 3DS. This will open the data management menu, where you can manage various types of saved data on your console.
Take a moment to explore the different options within the data management menu. Here, you can find settings related to software, extra data, downloadable content, and more.
It’s important to note that the exact appearance of the data management menu may vary depending on the model of your Nintendo 3DS. However, the option to transfer SD card data should be easily accessible within this section.
Now that you have successfully navigated to the data management section, you are ready to move on to the next step and select the option to transfer your SD card data from the old card to the new one.
Stay tuned as we guide you through the remaining steps to ensure a smooth and successful data transfer process for your Nintendo 3DS!
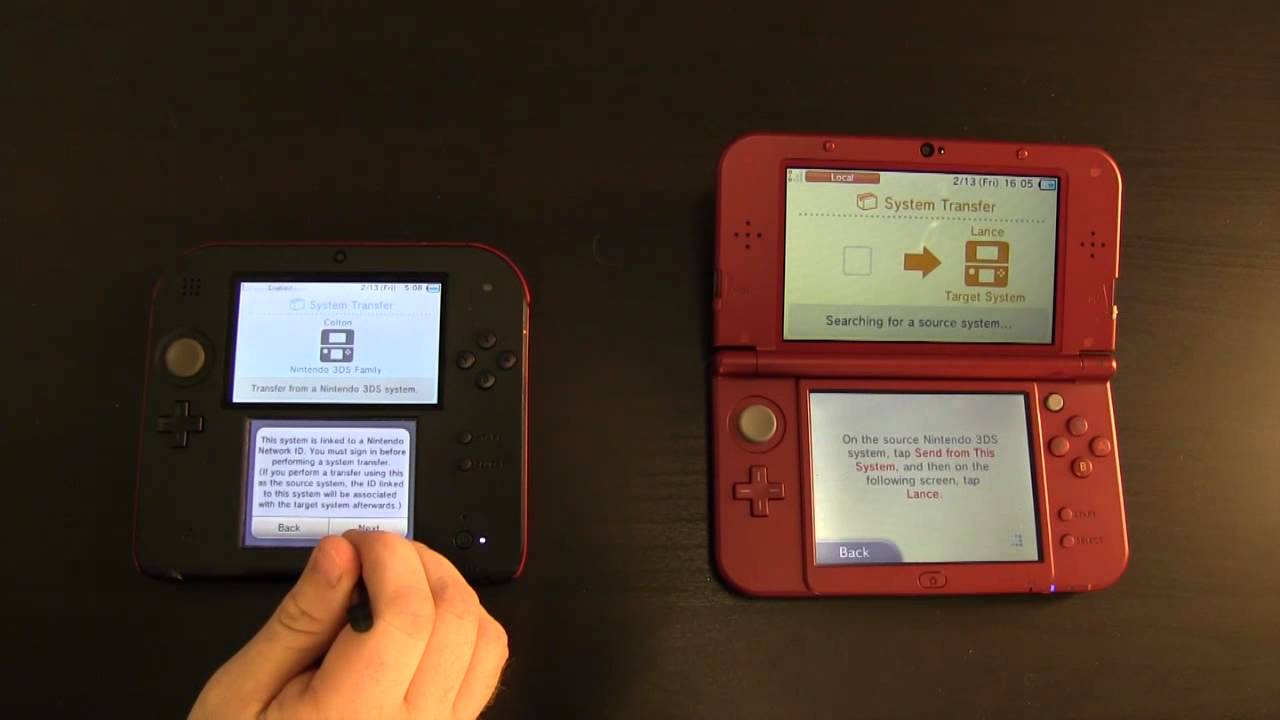
Step 7: Select the option to Transfer SD Card Data
Now that you have reached the Data Management section in your Nintendo 3DS system settings, it’s time to select the option to transfer SD card data. This is the crucial step that will initiate the transfer process and allow you to migrate your data from the old SD card to the new one.
In the Data Management menu, you will see various options related to managing different types of data on your Nintendo 3DS. Use the circle pad or the touchscreen to navigate and locate the option labeled “Transfer SD Card Data.”
Select the “Transfer SD Card Data” option by tapping on it with the stylus or pressing the A button on your Nintendo 3DS. This will open the transfer data menu, where you can initiate the transfer process and follow the subsequent steps.
Take a moment to review the instructions or information provided within the transfer data menu. This will help you understand the process and any additional requirements or considerations for a successful transfer.
Within the transfer data menu, you may also be prompted to confirm that both the source (old) SD card and target (new) SD card are inserted correctly. Make sure that both cards are securely in place before proceeding.
Please note that the exact appearance and wording of the transfer data menu may vary depending on the model of your Nintendo 3DS. However, the option to transfer SD card data should be easily identifiable within this section.
Now that you have selected the option to transfer SD card data, you are ready to move on to the next steps, where you will specify the source SD card and choose the data you want to transfer. Let’s continue our journey toward a successful data transfer for your Nintendo 3DS!
Step 8: Choose the source SD card
After selecting the option to transfer SD card data on your Nintendo 3DS, the next step is to choose the source SD card. This is the SD card that contains the data you want to transfer to the new SD card.
In the transfer data menu, you will be presented with a screen that displays the available SD cards for selection. This screen will show the details of the currently inserted SD cards, such as their storage capacity and name.
Use the circle pad or the touchscreen to navigate and select the source SD card. The source SD card is typically the one that you have removed from your Nintendo 3DS in the earlier steps.
If you have multiple SD cards inserted into your Nintendo 3DS, ensure that you are selecting the correct one that contains the data you wish to transfer. Take note of the name or any unique identifiers of the SD card to avoid any confusion.
Once you have selected the source SD card, you may be prompted to confirm your selection. Double-check that the correct SD card is highlighted or selected before proceeding.
If you have only one SD card inserted or if the system automatically detects the source SD card, you may not need to manually choose the source SD card. In such cases, the system will automatically proceed to the next step of selecting the data to transfer.
Now that you have successfully chosen the source SD card, it’s time to move on to the next step and specify the data you want to transfer to the new SD card. Let’s continue on our quest to complete the data transfer process for your Nintendo 3DS!
Step 9: Select the data you want to transfer
Now that you have chosen the source SD card in the transfer data menu of your Nintendo 3DS, it’s time to select the specific data you want to transfer to the new SD card. This step allows you to customize the transfer process and choose which files and applications you want to migrate.
In the transfer data menu, you will be presented with a list of data categories or types that can be transferred. These categories typically include save data, extra data, and downloaded software.
Use the circle pad or the touchscreen to navigate through the list and select the data categories you wish to transfer. You can choose all available categories or select specific ones based on your preferences and storage capacity of the new SD card.
As you select each data category, you may also be given the option to select specific files or applications within that category. For example, within the save data category, you can choose individual game saves to transfer rather than transferring all of them.
Take your time to carefully review the available options and select the data that is important to you. Remember that some files, such as photos and videos captured with the Nintendo 3DS camera, may reside in a separate data category within the transfer data menu.
In addition to selecting specific data categories, you may also have the option to transfer downloaded software or applications. This can include games and other software that you have purchased and downloaded from the Nintendo eShop.
Keep in mind that the specific options and categories available for transfer may vary depending on the model and system software version of your Nintendo 3DS. However, the process of selecting the data to transfer should be straightforward and intuitive.
Once you have selected the desired data to transfer, you may be prompted to confirm your selections before proceeding. Double-check that you have chosen the correct data categories and files before confirming the transfer.
With the data selection complete, you are now ready to carry out the transfer process. Move on to the next step to initiate the transfer and successfully migrate your chosen data to the new SD card!
Step 10: Confirm the transfer
After selecting the data you want to transfer from the old SD card to the new one on your Nintendo 3DS, the next step is to confirm the transfer. This is your opportunity to review your selections and ensure that you are ready to proceed with the migration process.
In the transfer data menu, you will see a summary or confirmation screen that displays the chosen data categories and files for transfer. Take a moment to carefully review the list and verify that everything you want to transfer is included.
If you need to make any changes or adjustments, you can go back to the previous steps and modify your selections accordingly. This is your last chance to add or remove any data before proceeding with the transfer.
Once you have reviewed the selected data and are satisfied with your choices, carefully read any additional information or instructions provided on the confirmation screen. This can include important details about the transfer process and any possible implications or limitations.
If you are ready to proceed, select the “Confirm” or “Start Transfer” option to initiate the transfer. Depending on the amount of data being transferred and the speed of the SD cards, the transfer process may take some time to complete.
While the transfer is in progress, make sure that your Nintendo 3DS remains powered on and that both the old and new SD cards are securely inserted. Interrupting the transfer or removing the SD cards prematurely can result in data loss or corruption.
Keep in mind that the transfer process may involve overwriting data on the new SD card, so ensure that you have a backup of any important data before proceeding.
Once the transfer is complete, you will receive a notification or confirmation message on your Nintendo 3DS. This indicates that the data has been successfully transferred from the old SD card to the new one.
With the transfer confirmed, you are one step closer to completing the data migration process for your Nintendo 3DS. Now, let’s move on to the next step and wait for the transfer to finish!
Step 11: Wait for the transfer to complete
After confirming the transfer of data from the old SD card to the new one on your Nintendo 3DS, the next step is to patiently wait for the transfer process to complete. The duration of the transfer will depend on the amount of data being transferred and the speed of the SD cards.
During the transfer, it is essential to avoid interrupting the process or turning off your Nintendo 3DS. Ensure that both the old and new SD cards remain securely inserted in their respective slots throughout the transfer.
The progress of the transfer may be indicated on the screen, showing you the percentage of completion or an estimated time remaining. This can give you an idea of how long the process will take, but keep in mind that it can vary depending on various factors.
While waiting for the transfer to complete, you can take this opportunity to ensure that your Nintendo 3DS is connected to a reliable power source to avoid any unexpected shut-offs due to low battery. It is also a good practice to avoid using or launching any applications during the transfer to prevent any potential conflicts or errors.
Remember that patience is key during this step, as rushing or prematurely interrupting the transfer process can lead to data loss or corruption. Allow the transfer to run its course and trust that your Nintendo 3DS is working diligently to safely migrate your chosen data to the new SD card.
Once the transfer is finished, you will receive a notification or confirmation message on your Nintendo 3DS. This indicates that the data transfer has been successfully completed, and you can proceed to the final steps of the process.
Congratulations on successfully waiting for the transfer to complete! Now, let’s move on to the next step and prepare to remove the old SD card from your Nintendo 3DS.
Step 12: Power off and remove the old SD card
With the data transfer process complete on your Nintendo 3DS, it’s time to power off the device and remove the old SD card. This step ensures that you can safely remove the card without any risk of data corruption or damage to the device.
To power off your Nintendo 3DS, press and hold the power button located on the right-hand side of the console. A dialog box will appear on the touchscreen, giving you the option to power off the device. Tap on “Power off” to initiate the shutdown process.
Wait a few seconds for the Nintendo 3DS to completely power down. Verify that the screens are dark, and there are no indicator lights on before proceeding.
Once the Nintendo 3DS is powered off, locate the old SD card slot on the back of the console. For regular Nintendo 3DS, Nintendo 3DS XL, or Nintendo 2DS models, you can open the back cover by sliding the switch or pushing the tab, depending on the specific model.
Gently press the edge of the old SD card to release it from the slot. The card will partially pop out, allowing you to grasp it and remove it completely. Handle the SD card with care to avoid any physical damage.
If you have a New Nintendo 3DS, New Nintendo 3DS XL, or New Nintendo 2DS XL, you will need to remove the back cover first. Remove the screws on the back of the device using a small Phillips-head screwdriver, and slide off the cover to access the SD card slot.
Press on the old SD card to release it from the slot, and carefully remove it. Be cautious not to touch the metal contacts on the card, as this can potentially cause damage or interfere with future data transfers.
Now that you have successfully powered off your Nintendo 3DS and removed the old SD card, you can set the old card aside or store it safely as a backup. Your data has been transferred to the new SD card, and you’re ready to enjoy your Nintendo 3DS with the updated storage.
By following these steps, you have successfully completed the process of transferring your Nintendo 3DS data from one SD card to another. Enjoy your games, photos, and other files on the new SD card, and have a great gaming experience!
Conclusion
Transferring your Nintendo 3DS data from one SD card to another is a straightforward process that allows you to preserve your saved games, photos, and other important files. By following the steps outlined in this guide, you can seamlessly migrate your data to a new SD card and continue your gaming adventures without any interruptions.
Remember to power off your Nintendo 3DS before removing or inserting an SD card to avoid any potential damage. Take care when handling the SD cards to prevent physical damage or touching the metal contacts. Ensure that your new SD card is compatible, properly formatted, and has enough storage capacity to accommodate your data.
Navigate through the system settings and data management menus to select the source SD card, choose the data you want to transfer, and confirm the transfer. Patience is key during the transfer process, as interrupting it can result in data loss.
Once the transfer is complete, power off the Nintendo 3DS and remove the old SD card. Safely store the old card as a backup, and enjoy using your Nintendo 3DS with the new SD card, preserving all your precious memories and progress.
Now that you have successfully transferred your Nintendo 3DS data to a new SD card, you can continue your gaming journey with confidence, knowing that your data is secure and accessible. Whether you’re upgrading to a larger capacity card or simply backing up your files, this process ensures that you can continue enjoying your Nintendo 3DS experience without interruption.
Thank you for following this guide. We hope it has been helpful in simplifying the data transfer process for your Nintendo 3DS. Enjoy your gaming adventures and have a fantastic time exploring the vast world of Nintendo!