Introduction
Whether you want to capture a special moment from a video, save a part of a webpage for future reference, or demonstrate a software issue to tech support, taking a screenshot can be incredibly useful. However, if you are using multiple monitors, you may only want to capture what is displayed on one specific monitor. In this article, we will explore different methods to take a screenshot of only one monitor.
Having multiple monitors can significantly enhance your productivity by providing you with a larger workspace. However, the default screenshot methods often capture everything that is currently visible on all monitors, which is not always desirable. The good news is that there are several ways to overcome this limitation and capture screenshots of just one monitor.
In this article, we will discuss various methods, including built-in keyboard shortcuts, third-party software, and operating system-specific tools. Each method offers a unique solution, allowing you to choose the one that best fits your needs and preferences.
Whether you are a Windows or Mac user, we have got you covered. Let’s dive into the different methods and learn how to take a screenshot of only one monitor on your computer.
Understanding the Problem
Before we explore the various methods for taking a screenshot of only one monitor, let’s understand the problem we are trying to solve. When you have multiple monitors connected to your computer, taking a screenshot using the standard methods captures the content from all the screens. This can be inconvenient, especially if you want to focus on capturing the content displayed on a specific monitor.
When working with dual monitors or more, you might have different applications, documents, or webpages open on each screen. Taking a screenshot of everything can result in a cluttered image that includes unwanted content from other monitors. That’s why it’s essential to find methods that enable you to capture just the screen you want while keeping the image clear and focused.
By understanding the problem, you can make an informed decision on which method to use based on your specific requirements. Whether you need to capture a specific window, a portion of the screen, or the entire monitor, it’s crucial to choose the right approach to get the desired result.
Now that we have a clear understanding of the problem, let’s explore the different methods that can help us achieve our goal of taking a screenshot of only one monitor. By utilizing these methods, you’ll have the flexibility to capture screenshots with precision and simplicity, without any unwanted distractions from other screens.
Methods for Taking a Screenshot of Only One Monitor
When it comes to capturing a screenshot of only one monitor, you have several methods at your disposal. These methods can be categorized into three main approaches: using built-in keyboard shortcuts, employing third-party software, or utilizing the operating system’s native screenshot tools. Let’s explore each of these methods in detail:
-
Method 1: Using Built-in Keyboard Shortcuts
Many operating systems, such as Windows and macOS, have built-in keyboard shortcuts that allow you to take screenshots. These shortcuts can be customized to capture the active window, the entire screen, or specific areas. To capture a screenshot of only one monitor using keyboard shortcuts, you’ll need to know the specific key combination for your operating system. -
Method 2: Using Third-party Software
If you’re looking for more advanced features and flexibility in capturing screenshots, you may want to consider using third-party software. There are numerous applications available that allow you to capture screenshots of specific monitors while offering additional editing and annotation options. Some popular options include Snagit, Greenshot, and Lightshot. -
Method 3: Using the Windows Snipping Tool
Windows users have access to a built-in screenshot tool called the Snipping Tool. This tool allows you to capture screenshots of selected areas, active windows, or the entire screen. By using the Snipping Tool, you can easily capture a screenshot of only one monitor by selecting the desired area on that specific screen. -
Method 4: Using macOS’s Screenshot Tool
Mac users can utilize the built-in screenshot tool provided by macOS. With this tool, you can take screenshots of the entire screen, a selected window, or a specific portion of the screen. By using the macOS screenshot tool, you can capture a screenshot of only one monitor by selecting the desired area on that particular screen.
These methods provide you with a range of options for capturing screenshots of only one monitor. Each method has its own advantages and may cater to different preferences and operating systems. By experimenting with these methods, you can find the one that best suits your needs and allows you to capture screenshots with ease and accuracy.
Method 1: Using Built-in Keyboard Shortcuts
One of the simplest and quickest methods to capture a screenshot of only one monitor is by utilizing the built-in keyboard shortcuts provided by your operating system. Both Windows and macOS offer convenient key combinations to capture screenshots with ease. Let’s take a closer look at how to use these built-in keyboard shortcuts:
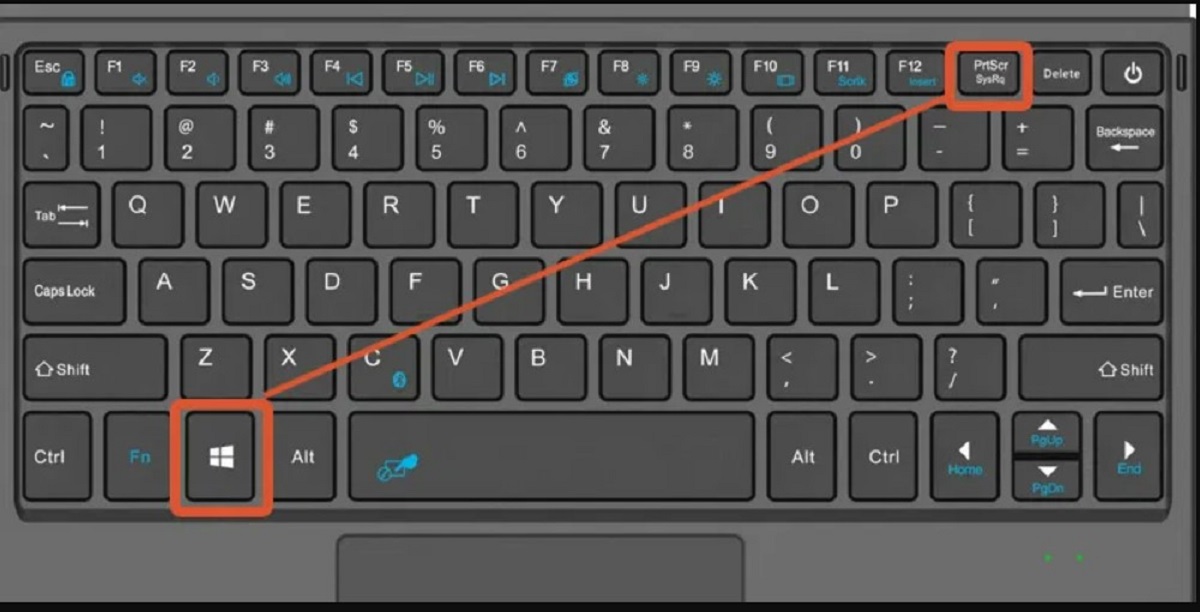
Windows: On Windows, you can use the “Print Screen” (PrtScn) key on your keyboard to capture a screenshot of the entire screen. To capture a screenshot of only one monitor, you can use the combination of the Windows key + Shift + S. This will activate the snipping tool, allowing you to select the desired area on the specific monitor you want to capture.
macOS: For macOS users, the keyboard shortcut varies depending on the version of the operating system. On older versions, you can use the combination of Command + Shift + 3 to capture a screenshot of the entire screen. To capture a screenshot of only one monitor, you can use the combination of Command + Shift + 4, followed by the Spacebar. This will turn the cursor into a camera icon, allowing you to select the specific monitor you want to capture.
By utilizing these built-in keyboard shortcuts, you can quickly and efficiently capture screenshots of only one monitor. It provides a convenient solution without the need for any additional software. However, it’s essential to remember the specific key combinations and practice using them to ensure you capture the desired area accurately.
Keep in mind that these keyboard shortcuts may vary slightly depending on your specific operating system version. Therefore, it’s advisable to consult the documentation provided by your operating system to ensure you have the correct information.
Now that we have explored the first method of using built-in keyboard shortcuts, let’s move on to the next method: using third-party software. This method offers more advanced features and customization options, making it ideal for users who require additional functionality when capturing screenshots.
Method 2: Using Third-party Software
If you’re looking for more advanced features and customization options when capturing screenshots of only one monitor, utilizing third-party software can be a great solution. There are several applications available that offer additional functionality beyond the built-in options provided by your operating system. Let’s explore how you can use third-party software to capture screenshots:
One popular option for Windows users is Snagit. Snagit is a powerful tool that allows you to capture screenshots, record screen activity, and even create GIFs. With Snagit, you can select specific monitor areas, capture windows, or even create panoramic captures by scrolling through a webpage or document. It provides numerous editing and annotation features to enhance and customize your screenshots.
Greenshot is another excellent choice for Windows users. It offers similar functionality to Snagit, allowing you to capture specific areas, full screens, and windows. Greenshot also allows for capturing scrolling windows, enabling you to capture entire webpages or documents without any limitations. Additionally, Greenshot provides a variety of annotation tools to add text, shapes, and highlights to your screenshots.
For both Windows and macOS users, Lightshot is a popular and user-friendly option. Lightshot allows you to capture screenshots of specific areas, full screens, and windows. Once you capture a screenshot, Lightshot provides a simple and intuitive editing interface, enabling you to crop, add annotations, and easily share your screenshots with others.
By using third-party software, you have access to a wide range of features and customization options to capture screenshots of only one monitor. Whether you need to capture specific areas, entire windows, or even create GIFs, these applications offer enhanced flexibility and functionality.
Before choosing a third-party software, it’s important to consider your specific requirements and preferences. Take the time to explore the features of various applications and find one that best suits your needs. Each software may have its own unique set of tools and capabilities, so it’s important to choose the one that aligns with your desired screenshot capturing and editing workflows.
Now that we have covered the second method of using third-party software, let’s move on to the next method: using the Windows Snipping Tool. This built-in tool provides additional options for capturing screenshots on Windows computers.
Method 3: Using the Windows Snipping Tool
If you’re using a Windows computer and prefer to use a built-in tool for capturing screenshots of only one monitor, the Windows Snipping Tool is a great option. The Snipping Tool provides additional flexibility and customization compared to the default “Print Screen” method. Let’s explore how to use the Windows Snipping Tool:
To open the Snipping Tool, you can simply search for it in the Windows search bar or access it through the Start Menu. Once open, the Snipping Tool allows you to choose from four different snip types:
- Free-form Snip: This option allows you to draw a free-form shape around the area you want to capture. It gives you maximum flexibility for selecting irregular shapes.
- Rectangular Snip: With this option, you can capture a rectangular area by simply dragging your cursor to select the desired range.
- Window Snip: This option enables you to capture the entire window by clicking on it.
- Fullscreen Snip: As the name suggests, this option captures the entire screen.
Once you have selected the snip type and captured the desired area on the monitor you want, the Snipping Tool provides various editing tools. You can add highlights, drawings, or even write directly on the capture. Additionally, you can save the screenshot as an image file or copy it to the clipboard for easy sharing and pasting into other applications.
The Windows Snipping Tool offers a convenient and built-in solution for capturing screenshots of only one monitor. With its various snip types and editing options, you can easily tailor your captures to your specific requirements.
Keep in mind that the Snipping Tool may not be available in the latest versions of Windows. In that case, Windows provides an alternative called “Snip & Sketch” or “Snip & Tool.” These applications offer similar functionalities to the Snipping Tool, allowing you to capture screenshots and make quick annotations.
Now that we have covered the third method of using the Windows Snipping Tool, let’s explore the next method: using the screenshot tool provided by macOS, the operating system used on Apple devices.
Method 4: Using Mac’s Screenshot Tool
If you’re using a Mac computer, you have the advantage of having a built-in screenshot tool that offers various options for capturing screenshots of only one monitor. The screenshot tool on macOS provides different capture modes and editing features that can enhance your screenshot-taking experience. Let’s explore how to use the screenshot tool on Mac:
To access the screenshot tool on macOS, you can use the following keyboard shortcuts:
- Command + Shift + 3: This captures the entire screen and saves it as a file on your desktop.
- Command + Shift + 4: This allows you to capture a specific portion of the screen. After pressing this shortcut, your cursor will turn into a crosshair. Simply click and drag to select the desired area to capture. Once you release the mouse button, the screenshot will be saved as a file.
- Command + Shift + 4 + Spacebar: This enables you to capture a specific window. After pressing this shortcut, your cursor will turn into a camera icon. Simply move the camera icon over the window you want to capture and click on it.
Once you have taken a screenshot, a thumbnail will appear in the bottom-right corner of your screen. Clicking on the thumbnail will open the screenshot in the preview mode, where you can make quick edits and annotations. You can also use the Tools menu in the preview mode to crop, rotate, add shapes, or draw on the screenshot.
These native screenshot tools in macOS provide a simple and efficient way to capture screenshots of only one monitor. With the ability to capture full screens, specific areas, or individual windows, you have the flexibility to choose the most suitable method for your needs.
It’s worth noting that macOS also offers a powerful and feature-rich application called “Grab” for capturing screenshots. Grab provides additional options such as timed captures and the ability to capture a specific menu or the cursor. To access Grab, you can search for it in the Applications folder.
Now that we have covered the fourth method of using the screenshot tool provided by macOS, let’s summarize what we’ve learned and conclude our exploration of methods for taking a screenshot of only one monitor.
Conclusion
Taking a screenshot of only one monitor can be essential when you’re working with multiple screens and want to capture specific content without any distractions. In this article, we explored different methods to accomplish this task.
First, we discussed the convenience of using built-in keyboard shortcuts provided by your operating system. By utilizing these shortcuts, you can quickly capture screenshots of only one monitor without the need for any additional software.
We then moved on to exploring the option of using third-party software. Applications like Snagit, Greenshot, and Lightshot offer advanced features and customization options, allowing you to capture screenshots tailored to your specific requirements.
Next, we discussed the Windows Snipping Tool, a built-in tool that provides additional flexibility to capture specific areas, windows, or the entire screen on Windows computers.
Lastly, we explored Mac’s native screenshot tool on macOS, which offers different capture modes and editing features to enhance your screenshot-taking experience on Apple devices.
By understanding and utilizing these methods, you can efficiently capture screenshots of only one monitor, ensuring that you capture the desired content without any unwanted distractions.
Remember to consider your specific needs and preferences when choosing a method. Whether you prefer the simplicity of built-in keyboard shortcuts, the customization options offered by third-party software, or the functionality of native tools, there is a method that will work best for you.
Now that you have a variety of methods at your disposal, go ahead and capture those screenshots with precision, focusing on the content of a specific monitor with confidence and ease.