Introduction
Email has become an essential part of our everyday lives, allowing us to communicate, collaborate, and stay connected with others. Whether it’s for work, personal use, or both, having a reliable and efficient email syncing system is crucial. Android devices offer a variety of methods to sync emails, providing users with flexibility and convenience.
In this article, we will explore different methods to sync emails on Android devices. We will cover using the default email app, the Gmail app, and third-party email apps. By following these simple steps, you can ensure that your emails are synced across devices and easily accessible whenever you need them.
Syncing emails on Android not only ensures that you stay updated with your inbox but also allows you to send and receive emails seamlessly. Whether you’re on the go or at your desk, having a synced email system will help you stay organized and efficient in managing your messages.
So, let’s dive in and explore the different methods available to sync emails on your Android device. Whether you’re a tech-savvy individual or a beginner, these methods are easy to follow and will have your emails up and running in no time. Whether you’re using the default email app, Gmail app, or a third-party email app, you’ll find a solution that works best for you.
Method 1: Using the Default Email App
The default email app on Android devices offers a straightforward way to sync your emails. Follow these simple steps to set up email synchronization using the default app:
- Open the Email app on your Android device. You can usually find it in the app drawer or on your home screen.
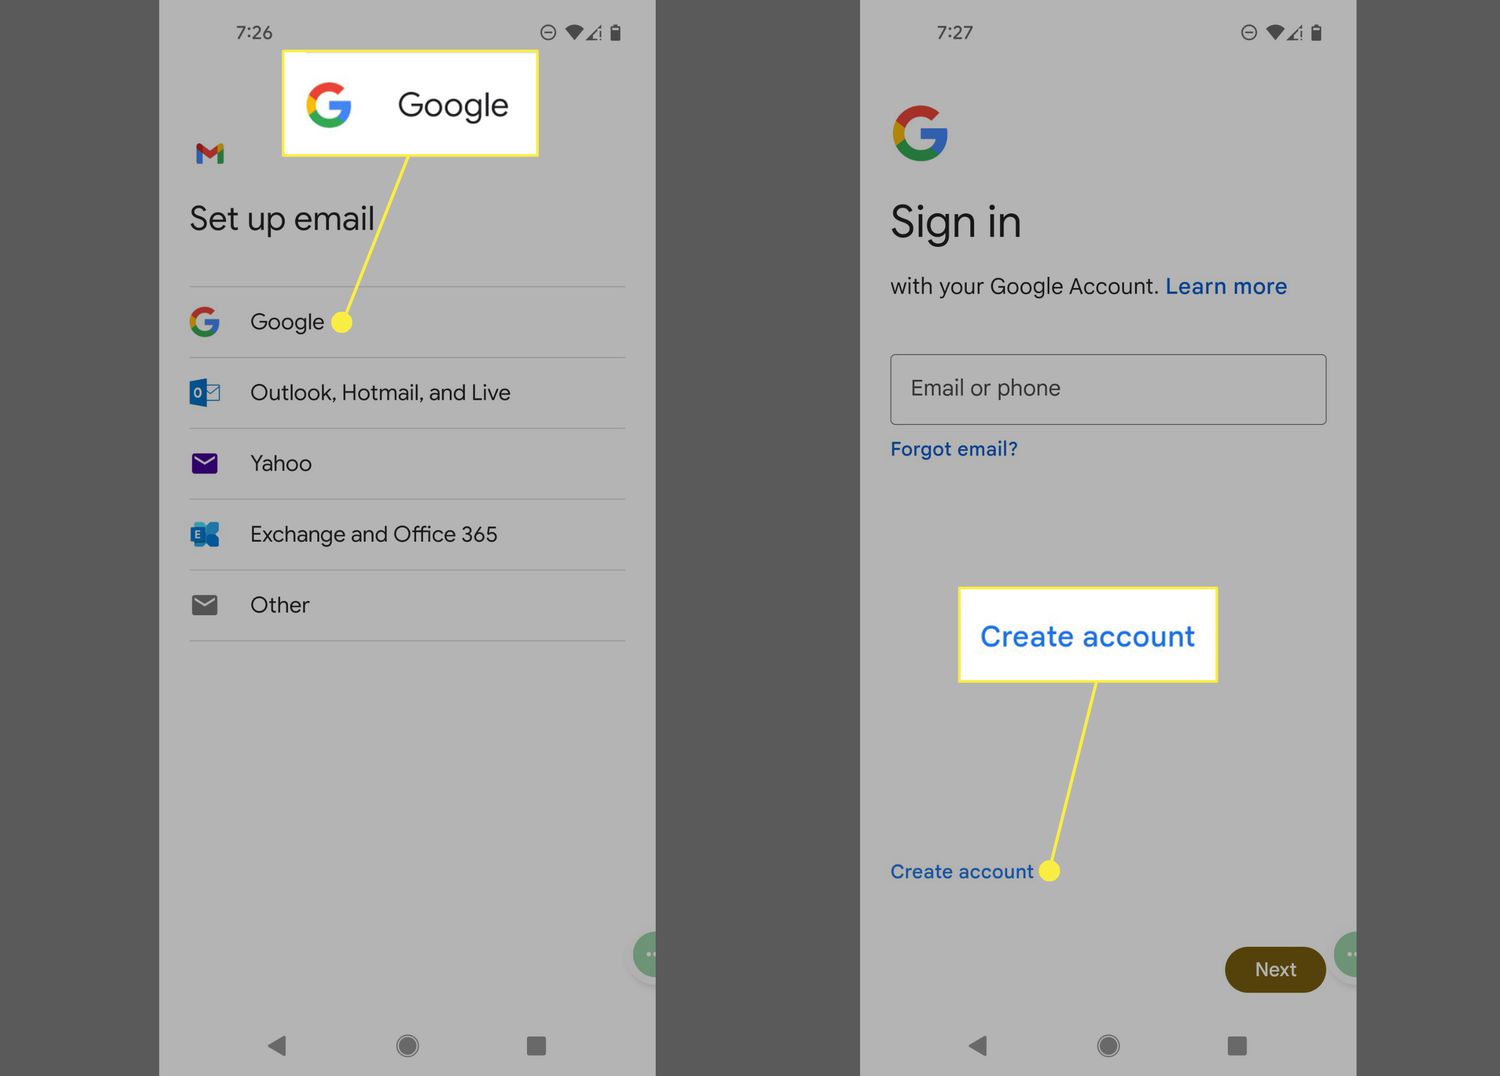
- If you haven’t already added an email account, you’ll be prompted to set up an account. Select the appropriate email provider from the list (e.g., Gmail, Outlook, Yahoo, etc.) or choose “Other” if your email provider is not listed.
- Enter your email address and password. The app will attempt to automatically configure the necessary settings for your email account. If the automatic setup fails, you may need to enter the server settings manually. Consult your email provider’s documentation or support for the correct server settings.
- Once your account is set up, the app will start syncing your emails. Depending on the size of your mailbox and the number of emails, it may take some time to complete the initial sync.
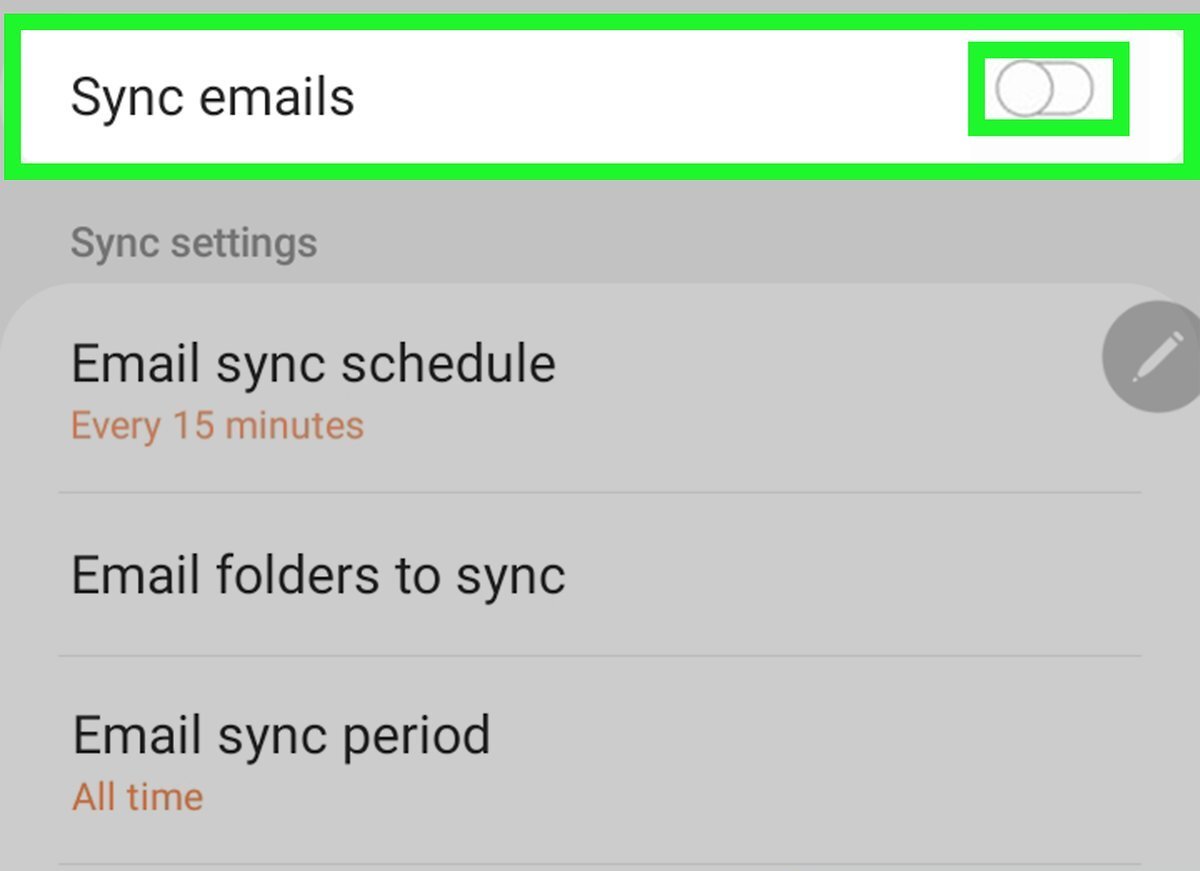
- You can customize the sync settings to specify how often you want the app to check for new emails and how many past days’ worth of emails you want to sync. To access the sync settings, go to the app’s settings menu and look for the options under your email account settings.
By following these steps, you can easily set up email synchronization using the default email app on your Android device. Keep in mind that the exact steps may vary slightly depending on the version of Android and the specific device you are using.
Using the default email app is a convenient option for many Android users, as it provides a simple and straightforward interface to manage emails from multiple accounts. However, if you prefer using the Gmail app or want to explore third-party options, continue reading to learn about alternative methods for syncing your emails on Android.
Method 2: Using the Gmail App
If you primarily use Gmail as your email provider, using the Gmail app on your Android device is a convenient way to sync your emails. Follow these steps to set up email synchronization using the Gmail app:
- Open the Gmail app on your Android device. If you don’t have the app installed, you can download it from the Google Play Store.
- Sign in to your Gmail account. If you have multiple accounts, you’ll need to select the account you want to sync with.
- Once you’re signed in, the app will start syncing your emails automatically. Depending on the size of your mailbox and the number of emails, it may take some time to complete the initial sync.
- You can customize the sync settings to specify how often you want the app to check for new emails and how many past days’ worth of emails you want to sync. To access the sync settings, tap on the menu icon in the top left corner, then go to “Settings” and select your Gmail account. Look for the “Sync” options to adjust the settings according to your preference.
- The Gmail app also allows you to enable notifications for new emails, so you can stay informed about incoming messages. You can customize the notification settings for each account separately. To access the notification settings, go to “Settings” in the app, select your Gmail account, and then tap on “Notifications.”
By following these steps, you can easily set up email synchronization using the Gmail app on your Android device. The Gmail app not only provides seamless synchronization but also offers powerful features, such as labels, filters, and search functionality, to help you manage your emails efficiently.
Using the Gmail app is an excellent choice if you primarily use Gmail for your email needs. However, if you have accounts with other email providers or prefer using a different email app, continue reading to learn about the third method for syncing your emails on Android.
Method 3: Using a Third-Party Email App
If you prefer using a third-party email app or have accounts with multiple email providers, you can choose from a variety of apps available on the Google Play Store that offer advanced features and customization options for syncing your emails. Here’s how you can set up email synchronization using a third-party email app:
- Choose a third-party email app that fits your needs and preferences. Some popular options include Microsoft Outlook, BlueMail, Spark, and Nine. Open the Google Play Store on your Android device, search for the app, and install it.
- Launch the app and follow the on-screen instructions to set up your email account(s). You’ll typically need to provide your email address and password, and the app will attempt to automatically configure the necessary settings. If the automatic setup fails, you’ll need to enter the server settings manually. Consult your email provider’s documentation or support for the correct server settings.
- Once your account is set up, the app will start syncing your emails. You can customize the sync settings in the app’s settings menu to specify how often you want the app to check for new emails and other synchronization preferences.
- Third-party email apps often offer additional features and customization options. Explore the app’s settings to tailor the app to your liking. You can customize notification settings, email signatures, swipe gestures, and more. Each app may have its unique set of features and options.
By following these steps, you can set up email synchronization using a third-party email app that suits your preferences. These apps provide a range of advanced features and customization options, allowing you to tailor your email experience to your liking.
Using a third-party email app on Android gives you the flexibility to manage multiple email accounts from different providers in one unified interface. You can take advantage of features like unified inbox, advanced search options, and support for various email protocols.
However, with numerous third-party email apps available, it’s essential to choose one that suits your needs and has a proven track record of reliability and security. Read user reviews, explore the features, and consider your specific requirements when selecting an app.
Now that you’ve learned three different methods to sync emails on your Android device – using the default email app, the Gmail app, or a third-party email app – you can choose the method that best suits your preferences and needs. Stay connected and never miss an important email again!
Conclusion
Syncing emails on your Android device is crucial for staying organized and ensuring you have easy access to your messages. Whether you prefer the default email app, the Gmail app, or a third-party email app, there are various methods available to sync your emails seamlessly.
In this article, we explored three different methods to sync emails on Android:
- Using the default email app: This method is straightforward and convenient, allowing you to sync your emails quickly and easily.
- Using the Gmail app: If you primarily use Gmail, this app provides a seamless experience with powerful features to manage your emails effectively.
- Using a third-party email app: For those who prefer customization options and advanced features, third-party email apps offer flexibility and support for multiple email accounts.
By following the step-by-step instructions for each method, you can set up email synchronization on your Android device within minutes. Ensure that you choose the method that best suits your preferences and needs, considering factors such as your primary email provider, desired features, and customization options.
Remember to customize the sync settings according to your preferences, including how often you want your app to check for new emails and how many past days’ worth of emails you want to sync. Additionally, take advantage of features like notifications, labels, filters, and search functionality to enhance your email management experience.
Whether you’re using the default app, the Gmail app, or a third-party app, having your emails in sync ensures that you stay connected and productive. No matter where you are or what device you’re using, your emails will be readily accessible, allowing you to respond promptly and efficiently.
Now that you have a clear understanding of the different methods available, take the next step and set up email synchronization on your Android device. Stay organized, never miss an important email, and make the most out of your email experience.