Introduction
Welcome to our guide on how to solve RAM problems in your PC. Random Access Memory (RAM) is an essential component of your computer’s hardware that plays a crucial role in its overall performance. It serves as temporary storage for data that your computer needs to access quickly.
Over time, you may encounter various issues with your computer’s RAM that can affect its speed, responsiveness, and overall functionality. Recognizing and resolving these problems is essential to ensure seamless operation and improve your computing experience.
In this guide, we will explore common symptoms associated with RAM problems, as well as provide step-by-step solutions to help you effectively troubleshoot and resolve them. Whether you’re experiencing slowdowns, crashes, or other performance issues, this guide will help you identify the root cause and implement the necessary fixes.
Before diving into the troubleshooting process, it’s important to understand how RAM works and the impact it has on your computer’s performance. RAM is responsible for temporarily storing data that your processor needs to access quickly. It allows your computer to retrieve and write data at a much faster rate than from your hard drive.
RAM acts as a bridge between your processor and the storage drive, ensuring the smooth and efficient execution of tasks. When you open programs or work on tasks, the necessary data is temporarily stored in RAM to facilitate easy and quick access. However, if your computer encounters RAM-related issues, it can cause delays, freezes, or even crashes.
This guide will walk you through various steps to identify and resolve RAM problems on your PC. From checking RAM usage to updating drivers and adjusting virtual memory settings, we will cover a range of troubleshooting techniques to help you optimize your computer’s RAM performance.
So, if you’re ready to take control of your computer’s RAM issues and enhance your PC’s performance, let’s dive into the common symptoms of RAM problems and how to resolve them.
Understanding RAM
Before we delve into troubleshooting RAM problems, it’s essential to have a basic understanding of what RAM is and how it functions. RAM, which stands for Random Access Memory, is a type of computer memory that serves as temporary storage for data that your computer needs to access quickly. It is an integral part of your computer’s hardware and plays a crucial role in its overall performance.
RAM is different from your computer’s hard drive or solid-state drive (SSD), which store data for long-term use. In contrast, RAM provides fast and temporary storage that allows your computer to quickly access information and execute tasks. It acts as a bridge between your computer’s processor and storage drives, ensuring swift data transfer and keeping your computer running smoothly.
When you open programs, launch applications, or perform any computing task, the necessary data and instructions are loaded into RAM from the storage drive. This allows your computer’s processor to access the data quickly, improving the overall performance and responsiveness of your system.
RAM is measured in gigabytes (GB) and determines the amount of memory that your system can use. More RAM generally results in better performance, as it allows your PC to handle multiple tasks simultaneously without experiencing slowdowns or delays.
It’s worth noting that RAM is volatile memory, meaning that it requires continuous power to retain stored data. When you shut down your computer, the data stored in RAM is erased, and the memory is reset. This is why it’s important to save your work regularly and rely on long-term storage drives, such as hard drives or SSDs, for permanent data storage.
In summary, RAM is a critical component of your computer’s hardware that provides temporary storage for data needed by your computer’s processor. It allows for fast data access and execution of tasks, ultimately affecting the overall performance and responsiveness of your system. The amount of RAM you have impacts your computer’s multitasking capabilities, as more RAM enables smoother simultaneous operation of multiple programs.
Now that we have a clear understanding of RAM and its role in your computer, let’s move on to the next section, where we will explore common symptoms of RAM problems in more detail.
Common Symptoms of RAM Problems
Recognizing the symptoms of RAM problems is crucial in troubleshooting and resolving issues effectively. RAM problems can manifest in various ways, affecting your computer’s performance, stability, and overall user experience. Here are some common symptoms to look out for:
- System Freezing or Crashing: If your PC freezes frequently or crashes unexpectedly, it could be an indication of RAM-related issues. Insufficient or faulty RAM can cause your system to become unresponsive, leading to crashes or the need for manual restarts.
- Slow Performance: When your computer lacks sufficient RAM, it may struggle to handle multiple tasks simultaneously, resulting in sluggish performance. Programs may take longer to load, and overall responsiveness can be significantly impacted.
- Programs Not Responding: If you notice that certain programs frequently become unresponsive or fail to open altogether, it could be due to insufficient RAM. Inadequate memory resources can cause applications to struggle or fail to launch properly.
- Blue Screen of Death (BSOD) Errors: RAM-related issues can trigger the infamous Blue Screen of Death errors. If you encounter frequent BSOD errors with error codes such as “MEMORY_MANAGEMENT” or “PAGE_FAULT_IN_NONPAGED_AREA,” it may indicate RAM problems.
- Strange Behavior and Error Messages: Insufficient or faulty RAM can result in unusual behavior from your computer. You may encounter frequent error messages, unexpected system restarts, or strange graphical glitches.
- Increased Disk Activity: When your computer lacks sufficient RAM, it may compensate by relying heavily on your hard drive or SSD for virtual memory, resulting in increased disk activity. You may hear your computer’s hard drive constantly spinning or notice a significant slowdown in performance.
If you are experiencing one or more of these symptoms, it’s likely that your computer is facing RAM-related problems. The following sections will guide you through various troubleshooting steps to help identify and resolve these issues effectively.
Now that we’ve covered the common symptoms associated with RAM problems, let’s move on to the next section, where we will discuss how to check RAM usage in your PC.
Checking RAM Usage
Before delving into troubleshooting RAM problems, it’s important to understand how to check your computer’s RAM usage. This will provide valuable insight into whether your system is experiencing any memory-related issues and help you determine if RAM is the cause of your performance problems. Here are a few methods to check RAM usage:
- Task Manager: One of the easiest ways to check RAM usage is by using the built-in Task Manager on Windows. Press the
Ctrl + Shift + Esckeys together to open Task Manager, then go to the “Performance” tab. Here, you’ll see a visual representation of your computer’s overall memory usage, including the amount of RAM being used and available. - Resource Monitor: Another useful tool on Windows is the Resource Monitor. You can access it by searching for “Resource Monitor” in the Start menu or by opening Task Manager and navigating to the “Performance” tab, then clicking on “Open Resource Monitor.” In the Resource Monitor, go to the “Memory” tab to view detailed information about the RAM usage of each running process.
- Activity Monitor: For Mac users, the Activity Monitor provides similar functionality to check RAM usage. You can open it by searching for “Activity Monitor” in Spotlight or by going to “Applications” > “Utilities” > “Activity Monitor.” In the “Memory” tab, you’ll find a visual representation of your RAM usage, as well as detailed information about memory consumption by individual applications and processes.
- Command Line Tools: Advanced users may prefer using command line tools to check RAM usage. On Windows, you can open the Command Prompt and use the
tasklistcommand to view running processes and their memory usage. On Mac, you can use thetoporhtopcommand in the Terminal to display real-time memory usage statistics.
By regularly monitoring your computer’s RAM usage, you can identify if your system is running low on memory or if specific applications are consuming an excessive amount. High RAM usage indicates that your system may benefit from additional memory or that certain programs may need to be optimized.
Now that you know how to check RAM usage on your PC, we will proceed to the next section, where we will discuss various troubleshooting steps to effectively resolve RAM problems.
Resolving RAM Issues
When encountering RAM problems in your PC, it’s important to address them promptly to restore your system’s performance and stability. Here are a few steps you can take to effectively resolve RAM issues:
- Restarting Your PC: One of the simplest solutions to address RAM-related issues is to restart your computer. This helps clear the temporary data stored in RAM and can often resolve minor glitches or memory leaks causing performance problems.
- Running a Memory Diagnostic Test: To determine if your RAM is faulty, you can run a memory diagnostic test. Windows 10 has a built-in tool called Windows Memory Diagnostic that can help identify and diagnose issues with your RAM. You can access it by typing “Windows Memory Diagnostic” in the Start menu search bar and following the on-screen instructions.
- Verifying RAM Compatibility: If you recently added or upgraded your RAM modules, it’s important to ensure they are compatible with your motherboard and other hardware components. Incompatibility issues can lead to various problems. Consult your motherboard’s specifications or use online compatibility tools to verify compatibility before purchasing or installing RAM.
- Checking for Faulty RAM Modules: If you suspect faulty RAM modules, you can try isolating the problem by testing each module individually. Remove all but one RAM module and test your computer’s performance. If you experience issues with a particular module, it may be faulty and need to be replaced.
- Updating BIOS and Drivers: Outdated BIOS (Basic Input/Output System) or drivers can lead to compatibility issues and RAM-related problems. Visit your computer or motherboard manufacturer’s website to check for BIOS and driver updates. Installing the latest versions can often resolve compatibility issues and improve system stability.
- Adjusting Virtual Memory Settings: Virtual memory, also known as the page file, is a portion of your hard drive or SSD that acts as an extension of physical RAM. Adjusting virtual memory settings can help alleviate RAM-related issues. To access virtual memory settings on Windows, go to “Control Panel” > “System and Security” > “System” > “Advanced system settings” > “Settings” under the “Performance” section > “Advanced” tab > “Change” under the “Virtual memory” section.
- Removing Unnecessary Programs and Files: Unnecessary programs and files can consume valuable RAM resources, leading to performance issues. Uninstalling unused programs and regularly clearing out temporary files can free up memory and improve overall system performance.
- Upgrading RAM Capacity: If you consistently experience low memory issues or your system struggles to handle your computing needs, upgrading your RAM capacity may be necessary. Adding more RAM can provide a significant boost in performance and allow for smoother multitasking.
By following these steps, you can effectively address and resolve RAM issues in your PC. However, if the problems persist despite your troubleshooting efforts, it may be advisable to seek professional assistance or consult with a computer technician.
With the knowledge and techniques provided in this guide, you are equipped to tackle RAM-related problems and optimize your computer’s performance. In the final section, we will conclude our discussion and highlight the importance of maintaining a healthy and efficient RAM system.
Restarting Your PC
When experiencing RAM-related issues on your computer, one of the simplest and most effective troubleshooting steps you can take is to restart your PC. Restarting helps clear temporary data stored in RAM, refresh system processes, and resolve minor glitches that may be affecting your system’s performance. Here’s how you can restart your PC:
- Click on the “Start” menu located at the bottom left corner of your screen.
- Select the “Power” option.
- Choose “Restart” from the drop-down menu.
- Wait for your computer to shut down and restart.
Alternatively, you can also use the following keyboard shortcut to restart your PC:
- Press and hold the
Ctrlkey on your keyboard. - While holding the
Ctrlkey, press theAltkey and theDelkey simultaneously. - Select the “Restart” option from the screen that appears.
- Wait for your computer to restart.
Restarting your PC can help resolve various RAM-related issues, including memory leaks, temporary glitches, and software conflicts. It provides a fresh start for your system and helps alleviate any performance problems you may be experiencing.
Keep in mind that a simple restart may not always solve more complex RAM issues, such as faulty memory modules or compatibility problems. However, it’s a good first step to try before moving on to more advanced troubleshooting methods.
If the RAM problem persists after restarting your PC, continue with the other troubleshooting steps outlined in this guide to effectively identify and resolve the issue.
Now that we’ve covered the importance of restarting your PC in resolving RAM issues, let’s move on to the next section, where we will discuss running a memory diagnostic test.
Running a Memory Diagnostic Test
If you suspect that your computer is experiencing RAM-related issues, running a memory diagnostic test can help identify potential problems with your RAM modules. Windows 10 includes a built-in tool called Windows Memory Diagnostic that can effectively diagnose and pinpoint memory issues. Here’s how you can run a memory diagnostic test:
- Open the Start menu by clicking on the Windows icon located at the bottom left corner of your screen.
- Type “Windows Memory Diagnostic” in the search bar.
- Click on the “Windows Memory Diagnostic” app that appears in the search results.
- Select the option to “Restart now and check for problems (recommended)”.
- Your computer will restart, and the Windows Memory Diagnostic tool will begin scanning your RAM for errors.
- Wait for the scanning process to complete, which may take several minutes.
- After the scan is finished, your computer will automatically restart, and the results of the memory test will be displayed.
The Windows Memory Diagnostic tool will inform you if any issues are detected with your RAM modules. If errors are found, it indicates that your RAM is faulty or experiencing problems. In such cases, it may be necessary to replace the faulty RAM modules to resolve the issue.
It’s important to note that running a memory diagnostic test requires restarting your PC and temporarily interrupting your work. Therefore, it’s advisable to save any ongoing work and close any unsaved programs before initiating the memory test.
If you don’t have access to the Windows Memory Diagnostic tool, you can also use third-party memory testing software, such as Memtest86, to perform a thorough examination of your RAM modules. These tools provide more advanced testing capabilities and are suitable for detecting deeper hardware issues that may not be identified by the Windows Memory Diagnostic tool.
By running a memory diagnostic test, you can effectively determine if your RAM modules are causing performance issues or other system instabilities. If the test reveals any errors, proceed with the appropriate steps to address the faulty RAM modules, such as replacing them or seeking professional assistance.
Now that we’ve covered running a memory diagnostic test, we can move on to the next section, where we will discuss verifying RAM compatibility.
Verifying RAM Compatibility
When encountering RAM issues, it’s important to verify that your RAM modules are compatible with your computer’s hardware. Incompatibility between RAM and your motherboard can lead to various problems, including system crashes, instability, and performance issues. Here’s how you can verify RAM compatibility:
- Identify your computer’s motherboard model. You can find this information in the documentation that came with your computer or by searching for your computer’s model online.
- Understand the specifications of your motherboard, including the supported RAM type, speed, and maximum capacity. This information can typically be found on the manufacturer’s website or in the motherboard’s documentation.
- Check the specifications of your installed RAM modules. These details can often be found on the physical modules themselves or in the documentation that came with your RAM.
- Compare the specifications of your RAM modules with the supported specifications of your motherboard. Pay attention to factors such as RAM type (DDR3, DDR4, etc.), speed (in MHz), and capacity (in GB).
- Ensure that your installed RAM modules match or are within the supported specifications of your motherboard. If they do not match or exceed the specifications, compatibility issues may arise.
It’s worth noting that while some motherboards support multiple RAM types and speeds, it’s generally recommended to use RAM modules that meet the motherboard’s exact specifications for optimal compatibility and performance. Using unsupported RAM or mixing different types and speeds of RAM modules can result in system instability and errors.
If you find that your installed RAM modules are not compatible with your motherboard, you may need to consider replacing them with modules that meet the correct specifications. Consult your motherboard’s documentation or visit the manufacturer’s website for a list of recommended RAM modules.
Verifying RAM compatibility is an important step in troubleshooting RAM issues. Ensuring that your RAM is compatible with your motherboard helps eliminate potential compatibility-related problems, allowing for a stable and efficient system.
Now that we’ve discussed the importance of verifying RAM compatibility, let’s move on to the next section, where we will explore how to check for faulty RAM modules.
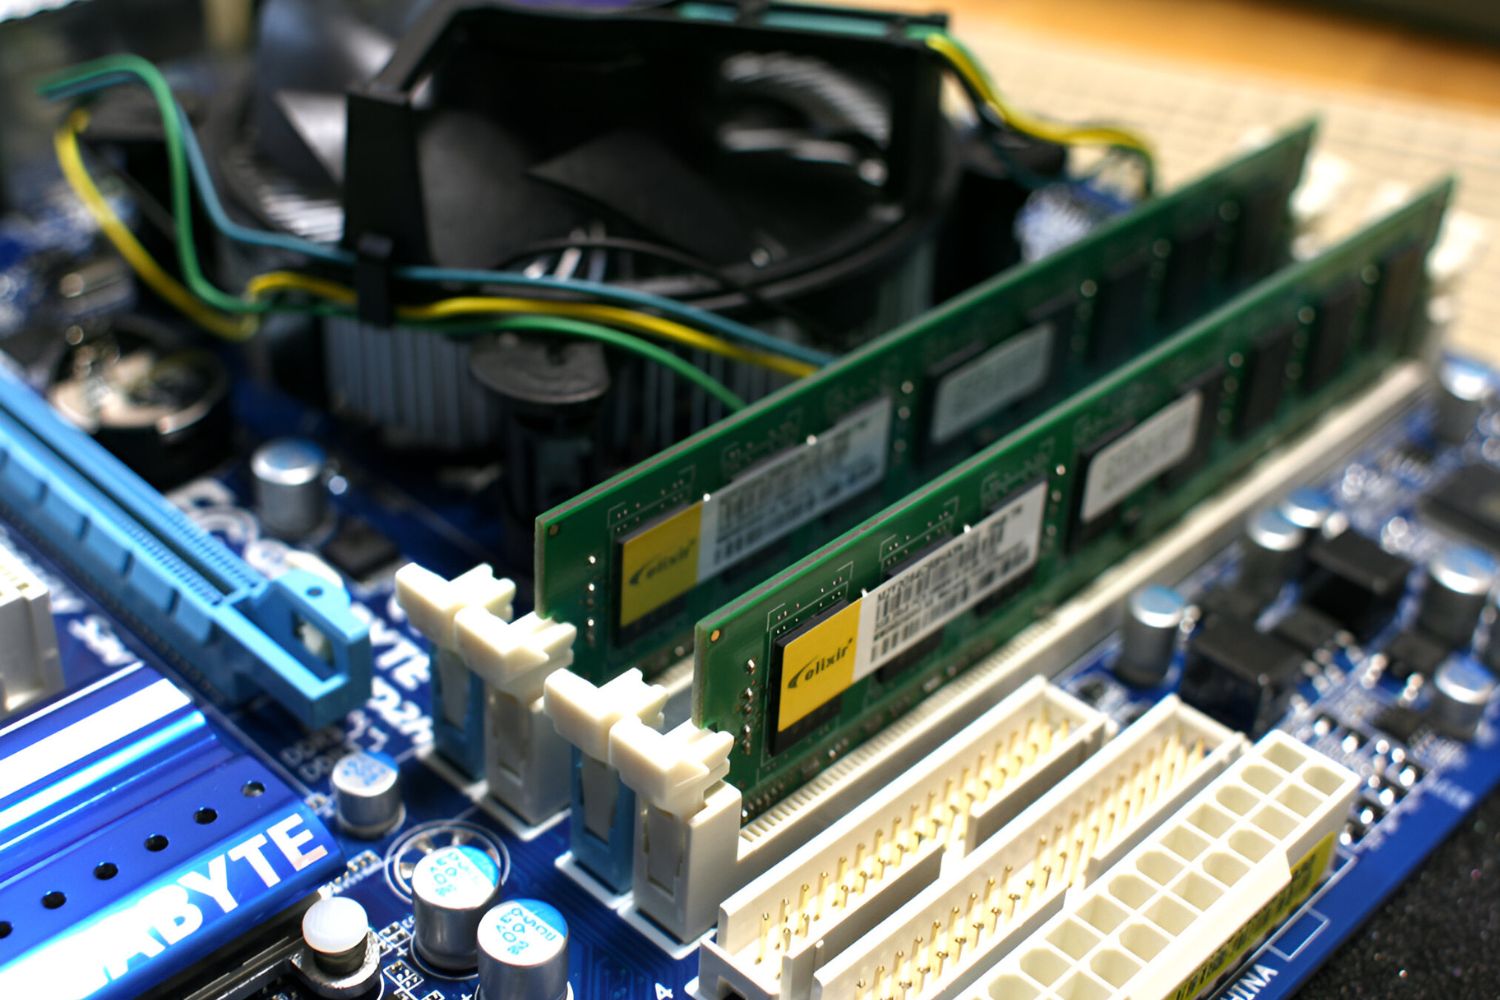
Checking for Faulty RAM Modules
If you suspect that one or more of your RAM modules are faulty, it’s important to perform a thorough check to identify the problematic module. A faulty RAM module can cause various issues, including crashes, system instability, and performance problems. Here’s how you can check for faulty RAM modules:
- Power off your computer and disconnect it from the power source to ensure your safety.
- Open your computer’s casing to access the RAM slots. The location of RAM slots may vary depending on your computer’s make and model, but they are typically found near the CPU.
- Carefully remove all but one RAM module from the slots. Note the orientation of the modules and gently press down on the release clips at each end to release the module.
- Power on your computer with only one RAM module installed. If the computer starts up without any issues, it indicates that this particular module is functioning properly.
- Repeat the process with the remaining RAM modules, testing each one individually by powering on the computer. This will help determine if any of the modules are faulty.
- If you encounter issues with a specific RAM module, such as system crashes or errors, it’s likely that module is faulty. Remove it from the slot and set it aside for further inspection.
Once you have identified a potentially faulty RAM module, visually inspect it for any physical damage, such as bent or corroded pins. If you notice any damage, it’s best to replace the module with a new one. If there is no visible damage, you can try cleaning the module by gently wiping the gold contacts with a soft, lint-free cloth and reinserting it to see if the issue persists.
If you have spare RAM modules or access to a known-working module, you can also use them to substitute the potentially faulty module. By replacing the module and testing the system, you can confirm whether the original module is indeed faulty.
Remember to handle RAM modules with care, keeping them free from static electricity and avoiding excessive force during installation or removal to prevent damage.
Checking for faulty RAM modules is an important step in troubleshooting RAM-related issues. By identifying and replacing faulty modules, you can ensure the stability and optimal performance of your computer system.
Now that we’ve covered how to check for faulty RAM modules, let’s move on to the next section, where we will discuss the importance of updating BIOS and drivers.
Updating BIOS and Drivers
Updating the BIOS (Basic Input/Output System) and drivers on your computer can help resolve compatibility issues, including RAM-related problems. Outdated BIOS and drivers can cause system instability, crashes, and performance issues. Here’s how you can update the BIOS and drivers:
- Identify your computer’s motherboard model. You can find this information in the documentation that came with your computer or by searching for your computer’s model online.
- Visit the website of your motherboard’s manufacturer and navigate to the support or downloads section.
- Find the list of available BIOS updates for your motherboard model. Download the latest version that is compatible with your hardware.
- Follow the instructions provided by the manufacturer to update the BIOS. This may involve creating a bootable USB drive with the BIOS update or using a specific software utility provided by the manufacturer.
- After updating the BIOS, restart your computer to apply the changes.
- To update drivers, start by visiting your computer manufacturer’s website or the website of the individual hardware component manufacturers (such as the graphics card or motherboard).
- Navigate to the downloads or support section and locate the latest drivers for your specific hardware components.
- Download and install the updated drivers following the provided instructions.
- Restart your computer to complete the driver installation process.
Updating the BIOS and drivers ensures that your computer’s hardware and software work harmoniously, minimizing compatibility issues that can negatively impact RAM performance. It’s especially important to update chipset drivers, as these play a crucial role in facilitating communication between the RAM and other system components.
Be cautious when updating the BIOS, as a failed update process can cause irreversible damage to your motherboard. Ensure that you follow the manufacturer’s instructions carefully and only update the BIOS if you are experiencing compatibility or stability issues.
Regularly checking for and installing BIOS and driver updates can help resolve RAM-related problems and ensure optimal system performance. It’s advisable to periodically visit the manufacturer’s websites to stay up to date with the latest updates and compatibility fixes.
Now that we’ve covered the importance of updating the BIOS and drivers, let’s move on to the next section, where we will explore adjusting virtual memory settings.
Adjusting Virtual Memory Settings
Adjusting the virtual memory settings on your computer can help optimize RAM usage and improve overall system performance. Virtual memory, also known as the page file, is a portion of your hard drive or SSD that acts as an extension of physical RAM. Here’s how you can adjust virtual memory settings:
- Right-click on the “This PC” or “My Computer” icon on your desktop or file explorer and select “Properties.”
- In the System Properties window, click on the “Advanced system settings” link on the left-hand side.
- In the System Properties dialog box, go to the “Advanced” tab and click on the “Settings” button under the “Performance” section.
- In the Performance Options dialog box, go to the “Advanced” tab and click on the “Change” button under the “Virtual memory” section.
- Uncheck the box that says “Automatically manage paging file size for all drives.”
- Select your system drive (usually the C: drive) and choose the “Custom size” option.
- Set the initial size (in MB) based on your RAM size, typically around 1.5 times your physical RAM. For example, if you have 8GB of RAM, you might set the initial size to 12288MB (12GB).
- Set the maximum size (in MB) to a larger value, such as 2-3 times your physical RAM size. This allows the page file to expand if necessary.
- Click the “Set” button and then “OK” to save the changes.
- Restart your computer for the new virtual memory settings to take effect.
By adjusting the virtual memory settings, you ensure that your computer has sufficient space on the disk to store temporary data when the physical RAM is nearing its capacity. This prevents performance issues and system crashes that can occur when RAM becomes depleted.
It’s important to note that setting an excessively large virtual memory size can consume valuable disk space. Conversely, setting it too small can limit the performance benefits of virtual memory. Finding the right balance based on your system’s RAM capacity and usage patterns is key.
Regularly monitoring your system’s resource usage and adjusting the virtual memory settings accordingly can help optimize RAM usage and enhance overall system performance.
Now that we’ve discussed adjusting virtual memory settings, let’s move on to the next section, where we will explore removing unnecessary programs and files as a way to resolve RAM issues.
Removing Unnecessary Programs and Files
One effective way to resolve RAM-related issues and optimize your computer’s performance is by removing unnecessary programs and files. Over time, your system can accumulate unused software applications, large files, and temporary files that consume valuable RAM resources. Here’s how you can remove unnecessary programs and files:
- Open the Control Panel on your computer by searching for it in the Start menu or by right-clicking on the Start button and selecting “Control Panel.”
- In the Control Panel, click on “Uninstall a program” or “Programs and Features” to access the list of installed programs.
- Go through the list of programs and identify those you no longer need or use. Select each program and click on the “Uninstall” button to remove it from your system.
- Alternatively, you can use third-party uninstaller software to remove multiple programs simultaneously and ensure a thorough uninstallation process.
- To remove unnecessary files, open File Explorer (Windows Explorer) by pressing the Windows key + E on your keyboard.
- Navigate to your primary drive (usually the C: drive) and select “This PC” or “My Computer.”
- Right-click on the drive and select “Properties.”
- In the Properties window, click on the “Disk Cleanup” button to scan for unnecessary files on your computer.
- Select the file categories you want to clean, such as temporary files, system files, or cache files.
- Click on the “OK” or “Delete Files” button to remove the selected files.
Removing unnecessary programs and files helps free up valuable disk space and reduces the load on your RAM. This allows your system to allocate more memory to essential applications and processes, resulting in improved performance and responsiveness.
Regularly reviewing and uninstalling unused programs, as well as clearing out temporary and unnecessary files, will help ensure your system stays clutter-free and optimized for efficient RAM usage.
Now that we’ve covered removing unnecessary programs and files, let’s move on to the next section, where we will explore the option of upgrading your RAM capacity.
Upgrading RAM Capacity
If you consistently experience low memory issues or your computer struggles to handle the demands of your workload, upgrading your RAM capacity can be an effective solution. Increasing the amount of RAM in your system allows for smoother multitasking, improved performance, and enhanced overall responsiveness. Here’s how you can upgrade your RAM capacity:
- Determine the maximum amount of RAM your computer can support. Check your computer’s documentation or consult the manufacturer’s website for this information.
- Identify the type of RAM that is compatible with your computer. This may include factors such as DDR3, DDR4, or specific speed requirements.
- Purchase RAM modules that meet the necessary specifications. Ensure you are purchasing from a reputable manufacturer or retailer.
- Power off your computer and disconnect it from the power source to ensure your safety.
- Open your computer’s casing to access the RAM slots. Note the orientation and gently press down on the release clips at each end to remove the existing RAM modules.
- Insert the new RAM modules into the empty slots, ensuring they are securely seated. Align the notch on the module with the corresponding notch in the slot.
- Apply gentle and even pressure to both ends of the module until it clicks into place.
- Replace the casing and secure it.
- Power on your computer and verify that the new RAM capacity is recognized by checking the system properties or using third-party software.
Increasing your RAM capacity can significantly improve your computer’s performance, especially when dealing with resource-intensive tasks, such as video editing, 3D rendering, or running multiple virtual machines. It allows for smoother multitasking, faster data access, and reduced reliance on virtual memory, resulting in a more efficient and responsive system.
It’s important to note that while upgrading RAM is generally straightforward, it’s essential to ensure compatibility with your computer’s motherboard and other hardware components. Refer to the motherboard’s specifications or consult with a professional if you are unsure about the compatibility or installation process.
Now that we’ve covered the option of upgrading your RAM capacity, let’s move on to the next section, where we will conclude our guide on solving RAM problems in your PC.
Conclusion
Dealing with RAM problems can be frustrating, but by implementing the troubleshooting steps outlined in this guide, you can effectively diagnose and resolve these issues, improving your computer’s performance and stability. Understanding RAM and its role in your system, checking RAM usage, and recognizing common symptoms of RAM problems are essential first steps in the troubleshooting process.
Restarting your PC can often resolve minor RAM glitches, while running a memory diagnostic test helps identify faulty modules that require replacement. Verifying RAM compatibility ensures that your modules are suitable for your motherboard, and checking for faults allows you to isolate problematic modules. Updating the BIOS and drivers can address compatibility issues, while adjusting virtual memory settings helps optimize RAM usage.
Removing unnecessary programs and files frees up RAM resources, and upgrading your RAM capacity can provide a significant performance boost for demanding tasks. It’s important to research and follow proper installation procedures to ensure compatibility and avoid any potential damage to your hardware.
By employing these troubleshooting steps, you can effectively address RAM problems and enhance the overall performance and responsiveness of your PC.
Remember, if you encounter persistent RAM issues that cannot be resolved through these methods, it may be necessary to consult a professional technician for further assistance.
We hope this guide has provided you with valuable insights and solutions to tackle RAM problems. With a better understanding of RAM and the tools to troubleshoot and resolve issues, you can confidently optimize your computer’s performance.
Thank you for reading, and happy computing!