Introduction
When your PC starts acting up, running diagnostics can help identify and address any hardware or software issues that may be causing the problems. By performing a series of tests, you can pinpoint the exact cause of the issue and take the necessary steps to fix it.
Diagnostics involve assessing various components of your computer, including the hardware, operating system, and internet connectivity. These tests help in identifying problems such as hardware failures, memory issues, software conflicts, malware infections, and internet connectivity problems.
Running diagnostics on your PC is important for several reasons. First, it saves you time and frustration by identifying the root cause of the issue. Instead of randomly troubleshooting different components, diagnostics provide a targeted approach to identifying and solving the problem.
Second, diagnostics can prevent further damage. By detecting hardware issues early on, you can take necessary precautions to prevent more severe damage that could result in data loss or system failure.
Lastly, diagnostics can help optimize your PC’s performance. By identifying and addressing issues that may be slowing down your computer, you can improve its speed and efficiency, resulting in a smoother and more enjoyable computing experience.
In this article, we will guide you through a step-by-step process for running diagnostics on your PC. From checking for hardware problems to testing the internet connection, you’ll learn how to thoroughly examine your computer’s components and software to identify and resolve any issues that may be impacting its performance. So, let’s get started!
Step 1: Check for Hardware Issues
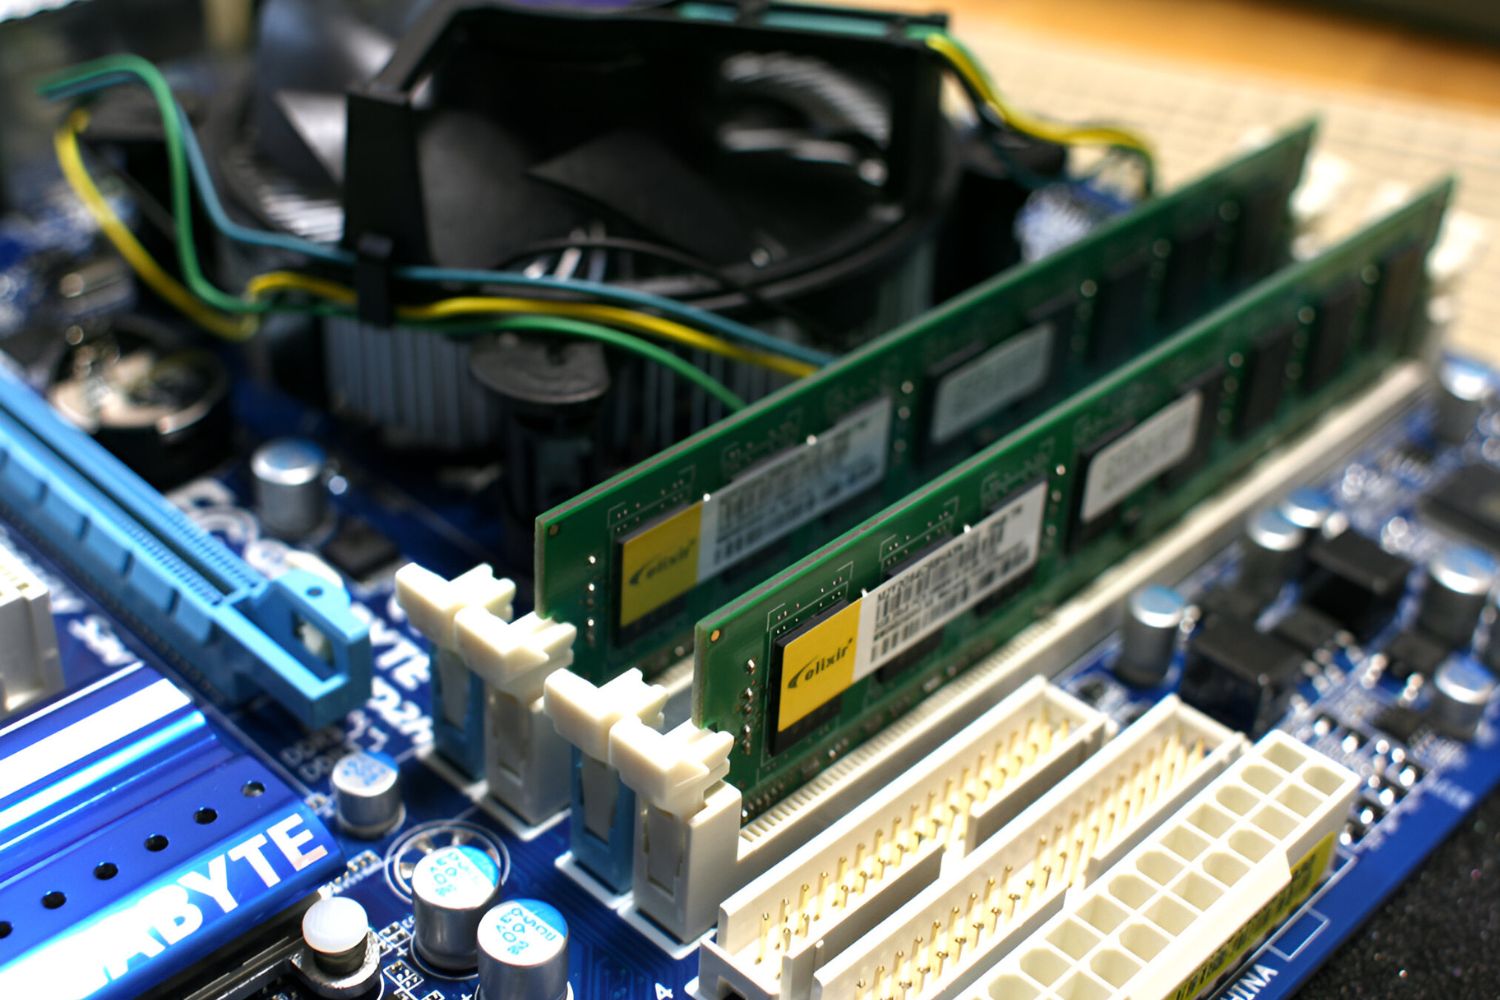
The first step in running diagnostics on your PC is to check for any hardware issues. Hardware problems can lead to a range of symptoms, including crashes, freezes, and performance issues. Here’s how to perform a thorough hardware check:
- Visual Inspection: Start by visually inspecting your computer’s hardware components. Look for any signs of physical damage, such as cracked or bulging capacitors, loose connections, or excessive dust buildup. If you spot any issues, address them accordingly.
- Check Power Supply: Ensure that your computer is receiving adequate power. Check the connections of the power cable and make sure it is securely plugged in. Consider using a different power outlet or power cable to rule out any power-related issues.
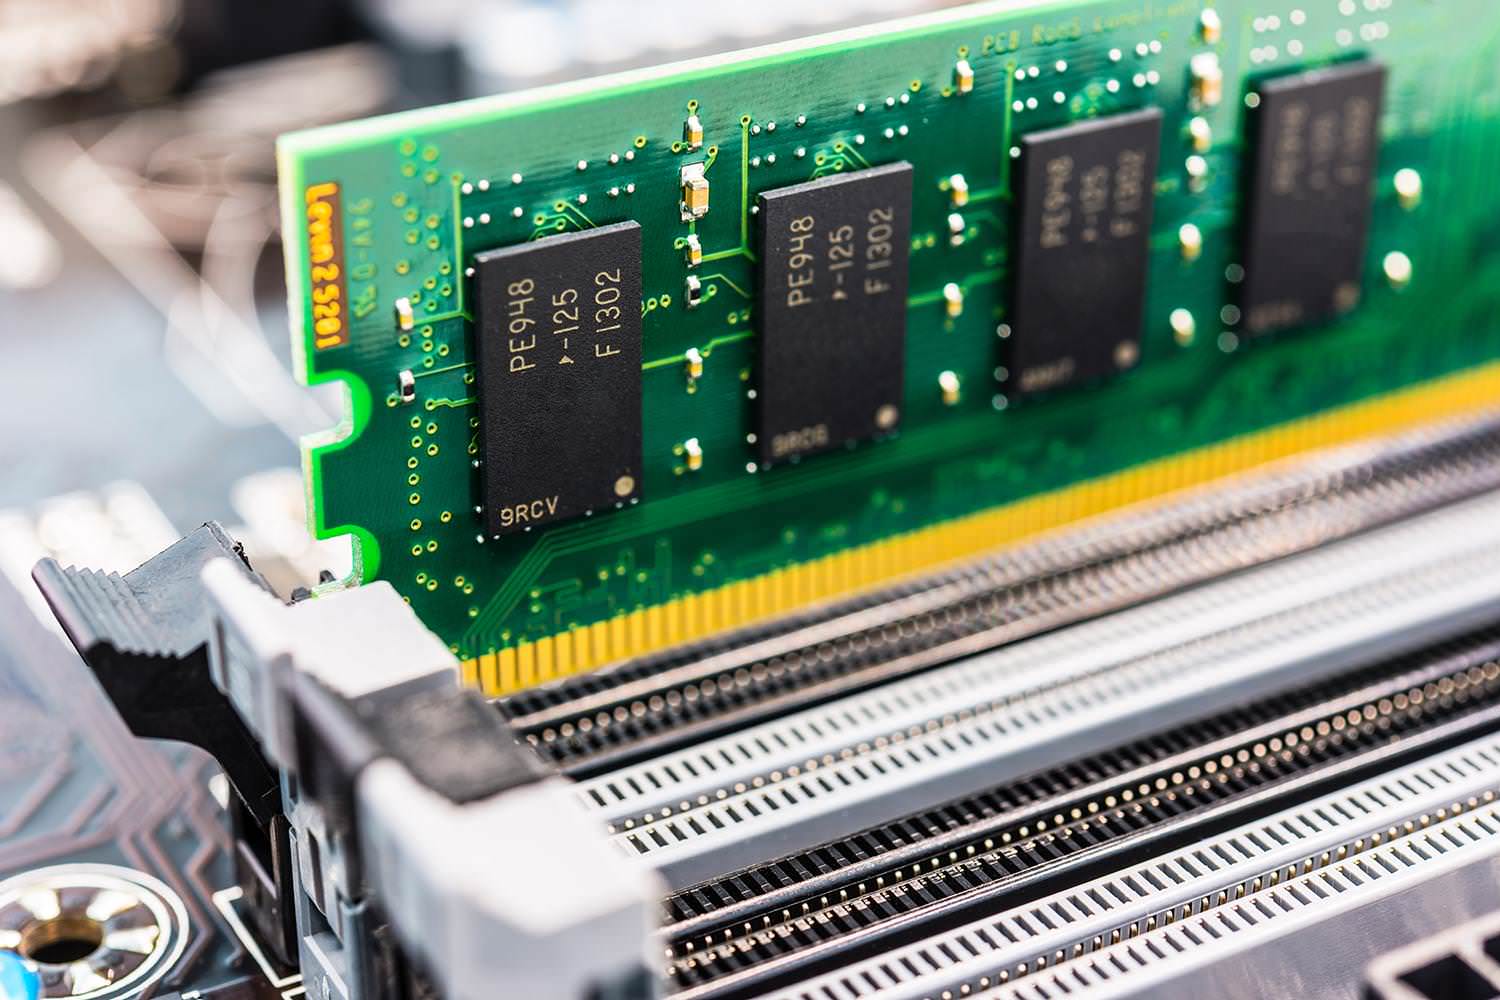
- Test RAM (Random Access Memory): RAM-related issues can cause frequent crashes and system instability. Run a memory diagnostic test to check for any errors. In Windows, you can use the built-in Windows Memory Diagnostic tool or third-party software like Memtest86.
- Inspect Hard Drive: A failing or faulty hard drive can impact your computer’s performance. Check the hard drive for any unusual noises, such as clicking or grinding sounds. Also, run a diagnostic test to identify any bad sectors or other errors. Tools like CHKDSK or third-party software like CrystalDiskInfo can help with this.
- Check CPU Temperatures: Overheating can cause system crashes and performance issues. Monitor your CPU temperatures using software like HWMonitor or Core Temp. If temperatures exceed safe levels, ensure that the CPU fan is functioning properly, and consider cleaning the cooling system or replacing thermal paste if necessary.
- Inspect Graphics Card: If you experience graphical glitches or poor performance in graphics-intensive tasks, check your graphics card. Make sure it is properly seated in the PCIe slot and check for any visible damage. Also, update the graphics card drivers to the latest version.
By checking for hardware issues, you can identify and address any problems that may be causing your PC to malfunction. Once you’ve completed this step, move on to the next section to further diagnose and troubleshoot any software-related issues.
Step 2: Test the Power Supply
A faulty power supply can cause a variety of problems, including random reboots, system crashes, and inadequate power delivery to the components. To ensure that your power supply is functioning properly, follow these steps:
- Use a Power Supply Tester: A power supply tester is a handy tool that allows you to check the voltage output of the power supply. Connect the power supply tester to the 24-pin ATX connector on the motherboard, as well as any other necessary connectors. Turn on the power supply and check the readings for each voltage rail, including 3.3V, 5V, and 12V. A significant deviation from the specified values could indicate a faulty power supply.
- Disconnect Unnecessary Devices: Disconnect any unnecessary devices from the power supply, such as optical drives, external hard drives, or additional graphics cards. This can help identify if an overloaded power supply is causing the issues.
- Swap the Power Supply: If you have access to a spare power supply, consider swapping it with the current one. This will help determine if the power supply is the root cause of the issues. Ensure that the replacement power supply has adequate wattage to support your system’s components.
- Monitor Power Supply Temperatures: Overheating can also affect the performance of a power supply. Use a temperature monitoring software like HWMonitor to check the temperatures of your power supply. Excessive heat could indicate a problem with the cooling fan or other internal components.
Testing the power supply is important as it provides the necessary voltage and current to your PC’s components. If there are any issues with the power supply, it can cause instability and performance problems. Once you’ve tested the power supply, move on to the next section to run a memory diagnostic test to check for any RAM-related issues.
Step 3: Run Memory Diagnostic Test
Memory issues can cause a range of problems, including system crashes, application errors, and overall sluggish performance. To determine if your computer’s RAM is causing the issues, you can run a memory diagnostic test. Follow these steps to perform the test:
- Use Windows Memory Diagnostic Tool: Windows provides a built-in memory diagnostic tool that can effectively test the RAM for errors. To access this tool, open the Start menu, type “Windows Memory Diagnostic,” and select the corresponding result. Choose the option to restart your computer and let the tool run a comprehensive scan of your RAM.
- Test with Memtest86: If you prefer a more in-depth memory test, you can use third-party software like Memtest86. Download the software from the official website and create a bootable USB drive or CD/DVD. Restart your computer and boot from the USB drive or CD/DVD to initiate the memory test. Allow the test to run for several passes to thoroughly analyze your RAM.
- Check for Error Reports: After the memory diagnostic test completes, Windows may provide information about any errors identified during the test. Pay attention to any error codes or messages, as they can help pinpoint the specific problematic areas of your RAM.
By running a memory diagnostic test, you can determine if your RAM is the culprit behind the performance issues. If any errors are detected, consider replacing the faulty RAM module or contacting a professional for further assistance. Once you’ve completed the memory diagnostic test, move on to the next section to conduct a thorough hard drive diagnostic test.
Step 4: Conduct Hard Drive Diagnostic Test
A failing or malfunctioning hard drive can lead to data corruption, slow performance, and frequent system errors. To ensure that your hard drive is functioning properly, it is essential to conduct a comprehensive diagnostic test. Follow these steps to perform a hard drive diagnostic test:
- Use Built-in Windows Tools: Windows provides several built-in tools that can help diagnose and repair hard drive issues. One such tool is CHKDSK (Check Disk), which scans the drive for errors and fixes them if possible. Open the Command Prompt as an administrator and run the command “chkdsk /f /r” followed by the drive letter you want to scan (e.g., C:, D:). Allow the scan to complete and follow any prompts for repair if necessary.
- Third-Party Software: For a more thorough hard drive diagnostic, you can opt for third-party software such as CrystalDiskInfo or HD Tune. These tools provide a detailed analysis of the hard drive’s health, including temperature, read/write error rates, and SMART (Self-Monitoring, Analysis, and Reporting Technology) attributes. Pay close attention to any warnings or critical values that indicate potential hard drive failure.
- Backup Important Data: Before conducting a hard drive diagnostic test, it is always a good idea to back up your important data. If there are any issues with the hard drive, the diagnostic test may further exacerbate them, potentially leading to data loss.
- Consider Professional Help: If the diagnostic test reveals significant errors or indicates an impending hard drive failure, it may be wise to seek professional assistance. Data recovery experts can help salvage your data and advise on the best course of action, such as replacing the hard drive or migrating to a new one.
Regularly conducting a hard drive diagnostic test can help prevent unexpected failures and ensure the reliability and performance of your system. By addressing any issues promptly, you can avoid data loss and minimize downtime. Once you’ve completed the hard drive diagnostic test, move on to the next section to perform a CPU stress test to check for any processor-related problems.
Step 5: Perform CPU Stress Test
The CPU (Central Processing Unit) of your computer is responsible for executing instructions and performing calculations. If your CPU is encountering issues, it can result in system instability, unexpected crashes, and slow performance. To diagnose any CPU-related problems, you can perform a CPU stress test. Follow these steps to conduct a CPU stress test:
- Use Prime95: Prime95 is a popular CPU stress testing tool that can effectively push your processor to its limits. Download Prime95 from the official website and run the software. Select the “Just Stress Testing” option and choose the maximum heat level. Leave the test running for at least 15-30 minutes to thoroughly stress test your CPU.
- Monitor CPU Temperatures: While the CPU stress test is running, use temperature monitoring software like HWMonitor or Core Temp to keep an eye on the CPU temperatures. If the temperatures exceed safe levels (generally above 85-90 degrees Celsius), consider checking the CPU cooling system, cleaning the fan, or applying new thermal paste.
- Watch for System Stability: During the CPU stress test, monitor your system for any crashes or stability issues. If your PC crashes or freezes while the stress test is running, it could indicate a problem with the CPU or other system components.
- Check Processor Speed and Power: After the CPU stress test concludes, check the processor speed and power settings. Ensure that the CPU is running at the correct clock speed and that the power settings are optimized for performance, if desired.
Performing a CPU stress test helps identify any potential issues with your processor, including overheating, inadequate cooling, or unstable performance. If the stress test reveals problems, you may need to address them by cleaning the cooling system, replacing faulty components, or adjusting the system’s power settings. Once you’ve completed the CPU stress test, move on to the next section to check the performance of your graphics card.
Step 6: Check Graphics Card Performance
The graphics card plays a crucial role in rendering graphics and ensuring smooth visuals in games, videos, and graphic-intensive applications. If you’re experiencing graphical glitches, low frame rates, or poor performance in graphics-intensive tasks, it’s essential to check the performance of your graphics card. Follow these steps to assess your graphics card’s performance:
- Update Graphics Card Drivers: Outdated or faulty graphics card drivers can negatively impact performance. Visit the manufacturer’s website or use a driver update utility to ensure that you have the latest drivers installed for your graphics card.
- Run Benchmarking Software: Benchmarking software can assess the performance of your graphics card by conducting various tests and measuring frame rates. Popular benchmarking tools like 3DMark and Unigine Heaven Benchmark can provide detailed insights into your graphics card’s capabilities.
- Monitor GPU Temperatures: Excessive heat can cause the graphics card to throttle its performance, leading to lower frame rates and stability issues. Use temperature monitoring software like GPU-Z or MSI Afterburner to monitor the GPU temperatures during a graphics-intensive task. If the temperatures rise above safe levels (usually above 85-90 degrees Celsius), ensure that the graphics card cooling system is functioning properly and consider cleaning or replacing the cooling components.
- Check for Driver or Compatibility Issues: In some cases, graphics card performance issues can be attributed to driver conflicts or compatibility problems with specific applications. Check for any reported driver issues or compatibility updates from the graphics card manufacturer or consult online forums and communities for possible solutions.
By checking the performance of your graphics card, you can identify any issues that may be causing poor graphical performance or stability problems. Updating drivers, monitoring temperatures, and addressing compatibility issues can help optimize your graphics card’s performance. Once you’ve completed this step, proceed to the next section to run a system file check and ensure the integrity of your operating system files.
Step 7: Run System File Checker
System file corruption can lead to various issues on your computer, including crashes, freezes, and error messages. To ensure the integrity of your operating system files, you can use the System File Checker (SFC) tool built into Windows. Follow these steps to run the System File Checker:
- Open Command Prompt as Administrator: Right-click on the Start button and select “Command Prompt (Admin)” from the menu. If you’re using Windows 10, you can also search for “cmd” in the Start menu, then right-click on “Command Prompt” and choose “Run as administrator.”
- Run the System File Checker: In the Command Prompt window, type “sfc /scannow” and press Enter. The System File Checker will now scan your system files and attempt to repair any corrupted files it finds.
- Wait for the Process to Complete: The scanning and repair process may take some time, depending on the size of your system files and the extent of corruption. Do not interrupt the process, and let it complete uninterrupted.
- Review the Scan Results: After the scan is complete, the System File Checker will provide a report on any corrupted files it found and whether it was able to repair them. If the tool was not able to fix all the issues, you may need to further troubleshoot or seek professional help.
By running the System File Checker, you can repair any corrupted or missing system files, which can help resolve various software-related issues and improve the stability of your operating system. If the scan reveals any problems that the tool couldn’t fix, you may need to consider other troubleshooting methods or consult a professional for further assistance. Once you’ve completed this step, move on to the next section to perform a malware scan on your system.
Step 8: Scan for Malware and Viruses
Malware and viruses can wreak havoc on your computer, leading to performance issues, data loss, and privacy breaches. To ensure the security of your system, it is important to regularly scan for malware and viruses. Follow these steps to perform a thorough malware scan:
- Use Antivirus Software: Ensure that you have reliable antivirus software installed on your computer. Update the antivirus software to the latest version to ensure that it can effectively detect and remove the latest threats.
- Perform a Full System Scan: Open your antivirus software and initiate a full system scan. This scan will examine all files and folders on your computer, searching for any malware, viruses, or suspicious programs that may be present.
- Quarantine or Remove Detected Threats: If the antivirus software detects any malware or viruses, follow the recommended actions to quarantine or remove them from your system. Some antivirus software may also provide the option to automatically perform these actions.
- Consider On-Demand Scanners: In addition to your regular antivirus software, you can also use on-demand scanners like Malwarebytes or HitmanPro to perform secondary scans for enhanced malware detection.
- Update and Secure Your System: Along with scanning for malware, ensure that your operating system and software are up to date with the latest security patches. This helps protect your system from known vulnerabilities that malware could exploit.
Regularly scanning for malware and viruses is essential for maintaining the security and performance of your computer. It helps detect and remove any malicious programs that may be affecting your system. Remember to keep your antivirus software and operating system updated to stay protected against the latest threats. Once you’ve completed this step, move on to the next section to test your internet connection.
Step 9: Test Internet Connection
A stable and reliable internet connection is crucial for various online activities, such as browsing the web, streaming content, and online gaming. If you’re experiencing slow internet speeds or frequent disconnections, it’s important to test your internet connection. Follow these steps to assess the performance of your internet connection:
- Check Network Cables and Connections: Ensure that all network cables are properly connected and that there are no visible signs of damage. Try disconnecting and reconnecting the cables to eliminate any loose connections.
- Restart the Router and Modem: Power cycle the router and modem by unplugging them from the power source, waiting for 30 seconds, and then plugging them back in. This can help refresh the network connection and resolve temporary issues.
- Perform a Speed Test: Use online speed test tools like Ookla’s Speedtest or Fast.com to measure your internet connection’s speed. These tools measure your download and upload speeds as well as ping latency. Compare the results with your internet service provider’s advertised speeds to identify any discrepancies.
- Check for Interference: Other electronic devices or nearby networks can interfere with your Wi-Fi signal, leading to poor internet performance. Move your router away from other devices, especially those that operate on the same frequency, such as cordless phones or microwave ovens.
- Update Router Firmware: Outdated router firmware can cause compatibility issues and degrade internet performance. Visit the manufacturer’s website and check for any available firmware updates for your router. Follow the instructions provided to update the firmware.
- Contact Your Internet Service Provider (ISP): If you consistently experience poor internet performance or frequent disconnections, it may be necessary to contact your ISP. They can perform further tests and troubleshoot any issues with your internet connection or provide guidance on upgrading your plan, if needed.
Testing your internet connection helps identify any issues that may be impacting its performance. By ensuring proper network connections, troubleshooting interference problems, and staying updated with the latest router firmware, you can optimize your internet connection for a smooth online experience. Once you’ve completed this step, move on to the final section for checking for software issues on your PC.
Step 10: Check for Software Issues
Software issues can have a significant impact on the performance and stability of your PC. It’s essential to check for any software-related problems that may be causing issues. Follow these steps to identify and address software issues on your computer:
- Update Software and Drivers: Ensure that all your software and drivers are up to date with the latest versions. These updates often bring bug fixes and performance improvements that can help resolve software-related issues.
- Uninstall Unnecessary Programs: Over time, your computer may accumulate unnecessary software that can consume system resources and slow down performance. Remove any programs that you no longer use or need, especially those that run at startup.
- Disable Startup Programs: Some programs automatically start with your computer, which can cause slow boot times and affect system performance. Use the Task Manager or a third-party startup manager to disable unnecessary startup programs.
- Clean Temporary Files: Temporary files and caches can accumulate over time, taking up valuable disk space and potentially causing performance issues. Use disk cleanup tools like CCleaner to remove temporary files and clean the system.
- Check for Software Conflicts: Conflicting software can lead to crashes and system instability. Look for any recently installed programs that might be conflicting with existing software. Consider uninstalling or disabling conflicting software to resolve the issues.
- Perform a Clean Boot: A clean boot starts your computer with only essential services and drivers, eliminating any software conflicts. Follow the instructions from Microsoft’s support website to perform a clean boot and identify if a third-party program is causing the issues.
- Run System Restore: If you recently encountered software issues and made changes to your system, such as installing a new program or driver, performing a system restore can revert your computer back to a previous stable state.
- Reinstall Operating System (if necessary): If none of the above steps resolve the software issues, you may consider reinstalling your operating system as a last resort. This will provide a fresh start and eliminate any lingering software problems.
Checking for software issues is crucial to ensure the smooth functioning of your PC. By updating software, removing unnecessary programs, and troubleshooting conflicts, you can optimize your system’s performance and resolve any software-related problems. Once you’ve completed this final step, you have gone through a comprehensive set of diagnostics to identify and address any hardware or software issues that may be affecting your PC’s performance.
Conclusion
Running diagnostics on your PC is essential for identifying and resolving hardware and software issues that may be impacting its performance. By following the step-by-step process outlined in this guide, you can effectively troubleshoot and address problems that can cause crashes, freezes, slow performance, and other frustrating issues.
Starting with checking for hardware issues, such as power supply problems, memory errors, and hard drive reliability, ensures that the foundation of your PC is stable. Testing the CPU, inspecting the graphics card, and running a system file check further narrows down the potential causes of any problems. Additionally, scanning for malware and viruses helps safeguard your system and improves overall security.
Checking your internet connection and testing its performance allows you to ensure a smooth online experience, while examining software-related issues helps optimize your PC’s performance and resolve any conflicts or compatibility problems.
By diligently following these diagnostic steps, you’ll be able to identify and address a wide range of issues that may be affecting your PC. Remember to regularly update your software and drivers, perform routine maintenance tasks, and keep your system secure to maintain optimal performance.
Diagnosing and resolving computer issues can be complex at times, and if you encounter challenges beyond your expertise, it’s recommended to seek professional help or consult with technology experts.
Take the time to regularly run diagnostics on your PC to ensure its smooth operation, maximize its performance, and prolong its lifespan. Doing so will enable you to enjoy a seamless computing experience and avoid unnecessary frustrations.