Introduction
Shipping a graphics card without its original box can be a daunting task for many. Without proper packaging, there is a risk of damage during transit, which can lead to costly repairs or even render the card unusable. However, there are times when you might need to ship a graphics card without its original box, such as when selling it separately or when moving to a new location.
In this guide, we will walk you through the steps to safely ship a graphics card without its box. We will provide you with valuable tips and techniques to ensure that your graphics card reaches its destination unharmed.
While it is always recommended to have the original packaging for shipping electronic components, sometimes it is not feasible or available. Whether you are a computer enthusiast or a seller looking to ship a graphics card without its original box, this guide will equip you with the knowledge you need to package and ship it securely.
Keep in mind that shipping a graphics card without its original box requires extra care and attention. By following the steps outlined in this guide, you can reduce the risk of damage and have peace of mind knowing that your valuable graphics card is well-protected during transit.
Why Ship a Graphics Card Without a Box?
There are several reasons why you might find yourself needing to ship a graphics card without its original box. Understanding these reasons can help you determine the importance of proper packaging and shipping methods. Here are a few common scenarios:
1. Selling Separately: When selling a graphics card, some buyers may not require the original box. In such cases, shipping without the box can help save on shipping costs and provide a more streamlined experience for both the buyer and the seller.
2. Moving or Transporting: If you are moving to a new location or need to transport your computer system, removing the graphics card from its box can help save space and reduce the overall bulk of your belongings during the move.
3. Box Damage: In some cases, the original box of a graphics card may be damaged or unavailable. Shipping a graphics card without the box becomes a necessity in such situations.
While there may be valid reasons for shipping a graphics card without its original box, it is important to note that proper packaging is crucial to protect it from potential damage during transit. Without the protection of the box, the graphics card is more vulnerable to shocks, impacts, and vibrations that can occur during shipping.
By understanding the reasons for shipping a graphics card without its original box, you can make informed decisions about the packaging and shipping methods required to ensure safe delivery. The following sections will provide you with step-by-step instructions on how to properly package and ship a graphics card without its box, minimizing the risk of damage.
Materials Needed
Before you begin packaging and shipping a graphics card without its original box, gather the necessary materials to ensure a secure and protected shipment. Here’s a list of materials you’ll need:
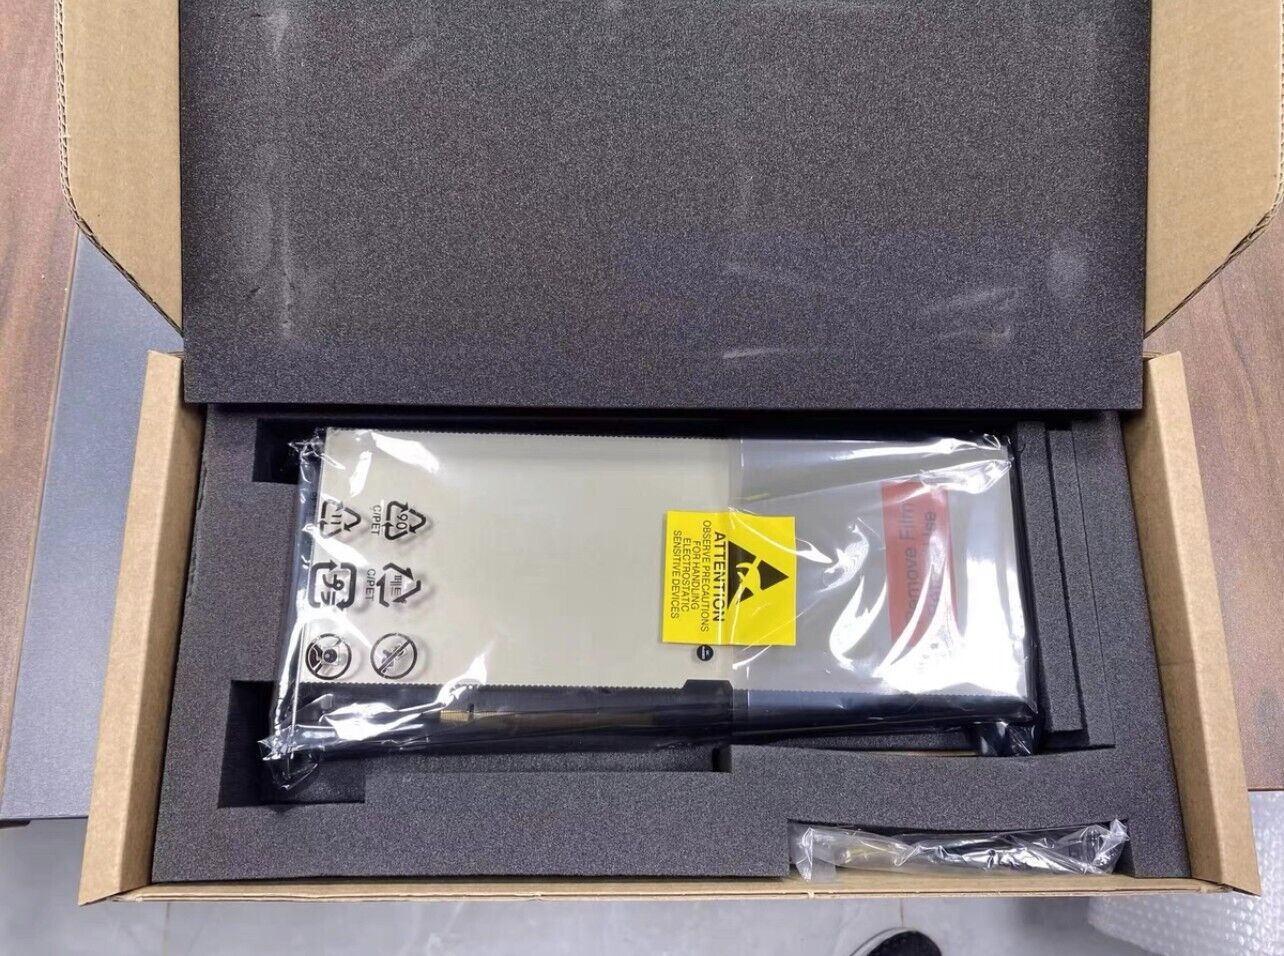
1. Anti-Static Bag: An anti-static bag is crucial for safely storing the graphics card. It helps protect the card from static electricity, which can cause damage. Make sure the bag is large enough to accommodate the size of the graphics card.
2. Bubble Wrap: Bubble wrap provides additional cushioning and protection during transit. Wrap the graphics card carefully to prevent any impact or shock damage.
3. Packing Peanuts or Foam Inserts: These materials add an extra layer of cushioning to protect the graphics card. Use packing peanuts or foam inserts to fill any empty spaces in the shipping box to prevent the card from shifting during transit.
4. Shipping Box: Find a sturdy and appropriately sized shipping box that can accommodate the graphics card and additional packaging materials. Ensure the box is strong enough to withstand the rigors of shipping.
5. Packing Tape: Use strong packing tape to seal the shipping box securely. Avoid using regular scotch tape, as it may not provide adequate strength for shipping.
6. Markers: Make sure to have markers on hand to address and label the package clearly. This will help ensure that the package reaches the intended destination without any confusion.
7. Fragile Labels: Fragile labels act as a visual reminder to handle the package with care. Affix these labels prominently on the shipping box to alert the shipping carrier and anyone involved in handling the package.
Take the time to gather these materials before initiating the packaging process. Having all the necessary items at hand will make the process smoother and help ensure that your graphics card is well-protected during transit.
Step 1: Preparing the Graphics Card
Properly preparing the graphics card before packaging is essential to ensure its safety during shipping. Follow these steps to prepare the graphics card:
1. Remove the Card: Carefully remove the graphics card from your computer system. Power off your computer and disconnect any cables or connections attached to the card. If your card is secured with screws, use a screwdriver to unscrew them and gently remove the card from its slot.
2. Clean the Card: Before packaging, it’s a good idea to clean the graphics card to remove any dust or debris. Use a can of compressed air or an anti-static brush to gently clean the card’s surface, heatsink, and fans. Avoid using any liquids or abrasive cleaning materials, as they can damage the card.
3. Check for Physical Damage: Examine the graphics card for any visible physical damage such as bent pins, cracked components, or loose connections. If you notice any damage, it’s best to seek professional assistance or contact the manufacturer for guidance.
4. Place in an Anti-Static Bag: Once the graphics card is clean and inspected, carefully place it in an anti-static bag. These bags are specially designed to protect delicate electronic components from static electricity. Ensure that the card is snugly fit inside the bag but not excessively tight, as this can cause pressure on the card.
By properly preparing the graphics card, you minimize the risk of damage during transit. The next step is to wrap the graphics card securely to provide an extra layer of protection. Follow the next section for detailed instructions on wrapping the graphics card.
Step 2: Wrapping the Graphics Card
Once the graphics card is prepared, the next step is to wrap it securely to provide additional protection during shipping. Follow these steps to wrap the graphics card:
1. Take a sheet of bubble wrap: Lay a sheet of bubble wrap on a clean, flat surface. Ensure that the size of the bubble wrap is sufficient to cover the entire graphics card.
2. Place the graphics card on the bubble wrap: Gently place the graphics card in the center of the bubble wrap. Make sure that the card is positioned horizontally, with the components facing up.
3. Wrap the graphics card: Fold the sides of the bubble wrap over the graphics card, covering it completely. Take care to ensure that there are no gaps or exposed areas.
4. Secure the bubble wrap: Use packing tape to secure the bubble wrap around the graphics card. Apply tape along the edges to ensure that the bubble wrap stays in place during transit.
5. Double wrap for extra protection: If desired, you can double wrap the graphics card with an additional layer of bubble wrap for added cushioning.
By wrapping the graphics card in bubble wrap, you provide a protective barrier against potential impact or shock during shipping. The next step is to add cushioning material to further safeguard the card. Move on to the next section for detailed instructions on adding cushioning material.
Step 3: Adding Cushioning Material
Adding cushioning material is crucial to further protect the wrapped graphics card from any movement or impact during transit. Follow these steps to add cushioning material:
1. Prepare the shipping box: Open the shipping box and ensure that it is clean and free from any debris. If necessary, you can use a soft cloth or a vacuum cleaner to remove any dust or particles.
2. Place packing peanuts or foam inserts at the bottom: Fill the bottom of the shipping box with packing peanuts or foam inserts. This will create a cushioned layer for the graphics card to rest on.
3. Position the wrapped graphics card: Gently place the wrapped graphics card on top of the cushioning material in the shipping box. Ensure that the card is centered and well-positioned, with adequate space around it.
4. Fill any empty spaces: Fill any empty spaces around the graphics card with additional packing peanuts or foam inserts. The goal is to prevent any movement or shifting of the card during shipping.
5. Test for stability: Gently shake the shipping box to ensure that the graphics card does not move around excessively. If there is any movement, add more cushioning material until the card is secure and stable.
By adding cushioning material, you create a protective buffer that absorbs shocks and minimizes the risk of damage during shipping. The next step is to secure the graphics card in place to prevent it from moving during transit. Proceed to the next section for instructions on securing the graphics card.
Step 4: Securing the Graphics Card
Securing the graphics card in the shipping box is vital to prevent any movement or shifting during transit. Follow these steps to secure the graphics card:
1. Close the shipping box: Once the graphics card is in place, close the shipping box securely. Ensure that the flaps are folded down and aligned properly.
2. Seal the shipping box with packing tape: Use strong packing tape to seal all edges and seams of the shipping box. Apply tape along the top and bottom flaps, as well as along the sides, to reinforce the box’s integrity.
3. Label the package as “Fragile”: Using a marker, clearly label the shipping box as “Fragile”. This will help alert the shipping carrier and anyone else involved in handling the package to exercise caution during transit.
4. Add additional markings: If there are any specific handling instructions or special considerations for the graphics card, such as “This side up” or “Do not stack,” make sure to label the box accordingly.
5. Secure the shipping label: Place the shipping label on the top of the package, ensuring that it is visible and legible. Double-check the accuracy of the recipient’s address and contact information before affixing the label.
By securing the graphics card and properly labeling the package, you reduce the chances of damage during transit. The next step is to choose a suitable shipping carrier to transport the package. Continue reading the following section for guidance on selecting a shipping carrier.
Step 5: Addressing and Labeling the Package
Properly addressing and labeling the package is essential to ensure that it reaches its intended destination without any issues. Follow these steps to address and label the package:
1. Double-check the recipient’s address: Ensure that you have the correct and complete address of the recipient. Verify the street name, building number, apartment or suite number (if applicable), city, state, and zip code. Mistakes in the address can result in delayed or misdirected shipments.
2. Write the recipient’s address on the shipping box: Using a marker or a pen with waterproof ink, write the recipient’s address legibly and clearly on the shipping box. Write it on a prominent area, preferably on the top or one of the sides of the box.
3. Add a return address: Include your own return address on the shipping box. This is important in case the package needs to be returned or if there are any delivery issues.
4. Affix any required shipping labels: If there are any shipping labels provided by the carrier, such as barcodes or tracking labels, make sure to affix them in the appropriate locations on the shipping box. Follow any specific instructions provided by the carrier regarding label placement.
5. Declare value for insurance (if applicable): If you have opted for insurance coverage for the package, fill out any necessary forms or customs declarations to declare the value of the graphics card. This will facilitate the claims process in case of loss or damage.
6. Consider adding additional precautions: If you have any special instructions for the carrier, such as requesting a signature upon delivery or specifying a preferred delivery date, communicate these to the carrier or note them on the package.
By addressing and labeling the package correctly, you ensure that it is properly routed and handled by the shipping carrier. The next step is to choose a suitable shipping carrier for your package. Continue reading the following section for guidance on selecting the right shipping carrier.
Step 6: Choosing a Shipping Carrier
Choosing the right shipping carrier is crucial to ensure that your package is handled carefully and reaches its destination in a timely manner. Consider the following factors when selecting a shipping carrier:
1. Reputation and Reliability: Research and compare the reputation and reliability of different shipping carriers. Look for carriers with a track record of safe and on-time deliveries.
2. Insurance Options: Check if the shipping carrier offers insurance coverage for your package. This can provide added protection in case of loss, damage, or theft during transit. Evaluate the insurance policies, coverage limits, and costs offered by different carriers.
3. Tracking Services: Look for shipping carriers that provide reliable tracking services. This allows you and the recipient to monitor the progress of the package and ensures transparency in the delivery process.
4. Delivery Options: Consider the delivery options offered by different carriers. Look for carriers that offer flexibility in terms of delivery speed, options for signature confirmation, and the ability to schedule delivery at convenient times.
5. Cost: Compare the shipping rates and fees of different carriers. Take into account factors such as distance, package weight, and any additional services required. Balancing cost with the level of service and reliability is crucial in making the right choice.
6. Additional Services: Consider any additional services that the shipping carrier may offer, such as package pickup, drop-off locations, or customs clearance assistance for international shipments.
By evaluating these factors, you can make an informed decision about the most suitable shipping carrier for your package. Once the carrier is selected, proceed with the necessary steps to insure your package (if desired) and track the shipment. The following sections will guide you through these steps.
Step 7: Insuring the Package (Optional)
Insuring your package is an optional step, but it can provide you with peace of mind and financial protection in case of loss or damage during transit. Follow these steps to insure your package:
1. Evaluate the value of the graphics card: Determine the value of the graphics card that you are shipping. Consider the original purchase price, current market value, and any additional accessories or components included.
2. Check the shipping carrier’s insurance options: Review the insurance options provided by the shipping carrier you have chosen. Different carriers may offer varying coverage limits and premiums.
3. Calculate the insurance cost: Calculate the cost of insuring your package based on its value and the carrier’s insurance rates. Consider whether the added cost of insurance is worth the potential risk.
4. Complete the necessary forms: If you decide to insure your package, fill out any required forms or declarations provided by the shipping carrier. Provide accurate information about the contents and value of the package.
5. Pay the insurance fee: Make the necessary payment for the insurance coverage. Some carriers may include the insurance fee in the overall shipping cost, while others may require a separate payment.
6. Keep documentation and receipts: Ensure that you keep copies of all documentation related to the insurance coverage for your records. This includes receipts, insurance forms, and any correspondence with the shipping carrier.
Insuring your package provides an extra layer of protection and can be beneficial if you are shipping a high-value graphics card. However, it is important to note that insurance coverage may have certain limitations and exclusions. Review the terms and conditions provided by the shipping carrier before making a decision.
After insuring your package, the next step is to track the shipment during transit. Proceed to the following section for guidance on tracking your package.
Step 8: Tracking the Shipment
Tracking your shipment is crucial to stay informed about its progress and ensure a smooth delivery process. Follow these steps to track the shipment of your graphics card:
1. Obtain the tracking number: When you ship the package, the shipping carrier will provide you with a unique tracking number. This number is essential for tracking the progress of your shipment.
2. Track online: Visit the website of the shipping carrier and navigate to the “Track Shipment” or “Track Package” section. Enter your tracking number in the designated field and submit the request to view the shipment’s status.
3. Check for updates: Once you initiate the tracking process, the carrier’s website will display information about the package’s current location, expected delivery date, and any recent updates. Check regularly for updates on the status of your shipment.
4. Set up notifications: Some carriers allow you to set up notifications via email or SMS to receive updates about your shipment. Consider enabling these notifications to stay informed about any changes or delays during transit.
5. Contact customer service if needed: If you have concerns or questions about the delivery status or any issues with your shipment, contact the customer service department of the shipping carrier. They can provide additional information and address any concerns you may have.
Tracking your shipment provides valuable insight into the progress of your package and allows you to anticipate its arrival. Monitor the tracking information closely to ensure that there are no unexpected delays or issues during transit.
Once the package is safely delivered to its destination, ensure that the recipient inspects the graphics card for any damage. If any issues are discovered, the recipient should follow the necessary steps to file a claim with the shipping carrier for compensation or reimbursement.
By following these steps, you can ensure a smooth and secure shipping process for your graphics card, from packaging to delivery.
Conclusion
Shipping a graphics card without its original box requires careful planning and attention to detail. By following the steps outlined in this guide, you can safely package and ship your graphics card, ensuring its protection during transit.
Beginning with preparing and cleaning the graphics card, wrapping it securely with bubble wrap, adding cushioning material in the shipping box, and securing it to prevent any movement, each step is essential in safeguarding the graphics card. Addressing and labeling the package correctly, choosing a suitable shipping carrier, and considering optional insurance coverage offer additional layers of protection and peace of mind.
Tracking the shipment allows you to stay informed about its progress and ensure a smooth delivery process. By monitoring the tracking information and addressing any concerns promptly, you can mitigate any potential issues and ensure successful delivery.
Remember, while shipping a graphics card without its original box may be necessary at times, having the original packaging is always recommended. The original box provides optimal protection designed specifically for the graphics card.
By taking the necessary precautions and following the steps outlined in this guide, you can minimize the risk of damage to your graphics card during shipping. Whether you are selling a graphics card or relocating, proper packaging and shipping techniques will ensure that your valuable graphics card reaches its destination safely, ready for use or sale.
Stay organized, use quality packaging materials, choose a reliable shipping carrier, and consider insurance coverage when appropriate. With these tips, you can confidently ship your graphics card without its original box, knowing that you have taken the necessary steps to protect your investment.