Introduction
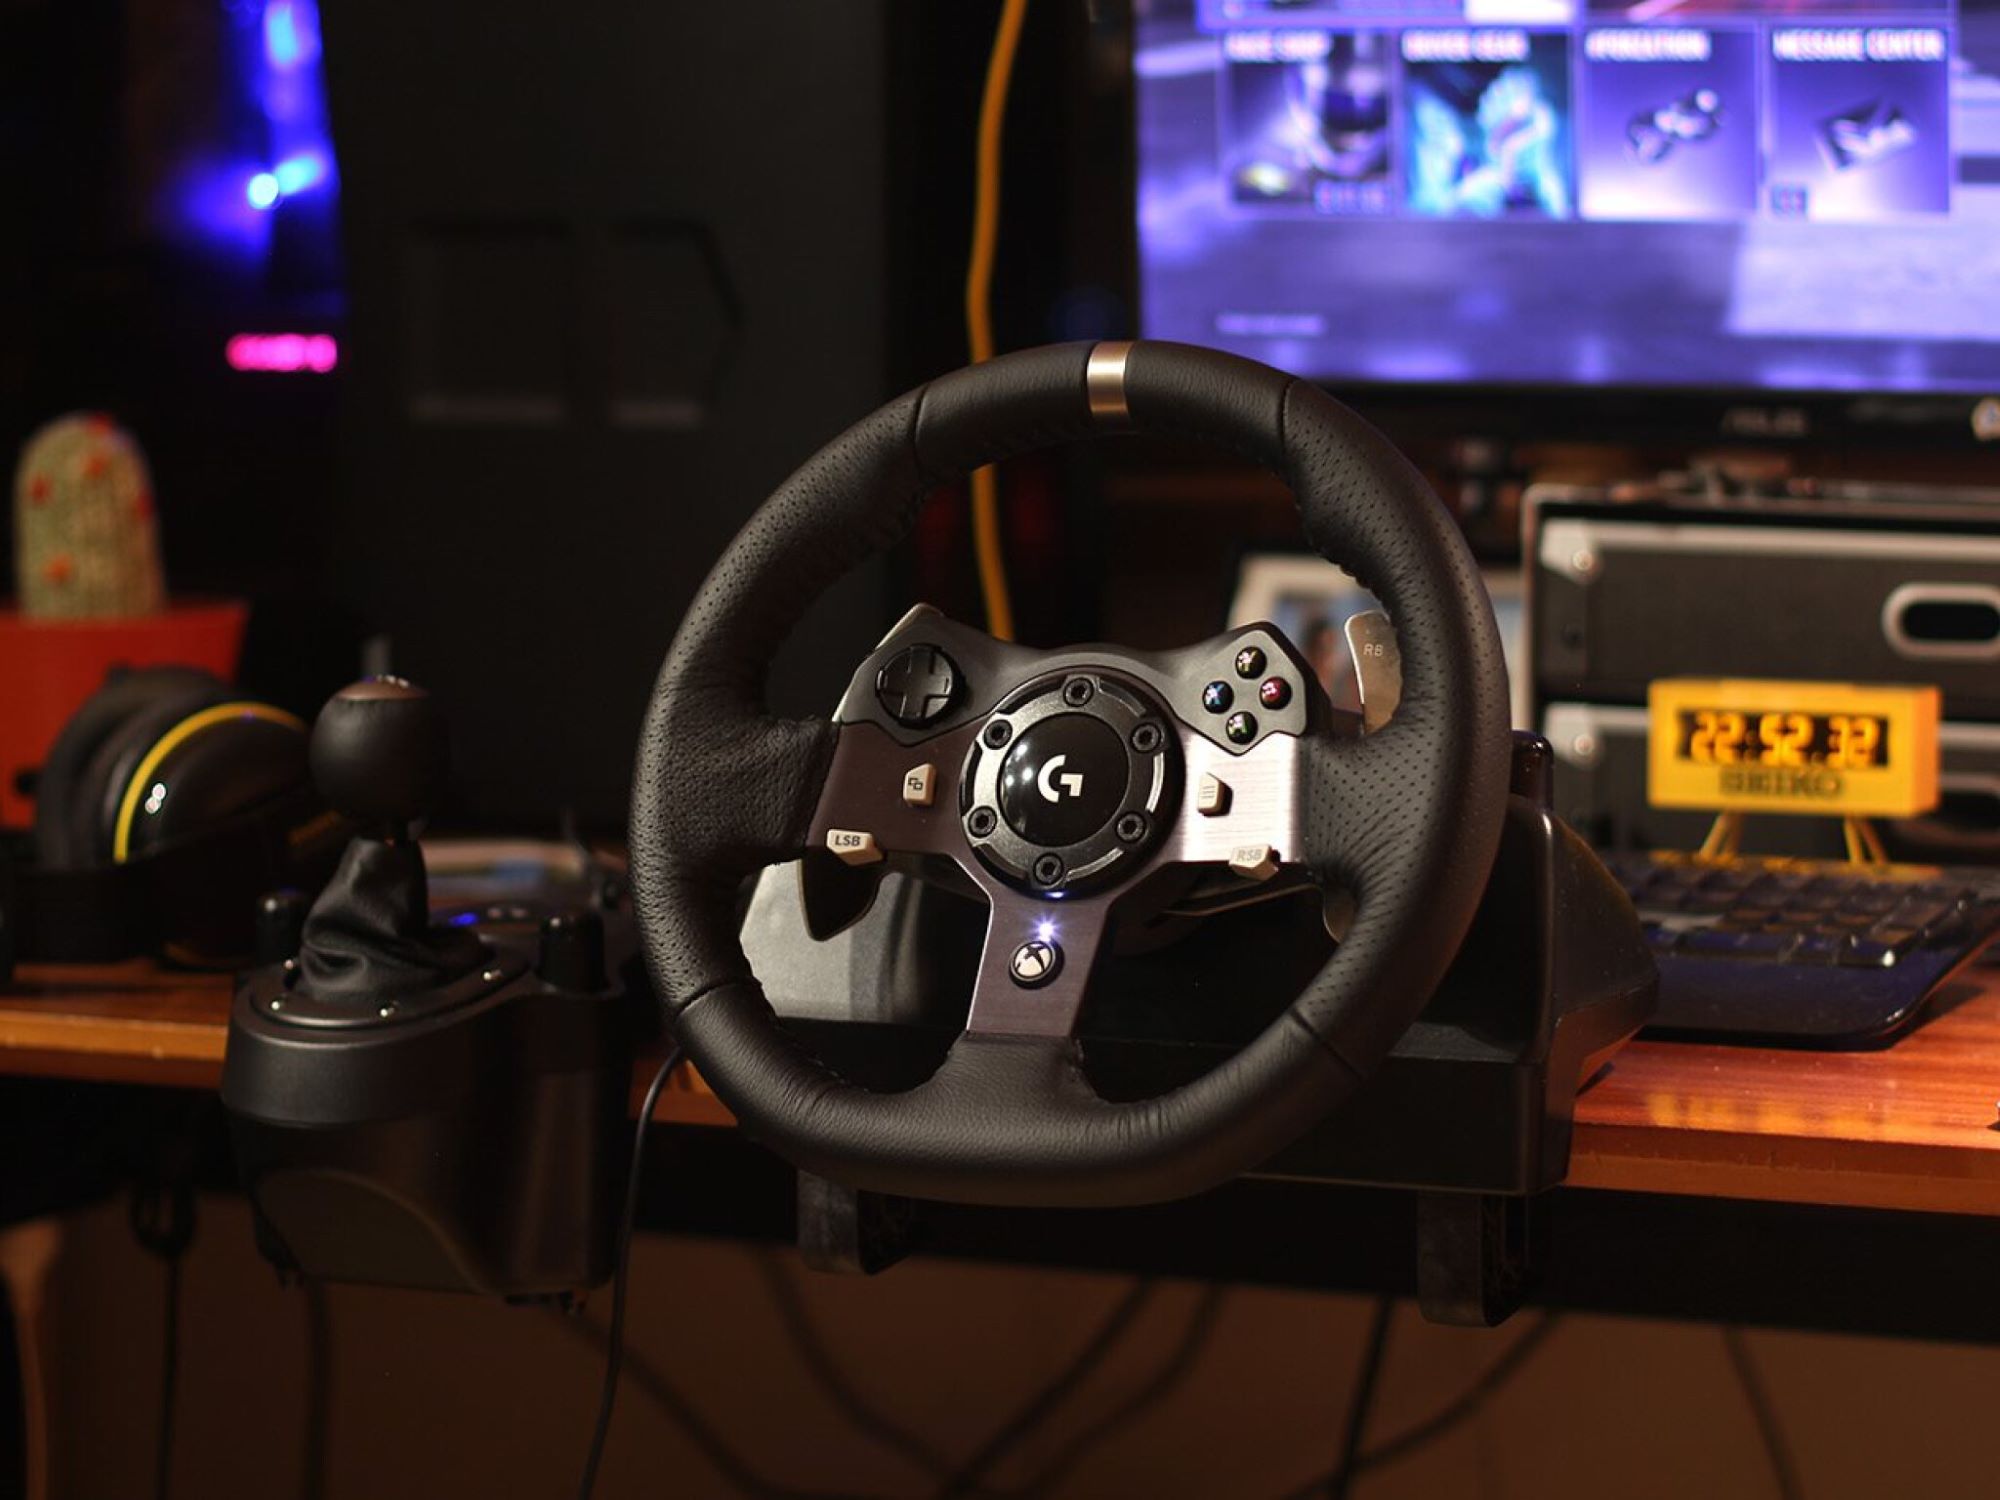
Welcome to our guide on how to set up the Logitech G920 racing wheel on your Xbox One console. The Logitech G920 is a popular choice among racing enthusiasts for its high-quality construction and impressive performance. Whether you’re a casual gamer or a dedicated racing enthusiast, getting your G920 wheel up and running on your Xbox One is a crucial step towards an immersive and authentic racing experience.
In this article, we will walk you through the simple and straightforward process of setting up your Logitech G920 on your Xbox One. We will cover everything from connecting the wheel to installing the necessary software and calibrating it for optimal performance. So, grab your G920 wheel, get your Xbox One console ready, and let’s get started!
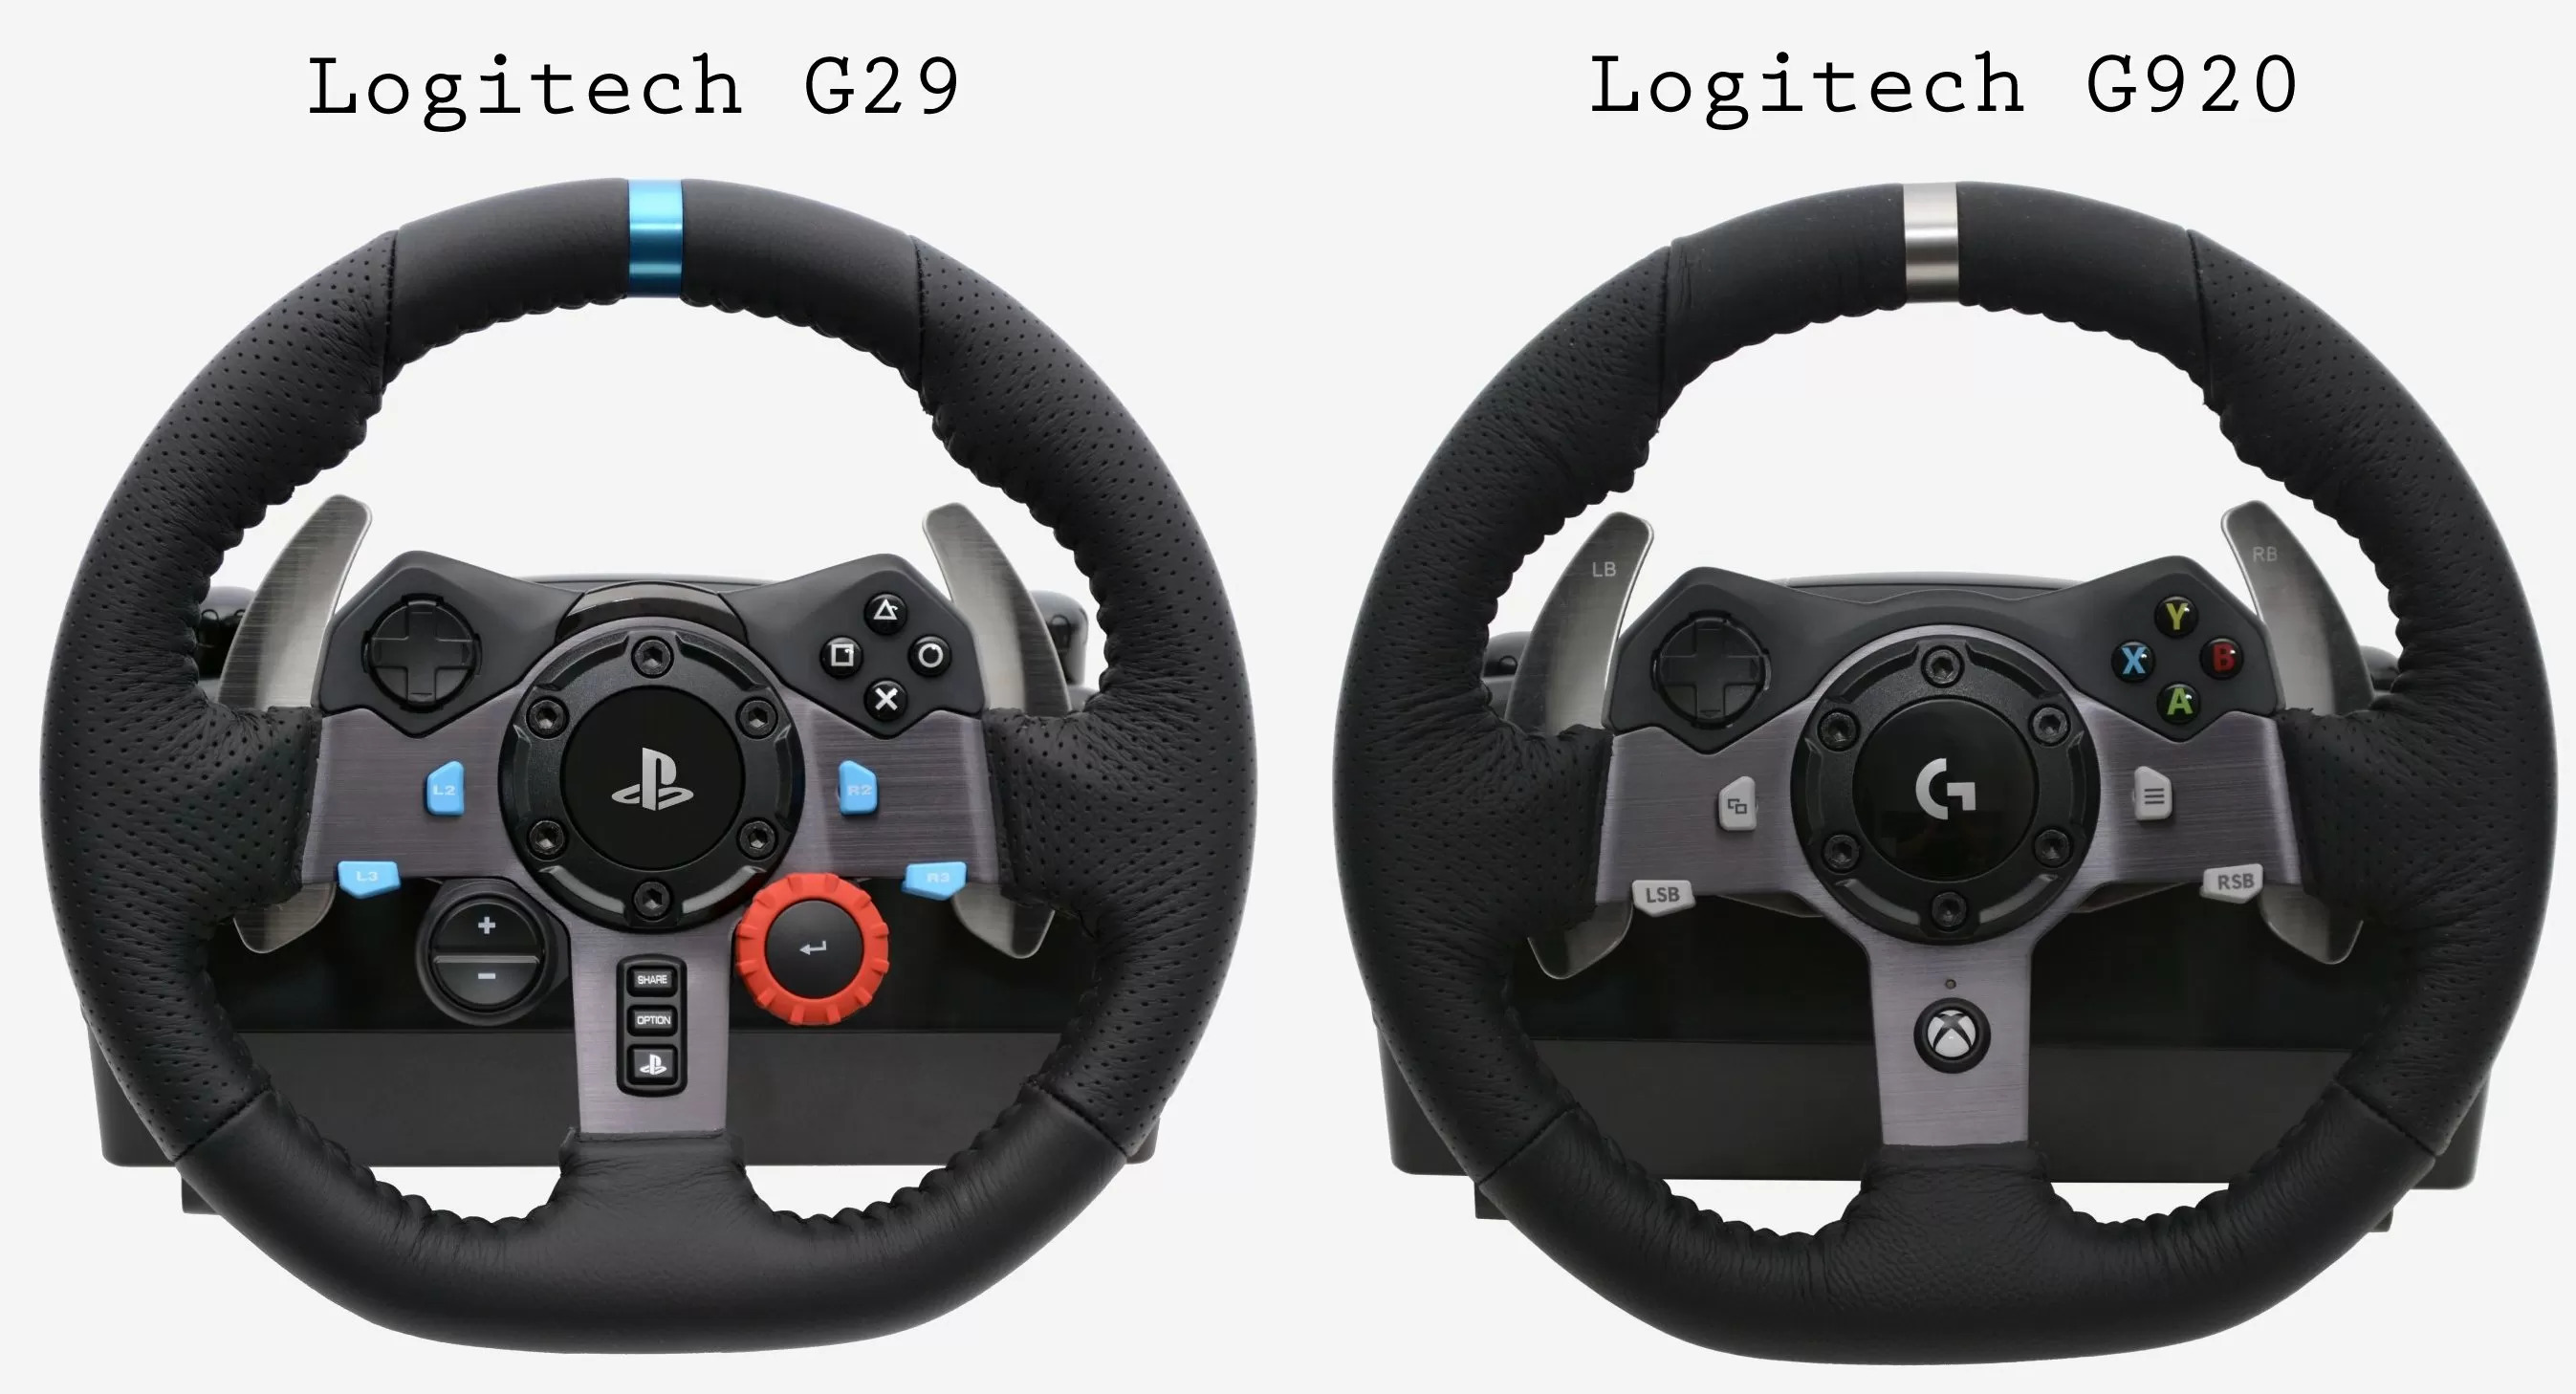
Before we dive into the setup process, it’s important to note that the Logitech G920 is specifically designed for Xbox One and PC gaming. This means that it offers seamless compatibility and optimized performance when used with an Xbox One console. So, if you’re an Xbox gamer looking to enhance your racing experience, the G920 is the perfect choice for you.
Now that you have a better understanding of what the Logitech G920 is and its compatibility with Xbox One, let’s proceed to the first step of the setup process: connecting the G920 wheel to your Xbox One console.
Step 1: Connecting the G920 Wheel to the Xbox One
Before you can start racing with your Logitech G920 on your Xbox One, you’ll need to connect the wheel to your console. Follow these simple steps to establish a connection:
- Locate the USB cable that came with your Logitech G920 wheel. One end of the cable has a USB Type-A connector, while the other end has a proprietary connector specifically designed for the G920 wheel.
- Insert the USB Type-A end of the cable into an available USB port on your Xbox One console.
- Plug the proprietary connector into the back of the G920 wheel.
- Ensure that the power cable of the G920 wheel is connected securely to an electrical outlet.
- Turn on your Xbox One console and wait for it to boot up.
Once your G920 wheel is connected to your Xbox One console, the system will detect the wheel and automatically install any necessary drivers. This process may take a few moments, so be patient.
It’s worth mentioning that the G920 wheel requires a stable power source to function properly. Therefore, it’s essential to keep the power cable securely connected during gameplay to avoid any potential disruptions.
With the G920 wheel successfully connected to your Xbox One console, you’re now ready to move on to the next step: installing the Logitech G Hub software.
Step 2: Installing the Logitech G Hub Software
In order to customize and optimize your Logitech G920 wheel settings, you’ll need to install the Logitech G Hub software. This software allows you to fine-tune various aspects of your wheel, such as button assignments, sensitivity, and force feedback options. Follow these steps to install the Logitech G Hub software:
- Using your Xbox controller, navigate to the Xbox Store on your console.
- In the search bar, type “Logitech G Hub” and select the Logitech G Hub app from the search results.
- Select “Install” to begin the installation process.
- Wait for the software to download and install on your Xbox One.
- Once the installation is complete, you can launch the Logitech G Hub software from your Xbox dashboard.
It’s important to note that the Logitech G Hub software is specifically designed for the Logitech G series of devices, including the G920 wheel. It offers a user-friendly interface where you can customize and save multiple profiles for different games or racing scenarios.
With the Logitech G Hub software installed, you’re now ready to proceed to the next step: configuring the wheel settings for optimal performance.
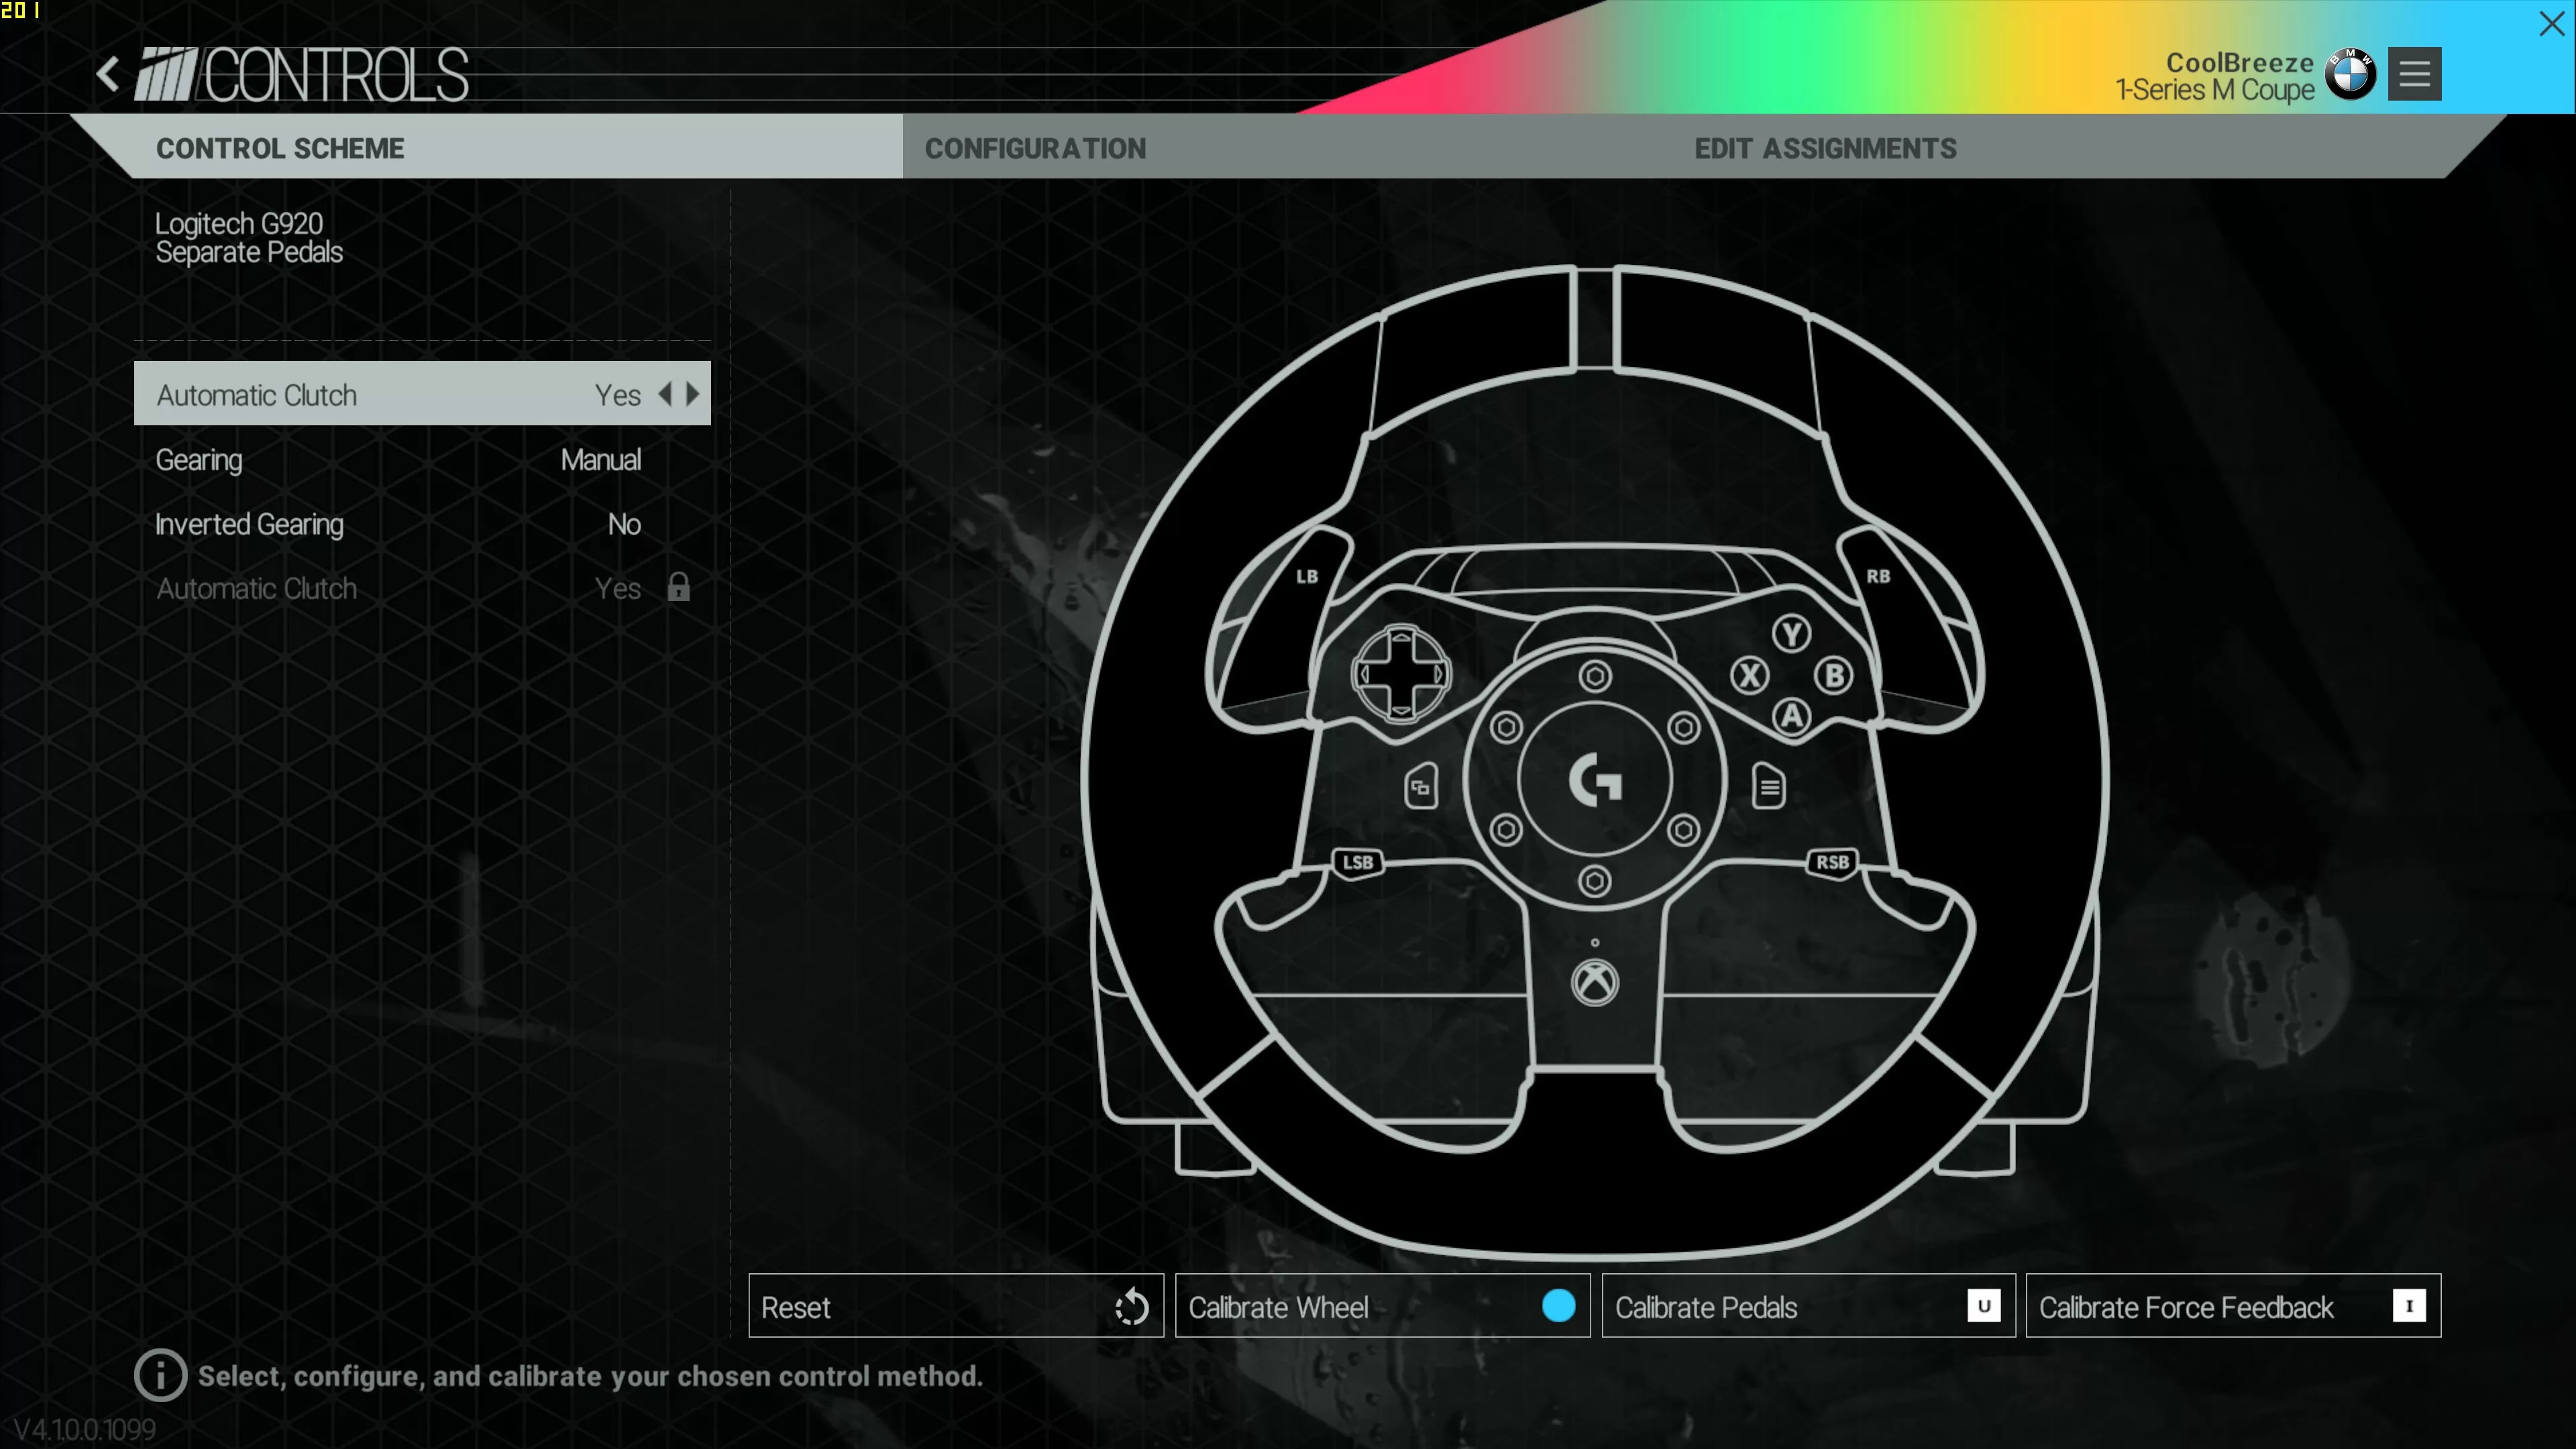
Step 3: Configuring the Wheel Settings in Logitech G Hub
Once you have installed the Logitech G Hub software, you can now customize your Logitech G920 wheel settings to suit your preferences and gameplay style. Follow these steps to configure the wheel settings:
- Launch the Logitech G Hub software on your Xbox One console.
- Select the Logitech G920 wheel from the list of connected devices.
- On the main screen, you will find various options to customize your wheel settings.
- Adjust the wheel rotation angle to your preference. The G920 offers adjustable rotation angles, allowing you to choose between 900 degrees and lower settings for more precise control.
- Assign specific functions or macros to the wheel’s buttons using the “Assignments” tab. You can customize these assignments based on your gaming needs.
- Under the “Sensitivity” tab, you can fine-tune the wheel’s sensitivity to achieve the desired level of responsiveness.
- Explore the advanced settings such as force feedback options, pedal response, and more to further tailor the wheel’s behavior to your liking.
- Once you have configured your desired settings, click on “Apply” or “Save” to save the changes.
It’s important to note that the Logitech G Hub software provides a wide range of customization options to enhance your racing experience. Take the time to experiment with different settings and find the configuration that suits you best.
Now that you’re done configuring the wheel settings, let’s move on to the next step: calibrating the G920 wheel for accurate gameplay.
Step 4: Calibrating the G920 Wheel
Calibrating your Logitech G920 wheel is an essential step to ensure accurate and responsive gameplay. Follow these steps to calibrate your G920 wheel:
- Make sure your G920 wheel is properly connected to your Xbox One console and the Logitech G Hub software is running.
- Open the Logitech G Hub software and navigate to the “Settings” tab.
- Select the “Calibration” option to access the calibration settings.
- Follow the on-screen instructions to calibrate the wheel. This usually involves rotating the wheel fully to each side and pressing the indicated buttons.
- Once the calibration is complete, the software will confirm the successful calibration.
Calibrating the G920 wheel ensures that it registers your inputs accurately and provides a consistent racing experience. It allows the wheel to accurately translate your movements into in-game actions, making your gameplay more immersive and enjoyable.
It’s worth noting that occasional recalibration may be required, especially if you notice any inaccuracies or drift in the wheel’s response. Refer to the Logitech G Hub software for detailed instructions on how to recalibrate your wheel.
Now that your G920 wheel is properly calibrated, let’s move on to the next step: adjusting the force feedback settings for a more realistic racing experience.
Step 5: Adjusting Force Feedback Settings
The force feedback feature of the Logitech G920 wheel adds an extra layer of immersion by providing realistic vibrations and resistance to simulate the feeling of driving a real car. Adjusting the force feedback settings can greatly enhance your racing experience. Follow these steps to fine-tune the force feedback settings:
- Launch the Logitech G Hub software on your Xbox One console.
- Select the Logitech G920 wheel from the list of connected devices.
- Navigate to the “Force Feedback” settings tab.
- Adjust the strength of the force feedback effects to your preference. You can increase or decrease the overall strength of the effects using a slider or numerical values.
- Experiment with different settings to find the right balance between realism and comfort. Higher settings provide stronger and more pronounced feedback, while lower settings offer a smoother and less intense experience.
- Pay attention to specific force feedback effects such as tire slip, curbs, and collisions. Adjust these individual effects to achieve the desired level of realism and immersion.
- Save your changes by clicking on “Apply” or “Save” to ensure the adjusted force feedback settings are applied during gameplay.
Keep in mind that force feedback settings are highly subjective and personal preferences may vary. It’s recommended to start with the default settings and gradually make adjustments based on your individual preferences and the type of racing game you’re playing.
With the force feedback settings adjusted to your liking, you’re now ready to enjoy a more immersive and realistic racing experience with your Logitech G920 wheel and Xbox One console!
Troubleshooting Common Issues
While setting up and using your Logitech G920 wheel on your Xbox One, you may encounter some common issues. Here are a few troubleshooting tips to help resolve them:
1. Wheel Not Recognized: If your G920 wheel is not being detected by your Xbox One console or the Logitech G Hub software, try the following steps:
- Ensure that the USB cable is securely connected to both the wheel and the console.
- Try connecting the USB cable to a different USB port on your Xbox One.
- Restart your Xbox One console.
- Make sure the Logitech G Hub software is up to date.
2. Calibration Issues: If you are experiencing calibration problems with your G920 wheel, follow these steps:
- Ensure that the wheel is properly connected and the Logitech G Hub software is running.
- Try calibrating the wheel again using the calibration settings in the Logitech G Hub software.
- If the issue persists, disconnect and reconnect the wheel, then restart your Xbox One console.
3. Force Feedback not Working: If you are not experiencing any force feedback effects, try the following:
- Check the force feedback settings in the Logitech G Hub software and make sure they are properly configured.
- Ensure that the force feedback option is enabled in the game settings.
- If the game you are playing supports force feedback, try restarting the game.
- Make sure the wheel’s power cable is securely connected to an electrical outlet.
If you continue to experience issues with your Logitech G920 wheel, it’s recommended to check for firmware updates for both the wheel and the Logitech G Hub software. Additionally, referring to the official Logitech support website or contacting their customer support team can provide further assistance in troubleshooting specific issues.
By following these troubleshooting tips, you should be able to overcome common issues and enjoy a seamless and immersive gaming experience with your Logitech G920 wheel on Xbox One.
Conclusion
Congratulations! You’ve successfully set up your Logitech G920 wheel on your Xbox One console. With its seamless compatibility and customizable settings, you can now enjoy an immersive racing experience right from the comfort of your own home.
In this guide, we walked you through the step-by-step process of connecting the G920 wheel to your Xbox One, installing the Logitech G Hub software, configuring the wheel settings, calibrating the wheel, adjusting the force feedback settings, and troubleshooting common issues that may arise during the setup process. By following these steps, you can ensure optimal performance and a more realistic racing experience.
Remember, the Logitech G920 wheel offers customizable options to suit your preferences and gaming style. Take the time to explore the different settings and fine-tune them to enhance your gameplay. Whether you’re competing on the racetrack or simply enjoying a casual drive, the G920 wheel provides a smooth and responsive experience.
If you ever encounter any issues or need further assistance, don’t hesitate to consult the Logitech G Hub software documentation or reach out to Logitech customer support for professional help. They are equipped to provide you with the necessary guidance and solutions to any problems you may encounter.
Now that you’re all set up, it’s time to buckle up, hit the gas, and experience the thrill of racing with your Logitech G920 wheel on Xbox One. Enjoy the ride!