Introduction
Welcome to this guide on how to set up the Logitech G430 Mic. The Logitech G430 is a popular choice for gamers and content creators who want high-quality audio and clear communication. This microphone is known for its exceptional sound reproduction and noise-canceling capabilities, making it the perfect companion for gaming sessions, live streams, or virtual meetings.
Setting up the Logitech G430 Mic may seem daunting at first, especially if you’re new to audio equipment. However, with the right guidance, you’ll have your mic up and running in no time. In this article, we’ll take you through each step of the process, from unboxing the mic to adjusting its settings. So, let’s dive right in and get you ready to unleash your voice with the Logitech G430 Mic.
Note that the Logitech G430 Mic is designed for use with computers and requires the Logitech Gaming Software for full functionality. Before we proceed, ensure that your computer meets the system requirements and that you have the necessary software installed. Now, let’s move on to the first step: unboxing the Logitech G430 Mic.
Step 1: Unboxing the Logitech G430 Mic
Before you can start using the Logitech G430 Mic, you need to unbox it and familiarize yourself with its components. The packaging is designed to protect the mic during transit, so let’s ensure we handle it with care.
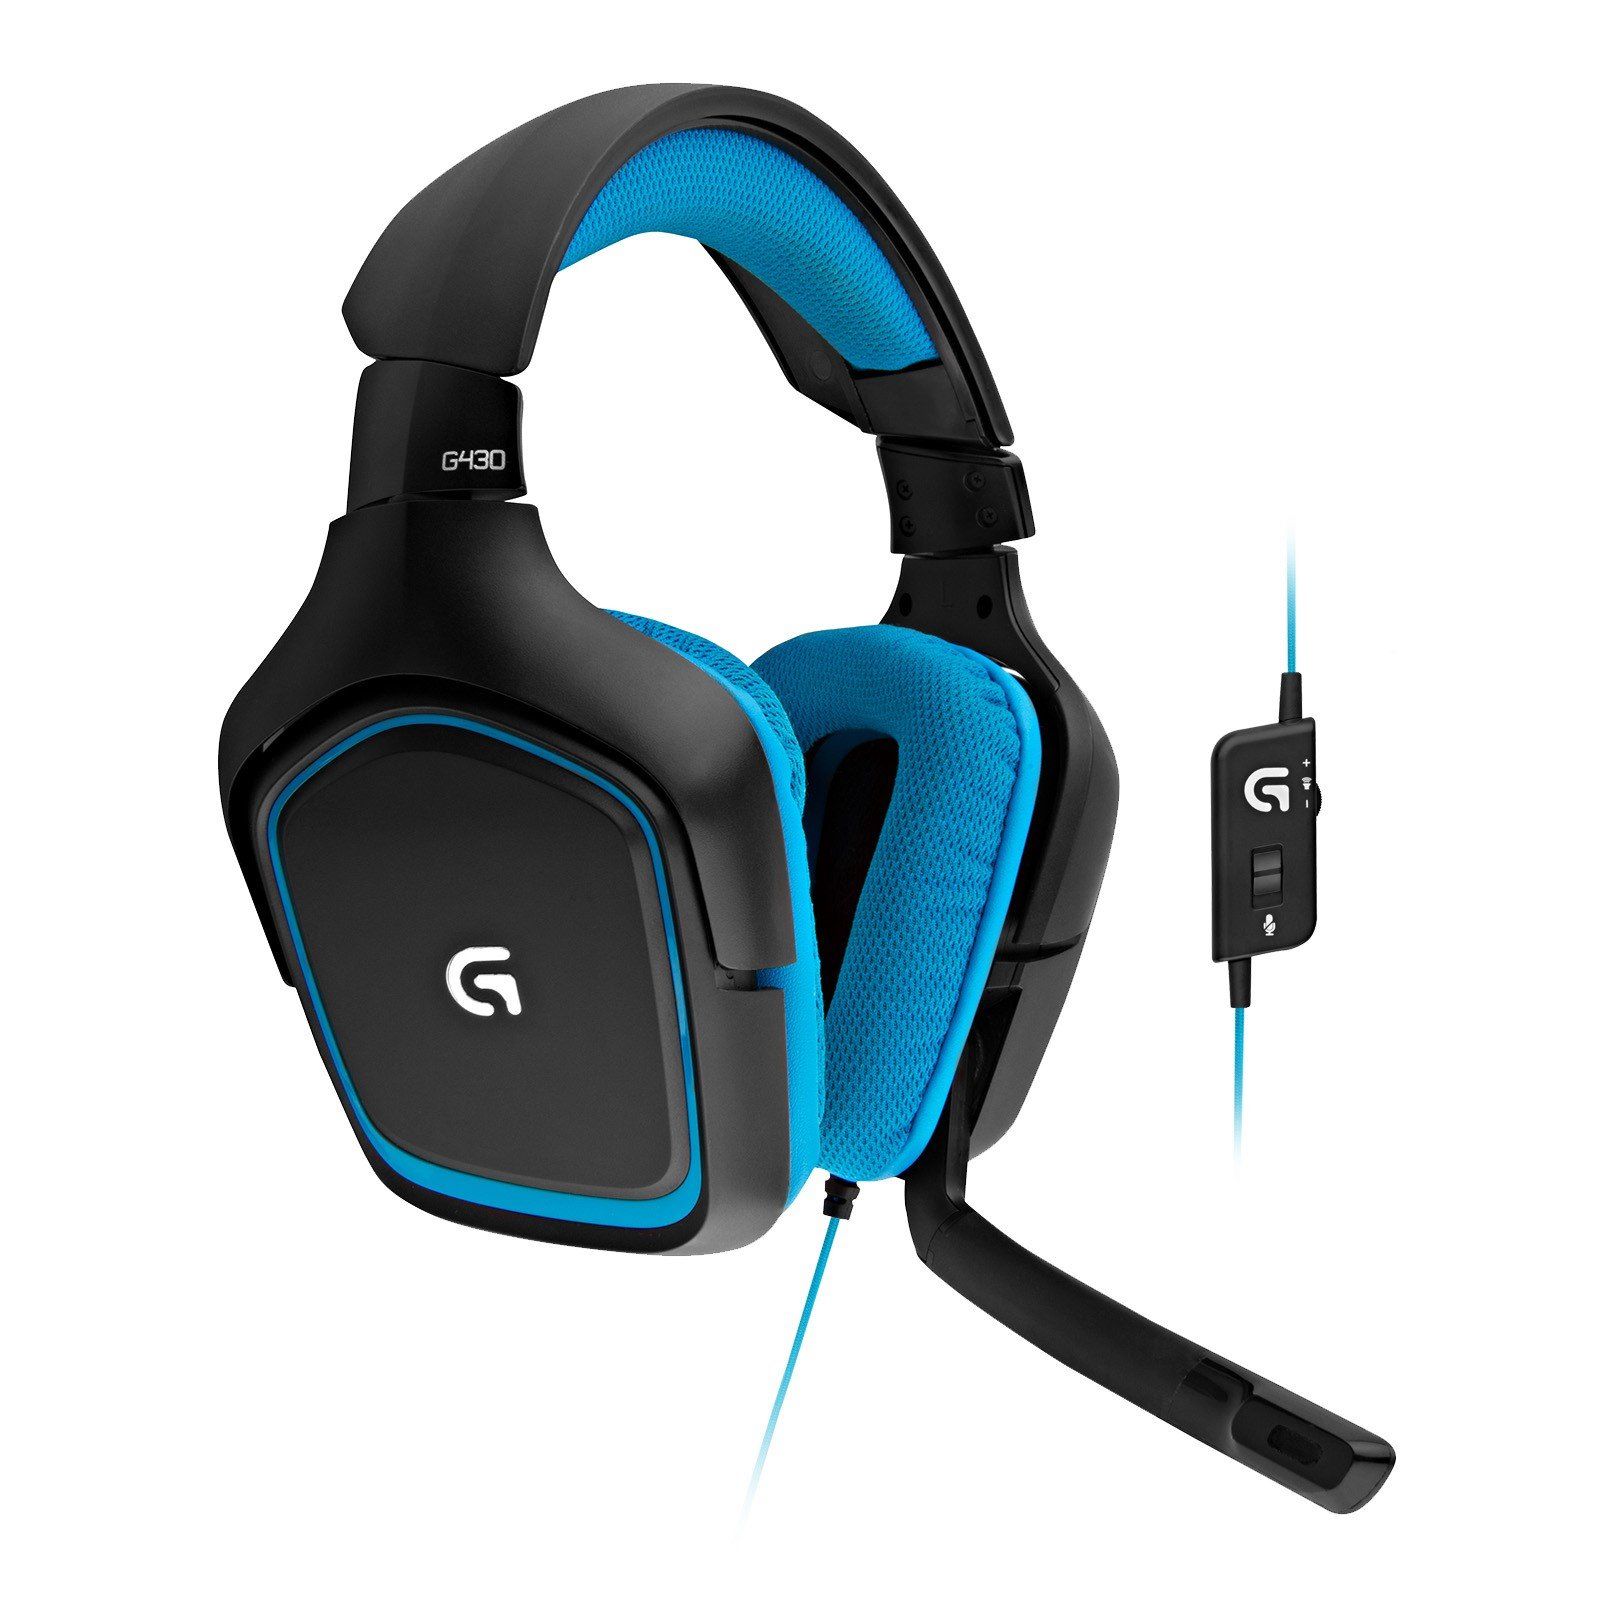
Open the box gently and remove the contents. Inside, you’ll find the Logitech G430 Mic, a USB cable, and an instruction manual. Take a moment to read through the manual for any specific instructions or troubleshooting tips.
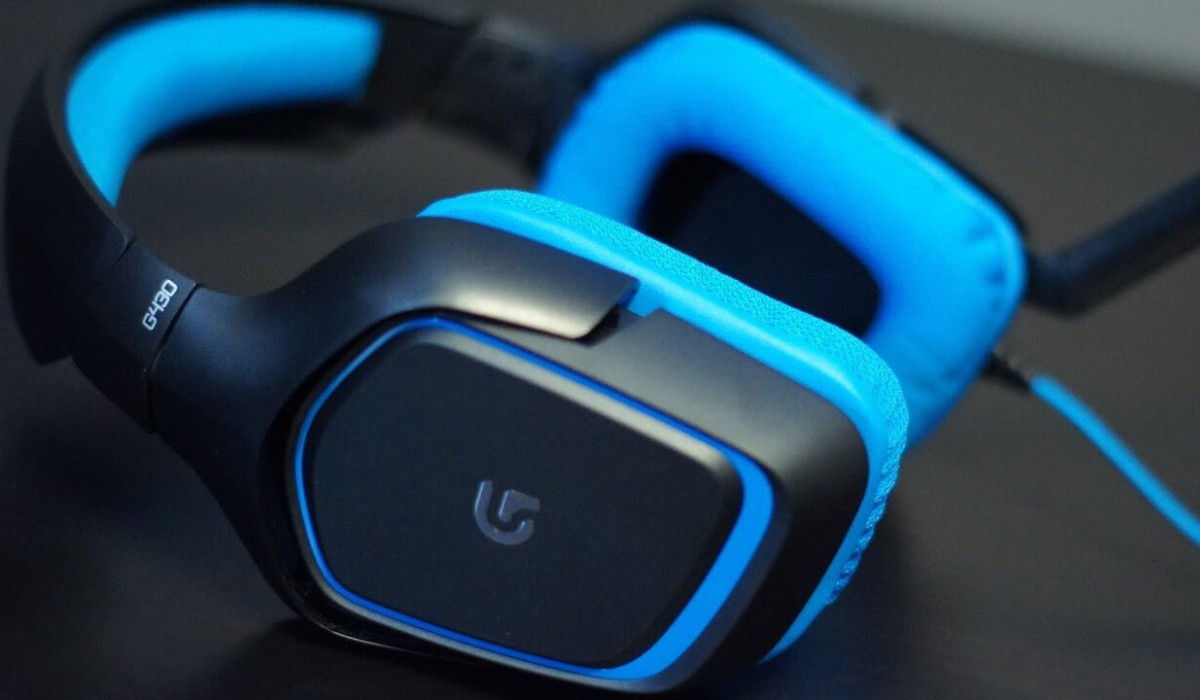
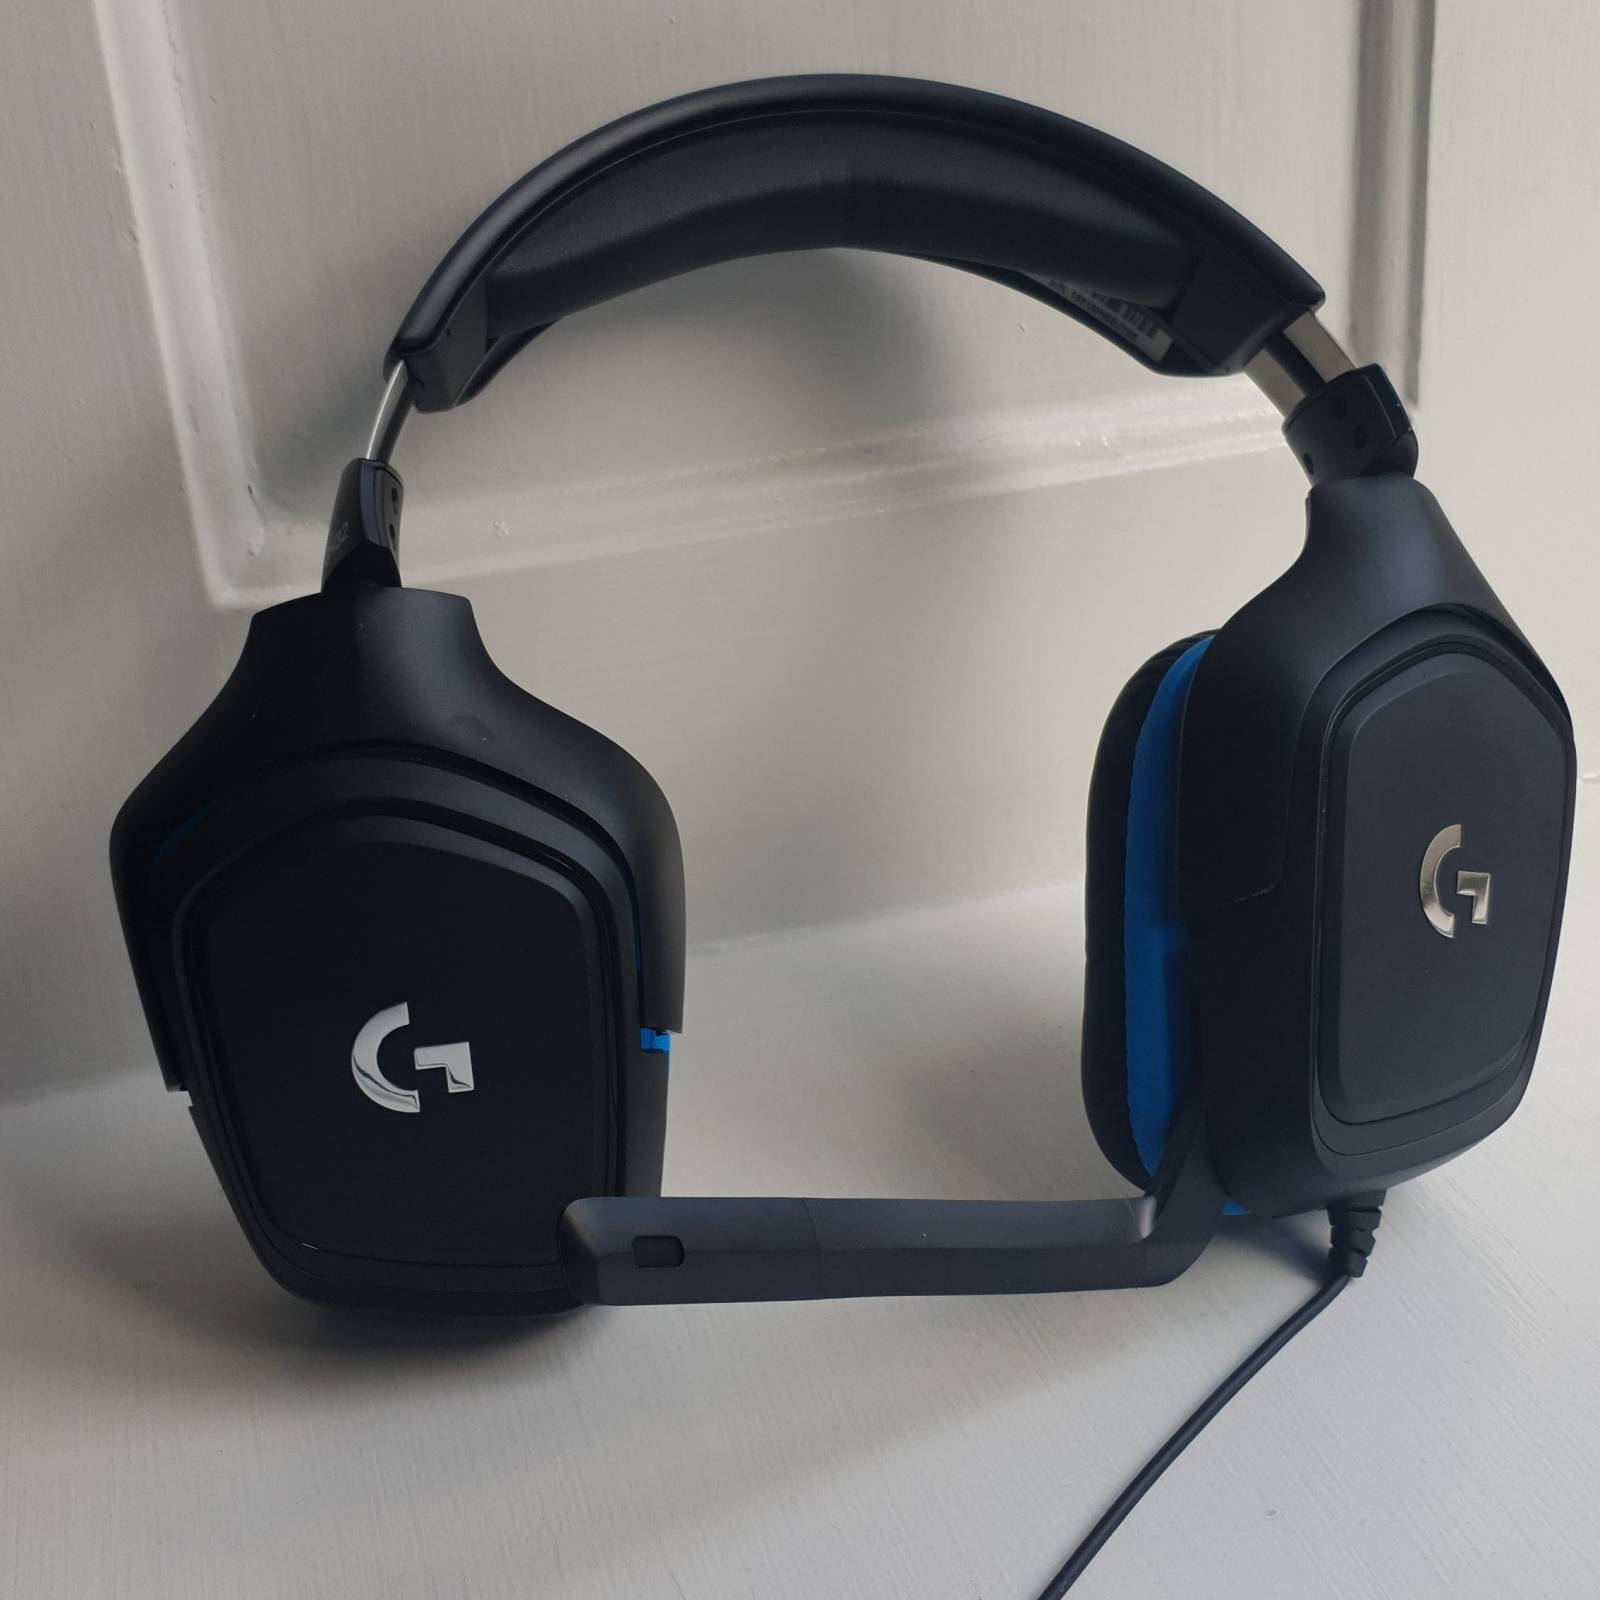
The Logitech G430 Mic has an over-ear design and a flexible boom microphone. It comes in a sleek black finish with blue accents, giving it a stylish appearance. The ear cups are padded with soft foam for comfortable use during long gaming or recording sessions.
Inspect the mic for any visible damage or defects. It’s essential to ensure that everything is in good condition before proceeding to the next steps. If you notice any issues, such as a damaged cable or a malfunctioning microphone, reach out to Logitech’s customer support for assistance.
Now, let’s move on to the next step, where we’ll connect the Logitech G430 Mic to your computer.
Step 2: Connecting the Mic to Your Computer
Now that you’ve unboxed the Logitech G430 Mic, it’s time to connect it to your computer. Follow these steps to ensure a proper connection:
- Locate the USB cable that came with the Logitech G430 Mic.
- Take one end of the USB cable and insert it into the USB port on your computer. Make sure it’s securely plugged in.
- Take the other end of the USB cable and connect it to the USB port on the back of the Logitech G430 Mic. You’ll find the port located on the left ear cup.
- Ensure that the connection is secure on both ends of the cable.
Once you’ve completed these steps, your Logitech G430 Mic should be successfully connected to your computer. Now, let’s move on to the next step, where we’ll install the Logitech Gaming Software.
Step 3: Installing the Logitech Gaming Software
In order to fully utilize the features of the Logitech G430 Mic, you’ll need to install the Logitech Gaming Software. This software provides additional customization options for your microphone and ensures optimal performance. Follow these steps to install the Logitech Gaming Software:
- Visit the Logitech official website and navigate to the Support section. Look for the Downloads page.
- Search for the Logitech Gaming Software and select the appropriate version for your operating system.
- Click on the download link and follow the on-screen instructions to download the software.
- Once the download is complete, locate the installation file and double-click on it to start the installation process.
- Follow the prompts in the installation wizard to complete the installation. Make sure to read and accept the License Agreement.
- Once the installation is finished, restart your computer to ensure that the software is properly installed.
After your computer has restarted, you can open the Logitech Gaming Software and explore the various customization options available. You’ll be able to adjust the microphone’s sensitivity, equalizer settings, and even assign specific functions to programmable buttons on the mic itself.
Now that you have installed the Logitech Gaming Software, let’s move on to the next step where we’ll adjust the mic settings in Windows.
Step 4: Adjusting Mic Settings in Windows
Now that you have the Logitech Gaming Software installed, it’s time to fine-tune the Logitech G430 Mic settings in Windows. These settings will ensure that your microphone is recognized by your computer and that it’s properly configured for optimal performance. Follow these steps to adjust the mic settings:
- Right-click on the sound icon in the system tray of your Windows taskbar and select “Open Sound Settings.
- In the Sound settings window, navigate to the “Input” section.
- Under the Input section, you should see the Logitech G430 Mic listed. Click on it to select it as the default recording device.
- Once selected, click on the “Device properties” link to access the microphone’s advanced settings.
- In the microphone’s properties window, you can adjust the volume level, toggle on/off enhancements like noise cancellation or echo cancellation, and select the microphone boost level if desired.
- Make any necessary adjustments to the settings and click “Apply” to save the changes.
It’s recommended to test your microphone after making these adjustments to ensure that it’s working properly. You can do this by speaking into the mic and checking the input level in the Sound settings window.
Now that you have adjusted the Logitech G430 Mic settings in Windows, let’s move on to the final step: testing your microphone.
Step 5: Testing Your Logitech G430 Mic
After setting up and adjusting the Logitech G430 Mic, it’s crucial to test its functionality to ensure that it’s working as expected. This step will help you identify any issues and make any necessary adjustments. Here’s how you can test your Logitech G430 Mic:
- Open an audio recording or communication application on your computer. This can be a voice recording software, a gaming platform, or a video conferencing tool.
- Select the Logitech G430 Mic as the input device in the settings of the application you are using.
- Say a few words or make a sound into the mic to test its audio input.
- Observe the input level or listen to the playback to ensure that the audio from the Logitech G430 Mic is clear and without any distortion or background noise.
- If you encounter any issues with the mic’s performance or audio quality, double-check the connections, software settings, and make any necessary adjustments.
By testing the Logitech G430 Mic, you can ensure that it’s working effectively and provides the desired audio output for your needs. If you encounter persistent issues or require further assistance, consult the Logitech support resources or reach out to their customer support team.
Congratulations! You have successfully set up and tested your Logitech G430 Mic. Now you can enjoy crystal-clear audio and improved communication during your gaming sessions, live streams, or virtual meetings. Embrace the power of high-quality audio with the Logitech G430 Mic.
Conclusion
Setting up the Logitech G430 Mic may initially seem daunting, but with the step-by-step guide provided in this article, you can easily get your microphone up and running. By unboxing the mic, connecting it to your computer, installing the Logitech Gaming Software, adjusting the mic settings in Windows, and testing its functionality, you have ensured that your Logitech G430 Mic is ready for high-quality audio experiences.
Remember to handle the microphone with care during the unboxing process and check for any visible damage or defects. Properly connecting the mic to your computer using the USB cable is essential for a reliable and functional setup.
The installation of the Logitech Gaming Software grants you access to advanced customization options for your microphone. Explore the software to set the optimal sensitivity, equalizer settings, and program specific functions to the programmable buttons on your mic.
Adjusting the mic settings in Windows is crucial to ensure that the Logitech G430 Mic is recognized as the default recording device and is configured properly. By fine-tuning the volume level, toggling enhancements like noise cancellation or echo cancellation, and adjusting the microphone boost level, you can optimize the microphone’s performance according to your preferences.
Finally, testing your Logitech G430 Mic is imperative to ensure that it functions properly and delivers clear and high-quality audio. With the microphone selected as the input device in your desired application, speak into it and observe the input level or listen to the playback to ensure optimal performance.
With the Logitech G430 Mic properly set up and tested, you can now immerse yourself in gaming sessions, confidently conduct live streams, or engage in virtual meetings with clear and crisp audio. Enjoy a seamless audio experience and let your voice be heard with the Logitech G430 Mic.