Introduction
Welcome to our guide on how to set up a capture card on Streamlabs! If you’re looking to take your streaming game to the next level, a capture card is an essential tool that allows you to capture and broadcast high-quality gameplay footage from external devices like consoles or cameras. Whether you’re a seasoned streamer or just starting out, incorporating a capture card into your setup can greatly enhance the quality of your streams.
So, what exactly is a capture card? In simple terms, a capture card is a hardware device that connects to your PC and allows you to capture and record video and audio signals from external sources. This means you can capture gameplay from your gaming console, record footage from a camera, or even stream live events directly to your audience. By using a capture card, you can bypass the limitations of software-based screen capturing and achieve higher video quality and lower latency.
There are numerous benefits to using a capture card in your streaming setup. First and foremost, it improves the overall video quality of your streams. Capture cards are designed to handle high-resolution video and audio signals, ensuring that your viewers can enjoy a crisp and immersive streaming experience. Additionally, using a capture card reduces the strain on your computer’s processing power, allowing for smoother gameplay and uninterrupted streaming.
Choosing the right capture card for your needs is crucial. There are several factors to consider, such as the types of inputs and outputs supported, video resolutions and frame rates, compatibility with your streaming software, and budget. It’s important to do some research and read reviews to find a capture card that meets your requirements.
In this guide, we will take you through the step-by-step process of setting up a capture card on Streamlabs. We’ll cover everything from connecting the capture card to your PC, installing the necessary drivers, configuring the capture card in Streamlabs, to testing the setup. By the end of this guide, you’ll have all the knowledge you need to start using a capture card and take your streaming to the next level. So, let’s get started!
What is a Capture Card?
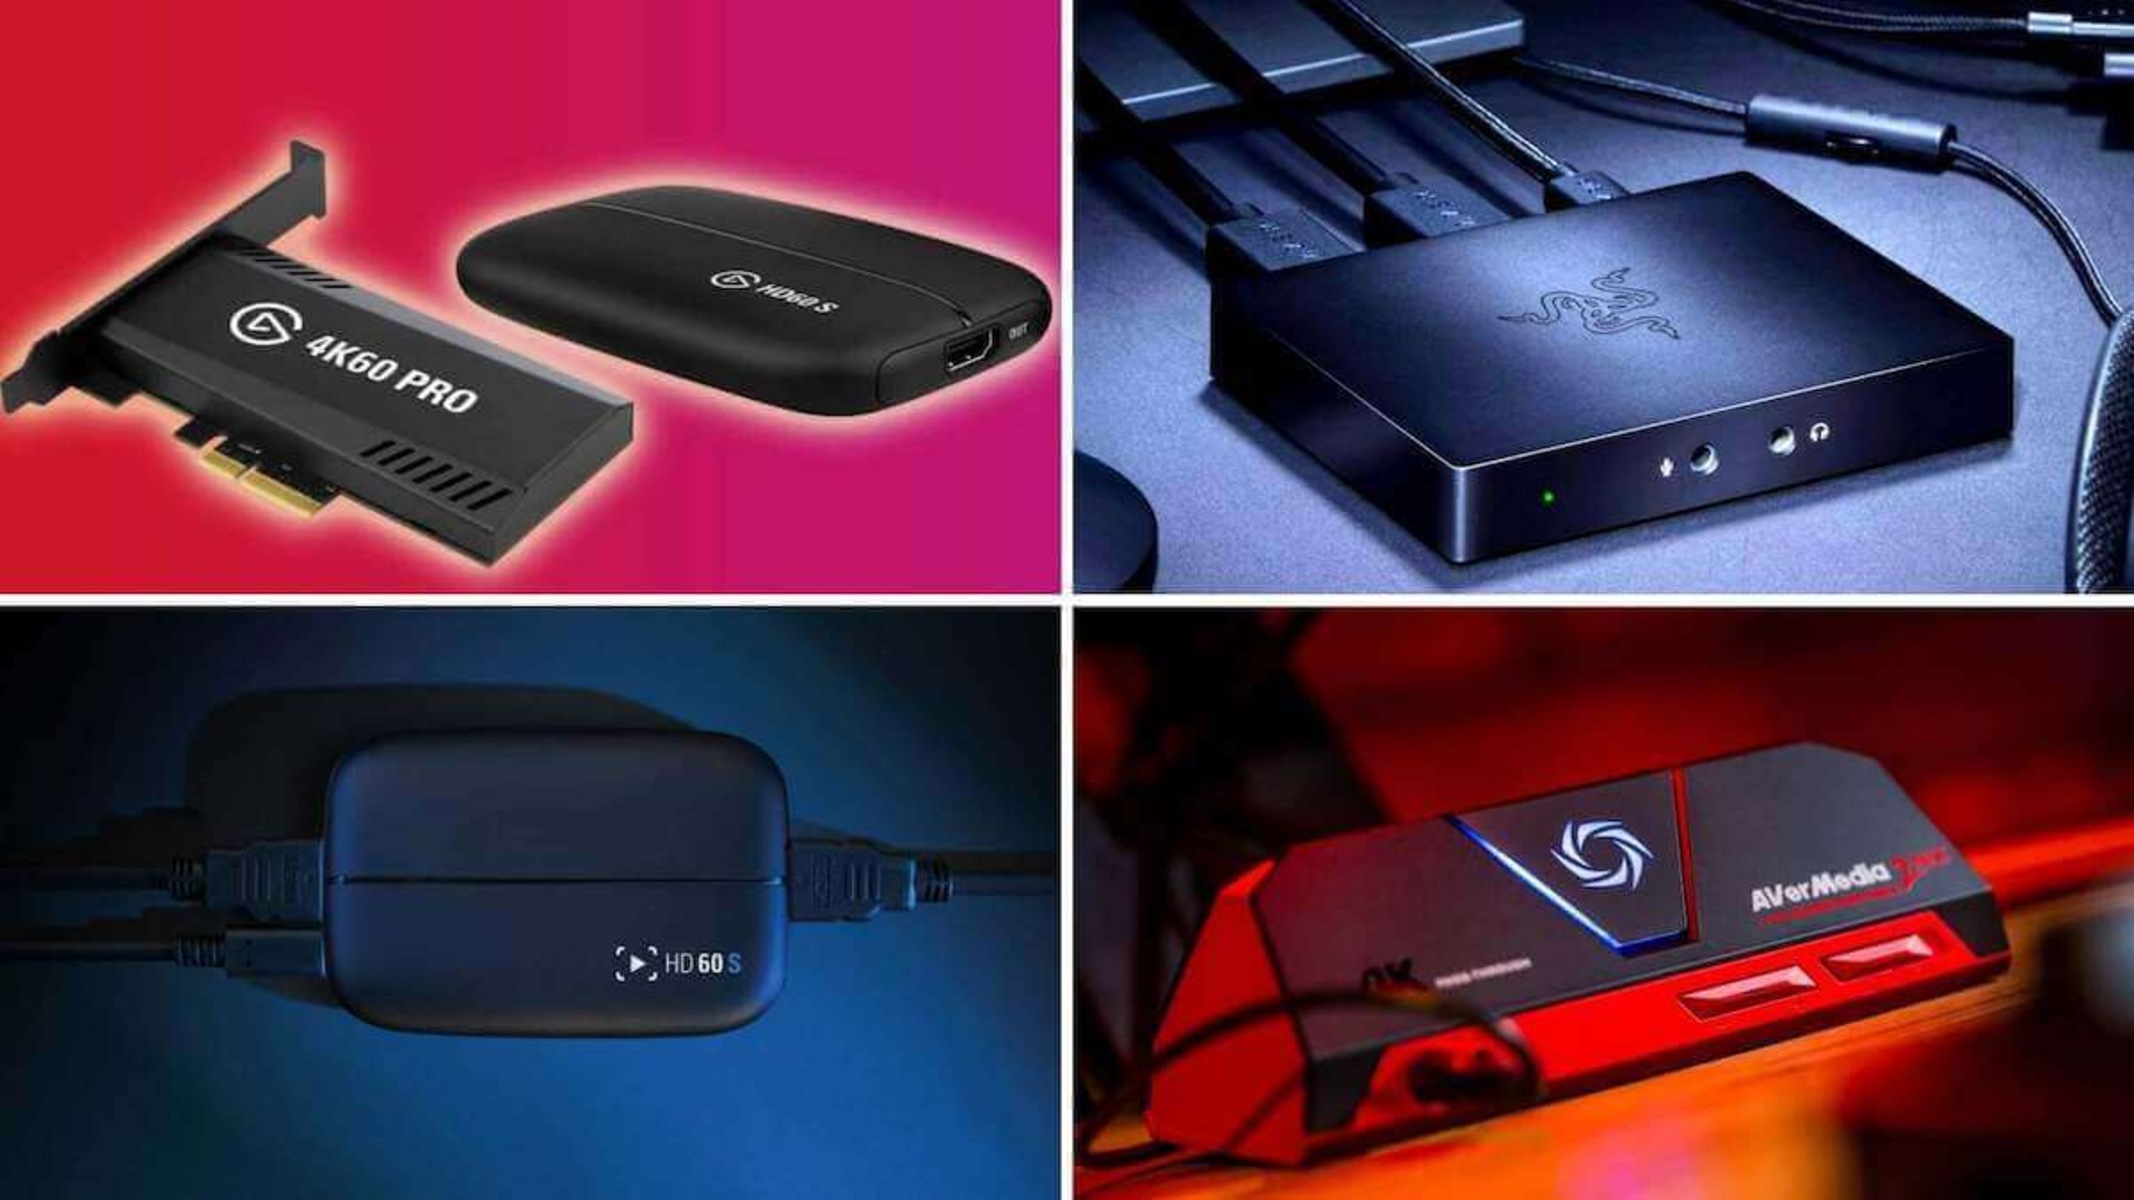
A capture card is a hardware device that allows you to capture and record video and audio signals from external sources and transfer them to your computer for streaming or recording purposes. It acts as an intermediary between your gaming console, camera, or other devices and your computer, enabling you to capture high-quality footage and incorporate it into your streaming setup.
With a capture card, you can connect your gaming console, such as a PlayStation or Xbox, to your computer and stream or record gameplay with ease. It captures the video and audio signals from your console and transfers them to your computer in real-time. This is especially beneficial for gamers who want to broadcast their gameplay live on platforms like Twitch or YouTube, as it provides a more professional and high-quality streaming experience.
In addition to gaming consoles, capture cards can also be used to capture footage from other devices, such as digital cameras, camcorders, or even smartphones. This versatility allows you to incorporate various video sources into your streams, whether you want to showcase your gaming skills, vlog your adventures, or create tutorial videos.
Capture cards typically connect to your computer via USB or PCIe interfaces, depending on the model. USB capture cards are easy to set up and are suitable for most streaming needs, while PCIe capture cards offer higher bandwidth and can handle higher resolutions and frame rates.
One of the primary advantages of using a capture card is the ability to capture video and audio signals directly from the source. This eliminates the need for software-based screen capturing methods, which can cause performance issues and result in lower video quality. By directly capturing the signal from the source, capture cards provide a more reliable and high-quality streaming experience.
Another benefit of using a capture card is the reduced strain on your computer’s resources. Since the capture card handles the task of capturing and encoding the video and audio signals, your computer can focus on processing the stream and running other applications without sacrificing performance. This ensures a smooth streaming experience without any lag or frame drops.
Overall, a capture card is an essential tool for streamers and content creators who want to elevate their streaming quality and expand their creative possibilities. With the ability to capture high-quality video and audio signals from external devices, a capture card unlocks a whole new level of professionalism and flexibility in your streaming setup.
Benefits of Using a Capture Card
Using a capture card in your streaming setup offers several benefits that can greatly enhance the quality and versatility of your streams. Let’s take a closer look at some of the key advantages:
1. Improved Video Quality: One of the major benefits of using a capture card is the ability to capture and stream high-quality video footage. Capture cards are designed to handle high-resolution video signals, allowing you to showcase your gameplay or capture footage from other devices with exceptional clarity and detail. This ensures that your viewers can enjoy a more immersive and visually appealing streaming experience.
2. Reduced CPU Usage: By offloading the task of capturing and encoding video signals to the capture card, the strain on your computer’s CPU is significantly reduced. This means that your computer can focus more on running your streaming software, processing other applications, and maintaining a smooth stream. As a result, you’ll experience fewer instances of lag, frame drops, or performance issues during your streams.
3. Expanded Streaming Options: With a capture card, you’re not limited to streaming content solely from your computer. You can connect external devices such as gaming consoles, cameras, or even smartphones to your capture card and incorporate them into your streams. This opens up a world of possibilities, allowing you to stream gameplay, vlogs, tutorials, or live events with ease.
4. Real-Time Streaming: Capture cards enable real-time streaming, which means that your gameplay or content is streamed as it happens, without any noticeable delay. This is crucial for live streaming, as it provides a more interactive and engaging experience for your viewers. Real-time streaming allows for seamless viewer interactions, such as chat responses and audience participation.
5. Versatility and Flexibility: Capture cards are versatile tools that can be used for a variety of streaming and recording purposes. Whether you’re a gamer, a content creator, or a professional streamer, a capture card can adapt to your specific needs. You can easily switch between different video sources, adjust settings for optimal performance, and customize your setup to deliver the best streaming experience possible.
6. Professional-Level Streaming: Incorporating a capture card into your setup adds a level of professionalism to your streams. With the ability to capture high-quality footage and seamlessly integrate external devices, your streams will have a more polished and engaging look. This can attract more viewers, enhance your brand image, and set you apart from other streamers.
These are just a few of the many benefits of using a capture card for streaming. By investing in a capture card, you can take your streams to the next level and provide your viewers with a higher-quality, more immersive streaming experience.
Choosing the Right Capture Card
When it comes to selecting a capture card for your streaming setup, there are several factors to consider to ensure that you choose the right one for your needs. Here are some important considerations to keep in mind:
1. Types of Inputs and Outputs: Different capture cards offer various input and output options. Consider what devices you plan to connect to the capture card and ensure that it has the necessary ports and connectors to accommodate them. For example, if you want to capture gameplay from a gaming console, make sure the capture card has HDMI or component video inputs.
2. Video Resolutions and Frame Rates: Capture cards support different video resolutions and frame rates, so it’s essential to match them with your streaming requirements. If you want to stream in high definition, look for a capture card that supports resolutions of at least 1080p at 60 frames per second (FPS) or higher for smoother, more professional-looking streams.
3. Compatibility with Streaming Software: Ensure that the capture card you choose is compatible with your preferred streaming software, such as Streamlabs OBS, OBS Studio, or XSplit. Check for any specific requirements or recommended capture card models mentioned by the streaming software’s developer to ensure seamless integration.
4. Budget: Capture cards come in a range of prices, so consider your budget when choosing one. Keep in mind that higher-end capture cards may offer additional features and higher video quality, but they might not be necessary if you’re just starting out. Assess your needs and find a capture card that strikes a balance between affordability and functionality.
5. Reviews and Recommendations: Before making a purchase, read reviews and seek recommendations from experienced streamers or content creators. Hearing about the firsthand experiences of others can provide valuable insights into the performance, reliability, and overall satisfaction of different capture card models.
6. Software and Driver Support: Ensure that the capture card you choose has up-to-date software and driver support. Regular updates from the manufacturer can improve compatibility, performance, and address any issues or bugs that may arise. Check the manufacturer’s website for the latest drivers and software downloads.
Considering these factors will help you narrow down your options and choose a capture card that meets your specific streaming needs. It’s important to do thorough research and carefully evaluate each capture card’s specifications to make an informed decision.
Remember, the right capture card is an investment in your streaming setup, providing the foundation for delivering high-quality, professional streams to your audience. Take your time, weigh your options, and choose the capture card that best suits your requirements and budget.
Step 1: Connecting the Capture Card to Your PC
Before you can start using a capture card on Streamlabs, the first step is to connect the capture card to your PC. Here’s a step-by-step guide on how to do it:
1. Ensure Compatibility: Make sure that your capture card is compatible with your PC. Check the manufacturer’s specifications to confirm that it supports your operating system and has the necessary interface (USB or PCIe) for your computer.
2. Power off Your PC and Unplug: Before making any connections, it’s important to power off your PC and unplug it from the electrical outlet. This minimizes any risk of electric shock or damage to your computer components.
3. Identify the Correct Port: Locate the appropriate port on your capture card for connecting to your PC. This will typically be a USB port or a PCIe slot, depending on the type of capture card you have.
4. Connect the Capture Card: If you have a USB capture card, plug the capture card into an available USB port on your PC. Ensure that the connection is secure. If you have a PCIe capture card, gently insert it into an available PCIe slot on your motherboard. Make sure it is properly seated and secured with the screw if necessary.
5. Power on Your PC: Once the capture card is connected, power on your PC. Your computer will detect the new device and may prompt you to install drivers or software for the capture card.
6. Follow Installation Prompts: If prompted, follow the on-screen instructions to install the necessary drivers and software for your capture card. These drivers can usually be downloaded from the manufacturer’s website if they are not included with the card. Restart your PC if required to complete the installation process.
7. Confirm Connection: After the installation is complete, confirm that the capture card is recognized by your PC. You can do this by checking the device manager or the software provided with your capture card. It should be listed as a connected device without any error notifications.
8. Update Firmware (if necessary): It’s always a good idea to check for firmware updates for your capture card. Visit the manufacturer’s website and download any available firmware updates. Follow the instructions provided with the update to ensure the firmware is properly installed.
Once you have successfully connected your capture card to your PC, you’re ready to move on to the next steps of setting up your capture card in Streamlabs. These steps will involve configuring your capture card in Streamlabs and testing it to ensure everything is working correctly.
Note that the specific steps for connecting your capture card to your PC may vary depending on the model and manufacturer. Refer to the user manual or online resources provided by the manufacturer for detailed instructions tailored to your capture card.
Step 2: Installing the Capture Card Drivers
After connecting your capture card to your PC, the next step is to install the necessary drivers for it to function properly. Here’s a step-by-step guide on how to install the capture card drivers:
1. Locate the Manufacturer’s Website: Visit the website of the manufacturer that produced your capture card. This is where you’ll find the latest drivers and software for your specific model.
2. Identify Your Capture Card Model: Find the model name or number of your capture card. This information is usually printed on the capture card itself or mentioned in the documentation that came with it.
3. Download the Drivers: Navigate to the support or downloads section of the manufacturer’s website. Locate the drivers corresponding to your capture card model and download them. Ensure that you download the drivers that are compatible with your operating system.
4. Run the Installer: Once the drivers are downloaded, locate the installation file and run it. Follow the prompts provided by the installer to begin the installation process. Ensure that you read and understand any license agreements that may be presented to you.
5. Follow Installation Prompts: The installation process may require you to agree to terms and conditions, specify an installation location, or customize certain settings. Follow the on-screen prompts and make the appropriate selections based on your preferences.
6. Wait for the Installation to Complete: Allow the installer to complete the driver installation process. This may take a few minutes. Avoid interrupting the installation or turning off your PC during this time.
7. Restart Your PC (if necessary): After the installation is complete, you may be prompted to restart your PC. If this is the case, save any ongoing work, close all applications, and restart your computer as instructed.
8. Test the Capture Card: Once your PC has restarted, test the capture card to ensure it is installed correctly. Open the software provided with your capture card or launch your streaming software (e.g., Streamlabs OBS) and check if the capture card is detected and functioning properly. If any issues arise, refer to the troubleshooting section or seek support from the capture card manufacturer.
That’s it! You have now successfully installed the drivers for your capture card. The drivers allow your PC to communicate with the capture card, enabling it to capture and process video and audio signals accurately. With the drivers installed, you can now move on to the next steps of setting up your capture card in Streamlabs.
Note that the installation steps may vary slightly depending on the manufacturer and model of your capture card. Always refer to the documentation provided by the manufacturer for detailed and accurate installation instructions.
Step 3: Setting up Streamlabs
Now that your capture card drivers are installed, it’s time to configure Streamlabs to work with your capture card. Streamlabs is a popular streaming software that allows you to customize and manage your streams effectively. Here’s a step-by-step guide on how to set up Streamlabs:
1. Download and Install Streamlabs: If you don’t have Streamlabs installed on your computer, visit the Streamlabs website and download the latest version of Streamlabs OBS. Follow the prompts to install the software on your PC.
2. Launch Streamlabs: Once Streamlabs is installed, launch the software on your computer. You’ll be presented with a setup wizard that will guide you through the initial configuration process.
3. Configure Streamlabs Settings: Follow the setup wizard prompts to configure various settings, such as choosing your streaming platform, setting up your streaming preferences (video resolution, frame rate, etc.), and customizing your streaming layout. Ensure that you select the appropriate settings that align with your streaming goals and capture card specifications.
4. Add Capture Card as a Video Source: In the Streamlabs OBS software interface, click on the “+” icon under the “Sources” section. From the menu that appears, select “Video Capture Device” to add your capture card as a source. Give the source a name and click “OK” to proceed.
5. Select Your Capture Card: A settings window will open for the video capture device. Use the drop-down menu under the “Device” tab to select your capture card from the list of available devices. Streamlabs should detect your capture card automatically if the drivers are installed correctly.
6. Configure Capture Card Settings: Customize the settings for your capture card source according to your preferences. You can adjust parameters such as video resolution, frame rate, audio settings, and any additional features offered by your capture card. Experiment with different settings to achieve the desired level of quality and performance.
7. Preview and Test: To ensure that your capture card is functioning as expected, use the preview feature in Streamlabs to see the video feed from your capture card. Make any necessary adjustments to the settings until you are satisfied with the video quality and performance.
8. Save and Start Streaming: Once you have configured your capture card settings in Streamlabs, click “OK” to save the changes. You’re now ready to start streaming! Customize the rest of your stream layout, add additional sources as needed (such as webcam or overlays), and go live to share your content with your audience.
With Streamlabs properly configured to work with your capture card, you can now incorporate high-quality gameplay footage or other external devices seamlessly into your streams. Remember to regularly update Streamlabs and your capture card drivers to ensure compatibility and access any new features or improvements.
Keep in mind that the steps for setting up Streamlabs may vary slightly depending on updates and software versions. Consult the documentation provided by Streamlabs or visit their support forums for any specific guidance or troubleshooting assistance.
Step 4: Configuring the Capture Card in Streamlabs
Now that you have set up Streamlabs and added your capture card as a video source, the next step is to configure your capture card settings within Streamlabs. This will ensure that your capture card is optimized for the best streaming experience. Here’s a step-by-step guide on how to configure the capture card in Streamlabs:
1. Select the Capture Card Source: In the Streamlabs OBS software interface, locate your capture card source under the “Sources” section. Ensure that it is selected or click on it once to highlight it.
2. Open Capture Card Settings: Right-click on the capture card source and select “Properties” from the context menu that appears. This will open the settings window for the capture card source.
3. Adjust Video Settings: In the capture card settings window, you can adjust various video settings to optimize the quality and performance. This may include selecting the desired video resolution, frame rate, and color settings. Make adjustments based on your streaming requirements and the capabilities of your capture card.
4. Configure Audio Settings: If your capture card supports audio input, you can also configure the audio settings in the capture card settings window. Ensure that the correct audio source is selected, whether it’s the onboard audio from your console or an external microphone connected to your PC for commentary.
5. Check for Delay: Some capture cards may introduce a slight delay in the video and audio feed. This can cause a mismatch between gameplay and commentary. To compensate for this delay, you can add a manual delay to your audio sources within Streamlabs. This can be done in the “Audio Mixer” section by clicking on the gear icon next to your audio source and selecting “Advanced Audio Properties.” Adjust the “Sync Offset” value until the audio aligns with the gameplay.
6. Test and Fine-Tune: After making the necessary adjustments, use the preview feature in Streamlabs to test the setup. Check the video quality, audio synchronization, and overall performance. If needed, make further adjustments to the settings until you’re satisfied with the stream’s quality and alignment.
7. Save and Apply: Once you’re happy with the settings, click “OK” in the capture card settings window to save and apply the changes. Your capture card will now be configured with the optimized settings within Streamlabs.
It’s important to regularly update both Streamlabs and your capture card drivers to ensure compatibility and access any new features or improvements. This will help you maintain optimal performance and take advantage of the latest enhancements in streaming technology.
Remember that depending on your capture card model and software version, the available settings and options may vary slightly. Refer to the documentation provided by both Streamlabs and your capture card manufacturer for specific details and instructions.
With your capture card properly configured in Streamlabs, you’re now ready to move on to the final step of the setup process: testing the capture card to ensure it is functioning correctly.
Step 5: Testing the Capture Card
After setting up and configuring your capture card in Streamlabs, the next crucial step is to test the capture card to ensure that it is functioning correctly. Testing allows you to verify the video and audio feed, check for any synchronization issues, and fine-tune your settings if necessary. Here’s a step-by-step guide on how to test your capture card:
1. Start a Test Stream: Open your streaming software (Streamlabs OBS, for example) and start a test stream. This will enable you to see the live output of your stream and make adjustments as needed.
2. Review Video Quality: Observe the quality of the captured video feed from your capture card. Ensure that the resolution, frame rate, and color settings are accurately represented in the streaming software. Pay attention to any signs of pixelation, blurriness, or irregularities in the video quality.
3. Check Audio Synchronization: Listen to the audio coming from your capture card source. Ensure that it is properly synchronized with the video feed. Pay attention to any noticeable delays or discrepancies between the audio and video. If there are any issues, refer back to the Step 4 instructions to adjust the audio delay accordingly.
4. Test External Devices: If you are using external devices, such as gaming consoles or cameras, ensure that they are connected properly to the capture card. Verify that the captured video and audio signals are coming through correctly without any glitches or distortions.
5. Check Stream Performance: Monitor the performance of your stream during the testing phase. Look for any signs of dropped frames, lag, or high CPU usage. If you notice any issues, consider adjusting your stream settings, such as video bitrate or encoder options, to improve performance.
6. Interaction and Feedback: During the test stream, encourage your viewers or friends to provide feedback on the stream quality. Ask them to comment on any visible issues, such as video/audio synchronization, stream stuttering, or any other anomalies they may encounter. Use their feedback to further fine-tune your settings and improve the overall streaming experience.
7. Continuously Refine: Testing your capture card is not just a one-time task. It’s essential to regularly test and evaluate your streaming setup, especially when you make changes or upgrade equipment. Monitor the quality and performance of your captures, make necessary adjustments, and refine your settings to ensure a consistent and high-quality stream for your viewers.
By thoroughly testing your capture card setup, you can identify any issues and make the necessary adjustments to deliver the best possible streaming experience. Regular testing helps ensure that your stream quality remains top-notch and provides a seamless, professional, and enjoyable experience for your viewers.
Remember that specific testing methods and options may vary depending on your capture card model and streaming software. Consult the user manual and refer to the support documentation provided by your capture card manufacturer and streaming software for detailed instructions tailored to your setup.
Troubleshooting Common Issues
While setting up and using a capture card, you may encounter some common issues that can affect the functionality or performance of the device. Here are a few troubleshooting steps to help you resolve these issues:
1. Driver Issues: If you’re experiencing problems with your capture card, the first step is to ensure that you have the latest drivers installed. Visit the manufacturer’s website and download the most up-to-date drivers for your specific model. Uninstall the existing drivers, restart your computer, and then install the new drivers.
2. Connection Problems: Check all of your connections to ensure they are secure and properly plugged in. USB cables should be firmly connected to both the capture card and your PC. If you’re using a PCIe capture card, make sure it is fully seated in the PCIe slot. Also, ensure that you’re using the correct input/output ports on the capture card for connecting your devices.
3. Resolution and Frame Rate Mismatch: If your video feed appears distorted, blurry, or pixelated, check that the resolution and frame rate settings of your capture card, streaming software, and the source device (e.g., gaming console or camera) are all properly aligned. Make sure they are set to the same resolutions and frame rates to ensure seamless capture and streaming.
4. Audio Sync Issues: If there is a delay in the audio or if it’s out of sync with the video feed, adjust the audio synchronization in your streaming software. Use the audio sync offset settings to fine-tune the timing until audio and video are in perfect harmony. Test different values to find the optimal synchronization settings for your specific setup.
5. Performance and Lag: If you’re experiencing dropped frames, stuttering, or lag during your streams, you may need to adjust your stream settings to optimize performance. Lower the video bitrate or adjust the encoder settings to reduce the strain on your computer’s resources. Additionally, closing any unnecessary background applications or processes can help improve performance.
6. Compatibility Issues: Ensure that your capture card is compatible with your operating system and streaming software. Check the system requirements provided by the manufacturer and make sure your computer meets those specifications. Additionally, check for any specific compatibility issues or known limitations outlined in the documentation or support resources for your capture card and software.
7. Firmware Updates: Regularly check for firmware updates for your capture card. Manufacturers often release updates to address bugs, improve performance, and introduce new features. Visit the manufacturer’s website and follow the instructions to update the firmware of your capture card, if available.
8. Support and Troubleshooting Resources: If you’ve exhausted all troubleshooting steps and are still experiencing issues, reach out to the manufacturer’s support team or consult their troubleshooting resources. They can provide specific guidance and assistance based on your capture card model and the issues you’re experiencing.
Remember that capturing and streaming video can be complex, and issues can arise due to factors beyond your control. Patience and persistence are key when troubleshooting these issues. Don’t hesitate to seek assistance from the manufacturer’s support team or online communities dedicated to streaming to help resolve any persistent problems.
By troubleshooting and addressing these common issues, you can ensure that your capture card setup performs optimally and delivers high-quality, smooth, and uninterrupted streams for your audience.
Conclusion
Congratulations! You have successfully set up and configured your capture card on Streamlabs, opening up a world of possibilities for your streaming and content creation endeavors. By following the steps outlined in this guide, you have learned how to connect your capture card to your PC, install the necessary drivers, and configure the card within Streamlabs.
A capture card provides numerous benefits, such as improved video quality, reduced CPU usage, expanded streaming options, real-time streaming capabilities, and a more professional-level streaming experience. With your capture card in place, you can now capture high-quality gameplay footage, record from external devices, and stream live events seamlessly.
Remember to choose a capture card that suits your needs, considering factors such as input and output options, video resolutions and frame rates, compatibility with your streaming software, and your budget. Regularly update your capture card drivers and software to ensure optimal performance and access any new features or improvements.
Throughout the setup process, testing and troubleshooting are essential. Testing your capture card helps you evaluate the quality, synchronization, and performance of your streams. Troubleshooting common issues ensures that any challenges or glitches are promptly addressed to deliver the best streaming experience to your audience.
As you continue your streaming journey, don’t forget to explore additional features and tools offered by Streamlabs and experiment with different settings to enhance the production value and engagement of your streams.
Streaming is an ever-evolving field, and staying up to date with the latest trends and technologies will help you continually refine and improve your streaming setup. Whether you’re a seasoned streamer or just starting out, embracing the possibilities of a capture card and leveraging the power of Streamlabs will undoubtedly elevate your streaming game.
Now it’s time to go live, connect with your viewers, and share your passion with the world. Happy streaming!


