Introduction
Welcome to the wonderful world of gaming! The Nintendo Switch has quickly become one of the most popular gaming consoles, offering gamers a unique and versatile gaming experience. But what if you want to play your Nintendo Switch games on a larger screen, like your Chromebook? Thankfully, you can easily connect your Nintendo Switch to your Chromebook without the need for a capture card.
Connecting your Nintendo Switch to your Chromebook opens up a whole new world of gaming possibilities. You can enjoy your favorite games on a bigger screen, take advantage of the Chromebook’s keyboard and mouse for certain games, and even live stream your gameplay for others to see and enjoy.
In this guide, we will walk you through the step-by-step process of connecting your Nintendo Switch to your Chromebook, without the need for a capture card. We will cover everything from preparing your Chromebook to configuring the video and audio settings, ensuring that you have a seamless gaming experience.
So, whether you’re a seasoned gamer or just starting out, buckle up and get ready to learn how to connect your Nintendo Switch to your Chromebook. Let’s dive in and get started!
Step 1: Prepare Your Chromebook
Before you can start connecting your Nintendo Switch to your Chromebook, you need to make sure your Chromebook is ready for the task. Follow these steps to prepare your Chromebook:
- Check the system requirements: Make sure your Chromebook meets the minimum system requirements for connecting external devices, such as a Nintendo Switch. Check the official documentation or the manufacturer’s website for the specific requirements.
- Update your Chromebook: Ensure that your Chromebook is running on the latest version of Chrome OS. To update your Chromebook, click on the status area in the bottom-right corner, then click on the gear icon to access the Settings menu. From there, click on “About Chrome OS” and then “Check for updates.” Follow the on-screen instructions to update your Chromebook to the latest version.
- Charge your Chromebook: Connect your Chromebook to a power source and let it charge fully. This will ensure that you have enough battery power to complete the connection process without any interruptions.
- Clear up storage space: Make sure you have enough free storage space on your Chromebook to accommodate the Nintendo Switch connection. Remove any unnecessary files or applications to create sufficient space.
- Disable Bluetooth: Turn off Bluetooth on your Chromebook to prevent any interference or conflicts with the Nintendo Switch connection. To do this, click on the status area in the bottom-right corner, then click on the Bluetooth icon. Toggle the Bluetooth switch to the off position.
By following these steps, you will ensure that your Chromebook is prepared for the seamless connection with your Nintendo Switch. Once you have completed these preparations, you are ready to move on to the next step: connecting your Nintendo Switch to your Chromebook.
Step 2: Connect Your Nintendo Switch to Your Chromebook
Now that your Chromebook is prepared, it’s time to connect your Nintendo Switch. Follow these simple steps to establish the connection:
- Power off your Nintendo Switch: Make sure your Nintendo Switch is powered off before connecting it to your Chromebook.
- Locate the USB Type-C cable: You will need a USB Type-C cable to connect your Nintendo Switch to your Chromebook. If you don’t have one, you can purchase it separately or use the cable that came with your Nintendo Switch dock.
- Connect the USB Type-C cable: Plug one end of the USB Type-C cable into the USB Type-C port on your Nintendo Switch. Then, plug the other end of the cable into one of the available USB Type-C ports on your Chromebook.
- Turn on your Nintendo Switch: Power on your Nintendo Switch by pressing the power button on the console. The screen should light up, indicating that it’s powered on.
- Wait for the connection: Your Chromebook should automatically detect the Nintendo Switch and establish a connection. It may take a few seconds for the connection to be recognized.
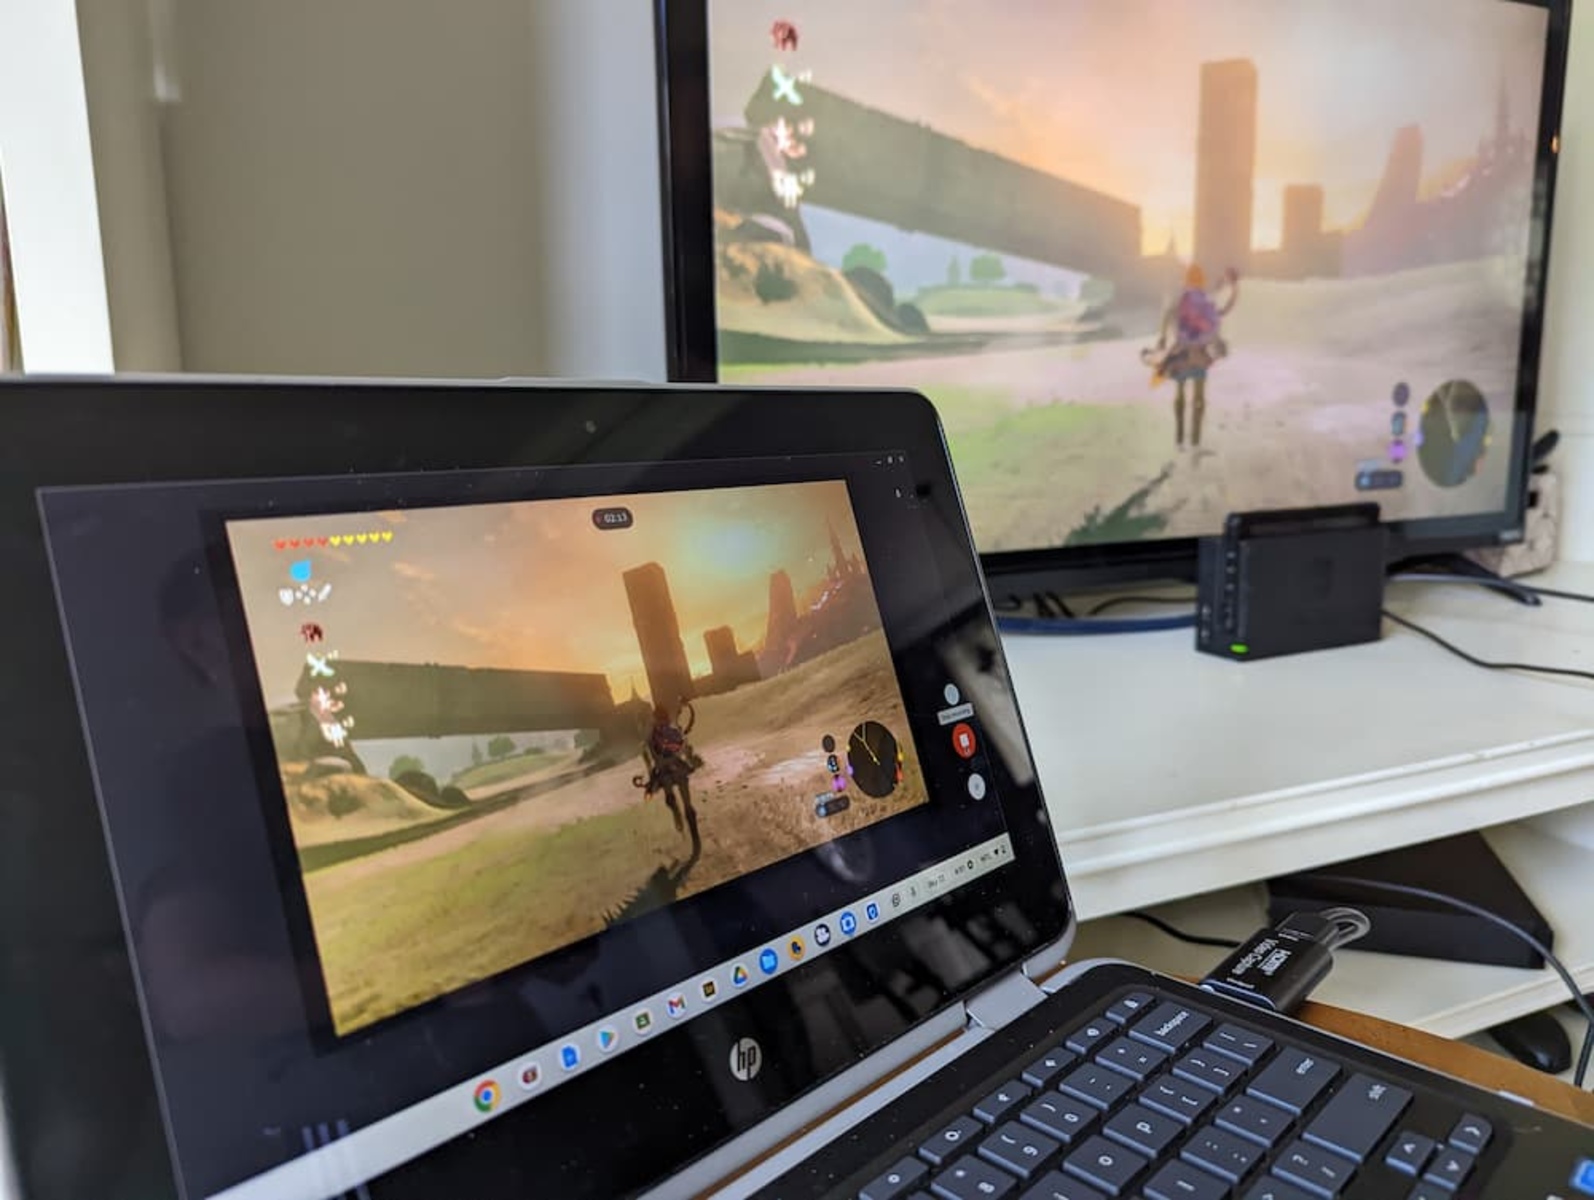
- Confirm the connection: Once the connection is established, you should see the Nintendo Switch screen mirrored on your Chromebook display. You are now ready to configure the video and audio settings for the best gaming experience.
That’s it! Your Nintendo Switch is now successfully connected to your Chromebook. You can now enjoy your favorite games on the bigger screen of your Chromebook and take advantage of the additional functionalities it offers.
In the next step, we will guide you through the process of configuring the video settings to ensure optimal display quality. Let’s move on to step 3!
Step 3: Configure the Video Settings
Now that your Nintendo Switch is connected to your Chromebook, it’s time to configure the video settings for the best gaming experience. Follow these steps to optimize the display quality:
- Access the display settings: Click on the system tray in the bottom-right corner of your Chromebook screen, then click on the gear icon to access the Settings menu. From there, click on the “Display” option to open the display settings.
- Adjust the screen resolution: In the display settings menu, you can adjust the screen resolution to ensure a crisp and clear display. Select the recommended resolution for your Chromebook screen or experiment with different resolutions to find the one that suits your preference.
- Enable game mode: Some Chromebooks offer a game mode or gaming-specific display settings. If your Chromebook has this feature, enable it to optimize the display for gaming. This may enhance the color saturation, contrast, and overall gaming visuals.
- Disable display zoom: It’s essential to disable any display zoom or magnification settings on your Chromebook, as they may affect the quality and visibility of the Nintendo Switch gameplay. Make sure the display zoom is set to 100% or the default setting.
- Adjust screen brightness: Adjust the screen brightness on your Chromebook to a comfortable level for gaming. You can use the brightness controls on your Chromebook keyboard or navigate to the display settings menu to make the adjustments.
By following these steps, you can configure the video settings on your Chromebook to enhance the display quality and ensure an immersive gaming experience with your Nintendo Switch.
In the next step, we will focus on configuring the audio settings to ensure optimal sound output. Let’s move on to step 4!
Step 4: Configure the Audio Settings
Along with the video settings, it’s important to configure the audio settings on your Chromebook to ensure a rich and immersive sound experience while gaming with your Nintendo Switch. Here’s how you can configure the audio settings:
- Access the sound settings: Click on the system tray in the bottom-right corner of your Chromebook screen, then click on the gear icon to access the Settings menu. From there, click on the “Sound” option to open the sound settings.
- Select the output device: In the sound settings, make sure to select the appropriate output device for audio playback. Choose the option that represents the speakers or headphones you will be using to hear the audio.
- Adjust the volume: Adjust the volume level on your Chromebook to a comfortable level for gaming. You can use the volume controls on your Chromebook keyboard or navigate to the sound settings menu to make the adjustments.
- Enable or disable enhancements: Chromebooks may offer audio enhancement options, such as equalizer settings or dynamic range compression. Experiment with these settings to find the audio configuration that best suits your gaming preferences.
- Test the audio output: To ensure that the audio settings are properly configured, play some audio or a game on your Nintendo Switch and listen for any distortions or irregularities in the sound output. Make further adjustments if necessary.
By following these steps, you can configure the audio settings on your Chromebook to optimize the sound output while gaming with your Nintendo Switch. This will help you enjoy the full audio experience and immerse yourself in the world of your favorite games.
In the next and final step, we will test the connection to ensure everything is working smoothly. Let’s move on to step 5!
Step 5: Test the Connection
After configuring the video and audio settings, it’s important to test the connection between your Nintendo Switch and your Chromebook to ensure that everything is working smoothly. Follow these steps to test the connection:
- Launch a game: Start a game on your Nintendo Switch and observe the gameplay on your Chromebook screen. Make sure the game runs smoothly and there are no noticeable lags or delays.
- Check for audio synchronization: Listen to the audio from the game and ensure that it is synchronized with the visuals on the screen. There should be no noticeable delay between the sound effects and the corresponding actions in the game.
- Test controller functionality: Use your Nintendo Switch controller to navigate through the game menus and control the gameplay. Ensure that all the buttons, joysticks, and other inputs on the controller work correctly and are responsive.
- Play a multiplayer game: If you have a multiplayer game, connect additional controllers to your Nintendo Switch and test the multiplayer functionality. Confirm that all the connected controllers are working properly and that the multiplayer experience is smooth and enjoyable.
- Monitor the system temperature: While playing games on your Nintendo Switch through your Chromebook, keep an eye on the temperature of both devices. If either device gets excessively hot, take breaks or consider using a cooling solution to prevent overheating.
By testing the connection and ensuring that everything is functioning as expected, you can be confident in your setup and enjoy a seamless gaming experience with your Nintendo Switch on your Chromebook.
Once you have successfully tested the connection, you are ready to embark on countless gaming adventures and make the most of your Nintendo Switch on your Chromebook. Happy gaming!
Conclusion
Congratulations! You have successfully learned how to connect your Nintendo Switch to your Chromebook without the need for a capture card. By following the step-by-step guide, you are now able to enjoy your favorite Nintendo Switch games on the larger screen of your Chromebook.
We started by preparing your Chromebook, ensuring that it meets the system requirements and updating it to the latest version of Chrome OS. Then, we walked through the process of connecting your Nintendo Switch to your Chromebook using a USB Type-C cable. Remember to power off your Nintendo Switch before making the connection.
Once the connection was established, we moved on to configuring the video settings on your Chromebook. Adjusting the screen resolution, enabling game mode, and disabling display zoom are key steps in optimizing the display quality for an immersive gaming experience.
We then focused on configuring the audio settings to enhance the sound output while gaming with your Nintendo Switch. Selecting the appropriate output device, adjusting the volume, and enabling/disabling enhancements are crucial steps to ensure a rich audio experience.
Finally, we emphasized the significance of testing the connection by launching a game, checking for audio synchronization, testing controller functionality, playing multiplayer games, and monitoring system temperature. By doing so, you can ensure that everything is working smoothly and enjoy uninterrupted gaming sessions.
Now that you have mastered the art of connecting your Nintendo Switch to your Chromebook, unleash your gaming prowess and delve into a world of endless possibilities. Whether you’re conquering kingdoms, exploring new realms, or competing with friends, your Chromebook will be your gateway to an extraordinary gaming adventure.
So grab your Nintendo Switch, power up your Chromebook, and embark on an unforgettable gaming journey. Happy gaming!