Introduction
Welcome to the world of visual voicemail on Android! Managing your voicemail messages has never been easier with the convenience and efficiency of visual voicemail. Whether you’re new to Android or simply looking for a guide to help you set up visual voicemail on your device, you’ve come to the right place.
In this article, we’ll walk you through the step-by-step process of setting up visual voicemail on your Android phone. Before we get started, let’s take a quick look at what visual voicemail is and how it can improve your voicemail experience.
Visual voicemail is a feature that allows you to view and manage your voicemail messages in a visual interface on your Android device. Instead of dialing a voicemail number and listening to your messages one by one, visual voicemail gives you the ability to see a list of your voicemail messages, read transcriptions of the messages, and choose which ones to listen to or delete.
This efficient method of managing voicemail saves you time and eliminates the frustration of listening to lengthy voicemail greetings or irrelevant messages. With visual voicemail, you can quickly scan through your messages, prioritize the important ones, and easily delete the ones you don’t need.
Now that you understand the benefits of visual voicemail, let’s dive into the step-by-step process of setting it up on your Android device. But before we proceed, it’s important to ensure that your phone is compatible with visual voicemail.
Note: The instructions in this article may vary slightly depending on the make and model of your Android device and the version of the operating system it is running. However, the basic steps should be similar across most Android phones.
Step 1: Check compatibility
Before you proceed with setting up visual voicemail on your Android device, it’s important to confirm that your phone is compatible with this feature. While the vast majority of modern Android devices support visual voicemail, there may be some older models or carrier-specific variations that do not offer this functionality.
To check if your Android phone supports visual voicemail, follow these steps:
- Open the Phone app on your Android device.
- Look for a voicemail icon or a voicemail tab at the bottom of the screen. Tap on it.
- If you see a message that says “Visual voicemail is not available for your device” or something similar, it means that your phone does not support visual voicemail.
- If you don’t see any message, it’s likely that your device is compatible with visual voicemail. Continue to the next step to proceed with the setup process.
If your phone is not compatible with visual voicemail, don’t worry. You can still use the traditional method of dialing your voicemail number to listen to your messages. However, if visual voicemail is available for your device, it’s definitely worth setting up as it offers a more convenient and efficient way to manage your voicemail.
Now that you’ve determined the compatibility of your Android device, let’s move on to the next step: accessing your phone settings to set up visual voicemail.
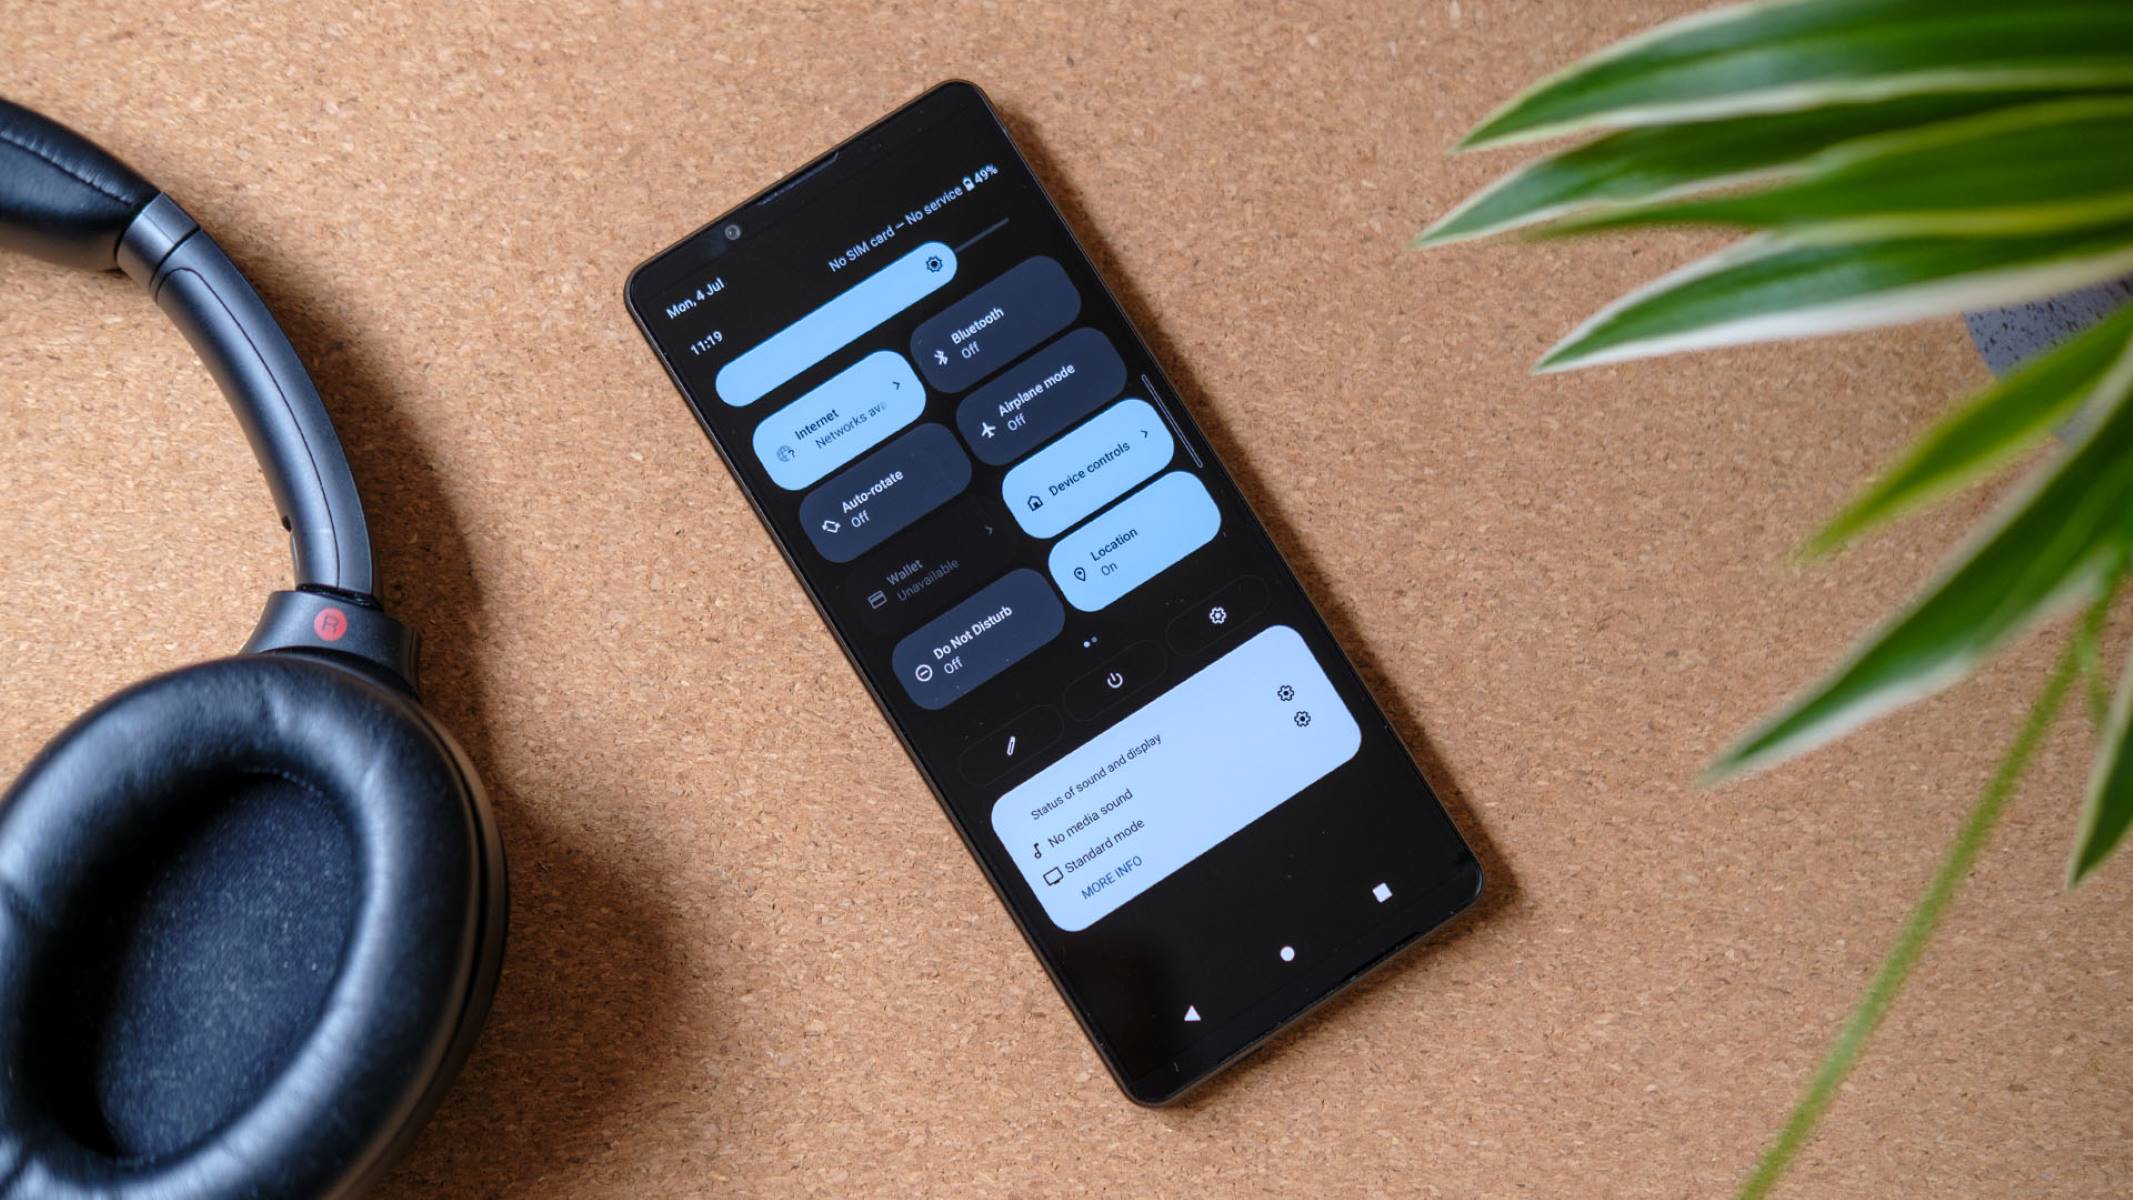
Step 2: Access phone settings
In order to set up visual voicemail on your Android device, you’ll need to access the phone settings. The exact steps to access settings may vary slightly depending on the make and model of your device, but the general process is as follows:
- Swipe down from the top of your screen to open the notification panel.
- Tap on the gear-shaped icon or the “Settings” option to open the Settings app.
- Alternatively, you can find the Settings app in your app drawer. Look for an icon that resembles a gear or simply search for “Settings” using the search function.
Once you’ve successfully opened the Settings app, you’re ready to move on to the next step of setting up visual voicemail on your Android device. In the Settings app, you’ll find various options and settings related to your phone’s features and functions.
Now that you’re familiar with accessing your phone settings, let’s proceed to the next step: finding the Voicemail section.
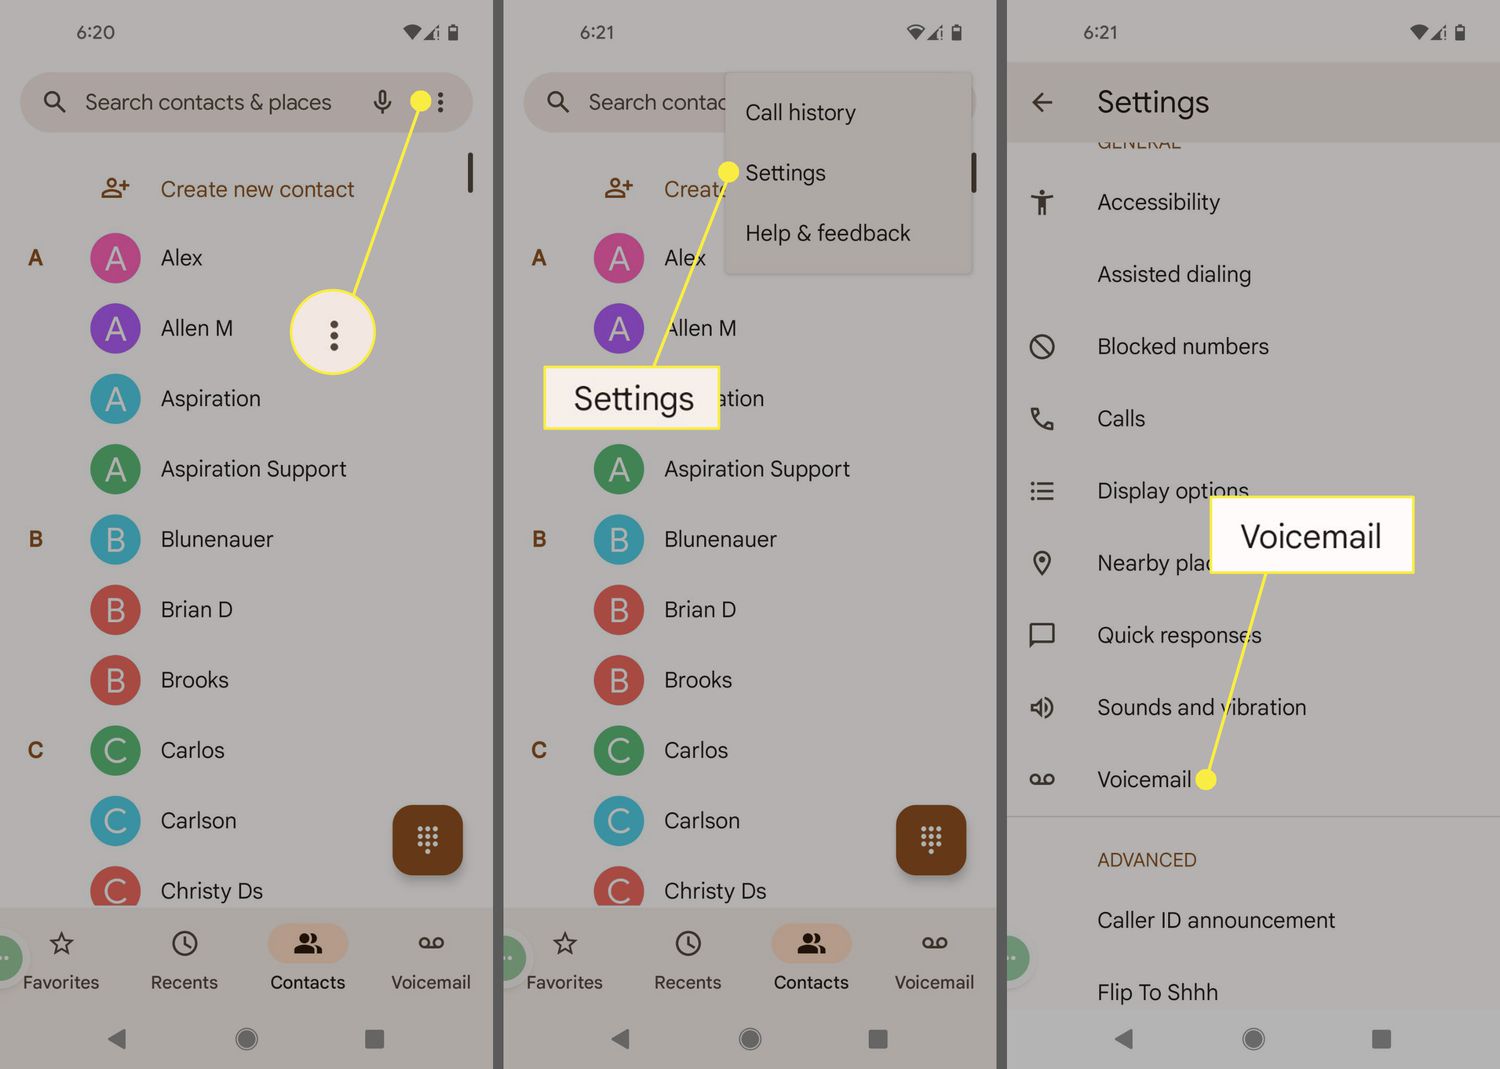
Step 3: Find the Voicemail section
Once you have accessed the phone settings on your Android device, it’s time to locate the Voicemail section. This is where you’ll find the settings related to your voicemail, including the option to set up visual voicemail.
To find the Voicemail section, follow these steps:
- Scroll down or swipe up in the Settings app to navigate through the various options.
- Look for the section that is labeled “Sound & Notification,” “Call,” or something similar. This section may vary depending on the make and model of your device.
- Within this section, you should see an option for “Voicemail” or “Voicemail settings.” Tap on it to access the voicemail settings.
If you’re unable to locate the Voicemail section within the Sound & Notification or Call settings, you can use the search function within the Settings app. Simply type in “Voicemail” in the search bar, and it should display the relevant results.
Once you have successfully located the Voicemail section, you’re ready to move on to the next step: setting up visual voicemail on your Android device. In the Voicemail settings, you’ll find the necessary options to enable and customize visual voicemail according to your preferences.
Now that you know how to find the Voicemail section, let’s proceed to the next step: setting up visual voicemail.
Step 4: Set up visual voicemail
Setting up visual voicemail on your Android device is a straightforward process once you have accessed the Voicemail settings. Follow these steps to get started:
- In the Voicemail settings, you may see an option to enable visual voicemail. If it’s available, simply toggle the switch to turn it on.
- If the option to enable visual voicemail is not available, don’t worry. Some Android phones automatically activate visual voicemail when you insert a compatible SIM card.
- If visual voicemail is not activated automatically, you may need to contact your mobile carrier and inquire about enabling the feature. They might be able to assist you with the setup process or provide you with the necessary instructions.
- Once you have enabled visual voicemail, you may have to wait a few minutes for your device to synchronize and retrieve your voicemail messages.
It’s important to note that the exact process of setting up visual voicemail may vary depending on your mobile carrier and the version of Android running on your device. Some carriers may provide their dedicated visual voicemail app or require additional steps to activate the feature.
Make sure to follow any specific instructions provided by your carrier or consult their support resources if you encounter any difficulties during the setup process.
Now that you have successfully set up visual voicemail on your Android device, let’s move on to the next step: customizing your voicemail settings to enhance your voicemail experience.
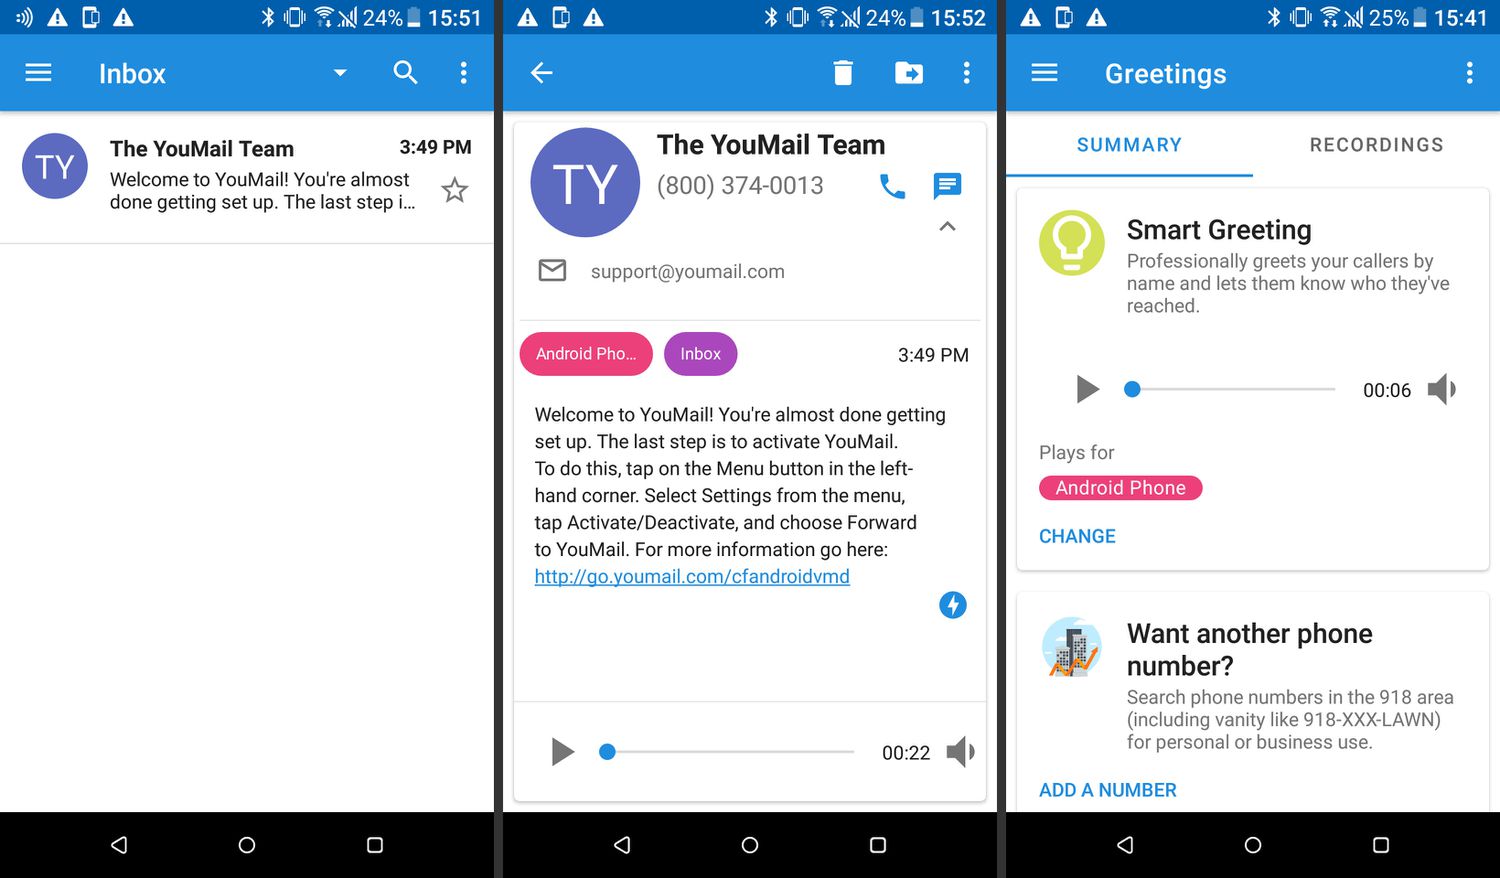
Step 5: Customize voicemail settings
After setting up visual voicemail on your Android device, you have the option to customize your voicemail settings to enhance your voicemail experience. Customizing these settings allows you to personalize how you receive and manage your voicemail messages. Here’s how you can do it:
- Open the Voicemail settings on your Android device.
- Within the voicemail settings, you’ll find various options that you can customize according to your preferences. These options may include:
- Greeting: Customize your voicemail greeting to create a personalized message for callers to hear before leaving a voicemail.
- Notifications: Configure how you receive notifications for new voicemail messages, such as sound, vibration, or LED light.
- Transcription: Enable or disable the voicemail transcription feature, which converts your voicemail messages into text for easier reading.
- Storage: Manage the storage space dedicated to voicemail messages and set limits for automatic deletion of old messages.
- Accessibility: Adjust accessibility options, such as increasing font size or enabling captions, for users with visual or hearing impairments.
- Explore each option and make the desired changes as per your preferences.
- Remember to save your settings before exiting the Voicemail settings.
By customizing these voicemail settings, you can create a personalized voicemail experience that suits your needs and preferences. Whether it’s recording a unique voicemail greeting or choosing how you receive notifications, these customization options help streamline your voicemail management.
Now that you’ve customized your voicemail settings, let’s move on to the next step: accessing and managing your visual voicemail messages on your Android device.
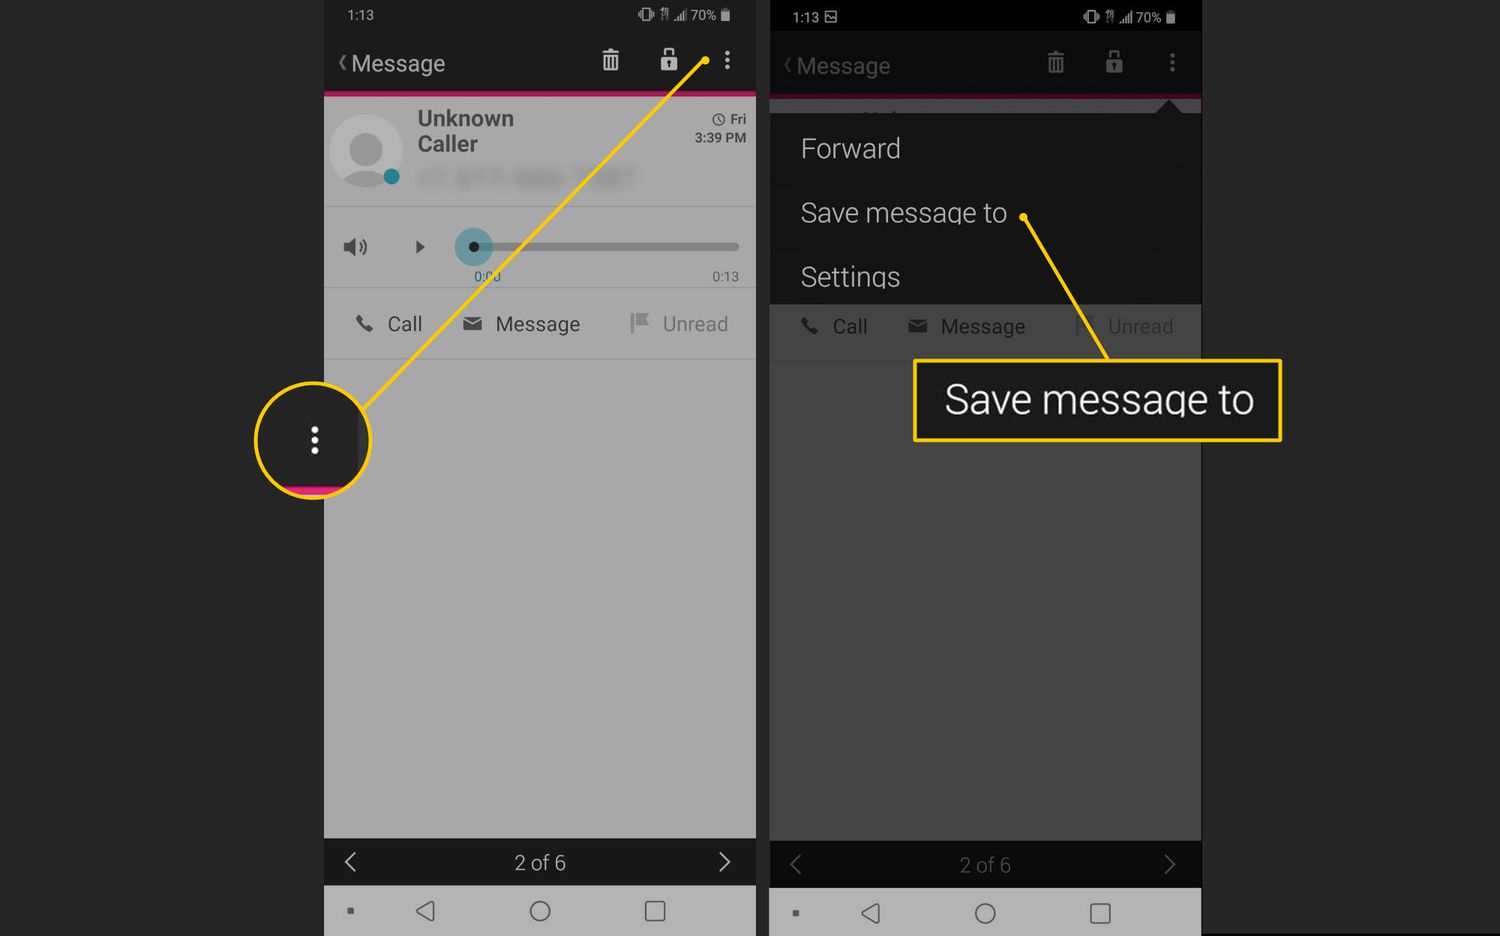
Step 6: Access and manage visual voicemail
Now that you have set up visual voicemail and customized your settings on your Android device, it’s time to learn how to access and manage your voicemail messages. With visual voicemail, you can easily view and organize your messages in a visually appealing interface. Here’s how:
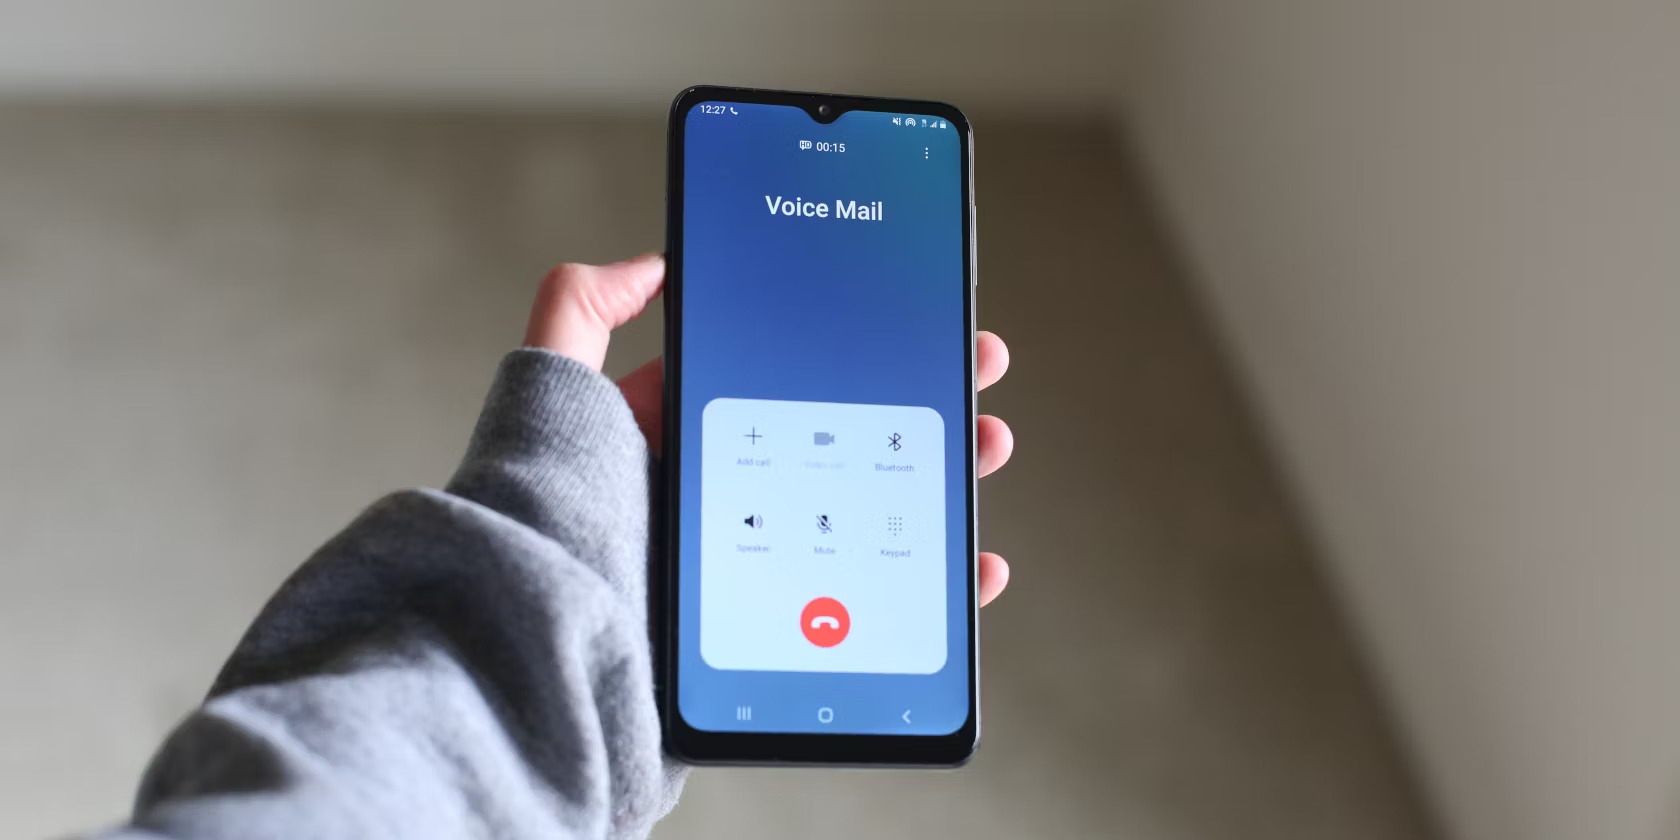
- Open the Phone app on your Android device.
- Look for the voicemail icon or tab at the bottom of the screen. Tap on it to access your visual voicemail.
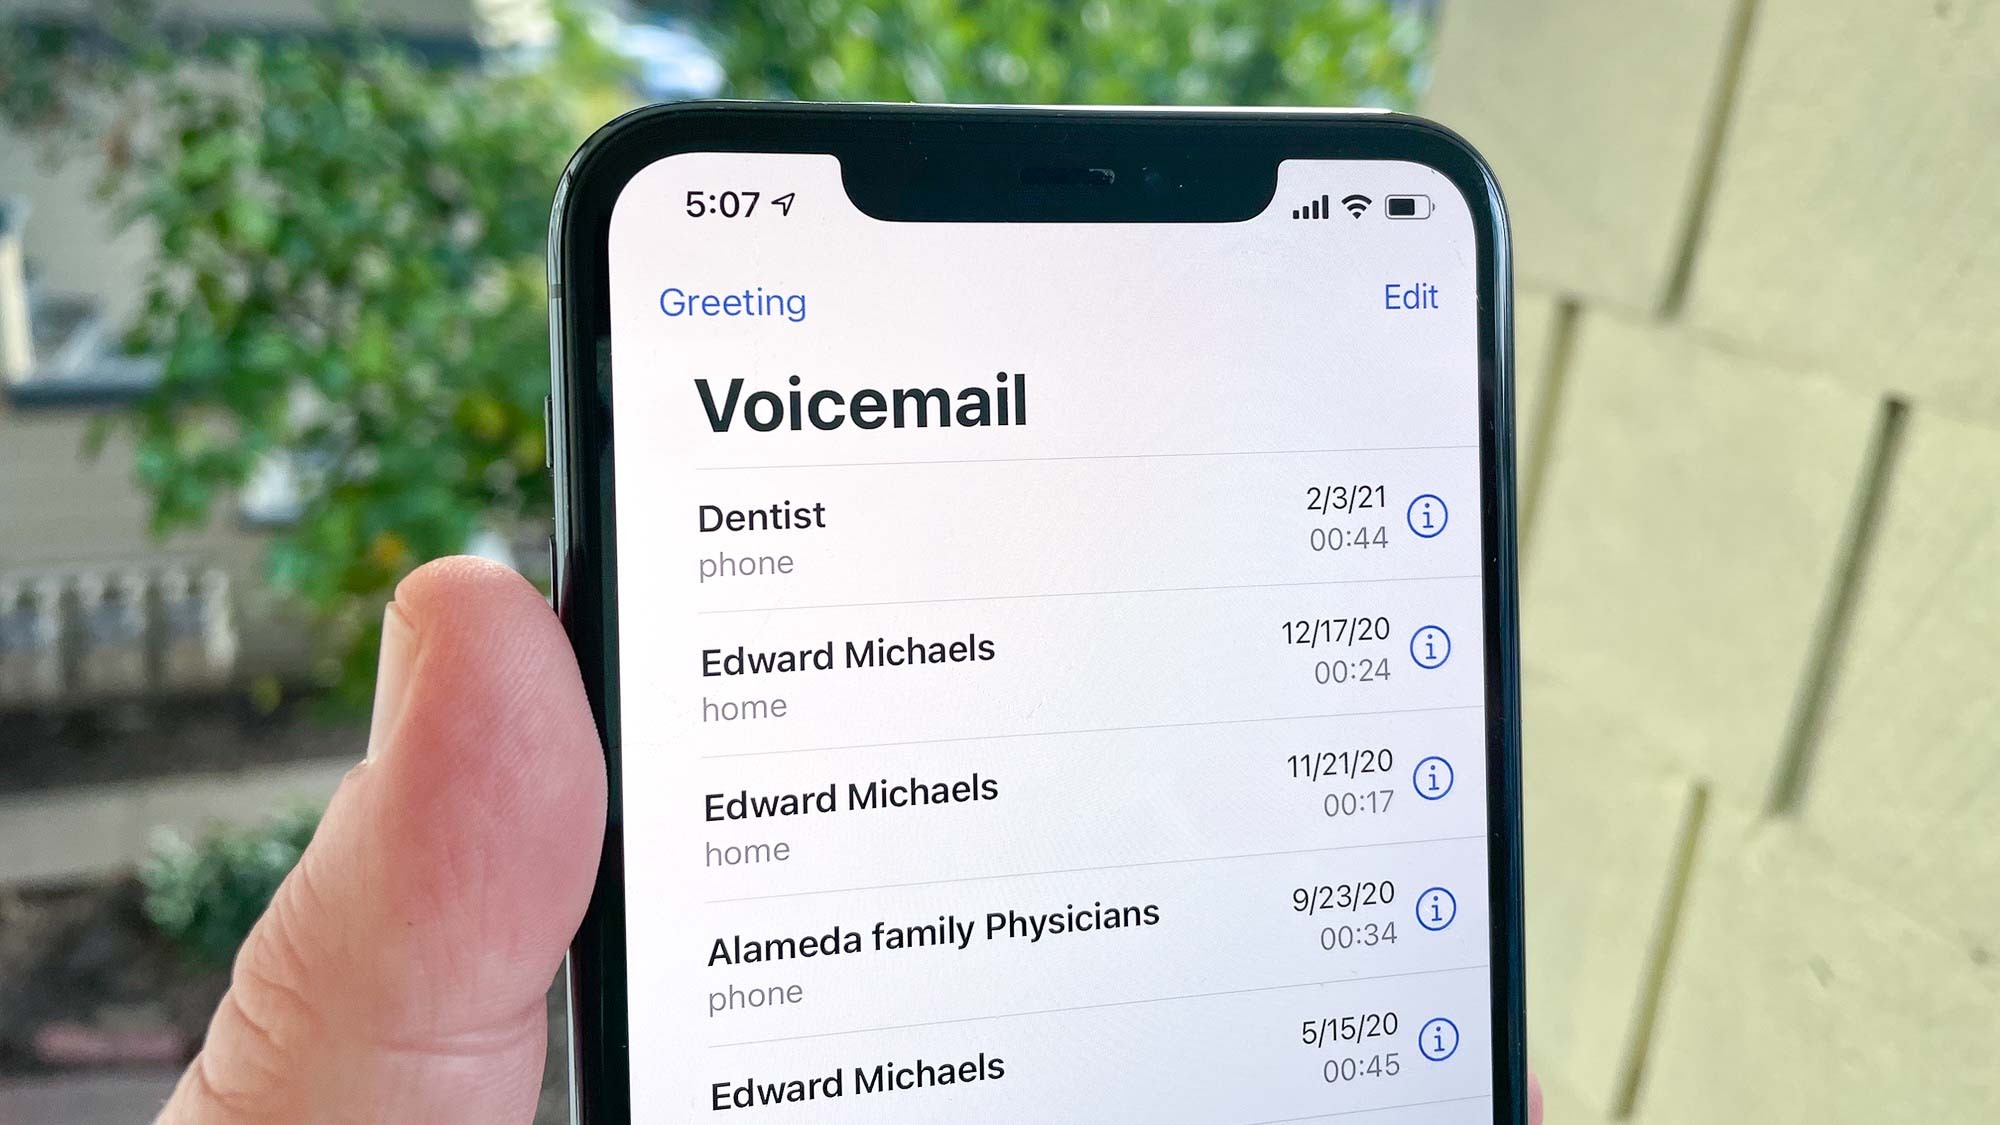
- You’ll see a list of voicemail messages with important details like the caller’s name or phone number, the date and time of the message, and a transcription of the message if you have the feature enabled.
- Tap on a voicemail message to listen to it. You can also swipe left or right to navigate through your messages.
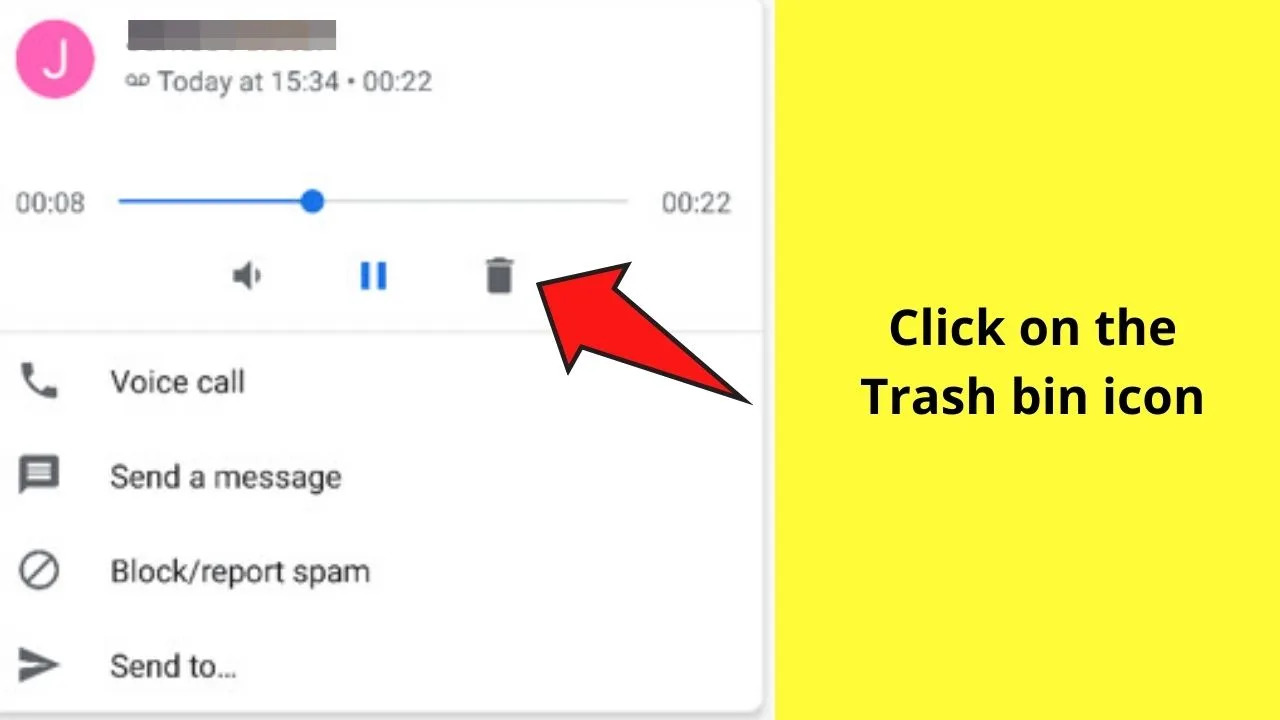
- Depending on the options available, you can perform actions such as archiving, deleting, or saving voicemail messages. Look for icons or options within the visual voicemail interface to access these functions.
- If you want to call back the person who left the voicemail, simply tap on the phone number displayed in the voicemail message, and your device will initiate the call.
- Remember to regularly manage your voicemail messages by deleting unnecessary ones to free up storage space.
With visual voicemail, you have the flexibility to navigate through your messages, prioritize important ones, and easily listen or respond to them. This efficient method of managing voicemail saves you time and ensures that you never miss crucial messages.
Now that you know how to access and manage your visual voicemail, you’re all set to make the most of this convenient feature on your Android device.
Conclusion
Congratulations! You have successfully set up visual voicemail on your Android device. By following the step-by-step process outlined in this guide, you can now enjoy the convenience and efficiency of managing your voicemail messages in a visual interface.
With visual voicemail, you can say goodbye to the tedious task of dialing a voicemail number and listening to messages one by one. Instead, you can easily view a list of your voicemail messages, read transcriptions, and choose which ones to listen to or delete.
Remember to customize your voicemail settings to personalize your voicemail experience. Whether it’s recording a unique greeting, adjusting notifications, or enabling voicemail transcription, these settings allow you to tailor the feature to suit your preferences.
When it comes to accessing and managing your visual voicemail, simply open your Phone app and tap on the voicemail icon or tab. From there, you can listen to your messages, call back the sender, and perform various actions depending on the available options.
As you continue to use visual voicemail, make it a habit to regularly delete unnecessary messages to keep your voicemail inbox organized and maintain sufficient storage space.
Remember that the exact steps and options may vary depending on your Android device and mobile carrier. If you encounter any difficulties or have specific questions, don’t hesitate to reach out to your carrier’s support for assistance.
Visual voicemail is a valuable feature that simplifies and enhances your voicemail experience. It saves you time, provides a visual interface for easier management, and allows you to prioritize important messages more efficiently.
Now that you’re well-versed in setting up and using visual voicemail on your Android device, embrace this convenient feature and enjoy an improved voicemail experience.