Introduction
As Halloween approaches, many people are looking for creative ways to decorate their homes and create a spooky atmosphere. One popular idea is to set up a Halloween projector to display eerie and creepy images on the exterior of the house. This not only adds an element of excitement but also becomes a focal point for trick-or-treaters and neighbors alike.
Setting up a Halloween projector may seem like a daunting task, especially if you have little experience with audio-visual equipment. However, with the right guidance and a few simple steps, you can easily transform your home into a haunted masterpiece.
In this guide, we will walk you through the process of setting up a Halloween projector, from selecting the right projector to troubleshooting common issues. Whether you want to project ghosts, pumpkins, or spooky creatures onto your house, these tips will help you create a memorable and spooky display.
So, grab your cauldron of creativity and let’s dive into the world of Halloween projectors!
Selecting the Right Projector
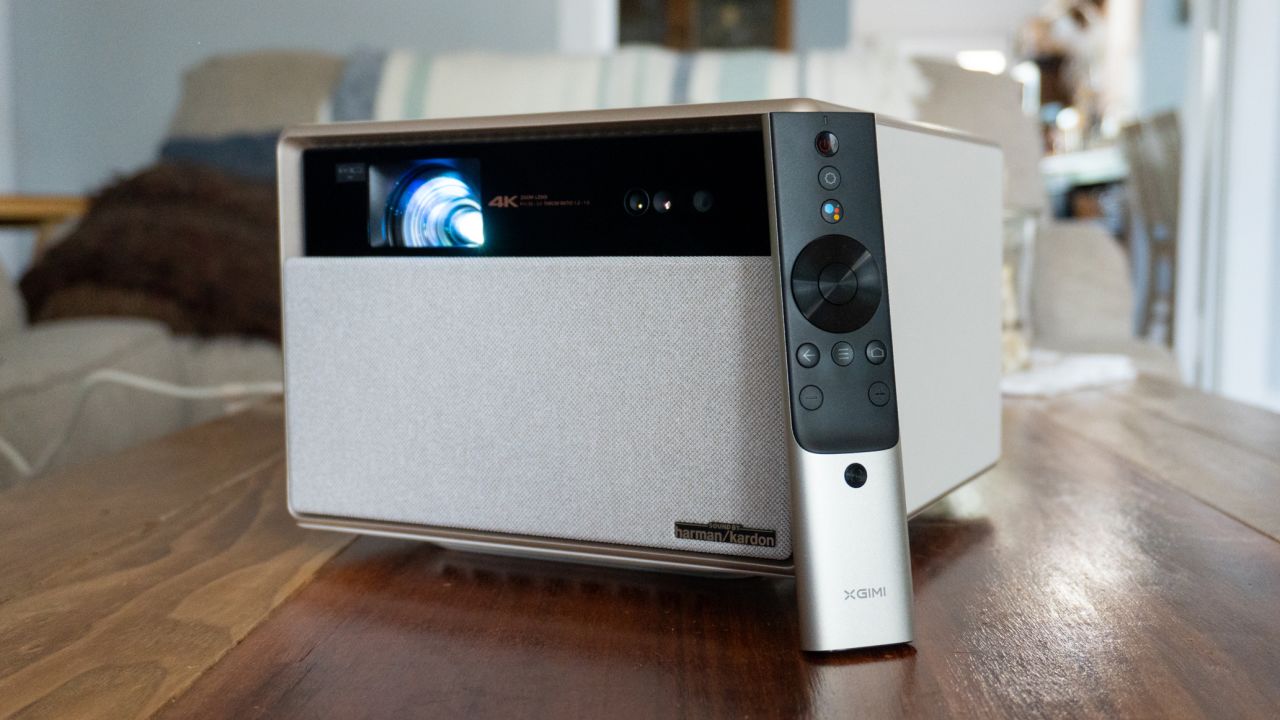
When it comes to choosing a projector for your Halloween display, there are a few key factors to consider. The right projector can make all the difference in the quality and impact of your projected images. Here are some things to keep in mind:
- Brightness: Opt for a projector with high brightness output to ensure clear and vivid images, even in outdoor settings. Look for projectors with at least 2,000 lumens for optimal results.
- Resolution: Higher resolution projectors will provide sharper and more detailed images. Aim for a minimum resolution of 1080p to ensure a crisp display.
- Throw Distance: Consider the size of your display area and the distance between the projector and the projection surface. Choose a projector with an adjustable throw distance to ensure the images fit perfectly on your desired surface.
- Contrast Ratio: A higher contrast ratio will result in more defined and vibrant images. Look for projectors with a contrast ratio of at least 10,000:1 for optimal performance.
- Connectivity Options: Ensure that the projector has the necessary connectivity options, such as HDMI or VGA ports, to connect to your chosen media source (e.g., laptop, DVD player, or media streaming device).
- Durability: Since the projector will be used outdoors, it is important to choose one that is weather-resistant and can withstand the elements. Look for projectors with an IP65 or higher rating for protection against dust and water.
Additionally, it is worth considering the size and weight of the projector, especially if you plan to mount it or move it around frequently. Portable projectors are a great option for flexibility and ease of use.
Take your time to research and compare different projectors to find the one that fits your needs and budget. Reading customer reviews and seeking recommendations can also help you make an informed decision.
Now that you have selected the right projector, let’s move on to the next step: choosing the perfect location for your Halloween projection.
Choosing the Perfect Location
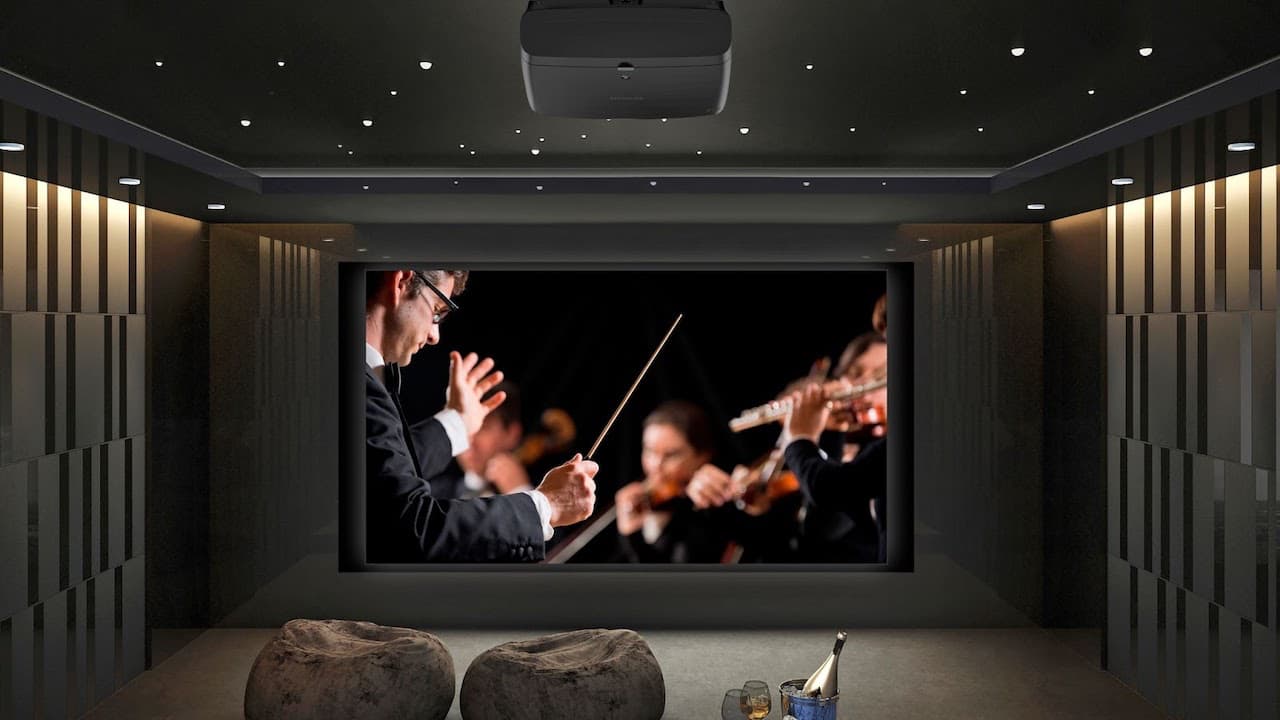
The success of your Halloween projector display relies heavily on selecting the perfect location. Here are some important considerations to keep in mind when choosing where to set up your projector:
- Visible Surface: Identify a large, flat surface on the exterior of your house that is easily visible from the street or your desired viewing area. This could be a blank wall, garage door, or even a large sheet hung from a secure structure.
- Distance and Size: Measure the distance between the projector and the projection surface. Ensure that the projector’s throw distance matches the size of the surface you want to project onto. Play around with different distances and surface sizes to achieve the desired effect.
- Avoiding Obstructions: Ensure that there are no obstacles, such as trees, branches, or other structures, obstructing the projection surface. These can interfere with the quality and visibility of the projected images.
- Lighting Conditions: Consider the ambient lighting conditions in the area where you plan to set up your projector. Ideally, choose a location with minimal light pollution to enhance the visibility of the projections. Avoid extremely bright areas that may wash out the images.
- Power Accessibility: Make sure there is a power outlet nearby to connect the projector and any additional audio equipment you may use. If the location is far from a power source, ensure that you have extension cords or a generator to provide power.
- Secure Mounting: If you plan to mount the projector, ensure that the location allows for secure installation. Check for sturdy surfaces or use mounting brackets and tools specifically designed for outdoor projectors.
Once you have considered these factors, take some time to experiment with different locations and angles before finalizing the setup. This will allow you to find the optimal positioning that provides the best image quality and visibility.
Remember, the goal is to create an immersive and captivating Halloween display, so choose a location that maximizes the impact of the projected images. With a well-chosen location, you are one step closer to creating a spooky atmosphere for your Halloween festivities.
Projecting Halloween Images
Now that you have selected the right projector and chosen the perfect location, it’s time to dive into projecting Halloween images onto your designated surface. Follow these steps to create a truly haunting display:
- Select Spooky Images: Choose Halloween-themed images or animations that fit the atmosphere you want to create. You can find a variety of pre-made images online or even create your own using graphic design software. Popular choices include ghosts, witches, pumpkins, skeletons, and bats.
- Create a Playlist or Loop: If you plan to display multiple images, create a playlist or loop of the selected images. This will allow them to play continuously and seamlessly throughout the night. Consider adding some transitions or effects between images to enhance the visual experience.
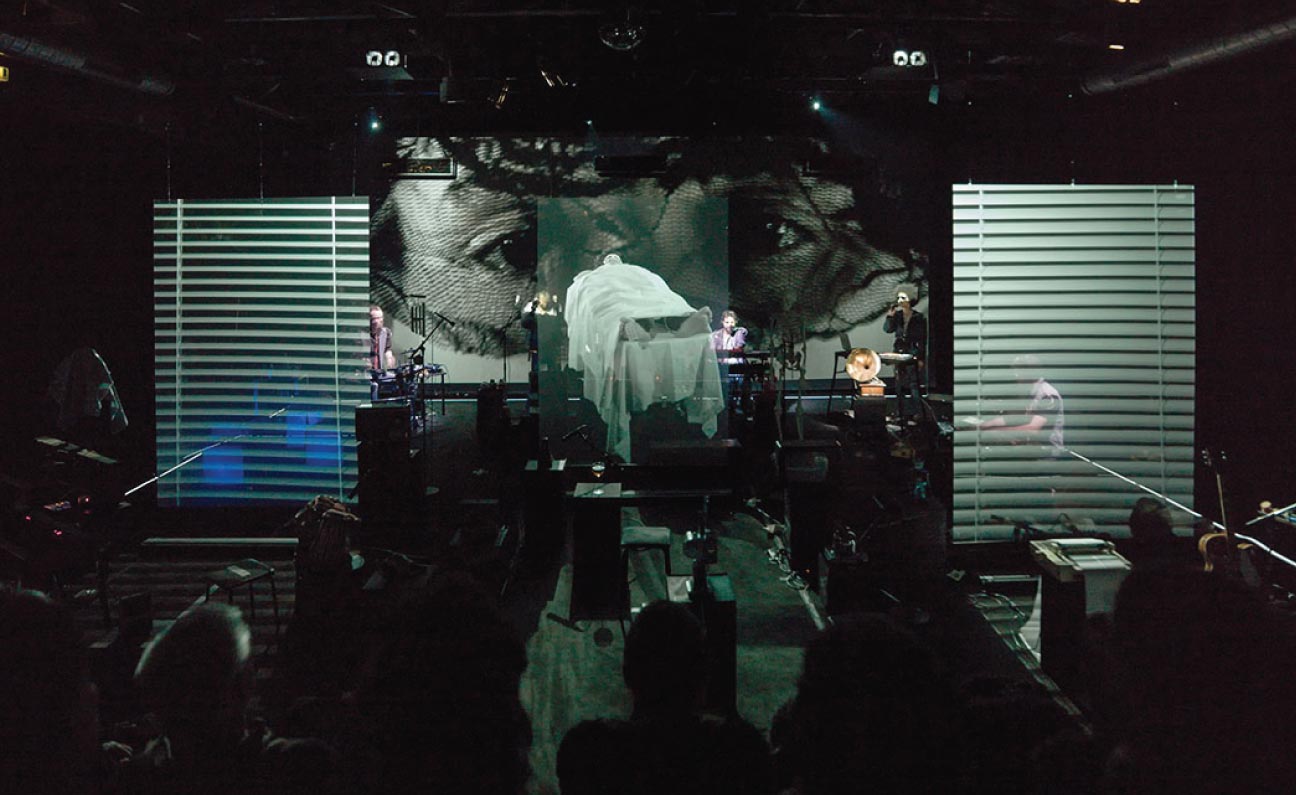
- Use Projection Mapping: Projection mapping is a technique that allows you to precisely align the images with the contours of the surface you are projecting onto. This creates a more immersive and realistic effect. Utilize specialized software or apps that help with projection mapping to align the images perfectly.
- Adjust Position and Size: Use the projector’s manual focus and keystone correction features to adjust the position and size of the projected image. This will ensure that the image fits well on the projection surface and appears crisp and clear.
- Consider Sound Effects: To enhance the overall spooky atmosphere, consider adding sound effects to accompany the projected images. You can use a separate outdoor speaker or connect audio devices directly to the projector, depending on the available audio options.
Experiment with different combinations of images, effects, and audio to find the perfect blend that creates the desired impact. Remember, the goal is to create a captivating and chilling visual experience for all who see your Halloween projector display.
Now that you have set up and projected the Halloween images, it’s time to focus on creating a spooky atmosphere to enhance the overall effect. Let’s proceed to the next section.
Creating a Spooky Atmosphere
Setting up a Halloween projector is not just about projecting images; it’s about creating a spine-chilling atmosphere that delights and scares. Here are some creative ideas to enhance the spooky ambiance:
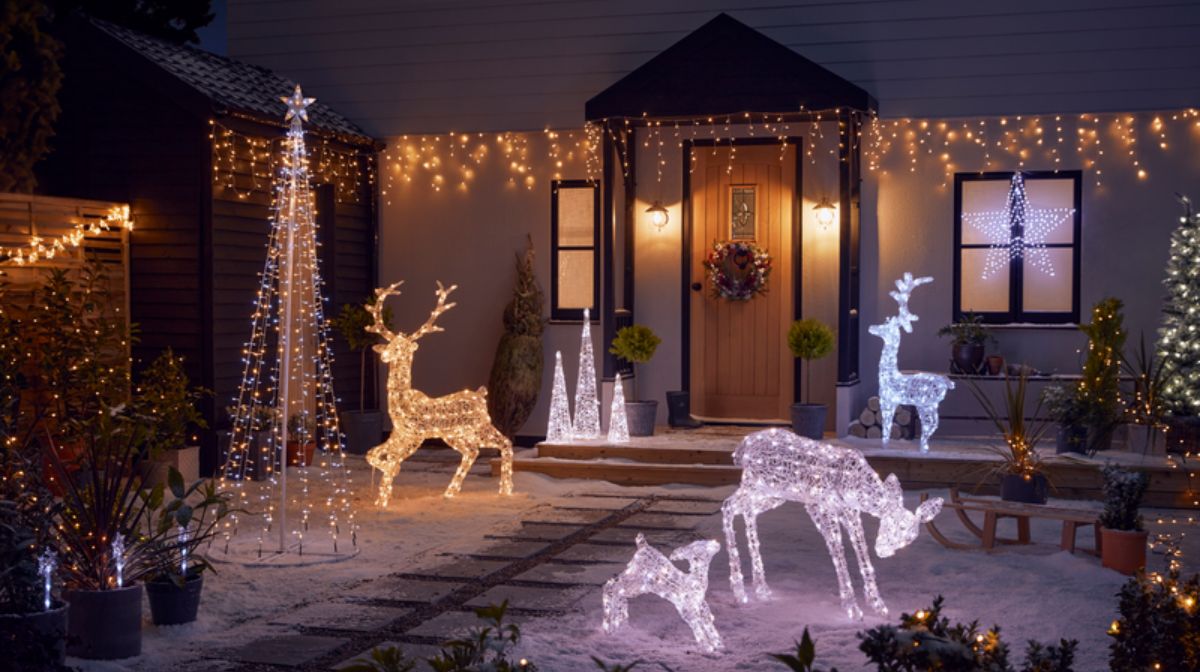
- Add Decorations: Use additional Halloween decorations, such as fake cobwebs, tombstones, lanterns, or hanging props, to create an eerie environment around the projection area. These decorations can complement the projected images and add to the overall Halloween theme.
- Utilize Lighting: Experiment with different lighting techniques to enhance the mood. Consider using colored lights, strobe lights, or flickering candles to cast eerie shadows and create a more haunting atmosphere. Lighting can greatly amplify the impact of the projected images.
- Set Up Fog Machines: If allowed in your area and safe to use, fog machines can add a layer of mystery and spookiness to your display. The swirling fog will not only enhance the visual effect of the projected images but also create an immersive experience for those passing by.
- Play Spooky Music: Set the right ambiance by playing spooky soundtracks or eerie music that complements the projections. The soundscape will heighten the overall experience and immerse viewers in a Halloween-inspired world. Consider using wireless speakers or outdoor audio systems for optimal sound quality.
- Dynamic Lighting Effects: If your projector supports it, use dynamic lighting effects that sync with the projected images. This can create a more interactive and captivating display, as the lights and images change in sync to create a thrilling visual experience.
Remember, attention to detail is key in creating a truly immersive and spooky atmosphere. Consider the positioning of your decorations, the placement of lighting sources, and the volume and placement of audio devices to ensure a cohesive and chilling effect.
Now that you have created a spooky atmosphere, let’s move on to the next section, which focuses on ensuring proper projection alignment to make your display even more captivating.
Ensuring Proper Projection Alignment
Proper projection alignment is crucial to ensure that your Halloween images are displayed accurately and effectively. Follow these steps to achieve the best alignment for your projector:
- Secure the Projector: Make sure that the projector is securely mounted or placed on a stable surface to avoid any movement or vibration during operation. This will prevent the images from shifting or becoming distorted.
- Level the Projector: Adjust the projector’s tilt and rotation to ensure that the projected image is level with the projection surface. Use the projector’s built-in level, if available, or a separate leveling tool to achieve the desired alignment.
- Keystone Correction: Most projectors offer keystone correction features to help adjust the distortions caused by projecting at an angle. Use this feature to correct any trapezoidal or skewed effect and obtain a rectangular image.
- Fine-Tune Positioning: Use the projector’s focus and zoom controls to refine the positioning and size of the projected image. Ensure that the entire image fits within the desired projection area without any cropping or distortion at the edges.
- Utilize Grid or Alignment Tools: Some projectors offer built-in alignment tools, such as grid patterns or alignment guides, to assist with fine-tuning the projection alignment. Use these tools to ensure precise and accurate placement of the images.
- Projection Mapping Techniques: If you are using projection mapping, use the mapping software or apps to align the images with the exact contours of the projection surface. This can create a more immersive and realistic visual experience.
Take the time to adjust and test the projection alignment from different viewing angles to ensure that the images are displayed correctly for all viewers. Make any necessary adjustments until you are satisfied with the alignment and positioning of the projected images.
Now that you have ensured proper projection alignment, let’s move on to the next step: adjusting brightness and contrast settings for optimal image quality.
Adjusting Brightness and Contrast
To achieve the best image quality and ensure that your Halloween projections stand out, it is important to properly adjust the brightness and contrast settings on your projector. Follow these steps to optimize the visual impact of your display:
- Darken the Environment: Before adjusting the brightness and contrast levels, make sure that the surrounding environment is as dark as possible. This will allow you to accurately gauge the impact of the projected images and adjust the settings accordingly.
- Start with Default Settings: Begin by setting your projector to its default or recommended settings for brightness and contrast. This will serve as a baseline from which you can make adjustments based on your specific environment and preferences.
- Adjust Brightness: Increase or decrease the projector’s brightness level until the projected images are clear and well-defined. Avoid setting the brightness too high, as it may wash out the colors and details. Strive for a balance that allows the images to be vivid and visible without causing strain or discomfort to viewers.
- Fine-Tune Contrast: Adjust the contrast settings to enhance the difference between light and dark areas of the projected image. This will add depth and richness to the visuals, making them more impactful. Be careful not to overdo it, as excessive contrast may result in lost details or unnatural-looking images.
- Consider Ambient Lighting: Take into account the ambient lighting conditions in the area where you are projecting. Adjust the brightness and contrast settings accordingly to ensure that the images remain visible and vibrant, even in the presence of some light pollution.
- Calibrate if Necessary: If you have access to calibration tools or a calibration disc, consider using them to fine-tune the brightness and contrast settings. This can help achieve optimal image quality based on the specific characteristics of your projector.
Remember to periodically review and readjust the brightness and contrast settings throughout your Halloween projection, as external lighting conditions may change over time. This will help maintain the best possible image quality and ensure that your display remains visually striking.
With the brightness and contrast properly adjusted, you are one step closer to creating a captivating and immersive Halloween experience. Let’s move on to the next section, which focuses on connecting audio devices to enhance the overall impact of your display.
Connecting Audio Devices
Adding audio to your Halloween projector display can greatly enhance the overall impact and create a more immersive experience for viewers. Follow these steps to connect audio devices and bring your projections to life:
- Determine Audio Source: Decide on the audio source you want to use for your Halloween display. This can be a laptop, smartphone, tablet, or any other device that can play audio files. Ensure that the audio source has compatible outputs for connecting to your projector or external speakers.
- Connect via HDMI or Audio Cable: If your audio source and projector both have HDMI ports, connect the HDMI cable from the audio source to the projector. This will transmit both the video and audio signals. Alternatively, you can use an audio cable (such as 3.5mm or RCA) to connect the audio output of your source to the corresponding audio input on the projector or external speakers.
- Use External Speakers: If you want to amplify the audio or need better sound quality, consider connecting external speakers to your audio source. This can be done using the audio output of your device or through the projector’s audio output, if available. Make sure to choose speakers suitable for outdoor use and place them strategically for optimal sound distribution.
- Wireless Audio Options: If you prefer a wireless setup or need more flexibility in speaker placement, consider using Bluetooth or Wi-Fi enabled speakers. These speakers can connect directly to your audio source, eliminating the need for cables. Ensure that the speakers have sufficient range and are compatible with your audio source.
- Test and Adjust: Once your audio devices are connected, test the audio output to ensure proper functioning. Adjust the volume level to achieve the desired balance between the audio and the visual elements of your Halloween projection. Make sure that the audio is clear and audible, enhancing the spooky atmosphere without overpowering the visuals.
Remember to take into account any necessary cable lengths, extension cords, or power supply requirements when setting up your audio devices. Keep in mind any limitations of the equipment and adjust your setup accordingly to ensure a seamless and synchronized audio-visual experience.
With your audio devices connected, you’re now ready to immerse your audience in a chilling and spine-tingling Halloween experience. Let’s move on to the next section, which will cover troubleshooting common issues that may arise during your Halloween projector setup.
Troubleshooting Common Issues
While setting up and using a Halloween projector, you may encounter some common issues. Here are a few troubleshooting tips to help you overcome these obstacles:
- Blurry or Distorted Images: If your projected images are blurry or distorted, first check the focus and keystone correction settings on your projector. Adjust them until the images become clear and properly aligned. If necessary, double-check the positioning and stability of the projector to ensure it is not vibrating or moving during operation.
- Poor Image Quality: If the projected images appear washed out or lack vibrant colors, start by adjusting the brightness and contrast settings on your projector. Ensure that the surrounding environment is as dark as possible and that there is minimal light pollution. Additionally, double-check the resolution of your image files to ensure they are optimal for projection.
- Audio Connectivity Issues: If you are experiencing issues connecting audio devices, first check the cables for any loose connections. Adjust the volume levels on both the audio source and the projector or speakers. If you are using wireless speakers, ensure that they are within range and properly paired with your audio source.
- Projection Alignment Problems: If the projected images are not aligned properly with the projection surface, go back and adjust the projector’s position, tilt, and rotation. Utilize any built-in alignment tools or mapping software to help with precise alignment. Take your time to fine-tune the positioning until the images fit perfectly on the desired surface.
- Power Issues: If your projector or audio devices are not powering on, check that they are properly connected to a power source. Ensure that all cables and power cords are securely plugged in. If necessary, try using a different power outlet or replace any faulty cables or adapters.
- Weather Conditions: If you are planning to set up your Halloween projector outdoors, be aware of weather conditions that may affect its performance. Protect the equipment from rain, humidity, and extreme temperatures by using weatherproof covers or enclosures. Consider using a canopy or tent to provide additional protection against the elements.
If you encounter any issues while setting up or using your Halloween projector, consult the user manual or manufacturer’s website for further troubleshooting instructions. Online forums and communities can also be a valuable resource for finding solutions or seeking advice from experienced users.
By addressing these common issues as they arise, you can ensure a smooth and captivating Halloween projection experience for all.
Conclusion
Congratulations! You have successfully learned how to set up a Halloween projector to create a visually stunning and spine-chilling display. By following the steps outlined in this guide, you have acquired the knowledge and skills to select the right projector, choose the perfect location, project Halloween images, create a spooky atmosphere, ensure proper projection alignment, adjust brightness and contrast settings, connect audio devices, and troubleshoot common issues.
Remember to choose the projector that best suits your needs and budget, considering factors such as brightness, resolution, throw distance, and connectivity options. Select a visible and unobstructed surface for projection, and experiment with different images, effects, lighting, and sound to create an immersive and truly spooky atmosphere.
Ensure proper alignment and adjust the brightness and contrast settings to optimize the quality of the projected images. Connect audio devices to enhance the overall impact and immerse viewers in an eerie soundscape. And, be prepared to troubleshoot common issues that may arise during the setup process.
With your Halloween projector display in place and fully operational, get ready to captivate trick-or-treaters, neighbors, and passersby with your haunted masterpiece. Brace yourself for the oohs and aahs as they marvel at your spooky projections and soak in the chilling atmosphere you have created.
Remember to always prioritize safety when setting up your Halloween projector, especially when working with electrical equipment and outdoor environments. Follow all safety guidelines provided by the manufacturer, and ensure that any power sources and cables are properly secured and protected.
Have a frightfully fun Halloween and happy projecting!