Introduction
Welcome to the world of projectors! Whether you’re using a projector in a classroom, a conference room, or even in your own home theater, you may have heard the term “keystone” being thrown around. But what exactly is keystone and what does it mean for your projector?
In simple terms, keystone is a term used to describe the distortion that can occur when an image is projected onto a screen or surface at an angle. This distortion can make the image appear wider at the top or bottom, causing a trapezoidal effect, rather than a perfect rectangle. Luckily, there is a solution to this problem: keystone correction.
Keystone correction is a feature found in most modern projectors that allows you to compensate for the distortion caused by projecting at an angle. It is a vital tool for ensuring that your projected image appears as it should, regardless of the projector’s position.
So how does keystone correction actually work? Well, it’s all about manipulating the pixel data to correct the distortion. When you activate keystone correction on your projector, it makes adjustments to the projected image by compressing or expanding certain parts of the image. This manipulation ensures that the resulting projected image appears rectangular and not distorted.
While keystone correction is undoubtedly a valuable feature, it’s important to note that it has its limitations. One common issue with keystone correction is that it can introduce some level of image degradation. As the projector manipulates the image to correct for keystone, it can result in a loss of resolution and image quality. Additionally, if the keystone correction is set to extreme levels, it can cause the image to become distorted or have a noticeable impact on the overall image quality.
Despite these limitations, keystone correction remains a popular and widely-used feature for projectors, thanks to its ability to correct image distortion and make adjustments on the fly. Whether you’re setting up a projector for a business presentation, a movie night with friends, or a classroom lecture, keystone correction can ensure that your projected image appears as it was intended.
In the following sections, we will delve deeper into how keystone correction works, explore some common issues you may encounter, weigh the pros and cons of using keystone correction, and provide tips for utilizing this feature effectively. So, let’s dive in and discover more about the fascinating world of keystone correction!
Definition of Keystone on a Projector
When it comes to projectors, the term “keystone” refers to the distortion that can occur when an image is projected onto a screen or surface at an angle. This distortion makes the image appear wider at the top or bottom, creating a trapezoidal effect instead of a perfect rectangle.
Keystone is a result of the projector’s position or the angle at which it is placed. If the projector is positioned higher or lower than the center of the screen, or if it is tilted to the side, keystone distortion can occur. This is especially noticeable when projecting onto a flat surface, such as a whiteboard or a projection screen.
The term “keystone” is derived from the shape of a keystone in architecture, which is a wedge-shaped piece at the top of an arch that helps distribute the load evenly. In the context of projectors, keystone refers to the shape that the projected image takes when there is distortion due to improper positioning or alignment.
It’s important to understand that keystone distortion is not a fault of the projector itself, but rather a result of the projection angle. Luckily, most projectors nowadays come equipped with a keystone correction feature to address this issue.
Keystone correction is the process of adjusting the projected image to counteract the keystone distortion. By making adjustments to the image, the projector can manipulate the pixel data to compress or expand certain parts of the image. This manipulation ensures that the resulting projection appears as a true rectangle, eliminating the trapezoidal effect caused by keystone distortion.
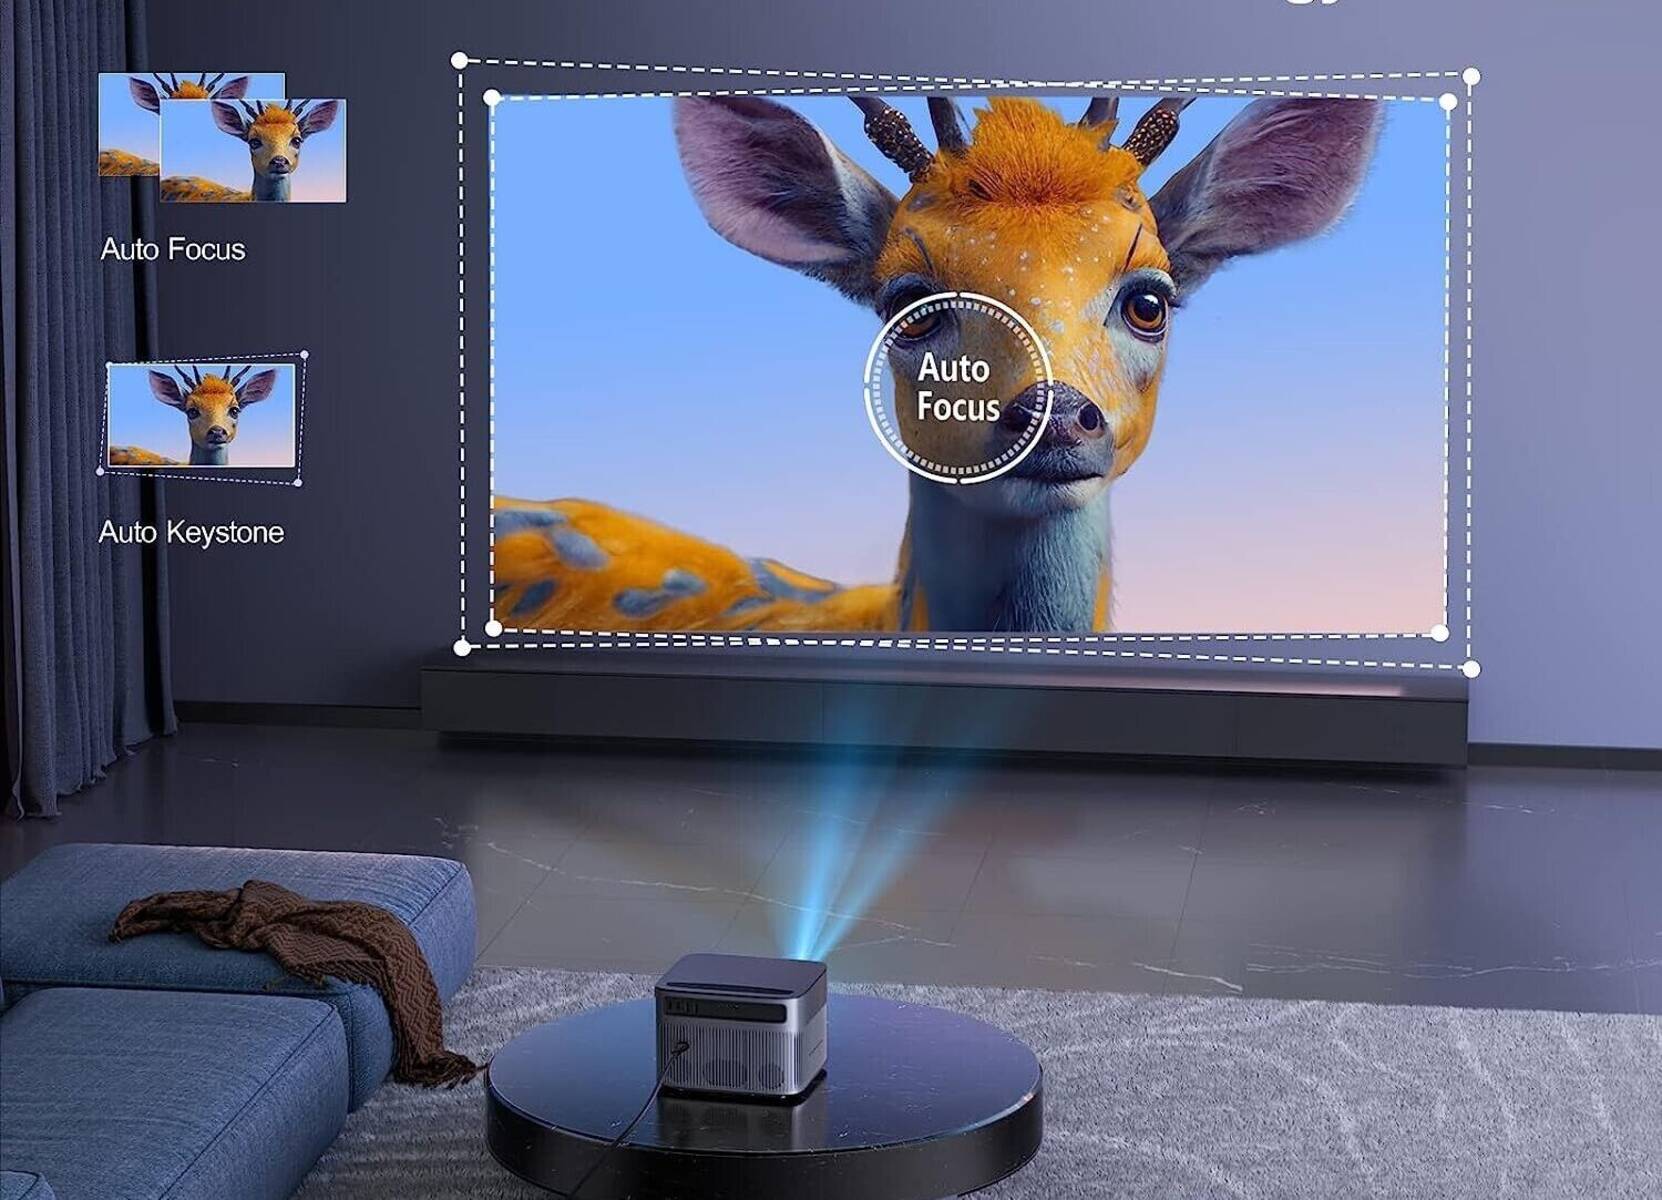
Keystone correction can be achieved through manual adjustments using the projector’s on-screen menu or remote control. Some projectors also offer automatic keystone correction, where the projector detects the keystone distortion and makes the necessary adjustments automatically.
Now that we have a clear understanding of what keystone on a projector refers to, let’s explore how keystone correction works and its implications in the next section.
How Keystone Correction Works
Keystone correction is a feature found in most modern projectors that helps correct the distortion caused by projecting at an angle. It works by manipulating the pixel data of the projected image, making adjustments to compress or expand certain parts of the image to rectify the trapezoidal effect caused by keystone distortion.
When keystone correction is activated, the projector analyzes the image and calculates the amount of distortion based on the projection angle. It then adjusts the image by digitally stretching or compressing specific areas to compensate for the keystone effect. This manipulation ensures that the image appears square or rectangular when projected onto a flat surface.
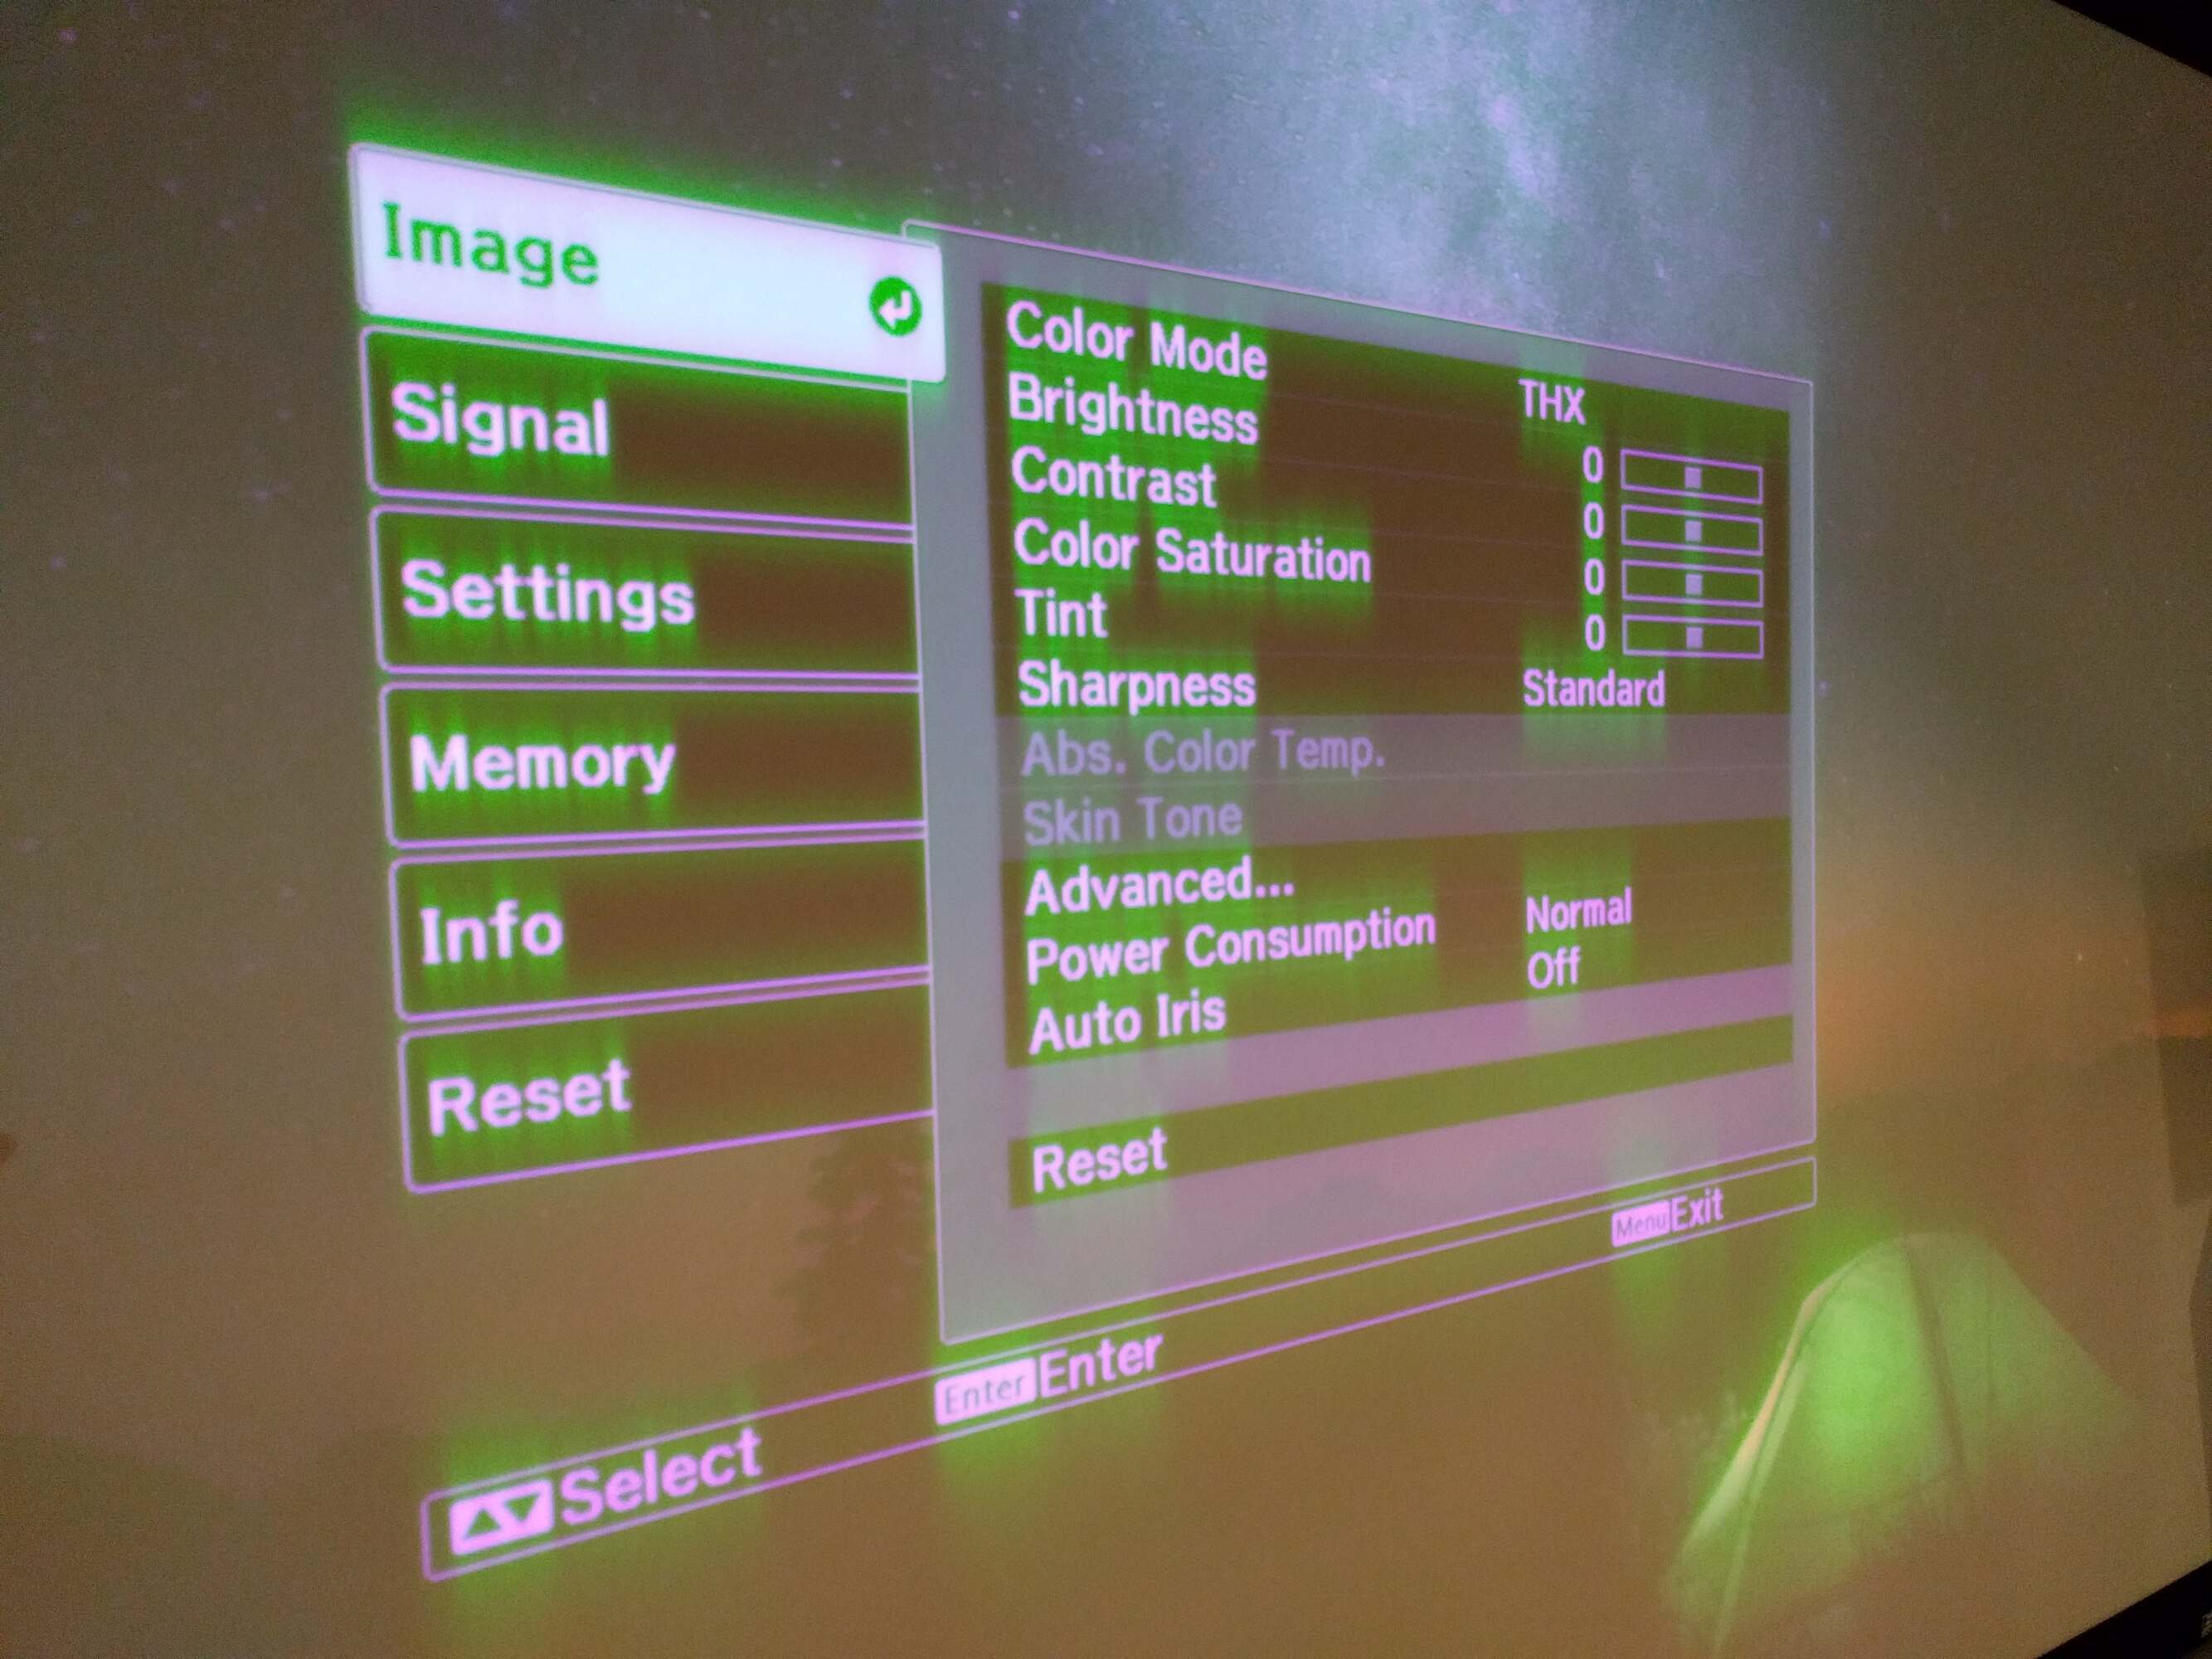
Using manual keystone correction, you can access the projector’s menu or remote control to make adjustments. In the menu, you’ll find options to align the top or bottom of the image and adjust the horizontal or vertical keystone. By manipulating these settings, you can fine-tune the projected image to eliminate distortion and achieve a more accurate rectangular shape.
Automatic keystone correction, available in some projectors, simplifies the process even further. Using built-in sensors or cameras, the projector detects the keystone distortion and automatically makes the necessary adjustments. This feature is particularly useful for quick setup or in situations where you frequently need to change the projection angle.
It’s important to note that keystone correction does have its limitations. When making adjustments to correct keystone distortion, the projector is essentially stretching or compressing pixels. This can result in a loss of image resolution and quality, especially if the distortion is severe or requires significant correction. The more extreme the keystone correction, the more noticeable the impact on the image quality may be, resulting in slightly softer edges or less sharpness.
Another factor to consider is that keystone correction is most effective when the projector is within a certain range of the screen. If the projection angle is too extreme, or the distortion is too severe, keystone correction may not be able to fully correct the image. In such cases, physical adjustments to the projector’s position may be necessary to achieve the desired rectangular projection.
Despite these limitations, keystone correction remains an invaluable tool for ensuring a properly proportioned and distortion-free image. It allows flexibility in projector placement and enables you to quickly align the image even in challenging projection environments.
Now that we understand how keystone correction works, let’s explore some common issues that you may encounter with keystone on projectors.
Common Issues with Keystone on Projectors
While keystone correction is a valuable feature for correcting image distortion, it does come with a few common issues that you may encounter when using projectors. Understanding these issues can help you overcome them and optimize your projection experience.
1. Image Degradation: One common issue with keystone correction is that it can lead to a loss of image quality. When the projector compresses or stretches pixels to correct keystone distortion, it can result in a slight loss of sharpness or resolution. This image degradation is most noticeable when significant keystone correction is required, or when projecting fine details or text.
2. Limited Correction Range: Another issue is that keystone correction has its limits. While projectors offer a certain range of adjustment, if the distortion is too severe or the projection angle is too extreme, the keystone correction may not be able to fully rectify the image. In such cases, physically adjusting the projector’s position or using additional accessories like lens shift or adjustable mounts may be necessary.
3. Aspect Ratio Changes: Keystone correction can also affect the aspect ratio of the projected image. When making adjustments, the image may be stretched or compressed horizontally or vertically, resulting in an altered aspect ratio. This can lead to distorted or elongated images, especially if multiple keystone adjustments are needed simultaneously.
4. Image Softness: In some cases, keystone correction can introduce softness or blurriness to the edges of the projected image. This effect becomes more noticeable when making significant adjustments to correct a large keystone distortion. It’s important to find a balance between correcting the distortion and maintaining image sharpness.
5. Keystone Correction Limitations: Different projectors have varying levels of keystone correction capabilities. Some projectors offer basic manual adjustments, while others provide more advanced automatic correction. It’s important to check the specifications and capabilities of your projector to understand its limitations and ensure you can achieve the desired correction.
Despite these common issues, keystone correction remains an essential feature for achieving a properly proportioned and distortion-free image. It provides flexibility in projector placement and allows for quick adjustments to align the image in various projection scenarios.
Next, we will explore the pros and cons of using keystone correction, helping you make an informed decision when utilizing this feature.
Pros and Cons of Keystone Correction
Keystone correction is a versatile feature that offers both advantages and disadvantages. Understanding the pros and cons can help you decide when and how to best utilize keystone correction with your projector.
Pros of Keystone Correction:
- Flexible Projector Placement: Keystone correction allows you to place the projector at various angles and heights while still achieving a rectangular projection. This flexibility is especially useful in situations where the projector cannot be placed directly in front of the screen or surface.
- Quick and Convenient Adjustments: Keystone correction provides a convenient way to make on-the-fly adjustments to correct image distortion. Manual adjustments can be made through the projector’s menu or remote control, while some projectors offer automatic keystone correction, taking the guesswork out of the process.
- Accessibility for Non-Ideal Environments: Keystone correction is particularly beneficial in environments where ideal projector placement is not feasible, such as rooms with low ceilings or limited space. It allows you to adapt to the constraints of the space while still achieving a presentable and properly proportioned image.
- Time and Cost Savings: By eliminating the need for precise projector positioning or expensive accessories like adjustable mounts or lens shift mechanisms, keystone correction can save you time and money. It simplifies the setup process and reduces the need for additional equipment.
Cons of Keystone Correction:
- Image Degradation: As mentioned earlier, keystone correction can result in a slight loss of image quality, especially when significant adjustments are needed. The stretching or compression of pixels can lead to a reduction in sharpness or resolution, and fine details or text may appear slightly less defined.
- Limited Correction Range: Keystone correction has its limits, and extreme distortions or angles may be beyond the projector’s correction capabilities. In such cases, physical adjustments to the projector’s position or the use of additional accessories may be necessary for achieving the desired projection.
- Aspect Ratio Changes: Making keystone corrections can alter the aspect ratio of the projected image. The image may appear stretched or compressed horizontally or vertically, leading to a distorted or elongated image. This can be particularly noticeable when multiple adjustments are required simultaneously.
- Softness or Blurriness: When making significant adjustments to correct keystone distortion, the image’s edges may appear slightly soft or blurry. Finding the right balance between correcting the distortion and preserving image sharpness can be a challenge.
Considering the pros and cons of keystone correction, it is essential to weigh the benefits it offers against the potential drawbacks. In some cases, the convenience and flexibility of keystone correction outweigh the minimal image degradation it may cause. However, in situations where image quality is critical or extreme distortions are present, alternative placement or projection techniques may be more suitable.
Next, let’s explore some tips for using keystone correction effectively to optimize your projection experience.
Tips for Using Keystone Correction Effectively
To make the most out of keystone correction and ensure optimal image quality, here are some tips to keep in mind when using this feature with your projector:
- Minimize Keystone Correction: Whenever possible, try to minimize the extent of keystone correction needed. This can be achieved by placing the projector as close to the center of the screen as possible and ensuring it is level and perpendicular to the projection surface. By starting with a well-aligned setup, you can reduce the amount of keystone correction required.
- Utilize Digital Keystone First: Begin by using the digital keystone correction feature provided by your projector. This allows you to make adjustments within the projector’s software or on-screen menu. Experiment with different settings to find the optimal balance between correcting distortion and preserving image quality.
- Consider Physical Adjustments: If the keystone correction range of your projector is insufficient to rectify extreme distortion, consider physically adjusting the projector’s position. This could involve repositioning the projector or using adjustable mounts, ceiling mounts, or projector stands to achieve a more favorable projection angle.
- Use Test Patterns: Utilize test patterns specifically designed for keystone correction to fine-tune the adjustments. These patterns help you identify distortion and make precise corrections for optimal image alignment.
- Calibrate Aspect Ratio: After applying keystone correction, ensure that the aspect ratio of the projected image is correct. Use the aspect ratio settings on the projector or the source device to adjust the image dimensions and prevent any elongation or distortion caused by the correction process.
- Double-Check Alignment: Once keystone correction is applied, double-check the alignment of the image with the screen or projection surface. Look for any remaining distortion or misalignment and make further adjustments as necessary.
- Consider Alternative Projection Techniques: In situations where image quality is crucial or extreme distortions cannot be adequately corrected, consider alternative projection techniques. This may involve using a projector with lens shift capabilities or exploring rear projection options to achieve a distortion-free image.
- Consult the User Manual: Always refer to the user manual provided with your projector for specific instructions on keystone correction. Different projectors may have unique settings and features, so familiarizing yourself with the manufacturer’s guidelines can help you make the most effective use of the tool.
By following these tips, you can leverage keystone correction effectively to achieve the best possible image alignment and ensure an impressive projection experience with your projector.
With a clearer understanding of how keystone correction works, common issues associated with it, and tips for using it effectively, you are now ready to confidently apply this feature to optimize your projector setup and projection quality.
Conclusion
Keystone correction is a valuable feature in modern projectors that helps address the distortion caused by projecting at an angle. By manipulating the pixel data of the projected image, keystone correction allows you to achieve a properly proportioned and distortion-free projection onto a flat surface.
While keystone correction offers flexibility in projector placement and convenient adjustments, it also has its limitations. Image degradation, limited correction range, and changes in aspect ratio are some common issues to consider when using keystone correction.
Despite these limitations, keystone correction remains a valuable tool for achieving optimal image alignment and ensuring an impressive projection experience. By following the tips for using keystone correction effectively, such as minimizing the need for correction, utilizing digital adjustments, and considering physical adjustments, you can optimize your projection setup and minimize any potential image degradation.
Ultimately, the decision to use keystone correction depends on the specific needs of your projection environment. It is important to balance the convenience and flexibility of keystone correction with the desired image quality. In cases where precise image integrity is paramount, alternative placement or projection techniques may be necessary.
With a clear understanding of keystone correction, its benefits, and its limitations, you can confidently set up your projector and utilize this feature to achieve a distortion-free and visually appealing projection every time.