Introduction
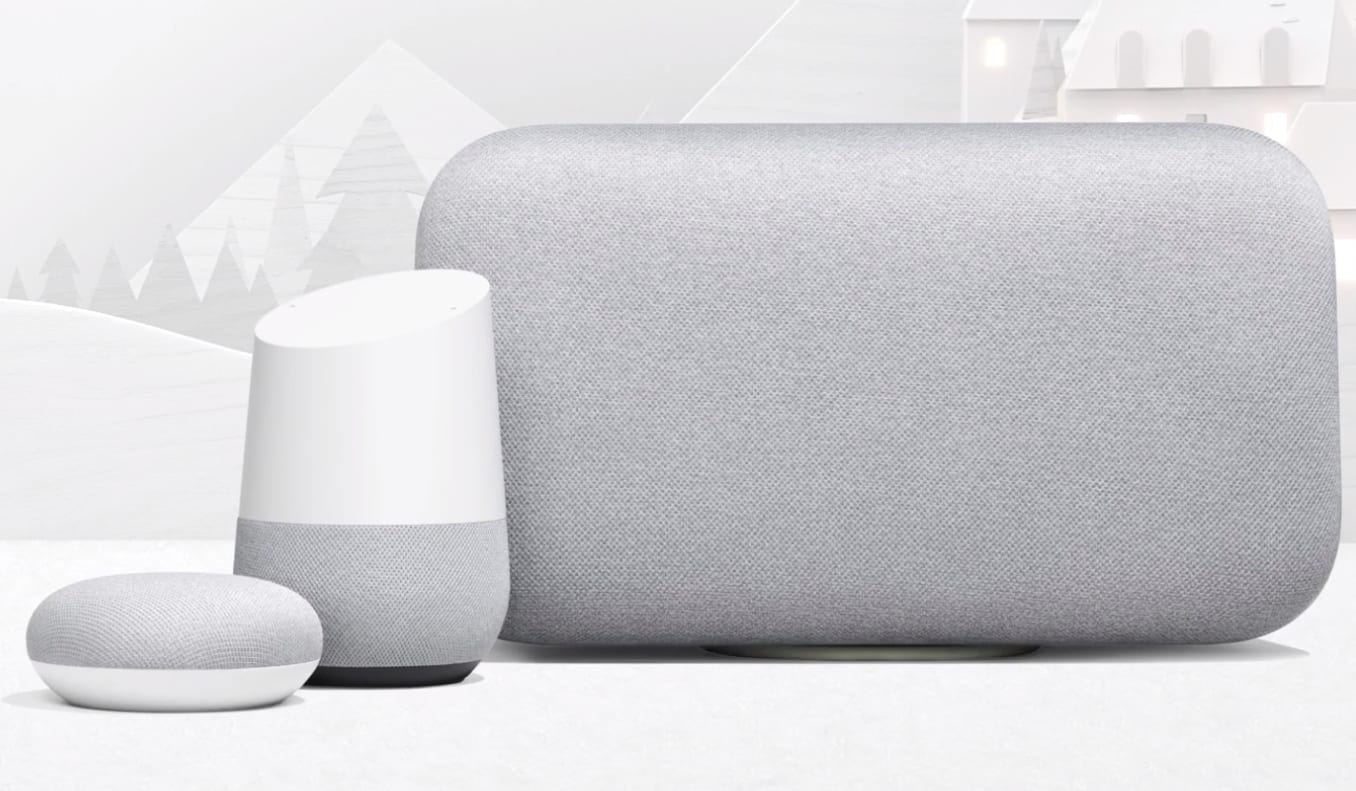
Welcome to the world of smart home devices! If you’ve just purchased a Google Home Mini, congratulations on taking the first step toward transforming your living space into a hands-free wonderland. The Google Home Mini is a compact and affordable smart speaker that offers a wide range of capabilities with the help of Google Assistant, making your everyday tasks easier and more convenient. Whether you want to play music, get weather updates, control your smart home devices, or simply ask a question, the Google Home Mini is at your service.
In this guide, we will walk you through the process of setting up your Google Home Mini. Don’t worry if you’re not particularly tech-savvy – the setup is a breeze, and you’ll be up and running in no time. By following these simple steps, you’ll have your Google Home Mini ready to assist you with your daily routines. So, without further ado, let’s dive in and unleash the full potential of your new smart home companion.
Before we start, make sure you have the necessary equipment on hand. You’ll need the Google Home Mini itself, a power adapter, and a smartphone or tablet with the Google Home app installed. Also, ensure that your Wi-Fi network is up and running. Now, let’s get started and set up your Google Home Mini step by step.
Step 1: Connecting the Power
The first step in setting up your Google Home Mini is connecting it to a power source. Start by plugging the power adapter into a wall socket or power strip. Then, plug the other end of the power adapter into the micro USB port on the back of your Google Home Mini. Once connected, you will see the device’s lights blinking and hear a sound indicating that it has powered on successfully.
It’s important to note that the power adapter provided with your Google Home Mini should be used to ensure optimal performance. Using a different adapter may not provide enough power or could even damage the device.
Once your Google Home Mini is connected to power, you can place it in a convenient location within your home. It’s recommended to place it in an area with good Wi-Fi signal strength and where it can easily hear your voice commands. This will ensure optimal performance and responsiveness.
Now that your Google Home Mini is connected to power and positioned correctly, you’re ready to move on to the next step: connecting it to your Wi-Fi network. This will allow your device to connect to the internet and access all the features and functionalities it offers. Don’t worry; it’s a straightforward process, and we’ll guide you through it in the next step.
Step 2: Connecting to Wi-Fi
Now that your Google Home Mini is powered on, the next step is to connect it to your Wi-Fi network. This will enable your device to access the internet and seamlessly integrate with other devices in your smart home ecosystem.
To begin the Wi-Fi setup process, open the Google Home app on your smartphone or tablet. If you don’t have the app yet, you can download it from the App Store or Google Play Store. Make sure your mobile device is connected to the same Wi-Fi network that you want your Google Home Mini to connect to.
In the Google Home app, tap on the “+” sign in the top left corner to add a new device. Select “Set up device” from the options that appear, and then choose “Set up new devices.” The app will then search for any compatible devices nearby. Once it detects your Google Home Mini, tap on it to proceed.
Follow the on-screen instructions provided by the app. It will guide you through the setup process, including selecting your preferred language and confirming your device’s location. You may be prompted to grant necessary permissions for the Google Home app to access your device’s location, microphone, and other features.
After confirming the device location, the app will display a list of available Wi-Fi networks. Select your network from the list and enter the password to establish the connection. Ensure that you enter the correct credentials to avoid any connectivity issues. Once the connection is established, your Google Home Mini will be successfully connected to your Wi-Fi network.
Now that your Google Home Mini is connected to Wi-Fi, it’s time to proceed to the next step: setting up the Google Home app on your device. This will allow you to personalize your device settings and tailor it to your specific preferences.
Step 3: Setting up the Google Home App
Once your Google Home Mini is connected to Wi-Fi, it’s time to set up the Google Home app on your smartphone or tablet. The app acts as a central hub for managing your Google Home Mini and customizing its settings to suit your needs.
To begin, open the Google Home app on your mobile device. If you haven’t already installed it, you can find it in the App Store for iPhone users or the Google Play Store for Android users. Make sure you are connected to the same Wi-Fi network as your Google Home Mini.
Once the app is open, it will automatically detect your Google Home Mini. Tap on the device’s name to proceed with the setup. You will then be prompted to choose the room where your device is located. This step helps you easily manage and control multiple devices if you have them throughout your home.
Next, the app will ask if you want to enable personal results. This feature allows Google Assistant on your Google Home Mini to access your personal information such as your calendar events, reminders, and commute details. Enable this option if you want a more personalized experience with your device.
After enabling personal results, the app will offer to train your Assistant to recognize your voice. This step is optional but highly recommended as it improves the device’s accuracy in recognizing your voice commands. Follow the on-screen instructions to complete the voice training process.
Once the initial setup is complete, the Google Home app will present you with a brief overview of the device’s capabilities and features. Take a few moments to explore the app and familiarize yourself with its interface. From here, you can access various settings and customize your Google Home Mini according to your preferences.
Congratulations! You have successfully set up the Google Home app and linked it to your Google Home Mini. In the next step, we will guide you through the process of linking your Google account to unlock even more features and functionality.
Step 4: Linking Your Google Account
In this step, you will link your Google account to your Google Home Mini. By doing so, you’ll be able to access your personalized information, such as your calendar events, reminders, and personalized recommendations. It’s a simple process that will enhance the functionality and usefulness of your device.
To link your Google account, open the Google Home app on your smartphone or tablet. Make sure you are connected to the same Wi-Fi network that your Google Home Mini is connected to. Once the app is open, tap on the device’s name to access its settings.
In the device settings, you’ll find an option to link your account. Tap on it, and the app will guide you through the process. You’ll be prompted to log in to your Google account with your email and password. Enter the required information and tap “Next” to proceed.
After logging in, you’ll be asked to review the permissions that the Google Home app requires to access your account. These permissions include accessing your Google Calendar, Contacts, and other relevant information. Review the permissions carefully and tap “Allow” to grant access.
Once your Google account is successfully linked, you’ll be able to access your personalized information and enjoy a more tailored experience with your Google Home Mini. For example, you can ask Google Assistant to add items to your Google Calendar, read your upcoming events, or even check your flight status.
Keep in mind that linking your Google account to your Google Home Mini is optional. If you’re concerned about privacy or prefer not to link your account, you can still use many of the device’s features without doing so. However, some personalized features and functions may be limited.
Congratulations! You have successfully linked your Google account to your Google Home Mini. You’re now one step closer to fully unlocking the potential of your device. In the next step, we will explore how to customize your Google Home Mini settings to personalize your experience even further.
Step 5: Customizing Your Google Home Mini Settings
In this step, we will explore how to customize the settings of your Google Home Mini. By personalizing the device’s settings, you can tailor its behavior, privacy, and preferences to align with your needs and preferences.
To begin customizing your Google Home Mini settings, open the Google Home app on your smartphone or tablet. Make sure you are connected to the same Wi-Fi network as your Google Home Mini. Once the app is open, tap on the device’s name to access its settings.
In the device settings, you’ll find a variety of options to customize your Google Home Mini. Let’s take a closer look at some of the key settings you can modify:
- Device Name: You can change the name of your Google Home Mini to something more memorable or meaningful. This can be particularly useful if you have multiple Google devices in your home.
- Default Music Service: Choose your preferred music streaming service and set it as the default. This way, when you ask Google Assistant to play music, it will automatically use your preferred service.
- Assistant Voice: Customize the voice of Google Assistant on your Google Home Mini. You can choose from a variety of voices to find the one that suits your style.
- Privacy Settings: Manage your privacy preferences, including controlling what data Google can collect and how it’s used. You can also disable features like personalized results or voice matching if you prefer.
- Home Control: Connect your smart home devices to your Google Home Mini and control them through voice commands. This allows you to seamlessly integrate and control devices such as smart lights, thermostats, and more.
- Broadcasting: Use your Google Home Mini as an intercom system by enabling the broadcasting feature. You can broadcast messages to all connected Google devices in your home, making it easy to communicate with family members in different rooms.
Feel free to explore other settings in the Google Home app to further customize your device. Don’t be afraid to experiment and tweak the settings to suit your preferences best.
Congratulations! You have now customized the settings of your Google Home Mini. In the final step, we will dive into the exciting world of Google Assistant features and explore the various ways you can utilize your device’s capabilities.
Step 6: Exploring Google Assistant Features
In this final step, we will explore the wide range of features and capabilities offered by Google Assistant on your Google Home Mini. Google Assistant is a powerful virtual assistant that can help you with tasks, answer questions, and provide information on a variety of topics. Let’s dive in and see what it can do!
To interact with Google Assistant, simply say “Hey Google” or “Okay Google” followed by your command or question. Here are some of the key features to explore:
- Music and Entertainment: Ask Google Assistant to play your favorite songs, artists, or playlists from popular music streaming services. You can also control playback, adjust volume, and explore new music recommendations.
- News and Information: Get the latest news updates, check the weather forecast, or ask for sports scores and game schedules. You can also ask general knowledge questions and get answers in real-time.
- Productivity and Organization: Set reminders, create to-do lists, and manage your calendar events. Google Assistant can integrate with your Google account to provide personalized information and help you stay organized.
- Smart Home Control: Control your connected smart home devices using voice commands. Turn on/off lights, adjust thermostat settings, lock doors, and more. You can even create custom routines to automate multiple actions with a single command.
- Communication and Messaging: Send messages, make calls, or even broadcast announcements to connected Google devices in your home. Google Assistant can also read and send text messages on your behalf.
- Fun and Games: Have fun with Google Assistant by playing interactive games, solving riddles, or enjoying some jokes. You can also ask for trivia questions or engage in voice-controlled storytelling.
These are just a few examples of the vast range of capabilities offered by Google Assistant. Feel free to explore and experiment with different commands to discover even more ways to enhance your daily routines and enjoy the benefits of a smart home ecosystem.
Congratulations! You have now successfully set up and explored the features of your Google Home Mini. Enjoy the convenience and ease that Google Assistant brings to your everyday life. Should you have any further questions or need assistance, don’t hesitate to ask Google Assistant for help.
Conclusion
Congratulations on successfully setting up your Google Home Mini! You are now equipped with a smart home device that can do so much more than just play music or answer questions. With Google Assistant at your disposal, you can effortlessly control smart devices, stay informed, manage your schedule, and enjoy a hands-free, connected experience.
Throughout this guide, we have covered the step-by-step process of setting up your Google Home Mini, connecting it to Wi-Fi, and customizing its settings. We also explored the exciting features offered by Google Assistant, allowing you to make the most out of your device.
Remember, as you continue to use your Google Home Mini, you can always explore new features and commands to further enhance your experience. Additionally, as technology evolves, new updates and features may become available, so be sure to keep your device and the Google Home app up to date.
Whether you’re using your Google Home Mini to play music, control your smart home, get answers to questions, or simply enjoy the convenience it brings, we hope that this guide has been helpful in getting you started on your smart home journey.
Thank you for choosing Google Home Mini, and we wish you many enjoyable and convenient moments with your new device. If you have any further questions or need assistance, don’t hesitate to ask Google Assistant for help. Happy exploring!


