Introduction
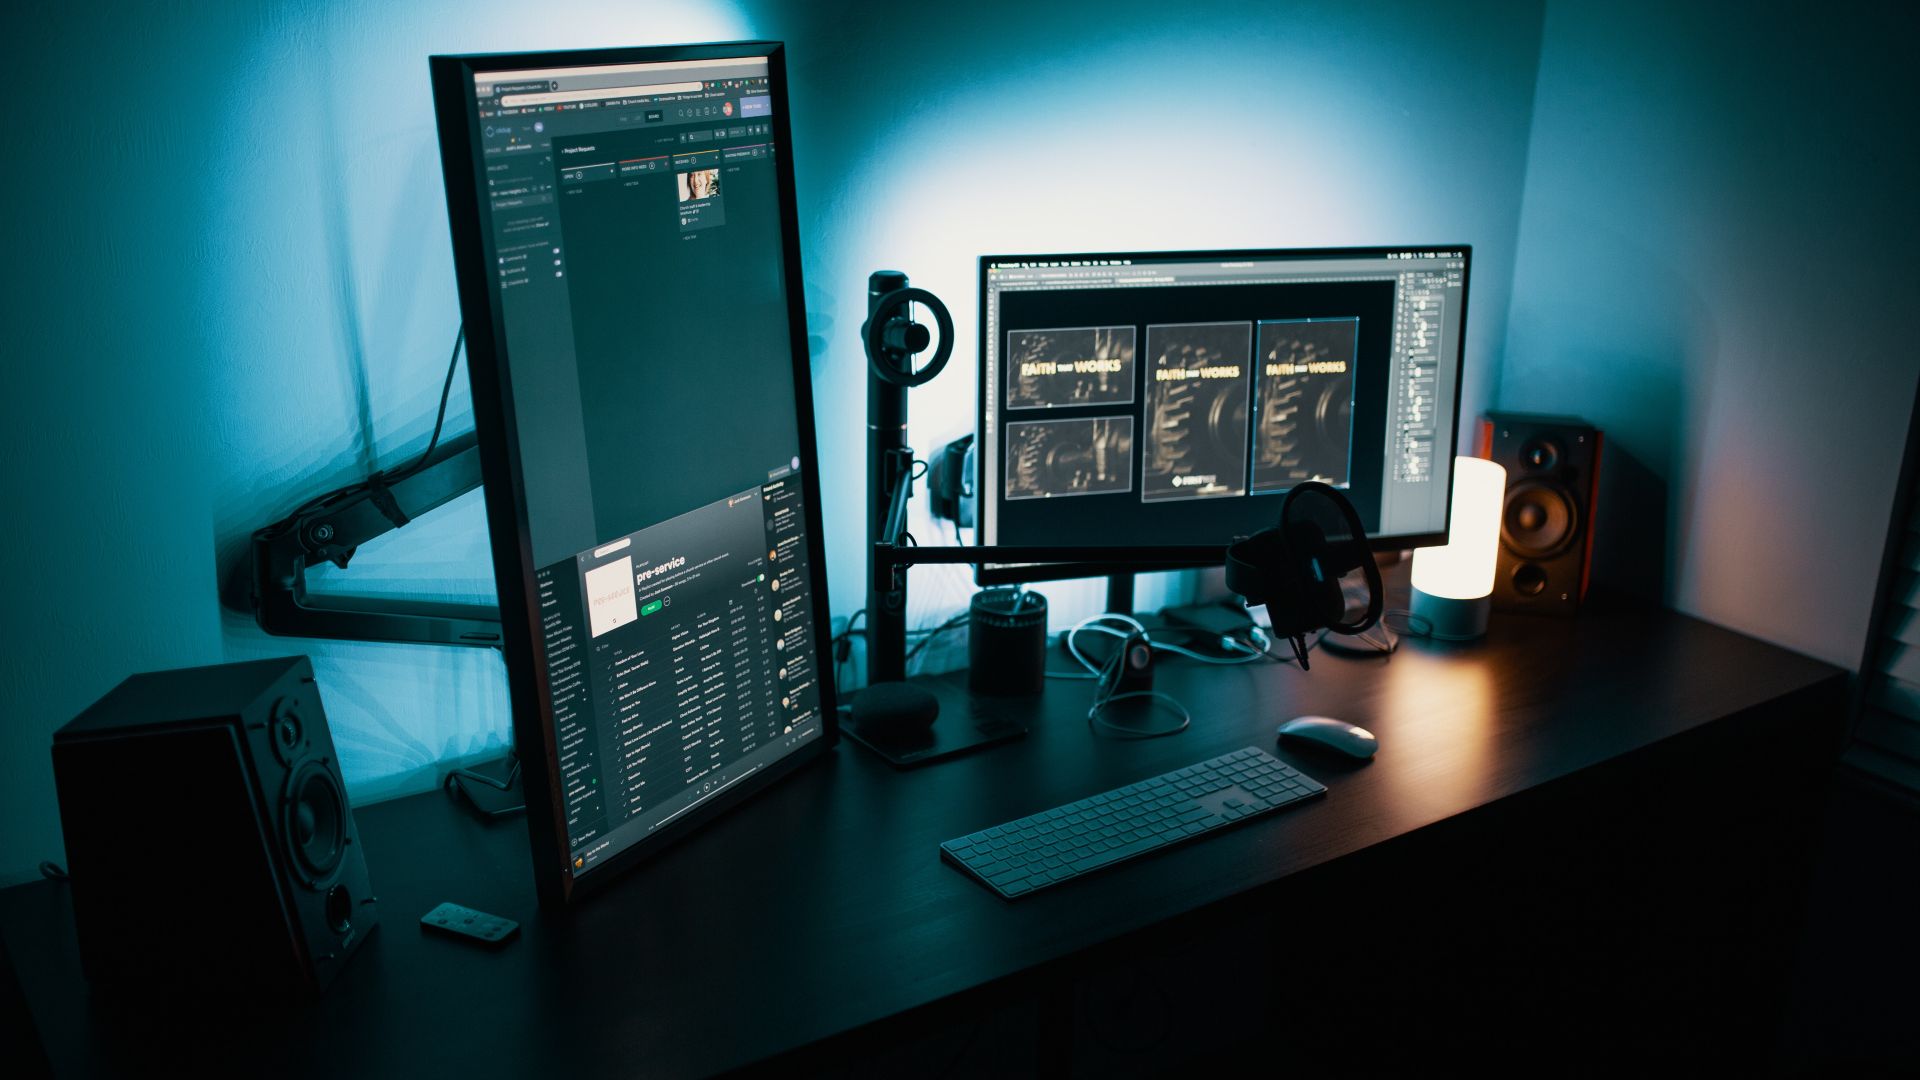
Dual monitors can significantly enhance your productivity and improve your computing experience. Whether you’re a professional who needs to multitask or a gamer who wants a more immersive gaming setup, setting up dual monitors can provide you with a larger workspace and increased flexibility.
With dual monitors, you can have multiple windows open side by side, easily switch between applications, and enjoy a seamless workflow. You can keep your email open on one screen while working on a document or spreadsheet on the other. If you’re a programmer, you can have your code editor on one screen and the output or documentation on the other. The possibilities are endless!
In this step-by-step guide, we’ll walk you through the process of setting up dual monitors. We’ll cover everything from checking your computer’s compatibility to troubleshooting common issues. So whether you’re a beginner or have some experience with computer hardware, we’ve got you covered.
Before we dive into the process, it’s essential to note that the specific steps may vary slightly depending on your operating system and the hardware you’re using. However, the general principles remain the same, so you should be able to adapt the instructions to your setup.
So, without further ado, let’s get started and unlock the full potential of your computer setup by setting up dual monitors!
Step 1: Check your computer’s compatibility
Before diving into the setup process, it’s crucial to ensure that your computer can support dual monitors. Most modern computers, both desktops, and laptops, are capable of driving two monitors simultaneously, but it’s still essential to check for compatibility.
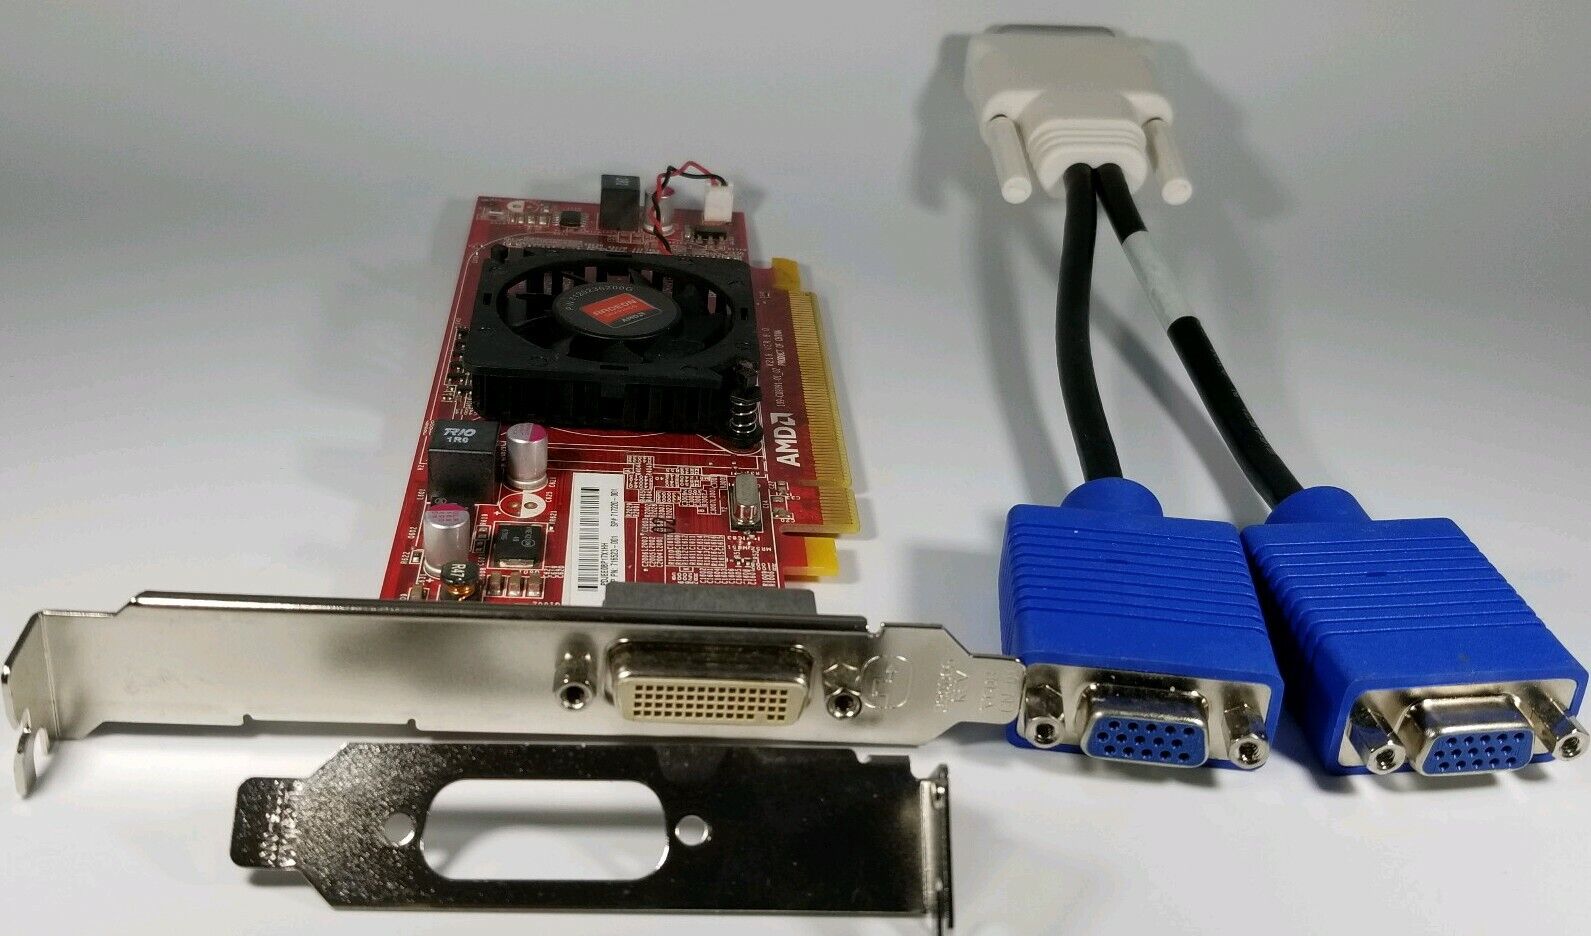
The first thing to consider is your computer’s graphics card or GPU (Graphics Processing Unit). Older or low-end graphics cards may not have the necessary ports or capabilities to support dual monitors. Check the specifications of your graphics card to see if it can support multiple displays. If your computer uses integrated graphics, it’s also crucial to verify whether it supports dual monitor setups.
The next consideration is the available ports on your computer. Look for HDMI, DisplayPort, or VGA ports on your computer’s back panel or sides. You will need at least two compatible ports to connect two monitors. If your computer doesn’t have the required ports, you may need to invest in a graphics card that supports dual displays or use external adapters or docking stations to connect the additional monitor(s).
Additionally, ensure that you have enough power and resources to run two monitors simultaneously. Higher-resolution displays or multiple applications running simultaneously may require more processing power, memory, and a higher-capacity power supply. Check your system’s specifications to ensure that it can handle the added workload.
Lastly, check the operating system requirements. Most modern operating systems such as Windows 10, macOS, and Linux have built-in support for dual monitors. However, older versions of operating systems may require additional software or drivers to enable dual monitor functionality.
By ensuring the compatibility of your computer, you can avoid any potential hardware or software limitations that may prevent a successful dual monitor setup. Once you’ve confirmed compatibility, you can move on to the next step of gathering the necessary equipment.
Step 2: Gather the necessary equipment
Now that you’ve confirmed your computer’s compatibility for dual monitors, it’s time to gather the necessary equipment. To set up dual monitors, you will need the following:
- Monitors: Purchase an additional monitor that matches your existing one or choose a different model for a varied display experience. Ensure that the monitors have compatible ports, such as HDMI, DisplayPort, or VGA, to connect them to your computer.
- Cables: Depending on the ports available on your computer and monitors, you’ll need the appropriate cables to connect them. HDMI and DisplayPort cables are common options for modern monitors, while VGA cables are suitable for older monitors.
- Power cables and adapters: Ensure that you have the necessary power cables and adapters to supply power to both monitors and your computer.
- Graphics card (if required): If your computer’s existing graphics card doesn’t support dual monitors or lacks the required ports, you may need to invest in a new graphics card that can handle the workload.
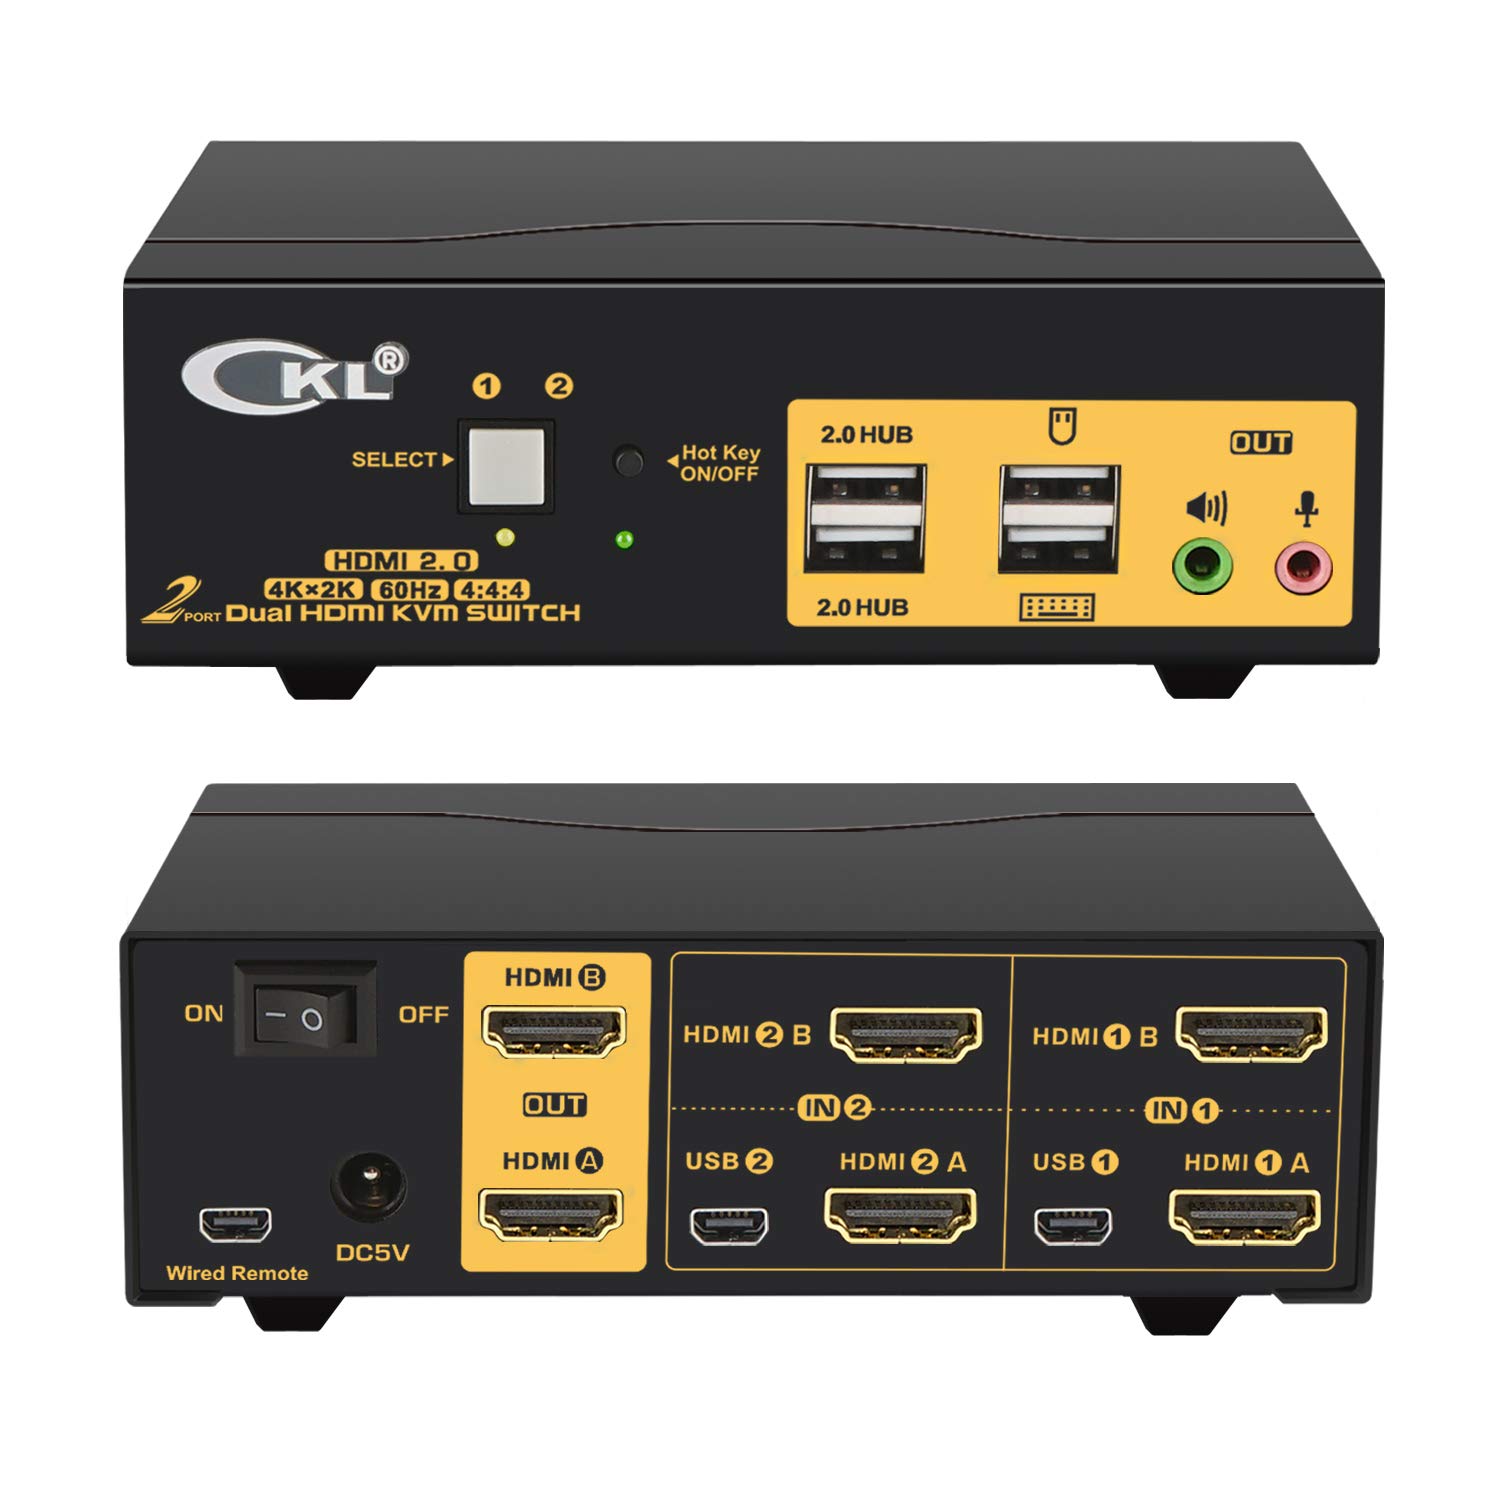
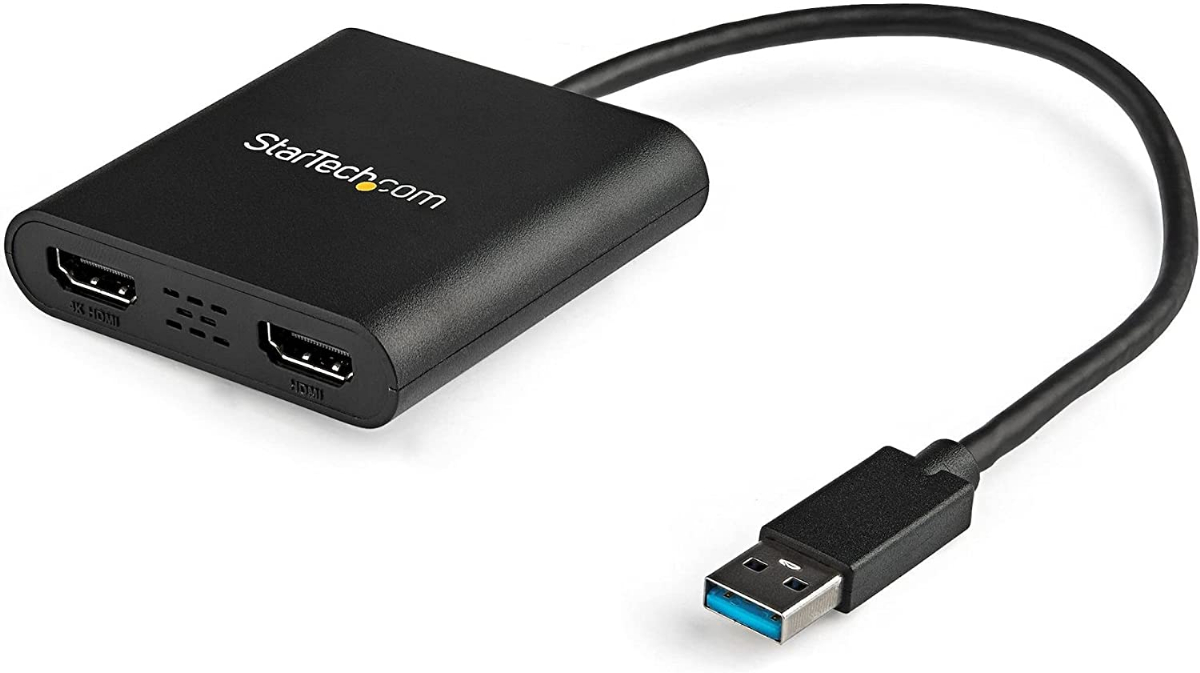
- External adapters or docking stations (if required): In some cases, you may need to use external adapters or docking stations to connect the additional monitor(s) to your computer. These devices can convert one type of port into another, allowing compatibility between your computer and monitor.
It’s important to ensure that you have all the necessary equipment and cables before proceeding with the setup. This will save you time and frustration, as you won’t have to halt the process to source missing components. Additionally, consider the space available on your desk to accommodate the extra monitor. Make sure you have enough space to position both monitors comfortably.
Keep in mind that the specific equipment you need may vary depending on your computer, monitors, and personal preferences. It’s always a good idea to consult the user manuals of your computer and monitors to determine the exact requirements and recommended accessories for setting up dual monitors.
Once you have gathered all the necessary equipment, you’re ready to move on to the next step: connecting the second monitor.
Step 3: Connect the second monitor
Now that you have all the necessary equipment, it’s time to connect the second monitor to your computer. Follow these steps to ensure a successful connection:
- Power off your computer and monitors: Before connecting any cables, it’s wise to power off your computer and both monitors to prevent any potential damage or electrical issues.
- Identify the correct ports: On the back or sides of your computer and monitors, locate the appropriate ports for connecting the cables. These may include HDMI, DisplayPort, or VGA ports.
- Connect the first cable: Take one end of the cable and connect it to the port on the back of your computer labeled for the primary monitor. This is normally the port closest to the motherboard. Ensure a secure connection by tightening any screws or latches.
- Connect the second cable: Now, take the other end of the cable and connect it to the corresponding port on the back of the second monitor.
- Power on your computer and monitors: Once both cables are securely connected, power on your computer and both monitors. Wait for the operating system to fully load.
- Adjust the display settings: Depending on your operating system, your computer may automatically detect the second monitor and extend the display. If not, you may need to adjust the display settings manually.
It’s important to note that the specific steps for connecting the second monitor may vary depending on the types of ports and cables you are using. Consult the user manuals for your computer and monitors for detailed instructions on proper cable connections.
Once both monitors are connected and powered on, you’re ready to move on to the next step: adjusting the display settings.
Step 4: Adjust the display settings
After connecting the second monitor, it’s necessary to adjust the display settings to optimize your dual monitor setup. Follow these steps to ensure the proper configuration:
- Access the display settings: Depending on your operating system, you can access the display settings through the Control Panel or Settings app. Look for the “Display” or “Screen Resolution” option.
- Detect the second monitor: Click on the “Detect” button to allow your computer to recognize the second monitor. This will prompt your system to identify the new display and configure it accordingly.
- Choose the display mode: Select the desired display mode. The most common options are “Extend,” “Duplicate,” and “Second Screen Only.” The “Extend” mode allows you to use both monitors as one large workspace, while the “Duplicate” mode mirrors your primary display on the second monitor. The “Second Screen Only” mode turns off your primary display and uses only the second monitor.
- Arrange the display layout: If you choose the “Extend” mode, you can arrange the position of your monitors. Click on the numbered icons representing the monitors and drag them to the desired position. This ensures that the movement of your cursor is natural when transitioning between screens.
- Adjust the resolution: Set the resolution for each monitor. It’s recommended to choose the optimal resolution that matches the native resolution of your monitors. This ensures the best image quality and readability.
After adjusting the display settings, you’ll notice that your desktop will now span across both monitors in the “Extend” mode. This allows you to drag windows and applications between monitors, effectively enabling a larger workspace.
Keep in mind that the steps and options for adjusting display settings may vary slightly depending on your operating system. Consult the documentation or online resources for your specific operating system for detailed instructions on configuring the display settings.
With the display settings properly adjusted, you’re now ready to move on to the next step: configuring display orientation and resolution.
Step 5: Configure display orientation and resolution
Once you have adjusted the basic display settings, it’s time to fine-tune the configuration of your dual monitor setup. Follow these steps to configure the display orientation and resolution:
- Access the display settings: Open the display settings on your computer through the Control Panel or Settings app, as mentioned in the previous step.
- Choose the display orientation: Select the desired display orientation for each monitor. The options typically include “Landscape,” “Portrait,” “Landscape (flipped),” and “Portrait (flipped).” Landscape orientation is the most common choice, where the monitor is wider than it is tall. Portrait orientation, on the other hand, is useful for tasks such as reading or coding, where a taller display can accommodate more lines of text.
- Adjust the display resolution: Set the resolution for each monitor individually. To ensure optimal image quality, select the native resolution recommended by the manufacturer. This will provide the sharpest and most accurate representation of the content on your screens.
- Apply the changes: After configuring the display orientation and resolution, apply the changes by clicking the “Apply” button. The displays will briefly go black as the adjustments are made.
- Test the configuration: Once the changes have been applied, test the configuration by moving your mouse cursor between the monitors. Ensure that the movement is smooth and fluid, without any noticeable gaps or misalignment. Also, open different applications or websites on each monitor to verify that they are displaying correctly.
By configuring the display orientation and resolution, you can customize your dual monitor setup to best suit your workflow and preferences. Whether you prefer a traditional landscape layout or a vertically-oriented portrait setup, adjusting the display settings can help optimize your productivity.
Remember, the specific steps and options for configuring display orientation and resolution may vary depending on your operating system. Refer to the documentation or online resources for your specific operating system to find detailed instructions for this step.
With the display orientation and resolution appropriately configured, you can now move on to the next step: calibrating color and brightness settings.
Step 6: Calibrate color and brightness settings
Once your dual monitors are set up and configured, it’s essential to calibrate the color and brightness settings to ensure accurate and consistent display quality across both screens. Follow these steps to calibrate the color and brightness settings:
- Access the display settings: Open the display settings on your operating system, as mentioned in earlier steps.
- Locate the color settings: Look for the color calibration or color settings option in the display settings. Depending on your operating system, it may be named differently.
- Begin the color calibration process: Follow the on-screen instructions to initiate the color calibration process. This typically involves adjusting settings such as brightness, contrast, gamma, and color balance.
- Use a calibration tool (optional): For more precise calibration, you can use specialized color calibration tools or software. These tools often come with guided steps to help you achieve accurate color reproduction. They usually involve displaying a series of color patches and adjusting your monitor’s settings accordingly.
- Verify color consistency: After completing the calibration process, verify the color consistency between both monitors by opening images or videos with a wide range of colors. Make sure that the colors appear consistent and accurate on both screens.
- Adjust brightness and contrast: Adjust the brightness and contrast settings to your preference. It’s generally recommended to set the brightness level to a comfortable level that doesn’t strain your eyes during prolonged use.
- Save the calibration settings (if possible): Depending on your operating system, you may have the option to save the calibrated color settings as a profile. This allows you to easily switch between different calibrated profiles for different purposes, such as photo editing or gaming.
By calibrating the color and brightness settings, you can ensure that the content displayed on your dual monitors is accurate, consistent, and visually appealing. This is especially important for tasks such as graphic design, photo editing, or any work that requires color accuracy.
Remember to periodically recheck and recalibrate your monitors’ color settings to compensate for any changes over time or if you switch to new monitors.
With the color and brightness settings calibrated, you can now proceed to the next step: arranging the positions of the monitors.
Step 7: Arrange the monitors’ positions
Once you have calibrated the color and brightness settings, it’s time to arrange the positions of your dual monitors. Properly arranging the monitors ensures a seamless transition between screens and enhances your overall viewing experience. Follow these steps to arrange the monitors’ positions:
- Access the display settings: Open the display settings on your operating system.
- Navigate to the monitor arrangement section: Look for the “Arrangement” or “Monitor Layout” option within the display settings. This section allows you to adjust the physical arrangement of your monitors.
- Drag and position the monitors: Within the monitor arrangement section, you will see a visual representation of your monitors. Click and drag the monitors to the desired positions on the screen. This will reflect the physical arrangement of your monitors on your desk.
- Configure primary monitor (optional): If you have a preferred monitor for the primary display, ensure that it is correctly set as the primary monitor. The primary monitor will host the taskbar, desktop icons, and the default launching point for applications.
- Align the monitors: Make sure that the edges of the monitors are properly aligned so that there are no gaps or overlapping areas when moving windows or dragging elements across screens.
- Adjust the scaling (optional): Depending on the resolution and size difference between your monitors, you may need to adjust the scaling settings. This ensures that elements, such as text and icons, appear at an appropriate size on each monitor, eliminating any disparity in element sizes.
By arranging the monitors’ positions, you create a seamless and intuitive workspace that allows smooth navigation between screens. This becomes especially important when working with applications that span across both displays or when moving windows between monitors.
Remember to experiment with different monitor arrangements if needed, as the ideal positioning can vary based on personal preference and desk space limitations.
With the monitors’ positions arranged, you can now proceed to the next step: extending your workspace.
Step 8: Extend your workspace
Now that you have set up and positioned your dual monitors, it’s time to extend your workspace. By extending your workspace, you can utilize the extra screen real estate to multitask effectively and enhance your productivity. Follow these steps to extend your workspace:
- Access the display settings: Open the display settings on your operating system.
- Navigate to the display mode section: Look for the “Display Mode” or “Multiple Displays” option within the display settings.
- Select the “Extend” display mode: Choose the “Extend” or “Extend these displays” option to enable the extended workspace across your dual monitors.
- Apply the changes: Click the “Apply” button to activate the extended display mode. Your desktop will now span across both monitors.
- Drag windows between monitors: To make use of the extended workspace, simply drag windows or applications from one monitor to the other. You can position different applications on separate monitors, allowing you to work simultaneously on multiple tasks.
- Maximize productivity: Take advantage of the expanded workspace by arranging your applications strategically. For example, you can keep your email client open on one monitor while working on documents or web browsing on the other.
- Customize your workspace: Experiment with different layouts and arrangements that suit your workflow and preferences. You can adjust the sizes of windows, position them side by side, or even have one monitor dedicated to specific tasks, such as monitoring system resources or displaying reference materials.
Extending your workspace with dual monitors provides the freedom to work on multiple projects simultaneously without constantly switching between windows. It enhances efficiency, reduces clutter, and allows for better organization of tasks and resources.
Remember to utilize features like snapping windows to align them to specific areas of the screen and using virtual desktops to further enhance your productivity. These features are usually built-in to modern operating systems and can further streamline your workflow.
With your workspace extended across dual monitors, you’re now ready to move on to the next step: customizing display preferences.
Step 9: Customize display preferences
After setting up your dual monitors and extending your workspace, you may want to further customize your display preferences to personalize and optimize your dual monitor setup. Here are a few options to consider:
- Customize wallpaper: Choose unique wallpapers or backgrounds for each monitor to add a personal touch to your dual monitor setup. Many operating systems allow you to set different wallpapers for each monitor.
- Adjust display scaling: If you find that the size of text and icons are not consistent between monitors due to their differing resolutions, you can adjust the display scaling individually for each monitor. This ensures a smooth visual experience on both displays.
- Set up a screensaver: Configure screensavers to activate after a certain period of inactivity. You can choose different screensavers for each monitor or have them span across both displays.
- Customize taskbar settings: Adjust the taskbar settings to best suit your preferences. You can choose to have the taskbar appear on both monitors or only on your primary monitor. Some operating systems also allow you to display taskbar icons and notifications on both monitors.
- Use keyboard shortcuts: Familiarize yourself with keyboard shortcuts specific to managing dual monitors. These shortcuts can streamline your workflow, such as moving windows between monitors, adjusting display settings, or activating specific features.
- Explore advanced display settings: Depending on your operating system and graphics card, there may be additional advanced settings available for further customization. Explore these settings to fine-tune your dual monitor setup to your liking.
By customizing your display preferences, you can make your dual monitor setup work seamlessly with your personal style and preferences. Customizing the look and feel of your dual monitors enhances the overall user experience and makes you feel more at ease and productive in your workspace.
Take some time to experiment with different settings and options to find what works best for you. Remember, personalizing your dual monitor setup is all about creating a workspace that is both aesthetically pleasing and functional for your specific needs.
With your display preferences customized, you’re now ready to move on to the final step: troubleshooting common issues.
Step 10: Troubleshooting common issues
While setting up dual monitors can greatly enhance your productivity and computing experience, you may encounter certain issues along the way. Here are some common problems that you might encounter and how to troubleshoot them:
- No display on the second monitor: Ensure that the second monitor is properly connected and powered on. Check the cables for any damage or loose connections. If necessary, try using a different cable or port.
- Incorrect screen resolution: If the resolution on one of the monitors appears incorrect, access the display settings and adjust the resolution manually. Ensure that the resolution matches the native resolution recommended by the manufacturer.
- Misaligned or overlapping displays: If the monitors are misaligned or overlapping, go to the display settings and rearrange the monitors’ positions. Drag and position them properly to eliminate any gaps or overlapping areas.
- Unresponsive or flickering screen: Check the cable connections and ensure that they are secure. Try adjusting the refresh rate and updating graphics card drivers. If the issue persists, there may be a hardware problem with the monitor or graphics card.
- Different color or brightness levels: Calibrate the color and brightness settings on both monitors to make sure they are consistent. Use built-in calibration tools or dedicated calibration software for more precise adjustments.
If you encounter other issues that are not mentioned here, consult the documentation for your operating system and monitor or seek assistance from online forums and support communities. Remember to stay patient and methodical when troubleshooting and take note of any changes you make to your settings for easier reverting if needed.
With proper troubleshooting and attention to detail, you can overcome common issues and fully enjoy the benefits of your dual monitor setup.
Now that you’re equipped with troubleshooting techniques, you’ve successfully completed the ten steps to set up and optimize your dual monitor configuration. Congratulations!
Conclusion
Setting up dual monitors can greatly enhance your productivity, increase your workspace, and improve your overall computing experience. By following the ten steps outlined in this guide, you have successfully configured and optimized your dual monitor setup.
We began by checking your computer’s compatibility and gathering the necessary equipment, ensuring that your system meets the hardware requirements for dual monitors. Then, we connected the second monitor and adjusted the display settings, including orientation and resolution, to ensure a seamless transition between screens.
Next, we calibrated the color and brightness settings, allowing for accurate and consistent display results across both monitors. We then arranged the monitors’ positions, maximizing usability and minimizing any gaps or overlaps between displays.
Extending the workspace was the next step, enabling you to multitask efficiently and work on multiple projects simultaneously. By customizing your display preferences, such as wallpapers, taskbar settings, and keyboard shortcuts, you personalized your dual monitor setup to align with your preferences and needs.
Finally, we covered troubleshooting common issues that may arise during the setup process. By addressing connectivity, resolution, alignment, and other potential problems, you can overcome obstacles and ensure a smooth dual monitor experience.
With your dual monitor setup fully optimized, you’re now ready to enjoy the advantages it offers. Whether you’re a professional requiring a larger workspace or a gamer seeking an immersive gaming experience, dual monitors provide increased productivity and versatility.
Remember to periodically review and update your display settings, as well as stay up to date with software and driver updates to maintain optimal performance. Make sure to consult the documentation and support resources specific to your operating system and hardware for any further assistance.
By following these steps and customizing your dual monitor setup to your liking, you can maximize efficiency, streamline your workflow, and take your computing experience to new heights.